Max Systems SignMax User manual

www.maxsystems.de
Instruction manualww

2
Instruction manual LabelMax MP1
TABLE OF CONTENTS
03 User interface
04 Setup SignMax MP
05 Design labels
06 Insert elements
07 Attributes of texts
08 Attributes of barcodes // Attributes of QR codes // Attributes of images
09 Align multiple elements
10 Serialization
11 Database linking
12 Save and print labels
2
3
Instruction manual LabelMax MP1
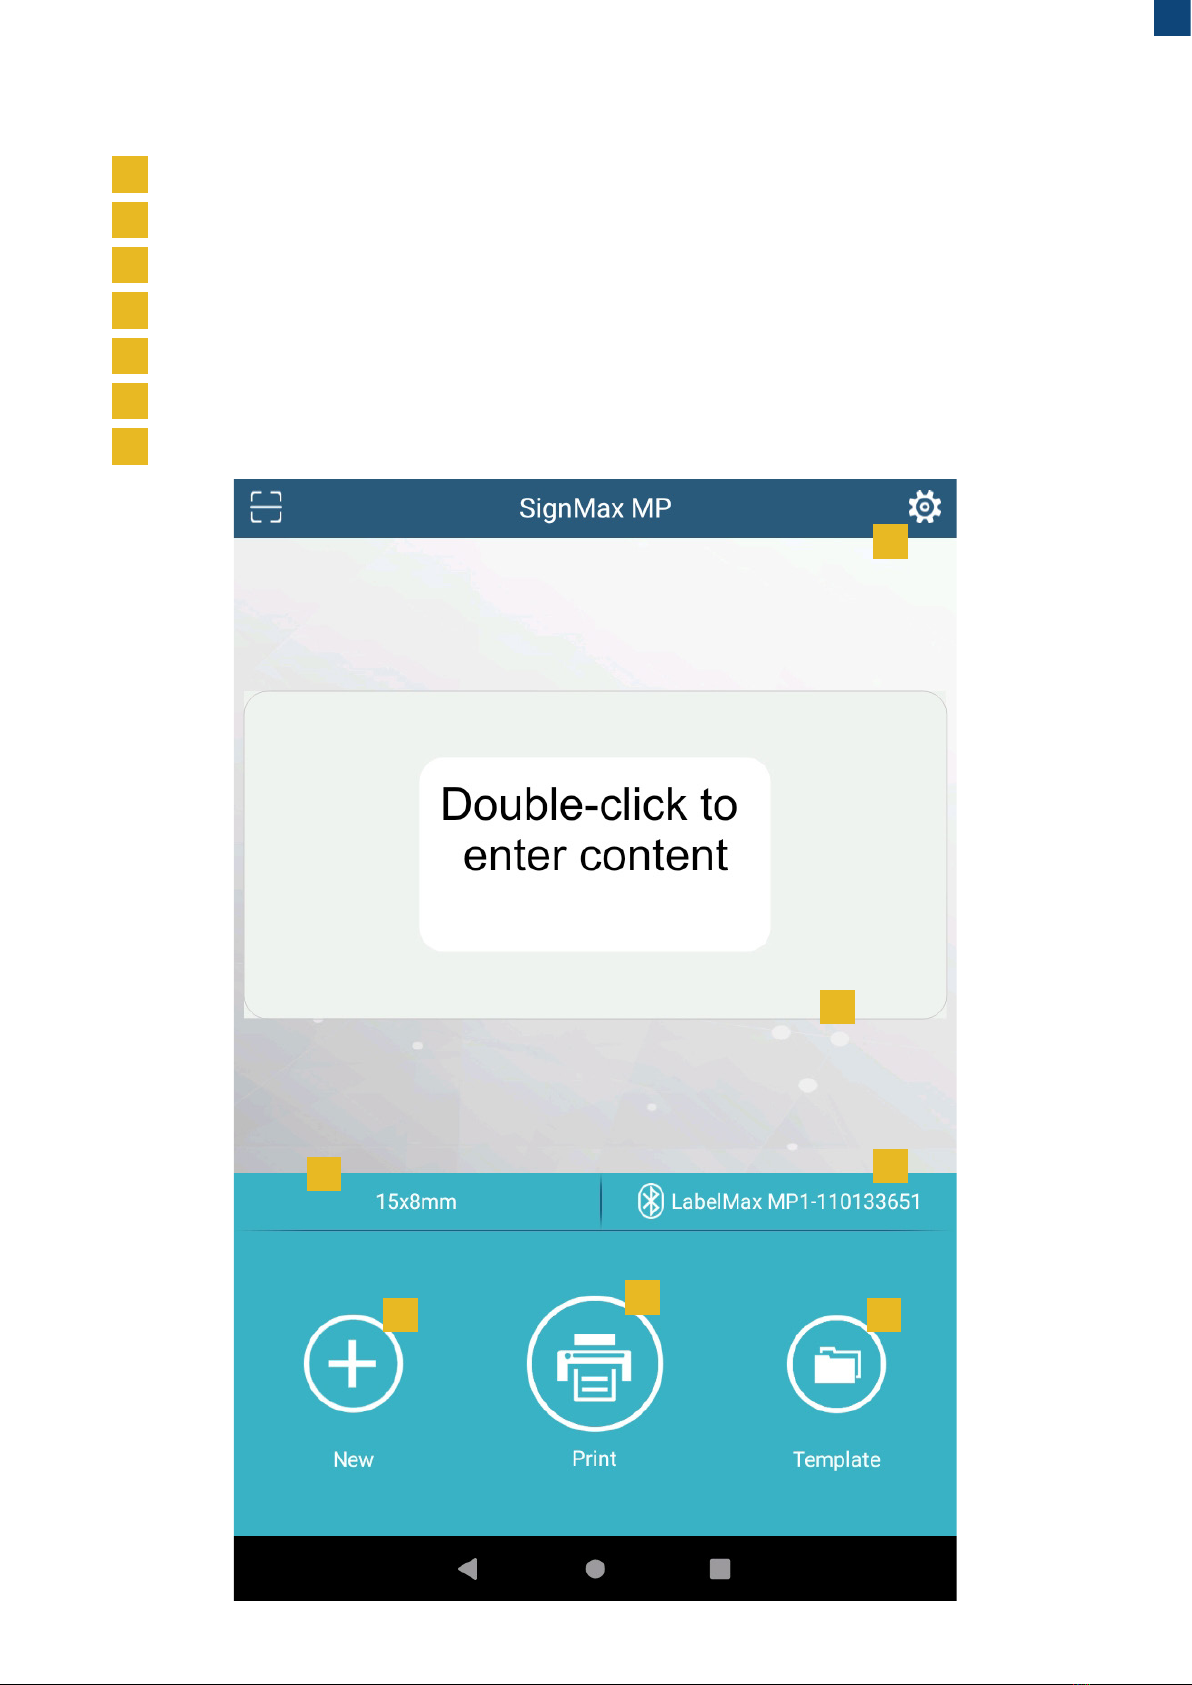
USER INTERFACE
Open settings
Preview of the last edited label. Click to edit.
Name of the current label. Click to open templates.
Currently connected printer. Click to display available devices.
Create new label.
Print current label.
Open label templates.
1
7
6
5
2
34
1
2
3
4
5
6
6
4
Instruction manual LabelMax MP1
1
3
2
1
3
2
4
5
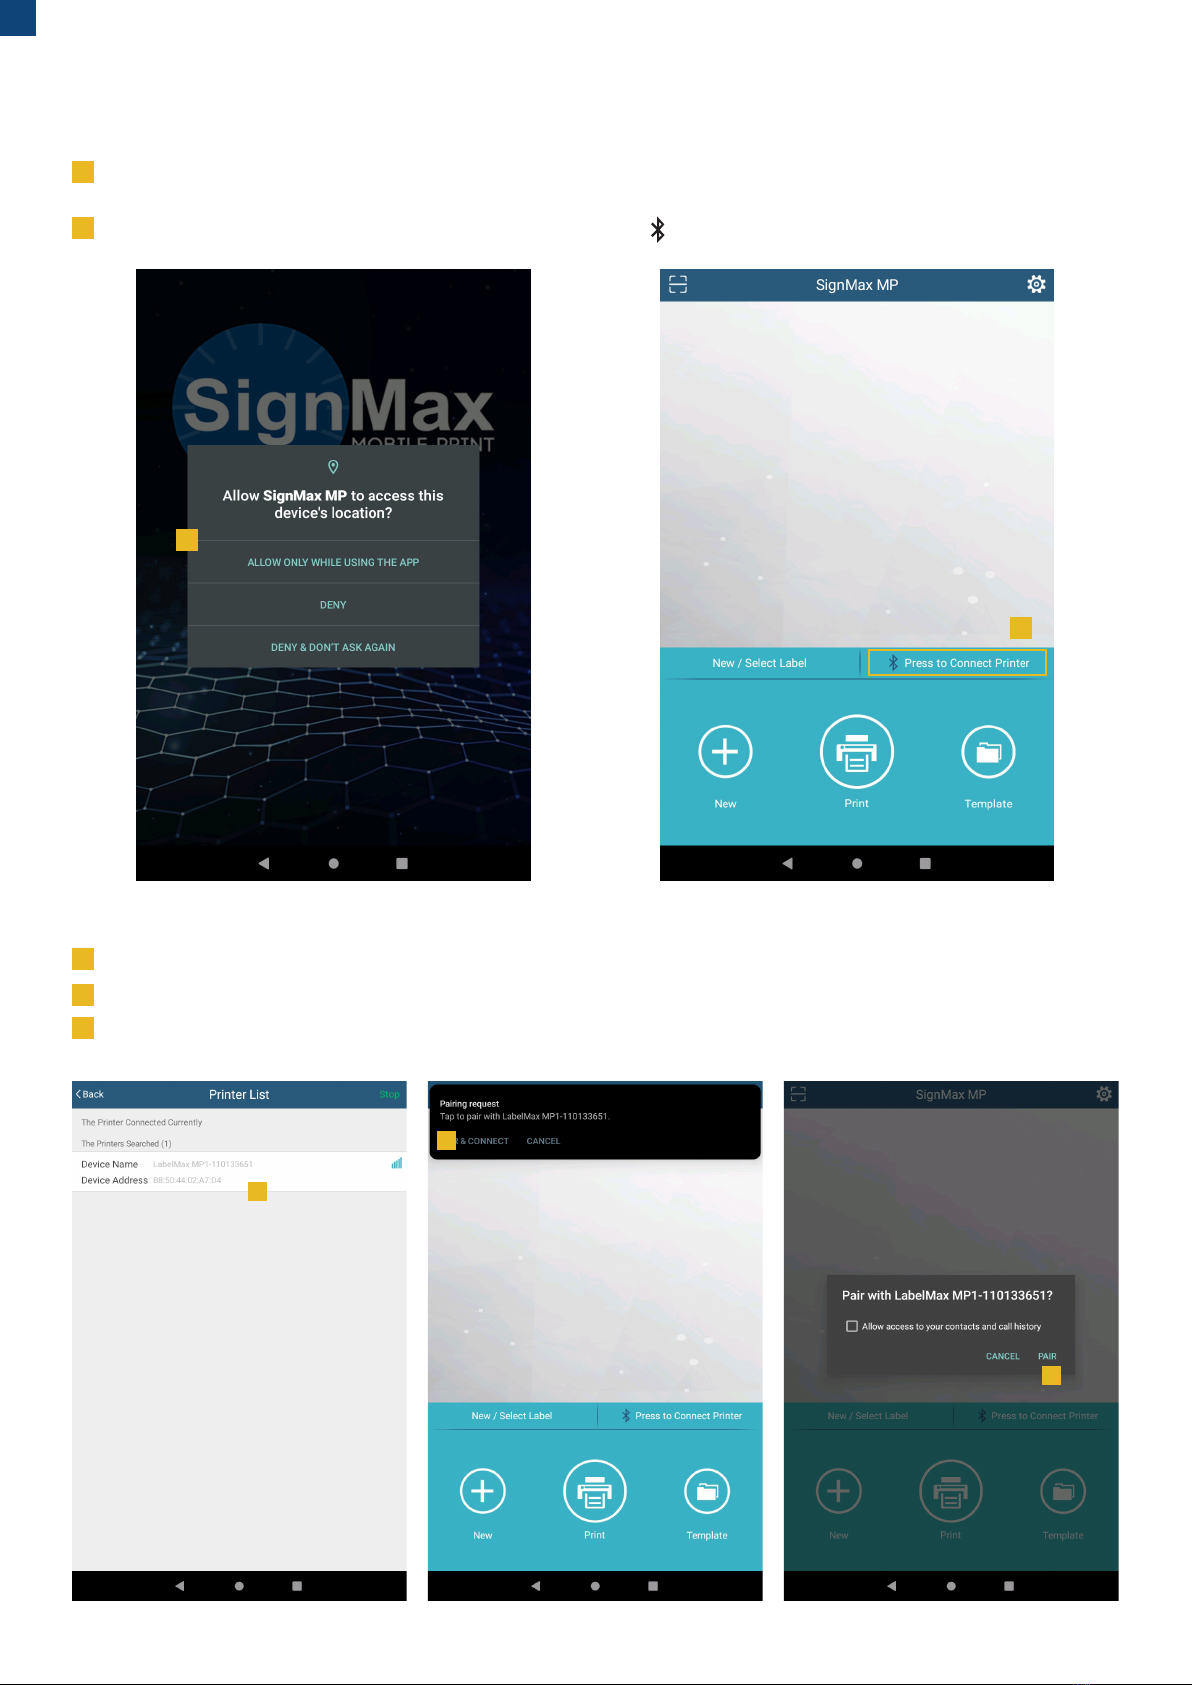
SETUP SIGNMAX MP
When starting the SignMax MP for the rst time, you will need to conrm that the location can be accessed during use in order for the
LabelMax MP1 to pair with the tablet.
To connect the LabelMax MP1 to your tablet, click on the button marked with .
The switched on LabelMax MP1 is now displayed in the printer overview. Click on the printer.
Now you have to conrm the pairing request.
Press „Pair“ to nish (Access to contacts does not need to be allowed).
4
5

5
Instruction manual LabelMax MP1
DESIGN LABELS
1
4
2
5
5
3
6
6
1
4
2
Open the corresponding template, suitable for your inserted label. To do this, click on the „Template“ button.
If no templates are displayed in the cloud, log in by typing „SignMax“ and leaving the password blank.
Click the desired template to save it on your tablet and edit it.
To edit the label, simply click on the preview.
The edit mode opens. Here you can edit your label according to your wishes. To save the label, insert elements or adjust the content, click on the
corresponding tab in the bar.
To edit elements, select them and go to the „Property“ tab. Here you can make various settings for the selected element.
3
Table of contents
Popular Printer Accessories manuals by other brands


Star Micronics
Star Micronics TSP800 Series install guide

Citizen
Citizen CBM-202PC Series user manual

Canon
Canon Color imageCLASS MF8170c installation instructions

Codonics
Codonics Virtua 1VCX-LR833 Technical brief

Roland
Roland DU2-64 Supplementary manual

TonerRefillKits
TonerRefillKits ReChargX RX126 instructions