Maxford 40" EP Gee Bee Y Scale ARF V2 User manual

40” EP Gee Bee Y Scale ARF V2
Instruction Manual
Specs:
Wing Span: 40"
Overall length: 30"
Wing area: 306 sq. in
Ready to fly weight: 28~32 oz
Motor/Engine:
Electric: Uranus-28309 brushless outrunner motor, 25A ESC
Prop: 10x4.7, 10x5
Radio required: 4ch, 4 mini servos

©2008 Maxford USA www.maxfordusa.com
2
2
An important notice to our customers!
This product is NOT a toy. Any test, flight and later flight by this product are done at your
own risk. Please enjoy your hobby and fly safely!
Waiver
Maxford USA provides high quality, thoroughly tested model airplane kits, but ultimately
the quality and capability of your finished model airplane depends on how you build it.
Maxford USA can NOT in any way guarantee the performance of your finished model
airplane.
Maxford USA will not accept liability for personal injury, property damage, or wrongful
death caused by negligent use of this product.
Return Policy
Maxford USA guarantees this kit to be free from defects in both material and
workmanship at the date of purchase. Maxford USA has no control over the final
assembly or material used for final assembly. All of our products are inspected in our
factory and are checked again when shipped from our warehouse. If you think there is
any missing part or shipping damage, please read our return policy as below.
1. Your order should be inspected upon delivery for any shipping damage, missing
parts or boxes and you should contact us within 10 days from receipt if there is a
problem. No return or exchange after 10 days.
2. You must call us to get a RMA# (return merchandise authorization number)
before you send the package back to us. The RMA# must be clearly marked
outside of the package.
3. The return item must be in original and good condition (NOT assembled or
modified) with original packing material, manuals and accessories.
4. All shipping and insurance must be prepaid.
5. A 10~20% restocking fee might be charged.
6. No return for Li-Po batteries.
Return Address:
Maxford USA Corp.
13909 Artesia Blvd.
Cerritos, CA 90703
Tel: 562-802-0680
Fax: 562-802-0650

©2008 Maxford USA www.maxfordusa.com
3
3
IMPORTANT SAFETY PRECAUTIONS TO PROTECT YOUR
MODEL, YOURSELF & OTHERS
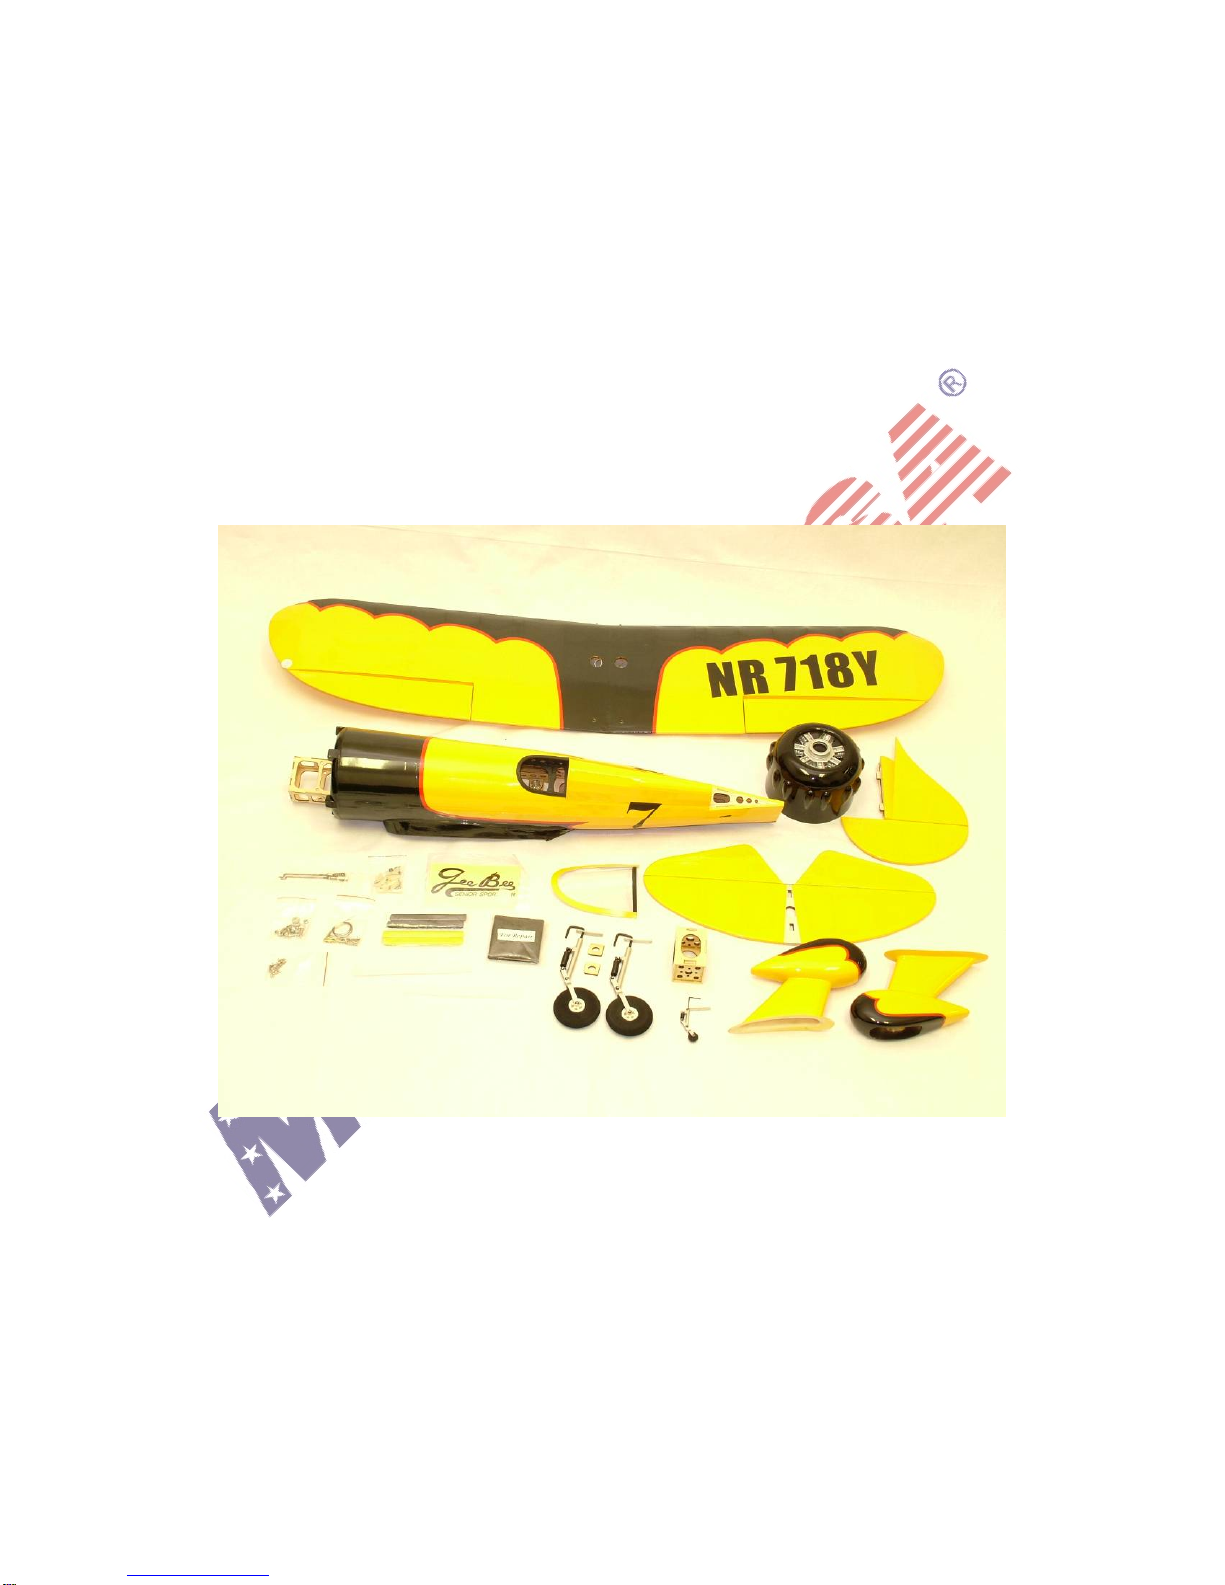
1. This product should not be considered as a toy, but rather a sophisticated,
working model that functions much like a full-scale airplane. Because of its
performance capabilities, the model airplane, if not assembled and operated
correctly, could possibly cause injury to you or spectators and damage to
property.
2. Assemble the model airplane according to the instructions. Do not alter or modify
the model, as doing so may result in an unsafe or unworkable model. In a few
cases the instructions may differ slightly from the photos. In those instances the
written instructions should be considered as correct. If you have any question
about this instruction, contact us before you assemble the model.
3. Take time to build straight, TRUE and STRONG.
4. Maxford USA recommends that you use a good quality radio system and our
recommended or same sized good quality motor and components throughout the
building process.
5. Install all R/C and other components correctly so that the model operates
correctly on the ground and in the air.
6. Always check the operation of the model before every flight to insure that all
equipment is operating and that the model has remained structurally sound.
Always check clevises or other connectors and replace them if necessary.
7. If you are not an experienced pilot or have not flown this type of model before,
we recommend that you get the assistance of an experienced pilot.
8. While this kit has been flight tested to exceed normal use, if the plane will be
used for extremely high stress flying, such as racing, or if a motor larger than one
in the recommended range is used, the modeler is responsible for taking steps to
reinforce the high stress points and/or substituting hardware more suitable for the
increased stress.
WARNING
Some parts included in this kit are made of fiberglass, the fiber of which may cause eye,
skin and respiratory tract irritation. Never blow into a part to remove fiberglass dust, as
the dust will blow back into your eyes. Always wear safety goggles, a particle mask and
rubber gloves when grinding, drilling and sanding fiberglass parts.
LITHIUM BATTERY HANDLING & USAGE
WARNING!! Read the entire instruction sheet included with the battery. Failure to follow
all instructions could cause permanent damage to the battery and its surroundings, and
cause bodily harm!
• ONLY use a Li-Po approved charger. NEVER use a NiCd/NiMH peak charger!
• NEVER charge in excess of 4.20V per cell.
• ONLY charge through the “charge” lead. NEVER charge through the “discharge” lead.
• NEVER charge at currents greater than 1C.
• ALWAYS set charger’s output volts to match battery volts.

©2008 Maxford USA www.maxfordusa.com
4
4
• ALWAYS charge in a fireproof location.
• NEVER trickle charge.
• NEVER allow battery temperature to exceed 150° F (65° C).
• NEVER disassemble or modify pack wiring in any way or puncture cells.
• NEVER discharge below 2.5V per cell.
• NEVER place on combustible materials or leave unattended during charge or
discharge.
• If you crash the plane, always check if the Li-Po battery is damaged. Do NOT try to
use or charge a damaged Li-Po battery.
• ALWAYS KEEP OUT OF REACH OF CHILDREN.
PARTS LIST
Wing set in 1 piece
(V2 wing can not be used on previous version planes. Wing of the above pictures is V1.1)
Fuselage 1 piece
Magnetic Battery Hatch 1 piece
Vertical Stabilizer with pre-hinged rudder
Horizontal Stabilizer with pre-hinged elevator
Landing gear with wheels and Fiberglass Wheel Pants
Tail wheel 1 piece
Scale Fiberglass Cowl
Hardware and accessories bag, Repair bag

©2008 Maxford USA www.maxfordusa.com
5
5
Other items you need to assemble this model
4 pieces HS-SG90 mini servos or equivalent
10” servo extensions and 6” Y cable
Servo Extension Safety Clip 4 pieces
Electric outrunner motor and ESC
10x5 Propeller
3 cell 2100 mAh Li-Po battery
Li-Po Battery Charger
Receiver and Transmitter
Special Features
Scale ARF for beginner and mid level RC pilots
Fiberglass cowl with scale radial engine cylinders
Unique design suspension landing gear
Spring loaded tail wheel
Improvements on V2
This manual is for 40” EP Gee Bee Y version 2. There are some improvements on this
version. The major improvement is the re-designed battery hatch. On V2 Gee Bee, you
may use 2100 mAh or even bigger size Li-Po battery without any modification on the
battery box. The motor mount on V1.0 and V1.1 was removed. The motor will be
installed on firewall. These improvements make this plane become a 99% pre-
assembled ARF.
*V2 wing is different with V1.0 and 1.10 and can not be used on previous version planes.
EP Gee Bee V1.0 and 1.1 EP Gee Bee V2.0
Motor Mount
V1.0 need to be installed in right
angel. There is only one way to install
it on V1.1. There is no way that people
can install V1.1 box wrong.
There is no separate motor mount.
Motor will be installed on firewall.

©2008 Maxford USA www.maxfordusa.com
6
6
Battery
Hatch
V1.0 battery hatch with one piece
small magnetic. V1.1 has 2- pieces
magnetic to hold the hatch.
V2.0 with a bigger magnetic battery
hatch. There are 2 holes on it for easy
remove the hatch and better cooling.
Battery Box
V1.0 and 1.1 have a small battery box,
design for 1300 mAh Li-Po battery. V2.0 battery box will fit 2100 mAh or
bigger Li-Po battery.
Before you begin:
-Read the instructions completely before beginning assembly.
-Don’t work when tired. Many aircraft (including full sized ones) have crashed because of
errors made by tired builders.
-Always work in a well ventilated and lighted area.

©2008 Maxford USA www.maxfordusa.com
7
7
Start to Assemble your Gee Bee
Horizontal & Vertical Stabilizers
Rudder and Elevator are pre-hinged, you just need to install control horns on it. The control
horn for elevator need to be on right (suppose you sit in the canopy), because the push rod
will come out from right side.
You will install 2 horns on rudder for the pull-pull rudder.
There is a pre-cut little tray for the tail wheel. The installation stick of the tail wheel was
bended over in the factory. You just need to slide it into the pre-drilled hole in rudder, then
use a few drops of CA to fix it. Install horizontal and vertical stabilizers to the fuselage and
glue the connections. The long square shape metal piece on the tail wheel need to be held
on the bottom of the fuselage.
Rudder Control Lines
a) There are 2 pre-tied metal clevis, see below pictures in case you need to re-tie pull-
pull wires back to the clevis.
b) There are 2 pre-installed tubes inside of the fuselage for control lines. Slide one wire
into the tube on each side of the fuselage, then pull them out from the fuselage.

©2008 Maxford USA www.maxfordusa.com
8
8
c) You have 2 pieces of metal snap-hooks in the accessories bag. Those will be used to
tie to each wire and connected to rudder servos arms.
d) Install the rudder servo into the fuselage, line snap hooks to the outer most holes in
the servo arm.
e) Center the rudder servo, then attached servo arm with control lines to the servo.
f) Tighten and adjust the length of the control line if necessary, then crimp tubes over
the lines.
Elevator
There is a carbon fiber push rod with re-bended metal stick on each side in the box. The
length is perfect, just slide it into the fuselage from the tail side, then connect it to the
elevator control horn and servo arm.
Wing and Landing Gear
1. Attach 10” extension cable to the servo cable, use Extension Safety Clip to hold the
connection. There is a leading wire in each servo tray, tie it on the end of extension
cable, pull the wire to lead the cable out of the wing.
2. Connect 2 servo extensions to a 6” Y Harness, use Extension Safety Clip to hold the
connection.
3. Install aileron servos, control horns and push rods.
4. Remove the screw on the main landing gear, then it become to 2 pieces as below
picture. Put the small square wood piece to the U shaped strut, then slide it into the
tray. You have the option to glue the wood piece with the wing. If you decide to do
so, you may not be able to uninstall the landing gear. Apply the long square shaped
metal piece to the strut, use 2 screws to hold it.

©2008 Maxford USA www.maxfordusa.com
9
9
5. Put the wheel piece into the fiberglass wheel pant, make sure the black spring face
to the tail. Slide the stick into the aluminum wheel support, tie up the screw on it to
hold the stick. Put the wheel pant down to the wing bottom, use 2 screws to hold the
wheel pant.
6. Attach the wing to the fuselage with 2 nylon bolts in the accessories bag.
7. Install wing 2 pieces of scale wing struts on each side.
8. Install Canopy. Put the black rubber piece to the edge of the canopy, use a few
drops of CA to hold it. Attach 3 small screws to hold the canopy on to the
fuselage.
Motor and Cowling
Install motor to the firewall, then attach the fiberglass cowl to the fuselage. You should
leave a gap between the edge of the cowl and the fuselage. That is the design for better
cooling. Do not push the cowl down to the end.

©2008 Maxford USA www.maxfordusa.com
10
10
-You may add a pilot figures if you want.
Balancing the Gee Bee
•Mount the battery in the front compartment fasten the tape and attach the
magnetic hatch. There are 2 holes on the surface of the hatch for easy remove
the hatch and better cooling.
•Attach the prop.
•CG: 2 3/8” (60mm) from the wing front edge
•Control Throw:
Ailerons - 27mm up and down, Elevator - 25 mm up and down, Rudder - 30mm
up and down

©2008 Maxford USA www.maxfordusa.com
11
11
Final check before flying
Before the first flight
•Check all nuts, bolts, screws, and clevises.
•Check the controls for proper operation.
At the field
•With the aircraft properly restrained, perform a range check with the motor
running and the prop attached. You should be able to get at least 100’ away from
the model with your transmitter’s antenna stowed with reliable control.
•If possible, have another modeler check your Jenny over. Smart pilots never
mind a second opinion.
Hopefully you will never need them,
but for replacement parts check our web site at
www.maxfordusa.com
An important notice to our customers!
This product is NOT a toy. Any use of this product is done at your own risk. Please enjoy
your hobby and fly safely!
Distributed by
Maxford USA Corp.
DBA: Green RC Models USA
Address: 13909 Artesia Blvd., Cerritos, CA 90703
Tel: 562-802-0680 Fax: 562-802-0650
Web site: www.maxfordusa.com
Table of contents
Other Maxford Toy manuals
Popular Toy manuals by other brands

Combrig
Combrig HMS NEW ZEALAND Battlecruiser 1912 Assembly instructions

REVELL
REVELL KIT 0313 Assembly manual

Faller
Faller Deslagging plant manual

Hangar 9
Hangar 9 Twist Plug-N-Play Assembly manual

Eduard
Eduard He 219 Uhu self adhesive quick start guide

Canon
Canon CREATIVE PARK 3D Decoupage Assembly instructions