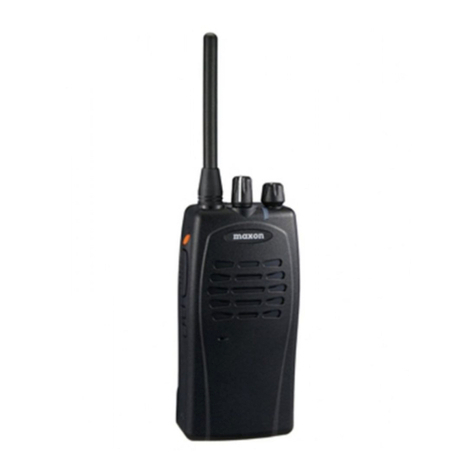
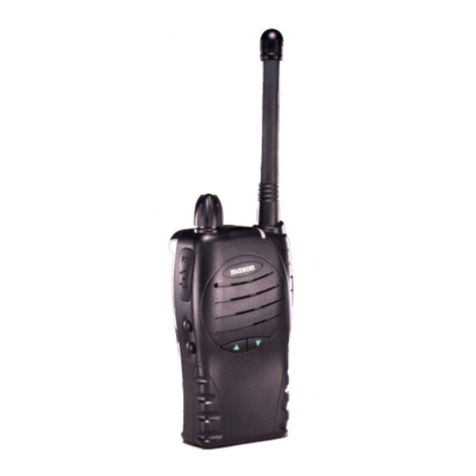
Maxon SP-1402 User manual

Service Manual SP - 1402
Page 1 of 35
.
SP - 1402
Service Manual

Service Manual SP - 1402
Page 2 of 35
Warnings
1. WARNING! NEVER connect the transceiver to an AC outlet. This may pose a fire hazard
or result in an electric shock.
2. NEVER operate the radio transmitter without a suitable artificial load or antenna
connected.
3. NEVER connect the transceiver to a power source of more than 8.4V DC such as a 13.8V
battery.
4. NEVER dispose of the battery in fire –it can explode causing personal injury.
5. NEVER attempt to disassemble the battery or remove its case material or charging
contacts. Do not short the battery terminals.
6. NEVER expose the transceiver to rain, snow or any liquids.
7. NEVER modify a radio or accessory except as instructed in the service manual,
engineering bulletins or formal communication as this may invalidate any warranty,
guarantee or type approval.
8. USE the supplied microphone only. Other microphones have different pin assignments
and may damage the transceiver.
9. DO NOT use or place the transceiver in areas with temperatures below -30°C or above
+60°C, In areas subject to direct sunlight, such as the dashboard.
10. DO NOT hold the radio in such a manner that the antenna is next to, or touching,
exposed parts of the body, especially the face or eyes, while transmitting.
11. DO NOT allow children to operate transmitter-equipped radio equipment.
12. DO NOT operate the radio near unshielded electrical blasting caps or in an explosive
atmosphere, unless it is a type especially designed and qualified for such use.
13. DO NOT press and hold the transmit bar (P-T-T) when not actually wishing to transmit.
14. AVOID placing the transceiver in excessively dusty environments.

Service Manual SP - 1402
Page 3 of 35
Contents
SP -1402 ..................................................................................................................................
Introduction............................................................................................................................ 4
Specification ........................................................................................................................... 6
Maintenance and Repair ........................................................................................................ 10
Transmitter Performance Tests .............................................................................................. 13
Detailed Functional Description .............................................................................................. 22
Troubleshooting.................................................................................................................... 26
Schematics and PCB layout Index .......................................................................................... 28
Parts List & Exploded View .................................................................................................... 34
Contact details ..................................................................................................................... 36
C
C
Co
o
on
n
nt
t
te
e
en
n
nt
t
ts
s
s

Service Manual SP - 1402
Page 4 of 35
Introduction
This Maxon Service Manual is a comprehensive guide to the maintenance and field repair of this
equipment. It covers all versions of the SP-1402 Series radio(s). Before using this manual please
read the whole of this introductory chapter, this will help you to make the best use of it. If you
have not done so already, please also read the warnings immediately in front of this chapter
before proceeding any further.
Using this Manual
The organization of this manual has been arranged to enable the location and referencing of
information, as quickly as possible.
Section 3 - Installation, Commissioning & Alignment. Describes connections to the radio, how
to commission it and how to align the radio should this becomes necessary.
Section 4 - Detailed functional description.
Section 5 - Troubleshooting.
Amendments to this Manual
From time to time during its lifetime, this product will be updated and improved. To cover such
changes, amendments to this manual will be issued in the form of replacements and/or additional
pages. It is important that anyone working on a product has all the relevant information.
Therefore you should incorporate amendments to this manual on receipt. Please follow the
instructions accompanying the amendment (in the form of an Engineering Bulletin) and be sure to
complete the amendment record at the front of this manual.
On occasion it may be necessary to issue product information more quickly than can be achieved
with an amendment. In this case the information will be distributed as a Maxon Engineering
Bulletin. Engineering Bulletin numbers are prefixed with a category letter –A, B or C.
E.g. CATEGORY C –ENGINEERING BULLETIN 120
Category C describes how Maxon recommends an improvement and/or a modification to make an
improvement to a product
Engineering Bulletin 120 index number allocated to this bulletin.
‘A’ Category A Engineering Bulletins will only be released if, by using the equipment
manufactured by Maxon or its subcontractors, a risk to operator safety or an infringement of
Type Approval is probable.
All units affected should be returned for modification to Maxon CIC Europe Works Department on
receipt of such a Bulletin.
Service Manual SP - 1402
Page 5 of 35
‘B’ Category B Engineering Bulletins are for equipment manufactured by Maxon CIC that may
have component batch problems.
All equipment affected that is in service must be returned to the Distributor or Dealer workshop
for modification. Maxon CIC will supply replacement components free of charge.
‘C’ Category C Engineering Bulletins are for improvement or modification to equipment
manufactured by Maxon.
Dealer/Distributor to modify affected units in the field on the next service call. Maxon will supply
components free of charge.
Please place these at the back of this manual and refer to them before carrying out any work.
This Service Manual should be updated with any accompanying replacement pages. You may
wish to retain the previous issue pages for future reference.

Service Manual SP - 1402
Page 6 of 35
Specification
General
Performance specifications
FCC Compliance
Frequency coverage
440.000~470.000 MHz
Channel spacing
N-BAND 12.5KHz
S-BAND 25KHz
RF output power
5W
Modulation type
F3E
Audio power
500mW(Ext with 4 ohm)
Intermediate frequencies
45.1MHz & 455 KHz
Number of channels
16
Frequency source
Synthesizer
Frequency stability
0.0005%(-30oC to +60oC)
Power supply
Rechargeable Li-on Battery
7.5 VDC +/-10%
Current consumption
Off <1 mA
Standby(Muted) <30 mA(Battery save on)
<60 mA(Battery save off)
Unmuted,100% MaxAFPower<500mA
Transmit 5 Watts RF Power <2.0 A
Temperature range operating
Storage from -40oC to +80oC
Operating from -30oC to +60oC
Humidity
90%-95% at +50oC
Physical dimensions
40X60X195
Weight
0.244 Kg

Service Manual SP - 1402
Page 7 of 35
Transmitter
Test Method is TIA / EIA-603 unless stated. Performance without Sub-Audio Modulation.
Power Output
Low Power 1W
Audio Freq. Deviation
Nominal Peak
12.5 kHz +/-2.3KHz +/- 2.5KHz
25 KHz +/-4KHz +/-5KHz
With or without audio sub-modulation (10% peak deviation)
Audio Characteristics
Modulation Type F3E
Within +1/-3dB of limit wrt 1 kHz:
300Hz to 2.55 kHz for 12.5kHz channel spacing
300Hz to 3.0 kHz for 20 / 25kHz channel spacing
TX Spurious Emission (conducted and radiated)
Below 1GHz Better than –36dBm
1 –4GHz Better than –30dBm
MIC Sensitivity
At Accessory/Mic connector 15mV +/- 5mV
Values for 60% peak dev.
Transmitter Audio Distortion (Without CTCSS)
1 kHz < 5% (nominal)
Transmitter Audio Distortion (With CTCSS)
1 kHz < 8% (nominal)
Audio frequency = 1 kHz, with any CTCSS freq. combined.
Hum and Noise (Residual Modulation)
Better than 40dB (with PSOPH)

Service Manual SP - 1402
Page 8 of 35
Sub Audio Tones - CTCSS
Tone Range
67 to 250.3Hz @ 0.3% accuracy
Nominal Tone
15% (10-20%) Pk Sys Dev.
Sub Audio Tones - DCS
Tone Standard Normal and Inverted
Tone Deviation 15% (3%) Pk System Dev.
Receiver
Test Method is TIA / EIA-603 unless stated. Performance without Sub-Audio Modulation
Sensitivity
12dB SINAD (nominal) UHF: Better than –117dBm
Amplitude Characteristic
Within +/- 3dB
Co-channel Rejection
12.5 kHz From 0dB to –12dB
25 kHz From 0dB to –12dB
Adjacent Channel Selectivity Nominal
12.5 kHz Better than 60Db
25 kHz Better than 70Db
Spurious Response Rejection
Better than 60dB (100 kHz –4GHz)
Intermediation Response Rejection
+/- 25 / 50 kHz Better than 65dB
+/- 50 / 100 kHz Better than 65dB
Blocking
>85dB (+/-1MHz, +/-5MHz, +/-10MHz)

Service Manual SP - 1402
Page 9 of 35
Rx Spurious Emissions (radiated) - nominal
9 kHz –1GHz Better than –57dBm
1GHz –4GHz Better than –47dBm
Audio Power
500mW max. (Internal 4Ω speaker)
AF Distortion
1 kHz < 5% (nominal)
RX Hum and Noise
Method as TIA / EIA-603
12.5 kHz >34dB No PSOPH
25 kHz >40dB No PSOPH
Sub Audio Tones - CTCSS
Tone Range 67 to 250.3Hz @ 0.3% accuracy
Decode Sensitivity
Method (Decrease Signal Level, @ 15% peak dev. with no audio tone)
All Tones <=12dB SINAD

Service Manual SP - 1402
Page 10 of 35
Maintenance and Repair
Introduction
This section covers the tests which should be undertaken prior to customer handover. All of the
following tests can be carried out without having to gain access to the interior of the radio.
Recommended Test Equipment
The alignment and performance test procedures assume the use of the following equipment. The
functions of most of the equipment may be found in a “Communications Test Set”. This type of
equipment is available from a number of test equipment manufacturers.
Throughout this book, reference will be made to the use of the Communications Test Set. Where
applicable, the equivalent discrete item of test equipment may be used. For example, if
measuring power, a stand-alone power meter and a dummy load could be used instead of the
Test Set.
Discrete Test Equipment
RF Signal Generator
RF Power Meter
RF Frequency Counter
Spectrum Analyzer and notch filter (optional)
Audio Signal Generator
Audio Power Meter
SINAD Meter
Modulation Meter
Oscilloscope
Voltmeter
DC Power Supply, 0 - 15V 5A min.
Combined Equipment
Communications Test Set (e.g. HP 8920B,
Stabilock 4040 or similar).
Accessories
SP -1402
Note: Use fig.1 as a suggested connection diagram to connect up the recommended discrete test
equipment.

Service Manual SP - 1402
Page 11 of 35
Test Equipment Configuration
(Fig. 1)
Prerequisites
For the following tests, signal generator modulation level should be set to Average System
Deviation, i.e. 60% of maximum system deviation.
The level should therefore be set to:
N-BAND 1.5 kHz for 12.5 kHz channel spacing
S-BAND 3 kHz for 25 kHz channel spacing

Service Manual SP - 1402
Page 12 of 35
EEPROM programming
Ensure that the EEPROM has the required customer parameters programmed, otherwise ensure
that a test EEPROM is programmed with at least the lowest, middle and highest RX/TX
frequencies prior to aligning the UHF scanning mobile radio.
Test Equipment Connection
Test equipment connections for performance and Alignment tests are shown in figure 1.
Connect the power supply leads as follows:
1. Ensure the power supply is switched off.
2. Positive lead of the power supply to the red wire terminal tag of the 7.5V D.C. connector.
3. Negative lead of the power supply to the black wire terminal tag of the 7.5V D.C.
connector.

Service Manual SP - 1402
Page 13 of 35
Transmitter Performance Tests
Power Output
a) Connect the transmitter to the Communications Test Set (CTS) with the power meter set
to read 5W for the SP-1402
b) Set the power supply to 7.5Vdc and connect a dc voltmeter across the power supply to
monitor the supply voltage.
c) Set the CTS to the same frequency as the radio and then set the PTT to start
transmitting. Check and record the power output. The nominal power output is 5W
d) Reduce the power supply voltage to 6.6Vdc and then set the PTT to start transmitting.
The output power should be greater than 65% of the level measured above.
Frequency Error
a) Using the frequency counter check that the transmit frequency is within +/- 750Hz of the
frequency which is programmed into the radio.
Distortion and Deviation Measurements
a) Set the radio to the middle TX frequency. Connect the oscilloscope to the AF output of
the modulation meter.
b) Set the audio signal generator to 1 kHz tone, low output impedance and adjusts its level
for 60% system deviation:
12.5 kHz channel spacing 1.5kHz dev
25 kHz channel spacing 3kHz dev
c) Press and hold the PTT button.
d) Measure the audio distortion. This should be less than 5%.
e) Increase the audio signal generator level by 20dB (10x voltage). The peak deviation
should be:
12.5 kHz channel spacing <= 2.0 kHz dev
25 kHz channel spacing <= 3.5 kHz dev

Service Manual SP - 1402
Page 14 of 35
f) Release PTT.
When CTCSS and DCS performance checks are also required, ensure that the lowest,
middle and highest RX/TX frequencies include: (see below for suggested test channel set-
up).
Lowest RX/TX freq. ch. 67.0 Hz CTCSS
Middle RX/TX freq. ch DCS Code 023
Highest RX/TX freq. ch 250.3 Hz CTCSS
The middle RX/TX frequencies should be halfway between the lowest and the highest
frequencies.
Receiver Performance Tests
Sensitivity
Set the radio to the correct channel.
SINAD performance test is used to test the sensitivity of the radio receiver.
Select the required frequency to be measured (without CTCSS enabled)
a) Connect the RF signal generator, modulated with a 1 kHz tone, to the radio.
b) Set the frequency of the RF signal generator, to correspond with to the RX frequency of
selected channel
c) Connect the SINAD voltmeter to the external speaker socket on the radio. Ensure that
the radio has been programmed to path the audio to the external accessory socket.
d) If signal is not present press the monitor button. Set the volume control to mid-range.
e) Set the RF signal generator deviation to:
12.5 kHz channel spacing 1.5 kHz dev
25 kHz channel spacing 3kHz dev
f) Adjust the RF signal generator level until the SINAD meter reads 12dB.
g) Check that the signal generator
RF level is < -117dBm (0.31µVpd).

Service Manual SP - 1402
Page 15 of 35
Squelch
a) Ensure that both the radio and the signal generator are set to the appropriate channel
spacing.
b) With the above setting, reduce the RF level to –130dBm (speaker should be muted).
Adjust the RF output level until the radio unmutes. Sinad reading should be in the range
of 8db to 12db.
Audio Output
a) Set the RF signal generator to 1mV Pd (-47.0dBm) and the tone and deviation as above.
b) Connect the audio power meter set to 8Ω to the external speaker socket on the radio.
Note: The audio power meter should be set to 4`Ω.
c) Adjust the volume control on the radio under test to maximum.
The voltmeter should indicate > 1.6VRMS (10% distortion)
The audio power meter should read >500mW. (Load: 4Ω)
This concludes the Performance Tests.
If the Radio should fail any of these tests it will be necessary to turn to the next section on
alignment.

Service Manual SP - 1402
Page 16 of 35
Alignment
Warnings
Any repairs or adjustments should only be made by, or under the supervision of a qualified radio-
telephone service technician.
Caution
This radio contains static sensitive devices. Static safe precautions should be observed; in
particular we would recommend the use of a suitable floor mat, table mat, bonding cords and a
wrist strap. The soldering iron should have an earthed tip.
Care should be exercised in the handling of static sensitive components and they should always
be transported in the correct containers.
Never remove, or insert, static sensitive devices with the power applied.
Alignment Section Frequency Table
CH
RX(MHz)
Option
TX(MHz)
Option
Band
Power
1
455.00000
None:
455.00000
None:
S
H
2
469.97500
None:
469.97500
None:
S
H
3
440.02500
None:
420.02500
None:
S
H
4
469.97500
None:
469.97500
None:
N
L
5
455.00000
None:
455.00000
None:
N
L
6
469.97500
None:
469.97500
None:
N
L
7
455.00000
Ctcss:67.0
455.00000
Ctcss:67.0
S
L
8
469.97500
Ctcss:136.5
469.97500
Ctcss:136.5
S
L
9
455.00000
Ctcss:254.1
455.00000
Ctcss:254.1
S
L
10
440.02500
Ctcss:67.0
440.02500
Ctcss:67.0
N
L
11
440.02500
Ctcss:136.5
440.02500
Ctcss:136.5
N
L
12
462.56250
Ctcss:254.1
462.56250
Ctcss:254.1
N
L
13
462.56250
Dcs:023
462.56250
Dcs:023
S
L
14
462.56250
Dcs:754
462.5625
Dcs:754
S
L
15
462.56250
Dcs:023
462.56250
Dcs:023
N
L
16
469.97500
Dcs:754
469.9750
Dcs:754
N
L
Note: The Above frequency table should be used whenever the alignment section refers to a
channel number.

Service Manual SP - 1402
Page 17 of 35
Disassembly and Re-assembly of the Radio
In order to carry out the following test and alignment procedures it will be necessary to gain
access to the inside of the radio.
Care should be exercised when opening up the radio for maintenance or repair.
Removing and replacing the main cover
a) Turn the radio over, so that the radio is upside down.
b) Remove the ANT and volume knob.
b) Remove the two holding screws.
c) Lift the cover off.
d) Replace the main cover by reversing the above procedure.

Service Manual SP - 1402
Page 18 of 35
Alignment
Alignment drawings required
(Fig.3)

Service Manual SP - 1402
Page 19 of 35
PLL Alignment
TX VCO
a) Select channel 1. (440.025MHz)
b) Set the PTT switch to on. Check that the VCO tuning voltage at TP1 is 0.7~1.0V. (CV1)
c) Set the PTT switch to off. Select Channel 8. (469.975MHz)
d) Set the PTT switch to on and check that the voltage at TP1 is 4.0~4.5V.
e) Set the PTT switch to off.
RX VCO
a) Select channel 1. (440.025MHz)
b) Check that the VCO tuning voltage at TP1 (Please see fig.3) is 0.7~1.0V. (CV901)
c) Select channel 8. (469.975MHz)
d) Check that the voltage at TP1 is 3.5~4.0V.
Transmitter Alignment
TCXO
a) Select channel 1. (440.025MHz)
b) Set the PTT switch to on.
c) Using the frequency counter, adjust the TCXO (RV1), so that the transmit frequency is
within +/- 300Hz of the required frequency.
d) Set the PTT switch to off.
If no further alignment is to be carried out, it may be necessary to reset the squelch.
Power
a) Select channel 1. (440.025MHz)
b) Set the PTT switch to on.
c) Adjust the RV4 max(clockwise),RV5 to get Power 5W

Service Manual SP - 1402
Page 20 of 35
Peak Deviation
a) Select channel 1. (440.025MHz)
b) Set the PTT switch to on.
c) Set audio generator to be 1KHz 100mVrms and connect to radio external jack.
d) Adjust the ±2.0-2.5KHz DEV. (RV2) and check S-band to get ±4.0-4.5KHz DEV.
Receiver Alignment
The receiver is, by design, a broadband device. It should require no special alignment unless
repairs are performed on the receiver.
The following alignment may be performed:
a) Select channel 1 on the radio.
b) Set the RF generator to the receiver frequency and the RF level to 1mV Pd (-47dBm).
c) Set the AF signal to 1 kHz.
d) Set the deviation to:
12.5 kHz channel spacing 1.5 kHz deviations
25 kHz channel spacing 3 kHz deviations
e) Monitor the audio output level and the distortion, setting the volume control to 1Vrms.
Squelch
a) Connect the RF signal generator to the radio.
b) Set the RF signal generator to the receive frequency of the current channel two.
c) Connect the SINAD meter to the speaker socket on the rear panel.
d) Set the volume control to mid-range.
e) Set the deviation to: 12.5 kHz channel spacing 1.5 kHz
f) Set the AF generator to 1 kHz.
g) With the above setting, reduce the RF level to –130dBm. The radio should be mute.
h) Adjust the RF level until the radio un-mutes. SINAD meter reads 10dB to 12dB. The radio
should un-mute. If radio does not un-mute adjust RV7 for 12.5 kHz channel spacing.
This completes the receiver alignment process.
This manual suits for next models
1
Table of contents
Other Maxon Two-way Radio manuals

Maxon
Maxon TPD-8124 User manual

Maxon
Maxon PM100 User manual

Maxon
Maxon TK14-VWX User manual

Maxon
Maxon FRS-114 User manual

Maxon
Maxon CM10 User manual

Maxon
Maxon SM-4450 User manual

Maxon
Maxon GMRS-50 User manual

Maxon
Maxon FRS-100 User manual

Maxon
Maxon TSD-4000 Series User manual

Maxon
Maxon GMRS-50 Manual

Maxon
Maxon SP-200 Series User manual

Maxon
Maxon SL-7402 Parts list manual

Maxon
Maxon SP-200K Series User manual

Maxon
Maxon FRS-214 User manual

Maxon
Maxon TP-8000 User manual

Maxon
Maxon S5 PMR446 User manual

Maxon
Maxon S5E PMR446 User manual

Maxon
Maxon SP-300 Series User manual

Maxon
Maxon SP-100 User manual

Maxon
Maxon GMRS-21X User manual