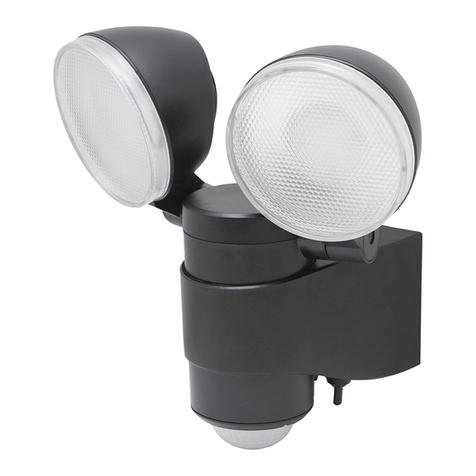
MAXSA 42111 Quick reference guide

Model
#:
42111
LEDYSECU'RITY
SPOTLIGHT
ASSEMBLY
&
OPERATING
INSTRUCTIONS
ABOUT
YOUR
BATTERY
POWERED
LED
SECURITY
SPOTLIGHT
The
LED
Security
Spotlight
is
perfect
for
lighting
porches,
doorways,
or
around
the
exterior
of
your
home
or
business.
The
2
super
bright
LEOs
in
the
LED
Security
Spotlight
have
an
estimated
life
of
30,000
hours
so
they
should
never
need
changing.
This
LED
Security
Spotlight
has
an
adjustable
TIME
dial
that
allows
light
duration
of
up
to
60
seconds
after
the
last
detected
motion.
The
LED
Security
Spotlight
has
a
built-in
motion
sensor,
which
automatically
turns
on
the
light
when
movement
of
a
heat
source
(such
as
people,
animals,
or
cars)
is
detected
in
the
area.
The
light
remains
on
while
motion
continues
to
be
detected
in
the
area
and
turns
off
after
a
predetermined
amount
of
time
once
the
motion
stops.
The
LED
Security
Spotlight
has
a
LUX
setting
which
can
be
adjusted
to
control
the
functioning
of
the
built-in
photosensor
so
that
the
light
only
turns
on
at
night.
The
LED
Security
Spotlight
requires
3
AA
batteries
(not
included).
The
shorter
the
time
period
used,
the
long
·
er
the
batteries
will
last.
The
spotlight
may
function
irregularly
or
not
at
all
at
temperatures
near
or
below
freezing
(20°
F/-6°
C)
due
to
the
functionality
of
alkaline
batteries.
Normal
operation
will
return
when
the
temperature
rises.
www.maxsainnovations.com
1

INCLUDED
PARTS:
II
II 2
screws
and
anchors
for
mounting
bracket
Adjustment
dials
are
located
on
the
underside
of
the
main
body.
They
are
denoted
by
TIME
and
LUX
stamps.
CHOOSING
A
LOCATION
FOR
YOUR
LED
SECURITY
SPOTLIGHT
This
LED
Security
Spotlight
provides
safety
and
security
around
your
home.
It
is
ideal
for
lighting
up
areas
where
electricity
is
not
available
such
as
porches,
driveways,
carports
outside,
garages
and
entrance
areas.
When
deciding
where
to
mount
the
light,
keep
in
mind
that
the
motion
sensor
has
a
horizontal
field
of
vision
of
120°
at
a
distance
of
up
to
26
feet
when
the
surrounding
temperature
is
75°F.
The
outside
temperature
will
impact
the
detection
distance.
As
temperatures
get
colder
the
motion
sensor
will
become
more
sensitive
and
the
range
of
the
motion
sensor
wiiJ
increase.
INSTALLING
OR
REPLACING
THE
BATTERIES
When
the
charging
ability
of
the
batteries
decrease,
you
can
replace
them
with
brand
new
AA
batteries.
Follow
the
steps
below
when
replacing
the
batteries.
1.
First
push
the
power
button
to
turn
the
light
off.
2.
Remove
the
thumbscrew
from
the
bottom
of
the
LED
Security
Spotlight
and
slide
the
light
up
and
off
of
the
mounting
bracket.
3.
Carefully
remove
the
old
batteries
from
the
battery
tray
and
replace
with
brand
new
AA
batteries.
Ensure
that
the
new
batteries
are
plugged
in
with
the
correct
+I-
polarity
orientation.
(WARNING:
Installing
the
batteries
in
the
opposite
direction
could
damage
the
unit.)
4.
Slide
the
light
back
onto
the
mounting
bracket
and
replace
the
thumbscrew.
NOTE:
DO
NOT
DISPOSE
OF
BATTERIES
IN
GENERAL
HOUSEHOLD
TRASH
OR
INTO
A
FIRE
SINCE
THE
BATTERIES
MAY
EXPLODE.
CONSULT
YOUR
LOCAL
REGULATIONS
FOR
CORRECT
DISPOSAL
OF
BATTERIES.
THE
BATTERIES
MAY
ALSO
BE
RETURNED
TO
MAXSA
INNOVATIONS
AT
8412
CATHEDRAL
FOREST
DRIVE,
FAIRFAX
STATION,
VA
22039.
DO
NOT
TAKE
APART
THE
BATTERIES
SINCE
THEY
CONTAIN
CORROSIVE
CHEMICALS.
NOTE:
DO
NOT
MIX
OLD
AND
NEW
BATTERIES.
DO
NOT
MIX
ALKALINE,
STANDARD
(CARBON-ZINC),
OR
RECHARGEABLE
(NICKEL-CADMIUM)
BATTERIES.
2
v15.3
©2015
MAXSA
Innovations,
LLC.
All
Rights
Reserved.

HOW
TO
INSTALL
YOUR
LED
SECURITY
SPOTLIGHT
Tools
Required
For
Install
You
will
need
a
drill
and
a
Phillips-head
screwdriver.
Mount
the
LED
Security
Spotlight
onto
a
solid
surface,
using
the
two
(2)
wood/sheet
metal
screws
supplied.
You
may
mount
the
LED
Security
Spotlight
either
vertically
or
horizontally.
1.
Remove
the
mounting
bracket
from
the
back
of
the
light.
Do
this
by
removing
the
thumbscrew,
then
grabbing
the tab
on
the
bottom
of
the
mounting
bracket
and
pulling
it
down
and
out
of
the
light.
2.
Align
the
mounting
bracket
on
the
wall
and
drill
the
first
hole
through
the
circular
depression
of
the
inside
of
the
mounting
bracket
and
into
the
waiL
This
is
depression
number
1
in
the
image
below.
3.
Next,
drill
through
the
lower,
oval
depression
on
the
mounting
bracket
and
into
the
wall.
This
is
depression
number
2
in
the
image
below.
Make
sure
your
first
hole
in
the
mounting
bracket
is
still
lined
up
with
the
associated
hole
in
the
mounting
surface
·
before
drilling
the
second
hole
.
-
IE
0
~
)>
<(
)>
<(
<Ill
~
®
~
.[D
~
c:J
~
d
Raised
areas
for
drilling
4.
If
drilling
into
cement,
brick,
or
similar
surfaces,
put
the
mounting
bracket
down
and
use
a
slightly
larger
drill
bit
to
make
the
holes
in
the
mounting
surface
larger.
Insert
the
included
anchors
in
the
larger
holes.
5.
Align
the
mounting
bracket
on
the
wall
and
install
the
two
screws
using
a
screwdriver.
6.
Slide
the
unit
back
over
the
mounting
bracket
and
put
the
thumbscrew
back
in
place.
OPERATING
YOUR
LED
SECURITY
SPOTLIGHT
After
installing
new
batteries
in
your
LED
Security
Spotlight
,
click
the
button
on
the
main
body
to
turn
the
light
ON.
When
you
do
this,
the
light
should
activate
immediately,
regardless
of
lighting
conditions
or
motion.
This
is
a
test
activation
to
show
there
is
power
flowing
from
the
batteries
to
the
light.
It
should
last
roughly
30
seconds.
After
this
test
activation,
the
light
will
function
based
on
the
dial
settings
mentioned
below.
Your
LED
Security
Spotlight
is
now
ready
for
use
.
www.maxsainnovations.com
3

On
the
bottom
of
the
light
body,
there
are
2
adjustment
dials:
TIME
and
LUX
The
LED
Security
Spotlight
has
been
factory
preset
as
follows:
TIME-
Set
at
15
seconds.
LUX-
Set
for
your
LED
Security
Spotlight
to
activate
at
dusk
when
motion
is
detected.
If
the
above
settings
are
not
suitable
for
your
application,
then
these
may
be
adjusted
as
follows
.
Time
Period
Adjustment
The
time
period
control
dial
sets
the
duration
that
the
LED
Security
Spotlight
will
remain
illuminated
after
the
last
detected
motion.
The
time
period
has
an
adjustable
range
of
10
seconds
to
60
seconds.
To
decrease
the
time
period,
move
the
dial
toward
the
( - )
symbol.
To
increase
the
time
period,
move
the
dial
toward
the
(
+ )
symbol.
Test
the
time
period
by
triggering
the
motion
sensor
and
measure
the
time
period
the
light
stays
on.
Adjust
the
TIME
control
until
the
desired
illumination
duration
is
reachec.
A
shorter
TIME
setting
will
conserve
battery
life.
For
best
results,
use
the
shortest
TIME
setting
for
your
location
as
possible.
Light
Level
Adjustment
The
LUX
dial
controls
the
natural
light
level
that
triggers
the
LED
Security
Spotlight
and
prevents
it
from
operating
during
daylight
hours.
Your
LED
Security
Spotlight
comes
preset
for
activation
at
dusk.
To
adjust
for
activation
before
dusk,
move
the
dial
toward
maximum
(
0
).
To
adjust
for
activation
after
dusk,
move
the
dial
toward
minimum
()).
SAFETY
TIPS
Do
not
immerse
the
LED
Security
Spotlight
in
water
or
other
liquid.
STORAGE
If
you
wish
to
store
your
light
indoors
for
more
than
two
or
three
days,
turn
the
power
switch
to
the
OFF
position
and
remove
the
batteries
to
prevent
damage
to
the
batteries.
Battery
capacity
may
be
reduced
or
damaged
during
prolonged
storage
MAINTENANCE
TIPS
The
LED
lights
in
your
LED
Security
Spotlight
will
last
up
to
30,000
hours
and
should
never
need
replacement.
When
the
lights
get
too
dim
or
stop
working
completely,
it
is
time
to
replace
the
batteries.
You
can
use
any
brand
new
AA
batteries.
To
keep
your
LED
Security
Spotlight
looking
its
best,
keep
the
lens
free
of
dust
and
deposits
by
wiping
occasionally
with
a
dry
cloth
or
with
warm
soapy
water.
Cold
Weather
Functionality
In
temperatures
below
20°F,
performance
of
the
batteries
may
be
reduced
.
Normal
performance
will
return
when
the
temperature
rises
4
v15
.3
©2015
MAXSA
Innovations,
LLC.
All
Rights
Reserved
.

TROUBLESHOOTING
PROBLEM
POSSIBLE
SOLUTIONS
•
Ensure
that
the
power
button
on
the
main
body
is
in
the
ON
position
•
Ensure
that
the
LED
Security
Spotlight
has
been
positioned
so
the
motion
LED
Security
sensor
faces
oncoming
movement.
Spotlight
will
not
•
Ensure
that
the
batteries
still
have
power.
switch
on
when
there
is
movement
•
Check
to
see
that
the
LUX
control
has
not
been
set
too
far
towards
the
in
the
detection
minimum
()
).
Setting
the
LUX
control
too
far
towards
minimum
())
will
area.
cause
the
LED
Security
Spotlight
to
turn
on
only
in
complete
darkness.
•
Check
to
see
that
the
motion
sensor
is
not
near
night
time
light
sources
such
as
street
lights.
LED
Security
•
The
LUX
control
may
be
set
too
far
towards
the
maximum
(
0)
position.
Spotlight
switches
•
Reposition
the
LED
Security
Spotlight
so
the
motion
sensor
faces
a
on
during
the
day
different
direction.
•
Moving
trees,
traffic,
pets,
or
birds
may
be
getting
in
the
area
of
detection.
This
may
be
unavoidable;
however
the
sensor
could
be
redirected
to
a
spot
where
this
is
less
likely
to
occur.
LED
Security
•
If
there
are
reflective
objects
in
the
detection
area
such
as
windows,
Spotlight
switches
water,
or
white
walls,
you.
may
need
to
redirect
or
possibly
reposition
the
on
for
no
apparent
motion
sensor.
reason
•
Test
the
motion
sensor
by
covering
it
completely
with
cardboard
and
waiting
several
minutes
to
make
sure
it
does
not
detect
motion.
If
the
LED
Security
Spotlight
still
switches
on,
please
contact
MAXSA
for
further
assistance.
LED
Security
•
Battery
charge
may
be
low.
See
"Installing
or
Replacing
the·
Batteries"
Spotlight
quickly
on
Pg
2
flashes
on
and
off.
•
Move
the
LUX
control
more
towards
the
minimum
())
position
LED
Security
•
Battery
charge
may
be
low.
See
"Installing
or
Replacing
the
Batteries"
Spotlight
is
not
as
bright
as
normal
on
Pg
2
www.maxsainnovations.com
5

ONE
YEAR
LIMITED
WARRANTY
1
YEAR
LIMITED
WARRANTY:
MAXSA
Innovations,
LLC
warrants
to
the
original
consumer/purchaser
that
this
product
shall
be
free
of
defects
in
material
and
workmanship
under
normal
use
and
circumstances
for
a
period
of
one
(1)
year
from
the
date
of
original
purchase
for
use.
When
the
original
consumer/purchaser
returns
the
product
pre-paid
(consumer
pays
return
shipping)
to
MAXSA
Innovations,
LLC,
8412
Cathedral
Forest
Drive,
Fairfax
Station,
VA
22039;
USA
within
the
warranty
period,
and
if
the
product
is
defective,
MAXSA
Innovations,
LLC
will
at
its
option
repair
or
replace
such.
This
warranty
shall
constitute
the
sole
liability
of
MAXSA
Innovations,
LLC
concerning
the
product.
MAXSA
Innovations,
LLC
expressly
disclaims
all
other
warranties
INCLUDING,
WITHOUT
LIMITATION,
THE
WARRANTIES
OF
MERCHANT
ABILITY
AND
FITNESS
FOR
A
PARTICULAR
PURPOSE.
NO
PERSON,
FIRM,
OR
COPORATION
IS
AUTHORIZED
TO
ASSUME
FOR
MAXSA
Innovations,
LLC
ANY
OTHER
LIABILITY
IN
CONNECTION
WITH
THE
SALE
AND
USE
OF
THE
PRODUCT.
MAXSA
Innovations,
LLC
and
agents
and
distributors
will
bear
no
liability
whatsoever
for
incidental
or
consequential
damages
or
charges
of
any
kind.
Some
states
do
not
allow
the
reclusion
or
limitation
of
incidental
or
consequential
damages,
so
the
above
disclaimer
regarding
incidental
or
consequential
damages
may
not
apply
to
you.
This
warranty
is
void
if
the
product
has
been
damaged
or
tampered
with
or
if
the
product
or
any
such
parts
have
been
opened.
In
all
cases
of
damage
during
shipment,
a
claim
must
be
filed
with
the
shipping
carrier
and
not
with
MAXSA
Innovations,
LLC.
This
warranty
gives
you
specific
legal
rights;
you
may
also
have
other
rights
which
vary
from
state
to
state.
SPECIFICATIONS
Power
Source:
Lumens:
Light
Color:
Function:
Power
Storage:
Light
Duration:
Detection
Angle:
Max
Detection:
Weatherproof
Rating:
MADE
IN
CHINA
B~ttery
100
6500K
(Cool
White
or
Daylight
color)
Motion-Activated
3
1.5V
AA
batteries
(not
included)
10-
60
seconds
120°
26
feet
(""'8
meters)
IP44
PLEASE
SAVE
THESE
INSTRUCTIONS
FOR
FUTURE
REFERENCE.
MAXSA,
®
MAXSA
Innovations,
LLC.
8412
Cathedral
Forest
Dr
Fairfax
station,
VA
22039
Tel:
703-495-0661
www.maxsainnovations.com
6
v15.3
©2015
MAXSA
Innovations,
LLC.
All
Rights
Reserved.
Table of contents
Other MAXSA Spotlight manuals
Popular Spotlight manuals by other brands
ANSMANN
ANSMANN POWERLIGHT 5.1 instructions

Brinkmann
Brinkmann 1 Million MaxPower Owner's manual & operating instructions

Artecta
Artecta Display Track Fresnel 20 SW V1 user manual

Prolycht
Prolycht Orion 300FS user manual

EuroLite
EuroLite PAR-56 Pro Short Spot user manual

Stanley
Stanley LIONLEDS instruction manual