MAXSA 44416 User manual

Model #: 44416, 44418
ASSEMBLY AND INSTRUCTION GUIDE
Solar-Powered, Motion-Activated Dual Head LED Security Light
The Motion-Activated Dual Head LED Security Light
turns on automatically at night when motion is detected.
This MAXSA Solar Security Light has an adjustable
TIME dial that allows light duration of up to 1 minute.
Because the light runs off of solar power using free
energy from the sun, it never costs you electricity and
can be mounted anywhere the solar panel can receive
sunlight.
ABOUT YOUR SOLAR SECURITY LIGHT
This Solar Powered Motion-Activated Dual Head LED
Security Light comes complete with a 15 foot cord so
you can place your Motion-Activated Dual Head LED
Security Light anywhere where sunlight is available.
Ensure that the Motion-Activated Dual Head LED
Security Light is not placed near night time light
sources such as porch lighting or street lighting.
This Motion-Activated Dual Head LED Security Light is
ideal for areas where electricity is not available --
including carports, outside garages, porches, decks,
and outside areas. The lights provide safety and secu-
rity around your home, business or community building.
When deciding where to mount the light, keep in mind
that the motion sensor has a field of vision of 120º
(horizontal) at a distance of 25 feet when the surround-
ing temperature is 75ºF. The outside temperature will
impact the detection distance.
CHOOSING A LOCATION
Page 1
IMPORTANT: Read all instructions carefully before use.
HOW TO INSTALL
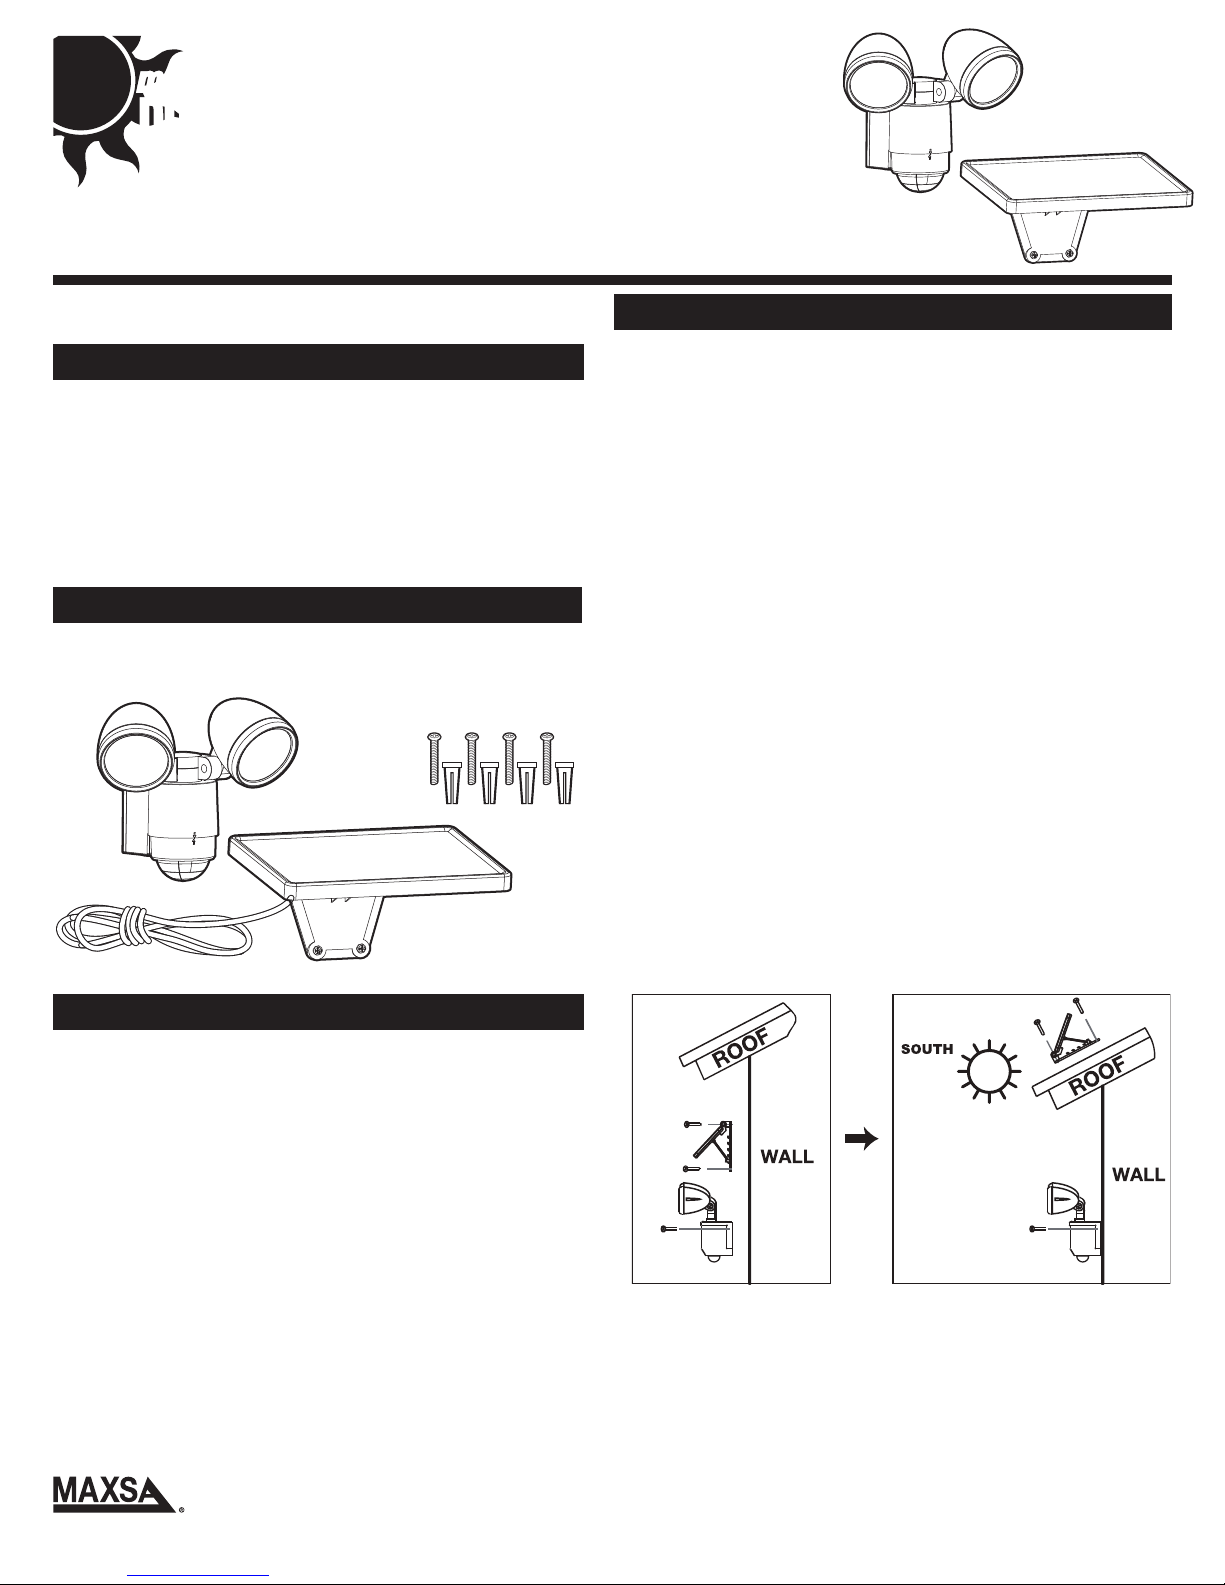
Your Motion-Activated Dual Head LED Security Light
works best when installed with the round motion sensor at
the bottom. To install the light onto a solid surface, remove
the thumbscrew on the bottom of the back section,
depress the button on the top of the back section, and
slide the plastic mounting bracket out of the back of the
light by pulling on the fabric loop.
Mount the white back piece using the 2 supplied screws
(and the wall hangers if needed) utilizing the two mounting
holes in the piece.
After the mounting bracket is secured, slide the main body
of your light back onto the mounting bracket until the
button on top clicks into place. Then replace the thumb-
screw in the bottom of the back of the light, securing the
light to the mounting bracket.
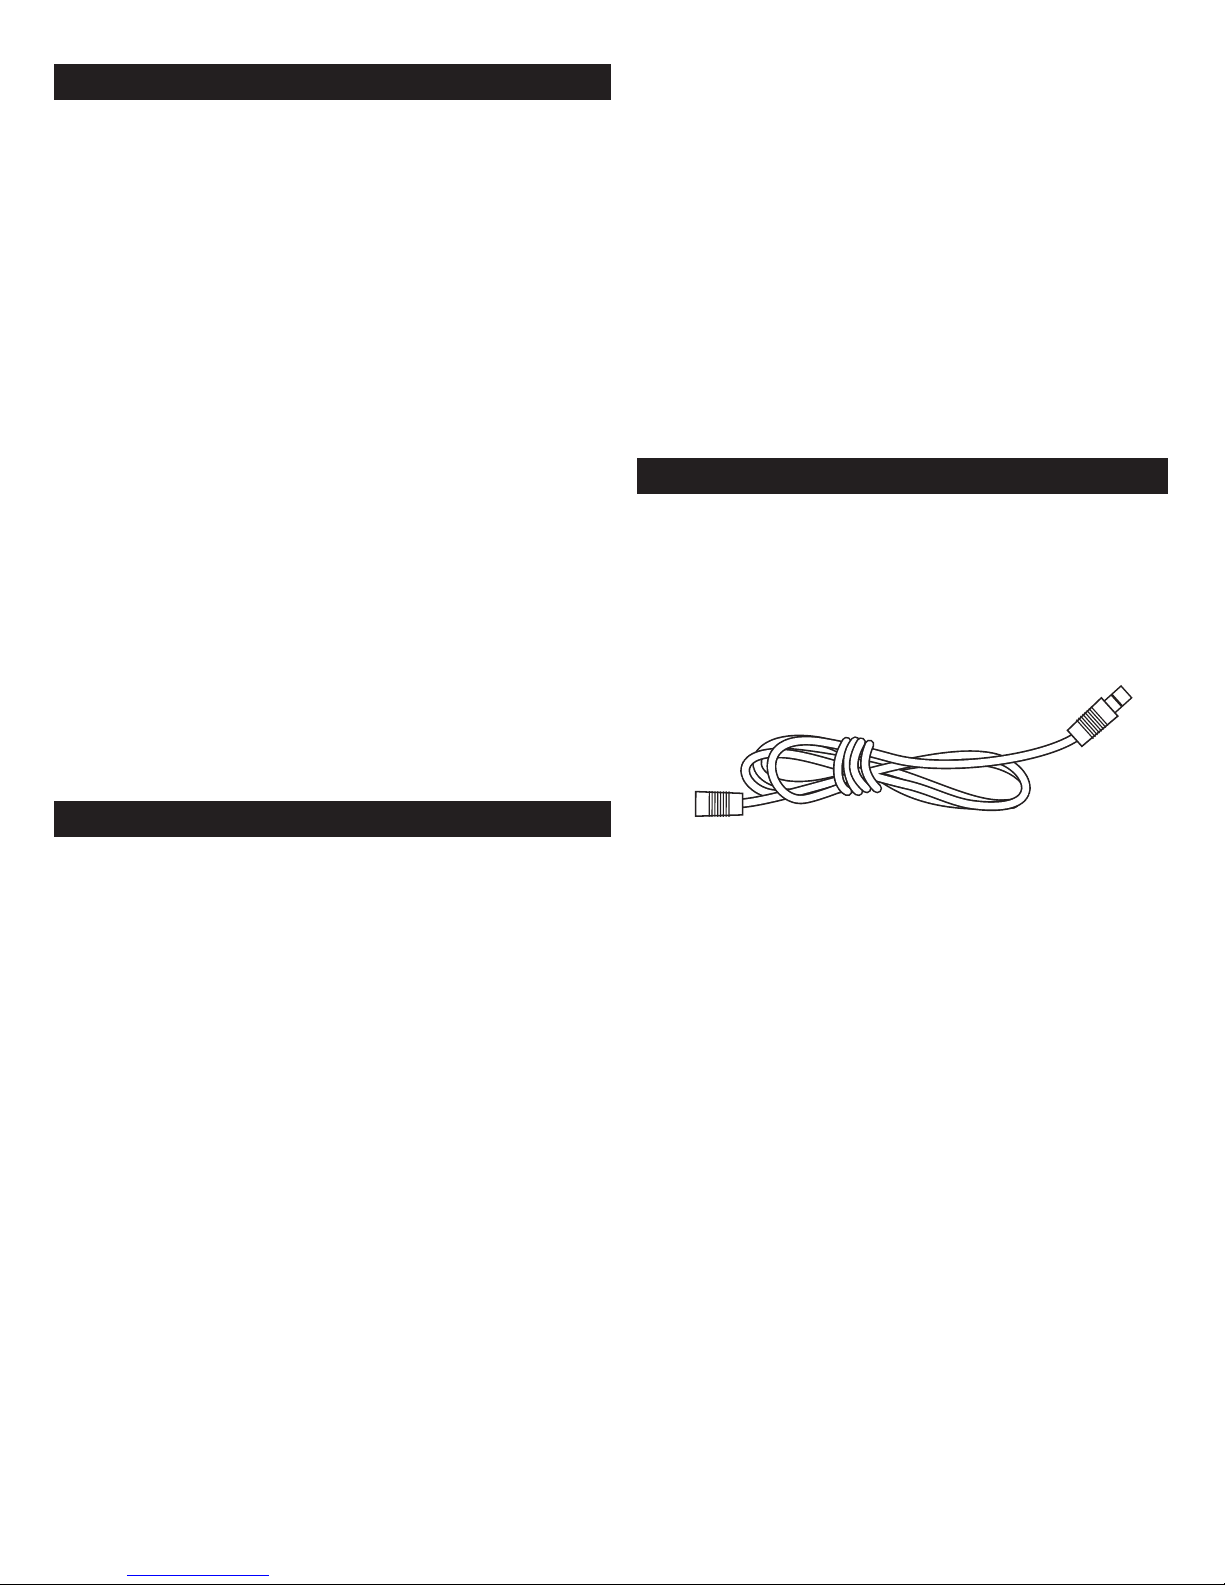
Be sure that a power source is within range of the 15 foot
power cord as the light will not function if it does not
receive power from the solar panel. (There are extension
cords available if you need more than 15 feet to go from
the solar panel to the light - see end of instructions).
Choose a location that receives plenty of sun. Ideally 6-8
hours of sunlight per day is required to fully recharge your
security light. The solar panel should be facing south to get
the most sunlight.
Placing the solar panel in a shaded location will not allow
the batteries to charge fully. This will reduce the number of
hours when the Solar Security Light will operate per
evening.
In choosing a location for your Solar Security Light, ensure
that the solar panel is not placed near nighttime light
sources such as porch light or street lighting.
The solar panel can be mounted vertically or horizontally
onto a solid surface using the supplied wood/sheet metal
screws and anchors. You can adjust the angle of the solar
cell by moving the angle adjustment on the solar panel to
different locking positions. Remember it is best to face the
panel south for direct sunlight exposure.
INSTALLING THE LIGHT
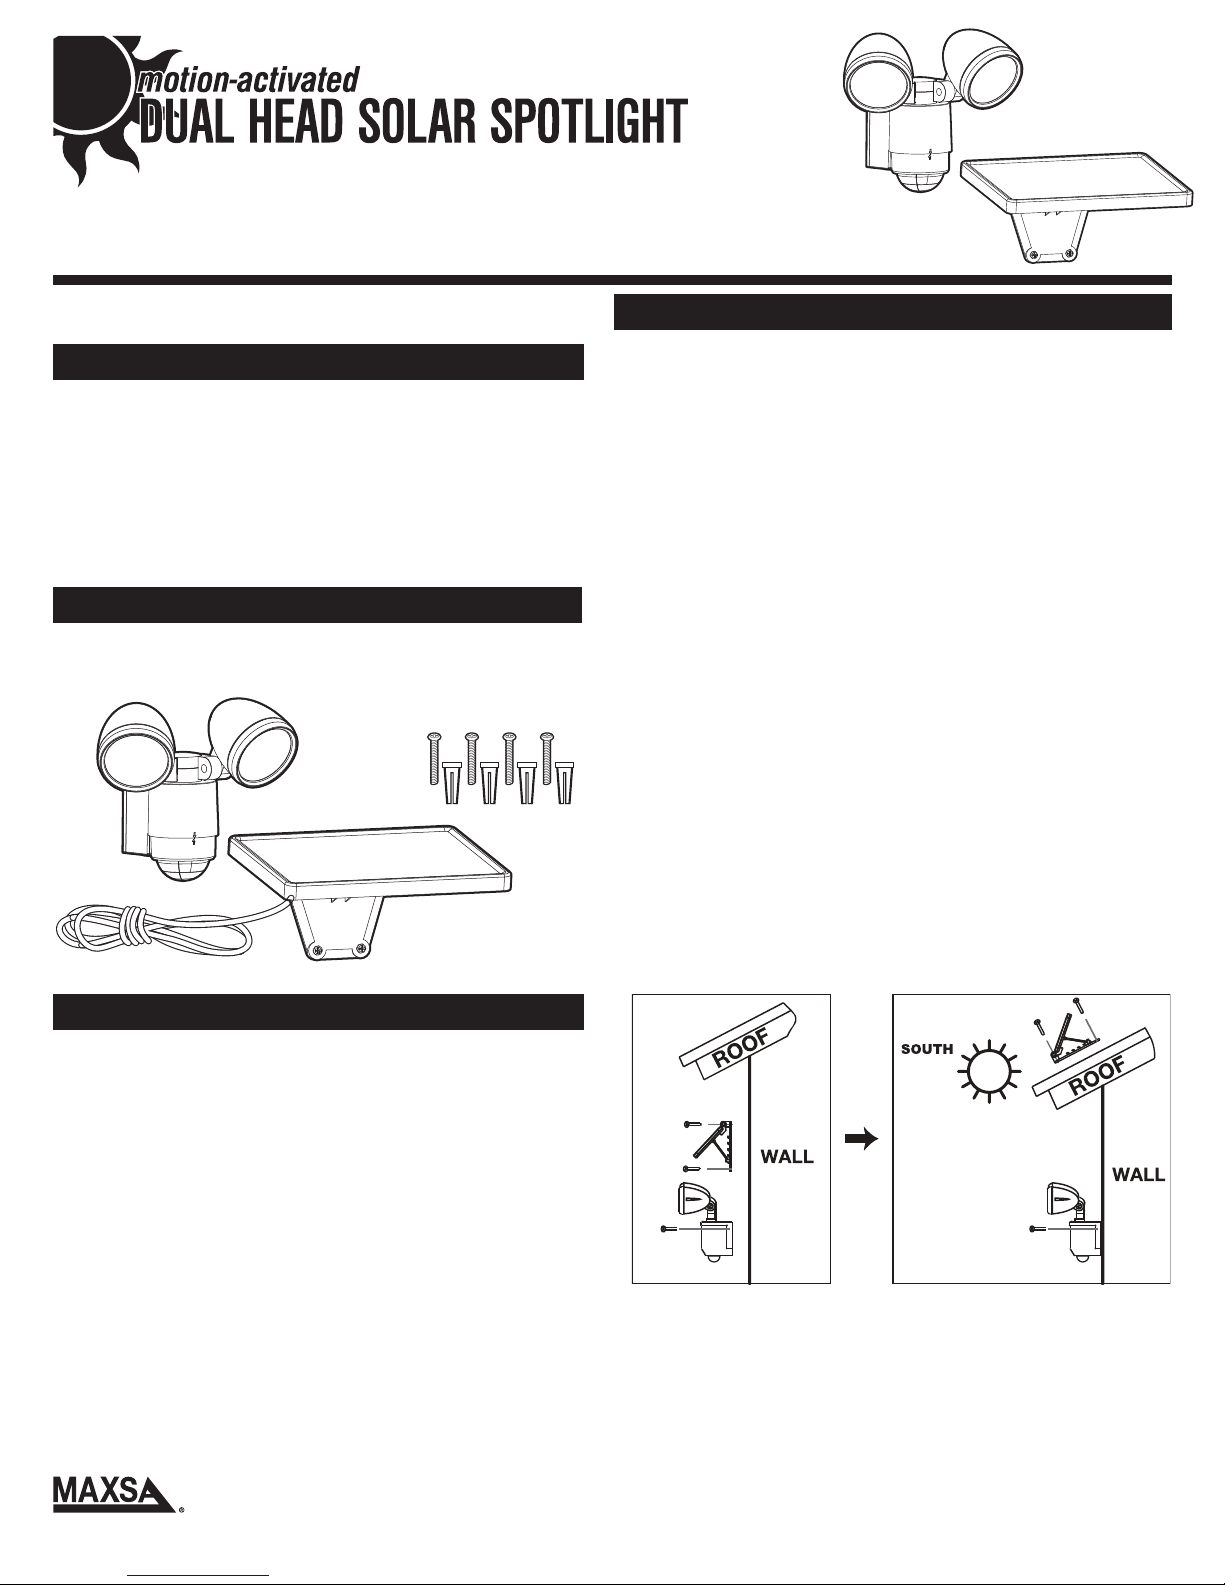
Carefully remove and identify all the parts from their
protective packaging and lay them out in front of you.
INCLUDED PARTS
Dual Head
Spotlight
Solar Panel
Mounting Hardware

After the Motion-Activated Dual Head LED Security Light
has been mounted and plugged in, it is now ready for use.
Turn switch on top to ON.
The motion sensor rotates and in the back of it are two
adjustment dials. The dial with the + and the - is the Time
dial and the dial with the () and the ( ) is the Lux dial.
The motion sensor rotates and in the back of it are 2
adjustment dials: TIME and LUX. The light has been
factory preset as follows:
TIME - Set at approximately 30 seconds.
LUX - Set for your Security Light to activate at dusk
when motion is detected.
If the above settings are not suitable for your application,
then these may be adjusted using the steps below.
TIME PERIOD ADJUSTMENT [+ AND –]
The time period adjustment control dial sets the duration
that the Solar Security Light will remain illuminated after
the last detected motion. The time period has an adjust-
able range of 10 seconds to 1 minute.
To decrease the time period, move the dial toward the (
- ) symbol.
To increase the time period, move the dial toward the (
+ ) symbol.
Test the time period by triggering the motion sensor and
measure the time period the light stays on. Adjust the
TIME control until the desired illumination duration is
reached.
COLD WEATHER
In temperatures below 20ºF, the Solar Powered Motion-
Activated Dual Head LED Security Light may not work as
well. Normal performance will return when the temperature
rises.
SAFETY TIPS
Do not cut the power wire. Discontinue use if the wire
becomes frayed or broken.
Do not immerse the Motion-Activated Dual Head LED
Security Light in water or other liquid.
Position the cord from the solar panel to the light so that it
is securely fastened and will not move around or cause
someone to trip over the cord.
MAINTENANCE TIPS
The LED lights in your Motion-Activated Dual Head LED
Security Light will last up to 30,000 hours and should
never need replacement.
Over time, the battery pack will lose its ability to hold a
charge and may need to be replaced. To access the
battery pack, remove the mounting bracket and the metal
battery tray. Disconnect the battery pack plug from the
circuit board. Battery pack replacements (3.6V, 2200 mAh,
AA cells) are available for purchase directly from MAXSA
Innovations by calling 703-495-0661.
To keep your Motion-Activated Dual Head LED Security
Light looking new, keep the lens free of dust and deposits
by wiping occasionally with a dry cloth or with warm soapy
water.
STORAGE
Extension cords for your solar panel are now available.
Each cord comes in 15 foot lengths and has the appro-
priate plugs on either end. Cost is $14.95 for one and
$9.95 each if you buy 2 or more.
Please contact MAXSA Innovations at 703-495-0661 or
EXTENSION SOLAR CABLE
Page 2
OPERATING YOUR SOLAR SECURITY LIGHT
A shorter TIME setting will conserve battery life. For
best results, use the shortest TIME setting for your
location as possible.
LUX LEVEL ADJUSTMENT [() AND
( )]
The LUX dial controls the natural light level that triggers
the Solar Security Light and prevents the light from oper-
ating during daylight hours.
Your Solar Security Light comes preset for activation at
dusk.
To adjust for activation in a brighter setting, move the
dial toward bright ()
To adjust for activation in a darker setting, move the dial
toward dark ( ). (Should look like a thin moon).
Once adjustments are made, move sensor back into posi-
tion with the arrows lined up.

EXTENSION SOLAR CABLE
Page 3
When the charging ability of the battery pack decreases,
you can replace it with a new 3.6V/2200 mAh NiMH
battery pack. Follow the steps below when replacing the
battery pack.
1. Move the power switch on the main body to the OFF
position
2. Remove the main unit from the mounting bracket by
removing the thumbscrew on the bottom of the back of
the unit, pressing the button on the top of the back of the
unit and pulling the light away from the mounted
surface.
3. Pull the battery pack out and remove the screws hold-
ing the metal battery tray in place. Now remove the
metal battery tray to uncover the circuit board.
4. Carefully unplug the battery pack from the unit. Be
sure to pull by the base of the plug. Do not pull the plug
by the wires as this may damage the unit.
5. Replace the battery pack with a new 3.6V/2200 mAh
NiMH battery pack obtained from MAXSA Innovations.
The plug will only fit in one orientation. Do not force the
plug into place as this may damage the unit. If it does
not fit, rotate the plug until it matches with the receiving
end on the circuit board.
6. Replace the battery tray with the screws removed in
step 3, taking care not to damage any cables.
7. Place the light back over the mounting bracket until
the top button on the bracket clicks in place on the top of
the back of the light body.
8. Replace the thumbscrew in the bottom of the back of
the light.
9. Repeat the steps in the "Before the First Use of Your
Solar Security Light" section on page 3 to ensure your
new battery pack is fully charged.
NOTE: Do not dispose of battery pack in general house-
hold trash or into a fire since the battery pack may
explode. Consult your local regulations for correct
disposal of NiMH battery packs. The battery pack may
also be returned to MAXSA Innovations at 8412 Cathe-
dral Forest Drive, Fairfax Station, VA, 22039. Do not
take apart the battery pack since it contains corrosive
chemicals.
Energy Source: Solar
Lumens: 686
Light Color: 6500K (Cool White or Daylight color)
Function: Motion-Activated
Energy Storage: 3.6V/2200 mAh
NiMH rechargeable battery pack
Light Duration: 10 - 60 seconds after motion stops
Maximum Runtime: 70 minutes on a full charge
Detection Angle: 130°
Maximum Detection Distance: 30 feet (9.14 meters)
Weatherproof Rating: IP44
REPLACING THE BATTERIES
SPECIFICATIONS
Battery Pack

v15-2
2015
1 YEAR LIMITED WARRANTY
MAXSA Innovations, LLC warrants to the original consumer/purchaser that this product shall be free of defects in material and workmanship under
normal use and circumstances for a period of one (1) year from the date of original purchase for use. When the original consumer/purchaser returns
the product pre-paid (consumer pays return shipping) to MAXSA Innovations, LLC, 8412 Cathedral Forest Dr; Fairfax Station, VA 22039; USA within
the warranty period, and if the product is defective, MAXSA Innovations, LLC will at its option repair or replace such. This warranty shall constitute the
sole liability of MAXSA Innovations, LLC concerning the product. MAXSA Innovations, LLC expressly disclaims all other warranties INCLUDING, WITH-
OUT LIMITATION, THE WARRANTIES OF MERCHANT ABILITY AND FITNESS FOR A PARTICULAR PURPOSE. NO PERSON, FIRM, OR
COPORATION IS AUTHORIZED TO ASSUME FOR MAXSA Innovations, LLC ANY OTHER LIABILITY IN CONNECTION WITH THE SALE AND USE
OF THE PRODUCT. MAXSA Innovations, LLC and agents and distributors will bear no liability whatsoever for incidental or consequential damages or
charges of any kind. Some states do not allow the reclusion or limitation of incidental or consequential damages, so the above disclaimer regarding
incidental or consequential damages may not apply to you. This warranty is void if the product has been damaged or tampered with or if the product or
any such parts have been opened. In all cases of damage during shipment, a claim must be filed with the shipping carrier and not with MAXSA Innova-
tions, LLC. This warranty gives you specific legal rights; you may also have other rights which vary from state to state.
Page 4
TROUBLESHOOTING
PROBLEM SOLUTION
Light will not switch on
when there is move-
ment in the detection
area.
The LUX control may be set too far towards the () position.
Reposition the motion sensor.
Light switches on during
the day.
Moving trees, traffic, pets or birds may be getting in the area of detection. This may be
unavoidable, however the sensor could be redirected to a height where this is less likely to
occur.
If there are reflective objects in the detection area such as windows, water, or white walls,
you may need to redirect or possibly reposition the motion sensor.
Test the motion sensor by covering it completely with cardboard and waiting several minutes
to make sure it does not detect motion. If the light still switches on, please contact MAXSA
for further assistance.
Light switches on for no
apparent reason.
Ensure that the power switch on the main body has been turned to the AUTO position.
Ensure that the motion sensor has been positioned to face oncoming movement.
Ensure that the batteries have been fully charged in direct sunlight for 3 sunny days. Refer
to the “Before First Use of Your Solar Security Light” section on page 4.
Check to see that the solar panel is facing south so that it receives direct sunlight for most
of the day, enabling the batteries to fully charge.
Check to see that the LUX control has not been set too far towards ( ). Setting the LUX
control too far towards ( ) will cause the Solar Security Light to turn on only in complete
darkness.
Check to see that the motion sensor is not near night time light sources such as street lights.

INSTRUCTIONS D'INSTALLATION ET DE FONCTIONNEMENT
Modèle #: 44416, 44418
à énergie solaire, Double Projecteur DEL de Sécurité
CHOIX DE L’EMPLACEMENT
Il y a un câble électrique de 5 mètres pour installer
votre Projecteur Solaire de Sécurité partout il y a du
soleil. N’installez pas votre projecteur près de sources
de lumière de la nuit, comme des réverbères.
Ce Projecteur Solaire de Sécurité est idéal pour les
zones sans électricité, par exemple, des carports, des
garages extérieurs, des porches, et tous les coins
extérieurs. Ce projecteur fournit la sécurité à votre
maison.
En décidant l’emplacement de votre projecteur,
n’oubliez pas que le capteur de mouvement a un
champ de vision de 120 degrés (à l’horizontale) à une
distance de 8 mètres, lorsque la température extérieure
est 24 degrés Celsius.
Page 1
N’installez pas votre projecteur près de sources de
lumière de nuit comme des réverbères.
Vous pouvez monter le panneau solaire verticalement ou
horizontalement. Vous pouvez régler l’angle du panneau
par repositionner le panneau dans une position différente.
INSTALLATION DE VOTRE PROJECTEUR DE SÉCURITÉ
COMMENT INSTALLER VOTRE PROJECTEUR
Pour l’utilisation optimale, installez le capteur de
mouvement en bas du projecteur. Pour installer votre
projecteur sur une surface solide, retirez la vis à oreilles
sur le fond de l’arrière du projecteur. Poussez le bouton
sur le dessus de la partie arrière, et enlevez le support de
montage de l’arrière du projecteur par tirez la boucle de
tissu.
Montez la partie blanche arrière en utilisant les 2 vis et
les deux trous de montage dans la partie.
Après attacher le support de montage, faites passer le
projecteur sur le support jusqu’au moment où le bouton
cliquet en place. Ensuite, remplacez le vis a oreilles en
bas de l’arrière du projecteur, et attachez le projecteur au
support de montage.
Il faut installer votre projecteur à une distance maximale
de 5 mètres du panneau solaire.
Chosiez un emplacement qui reçoit 6-8 heures du soleil
par jour. Installez votre panneau solaire face au sud.
Si vous installez votre panneau solaire à l’ombre, il ne
peut pas charger complètement le projecteur.
ATTENTION : Lisez toutes les instructions avant l’utilisation.
À PROPOS DE VOTRE PROJECTEUR DE SÉCURITÉ
Ce Projecteur de Sécurité s’allume automatiquement
dans la nuit au moment où il détecte les mouvements.
Ce produit a un cadran TIME qui permet une durée
d’une minute maximum de la lumière. Ce projecteur
utilise l’énergie solaire. Alors, il n’ajoute jamais à votre
facture d’électricité. Vous pouvez l’installer n’importe
où tant que le panneau solaire peut recevoir du soleil.
PIÈCES INCLUSES
Enlevez et identifiez toutes les pièces :
Double
Projecteur
Panneau Solaire
Quincaillerie de montage
DOUBLE PROJECTEUR SOLAIRE DE
SÉCURITÉ
Activé par le mouvement

TIME – Mis à 30 secondes
LUX – Mis à activer au crépuscule lorsqu’un
mouvement est détecté
Vous pouvez changer la configuration en suivant ces
étapes :
TIME PERIOD ADJUSTMENT [+ AND – ]
Le cadran TIME règle la durée de la lumière du
projecteur après qu’il détecte un mouvement. Vous
pouvez régler la durée de la lumière entre 10 secondes
et 1 minute.
Pour diminuer la durée, tournez le cadran vers le
symbole (-).
Pour augmenter la durée, tournez le cadran vers le
symbole (+).
Vous pouvez tester la durée de la lumière par activer le
capteur de mouvement et compter combien de temps
que la lumière dure.
RALLONGES ÉLECTRIQUES
Vous pouvez acheter une rallonge électrique au prix
de $14.95, qui comprend
l’expédition et la manutention. Cette rallonge
électrique permet au panneau solaire de
s’installer plus loin ou plus haut du projecteur pour
assurer une exposition directe au
soleil maximal. Pour plus d’informations, appelez
1-703-495-0661 et demandez une
rallonger électrique de modèle : EXT-Black.
Page 2
STOCKAGE
TEMPS FROID
Votre Projecteur de Sécurité ne fonctionne pas bien à des
températures inferieures à -7 degrés Celsius. Il va
fonctionner normalement quand la température revient à
normale.
CONSEILS DE SÉCURITÉ
Ne coupez pas le câble électrique. N’utilisez pas le câble
électrique s’il devient effiloché ou cassé.
N’immergez pas votre projecteur dans un liquide.
Positionnez le câble électrique afin que personne ne
trébuche dessus.
CONSEILS D’ENTRETIEN
Les ampoules dans votre projecteur durent 30,000
heures. Il ne faut jamais les remplacer.
Les batteries vont perdre leur capacité de maintenir une
charge, et vous devrez les remplacer. Pour accéder les
batteries, retirez le support de montage et le plateau de
batteries. Déconnectez les batteries du circuit imprimé.
Vous pouvez acheter des nouvelles batteries de MAXSA
Innovations par appeler 703-495-0661.
Pour conserver votre projecteur, essuyez-le avec un
chiffon sec ou savonneux de temps en temps.
UTILISATION DE VOTRE PROJECTEUR DE SÉCURITÉ
Après monter et connecter votre Projecteur de Sécurité, il
est prêt à l’utilisation. Tournez l’interrupteur à la position
ON.
Vous trouvez deux cadrans arrière du capteur de
mouvement. Le cadran avec les symboles + et – est le
cadran TIME, et le cadran avec les symboles du soleil et
de la lune est le cadran LUX.
La configuration d’usine du projecteur est la suivante :
A shorter TIME setting will conserve battery life. For
best results, use the shortest TIME setting for your
location as possible.
LUX LEVEL ADJUSTMENT [() AND
( )]
The LUX dial controls the natural light level that triggers
the Solar Security Light and prevents the light from oper-
ating during daylight hours.
Your Solar Security Light comes preset for activation at
dusk.
To adjust for activation in a brighter setting, move the
dial toward bright ()
To adjust for activation in a darker setting, move the dial
toward dark ( ). (Should look like a thin moon).
Once adjustments are made, move sensor back into posi-
tion with the arrows lined up.

EXTENSION SOLAR CABLE
Page 3
Vous pouvez remplacer les batteries si leur capacité
de charger diminue. Suivez les étapes pour remplacer
les batteries.
1. Tournez l’interrupteur d’alimentation à la position
OFF.
2. Enlevez le projecteur du support de montage par
dévisser le vis à oreilles en bas de l’arrière du
projecteur. Poussez le bouton sur le dessus de la partie
arrière du projecteur et tirez le projecteur hors de la
surface de montage.
3. Sortez les batteries et retirez les vis qui
maintiennent le plateau de batterie en place. Sortez
le plateau de batterie pour accéder le circuit
imprimé.
4. Déconnectez les batteries du projecteur.
5. Remplacez les batteries dans l’orientation de polarité
correcte.
6. Réinstallez le plateau de batterie avec les vis d’étape
7. Installez le projecteur sur le support de montage.
8. Réinstallez la vis à oreilles en bas du projecteur.
9. Répétez les étapes de la section « avant l’utilisation
de votre Projecteur de Sécurité » pour vérifier que les
batteries sont complètement chargées.
NOTE : NE JETEZ PAS LES PILES DANS LES
POUBELLES DE MAISON OU DANS UN FEU CAR
LES PILES POURRAIENT EXPLOSER. CONSULTE
LES LOIS ET REGLEMENTS LOCAUX POUR
SAVOIR OU JETER VOS PILES. LES PILES
PEUVENT AUSSI ETRE RETOURNEES À MAXSA
INNOVATIONS A 8412 CATHEDRAL FOREST
DRIVE., FAIRFAX STATION, VA 22039. N’OUVREZ
PAS LES PILES CAR ELLES CONTIENNENT DES
PRODUITS CHIMIQUES CORROSIFS
Solaire
686
6500K (Cool White or Daylight color)
Motion-Activated
3.6V/2200 mAh
NiMH rechargeable battery pack
Source d’énergie :
Lumens:
Couleur de la
lumière :
Fonction:
Batterie:
Duree de la lumiere
10 - 60 seconds after motion stops
Durée maximale
70 minutes on a full charge
130°
30 feet (9.14 meters)
Angle de détection
Distance maximale de détection:
Weatherproof Rating: IP44
REMPLACEMENT DES BATTERIES
SPECIFICATIONS
Battery Pack

v15-2
2015
GARANTIE LIMITÈE D'UNE (1) ANNÈE
GARANTIE LIMITEE D’UNE (1) ANNÈE : MAXSA Innovations, LLC garantit au client que ce produit ne présente aucun défaut de matériel ou de
fabrication avec l’utilisation normale pour une période d’une année suivant l’achat. Si le client rend le produit, qui doit être défectueux, à MAXSA
Innovations, LLC, 8412 Cathedral Forest Dr, Fairfax Station, VA 22039 (et le client doit payer l’expédition), dans la période de la garantie, MAXSA
Innovations, LLC choisira de le réparer ou de le remplacer. Cette garantie constitue l’unique responsabilité de MAXSA Innovations, LLC, en
concernant ce produit. MAXSA Innovations désavoue toutes les autres garanties Y COMPRIS, MAIS SANS SE LIMITER À LES GARANTIES DE
QUALITÉ MARCHANDE ET D’ADÉQUATION À UNE UTILISATION PARTICULIER. AUCUNE PERSONNE, ENTREPRISE, OU CORPORATION
N’EST AUTHORISÉ À ASSUMER POUR MAXSA Innovations, LLC TOUTE AUTRE RESPONSABILITÉ CONCERNANT LA VENTE ET
L’UTILISATION DU PRODUIT. MAXSA Innovations, LLC, ses agents et ses distributeurs n’assumeront aucune autre responsabilité des charges de
dommage accidentel ou conséquent. Il est possible que cette limitation de responsabilité ne vous concerne pas, SI vous habitez à une province qui
ne permet pas la réclusion ou la limitation des dommages indirects ou conséquents. Cette garantie est compostée si le produit a été endommagé ou
altéré, ou si le produit et ses pièces ont été ouverts. Si le produit est endommagé pendant l’expédition, il faut déposer une réclamation avec le
porteur d’exposition, et pas avec MAXSA Innovations, LLC. Cette garantie vous donne des droits légaux spécifiques ; Il est possible que vous ayez
des autres droits qui varient d’une province à l’autre.
Page 4
TROUBLESHOOTING
PROBLEM SOLUTION
La lumière ne va pas
allumer
•Le réglage LUX est peut-être positionné trop près de la position du soleil.
•Repositionnez le capteur de mouvement.
La lumière s’allume
durant la journée
• Le réglage SENS est peut-être positionné trop vers ( + ).
• Les arbres, les voitures, les animaux de compagnie et les oiseaux sont peut-être dans la
zone de détection. Ce problème peut être contourné en plaçant le détecteur à une hauteur
plus importante où ces éléments sont moins susceptibles de se manifester.
• S’il y a des objets réfléchissants dans la zone de détection comme des fenêtres, de l’eau
ou des murs blancs, repositionnez le détecteur de mouvement.
• Testez le détecteur de mouvement en le couvrant complètement avec du carton pendant
plusieurs minutes pour vérifier qu’il ne détecte aucun mouvement. Si la lumière s’allume
toujours, veuillez contacter MAXSA pour de l’aide.
La lumière s’allume
pour aucune raison
apparente.
•Vérifiez que vous avez tourné l’interrupteur sur le corps du projecteur à la position AUTO.
•Chargez les batteries au soleil pendant 3 jours ensoleillés (comme dit la section « avant la
première utilisation du projecteur solaire » sur page 4). Vous ne pouvez pas charger la
batterie en lumière artificielle.
Vérifiez que le panneau solaire est face à sud pour recevoir 6-8 heures du soleil par jour.
Vérifier que le projecteur est loin des autres lumières artificiels du soir comme des
réverbères.
This manual suits for next models
1
Table of contents
Languages:
Other MAXSA Spotlight manuals
Popular Spotlight manuals by other brands

Cameo
Cameo CLZW600IFULLGS installation instructions

Philips
Philips Ledino 57914/31/16 Specifications

Coleman
Coleman 4351-700 Instructions for use

brennenstuhl
brennenstuhl SOL 1x4 Instructions for installation and use

brennenstuhl
brennenstuhl EL 2000 MA operating instructions

YELLOWRIVER
YELLOWRIVER YR-COB100W user manual