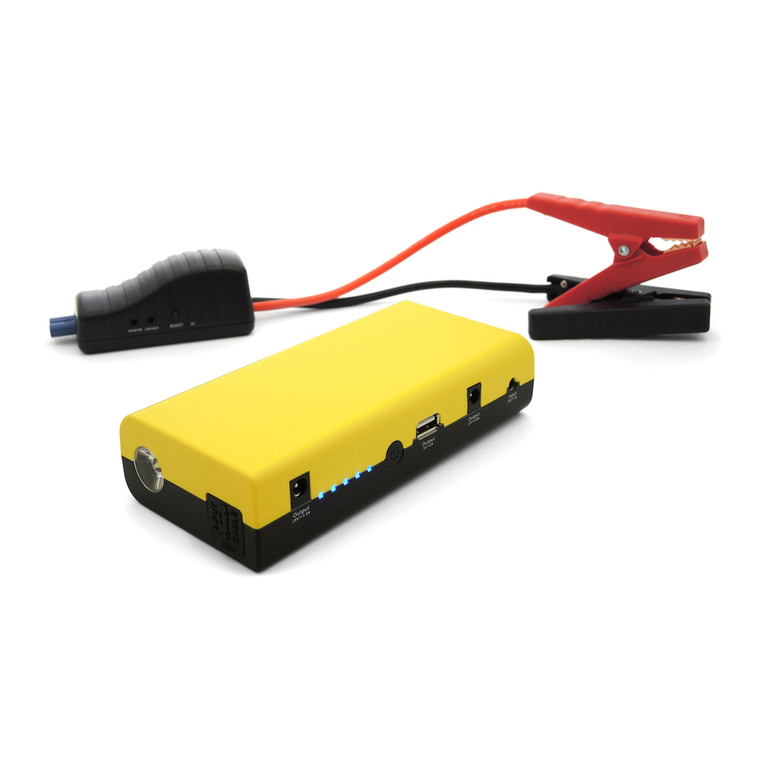
MAXTOOLS JS500 User manual

JS500
Jump Starter 12V
Peaks Amps 2200

2
MAX TOOLS - JS500

3
Italiano
MODO D’USO
1. Avvertenze 3
2. Informazioni generali
2.1 Descrizione 4
2.2 Lampada 5
2.3 Porta USB 5
2.4 Stato della batteria 5
2.5 Ricarica dell’Avviatore tramite la rete elettrica a AC/DC 230/12V 5
3. Istruzioni per l’uso
3.1 Avviamento di un veicolo 6
3.2 Per effettuare un avviamento 6
3.3 Come riporre il vostro Avviatore 6
3.4 Attenzone! 7
4. Garanzia 7
1. Avvertenze
Leggere attentamente il manuale d’uso prima dell’utilizzo!
• Il mancato rispetto delle istruzioni può determinare danni o esplosione.
• Il Booster deve sempre essere utilizzato in ambienti ben aerati, con guanti e
protezioni per gli occhi.
• Il Booster deve essere usato in un ambiente non inquinato e non conduttore.
• Non tentare mai di ricaricare o di avviare un veicolo con una batteria ghiacciata.
• Questa apparecchiatura non può essere usata da bambini o persone che non
siano in grado di leggere e comprendere il manuale. Accertatevi di conservare,
utilizzare e caricare il Booster fuori dalla portata dei bambini e delle persone non
autorizzate.
• Prima di utilizzarlo, ricaricate il vostro Avviatore per 24 ore subito dopo il
ricevimento.

4
Italiano
2. Informazioni generali
2.1 Descrizione
1. Uscita 12V protetta da fusibile 20A
2. Lampada pivottante
3. Pulsante lampada
4. Presa di ricarica (parte posteriore)
5. Presa USB
6. Pulsante stato batteria
7. Stato batteria
8. Led di ricarica
1
2
3
4
5
6
7
8

5
Italiano
2.2 Lampada
L’avviatore è dotato di lampada pivottante. Per accenderla premete semplicemente
sul pulsante a sinistra. Attenzione: per motivi di sicurezza la lampada si spegne
automaticamente rilasciando ll pulsante.
2.3 Porta USB
La porta USB può essere usata per ricaricare telefoni cellulari o altri dispositivi
elettronici. Essa eroga 500 mA a 5V DC. La porta USB funziona quando il pulsante
stato/batteria è in posizione ON.
2.4 Stato della batteria
Premete il bottone a destra per verificare il livello di carica della batteria dell’Avviatore,
dopo il controllo premete nuovamente il bottone in posizione OFF.
Lo stato di carica della batteria deve essere controllato dopo avere disconnesso il cavo
di ricarica da almeno mezz’ora.
Se lo stato di carica della batteria é:
Verde: l’avviatore è carico.
Giallo: dovete ricaricare l’avviatore.
Rosso: dovete ricaricare l’avviatore al più presto.
2.5 Ricarica dell’Avviatore tramite la rete elettrica a AC/DC 230/12V
Non bisogna mai scaricare a fondo le batterie dell’Avviatore prima di rimetterlo sotto
carica.Un caricatore/mantenitore di caricaAC/DC 230/12V elettronico e completamente
au-tomatico è integrato nell’avviatore. Collegate semplicemente il cavo di ricarica
alla rete a 230V, quindi inserite questo cavo all’avviatore tramite la presa di ricarica
posteriore. Il led di ricarica si accenderà. Potete lasciare il caricabatteria connesso
anche per dei mesi.
L’avviatore deve sempre essere ricaricato in ambienti ben areati e a
idonea distanza da materiali facilmente infiammabili.

6
Italiano
3. Istruzioni per l’uso
3.1 Avviamento di un veicolo
Togliete il contatto del veicolo prima di utilizzare l’Avviatore.
1. Connetterlo
Collegate prima la pinza rossa (+) al polo positivo + della batteria, quindi la pinza
nero (-) al polo negativo – della batteria.
2. Avviare
Per un massimo di 6 secondi, quindi attendete 3 minuti prima di un altro tentativo.
3. Staccarlo
Dopo l’avviamento, staccate prima la pinza nero (-), quindi la pinza rossa (+).
4. Riporlo
Posizionate correttamente i cavi e le pinze
5. Ricaricarlo
Dopo ogni uso ricaricate immediatamente il vostro Avviatore!
3.2 Per effettuare un avviamento
Non insistere con l’avviamento per più di 6 secondi, quindi attendere almeno 3 minuti
prima del successivo tentativo. Se al terzo tentativo il mezzo non si avvia occorre ricercare
la causa del guasto prima di continuare.
N.B.: se il vostro Avviatore è ben carico ma il motorino di avviamento gira piano, verificate
con un tester che la batteria del mezzo o il motorino non siano in corto circuito.
3.3 Come riporre il vostro Avviatore
• L’Avviatore può essere tenuto in qualunque posizione senza pericolo, in quanto
dotato di una batteria al piombo a secco.
• Se pensate di non utilizzare il vostro Avviatore per un lungo periodo di tempo,
ricaricatelo per 48 ore almeno ogni tre mesi.
• Non riponete l’Avviatore al di sotto di 0° se volete poi utilizzarlo in emergenza. La
bassa temperatura influisce negativamente sulle prestazioni, il range ideale è tra
i 10° e i 25°.
• Le pinze devono restare sui loro supporti e mai toccare una superficie metallica.

7
Italiano
3.4 Attenzione!
1. Questo dispositivo non deve essere usato da persone con ridotte facoltà mentali o
fisiche. Prima di utilizzarlo occorre averne ben compresi i limiti e le possibilità.
2. Non adatto all’utilizzo da parte di bambini.
3. Se i cavi elettrici sono danneggiati, essi dovranno essere sostituiti dal nostro Servizio
assistenza con materiali originali.
4. Il cavo di alimentazione di rete deve essere conforme agli standard della nazione in
cui il dispositivo viene utilizzato.
5. Prima di eliminare il prodotto occorre recuperare e smaltire in modo idoneo la
batteria.
6. L’avviatore deve essere scollegato dalla rete mentre viene rimossa la batteria.
7. La batteria deve essere smaltita secondo quanto previsto dagli standard nazionali.
Si tratta di una batteria piombo acido da 12V 18Ah ricaricabile. Durante la ricarica è
consigliabile posizionale l’avviatore in un’area ben ventilata.
8. Prima di riporlo verificare che le due pinze non possano accidentalmente entrare in
contatto.
9. Durante la rimozione e lo smaltimento della batteria, fare in modo che i due poli non
possano accidentalmente essere messi in corto circuito. Pericolo di esplosione!
4. Garanzia
Il prodotto è garantito due anni contro tutti i difetti di fabbricazione o di materiale, ad
eccezione della batteria.
La garanzia non è applicabile sugli Avviatori che sono stati usati in modo improprio,
errato o non conforme a quanto riportato sul presente libretto.
Le spese di spedizione dell’Avviatore e del cavo di ricarica sono sempre a carico
dell’utilizzatore.
AVVERTENZE PER IL CORRETTO SMALTIMENTO DEL PRODOTTO AI SENSI DELLA DIRETTIVA EUROPEA 2002/96/EC
Alla fine della sua vita utile il prodotto non deve esser smaltito insieme ai rifiuti urbani. Può essere consegnato presso
gli appositi centri di raccolta differenziata predisposti dalle amministrazioni comunali, oppure presso i rivenditorii che
forniscono questo servizio. Smaltire separatmente un elettrodomestico consente di evitare possibili conseguenze
negative per l’ambiente e per la salute derivanti da un suo smaltimento inadeguato e permette di recuperare i
materiali di cui è composto al fine di ottenere un importante risparmio di energia e di risorse. Per rimarcare l’obbligo
di smaltire separatmente gli elettrodomestici, sul prodotto è riportato il marchio del contenitore di spazzatura mobile
barrato.

8
English
INSTRUCTIONS FOR USE
1. Caution
Read carefully the user manual before first use!
• Failure to comply with the instructions can lead to damages or an explosion.
• Always use the Booster in well ventilated areas, and wear eye protection and
gloves.
• Always use the Booster in a non conductive and non polluting atmosphere.
• Never charge or jump-start a vehicle with a frozen battery.
• This equipment may not be used by children or by those who can not read and
understand the manual. Store, use and charge the Booster out of the reach of
children and unauthorized persons.
• Recharge your Booster after receipt 24 hours before using.
1. Caution 8
2. General information
2.1 Description 9
2.2 Lamp 10
2.3 USB port 10
2.4 Charge level of the battery 10
2.5 Recharge the Booster using the AC/DC 230/12V charger 10
3. Instruction manual
3.1 To start a vehicle 11
3.2 Starting attempt 11
3.3 Storage of your Booster 11
3.4 Warning! 12
4. Warranty 12

9
English
2. General information
2.1 Description
1. Outlet 12V protected by an internal fuse 20A
2. Pivoting lamp
3. Push button lamp
4. Plug to recharge (rear side)
5. USB port
6. Push button battery charge level
7. Charge level
8. Recharge led
1
2
3
4
5
6
7
8

10
2.2 Lamp
The Booster is provided with a pivoting lamp. To light it, push simply on the left push-
button. For security reasons, the lamp will stop lighting from the moment you release
the push button.
2.3 USB port
The USB port can be used as output power or recharge devices like cell phones and
other electronic devices, The values are DC 5V 500mA. The USB port will work if
the battery level button is in ON position.
2.4 Charge level of the battery
Press the right push-button to show the charge level of the battery of the Booster and
then press again to OFF position after checking.
Half an hour after disconnecting the recharge cable from the Booster, the charge
level must be in the green area.
If the recharge state is:
Green: your Booster is charged.
Yellow: you must recharge your Booster.
Red: you must urgently recharge your Booster.
2.5 Recharge the Booster using the AC/DC 230/12V charger
NEVER wait until the Booster is completely discharged before recharging.
An electronic full automatic charger AC/DC 230/12V is integrated in the Booster.
Connect the recharge cable to the sector AC 230V, then connect the recharge cable to
the Booster via the recharge plug on the back side of the Booster. The recharge led will
light up. Please note the recharge led will light up in red if the battery is low and the led
will become green once the battery is charged. The Booster can be left permanently
in charge.
The booster must always be recharged in well-ventilated places and
away from easily inflammable materials.
English

11
3. Instruction manual
3.1 To start a vehicle
Turn OFF ignition before using the Booster.
1. Connection
Connect the red clamp (+) to the positive terminal (+) of the battery, then connect
the black clamp (-) to the negative (-) terminal of the battery.
2. Start the engine
Turn the ignition key for a maximum of 6 seconds, wait for a further 3 minutes
before attempting to start again.
3. Disconnection
Having started the engine, disconnect the black (-) clamp first, followed by the red
(+) clamp.
4. Storing
Return the cables and clamps to their support posts.
5. Recharging
Recharge the Booster immediately after use!
3.2 Starting attempt
When using the Booster to start an engine, do not crank for more than 6 seconds, and
wait for a further 3 minutes before a second attempt. If after the third attempt the
engine does not start, it may be necessary to identify a further cause for the breakdown.
Note: if your Booster is fully charged but the starter turns slowly, the vehicle’s or Booster’s
battery may need checking for short circuit.
3.3 Storage
• The Booster can be stored in any position, without any danger for the battery, because
it is a dry battery, made of lead.
• When not using the Booster for long periods of time, recharge the unit every three
months for 48 hours.
• Do not store your Booster below 0°C if you want to use it urgently.Too cold,the Booster
will lack performance. The ideal operating temperature is between 10 to 25°C.
• Clamps must be stored on their support posts, ensuring they do not come to contact
with any metallic surface.
English

12
3.4 Warning!
1. The appliance is not to be used by children or persons with reduced physical, sensory
or mental capabilities, or lack of experience and knowledge, unless they have been
given supervision or instruction.
2. Children being supervised not to play with the appliance.
3. If the supply cord is damaged, it must be replaced by the manufacturer, its service
agent or similarly qualified persons in order to avoid a hazard.
4. The connection to the supply mains is to be in accordance with the national wiring
rules.
5. The battery must be removed from the appliance before it is scrapped.
6. The appliance must be disconnected from the supply mains when removing the
battery.
7. The battery is to be disposed of safely. The battery inside is 12V 18AH. It is
rechargeable. During charging, the battery must be placed in a well ventilated area.
8. During storage, make sure that the positive clamp is not in contact with the negative
clamp.
9. When remove the battery, make sure no metallic instrument or metallic material
connect battery negative and positive polarity, to avoid explosion!
4. Warranty
The product is guaranteed two years against all defects in material and workmanship,
with exception of the battery which is not guaranteed.
Boosters with any signs of abuse, misuse or modification, will not be repaired under
warranty. Freight cost (for the Booster and the recharge cable) are always on charge of
the customer.
IMPORTANT INFORMATION FOR CORRECT DISPOSAL OF THE PRODUCT IN ACCORDANCE WITH EC DIRECTIVE
2002/96/EC.
At the end of its working life, the product must not be disposed of as urban waste. If must be taken to a special
local authority differentiated waste collection centre or to a dealer providing this service. Disposing of a household
appliance separately avoids possible negative consequences for the environment and health deriving from
inappropriate disposal and enables the constituent materials to be recovered to obtain significant savings in energy
and resources. As a reminder of the need to dispose of household appliances separately,the product is marked with
a crossed-out wheeled dustbin.
English

13
Français
MODE D’EMPLOI
1. Mises en garde
Lire attentivement le mode d’emploi avant l’utilisation!
• Le non-respect des instructions peut entraîner des dommages ou une explosion.
• Le booster doit toujours être utilisé dans des environnements bien aérés, avec des
gants et des protections pour les yeux.
• Le Booster doit être utilisé dans un environnement non pollué et non-conducteur.
• Ne jamais essayer de recharger ou de démarrer un véhicule dont la batterie est
gelée.
• Cet équipement ne peut pas être utilisé par les enfants ou par des personnes
qui ne sont pas en mesure de lire et comprendre le manuel. Assurez-vous de
conserver, utiliser et charger le Booster en dehors de la portée des enfants et des
personnes non autorisées.
• Avant de l’utiliser, rechargez votre Démarreur pendant 24 heures tout de
suite après réception.
1. Mises en garde 13
2. Informations générales
2.1 Description 14
2.2 Lampe 15
2.3 Port USB 15
2.4 État de la batterie 15
2.5 Recharge du Démarreur par le biais du réseau électrique à AC/DC 230/12V 15
3. Mode d’emploi
3.1 Démarrage d’un véhicule 16
3.2 Pour effectuer un démarrage 16
3.3 Comment entreposer votre Démarreur 16
3.4 Attention! 17
4. Garantie 17

14
Français
2. Informations générales
2.1 Description
1. Sortie 12 V protégée par fusible 20A
2. Lampe pivotante
3. Bouton lampe
4. Prise de recharge (partie arrière)
5. Prise USB
6. Bouton état batterie
7. État batterie
8. Led de charge
1
2
3
4
5
6
7
8

15
2.2 Lampe
Le démarreur est équipé de lampe pivotante. Pour l’allumer, appuyer simplement
sur le bouton à gauche. Attention: pour des raisons de sécurité la lampe s’éteint
automatiquement en relâchant le bouton.
2.3 Port US
Le port USB peut être utilisé pour recharger les téléphones portables ou d’autres
dispositifs électroniques. Il livre 500 mA à 5V DC. Le port USB marche lorsque le
bouton état/batterie est sur ON.
2.4 État de la batterie
Appuyez sur le bouton à droite pour vérifier le niveau de charge de la batterie du
Démarreur. Une fois le contrôle effectué, appuyez à nouveau sur le bouton jusqu’à la
position OFF. L’état de charge de la batterie doit être vérifié après avoir débranché le
câble de charge depuis au moins une demi-heure.
Si l’état de charge de la batterie est:
Vert: le démarreur est chargé.
Jaune: vous devez recharger le démarreur.
Rouge: il faut recharger le démarreur au plus tôt.
2.5 Recharge du Démarreur par le biais du réseau électrique à AC/
DC 230/12V
Ne jamais décharger complètement les batteries du Démarreur avant de le placer sous charge.
Un chargeur/mainteneur de charge AC/DC 230/12/12/12V électronique et entièrement
automatique est intégré dans le démarreur. Il suffit de brancher le câble de charge au secteur
230V, puis de brancher ce câble au démarreur via la prise de charge arrière. Le led de charge
va s’allumer. Vous pouvez laisser le chargeur de batterie branché pendant des mois.
Le démarreur doit toujours être chargé dans des environnements bien aérés
et loin de matières inflammables
Français

16
3. Mode d’emploi
3.1 Démarrage d’un véhicule
Retirer la clé de contact du véhicule avant d’utiliser le Démarreur
1. Brancher
Brancher la pince rouge d’abord (+) au pôle positif + de la batterie, ensuite la pince
noire (-) au pôle négatif - de la batterie.
2. Démarrer
Pendant 6 secondes maximum, attendre ensuite 3 minutes avant d’effectuer une
deuxième tentative.
3. Débrancher
Après le démarrage, débranchez la pince noire d’abord (-) et la pince rouge
ensuite.
4. Entreposage
Placer correctement les câbles et les pinces sur les supports prévus.
5. Recharger
Après toute utilisation, recharger immédiatement le Démarreur!
3.2 Pour effectuer un démarrage
Ne pas insister avec le démarrage pendant plus de 6 secondes, ensuite, attendre au moins 3
minutes avant d’essayer à nouveau.Si,lors de la troisième tentative,le véhicule ne démarre pas,
la cause du défaut doit être recherchée avant de continuer.
N.B. :Si votre Démarreur est bien chargé mais le moteur du démarreur tourne lentement,vérifiez
par le biais d’un testeur que la batterie du véhicule ou du moteur n’est pas en court-circuit.
3.3 Comment entreposer votre Démarreur
• Le Démarreur peut être tenu dans n’importe quelle position sans danger, car il est équipé
d’une batterie sèche au plomb-acide.
• Si vous ne pensez pas utiliser votre Démarreur pendant une longue période, rechargez-le
pendant au moins 48 heures tous les trois mois.
• Ne placez pas le démarreur en dessous de 0° si vous voulez l’utiliser en cas d’urgence.
La basse température affecte négativement les performances, la plage idéale se situe
entre 10° et 25°.
• Les pinces doivent rester sur leurs supports et ne jamais toucher une surface métallique.
Français

17
3.4 Attention!
1. Cet appareil ne doit pas être utilisé par des personnes ayant des capacités mentales
ou physiques réduites. Avant de l’utiliser, les limites et les possibilités doivent être
bien comprises.
2. Ne convient pas aux enfants.
3. Si les câbles électriques sont endommagés, ils doivent être remplacés par des
matériaux d’origine par notre service après-vente.
4. Le cordon d’alimentation du réseau doit être conforme aux normes du pays dans
lequel l’appareil est utilisé.
5. La batterie doit être correctement récupérée et éliminée avant l’élimination du
produit.
6. Le démarreur doit être débranché du secteur pendant que la batterie est retirée.
7. La batterie doit être éliminée conformément aux réglementations nationales.
Il s’agit d’une batterie à plomb-acide 12V 18Ah rechargeable. Pendant la charge, il
est conseillé de placer le démarreur dans une zone bien aérée.
8. Avant de l’entreposer, vérifier que les deux pinces n’entrent pas en contact de
manière involontaire.
9. Lors du retrait et de l’élimination de la batterie, veillez à ce que les deux pôles ne
puissent pas être accidentellement court-circuités. Risque d’explosion!
4. Garantie
Le produit est garanti pendant deux ans contre tout défaut de fabrication ou de matériel,
à l’exception de la batterie. La garantie ne s’applique pas aux démarreurs qui ont été
utilisés de manière incorrecte, inappropriée ou non conforme à ce manuel. Les frais
d’expédition du Démarreur et du câble de chargement sont toujours à la charge de
l’utilisateur
MISES EN GARDE POUR L’ÉLIMINATION CORRECTE DU PRODUIT AU TITRE DE LA DIRECTIVE EUROPÉENNE 2002/96/CE.
À la fin de sa durée de vie, le produit ne doit pas être éliminé avec les déchets municipaux. Il peut être livré aux
centres de collecte spécifiques prévus par les autorités municipales ou aux commerçants qui assurent ce service.
La mise au rebut séparée d’un appareil permet d’éviter d’éventuelles conséquences négatives pour l’environnement
et la santé, résultant d’une mise au rebut inadéquate et permet de récupérer les matériaux dont il est composé, afin
d’obtenir une économie significative d’énergie et de ressources. Afin de souligner l’obligation d’éliminer séparément
les appareils électroménagers, le produit porte la marque de la poubelle barrée.
Français

18
Deutsch
ANWENDUNG
1. Sicherheitshinweise
Lesen Sie vor Benutzung dieses Gerätes sorgfältig die Bedienungsanleitung!
• Ein Nichtbefolgen dieserAnweisungen kann zu Beschädigungen sowie Explosionen
führen.
• Die Anwendung des Boosters muss ausschließlich in einer gut belüfteten
Umgebung erfolgen. Tragen Sie dabei Handschuhe und Schutzbrille.
• Le Booster doit être utilisé dans un environnement non pollué et non-conducteur.
• Die Anwendung des Boosters muss in einer nicht verschmutzten und nicht
leitfähigen Umgebung erfolgen.
• Dieses Gerät darf nicht von Kindern oder von Dritten verwendet werden, die
nicht in der Lage sind, diese Bedienungsanleitung zu lesen und zu verstehen. Bei
Lagerung, Anwendung und Aufladung des Boosters sind Kinder und unbefugte
Personen vom Arbeitsbereich fernzuhalten.
• Vor dem ersten Einsatz muss der Batterie-Booster mindestens 24 Stunden
aufgeladen werden.
1. Sicherheitshinweise 18
2. Allgemeine Hinweise
2.1 Beschreibung 19
2.2 Lampe 20
2.3 USB-Anschluss 20
2.4 Batterieladezustand 20
2.5 Batterieaufladung durch 230 V AC/DC Stromnetz 20
3. Bedienungsanleitung
3.1 Starthilfe eines Fahrzeugs 21
3.2 Startversuche 21
3.3 Lagerung des Batterie-Boosters 21
3.4 Achtung! 22
4. Garantiebedingungen 22

19
Deutsch
2. Allgemeine Hinweise
2.1 Beschreibung
1. 2V-Ausgang, geschützt von 20A-Schmelzsicherung
2. Schwenklampe
3. Lampenschalter
4. Ladebuchse (auf der Rückseite des Gerätes)
5. USB-Anschluss
6. Ladezustandsknopf
7. Ladezustandsanzeige
8. LED-Ladeanzeige
1
2
3
4
5
6
7
8

20
2.2 Lampe
Der Booster ist mit einer Schwenklampe ausgestattet. Betätigen Sie den Schalter links,
um die Lampe einzuschalten. Achtung: Wenn Sie den Schalter lassen, schaltet sich die
Lampe aus Sicherheitsgründen automatisch aus.
2.3 USB-Anschluss
Der USB-Anschluss kann auch verwendet werden, um Handys und sonstige
Elektrogeräte aufzuladen. Der USB-Anschluss liefert bei 5V DC 500 MA-Ladestrom.
Sein Betrieb ist nur möglich, wenn der Ladezustandsknopf auf ON gestellt ist.
2.4 Batterieladezustand
Um den Batterieladezustand des Boosters zu prüfen, betätigen Sie den rechten
Ladezustandsknopf und stellen Sie ihn dann wieder auf OFF.
Prüfen Sie den Ladezustand erst eine halbe Stunde nach der Vollaufladung der Batterie.
Der Ladezustand der Batterie wird an folgendermaßen gezeigt:
Grüne Anzeige: Die Batterie ist voll aufgeladené.
Gelbe Anzeige: Die Batterie muss aufgeladen werden.
Rote Anzeige: Die Batterie muss sobald wie möglich aufgeladen werden.
2.5 Batterieaufladung durch 230 V AC/DC Stromnetz
Vermeiden Sie eine Tiefentladung des Boosters, bevor Sie ihn erneut aufladen.
Der Booster ist mit einem elektronischen und voll automatischen Ladegerät/
Ladeerhaltungsgerät ausgestattet. Schließen Sie einfach das Ladekabel an das 230
V-Stromnetz an und stecken Sie es in die Ladebuchse auf der Rückseite des Boosters.
Die LED-Ladeanzeige schaltet sich ein. Sie können den Batterie-Booster auch
monatelang am Stromnetz angeschlossen lassen.
Der Starter muss immer in einer gut belüfteten Umgebung und in einem
angemessenen Abstand zu leicht entzündlichen Materialien aufgeladen werden
Deutsch
Table of contents
Languages:
Other MAXTOOLS Remote Starter manuals
Popular Remote Starter manuals by other brands

AstroStart
AstroStart TS-100 user manual

iDataLink
iDataLink DBI-AL(DL)-CH5-EN install guide

CrimeStopper
CrimeStopper Cool Start RS-1300DP operating instructions

Audiovox
Audiovox Pursuit PRO-9276 owner's manual

Young Shin Electronics
Young Shin Electronics R1 800F user guide

BGS technic
BGS technic 3382 instruction manual