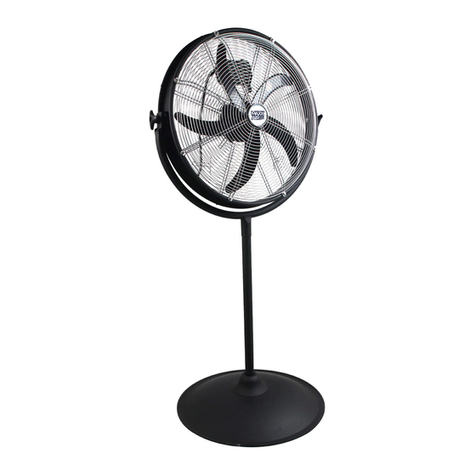
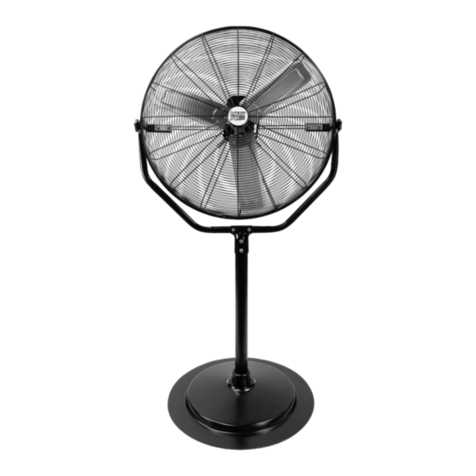
22” OSCILLATING PEDESTAL FAN
22” OSCILLATING PEDESTAL FAN22” OSCILLATING PEDESTAL FAN
22” OSCILLATING PEDESTAL FAN
Congratulations on your purchase of the MaxxAir 22” Oscillating Pedestal
Fan. Your new fan will be easy to assemble by referring to the Assembly
Instructions and Diagram below.
ASSEMBLY INSTRUCTIONS
ASSEMBLY INSTRUCTIONSASSEMBLY INSTRUCTIONS
ASSEMBLY INSTRUCTIONS
1. Attach the BOTTOM TUBE to the BASE
with the SC EWS (diagram, #1).
2. Insert UPPE TUBE in the BOTTOM
TUBE with KNOB (diagram, #2).
3. Attach MOTO to the TUBE with the
SC EW (diagram, #3).
4. Position the BACK G ILLE over the
MOTO shaft and attach with SC EWS
(diagram, #4).
5. Insert the BLADE ASSEMBLY on the
MOTO shaft until it reaches a stopping
point and the set screw is in line with the
flat groove on the MOTO shaft
(diagram, #5).
6. Attach F ONT G ILLE to the BACK
G ILLE with clips around the grille edge
(diagram, #6).
CAUTION: Do not alter the an’s assembly in any way.
WARNING: BE SURE BLADE SCREW IS FULLY TIGHTENED!
BE SURE FRONT GRILLE AND BACK GRILLE SCREWS ARE TIGHTENED!
Page 2
OPERATING INSTRUCTIONS
OPERATING INSTRUCTIONSOPERATING INSTRUCTIONS
OPERATING INSTRUCTIONS
READ AND SAVE THESE INSTRUCTIONS
CAUTION: ead and follow all instructions before operating fan. Do not use fan
if any parts are damaged or missing.
WARNING: To reduce the risk of electric shock, do not expose to water or rain.
To reduce the risk of fire or electric shock, do not use this fan with any solid state
speed control device. This appliance has a grounded plug. To reduce the risk of
fire or electric shock, this plug is intended to fit in an outlet only one way. If plug
does not fit outlet, contact a qualified electrician. Do not attempt to bypass this
procedure.
RULES FOR SAFE OPERATION:
RULES FOR SAFE OPERATION:RULES FOR SAFE OPERATION:
RULES FOR SAFE OPERATION:
1. Never insert fingers or other objects through the grille guard when fan is in
operation.
2. Disconnect the fan when moving from one location to another.
3. Disconnect the fan when removing guards for cleaning.
4. DO NOT use fan in windows. ain and moisture may create electrical hazard.
HO TO ADJUST TILT
HO TO ADJUST TILTHO TO ADJUST TILT
HO TO ADJUST TILT
1. Loosen the ADJUST KNOB.
2. Adjust fan head to the desired tilt.
3. Tighten the ADJUST KNOB.
SPEED CONTROL
SPEED CONTROLSPEED CONTROL
SPEED CONTROL
OTATE SWITCH markings 0, 1, 2, 3 designate OFF, LOW, MEDIUM, and
HIGH, respectively. It is normal for the fan to feel warm to the touch after
continuous operation. This fan features a thermostat that will automatically shut
off fan should it overheat for any reason. If this happens, immediately unplug the
fan from the outlet.
TO MAKE THE FAN O
TO MAKE THE FAN OTO MAKE THE FAN O
TO MAKE THE FAN OSCILLATE
SCILLATESCILLATE
SCILLATE
Depress the OSCILLATING PULLE at the top of the fan head.
TO STOP THE FAN FROM OSCILLATING
TO STOP THE FAN FROM OSCILLATINGTO STOP THE FAN FROM OSCILLATING
TO STOP THE FAN FROM OSCILLATING
Pull up on the OSCILLATING PULLE at the top of the fan head.
CLEANING
CLEANINGCLEANING
CLEANING
WARNING:
Unplug fan from electrical supply source before cleaning.
• Use a soft damp cloth to clean fan. Wipe dry.
• Do not use a cleaning solution that is harmful to paint or plastics.
• Do not bend the fan blades.
• The motor bearings are permanently sealed and do not require additional lubrication.
IMPORTANT: SURGES IN ELECTRICAL POWER OR EXCESSIVE HEAT MAY
CAUSE THE FAN TO TURN OFF. WAIT APPROXIMATELY 15 MINUTES FOR
THE FAN TO RESUME OPERATION.
Page 3
