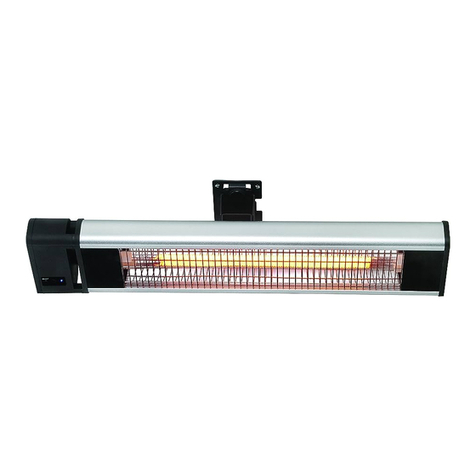
Maxxair H1028 Operation and maintenance manual

[1]
QTY Printed
SKU / Document #
©2020 VENTAMATIC, LTD. MODEL H1028 MANUAL 1214/REV.1
H1028
Portable Workspace
Forced Air Heater
UL 2021. FIXED AND LOCATION –DEDICATED ELECTRIC ROOM HEATERS
ANSI/UL 1278 MOVABLE AND WALL OR CEILING HUNG ELECTRIC ROOM HEATERS
DO NOT DISCARD THIS MANUAL
CUSTOMER: PLEASE RETAIN THIS MANUAL FOR FUTURE USE
INTENDED USE: This product is intended only for indoor household or oce use.
It is NOT intended for industrial or commercial use. DO NOT USE OUTDOORS
WARNING! IF THE INFORMATION IN THIS MANUAL IS NOT FOLLOWED EXACTLY, A
FIRE MAY RESULT CAUSING PROPERTY DAMAGE, PERSONAL INJURY OR LOSS OF LIFE.
FOR YOUR SAFETY
DO NOT STORE OR USE
GASOLINE OR OTHER
FLAMMABLE VAPORS OR
LIQUIDS IN THE VICINITY
OF THIS OR ANY OTHER
APPLIANCE
INSTALLATION INSTRUCTIONS AND OPERATOR’S MANUAL
Made in China
2018 HeTR Model H1028 Manual rev.1

[2]
PLEASE READ AND SAVE THESE IMPORTANT SAFETY INSTRUCTIONS
When using electrical appliances, basic precautions should always be followed to reduce
the risk of re, electrical shock, and injury to persons, including the following:
1. Read all instructions before using this heater.
2. This heater is hot when in use. To avoid burns, do not let bare skin touch hot surfaces. If provided, use
handles when moving this heater. Keep combustible materials, such as furniture, pillows, bedding,
papers, clothes and curtains at least 3 feet (0.9m) from the heater.
3. Extreme caution is necessary when any heater is used by or near children, pets or invalids and
whenever the heater is left operating unattended.
4. If possible always unplug this appliance when not in use.
5. Do not operate any heater with a damaged cord or plug or after the heater malfunctions, has been
dropped or damaged in any manner.
6. Any repairs to this appliance should be carried out by a qualied service person.
7. Under no circumstances should this appliance be modied. Parts having to be removed for servicing
must be replaced prior to operating this appliance again.
8. Do not use outdoors.
9. Use your heater only in dry environments. This heater is not intended for use in bathrooms, laundry
areas and similar indoor locations. Never locate the heater where it may fall into a bathtub or other
water container. Do not use your heater outdoors. Do not use near sinks, swimming pools or other
damp areas such as ooded basements, garages, etc or anyplace where the heater could come in
contact with water.
10. Do not run cord under carpeting. Do not cover cord with throw rugs, runners, or similar coverings.
Arrange cord away from trac area and where it will not be tripped over.
11. To disconnect heater, rst turn controls to o, then remove plug from outlet. Always unplug the
heater when not in use.
12. Connect to a properly grounded outlet only.
13. Do not insert or allow foreign objects to enter any ventilation or exhaust opening as this may cause an
electrical shock or re, or damage the heater.
14. To prevent a possible re, do not block air intakes or exhaust in any manner. Do not use on soft
surfaces, like a bed, where openings may become blocked.
15. This appliance has hot and arcing or sparking parts inside. Do not use it in areas where gasoline,
paint or ammable liquids are used or stored.
16. Use this heater only as described in this manual. Any other use not recommended by the
manufacturer may cause re, electric shock, or injury to persons.
17. Avoid the use of an extension cord because the extension cord may overheat and cause a risk of re.
However, if you have to use and extension cord, the cord shall be No. 14 AWG minimum size and
rated not less than 4700 watts.
18. This heater may include an audible (or visual) alarm to warn that parts of the heater are getting
excessively hot. If the alarm sounds (ashes), immediately turn the heater o and inspect for any
objects on or adjacent to the heater that may cause high temperatures. DO NOT OPERATE THE
HEATER WITH THE ALARM SOUNDING (FLASHING).
19. SAVE THESE INSTRUCTIONS
IMPORTANT INSTRUCTIONS

[3]
ALWAYS OBSERVE THESE SAFETY PRECAUTIONS WHEN OPERATING YOUR
ELECTRIC HEATER
ALWAYS Read all instructions before operating.
ALWAYS Locate your electric heater away from furniture or loose hanging drapes.
ALWAYS Keep the rear grill away from walls or drapes so as not to block the air intake. (If
applicable)
ALWAYS Unplug electric heater when not in use.
ALWAYS Use electric heater on a at dry surface.
ALWAYS Use on 208-240 volt 60Hz AC power supply.
ALWAYS Route the cord so it will not be walked on tripped over or pinched by furniture.
ALWAYS Keep electrical cords, drapes and other furnishings away from your electric heater.
ALWAYS Keep your electric heater clean and the lter free of dust. (If applicable)
ALWAYS Use indoors only.
NEVER Place drapes, clothing or towels over electric heater to dry.
NEVER Use in the presence of explosive or ammable vapors such as gas or paint.
NEVER Plug another electrical appliance into the same circuit. Blown fuses, tripped circuits
and re hazards may result.
NEVER Use water or liquids to clean your electric heater.
NEVER Let bare skin touch hot surfaces as this may cause burns.
NEVER Leave electric heater unattended.
NEVER Leave electric heater when children or pets are present.
NEVER Locate electric heater where it may fall into a bath tub or other water containers.
NEVER Operate electric heater with a damaged cord, plug or after the heater malfunctions, or
has been dropped or damaged in any manner.
NEVER Run cord under carpeting or cover with throw rugs or runners.
NEVER Insert or allow foreign objects to enter any ventilation or exhaust openings, as this may
cause an electrical shock, re or damage.
IMPORTANT INSTRUCTIONS

[4]
WHAT’S IN THE BOX
SAVE THESE INSTRUCTIONS
WARNING : Prior to operating, make sure the electrical outlet is of the
configuration and capacity appropriate for the heater.
MINIMUM CLEARANCE FROM COMBUSTIBLES
FRONT 3 Feet
TOP 1 Foot
SIDES 1 Foot
REAR 1 Foot
DANGER - ELECTRIC SHOCK OR FIRE HAZARD: READ ALL WIRE
SIZING, VOLTAGE REQUIREMENTS, AND SAFETY DATA TO AVOID
PROPERTY DAMAGE AND PERSONAL INJURY.
A
A. 65mm Screws x 3
B. 20mm Screw x 1
Lock Washer x 1
10mm Washer x 1
10mm Nut x 1
C. M10mm Screw x 1
5mm Nut x 1
D. 16mm Screws x 2
5mm Washers x 2
Lock Washers x 2
E. Wall/Ceiling Bracket x 1
Handle x 1
B
C
D E
Heater Coil
Carrying Handle
Remote Control Control Panel
Safety
Grille

[5]
ASSEMBLY/INSTALLATION INSTRUCTIONS
Remove heater and all packing material from the box. Be sure to remove the hardware
package from the styrofoam packaging.
Tools needed:
- Power drill - 4mm or 5/32in drill bit - Phillips head screwdriver
Attaching Heater to Wall/Ceiling:
1. Line up both holes on bracket with both holes on the heater handle. Attach heater to
bracket with 20mm screw and nut, 10mm washer and locking washer.
2. Locate wood stud in wall or joist in ceiling to mount heater.
3. Use holes in bracket to mark 2 holes for drilling.
4. Pre-drill 2 holes for screws.
5. Secure two 65mm screws to wall/ceiling joist, leaving 1/8” exposed. Two screws must be
attached securely to a wood stud of minimum 1.5”
6. Attach bracket to exposed screw head by sliding through keyholes on bracket and pushing
down to lock the bracket into place.
7. Tighten screws against bracket to secure.
SAVE THESE INSTRUCTIONS
WARNING: USE THIS HEATER ONLY AS DESCRIBED IN THIS MANUAL. ANY
OTHER USE NOT RECOMMENDED BY THE MANUFACTURER IS STRICTLY
PROHIBITED AND MAY CAUSE FIRE, ELECTRIC SHOCK, OR INJURY TO
PERSONS.
WALL MOUNT APPLICATION CEILING MOUNT APPLICATION
WARNING: HEATER MUST BE ATTACHED TO A JOIST WITH A MINIMUM OF
(2) SCREWS IN OPPOSING HOLES.

[6]
OPERATING INSTRUCTIONS
Note: When using the heater for the rst time, you may notice a slight emission of smoke.
This is normal and will stop after a short time. The heating element is made of steel and
was coated with a layer of protective oil during production.
Usage on outlets above 220 volts may cause a slight whistling sound due to the higher fan
speed. This results from the voltage supply. This is normal and is not aecting the operation
of the heater. This is not a defect.
1. Attach heater to wall or ceiling as noted in instructions on page 5.
2. Connect the fan heater to the proper electrical power. See grounding instructions. Power
indicator light will illuminate.
3. Press red power button. Display panel will ash ve (5) times then display the room
temperature.
4. To increase or decrease the set temperature, press the green mode button on the control
panel or remote control two (2) times, then select the Up/Down arrows to increase or
decrease the set temperature.
5. To set the timer functions, press the green mode button on the control panel or remote
control three (3) times.
6. The digital display turns set temperature readout to time value for the time OH. Press the
timer.
7. Use the Up/Down arrows. The value will vary from 0 to 9 hour duration (in 1 hour intervals).
WARNING: USE APPROPRIATE FASTENERS. THE SCREWS INCLUDED ARE
FOR INSTALLING IN WOOD STUDS ONLY AND ARE NOT INTENDED FOR
METAL JOISTS.
WARNING: BE CERTAIN ADJUSTMENT SCREWS ARE TIGHTENED FIRMLY
TO SECURE HEATER TO BRACKET.
SAVE THESE INSTRUCTIONS
IMPORTANT: Read all instructions and warnings carefully before installation
and use. Failure to follow these instructions may result in a possible electric
shock, injury to persons, fire hazard and will void the warranty.
ELECTRICAL OUTLET WIRING MUST COMPLY WITH LOCAL BUILDING
CODES AND OTHER APPLICABLE REGULATIONS TO REDUCE THE RISK
OF FIRE, ELECTRICAL SHOCK AND INJURY TO PERSONS.

[7]
DO NOT USE THIS APPLIANCE IF ANY PART OF IT HAS BEEN UNDERWATER.
IMMEDIATELY CALL A QUALIFIED SERVICE TECHNICIAN TO INSPECT
THE APPLIANCE AND REPLACE ANY PART OF THE ELECTRICAL SYSTEM
WHICH HAS BEEN UNDERWATER.
SAVE THESE INSTRUCTIONS
Grounding Instructions:
1. This heater is for use on 240 (208) volt circuits. The cord employs a NEMA
6-30P plug (as shown) and requires a NEMA 6-30R receptacle. No adapter
is available for this blade conguration, and none should be used.
2. The outlet type is a 240 (208) volt outlet with ground. When properly
installed it provides a ground connection through the cord to the heater
to prevent the operator from electric shock.
3. Be sure that the electrical receptacle is of the conguration and capacity
appropriate for the heater.
Automatic Overheat Safety Control
This heater is equipped with an internal heat limiting thermostat and overheat protection circuit.
When a potential overheat temperature is reached, the system will automatically shut the heater o.
IF SAFETY LIMIT LIGHT ILLUMINATES, an abnormal condition has turned o the heating elements. TO
RESET, WAIT 10 MINUTES to allow the heater to cool down. The heater will automatically reset once
the heating element cools down.
Cleaning and Maintenance
Any electrical repairs or rewiring of this unit should be carried out by a licensed electrician and in
accordance with national and local codes.
Before cleaning the appliance, disconnect it from the power outlet and let it cool down.
In order to protect the enclosure, don’t splash water onto the heater, and never use a solvent like
gasoline, isoamyl acetate, toluene, etc. to clean the heater.
DO NOT open the heater or attempt to clean the inside of this appliance.
CAUTION:
RISK OF ELECTRIC SHOCK
DO NOT OPEN - NO SERVICEABLE PARTS INSIDE

[8]
SPECIFICATIONS
Model: H1028 (All specications +5% / -10% tolerance)
BTU’s per/Hour 16400
Voltage 240V
Plug Type NEMA 6-30P
Watts 4800
Amps 30
Heating Area (ft²) 540
TROUBLE SHOOTING
PROBLEM CAUSE SOLUTION
Heating element does
not glow
Stainless steel elements
won’t glow red to
produce heat
Heater is operating
correctly
Do not feel heat or air
ow
No power to heater Check power connection
to heater
Desired room
temperature reached
Thermostat will shut
o heater once desired
room temperature is
reached
Auto-Reset has tripped Unplug heater allow
to cool down for 10
minutes then restart
Heater has fan only
setting
Set to run on full power
for heating
Fan running with no
heat
Heater in cool down
cycle
This is normal
to disperse heat
throughout the area.
Turn thermostat up
if additional heat is
desired.

LIMITED WARRANTY STATEMENT
This warranty is underwritten by Falco Insurance Company and is extended to the original retail
purchaser of this model or, if this unit is purchased and requires installation by a building contractor, to
the original owner of the home. No subsequent purchaser of the unit or of a home in which it is
installed is entitled to any of the benefits of this warranty.
This product is warranted against defects in materials and workmanship for a period of one (1) year
from the date of original retail purchase. No other parts or components are warranted. There is no
warranty for defects caused by abuse, faulty installation, or the like.
Repairs or replacement parts supplied under this warranty are warranted only for the period of this
warranty; that is, one (1) year from the date of the original retail purchase of the unit.
In the event of a defect or malfunction, we will replace or repair the defective part or component only
and return the new or repaired part to you freight prepaid.
You must bear all other expenses incurred in obtaining repairs, including labor required for field repair
or replacement, and the cost of shipping the defective part to us. You must also bear the cost of repair
to or replacement of any part or component and the shipping charges incurred for the repair or
replacement and return to you of any part or component not covered by this warranty, including parts
or components damaged by you.
The company reserves the right to demand and receive written evidence of the date of purchase
before undertaking its obligations under this warranty. The right to demand and receive written
evidence of date of purchase extends to all licensed dealers of Ventamatic, Ltd. products.
You should, therefore, retain your sales slip and attach a copy of it to the warranty claim.
To start a warranty claim you must:
Contact Ventamatic, Ltd.
An RGA (Returned Goods Authorization) form is required for returns to the factory to ensure your
return can be processed efficiently and quickly. Please contact Ventamatic, Ltd. toll-free at
800-433-1626 or via web at www.MYMAXXAIR.com to obtain an RGA and follow the instructions
given.
There is no informal dispute settling mechanism available in the event of a controversy involving this
warranty.
Any and all implied warranties which may exist terminate upon the expiration of this warranty one (1)
year from the date of the original retail purchase. Some states do not allow limitations on how long an
implied warranty lasts, so this limitation may not apply to you.
Ventamatic, Ltd. is not liable to you for incidental or consequential damages arising out of defect or
malfunction of a unit or its installation or out of any alleged breach of this warranty. Some states do not
allow the exclusion or limitation of incidental or consequential damages, so this limitation may not
apply to you.
This warranty gives you specific legal rights and you may also have other rights which may vary from
state to state.
rev.4/19
Table of contents
Other Maxxair Heater manuals
Popular Heater manuals by other brands

Thermablaster
Thermablaster RC9200IT product manual

WAGNER TUNING
WAGNER TUNING 200001072 Installation instruction

Herschel
Herschel PULSAR 1800W White Installation & operating instructions

Fanmaster
Fanmaster CF2000 instruction manual

Helo
Helo Hanko D product manual

Elnur
Elnur Gabarron IFP-2000 Installation instructions and user guide