Maytag BEVERAGE CENTER User manual

BEVERAGE CENTER
Use & Care Guide
For questions about features, operation/performance, parts, accessories or service, call: 1-800-688-9900 , or visit our website at www.maytag.com
In Canada, for assistance or service call: 1-800-807-6777, or visit our website at www.maytag.ca
REFRIGERADOR PARA BEBIDAS
Manual de uso y cuidado
Para consultas respecto a características, operación/desempeño, partes, accesorios o servicio, llame al: 1-800-688-9900
o visite nuestra página de internet en www.maytag.com
En Canadá, para obtener ayuda o servicio técnico llame al: 1-800-807-6777 o visite nuestra página de internet en www.maytag.ca
RÉFRIGÉRATEUR POUR BOISSONS
Guide d’utilisation et d’entretien
Au Canada, pour assistance ou service, composer le 1-800-807-6777 ou visitez notre site web à... www.maytag.ca
Table of Contents/Índice/Table des matières................................2
W10285880A - 8336411962010

2
TABLE OF CONTENTS
BEVERAGE CENTER SAFETY ......................................................3
Proper Disposal of Your Old Refrigerated Appliance..................3
INSTALLATION INSTRUCTIONS..................................................4
Location Requirements................................................................4
Electrical Requirements ...............................................................4
Unpack the Beverage Center.......................................................4
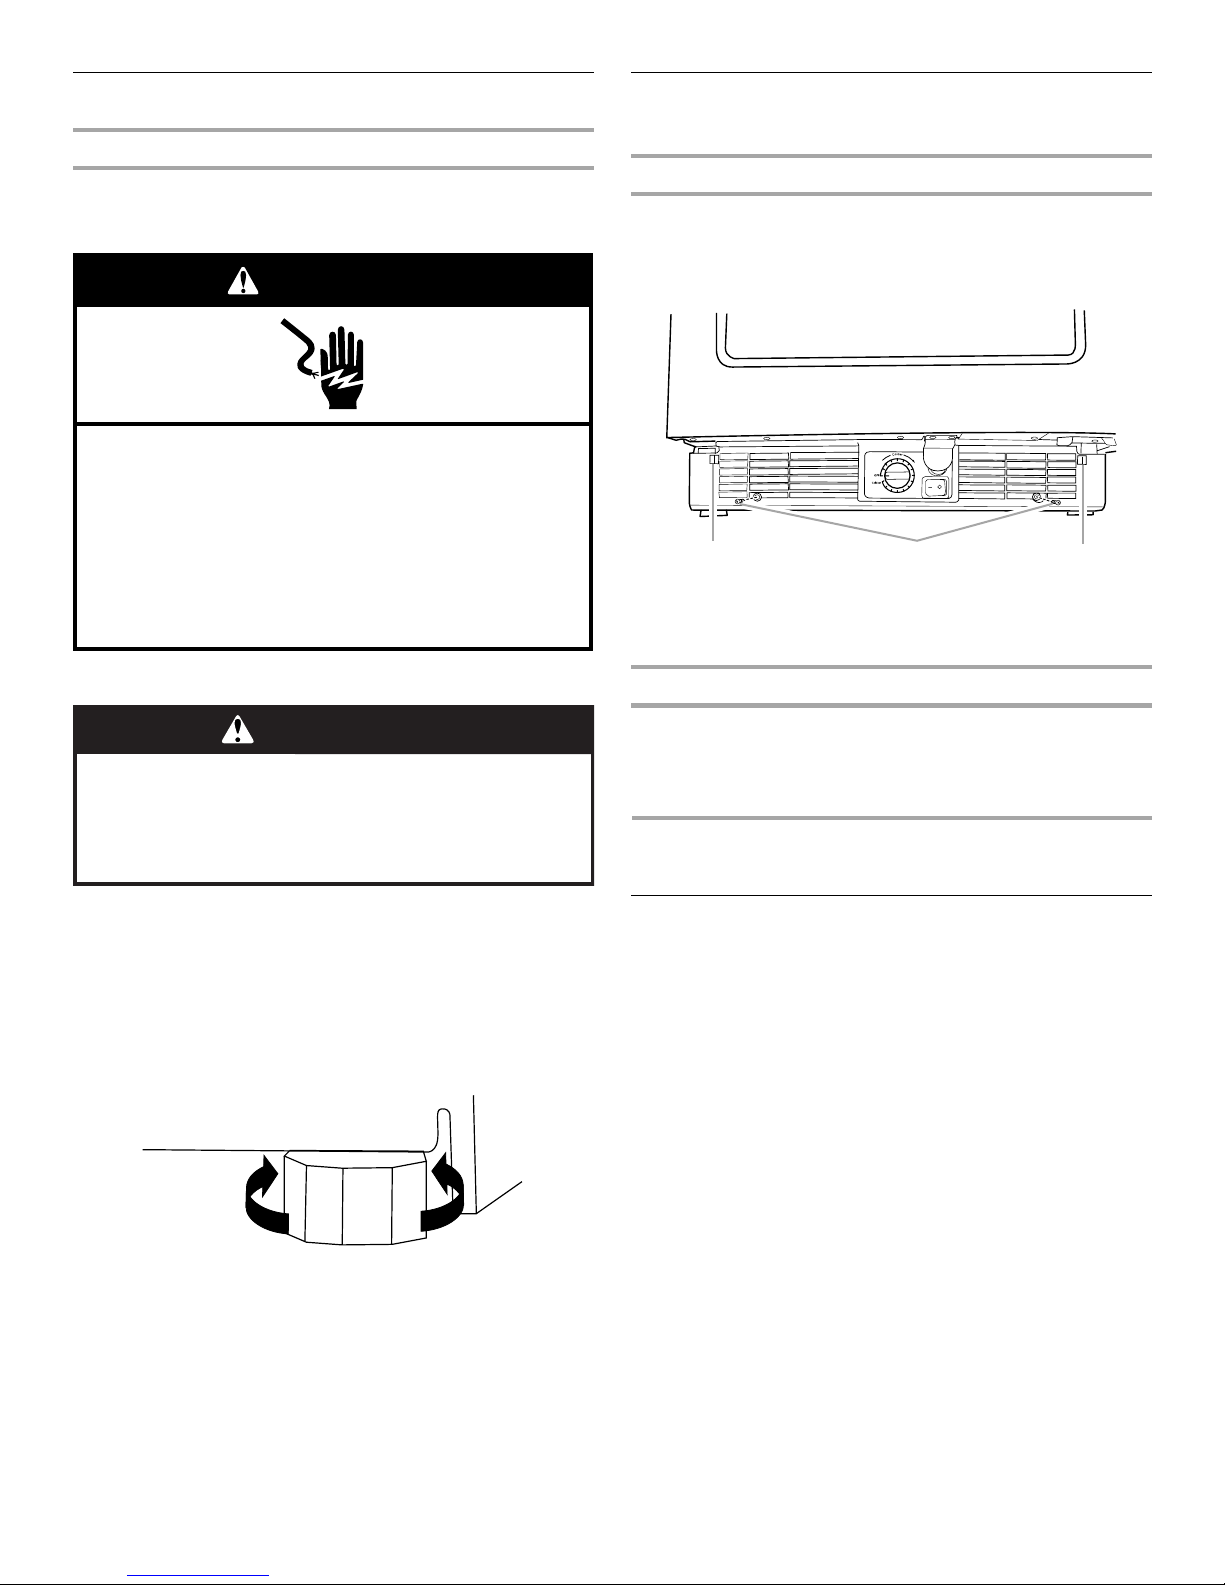
Reverse Door Swing ....................................................................5
Door Closing.................................................................................6
Base Grille ....................................................................................6
BEVERAGE CENTER USE.............................................................6
Normal Sounds ............................................................................6
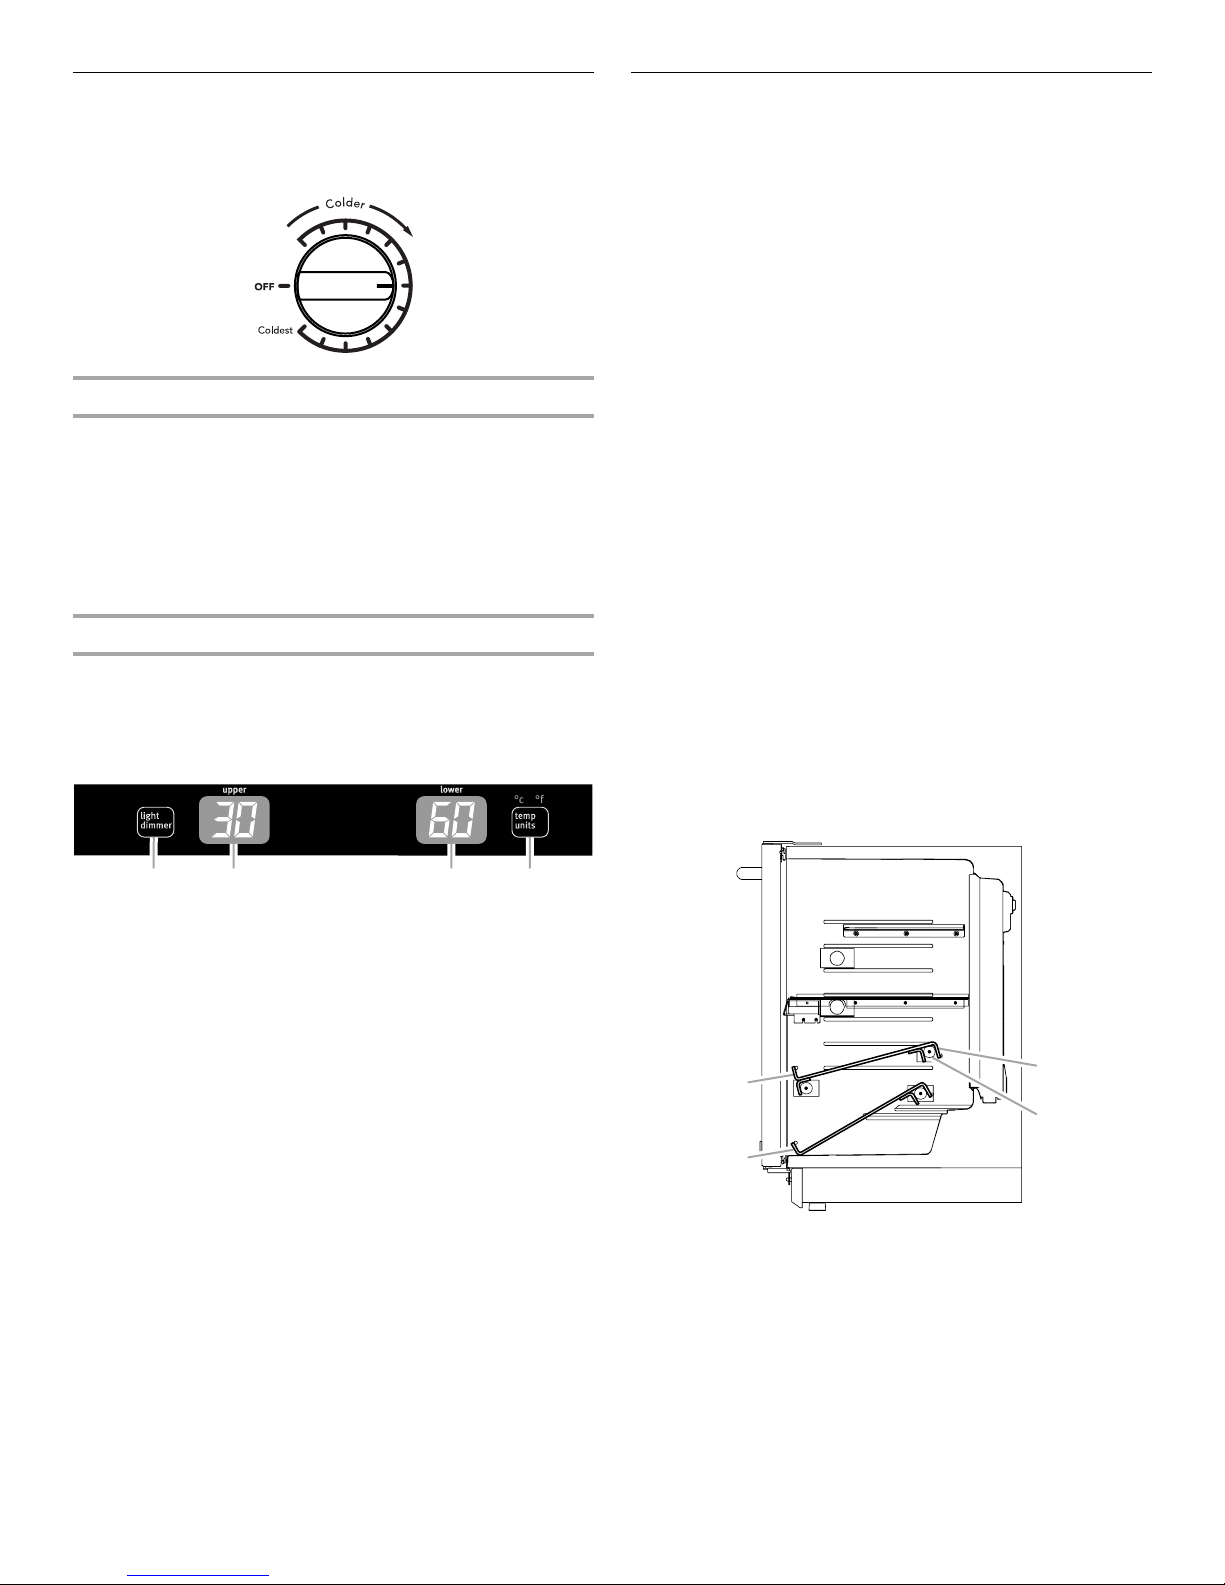
Using the Control .........................................................................7
Beverage/Wine Racks..................................................................7
Stocking the Beverage Center.....................................................8
Lighting the Beverage Center ......................................................8
BEVERAGE CENTER CARE ..........................................................8
Cleaning........................................................................................8
Changing the Light Bulb...............................................................9
Vacation and Moving Care...........................................................9
TROUBLESHOOTING ....................................................................9
ASSISTANCE OR SERVICE.........................................................11
In the U.S.A. ...............................................................................11
In Canada ...................................................................................11
Accessories ................................................................................11
WARRANTY ..................................................................................12
ÍNDICE
SEGURIDAD DEL REFRIGERADOR PARA BEBIDAS ..............13
Cómo deshacerse adecuadamente de
su aparato refrigerado viejo .......................................................13
INSTRUCCIONES DE INSTALACIÓN.........................................14
Requisitos de ubicación.............................................................14
Requisitos eléctricos..................................................................14
Desempaque del refrigerador para bebidas..............................14
Cambio del sentido de apertura de la puerta............................15
Cómo cerrar la puerta ................................................................16
Rejilla de la base ........................................................................16
USO DEL REFRIGERADOR PARA BEBIDAS ............................16
Sonidos normales ......................................................................16
Uso del control...........................................................................17
Portabebidas/portabotellas........................................................17
Cómo almacenar en el refrigerador para bebidas.....................17
Cómo iluminar el refrigerador para bebidas ..............................18
CUIDADO DEL REFRIGERADOR PARA BEBIDAS ...................18
Limpieza .....................................................................................18
Cómo cambiar el foco................................................................19
Cuidado durante las vacaciones y mudanzas...........................19
SOLUCIÓN DE PROBLEMAS......................................................19
AYUDA O SERVICIO TÉCNICO...................................................21
En los EE.UU. .............................................................................21
En Canadá..................................................................................21
Accesorios..................................................................................21
GARANTÍA.....................................................................................22
TABLE DES MATIÈRES
SÉCURITÉ DU RÉFRIGÉRATEUR POUR BOISSONS ..............23
Mise au rebut de votre vieil appareil réfrigéré ...........................23
INSTRUCTIONS D’INSTALLATION ............................................24
Exigences d'emplacement.........................................................24
Spécifications électriques..........................................................24
Déballage du réfrigérateur pour boissons .................................24
Inversion du sens de l'ouverture de la porte .............................25
Fermeture de la porte.................................................................26
Grille de la base..........................................................................26
UTILISATION DU RÉFRIGÉRATEUR POUR BOISSONS..........26
Sons normaux ............................................................................26
Utilisation de la commande .......................................................27
Casiers à vin/boissons ...............................................................27
Stockage dans le réfrigérateur pour boissons...........................27
Éclairage du réfrigérateur pour boissons...................................28
ENTRETIEN DU RÉFRIGÉRATEUR POUR BOISSONS ............28
Nettoyage ...................................................................................28
Changement de l'ampoule d'éclairage......................................29
Précautions à prendre pour les vacances et avant un
déménagement ..........................................................................29
DÉPANNAGE.................................................................................29
ASSISTANCE OU SERVICE.........................................................31
Aux États-Unis............................................................................31
Au Canada..................................................................................31
Accessoires ................................................................................31
GARANTIE.....................................................................................32

3
BEVERAGE CENTER SAFETY
Proper Disposal of Your Old
Refrigerated Appliance
IMPORTANT: Child entrapment and suffocation are not problems
of the past. Junked or abandoned beverage centers are still
dangerous – even if they will sit for “just a few days.” If you are
getting rid of your old beverage center, please follow these
instructions to help prevent accidents.
Before You Throw Away Your Old Refrigerated Appliance:
■Take off the door.
■Leave the racks and shelves in place so that children may not
easily climb inside.
You can be killed or seriously injured if you don't immediately
You can be killed or seriously injured if you don't follow
All safety messages will tell you what the potential hazard is, tell you how to reduce the chance of injury, and tell you what can
happen if the instructions are not followed.
Your safety and the safety of others are very important.
We have provided many important safety messages in this manual and on your appliance. Always read and obey all safety
messages.
This is the safety alert symbol.
This symbol alerts you to potential hazards that can kill or hurt you and others.
All safety messages will follow the safety alert symbol and either the word “DANGER” or “WARNING.”
These words mean:
follow instructions.
instructions.
DANGER
WARNING
IMPORTANT SAFETY INSTRUCTIONS
WARNING:
To reduce the risk of fire, electric shock, or injury when using your beverage center, follow these basic
SAVE THESE INSTRUCTIONS
■
Plug into a grounded 3 prong outlet.
■
Do not remove ground prong.
■
Do not use an adapter.
■
Do not use an extension cord.
■
Disconnect power before servicing.
■
Replace all parts and panels before operating.
■
Remove door or drawer(s) from your old refrigerated
appliance.
■
Use nonflammable cleaner.
■
Keep flammable materials and vapors, such as gasoline,
away from beverage center.
■
Use two or more people to move and install beverage
center.
precautions:
WARNING
Suffocation Hazard
Remove door or drawer(s) from your old refrigerated
appliance.
Failure to do so can result in death or brain damage.

4
INSTALLATION INSTRUCTIONS
Location Requirements
To ensure proper ventilation for your beverage center, allow for a
¹/₄" (6.35 mm) space on each side and at the top. When installing
your beverage center next to a fixed wall, leave 2¹⁄₂" (6.35 cm)
minimum clearance on the hinge side to allow for the door to
swing open.
NOTE: It is recommended that you do not install the beverage
center near an oven, radiator, or other heat source. Do not install
in a location where the temperature will fall below 55°F (13°C). For
best performance, do not install the beverage center behind a
cabinet door or block the base grille.
Electrical Requirements
Before you move your beverage center into its final location, it is
important to make sure you have the proper electrical
connection.
Recommended grounding method
A 115 Volt, 60 Hz., AC only, 15– or 20–amp fused, grounded
electrical supply is required. It is recommended that a separate
circuit serving only your beverage center be provided. Use an
outlet that cannot be turned off by a switch. Do not use an
extension cord.
NOTE: Before performing any type of installation, cleaning, or
removing a light bulb, unplug beverage center or disconnect
power.
Unpack the Beverage Center
Remove the Packaging
■Remove tape and glue residue from surfaces before turning
on the beverage center. Rub a small amount of liquid dish
soap over the adhesive with your fingers. Wipe with warm
water and dry.
■Do not use sharp instruments, rubbing alcohol, flammable
fluids, or abrasive cleaners to remove tape or glue. These
products can damage the surface of your beverage center.
For more information, see “Beverage Center Safety.”
■Dispose of/recycle all packaging materials.
WARNING
Explosion Hazard
Keep flammable materials and vapors, such as
gasoline, away from beverage center.
Failure to do so can result in death, explosion, or fire.
2¹⁄₂" (6.35 cm)
¹⁄₄" (6.35 mm)
Electrical Shock Hazard
Plug into a grounded 3 prong outlet.
Do not remove ground prong.
Do not use an adapter.
Do not use an extension cord.
Failure to follow these instructions can result in death,
fire, or electrical shock.
WARNING
WARNING
Excessive Weight Hazard
Use two or more people to move and install
beverage center.
Failure to do so can result in back or other injury.

5
Clean Before Using
After you remove all of the packaging materials, clean the inside
of your beverage center before using it. See the cleaning
instructions in “Beverage Center Care.”
Reverse Door Swing
(optional)
Tools Needed: Phillips screwdriver
1. Unplug beverage center or disconnect power.
2. Remove the screws from each side of the top of the beverage
center cabinet and set aside.
NOTE: There are seven screws total. Do not discard.
3. Remove the hinge cover and washer and set aside.
Top View
4. Lift the door straight up and off of the bottom hinge.
5. Remove the screws fastening the bottom hinge and cover to
the bottom of the beverage center cabinet. There are five
screws total.
6. Move the bottom hinge and cover each to the opposite side
of the bottom of the beverage center cabinet. Completely
tighten the five screws.
Front View
7. Remove the two screws fastening the door stop spacer and
the door stop to the bottom of the beverage center door.
8. Move the door stop spacer and the door stop to the opposite
side and fasten with the two screws. Completely tighten the
screws.
Bottom View
9. Place the washer onto the bottom hinge, then install the
beverage center door onto the washer and hinge pin.
10. Align the top hinge washer with the hinge hole in the top of
the door. Then, insert the top hinge pin through the washer
and into the hinge hole.
11. Fasten the top hinge cover with three screws and move the
remaining four screws to the opposite side. Completely
tighten the seven screws.
A. Top of beverage center cabinet
B. Hinge cover
C. Washer
When MovingYour Beverage Center:
Your beverage center is heavy. When moving the appliance
for cleaning and service, be sure to cover the floor with
cardboard or hardboard to avoid floor damage. Always pull
the appliance straight out when moving it. Do not wiggle or
“walk” the appliance when trying to move it, as floor
damage could occur.
Important information to know about glass shelves
and covers:
Do not clean glass shelves or covers with warm water when
they are cold. Shelves and covers may break if exposed to
sudden temperature changes or impact, such as bumping.
Tempered glass is designed to shatter into many small,
pebble-size pieces. This is normal. Glass shelves and covers
are heavy. Use both hands when removing them to avoid
dropping.
A
B
C
A. Cover
B. Bottom of beverage
center cabinet
C. Bottom hinge
D. Washer
A. Bottom of beverage center door
B. Door stop spacer
C. Door stop
A. Bottom hinge washer
B. Bottom hinge
A. Top hinge washer
B. Top hinge
B
A
C
D
B
A
C
B
A
BA

6
Door Closing
Door Closing
Your beverage center has four leveling legs. If your beverage
center seems unsteady or you want the door to close more easily,
adjust the beverage center’s tilt using the instructions below.
1. Plug into a grounded 3 prong outlet.
2. Move the beverage center into its final location.
3. Turn the leveling legs to the right to lower the beverage center
or turn the leveling legs to the left to raise it. It may take
several turns of the leveling legs to adjust the tilt of the
beverage center.
NOTE: Having someone push against the top of the beverage
center takes some weight off the leveling legs. This makes it
easier to adjust the leveling legs.
4. Make sure that the door closes as easily as you like. If not, tilt
the beverage center slightly more to the rear by turning both
front leveling screws to the left. It may take several more
turns, and you should turn both leveling legs the same
amount.
Base Grille
Tools Needed: Phillips screwdriver
Remove the Base Grille
1. Open the beverage center door.
2. Using a Phillips screwdriver, remove the two screws. Push
both tabs in toward the center to release the base grille from
the beverage center.
3. Remove the base grille.
Replace the Base Grille
1. Open the beverage center door.
2. Position the base grille so that both tabs align and the base
grille snaps into place. Replace the two screws. Tighten the
screws.
BEVERAGE CENTER USE
Normal Sounds
Your new beverage center may make sounds that your old one
didn’t make. Because the sounds are new to you, you might be
concerned about them. Most of the new sounds are normal. Hard
surfaces, such as the flooring and surrounding structures, can
make the sounds seem louder. The following describes the kinds
of sounds and what may be making them.
■Your beverage center is designed to run more efficiently to
keep your food items at the desired temperatures and to
minimize energy usage. The high efficiency compressor and
fans may cause your beverage center to run longer than your
old one. You may also hear a pulsating or high-pitched sound
from the compressor or fans adjusting to optimize
performance.
■Rattling noises may come from the flow of refrigerant or items
stored inside the beverage center.
■As each cycle ends, you may hear a gurgling sound due to
the refrigerant flowing in your beverage center.
■You may hear water running into the drain pan when the
beverage center is defrosting.
■You may hear clicking sounds when the beverage center
starts or stops running.
Electrical Shock Hazard
Plug into a grounded 3 prong outlet.
Do not remove ground prong.
Do not use an adapter.
Do not use an extension cord.
Failure to follow these instructions can result in death,
fire, or electrical shock.
WARNING
WARNING
Excessive Weight Hazard
Use two or more people to move and install
beverage center.
Failure to do so can result in back or other injury.
A. Tabs
B. Screws
BAA

7
Using the Control
For your convenience, your beverage center control is preset at
the factory. When you first install your beverage center, make
sure that the control is still preset to the mid-setting as shown.
Adjusting Controls
The mid-setting indicated in the previous section should be
correct for normal usage. The control is set correctly when
beverages are as cold as you like.
If you need to adjust the temperature, wait at least 24 hours
between adjustments and then recheck the temperature.
To make the beverage center colder, adjust the control to the next
higher setting. To make the beverage center less cold, adjust the
control to the next lower setting.
Temperature Separator (Temperature Display)
The temperature separator displays the current temperatures
(Fahrenheit or Celsius) for the upper and lower zones
(compartments) of the beverage center. To adjust the
temperature settings, see “Adjusting Controls” earlier in this
section.
Beverage/Wine Racks
Upper Wine Rack
To remove the wine rack:
1. Remove all bottles from the wine rack.
2. Lift the wine rack straight up slowly until it clears all four
resting posts. Pull the rack out of the compartment.
To replace the wine rack:
IMPORTANT: The wine rack hooks should be facing down when
the wine rack is installed.
1. Place the wine rack into the compartment above the four
resting posts and slide the rack back until it is aligned with all
four resting posts.
2. Push down gently on the rack until the wine rack hooks snap
firmly onto the two rear posts and the front of the rack is
resting on the two front posts.
Lower Wine Rack
To remove the wine rack:
1. Remove all bottles from the wine rack.
2. Slowly, lift the wine rack straight up until it clears the two rear
resting posts. Pull the rack out of the compartment.
To replace the wine rack:
IMPORTANT: The wine rack hooks should be facing down when
the wine rack is installed.
1. Slide the wine rack into the compartment until the two hooks
on the back of the rack are aligned with the two rear resting
posts.
2. Push down gently on the rack until the hooks on the back of
the rack snap firmly onto the two rear posts. Rest the front of
the rack on the compartment floor.
Side View
A. Dimmer
B. Upper zone display
C. Lower zone display
D. Fahrenheit/Celsius
A B C D
A. Upper wine rack
B. Lower wine rack
C. Rack hook
D. Resting post
A
B
C
D

8
Stocking the Beverage Center
1. Start stocking the beverage center with the bottom display
rack.
2. Place juices, sodas or other canned beverages on the glass
shelves.
Lighting the Beverage Center
The beverage center has an interior light that comes on any time
the door is opened. You may also turn the light on at any time by
opening the door and pressing the exterior switch located beside
the temperature control knob on the base grille.
NOTE: Leaving the light on for an extended period of time will
slightly increase the temperature of the beverage center.
BEVERAGE CENTER CARE
Cleaning
Clean the beverage center about once a month to avoid odor
buildup. Wipe up spills immediately.
To clean your beverage center:
1. Unplug beverage center or disconnect power.
2. Remove all racks and shelves from inside the beverage
center.
3. Hand wash, rinse, and dry removable parts and interior
surfaces thoroughly. Use a clean sponge or soft cloth and a
mild detergent in warm water.
■Do not use abrasive or harsh cleaners such as window
sprays, scouring cleansers, flammable fluids, cleaning
waxes, concentrated detergents, bleaches or cleansers
containing petroleum products on plastic parts, interior
and door liners or gaskets. Do not use paper towels,
scouring pads, or other harsh cleaning tools. These can
scratch or damage materials.
■To help remove odors, you can wash interior walls with a
mixture of warm water and baking soda (2 tbs to 1 qt
[26 g to 0.95 L] of water).
4. Wash stainless steel and painted metal exteriors with a clean
sponge or soft cloth and a mild detergent in warm water. Do
not use abrasive or harsh cleaners, or cleaners containing
chlorine. These can scratch or damage materials. Dry
thoroughly with a soft cloth.
NOTE: To keep your stainless steel beverage center looking
like new and to remove minor scuffs or marks, it is suggested
that you use the manufacturer’s approved Stainless Steel
Cleaner and Polish. To order the cleaner, see “Accessories.”
IMPORTANT: This cleaner is for stainless steel parts only!
Do not allow the Stainless Steel Cleaner and Polish to come
into contact with any plastic parts such as the trim pieces,
dispenser covers or door gaskets. If unintentional contact
does occur, clean plastic part with a sponge and mild
detergent in warm water. Dry thoroughly with a soft cloth.
5. Replace the racks and shelves.
6. Clean the condenser coils regularly. They are located behind
the base grille. Coils may need to be cleaned as often as
every other month. This may help save energy.
■Remove the base grille. See “Base Grille.”
■Use a vacuum cleaner with an extended attachment to
clean the condenser coils when they are dusty or dirty.
■Replace the base grille.
7. Plug in beverage center or reconnect power.
WARNING
Explosion Hazard
Use nonflammable cleaner.
Failure to do so can result in death, explosion, or fire.

9
Changing the Light Bulb
NOTE: Not all appliance bulbs will fit your beverage center. Be
sure to replace the bulb with one of the same size, shape, and
wattage.
To change the light bulb:
1. Unplug beverage center or disconnect power.
2. Using a Phillips screwdriver, remove the screw located at the
back of the light shield. Pull the light shield back to remove
the tabs from the appliance. Remove the light shield.
3. Replace the bulb.
4. Reinstall the light shield by inserting the tabs. Align the holes
and insert the screw. Tighten the screw.
5. Plug in beverage center or reconnect power.
Vacation and Moving Care
Vacations
If you choose to turn the beverage center off before you leave,
follow these steps.
1. Remove all wine bottles from the beverage center.
2. Unplug the beverage center.
3. Clean the beverage center. See “Cleaning.”
4. Tape a rubber or wood block to the top of the door to prop it
open far enough for air to get in. This stops odor and mold
from building up.
Moving
When you are moving your beverage center to a new home,
follow these steps to prepare it for the move.
1. Remove all wine bottles from the beverage center.
2. Unplug the beverage center.
3. Clean, wipe, and dry it thoroughly.
4. Take out all removable parts, wrap them well, and tape them
together so they don’t shift and rattle during the move.
5. Tape the doors shut and tape the power cord to the beverage
center.
When you get to your new home, put everything back and refer to
the “Installation Instructions” section for preparation instructions.
TROUBLESHOOTING
Try the solutions suggested here first in order to avoid the cost of an unnecessary service call.
Your beverage center will not operate
■Is the power supply cord unplugged? Plug into a grounded
3 prong outlet.
■Has a household fuse blown, or has a circuit breaker
tripped? Replace the fuse or reset the circuit.
■Is the Beverage Center Control turned to the OFF
position? See “Using the Control.”
The lights do not work
■Is a light bulb loose in the socket? Unplug beverage center
or disconnect power. Gently remove the bulb and reinsert.
Plug in beverage center or reconnect power.
■Has a light bulb burned out? Replace with an appliance
bulb of the same wattage, size, and shape. See “Changing
the Light Bulb.”
A. Light shield
B. Tabs
C. Screw
A
B
C
Electrical Shock Hazard
Plug into a grounded 3 prong outlet.
Do not remove ground prong.
Do not use an adapter.
Do not use an extension cord.
Failure to follow these instructions can result in death,
fire, or electrical shock.
WARNING

10
The motor seems to run too much
■Is the temperature outside hotter than normal? Expect the
motor to run longer under warm conditions. At normal
temperatures, expect your motor to run about 40% to 80% of
the time. Under warmer conditions, expect it to run even
more of the time.
■Is the door opened often? Expect the motor to run longer
when this occurs. In order to conserve energy, try to get
everything you need out of the beverage center at once, keep
wine bottles positioned label side up so that they are easy to
find, and close the door as soon as the wine is removed.
■Is the control set correctly for the surrounding
conditions? See “Using the Control.”
■Is the door closed completely? Push the door firmly shut. If
it will not shut all the way, see “The door will not close
completely” later in this section.
■Are the condenser coils dirty? This obstructs air transfer
and makes the motor work harder. Clean the condenser coils.
See “Cleaning.”
Temperature is too warm
■Is the door opened often? Be aware that the beverage
center will warm when this occurs. In order to keep the
beverage center cool, try to get everything you need out of
the beverage center at once, keep wine bottles positioned
label side up so that they are easy to find, and close the door
as soon as the wine is removed.
■Is the control set correctly for the surrounding
conditions? See “Using the Control.”
■Is the base grille blocked? For best performance, do not
install the beverage center behind a cabinet door or block the
base grille.
There is interior moisture buildup
■Is the door opened often? To avoid humidity buildup, try to
get everything you need out of the beverage center at once,
keep wine bottles positioned label side up so that they are
easy to find, and close the door as soon as the wine is
removed. When the door is opened, humidity from the room
air enters the beverage center. The more often the door is
opened, the faster humidity builds up, especially when the
room itself is very humid.
■Is it humid? It is normal for moisture to build up inside the
beverage center when the air is humid.
■Is the control set correctly for the surrounding
conditions? See “Using the Control.”
The door is difficult to open
■Is the gasket dirty or sticky? Clean the gasket and the
surface that it touches. Rub a thin coat of paraffin wax on the
gasket following cleaning.
The door will not close completely
■Are the racks or shelves out of position? Put the racks or
shelves back into their correct positions. See “Beverage
Center Use” for more information.
■Is the gasket sticking? Clean the gasket and the surface
that it touches. Rub a thin coat of paraffin wax on the gasket
following cleaning.
WARNING
Explosion Hazard
Use nonflammable cleaner.
Failure to do so can result in death, explosion, or fire.
WARNING
Explosion Hazard
Use nonflammable cleaner.
Failure to do so can result in death, explosion, or fire.

11
ASSISTANCE OR SERVICE
Before calling for assistance or service, please check
“Troubleshooting.” It may save you the cost of a service call. If
you still need help, follow the instructions below.
When calling, please know the purchase date and the complete
model and serial number of your appliance. This information will
help us to better respond to your request.
If you need replacement parts
If you need to order replacement parts, we recommend that you
only use factory specified replacement parts. Factory specified
replacement parts will fit right and work right because they are
made with the same precision used to build every new Maytag
appliance.
To locate factory specified replacement parts in your area, call us
or your nearest designated service center.
In the U.S.A.
Call the Maytag Customer eXperience Center toll free:
1-800-688-9900.
Our consultants provide assistance with:
■Features and specifications on our full line of appliances.
■Installation information.
■Use and maintenance procedures.
■Accessory and repair parts sales.
■Specialized customer assistance (Spanish speaking, hearing
impaired, limited vision, etc.).
■Referrals to local dealers, repair parts distributors, and
service companies. Maytag designated service technicians
are trained to fulfill the product warranty and provide after-
warranty service, anywhere in the United States.
To locate the Maytag designated service company in your area,
you can also look in your telephone directory Yellow Pages.
For further assistance
If you need further assistance, you can write to Maytag with any
questions or concerns at:
Maytag Brand Home Appliances
Customer eXperience Center
553 Benson Road
Benton Harbor, MI 49022-2692
Please include a daytime phone number in your correspondence.
In Canada
Call the Maytag Customer eXperience Centre toll free:
1-800-807-6777.
Our consultants provide assistance with:
■Features and specifications on our full line of appliances.
■Use and maintenance procedures.
■Accessory and repair parts sales.
■Referrals to local dealers, repair parts distributors, and
services companies. Maytag designated service technicians
are trained to fulfill the product warranty and provide after-
warranty service, anywhere in Canada.
For further assistance
If you need further assistance, you can write to Maytag with any
questions or concerns at:
Maytag Brand Home Appliances
Customer eXperience Centre
200 – 6750 Century Ave.
Mississauga, Ontario L5N 0B7
Please include a daytime phone number in your correspondence.
Accessories
To order accessories, call 1-877-232-6771 and ask for the
appropriate part number listed below or contact your authorized
Maytag dealer. In Canada, call 1-800-807-6777.
Stainless Steel Cleaner and Polish
Order Part #20000008

12
MAYTAG®MAJOR APPLIANCE WARRANTY
LIMITED WARRANTY
For one year from the date of purchase, when this major appliance is operated and maintained according to instructions attached to or
furnished with the product, Maytag brand of Whirlpool Corporation or Whirlpool Canada LP (hereafter “Maytag”) will pay for factory
specified parts and repair labor to correct defects in materials or workmanship that existed when this major appliance was purchased.
Service must be provided by a Maytag designated service company. YOUR SOLE AND EXCLUSIVE REMEDY UNDER THIS LIMITED
WARRANTY SHALL BE PRODUCT REPAIR AS PROVIDED HEREIN. This limited warranty is valid only in the United States or Canada
and applies only when the major appliance is used in the country in which it was purchased. Proof of original purchase date is required
to obtain service under this limited warranty.
ITEMS EXCLUDED FROM WARRANTY
This limited warranty does not cover:
1. Replacement parts or repair labor if this major appliance is used for other than normal, single-family household use or when it is
used in a manner that is inconsistent to published user or operator instructions and/or installation instructions.
2. Service calls to correct the installation of your major appliance, to instruct you on how to use your major appliance, to replace or
repair house fuses, or to correct house wiring or plumbing.
3. Service calls to repair or replace appliance light bulbs, air filters or water filters. Consumable parts are excluded from warranty
coverage.
4. Damage resulting from accident, alteration, misuse, abuse, fire, flood, acts of God, improper installation, installation not in
accordance with electrical or plumbing codes, or use of products not approved by Maytag.
5. Cosmetic damage, including scratches, dents, chips or other damage to the finish of your major appliance, unless such damage
results from defects in materials or workmanship and is reported to Maytag within 30 days from the date of purchase.
6. Any food or medicine loss due to refrigerator or freezer product failures.
7. Pickup and delivery. This major appliance is intended to be repaired in your home.
8. Repairs to parts or systems resulting from unauthorized modifications made to the appliance.
9. Expenses for travel and transportation for product service if your major appliance is located in a remote area where service by an
authorized Maytag servicer is not available.
10. The removal and reinstallation of your major appliance if it is installed in an inaccessible location or is not installed in accordance
with Maytag's published installation instructions.
11. Replacement parts or repair labor on major appliances with original model/serial numbers that have been removed, altered or
cannot be easily determined.
12. Discoloration, rust, or oxidation of stainless steel surfaces.
DISCLAIMER OF IMPLIED WARRANTIES
IMPLIED WARRANTIES, INCLUDING ANY IMPLIED WARRANTY OF MERCHANTABILITY OR IMPLIED WARRANTY OF FITNESS FOR
A PARTICULAR PURPOSE, ARE LIMITED TO ONE YEAR OR THE SHORTEST PERIOD ALLOWED BY LAW. Some states and provinces
do not allow limitations on the duration of implied warranties of merchantability or fitness, so this limitation may not apply to you. This
warranty gives you specific legal rights, and you also may have other rights that vary from state to state or province to province.
LIMITATION OF REMEDIES; EXCLUSION OF INCIDENTAL AND CONSEQUENTIAL DAMAGES
YOUR SOLE AND EXCLUSIVE REMEDY UNDER THIS LIMITED WARRANTY SHALL BE PRODUCT REPAIR AS PROVIDED HEREIN.
MAYTAG SHALL NOT BE LIABLE FOR INCIDENTAL OR CONSEQUENTIAL DAMAGES. Some states and provinces do not allow the
exclusion or limitation of incidental or consequential damages, so these limitations and exclusions may not apply to you. This warranty
gives you specific legal rights, and you also may have other rights that vary from state to state or province to province.
If outside the 50 United States and Canada, contact your authorized Maytag dealer to determine if another warranty applies. 6/08
Keep this book and your sales slip together for future
reference. You must provide proof of purchase or installation
date for in-warranty service.
Write down the following information about your major appliance
to better help you obtain assistance or service if you ever need it.
You will need to know your complete model number and serial
number. You can find this information on the model and serial
number label located on the product.
Dealer name____________________________________________________
Address ________________________________________________________
Phone number__________________________________________________
Model number __________________________________________________
Serial number __________________________________________________
Purchase date __________________________________________________

13
SEGURIDAD DEL REFRIGERADOR PARA BEBIDAS
Cómo deshacerse adecuadamente de su
aparato refrigerado viejo
IMPORTANTE: El atrapamiento y asfixia de niños no es un
problema del pasado. Los refrigeradores para bebidas tirados y
abandonados son un peligro, aún si van a quedar ahí “por unos
pocos días”. Si Ud. está por deshacerse de su refrigerador para
bebidas viejo, por favor siga las instrucciones que se dan a
continuación para prevenir accidentes.
Antes de descartar su viejo aparato refrigerado:
■Saque la puerta.
■Deje las rejillas y los estantes en su lugar así los niños no
pueden meterse adentro con facilidad.
Si no sigue las instrucciones de inmediato, usted puede
morir o sufrir una lesión grave.
Si no sigue las instrucciones, usted puede morir o sufrir
una lesión grave.
Todos los mensajes de seguridad le dirán el peligro potencial, le dirán cómo reducir las posibilidades de sufrir una lesión y lo que
puede suceder si no se siguen las instrucciones.
Su seguridad y la seguridad de los demás es muy importante.
Hemos incluido muchos mensajes importantes de seguridad en este manual y en su electrodoméstico. Lea y obedezca siempre
todos los mensajes de seguridad.
ADVERTENCIA
PELIGRO
Este es el símbolo de advertencia de seguridad.
Este símbolo le llama la atención sobre peligros potenciales que pueden ocasionar la muerte o una lesión a
usted y a los demás.
Todos los mensajes de seguridad irán a continuación del símbolo de advertencia de seguridad y de la palabra
“PELIGRO” o “ADVERTENCIA”. Estas palabras significan:
INSTRUCCIONES IMPORTANTES DE SEGURIDAD
ADVERTENCIA:
Para reducir el riesgo de incendio, choque eléctrico, o lesiones personales al usar su refrigerador para
GUARDE ESTAS INSTRUCCIONES
■
Conecte a un contacto de pared de conexión a tierra de
3 terminales.
■
No quite la terminal de conexión a tierra.
■
No use un adaptador.
■
No use un cable eléctrico de extensión.
■
Desconecte el suministro de energía antes de darle servicio.
■
Vuelva a colocar todos los componentes y paneles antes de
hacerlo funcionar.
■
Remueva la puerta o el(los) cajón(cajones) de su aparato
refrigerado viejo.
■
Use un limpiador no inflamable.
■
Mantenga los materiales y vapores inflamables, tales como
gasolina, alejados del refrigerador para bebidas.
■
Use dos o más personas para mover e instalar el
refrigerador para bebidas.
bebidas, siga estas precauciones básicas:
ADVERTENCIA
Peligro de Asfixia
Remueva la puerta o el(los) cajón(cajones) de su
aparato refrigerado viejo.
No seguir esta instrucción puede ocasionar la muerte
o daño al cerebro.

14
INSTRUCCIONES DE INSTALACIÓN
Requisitos de ubicación
Para asegurarse la ventilación adecuada del refrigerador para
bebidas, deje un espacio de ¹/₄" (6,35 mm) a cada lado y por
encima. Si Ud. instala el refrigerador próximo a una pared fija,
deje como mínimo 2¹/₂" (6,35 cm) del lado de la bisagra para
permitir que la puerta abra bien.
NOTA: No se recomienda instalar el refrigerador para bebidas
cerca de un horno, radiador u otra fuente de calor. No la instale en
un lugar donde la temperatura puede ser menor de 55°F (13°C).
Para obtener un óptimo funcionamiento, no instale el refrigerador
para bebidas detrás de la puerta de un armario ni bloquee la
rejilla de la base.
Requisitos eléctricos
Antes de mover el refrigerador para bebidas a su ubicación final,
es importante asegurarse de que tiene la conexión eléctrica
adecuada.
Método de conexión a tierra recomendado
Se requiere una fuente de energía eléctrica de 115 Voltios,
60 Hz., CA solamente y con fusibles de 15 ó 20 amperios,
debidamente conectados a tierra. Se recomienda que use un
circuito separado sólo para su refrigerador para bebidas. Use un
tomacorriente que no se pueda apagar con un interruptor. No use
un cable eléctrico de extensión.
NOTA: Antes de realizar cualquier tipo de instalación, limpieza o
de quitar un foco de luz, desenchufe el refrigerador para bebidas
o desconecte el suministro de energía.
Desempaque del refrigerador para bebidas
Cómo quitar los materiales de empaque
■Quite los residuos de cinta y goma de las superficies antes
de encender el refrigerador para bebidas. Frote un poco de
detergente líquido para vajillas sobre el adhesivo con los
dedos. Limpie con agua tibia y seque.
■No use instrumentos filosos, alcohol para fricciones, líquidos
inflamables o productos de limpieza abrasivos para eliminar
los restos de cinta o goma. Estos productos pueden dañar la
superficie de su refrigerador para bebidas. Para obtener más
información, vea “Seguridad del refrigerador para bebidas”.
■Deshágase de todos los materiales de embalaje o recíclelos.
ADVERTENCIA
Peligro de Explosión
Mantenga los materiales y vapores inflamables,
tales como gasolina, alejados del refrigerador para
bebidas.
No seguir esta instrucción puede ocasionar la muerte,
explosión, o incendio.
2¹⁄₂" (6,35 cm)
¹⁄₄" (6,35 mm)
ADVERTENCIA
Peligro de Choque Eléctrico
Conecte a un contacto de pared de conexión a tierra de
3 terminales.
No quite la terminal de conexión a tierra.
No use un adaptador.
No use un cable eléctrico de extensión.
No seguir estas instrucciones puede ocasionar
la muerte, incendio o choque eléctrico.
ADVERTENCIA
Peligro de Peso Excesivo
Use dos o más personas para mover e instalar
el refrigerador para bebidas.
No seguir esta instrucción puede ocasionar una
lesión en la espalda u otro tipo de lesiones.

15
Limpieza antes del uso
Una vez que usted haya quitado todos los materiales de
empaque, limpie el interior de su refrigerador para bebidas antes
de usarlo. Vea las instrucciones de limpieza en “Cuidado del
refrigerador para bebidas”.
Cambio del sentido de apertura de la puerta
(opcional)
Herramientas necesarias: Destornillador Phillips
1. Desenchufe el refrigerador para bebidas o desconecte el
suministro de energía.
2. Quite los tornillos de cada lado de la parte superior de la
carcasa del refrigerador para bebidas y póngalos a un lado.
NOTA: Hay siete tornillos en total. No los descarte.
3. Quite la cubierta y la arandela de la bisagra y déjelas a un
lado.
Vista superior
4. Levante la puerta y sáquela directamente de la bisagra
inferior.
5. Quite los tornillos que aseguran la bisagra y inferior y su
cubierta a la parte inferior de la carcasa del refrigerador para
bebidas. Hay cinco tornillos en total.
6. Mueva la bisagra inferior y su cubierta, cada una hacia el lado
opuesto de la parte inferior de la carcasa del refrigerador para
bebidas. Apriete por completo los cinco tornillos.
Vista frontal
7. Quite los dos tornillos que aseguran el espaciador del retén
de la puerta y el retén de la puerta a la parte inferior de la
puerta del refrigerador para bebidas.
8. Mueva el espaciador del retén de la puerta y el retén de la
puerta hacia el lado opuesto y asegúrelos con los dos
tornillos. Apriete por completo los tornillos.
Vista inferior
9. Coloque la arandela sobre la bisagra inferior; luego instale la
puerta del refrigerador para bebidas sobre la arandela y el
pasador de la bisagra.
10. Alinee la arandela de la bisagra superior con el orificio de la
bisagra en la parte superior de la puerta. Luego inserte el
pasador de la bisagra superior a través de la arandela y
dentro del orificio de la bisagra.
11. Asegure la cubierta de la bisagra superior con los tres
tornillos y mueva los cuatro tornillos restantes hacia el lado
opuesto. Apriete por completo los siete tornillos.
A. Parte superior de la carcasa
del refrigerador para bebidas
B. Cubierta de la bisagra
C. Arandela
Cuando mueva su refrigerador para bebidas:
Su refrigerador para bebidas es muy pesado. Cuando
mueva el electrodoméstico para limpiarlo y darle servicio,
cerciórese de cubrir el piso con cartón o madera para evitar
daños en el mismo. Al mover el electrodoméstico, siempre
tire directamente hacia afuera. No menee el
electrodoméstico de lado a lado ni lo haga “caminar”
cuando lo trate de mover ya que podría dañar el piso.
Información importante para saber acerca de los estantes
y tapas de vidrio:
No limpie los estantes y tapas de vidrio con agua caliente
mientras están fríos. Los estantes y tapas pueden romperse
si se exponen a cambios bruscos de temperatura o impacto,
como sería un golpe brusco. El vidrio templado se ha
diseñado para hacerse añicos. Esto es normal. Los estantes
y tapas de vidrio son muy pesados. Use ambas manos al
sacarlos para evitar que se caigan.
A
B
C
A. Cubierta
B. Parte inferior de la carcasa
del refrigerador para bebidas
C. Bisagra inferior
D. Arandela
A. Parte inferior de la puerta del refrigerador
para bebidas
B. Espaciador del retén de la puerta
C. Retén de la puerta
A. Arandela de la bisagra inferior
B. Bisagra inferior
A. Arandela de la bisagra superior
B. Bisagra superior
B
A
C
D
B
A
C
B
A
BA

16
Cómo cerrar la puerta
Su refrigerador para bebidas tiene cuatro patas niveladoras. Si su
refrigerador para bebidas parece inestable o usted quiere que la
puerta se cierre con mayor facilidad, ajuste la inclinación del
refrigerador para bebidas usando las instrucciones a
continuación.
1. Conecte a un contacto de pared de conexión a tierra de
3 terminales.
2. Mueva el refrigerador para bebidas hacia su posición final.
3. Gire las patas niveladoras hacia la derecha para bajar el
refrigerador para bebidas o gírelas hacia la izquierda para
levantarlo. Puede precisar darle varias vueltas a las patas
niveladoras para ajustar la inclinación del refrigerador para
bebidas.
NOTA: Para quitar un poco de peso de las patas niveladoras,
haga que alguien empuje la parte superior del refrigerador
para bebidas. Esto facilita el ajuste de las patas niveladoras.
4. Verifique para asegurarse de que se cierra con la facilidad
que usted desea. De lo contrario, incline el refrigerador para
bebidas ligeramente más hacia la parte posterior, girando
ambos tornillos reguladores frontales hacia la derecha.
Puede tomar varias vueltas más, y usted deberá girar ambas
patas niveladoras la misma cantidad de veces.
Rejilla de la base
Herramienta necesaria: Destornillador Phillips
Quite la rejilla de la base
1. Abra la puerta del refrigerador para bebidas.
2. Saque los dos tornillos con un destornillador Phillips. Empuje
ambas lengüetas hacia el centro para liberar la rejilla de la
base del refrigerador para bebidas.
3. Quite la rejilla de la base.
Vuelva a colocar la rejilla de la base
1. Abra la puerta del refrigerador para bebidas.
2. Coloque la rejilla de la base de manera que ambas lengüetas
estén alineadas y la rejilla de la base encaje en su lugar.
Vuelva a colocar los dos tornillos. Apriete los tornillos.
USO DEL REFRIGERADOR
PARA BEBIDAS
Sonidos normales
Su nuevo refrigerador para bebidas puede hacer ruidos que su
viejo refrigerador para bebidas no hacía. Como estos sonidos
son nuevos para Ud., puede ser que se preocupe. La mayoría de
los sonidos nuevos son normales. Las superficies duras tales
como el piso y las estructuras circundantes pueden hacer que
los sonidos parezcan más fuertes. A continuación se describen
los tipos de sonidos y qué puede causarlos.
■Su refrigerador para bebidas está diseñado para funcionar
con más eficiencia para conservar sus alimentos a la
temperatura deseada y para reducir al mínimo el uso de
energía. El compresor y los ventiladores de alta eficiencia
pueden causar que su nuevo refrigerador para bebidas
funcione por períodos de tiempo más largos que su
refrigerador para bebidas viejo. También puede escuchar un
sonido pulsante o agudo del compresor o los ventiladores
que se ajustan para un funcionamiento óptimo.
■Las vibraciones pueden producirse por el flujo de líquido
refrigerante o artículos guardados dentro del refrigerador
para bebidas.
■Al final de cada ciclo, Ud. puede escuchar un gorgoteo
debido al flujo de líquido refrigerante en su refrigerador para
bebidas.
ADVERTENCIA
Peligro de Choque Eléctrico
Conecte a un contacto de pared de conexión a tierra de
3 terminales.
No quite la terminal de conexión a tierra.
No use un adaptador.
No use un cable eléctrico de extensión.
No seguir estas instrucciones puede ocasionar
la muerte, incendio o choque eléctrico.
ADVERTENCIA
Peligro de Peso Excesivo
Use dos o más personas para mover e instalar
el refrigerador para bebidas.
No seguir esta instrucción puede ocasionar una
lesión en la espalda u otro tipo de lesiones.
A. Lengüetas
B. Tornillos
BAA

17
■Ud. puede escuchar agua corriendo hacia la bandeja
recolectora cuando el refrigerador para bebidas se está
descongelando.
■Es posible que escuche sonidos de chasquido cuando el
refrigerador para bebidas comienza o deja de funcionar.
Uso del control
Para su comodidad, el control de su refrigerador para bebidas ha
sido prefijado de fábrica. Al instalar su refrigerador para bebidas
por primera vez, cerciórese de que el control aún esté prefijado
en el ajuste medio, como se ilustra.
Cómo ajustar los controles
El ajuste medio indicado en la sección previa debe estar correcto
para el uso normal. El control está fijado correctamente cuando
las bebidas están tan frías como a usted le gusta.
Si necesita ajustar la temperatura, espere por lo menos 24 horas
entre un ajuste y otro, y después vuelva a verificar la
temperatura.
Para hacer que el refrigerador para bebidas esté más frío,
coloque el control en el siguiente ajuste más alto. Para hacer que
el refrigerador para bebidas esté menos frío, coloque el control
en el siguiente ajuste más bajo.
Separador de temperatura (Pantalla de temperatura)
El separador de temperatura muestra las temperaturas actuales
(en Fahrenheit o centígrados) para las zonas (compartimientos)
superior e inferior del refrigerador para bebidas. Para regular los
ajustes de temperatura, vea “Cómo ajustar los controles”
anteriormente en esta sección.
Portabebidas/portabotellas
Portabotellas superior
Para quitar el portabotellas:
1. Saque todas las botellas del portabotellas.
2. Levante el portabotellas lenta y directamente hasta sacarlo
por completo de los cuatro postes de apoyo. Jale la rejilla
hacia fuera del compartimiento.
Para volver a colocar el portabotellas:
IMPORTANTE: Los ganchos del portabotellas deberán mirar
hacia abajo cuando se instale el portabotellas.
1. Coloque el portabotellas dentro del compartimiento, encima
de los cuatro postes de apoyo, y deslícelo hacia atrás hasta
que quede alineado con los cuatro postes de apoyo.
2. Presione suavemente hacia abajo en la rejilla hasta que los
ganchos del portabotellas encajen firmemente a presión
sobre los dos postes posteriores y el frente de la rejilla esté
descansando sobre los dos postes frontales.
Portabotellas inferior
Para quitar el portabotellas:
1. Saque todas las botellas del portabotellas.
2. Levante lentamente y en forma recta el portabotellas hasta
sacarlo de los dos postes de apoyo. Jale la rejilla hacia fuera
del compartimiento.
Para volver a colocar el portabotellas:
IMPORTANTE: Los ganchos del portabotellas deberán mirar
hacia abajo cuando se instale el portabotellas.
1. Deslice el portabotellas dentro del compartimiento hasta que
los dos ganchos que están en la parte posterior de la rejilla
queden alineados con los dos postes de apoyo posteriores.
2. Presione suavemente hacia abajo en la rejilla hasta que los
ganchos que están en la parte posterior de la misma encajen
firmemente a presión sobre los dos postes de apoyo
posteriores. Coloque la parte frontal de la rejilla sobre la base
del compartimiento.
Vista lateral
Cómo almacenar en el refrigerador
para bebidas
1. Al almacenar en el refrigerador para bebidas, comience por el
portabotellas inferior.
A. Reductor de luz
B. Pantalla de la zona superior
C. Pantalla de la zona inferior
D. Fahrenheit/centígrados
A B C D
A. Portabotellas superior
B. Portabotellas inferior
C. Gancho de la rejilla
D. Poste de apoyo
A
B
C
D

18
2. Coloque los jugos, sodas u otras bebidas envasadas sobre
los estantes de vidrio.
Cómo iluminar el refrigerador para bebidas
El refrigerador para bebidas tiene una luz interior que se
enciende cada vez que se abre la puerta. También puede
encender la luz en cualquier momento, abriendo la puerta y
presionando el interruptor externo que está ubicado al lado de la
perilla de control de temperatura, sobre la rejilla de la base.
NOTA: Si se deja la luz encendida por mucho tiempo, aumentará
ligeramente la temperatura del refrigerador para bebidas.
CUIDADO DEL REFRIG-
ERADOR PARA BEBIDAS
Limpieza
Limpie el refrigerador para bebidas más o menos una vez al mes
para evitar la acumulación de olores. Limpie los derrames de
inmediato.
Para limpiar su refrigerador para bebidas:
1. Desenchufe el refrigerador para bebidas o desconecte el
suministro de energía.
2. Retire todas las rejillas y los estantes del interior del
refrigerador para bebidas.
3. Lave a mano, enjuague y seque todas las partes
desmontables y las superficies interiores meticulosamente.
Use una esponja limpia o un paño liso y un detergente suave
en agua tibia.
■No use productos de limpieza abrasivos o ásperos, como
aerosoles para ventanas, productos de limpieza para
pulir, líquidos inflamables, ceras para limpieza,
detergentes concentrados, blanqueadores o productos
de limpieza que contengan productos derivados de
petróleo en las partes de plástico, revestimientos
interiores o de la puerta o juntas. No use toallas de papel,
estropajos para fregar u otros utensilios de limpieza
ásperos. Éstos pueden rayar o dañar los materiales.
■Para ayudar a eliminar olores, puede lavar las paredes
interiores con una mezcla de agua tibia y bicarbonato de
sodio (2 cucharadas en un cuarto de galón
[26 g en 0,95 L] de agua).
4. Lave las superficies externas metálicas pintadas y de acero
inoxidable con una esponja limpia o un paño suave y
detergente delicado con agua tibia. No use productos de
limpieza abrasivos o ásperos o que contengan cloro. Éstos
pueden rayar o dañar los materiales. Seque meticulosamente
con un paño suave.
NOTA: Para mantener como nuevo su refrigerador para
bebidas de acero inoxidable y para quitar marcas o
rayaduras pequeñas, se sugiere usar un limpiador de acero
inoxidable aprobado por el fabricante. Para pedir el limpiador,
vea “Accesorios”.
IMPORTANTE: ¡Este limpiador es solamente para partes de
acero inoxidable!
No permita que el limpiador de acero inoxidable entre en
contacto con ninguna parte de plástico tales como las piezas
decorativas, las tapas del despachador o las
empaquetaduras de la puerta. Si se produce contacto
unintentional, limpie la pieza de plástico con una esponja y
detergente suave en agua tibia. Seque meticulosamente con
un paño suave.
5. Vuelva a colocar las rejillas y los estantes.
6. Limpie los serpentines del condensador regularmente. Están
ubicados detrás de la rejilla de la base. Quizás necesite
limpiar los serpentines cada dos meses. Esto puede ayudar a
ahorrar energía.
■Quite la rejilla de la base. Vea “Rejilla de la base”.
■Use una aspiradora con extensión para limpiar los
serpentines del condensador siempre que estén sucios o
polvorientos.
■Vuelva a colocar la rejilla de la base.
7. Enchufe el refrigerador para bebidas o reconecte el
suministro de energía.
ADVERTENCIA
Peligro de Explosión
Use un limpiador no inflamable.
No seguir esta instrucción puede ocasionar la muerte,
explosión o incendio.

19
Cómo cambiar el foco
NOTA: No todos los focos para electrodomésticos son
adecuados para su refrigerador para bebidas. Asegúrese de
reemplazar el foco con otro del mismo tamaño, forma y vataje.
Para cambiar el foco:
1. Desenchufe el refrigerador para bebidas o desconecte el
suministro de energía.
2. Saque el tornillo que está detrás de la pantalla de luz con un
destornillador Phillips. Jale hacia atrás la pantalla de luz para
quitar las lengüetas del electrodoméstico. Saque la pantalla
de luz.
3. Reemplace el foco.
4. Vuelva a instalar la pantalla de luz insertando las lengüetas.
Alinee los orificios e inserte el tornillo. Apriete el tornillo.
5. Enchufe el refrigerador para bebidas o reconecte el
suministro de energía.
Cuidado durante las vacaciones y mudanzas
Vacaciones
Si Ud. decide apagar el refrigerador para bebidas antes de irse,
siga estos pasos.
1. Saque todas las botellas de vino del refrigerador para
bebidas.
2. Desenchufe el refrigerador para bebidas.
3. Limpie el refrigerador para bebidas. Vea “Limpieza”.
4. Fije un bloque de goma o de madera con cinta adhesiva a la
parte superior de la puerta para que quede abierta y el aire
circule. Esto evita que se formen olores y que crezcan
hongos.
Mudanza
Si Ud. muda su refrigerador para bebidas a una casa nueva, siga
los siguientes pasos para prepararse para la mudanza.
1. Saque todas las botellas de vino del refrigerador para
bebidas.
2. Desenchufe el refrigerador para bebidas.
3. Límpielo, enjuáguelo y séquelo detalladamente.
4. Saque todas las partes desmontables, envuélvalas bien y
asegúrelas con cinta adhesiva para que no se sacudan
durante la mudanza.
5. Sostenga las puertas cerradas y el cable pegado a la carcasa
del refrigerador para bebidas con cinta adhesiva.
Cuando llegue a la casa nueva, ponga todo de nuevo y lea la
sección “Instrucciones de instalación” para obtener
instrucciones de preparación.
SOLUCIÓN DE PROBLEMAS
Primero pruebe las soluciones sugeridas aquí para evitar el costo innecesario del servicio.
Su refrigerador para bebidas no funciona
■¿Está desenchufado el cable de suministro de energía?
Conecte a un contacto de pared de conexión a tierra de
3 terminales.
■¿Hay un fusible de la casa fundido o se disparó el
cortacircuitos? Reemplace el fusible o reposicione el
cortacircuitos.
■¿Está el control del refrigerador para bebidas en la
posición OFF (Apagado)? Vea “Uso del control”.
Las luces no funcionan
■¿Está flojo un foco? Desenchufe el refrigerador para
bebidas o desconecte el suministro de energía. Quite
cuidadosamente el foco y vuelva a insertarlo. Enchufe el
refrigerador para bebidas o reconecte el suministro de
energía.
■¿Se quemó un foco? Reemplácelo con uno para
electrodomésticos del mismo tamaño, forma y vatiaje. Vea
“Cómo cambiar el foco”.
A. Pantalla de luz
B. Lengüetas
C. Tornillo
A
B
C
ADVERTENCIA
Peligro de Choque Eléctrico
Conecte a un contacto de pared de conexión a tierra de
3 terminales.
No quite la terminal de conexión a tierra.
No use un adaptador.
No use un cable eléctrico de extensión.
No seguir estas instrucciones puede ocasionar
la muerte, incendio o choque eléctrico.

20
Parece que el motor funciona excesivamente
■¿Está la temperatura exterior más caliente de lo normal?
En condiciones de calor, el motor funciona por períodos más
largos. Cuando la temperatura es normal, el motor funciona
entre 40% y 80% del tiempo. Bajo condiciones más
calientes, puede funcionar por aún más tiempo.
■¿Se abre la puerta a menudo? Cuando esto ocurre, el motor
puede funcionar por períodos más largos. Para ahorrar
energía, trate de sacar todo lo que necesite del refrigerador
para bebidas de una vez, mantenga las botellas de vino con
las etiquetas hacia arriba para que sean fáciles de encontrar
y cierre la puerta una vez que se haya sacado el vino.
■¿Se ha ajustado el control correctamente de acuerdo con
las condiciones circundantes? Vea “Uso del control”.
■¿Está completamente cerrada la puerta? Cierre la puerta
con firmeza. Si no se cierra completamente, vea “La puerta
no cierra completamente” más adelante en esta sección.
■¿Están sucios los serpentines del condensador? Esto
obstruye la transferencia de aire y hace que el motor trabaje
más. Limpie los serpentines del condensador. Vea
“Limpieza”.
La temperatura está demasiado caliente
■¿Se abre la puerta a menudo? Sea consciente de que el
refrigerador para bebidas se calienta cuando esto ocurre.
Para mantener el refrigerador para bebidas frío, trate de
sacar todo lo que necesite del mismo de una vez, mantenga
las botellas de vino con las etiquetas hacia arriba para que
sean fáciles de encontrar y cierre la puerta una vez que se
haya sacado el vino.
■¿Se ha ajustado el control correctamente de acuerdo con
las condiciones circundantes? Vea “Uso del control”.
■¿Está bloqueada la rejilla de la base? Para obtener un
óptimo funcionamiento, no instale el refrigerador para
bebidas detrás de la puerta de un armario ni bloquee la rejilla
de la base.
Hay acumulación de humedad en el interior
■¿Se abre la puerta a menudo? Para evitar la acumulación
de humedad, trate de sacar todo lo que necesite del
refrigerador para bebidas de una vez, mantenga las botellas
de vino con las etiquetas hacia arriba para que sean fáciles
de encontrar y cierre la puerta una vez que se haya sacado el
vino. Cuando la puerta está abierta, la humedad de la
habitación entra al refrigerador para bebidas. La humedad se
acumula más rápido cuanto más seguido se abre la puerta,
especialmente cuando la habitación está muy húmeda.
■¿Hay humedad? Es normal que se acumule humedad dentro
del refrigerador para bebidas cuando el aire está húmedo.
■¿Se ha ajustado el control correctamente de acuerdo con
las condiciones circundantes? Vea “Uso del control”.
Es difícil abrir la puerta
■¿Está la empaquetadura sucia o pegajosa? Limpie la
empaquetadura y la superficie que ésta toque. Frote una
capa delgada de cera de parafina sobre la empaquetadura
después de la limpieza.
La puerta no cierra completamente
■¿Están fuera de posición las rejillas o los estantes?
Coloque nuevamente las rejillas o los estantes en su posición
correcta. Vea “Uso del refrigerador para bebidas” para
obtener más información.
■¿Está la empaquetadura pegajosa? Limpie la
empaquetadura y la superficie que ésta toque. Frote una
capa delgada de cera de parafina sobre la empaquetadura
después de la limpieza.
ADVERTENCIA
Peligro de Explosión
Use un limpiador no inflamable.
No seguir esta instrucción puede ocasionar la muerte,
explosión o incendio.
ADVERTENCIA
Peligro de Explosión
Use un limpiador no inflamable.
No seguir esta instrucción puede ocasionar la muerte,
explosión o incendio.
Table of contents
Languages:
Other Maytag Kitchen Appliance manuals