manuals.online logo
Brands
  1. Home
  2. •
  3. Brands
  4. •
  5. MDC
  6. •
  7. Caravan
  8. •
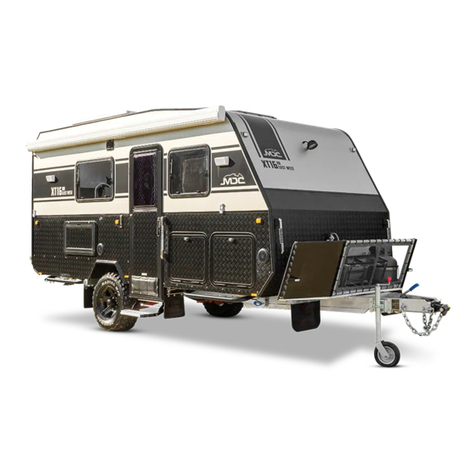
  9. MDC XT-17 User manual

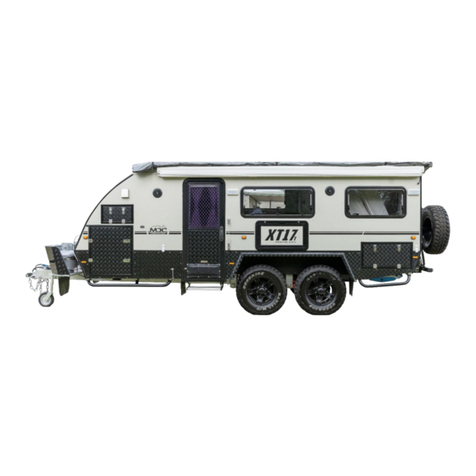
MDC XT-17 User manual

WIDE RANGE OF CAMPER trailers
STEP ThROUGh V4
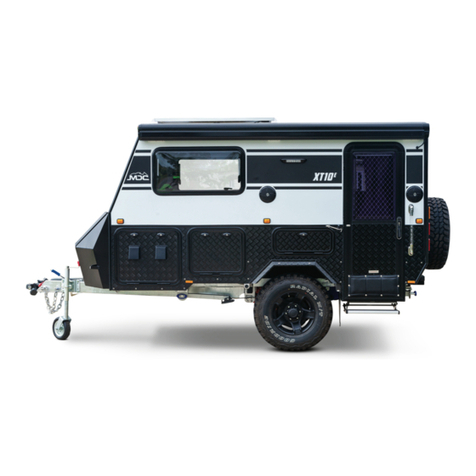
XT-10 EXTREME TERRAIN CARAVAN 10FT
$12,990*
ChASSIS & DRAWBAR WARRANTY ON SELECTED MODELS
1300 562 663
*showspecial:
*validonlywithordersplacedattheMackay,TownsvilleandCairns2014EXPO,s
d
market
direct
finance
DELIVERY AUSTRALIA WIDE
SEE MDC WEBSIE FOR DETAILS
rocket
gleno
robbo
STOCKCLEARANCE!
$10,000,000
MDCCAMPERTRAILERSANDOFFROADCARAVANS TOWNSVILLE
33Duckworth St,GarbuttQLD4814
Phone:1300494494
Ritzen M.
Michael P. mob: 0429 325 798
mob: 0437 713 340
NEW OPENING TIMES | MON-fri 8AM - 5PM | Sat 8AM - 12:30PM
Mick H.
Keith O.
Darren H.
Craig W.
mob: 0408 339 286
mob: 0458 554 473
mob: 0428 084 060
mob: 0422 656 122
NEW OPENING TIMES | MON-FRI 8AM - 5PM | SAT 8AM - 2PM | SUN CLOSED
Steve R.
Gary B. mob: 0428 084 056
mob: 0407 674 713
NEW OPENING TIMES | MON-FRI 9AM - 5PM | SAT 9AM - 3PM | SUN CLOSED
Matthew R.
Carolyn W.
Nathan G.
Stuart L.
mob: 0422 659 455
mob: 0458 454 598
mob: 0419 133 288
mob: 0457 721 943
NEW OPENING TIMES | MON-sat 8AM - 5PM | SUN 10AM - 2PM
Brad W.
Fernando B.
Tony H.
Chantel M.
mob: 0488 055 909
mob: 0458 444 534
mob: 0438 996 305
ph: 08 9240 1174
NEW OPENING TIMES | MON-FRI 8AM - 5PM | SAT 8AM - 1PM | SUN CLOSED
Kevin L.
David M.
Blake S.
Ross D.
mob: 0458 444 861
mob: 0439 296 157
mob: 0426 818 598
mob: 0458 445 517
NEW OPENING TIMES | MON-FRI 8AM - 5PM | SAT 8AM - 2PM | SUN CLOSED
Heath P.
Tyler D. mob: 0467 670 786
mob: 0408 353 021
OPENING TIMES | MON-fri 8AM - 5PM | Sat 8AM - 2PM
| SUN CLOSED
Ben
Mick H.
Keith
Darren
Michael B.
Craig
Tracey
Steve
Gary
Matt
Nathan
James
Carolyn
Kevin
David
Ross
Brad
Fernando
Tony
0448 759 740
0408 339 286
0458 554 473
0428 084 060
0408 320 194
0422 656 122
0408 339 286
0428 084 056
0407 674 713
0422 659 455
0419 133 288
0457 721 943
0458 454 598
0458 444 861
0439 296 157
0458 445 517
0488 055 909
0458 444 534
0438 996 305
NEW SOUTH WALES TEAM
VICTORIAN TEAM
ADELAIDE TEAM
WEST AUSTRALIAN TEAM
QUEENSLAND TEAM
Market Direct Camper Trailers reserves the right to alter any details of specifications and equipment without notice.
Details of specifications and equipment are also subject to change to suit local conditions and requirements.
No guarantee is given regarding the accuracy of information in this brochure. Trailers pictured and specifications detailed
may vary from models and equipment available in your area. Trailer body and colour might differ slightly from the pictures shown.
Please check model availability and full specification details with your nearest MDC dealer prior to ordering.
We are proud to be
an official Member of
the following Industry
Associations
PERTH SHOWROOM
44 Ledgar Road, Balcatta WA 6021
Tel: (08) 9240 1174
Email: [email protected]
Motor Dealers License #: MD24124
XT-17 MANUAL
OFF ROAD
CONTACT US
BRISBANE SHOWROOM
1/8 BoylandAvenue, Cooper Plains QLD 4108
Tel: (07) 3277 0198
Email: [email protected]
townsville SHOWROOM
33 Duckworth Street, Garbutt QLD 4814
Tel: 1300 494 494
Email: [email protected]
Sunshine coast SHOWROOM
1/1 Enterprise Street, Kunda Park QLD 4556
Tel: (07) 5476 7337
Email: [email protected]
SYDNEY SHOWROOM
297 Milperra Road, Revesby NSW 2212
Tel: (02) 9771 1088
Email: [email protected]
Motor Dealers License #: MD047506
ABN: 22 115 038 483
ADELAIDE SHOWROOM
1138 Port Wakefield Road, Burton SA 5110
Tel: (08) 8280 6110
Email: [email protected]
MELBOURNE SHOWROOM
43 Cooper Street, Campbellfield VIC 3061
Tel: (03) 8339 2621
Email: [email protected]
www.youtube.com.au/marketdirectcampers
www.facebook.com.au/marketdirectcampers
(1300 494 494) 2 (1300 494 494) 15
1300 4X4 4X4 1300 4X4 4X4
www.marketdirect.com.au www.marketdirect.com.au
INTRODUCTION
MDC Camper Trailers & Offroad Caravans is an Australian owned company that dedicates itself
to customer satisfaction and confidence in our products and services. We pride ourselves on
meticulously designing, engineering and manufacturing of caravans. Your comfort and safety
are foremost in the making of our quality products, which is why we can safely offer warranty
on all of our caravans. Full details of our warranty are enclosed.
Your owner’s manual has been designed to give you all the relevant information required to
operate and maintain your new XT17. This manual is a guide and relevant at the time of
production. For a full understanding of all of your working components please refer to the
individual manual’s supplied. Properly treated and maintained, your MDC product will give you
years of happy travelling.
Insurance
It is important that you protect yourself and others with insurance coverage for personal
liability, theft, collision and property damage. Please note that exceeding the load limit of your
XT17 above the manufacturers recommended maximum weight may invalidate your insurance
cover. Warranty information is within this Owner’s Manual.
Should you have any concerns or feedback we welcome you to contact us in any of the
following ways.
MDC Camper Trailers & Offroad Caravans
1/8 Boyland Avenue
Coopers Plains,
QLD, 4814
Phone: (07) 3277 0198
Em@IL: [email protected]
Kind Regards,
Vaughan Hindley
Managing Director
DEPARTURE CHECK LIST (GUIDE ONLY)
INTERNAL CHECK
Cupboard doors closed.
Plug in sink and shower.
Windows locked.
Table secured or stored away.
Shower door secured.
Mains – 12v isolation switch off.
EXTERNAL CHECK
Close valve on gas bottle.
Hot Water system cover on.
Close valve that drains shower and inside sink.
External shower cover fastened.
Disconnect gas at kitchen.
Secure refrigerator latches/catches.
Fold away stabilizer legs.
Door vent cover on.
SAFETY CHECK
Check safety chains attached.
Check lights, indicators and brake connections.
Check coupling security – ensure DO35 V2 is locked correctly.
Ensure jockey wheel is secured.
Release handbrake.
Lock camper door.
(1300 494 494) 2 (1300 494 494) 3
1300 4X4 4X4 1300 4X4 4X4
www.marketdirect.com.au www.marketdirect.com.au
CONTENTS
SET UP – OPERATION
∑Brake Controller – Hitch
∑Front Door
∑External Kitchen
∑Hot Water System
∑Filling Water Tanks
∑Stove/Oven/Grill
OPTIONS
∑Air Conditioner
ELECTRICAL SYSTEM
∑What Makes Up Your Electrical System
∑Operation Essentials
∑Main Switch Board 12v
∑240v Inverter
CHARGING YOUR BATTERIES
∑Vehicle
∑240v
∑Solar
∑Battery Voltage
∑General Tips
WARRANTY INFORMATION
∑Details
∑Claims
∑Warranty Limitations
∑Owners Responsibility
CARE & MAINTENANCE
∑General Care
∑Care For Your Van
∑Brakes & Bearings
DEPARTURE CHECKLIST
∑Before You Leave Checklist
DRIVING RECOMMENDATIONS (GUIDE ONLY)
INTRODUCTION
Some of the conditions that you may encounter during your travels can cause damage to your van if
you do not take appropriate actions. MDC has the following recommendation for some of these
conditions.
DIRT ROAD
Reduce speed and reduce all tyre pressures on both the van and vehicle to 25psi cold or if the tyres
are hot use 30psi. This will increase the tread area of the tyres and provide better road holding. You
will encounter fewer punctures and less vibration damage to both vehicles.
CORRUGATED DIRT ROAD
Reduce speed and reduce all tyre pressures on both the van and vehicle to 25psi cold or if the tyres
are hot use 30psi. This will increase the tread area of the tyres and provide better road holding. You
will encounter fewer punctures and les vibration damage to both vehicles.
SAND DRIVING
Reduce speed and reduce all tyre pressures on both the van and vehicle to 18psi. Try to drive on
harder sand, maintain the momentum of your vehicle while negotiating soft sand and stay in the
wheel ruts as they are usually harder than the soft sand. If your vehicle allows, select low range for
beach access and high range 4WD for hard sand driving. It is advisable to turn the brake controller
off as sudden stopping can bog the trailer.
RIVER CROSSINGS
Allow 20 minutes cooling of your bearings before river crossings. Always
check and regrease bearing after crossings as required.
(1300 494 494) 4 (1300 494 494) 15
1300 4X4 4X4 1300 4X4 4X4
www.marketdirect.com.au www.marketdirect.com.au
BRAKE CONTROLLER SETUP (GUIDE ONLY)
ROAD SETTING BRAKES
Drive off to about 20-30 KPH and brake to a halt, if the camper feels to be pushing the vehicle
then increase the setting on the controller. If the trailer is pulling up the vehicle quicker than
would be experienced without the trailer attached then reduce the setting on the controller.
Continue to test until the van is not influencing the braking of the tow vehicle.
PLEASE NOTE: This should only be carried out in a controlled safe environment..
WEARING IN THE BRAKES
As the trailer is new the brakes need to wear in. As this process occurs the brakes will become
more affective and the brake controller will need to be reset to bring the braking back to a less
aggressive response.
When the trailer is fully loaded with water and gear there can be a weight increase of up to 500kg,
depending on the model and options fitted. This means the brakes need to be adjusted at the
controller to increase the braking to compensate.
Always adjust the controller to try to achieve a neutral braking result for the tow vehicle, i,e. the
trailer is neither pushing nor pulling the tow vehicle while stopping.
OTHER REASONS TO ADJUST THE CONTROLLER
When travelling at high speed on dirt or tar roads we recommend increasing the brake
controller setting. This allows maximum braking in an emergency. You will have to adjust the
setting back to normal when your speed is reduced.
Sometimes the brakes will grab first time in the morning, this is due to moisture in the drums
that will soon dissipate. Back off the controller and slowly increase the setting while pressing
the brake pedal while driving away. Turn the brake controller down or off when driving on soft
sand as sudden braking can bog the vehicle and trailer. Hard sand driving can be done with a
normal setting.
When four wheel
driving the brake controller can be adjusted to suit the conditions. When travelling down a long
steep incline, select a lower gear and use the brake intermittently to reduce as much speed as
possible. Do not trail-brake or ride the brakes as this will overheat the brake components.
CARE AND MAINTANANCE (CONT)
HUBS & BRAKES
The bearing in the axle hubs when hot, maybe be subject to water ingress through the axle
seals if they are immersed in water for any period of time during a deep creep crossing. Prior to
long trips a qualified mechanic or approved service agent should carry out inspection and
maintenance of the brakes and hubs.
MAINTENANCE
Always check the hub temperatures at least twice a day, they should be warm to touch. If one
side is constantly hotter than the other then have them checked immediately by a mechanic.
When travelling on dirt roads check wheel nuts every morning before departure without fail, on
both tow vehicle and van. If
brakes or hubs become excessively noisy, hot or are grabbing, have them serviced by a
mechanic or a MDC branch. After water crossings, apply the brakes once on the track until
braking is normal or use the brake controller to dry out the linings. Always
check wheel bearing after water crossings.
SAFE JACKING
Park the trailer on firm and level ground.
Block the trailer tyres on the opposite side securely so that no forward or rearward movement is
possible. Jack up
the trailer directly under shock absorbers at lowest point on swing arm. Secure the
trailer on jack stands of adequate capacity front and rear.
(1300 494 494) 2 (1300 494 494) 5
1300 4X4 4X4 1300 4X4 4X4
www.marketdirect.com.au www.marketdirect.com.au
HITCHMASTER DO35 V2
COUPLING (Tips on how to)
∑Trailer should only be coupled (and uncoupled) on level ground.
∑Make sure the towing pin and universal is free of sand, dirt and foreign objects and is
lightly lubricated.
∑Raise the height of trailer coupling to be above the vehicle towing pin by adjusting the
jockey wheel.
∑Push and hold the lock button down, push the lock plate to full open position until the lock
button is able to spring back.
∑Align coupling over towing pin by moving either vehicle or trailer and lower.
∑Ensure that the universal is fully seated on the towing pin.
∑Push the lock button to release the plate into the locked position.
∑Assemble the dust cover by snapping in the back edge of the seal first and then pushing
down on the front. Dust cover will emit an audible snap when assembled correctly.
UNCOUPLING (Tips on how to)
∑Trailer should only be coupled and uncoupled on level ground.
∑Remove dust cover.
∑Push and hold lock button down, push the lock plate to full open position until the lock
button is able to spring back.
∑Raise height of trailer above vehicle towing pin by adjusting jockey wheel.
CARE AND MAINTANANCE
LOCKS AND SLIDES
All outside locks, hinges, drawer slides, fridge slides and key entry points require regular lubrication.
CARE OF THE BODY OF YOUR VAN
The body should be washed regularly with car wash to restore the original finish. If tar spots have
deposited on the van body, wipe over with a wet turps rag, leave for a half an hour and remove with a
dry rag then simple wash off residue with car wash. Never wash the body or door seals with a jet
washer as this will result in damage to your decals and seals. Extra care should be taken
when cleaning windows, do not use a harsh brush on these surfaces as the acrylic in the windows
may permanently scratch. Apply tyre shine to tyres and mud flaps to prevent
deterioration.
CARE OF BATWING AWNING CANVAS
The canvas awning will absorb stains and dust over time with use, but will tend to become more
pliable and also more waterproof. Canvas should be washed occasionally in clean water (DO NOT
USE BORE WATER OR DETERGENT). Allow to dry thoroughly in the sun before being packed
away. Remove any bird droppings as soon as they occur, as this will damage the proofing. This is
often difficult on holidays so do this when you return home. Use a sponge to remove stains not a
brush. Do not scuff the canvas, as this will damage the proofing. Proofing can be restored using a
spray on proofing available from camping stores.
NOTE: CARE MUST BE TAKEN DURING TIMES OF HIGH WIND AS DAMAGE CAN BE DONE TO
THE AWNING AND ANNEX.
CARE OF OUTDOOR KITCHEN
Your stainless steel kitchen unit has been manufactured to give you years of use. We suggest you
use a high quality stainless steel cleaner which are widely available through appliance stores.
SUSPENSION – INDEPENDENT COIL SPRING
Your XT17 has been fitted with a high quality fully independent coil spring suspension. This unit is
virtually maintenance free, however over time the front control arm urethane bushes may wear and
produce uneven tyre wear. The suspension bushes have grease nipples and should be greased after every long
trip.
SHOCK ABSORBERS
The top and bottom shock absorber bolts are subject to wear as this is a moveable joint that takes all
the pressure of the suspension over all terrain. These two bolts should be removed and greased with
Graphite grease before and after major trips. If they show wear then replace the bolts and nuts then
tighten. CAUTION: After major trips, the bottom shock absorber bolts should be removed and the
shock absorber fully extended and fully compressed to check that it is still firm through its full length
of travel. If need be the shock absorber should be replaced and all bolts fitted and re tightened.
TYRES
The tyre pressure should be checked before and during major trips and kept at approximately 38-
40psi. Always check spare tyre pressure when possible and especially before major trips. Uneven
tyre wear may indicate incorrect tyre pressure or worn suspension. Sand driving should be done on
about 18psi and when travelling over corrugations tyre pressure should be dropped to 25psi cold or
30psi hot.
(1300 494 494) 6 (1300 494 494) 15
1300 4X4 4X4 1300 4X4 4X4
www.marketdirect.com.au www.marketdirect.com.au
SETTING UP
GENERAL
Try to choose a site where your XT17 can be situated so that the ground is even. This allows for
correct adjustment of the van and Batwing annex.
If adjustment is necessary across the width of the van, drive the downhill wheel up onto a chock prior
to detaching the camper from the vehicle, this will make sleeping more comfortable. It is advisable to
use a small spirit level to ensure the van is level. After removing the van from the vehicle, wind the
jockey wheel handle up or down to level out the van. Once the van has been levelled, lower down the
front and rear stabiliser legs and adjust to support the van.
FRONT DOOR
To separate the door to utilize the security screen, please latch the door to caravan. Hold the inside
handle, lift up and at the same time pull the two doors apart.
There is a gas safety vent located at the bottom of the caravan door, which has a dust cover fitted as
standard. Upon entry to the caravan it is an absolute must that you remove the dust cover before
using any internal gas operated components. Please stow the dust cover away in a safe spot.
SETTING UP THE EXTERNAL KITCHEN
Unlock the kitchen door and open by pushing the latch button to release the locking mechanism.
Release the kitchen retaining spring bolt and pull out kitchen until it is stopped by the slide stops.
Open the glass cook top when ready to use (an external ignition source is needed to light the gas
burners). Attach the gas hose to the quick bayonet fitting which is located under the kitchen attached
to the body of the caravan. After that connect the stainless steel braided gas hose to your 9kg gas
cylinder found at the front of the caravan. To turn the gas on at the bottle, turn handle ¼ - ½ turn.
This allows for quick shut off in an emergency, yet still supplies adequate gas pressure.
Depending on your set up you may run a food waste hose from the kitchen sink or place a container
under the sink.
HOT WATER SYSTEM
NOTE: Before using any internal gas operated components, it is an absolute must that the
dust cover be removed from the gas safety vent located at the bottom of the caravan door.
To ignite the heater, turn on the gas at the gas bottle on the front of the van, ¼ to ½ a turn is enough.
Remove the outside air vent panel, go inside and press the ignition switch on the hot water heater
panel to the desired temperature (up for 60 degrees or down for 70 degrees). This can be located at
the foot of the bed. If the red light comes on the ignition switch, switch to off and confirm that you
have turned on the gas at the gas bottle on the front of the caravan and opened the outside air vent
panel. Occasionally an airlock in the gas line may occur after a gas bottle is replaced and may take
some time to clear. If this occurs, try lighting the kitchen stove as this tends to help bleed the air out
of the system (continue to try to ignite the heater). The system can be left on and will continue to
keep the water hot however it is advisable to switch off the heater and gas at the bottle before going
to bed, or when leaving the caravan unattended. The gas and hot water system MUST be turned off
and air vent MUST be secured before travelling.
WARRANTY REPAIRS/REPLACEMENT (CONT)
SUPPLIED COMPONENTS
Some of the materials and components used in the manufacture of the camper
trailer/caravan are not manufactured by MDC and are not covered by this warranty. Instead,
they are separately warranted by their individual manufactures warranty against defects.
Please note that the length of the warranty period provided for the supplied components and
their terms may vary depending on the product.
All relevant warranties and owner’s manuals will be supplied at the point of handover.
OWNERS RESPONSIBILITY
This warranty does not apply to maintenance items which are the responsibility of the owner.
The maintenance items include but are not limited to.
∑General servicing in accordance with MDC’s instructions.
∑Suspension servicing.
∑Wheel bearing servicing and adjustment.
∑Checking tyre pressures.
∑General greasing and tightening of components.
∑Rust proofing, painting and maintenance of painted and exposed surfaces.
Proper maintenance and use will guard against major repair expenses resulting from misuse,
neglect or inadequate maintenance.
The owner must ensure all maintenance and servicing required is performed within the
instructed time period as per the service schedule. It is the responsibility of the owner to
maintain a mileage log book for their camper trailer/caravan.
SERVICE SCHEDULE FOR YOUR CAMPER TRAILER/CARAVAN
The camper trailer/caravan will require a service every 10,000km.
(1300 494 494) 2 (1300 494 494) 7
1300 4X4 4X4 1300 4X4 4X4
www.marketdirect.com.au www.marketdirect.com.au
SETTING UP
FILLING THE WATER TANKS
Insert the hose (without any plastic fittings attached) into the filler and push it down inside the
filler neck tube. Initially this can be difficult to position.
Turn the tap on part way, if you try and fill the tank too quickly the air cannot escape. Water will
back up in the filler neck and bubble out, leading you to believe the tank is full which may not be
the case.
THETFORD STOVE/OVEN/GRILL
NOTE: Before using any internal gas operated components, it is an absolute must that
the dust cover be removed from the gas safety vent located at the bottom of the caravan
door.
USINING THE HOB BURNERS:
∑Ensure gas supply is connected and turned on.
∑Push in the control knob and turn anticlockwise to full rate – large flame.
∑The burner can be ignited by depressing the ignition button located on the fascia.
∑After the burner is lit continue depressing the knob for approximately 10 - 15 seconds.
∑Release knob and turn to required heat setting.
∑If burner has not lit within 15 seconds, release knob and wait at least 1 minute before
repeating point 2 to 5.
∑To turn off, rotate the control knob until the line on the knob is aligned with dot on the
control panel.
USING THE OVEN:
∑Ensure gas cylinder/supply is connected and turned on.
∑To light: Open door, push in the control knob and turn to full rate (Gas Mark 9, 240°C). The
burner can be ignited by depressing the ignition button located on the fascia. Ignition
must be carried out with the door open, and if the burner has not lit within 15 seconds
the control knob should be released and the oven left for at least 1 minute before a
further attempt to ignite the burner.
WARRANTY REPAIRS/REPLACEMENT
If a defect appears in MDC’s manufacture or assembly of the camper trailer/caravan before the end
of the warranty period and MDC finds the camper trailer/caravan to be defective in materials or
workmanship, MDC will in its sole discretion either:
∑Replace or repair the camper trailer/caravan or the defective part of the camper trailer/caravan
free of charge.
∑Have the camper trailer/caravan or the defective part be replaced or repaired by a licenced
repair agent free of charge.
MDC reserves the right to take ownership of all replaced parts. MDC will not reimburse any
payments made for work done or replaced parts done through an unauthorized repairer without
prior written consent from MDC.
MDC reserves the right to replace defective parts of the camper trailer/caravan with parts and
components of similar quality and grade where an identical part or component is not available.
Goods presented for repair may be replaced by refurbished goods of the same type rather than
being repaired.
WARRANTY LIMITATIONS
This warranty will not apply where:
∑The camper trailer/caravan has been used in way for which it was not designed or intended
to be used.
∑The camper trailer/caravan has been modified or changed since its original supply by
someone other than MDC or without written approval by an MDC representative.
∑The camper trailer/caravan has been loaded above its maximum weight capacity as
indicated on the individual VIN plate.
∑The camper trailer/caravan fails due to an accident, theft, abuse, neglect or misuse.
∑The camper trailer/caravan is defective or fails as a result, directly or indirectly of the
owners failure to maintain or service in accordance with MDC’s instructions.
∑The camper trailer/caravan has been cleaned using inappropriate cleaning
procedures/chemicals.
∑The alleged defect in the camper trailer/caravan is within acceptable industry variances.
∑MDC cannot establish any fault in the camper trailer/caravan after testing and inspection.
∑The camper trailer/caravan has been used as a permanent residence or for commercial
purposes.
∑The defect has arisen due to the owners request to customise the camper trailer/caravan.
∑Unauthorised parts or accessories have been used on or in relation to the camper
trailer/caravan.
∑The camper trailer/caravan has been used after a defect has become apparent.
This warranty does not extend to:
∑Batteries.
∑Stone damage to the body and chassis.
∑Damage or defects caused by creek crossings, flooding and other similar conditions.
∑Damage or defects caused by normal wear and tear, including impact or stone damage.
∑Damage or defects caused by excessive speed, failure to lower tyre pressure or hard
impact.
∑Damage to canvas and awnings due to condensation and moisture being left untreated.
(1300 494 494) 8 (1300 494 494) 15
1300 4X4 4X4 1300 4X4 4X4
www.marketdirect.com.au www.marketdirect.com.au
AIR CONDITIONING OPTIONS
DOMETIC FRESH JET FJ2200 AIR CONDITIONER
This reverse cycle model features a Soft-start, for reduced current draw during start up. Ideal for generator
running or in situations where current supply is restricted. Complete with a new stylish air distribution box
(ADB), the Fresh Jet ADB comes with four way vents, so air can be directed to where you want it. The ADB also
has 12 volt LED ambient lighting fitted, which is operated via the remote control.
Features:
∑Remote control.
∑Low current draw.
∑Timer function.
∑Will operate on most premium brand inverter type generators of 2000watts and above.
WARRANTY INFORMATION
VH & MG Imports PTY LTD trading as MDC Camper trailers & Offroad Caravans provides the
following warranty in relation to its camper trailers and caravans.
The benefits of this warranty are in addition to any rights and remedies imposed by Australian
State and Federal legislation that cannot be excluded. Nothing in this warranty is to be
interpreted as excluding, restricting or modifying any state or federal legislation applicable to the
supply of goods and services which cannot be excluded, restricted or modified.
Please take the time to read the owner’s manual to ensure that you are familiar with the camper
trailer/caravans operation and service procedures.
WARRANTY
MDC warrants, subject to the exclusions and limitations below. Five year structural and chassis
warranty with a twelve month warranty on all other components from the date of delivery. This
warranty is not transferable to a subsequent owner if the camper trailer/caravan is sold by the
original owner during the warranty period unless otherwise agreed to by MDC in writing.
WARRANTY CLAIMS
If a fault covered by warranty occurs, the owner must first contact MDC. Any warranty claim
must be accompanied by:
∑Proof of purchase.
∑Full details of the alleged defect.
∑Appropriate documentation and service records.
The owner must make the camper trailer/caravan available to a MDC branch or a licenced
repair agent for inspection and testing. If such inspection and testing finds now defect in the
camper trailer/caravan, the owner must pay MDC or the licenced repair agent’s usual costs of
service work and testing.
The owner must bear the cost of the transport of the camper trailer/caravan to and from MDC or
the licenced repair agent to make the warranty claim.
(1300 494 494) 2 (1300 494 494) 9
1300 4X4 4X4 1300 4X4 4X4
www.marketdirect.com.au www.marketdirect.com.au
AIR CONDITIONING OPTIONS
SPARROW MK4 AIR CONDITIONER
The Sparrow reverse cycle heat pump roof top air conditioner is a lightweight rooftop style unit.
The Sparrow provides both heating and cooling as well as filtered and dehumidified air.
Its lightweight design makes it suitable for a range of applications that the bigger units are
unable to achieve.
Features
∑Compact Dimension
∑The refrigerator heat pump operation produces up to 70% more heat than element type
units
∑Ultra-low profile ensures less drag when towing and greater clearance under your carport
or garage
∑Automatic de-ice setting for low ambient heating operation.
∑Remote control
GENERAL TIPS
NEVER try to use the inverter output to plug in the 240volt battery charger the current draw is to large
and it is self-defeating (you are taking power from the battery set to charge the battery set).
If too many 240volt appliances are attached to the 240volt outlet you may trip the circuit breaker. If
this occurs reduce the number of appliances and re -set the circuit breaker.
If you plug in a faulty 240volt appliance it will trip the circuit breaker. Remove the appliance and have
it checked by a licensed electrical repairer.
If you plug in a faulty 12-volt appliance it will trip the appropriate circuit breaker in the main control
box. Remove the appliance and have it checked by a licensed electrical repairer. To reset any of the
12-volt circuit breakers push the button in on the appropriate circuit.
It is recommended that you test your LPG alarm once a week to ensure the detector is working
correctly. Refer to the gas detector manual for a more comprehensive understanding of the unit.
All lights both internal and external are LED type so only replace with a similar LED globe.
Your caravan may have the Fusion sound system installed. It is fitted with a USB inlet so you can
play songs etc. from your smart phone through the USB or tune into local radio stations.
When the caravan is not in use the main switch should be set to "OFF" and all 12 volt switches
turned to "OFF".
It is recommended that you attach 240volt power via the 15 AMP inlet and recharge the battery set
every month. AGM batteries that are left in a low charge state for a prolonged period may not recover.
If you are using an external 240-volt generator it can be plugged into the 15 amp 240volt inlet.
Make sure your generator is compatible with the 240-volt system. If unsure seek professional advice.
For a more comprehensive understanding on any of the listed components, please refer to the
individual product user manuals provided with your caravan.
(1300 494 494) 10 (1300 494 494) 15
1300 4X4 4X4 1300 4X4 4X4
www.marketdirect.com.au www.marketdirect.com.au
ELECTRICAL SYSTEM
WHAT MAKES UP YOUR ELECTRICAL SYSTEM?
12V DC System Components:
∑3 x 100AH AGM Deep Cycle Batteries
∑Tekonsha Trailer Break Away System
∑200A Main Circuit Breaker
∑Powertech 40A 240V Battery Charger
∑DC-DC Battery Charger (chargers may vary in caravan models)
1. “Powertech” 40A DC-DC Charger
2. “Projector DC20” 20A DC-DC Charger
3. “Projector IDC25” 25A DC-DC Charger Inc. Built In Solar Controller
∑Powertech 1000W (Continuous) 240V AC Inverter
∑Main switchboard with 6 (XT12/12DB) or 8 (XT17) individually switched circuits each with its
own circuit breaker
∑LPG Gas Detection Alarm
∑Fusion MS-RA20 Marine Head Unit with FM/AM & USB Audio inc. 2 x 6" Marine Grade
Speakers
∑Optional: Dometic or Sparrow 240V Air Conditioner
∑Optional: 3 x 100W Monocrystalline Solar Panels
240V AC System Components:
∑15A 240V AC Inlet
∑16A RCDMCB Circuit Breaker
∑2 x Double Socket Outlets 10
ELECTRICAL SYSTEM
BATTERY VOLTAGE
The battery pack capacity is determined by your appliance usage, both 12 volts (eg: LED lights)
and 240volt consumption from the inverter.
There is a voltmeter and an amp meter in the main switch box.
If using the Powertech DC to DC Boost Charger (MB 3691), the voltage on the gauge is the
battery voltage and will go up when charging to;
14.6 volts in "BULK" and "ABSORBTION" mode and 13.5 volts in "FLOAT” mode,
Alternatively, if you’re using the Projector DC20 or Projector IDC25
The battery voltage will read as follows;
14.4 volts "BULK" and "ABSORBTION" mode and 13.7 volts in "FLOAT” mode.
These are the correct voltages for the battery as recommended by the supplier.
Directly beneath the voltmeter is the amp meter, the amp meter shows the total current draw of
ALL appliances from the battery pack.
The battery should be recharged as soon as possible after heavy discharge.
(1300 494 494) 2 (1300 494 494) 3
1300 4X4 4X4 1300 4X4 4X4
www.marketdirect.com.au www.marketdirect.com.au
ELECTRICAL SYSTEM
MAIN SWITCHBOARD 12V
On the main switchboard there is a main rotary switch labelled "ON" and "OFF".
This switch controls the 6 (XT12) or 8 (XT17) individually switched and fused 12-volt DC circuit
breakers for the caravan’s accessories. The function of each circuit is clearly labelled on the
switch panel.
Flip the required switch to "ON" and that circuit is now working. There is an LED in each switch
so you can easily see what circuits you have switched on.
Only switch on what circuits you need as switching on all circuits and not using them is
consuming precious power supply.
If you are travelling with a portable fridge in the front compartment of XT12 model make sure
you have the "DC OUTLET" switch "ON" make sure you turn the main switch "ON”.
If you are travelling with the installed Ventrifigo fridge AND a portable fridge in the front
compartment. Make sure you turn on both "REFRIGERATOR" and "DC OUTLET" and make
sure you turn the main switch "ON".
NOTE: The LPG gas detector is wired directly to the rotary switch in the "ON" position
and is protected by a 3 Amp fuse located near the Gas detector. As soon as you turn on
the rotary switch the gas detector will sound an audible self-test for approximately 5
seconds and will then stop and the green LED will be on and the detector operational.
The LPG gas detector will come in caravans after November 2015.
240V INVERTER
The Powertech 1000W inverter takes 12-volt power from the battery pack and convert it to 240V
AC power with a capacity of 1000 watts. It is protected internally as well as by a resettable
circuit breaker on the main control box and is marked "Inverter" You can use it to power 240volt
appliances that have a total power draw of 1000 watts. As there are two outlets and the total
draw on BOTH outlets should not exceed 1000watts continuously. The inverter is a modified
Sine wave device and as such you should check the suitability of your appliances.
Refer to the inverter owner’s manual for a more comprehensive understanding of the unit and
its options.
This unit comes with two additional RCD's that plug into the 3 pin plugs on the inverter.
RCDs (residual current devices), also commonly called safety switches, are designed to cut the
power in a fraction of a second in the event of a fault condition, thereby preventing
electrocution.
The unit has a test and reset function and is rated to 10A
ELECTRICAL SYSTEM
240V
Another option when charging your battery system is to utilize 240V power. Ideal for when your
caravan is at home or on a powered camp site. To get the 240V charging process started you will
need to connect a 240V 15Amp power lead to your 240V inlet – the inlet can be located at the front of
the caravan on the drivers’ side panel. This will provide the power to your Powertech Battery Charger.
To ensure you are transferring this power through to your batteries check that the main switch on the
battery charger is turned "ON" – switch can be located at the bottom of the charger. If it is turned
"OFF" then no power will flow to the battery set.
There are 5 "dip" switches located on the charger, the dip switches have different combinations to
suit different battery types. From the factory your caravan will have ‘AGM’ batteries installed,
therefore you will need to make sure the dip switches are set to ‘2’ and ‘5’. In the Powertech battery
charger manual there are range of dip switch settings for different battery types.
Turn on the power switch, the "POWER ON" LED lights up. This indicates the device is ready for
charging. The "BULK" LED will then light up, meaning the battery charger is beginning at the first
stage of charging.
The first stage is to ensure battery is always charged at the maximum charging condition. This is to
boost up the charging cycle and particularly to wake up a weak battery to absorb energy.
After 10-20 mins the charger will switch to the second stage, the "BULK" LED remains ON, the
battery is charged at the maximum current to the battery.
At the third stage the charger will switch to "ABSORBTION" mode and the red LED goes out and the
yellow LED lights up. The charger is delivering constant voltage to the battery at reduced current.
At the fourth stage, the battery has been charged to about 90% of its rated capacity. The "ABSORBTION" LED
goes out and the "FLOAT" LED lights up. The charging current is decreased and the charging voltage is held at a
constant level. Battery is now under "FLOAT" constant charging.
The system is protected by an external 60amp fuse marked "Battery Charger".
SOLAR
When you are in a remote area with no 240volt supply available the solar panels will provide power to
the battery pack (and the breakaway battery). The rate of charge is dependent upon the available
sunlight and your use of appliances.
The solar controller is there to regulate the charge coming from the solar panels to ensure there is no
damage done to the batteries.
(1300 494 494) 4 (1300 494 494) 15
1300 4X4 4X4 1300 4X4 4X4
www.marketdirect.com.au www.marketdirect.com.au
ELECTRICAL SYSTEM
CHARGING YOUR BATTERIES
There are several different steps you can take to charge your XT battery system:
VEHICLE
(DC Charger may vary in your caravan, there are instructions outlined for each model)
Powertech DC to DC Boost Charger (MB 3691)
When your car is attached to the trailer and the Anderson plug is connected to your car, power comes
from your car through the Anderson plug and into the Powertech DC to DC Boost Charger (MB
3691) which monitors the voltage and makes compensation to ensure your battery pack (and the
break- away battery) is receiving the correct charging parameters. The main switch on the DC to DC
charger must be turned "ON" for the charger to provide charging voltage to the battery set. If it is
turned "OFF" then no power will flow to the battery set. There are 5 "dip" switches which are factory
set to 2 and 5 "on".
Turn ON the Power switch, the “POWER ON” LED lights up, this indicates the device is ready for charging. The
smart DC-DC boost charger will perform the four stage charge automatically The “BULK” LED lights up. This
means the battery charger is beginning at the 1st stage of charging.
The 1st stage is to ensure battery is always charged at the maximum charging condition.
This is to boost up the charging cycle and particularly wake up a weak battery to absorb energy.
After 10-20 mins, the charger will switch to 2nd stage, the “BULK” LED remains ON and the battery is charged
at the maximum current to the battery.
At the 3rd stage, the charger will switch to “ABSORPTION” mode, the red LED goes out and the yellow LED
lights up. The device is delivering constant voltage to the battery with reduced current.
At the 4th stage, the battery has been charged to about 90% of its rated capacity. The “ABSORPTION” LED goes
out and the “FLOAT” green LED lights up. The charging current is decreased and the charging voltage is held at
a constant level. Battery is now under “FLOAT” constant charging.
The system is protected by an external 60amp fuse marked "Anderson".
ELECTRICAL SYSTEM
Projector DC20
Battery charger that is NOT fitted with an on /off switch. Simply plug in the Anderson plug to your tow
vehicle and the projector DC20 does the rest. It is protected on the input side by a 40-amp fuse marked
"Anderson" and on the outlet side a 25-amp fuse located near the battery terminal in the battery box
marked "Anderson". This unit is also internally fused in case of reverse polarity on both input and output
sides. The projector DC20 uses a 3 stage charging system mainly "BULK", "ABSORBTION" and finally
"FLOAT", to ensure your battery is kept in fully charged state.
The system is protected by an external 60amp fuse marked "Anderson".
Projector IDC25
Combined DC to DC charger and solar controller. The IDC25 constantly checks between the solar input
and the car input and always selects solar if there is enough voltage being produced otherwise it selects
the car output or a combination of both car and solar input. The projector IDC25 uses a 3 stage charging
system mainly "BULK", "ABSORBTION" and finally "FLOAT", to ensure your battery is kept in fully charged
state. It has a panel that shows if solar or alternator is supplying the battery charge current. With the
solar part of the controller you can fit a maximum of 4 of the solar panels 100 watts per panel. Our
standard fitment is 3 solar panels. There is no “ON “or “OFF” switch on the IDC 25.
The IDC25 also has battery temperature monitoring so that the correct charge rate can be matched to
the battery temperature. It has a LED array that is easily understood, the system is protected by an
external 60amp fuse marked "Anderson".
The projector IDC 25 is designed for modern vehicles fitted with “SMART” alternators but will
work just as well with older vehicles. The only thing necessary for cars fitted with “SMART”
alternators is that the blue (ignition) wire from the controller needs to go to pin 12 (auxiliary) on
the 12 pin plug. This is something you should have previously organized with your local Auto
Electrician.
All caravans will soon be fitted with the 12 pin plug as standard. Pin 11 is wired to the
breakaway battery for in car monitoring of breakaway battery voltage (NSW requirement only)
and pin 12 the IDC25 ignition on wire.
Vehicles in states where the battery monitoring is not required and they don’t have smart
alternators fitted to their vehicles will not require their vehicle to have these features wired into
their vehicles.

Other MDC Caravan manuals

MDC EXPLORER 2021 User manual

MDC

MDC EXPLORER 2021 User manual

MDC FORBES 15+ 2021 User manual

MDC

MDC FORBES 15+ 2021 User manual

MDC XT13 2021 User manual

MDC

MDC XT13 2021 User manual

MDC XT12 Assembly instructions

MDC

MDC XT12 Assembly instructions

MDC Forbes11TB Assembly instructions

MDC

MDC Forbes11TB Assembly instructions

MDC XT11E Assembly instructions

MDC

MDC XT11E Assembly instructions

MDC XT16-HR East West 2019 Assembly instructions

MDC

MDC XT16-HR East West 2019 Assembly instructions

MDC XT16HR EAST WEST 2021 User manual

MDC

MDC XT16HR EAST WEST 2021 User manual

MDC XT17T 2022 User manual

MDC

MDC XT17T 2022 User manual

MDC XH 2021 User manual

MDC

MDC XH 2021 User manual

MDC XT16HR EAST WEST 2022 User manual

MDC

MDC XT16HR EAST WEST 2022 User manual

MDC XT16-HR East West Assembly instructions

MDC

MDC XT16-HR East West Assembly instructions

MDC XT17-HRT User manual

MDC

MDC XT17-HRT User manual

MDC XT12DB 2021 User manual

MDC

MDC XT12DB 2021 User manual

MDC XT13 User manual

MDC

MDC XT13 User manual

MDC XT15-PT Assembly instructions

MDC

MDC XT15-PT Assembly instructions

MDC XT16-HR East West User manual

MDC

MDC XT16-HR East West User manual

MDC XT16-HR Island Assembly instructions

MDC

MDC XT16-HR Island Assembly instructions

MDC XT16HR Series User manual

MDC

MDC XT16HR Series User manual

MDC CRUIZER HIGHSIDE 2021 User manual

MDC

MDC CRUIZER HIGHSIDE 2021 User manual

MDC 15 Year Anniversary Edition XT 10E User manual

MDC

MDC 15 Year Anniversary Edition XT 10E User manual

MDC JACKSON 2021 User manual

MDC

MDC JACKSON 2021 User manual

MDC XT16HR ISLAND 2022 User manual

MDC

MDC XT16HR ISLAND 2022 User manual

MDC XT16-HR East West User manual

MDC

MDC XT16-HR East West User manual

Popular Caravan manuals by other brands

Ausrv X13 2021 owner's manual

Ausrv

Ausrv X13 2021 owner's manual

Jayco JAY SERIES owner's manual

Jayco

Jayco JAY SERIES owner's manual

Swift Sprite Alpine 2 Technical handbook

Swift

Swift Sprite Alpine 2 Technical handbook

manuals.online logo
manuals.online logoBrands
  • About & Mission
  • Contact us
  • Privacy Policy
  • Terms and Conditions

Copyright 2025 Manuals.Online. All Rights Reserved.