Storyteller Overland Mode 4x4 User manual


WELCOME TO MODElife!
We know you have a lot of options available to you these days, so we
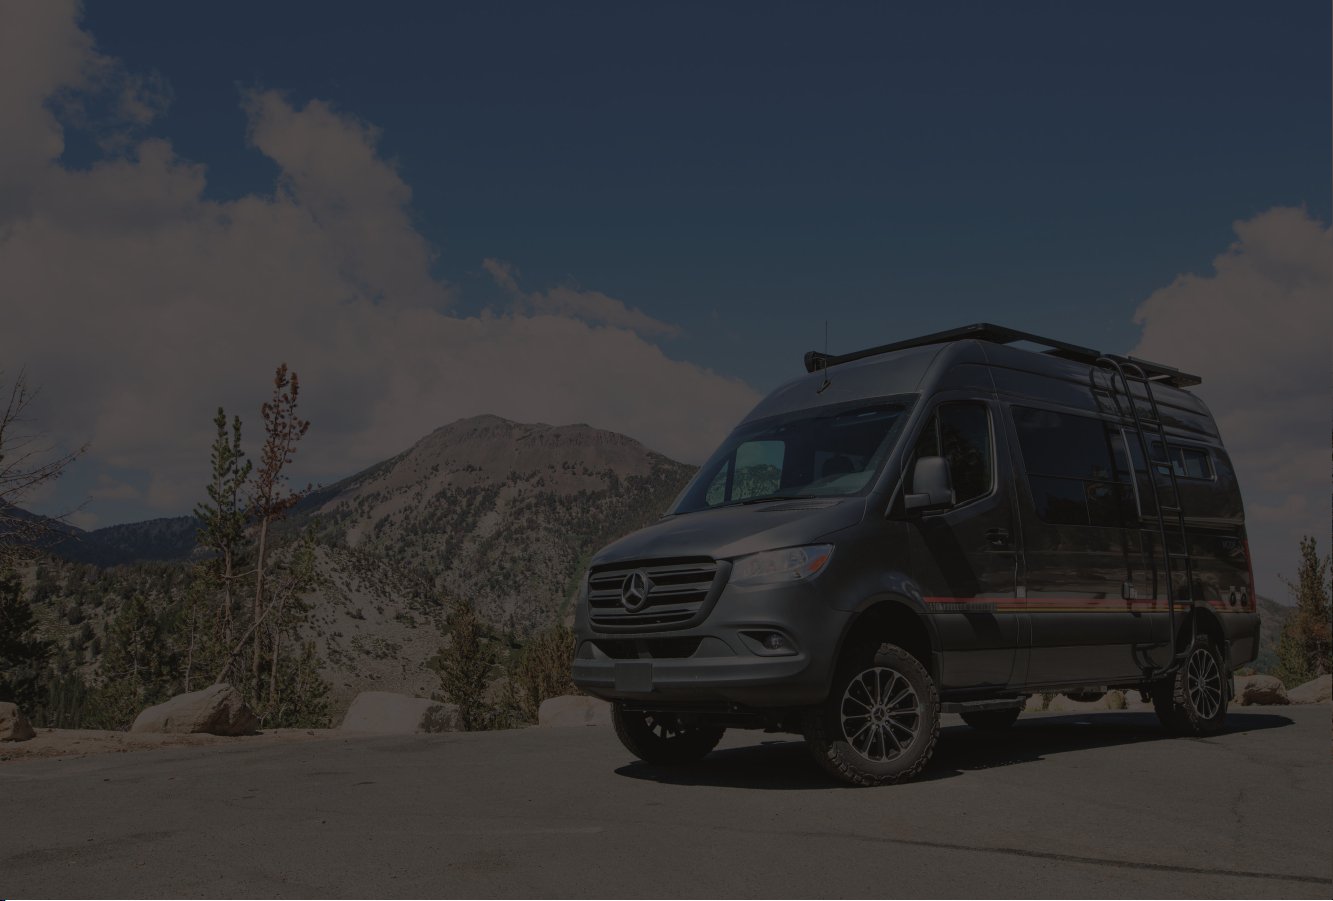
are grateful you have chosen the Storyteller Overland MODE4x4™
adventure van as your preferred getaway vehicle for a more adventurous
life out on the open road and beyond!
Before we discuss the key features and functions of your new vehicle,
let’s talk a little bit about the Core Values that drive the design,
engineering, craftsmanship, and overall experience of the MODE4x4.
Our approach throughout the entire process of creating and
manufacturing the MODE4x4 has been to deliver you an adventure-
ready vehicle that is… Safe, Simple, Fun, Flexible, Rugged, and Ready
to Go at all times!
What these core values mean to us is that we believe your experience
with all things MODElife should be…
SAFE
You and your passengers can rest in the knowledge that your MODE4x4
has been designed and engineered with seating and onboard power and
mechanical systems that are fully tested and compliant with all relevant
FMVSS, DOT, NHTSA safety regulations and has been manufactured in
accordance with best practices for our industry to meet or exceed the
rigorous RVIA certication and related OEM body builder standards.
SIMPLE
Your MODE4x4 features an uncomplicated, uncluttered, intuitive design
that makes it easy for you to get into whatever MODE of travel, camping,
exploring, etc… you are going for with the fewest hassles possible.
FUN
At its heart, the Storyteller Overland MODE4x4 is meant to provide you
and your crew with endless hours and many years of pure enjoyment out
on the open road and beyond.
FLEXIBLE
The MODE4x4 is not a “one-trick pony”! We know our customers have demanding lives, and they need their vehicle to rise to the challenges
that come along with being a daily driver, a weekend warrior, and a long-range traveler. Whether you are road tripping across the country with
your family, camping off-grid in the wild with your crew, or just ying solo for a quick “urban adventuring” grocery store run across town…
The MODE4x4 is meant to be your getaway vehicle of choice to help you ex between all aspects of a life fully lived.
RUGGED
We know life on the open road and beyond can get a little messy at times. That’s why we build the MODE4x4 on the innitely capable
Mercedes Benz Sprinter® 2500 4x4 144 chassis and then obsessively hand select only the highest quality components and materials for use
in our vehicles to ensure that each one will fully withstand the rigors of the open road for years to come. The on-demand 4WD capabilities
of the MB Sprinter 4x4 chassis can help carry you farther. The M-Power automotive-grade lithium power system (powered by Volta) can keep
you off-grid for longer without the need for a noisy, smelly generator. And the thoughtful design, quality craftsmanship, and resilient materials
incorporated throughout every aspect of your vehicle can endure just about anything you can put it through.
READY TO GO
And nally, we feel that your MODE4x4 should be ready to perform and keep its promise for you out on the open road or in the wild on a
moment’s notice. So we have made every effort to ensure that all of our onboard systems and components are easy to maintain and are readily
serviceable by qualied technicians. Furthermore, we have built out a nationwide dealer, service, and mobile support network to provide you
expert care in the eld if something does go wrong with your vehicle while you are traveling.
But we have even gone one step beyond that. To ensure that you feel completely condent in the full range of capabilities for your MODE4x4
vehicle at all times, we have developed an exclusive MODElife™ Customer Care App (Powered by RightRV) that gives you round the clock
access to self-help tips & tricks, user guides, FAQs and a host of other helpful resources to guide you through the key features and functionality
of your MODE4x4 at your own pace. You can also use the MODElife app to schedule a tech support or warranty conversation via text, talk, or
video conference directly with our customer care and user experience team at a time that best suits your schedule.
So there you have it! These are the core values that drive our thinking in the development of each and every aspect of your MODE4x4. We are
grateful that you have given us the opportunity to serve you and your crew, and we look forward to seeing you…
Live free, explore endlessly, and tell better stories out on the open road and beyond!
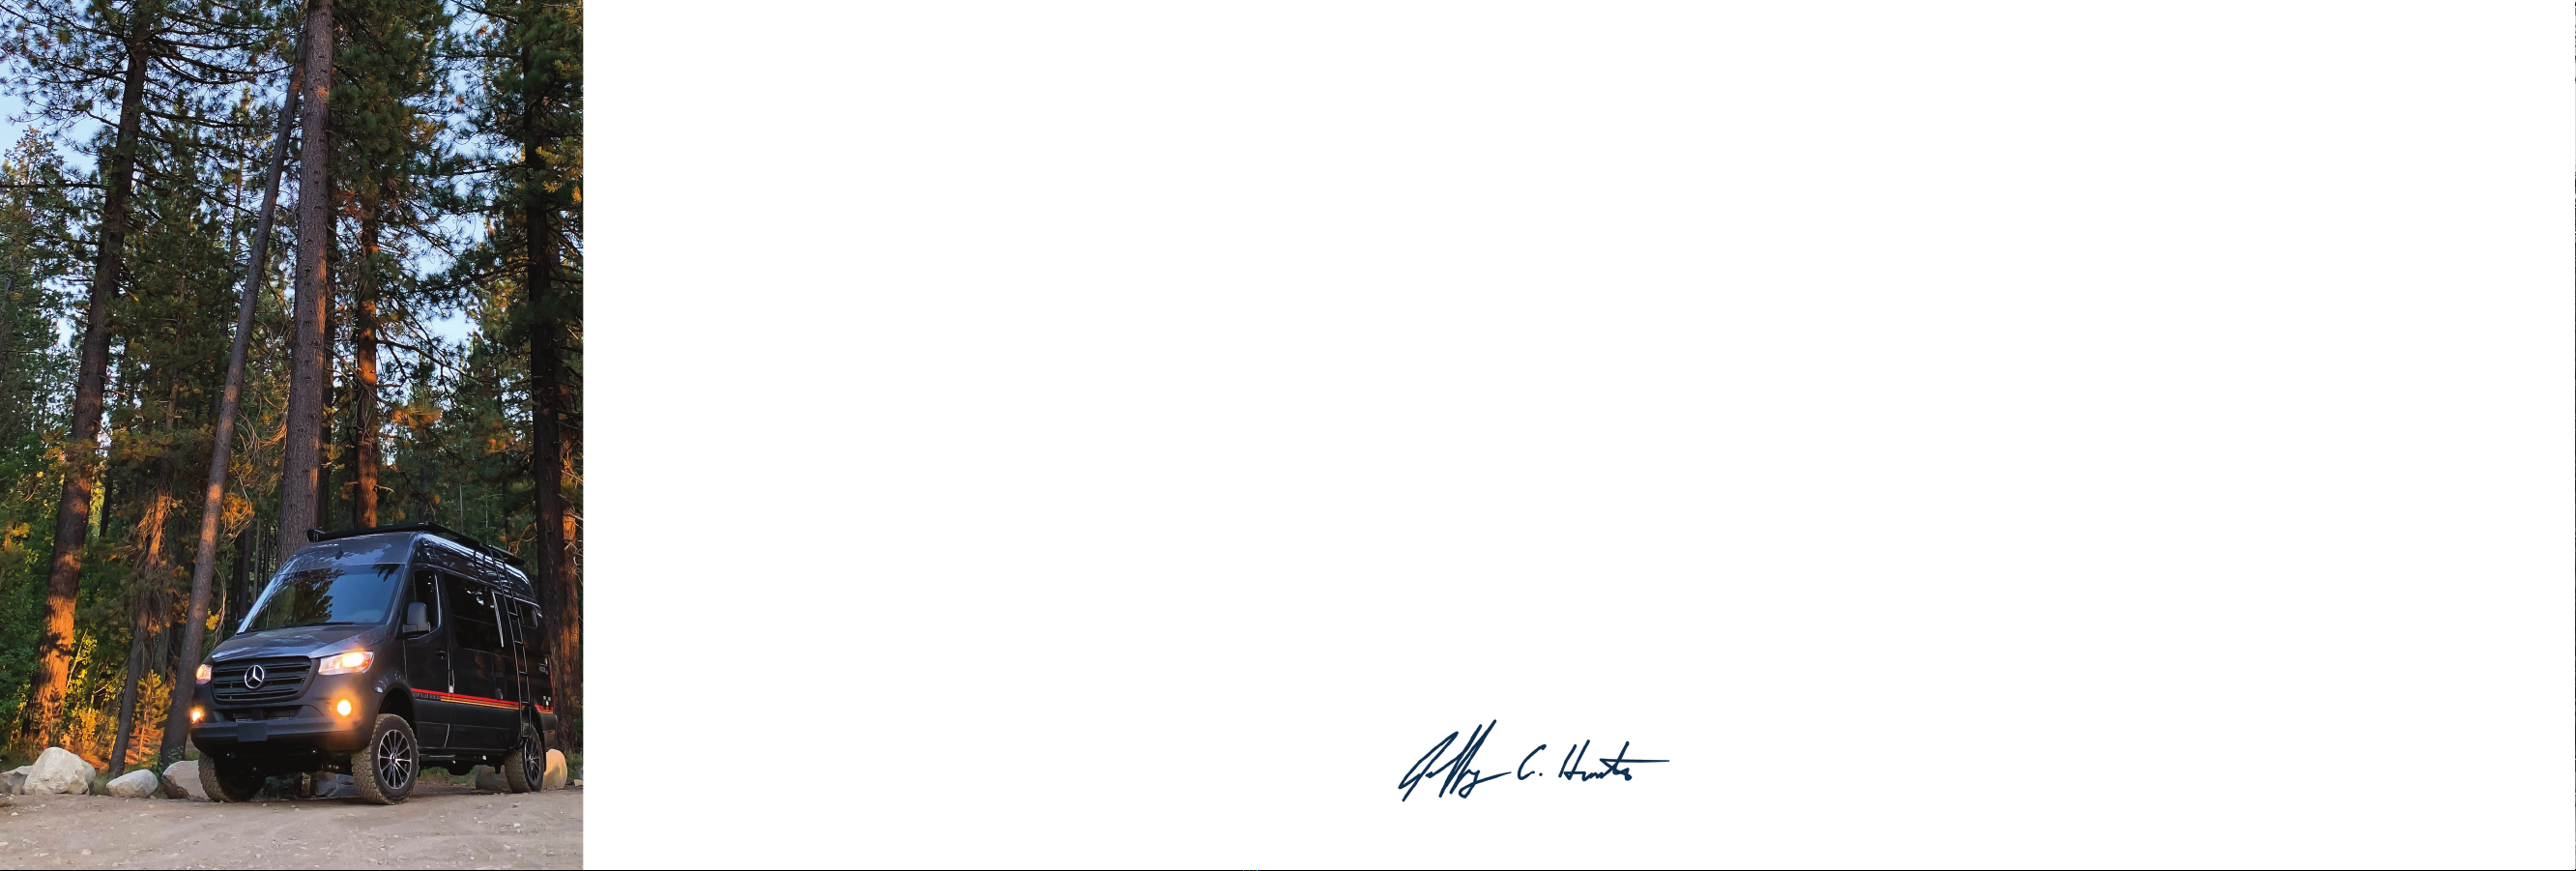
Cheers to the road ahead!
and your Storyteller Overland / MODElife family

i ii
Table of Contents
Section 1 - Introduction ........................................................................................2
About this User Guide..................................................................................................2
Safety Messages Used in this User Guide ....................................................................3
Pre-Delivery Inspection ................................................................................................3
Before Driving ..............................................................................................................3
Front Axle Alignment ...................................................................................................3
Service and Assistance .................................................................................................4
Reporting of Safety Defects .........................................................................................4
Occupant and Cargo Carrying Capacity ......................................................................5
Vehicle Certication Label............................................................................................5
Vehicle Certication Data Explanation .........................................................................5
Specications and Capacities.......................................................................................6
Owner and Vehicle Information....................................................................................7
Section 2 - Safety and Precautions .......................................................................9
General Warnings.......................................................................................................10
Carbon Monoxide Warning........................................................................................11
Smoke and Carbon Monoxide Alarm.........................................................................12
Smoke and Carbon Monoxide Alarm Replacement...................................................12
Fire Extinguisher.........................................................................................................12
Electrical Cautions......................................................................................................13
Loading ......................................................................................................................13
Maintenance...............................................................................................................13
Pinch Hazards .............................................................................................................14
Formaldehyde Information.........................................................................................14
Mold ...........................................................................................................................14
Roadside Emergency..................................................................................................15
If You Get a Flat Tire...................................................................................................16
Spare Tire ...................................................................................................................16
Recovery Towing ........................................................................................................17
Engine Overheating ...................................................................................................17
Jump Starting .............................................................................................................17
Section 3 - Driving Your Adventure Van .............................................................18
Front Seats .................................................................................................................19
Seat Belts....................................................................................................................19
Child Restraints...........................................................................................................19
Factory Dash Climate Controls...................................................................................20
Infotainment Systems and Driver Assist Features.......................................................20
Vehicle Maintenance ..................................................................................................20
Front Axle Alignment and Tire Balancing...................................................................20
Tires............................................................................................................................21
Control Panels and Functions.....................................................................................21
Section 4 - Systems and Appliances ...................................................................22
M-Power Energy Storage System...............................................................................23
58 Volt System and Components...............................................................................24
12 Volt Components...................................................................................................24
12 Volt Fuse Panel ......................................................................................................25
Fuse Panel Layout ......................................................................................................25
110 Volt Components.................................................................................................25
110 Volt Breakers........................................................................................................26
GFI Circuits.................................................................................................................26
Chassis Battery ...........................................................................................................26

iii iv
Activating the M-Power Energy Storage System........................................................27
Turning off the M-Power Energy Storage System ......................................................27
Turn On/Off the Inverter/Charger ..............................................................................27
Checking M-Power Energy Storage System Levels....................................................28
Charging.....................................................................................................................28
Recovery from a Depleted Power State (Zero State of Charge).................................30
Storage of your Vehicle: M-Power Energy Storage System Procedures.....................31
Waking the System from Deep Sleep Storage...........................................................33
Heater Operating Limits.............................................................................................34
High-Temperature Operation.....................................................................................34
Service and Maintenance ...........................................................................................34
If M-Power Energy Storage System Fails to Operate.................................................35
Interior Lighting..........................................................................................................37
Cabin Climate Control System ...................................................................................37
Cooling System ..........................................................................................................37
Air Conditioner Filters ................................................................................................38
Venting and Exhaust...................................................................................................38
Fuel Fired Heating System .........................................................................................38
Activating the Heating System...................................................................................38
Using the Cabin Heat ..................................................................................................39
Using and Setting the Thermostat for Cabin Heat......................................................40
Using the Engine Heat Exchanger...............................................................................40
Troubleshooting the Heating System..........................................................................40
Fuel-Fired Furnace Fails to Start..................................................................................41
Fuel-Fired Furnace Diagnostic Codes.........................................................................41
Accessing the Diagnostic Codes and Clearing Diagnostic Codes..............................41
Plumbing System.........................................................................................................42
Freshwater System ......................................................................................................42
Water Pressure and Water Regulators.........................................................................42
Water Filtration Systems..............................................................................................42
City Water Connection ................................................................................................43
Freshwater Tank Fill .....................................................................................................43
Freshwater Pump.........................................................................................................44
Freshwater Pump Location..........................................................................................44
Water Pump Strainer ...................................................................................................44
Water Pump Strainer Location and Servicing..............................................................45
Water Pump Switch .....................................................................................................45
Priming Water Lines for Use ........................................................................................45
Disinfecting the Freshwater System ............................................................................46
Alternate Freshwater Disinfection Methods................................................................47
Water Fixtures and Faucets .........................................................................................47
Shower Hose Vacuum Breaker ....................................................................................47
Halo Shower ................................................................................................................48
Rear Shower Operation...............................................................................................48
Galley Sink...................................................................................................................48
Draining Freshwater System....................................................................................... 49
Drainage System ........................................................................................................ 49
Portable Toilet ............................................................................................................ 50
Drain Blockages.......................................................................................................... 50
Winterizing the Plumbing System .............................................................................. 51
Winterizing the Freshwater Lines ............................................................................... 51
Winterizing the Galley Sink Drain Pump..................................................................... 51
Winterizing P-Traps..................................................................................................... 51
Appliances.................................................................................................................. 52
Refrigerator................................................................................................................. 52
Cooktop ..................................................................................................................... 53

v
Microwave .................................................................................................................. 53
Sleeping and Seating Systems ................................................................................... 54
Dreamweaver Bed System/Convertible Work Surface ............................................... 54
GrooveLounge 2 seater/2 sleeper Convertable Sofa Bed ......................................... 54
Dinette Table .............................................................................................................. 55
Fold Out Exterior Table .............................................................................................. 56
Exterior Features ........................................................................................................ 56
Roof Rack and Ladder ................................................................................................ 56
Awning ....................................................................................................................... 56
Electrical Expandability - Auxiliary Electrical Circuit................................................... 57
Maintenance and Storage .......................................................................................... 57
Exterior Care............................................................................................................... 58
Seals and Sealant Inspection...................................................................................... 58
Roof ............................................................................................................................ 58
Undercarriage............................................................................................................. 59
Exterior Finish............................................................................................................. 59
Interior Care ............................................................................................................... 60
Preparing Vehicle for Storage.....................................................................................64
Removing Vehicle From Storage................................................................................65
Adventure Van Maintenance Chart ............................................................................66
Loading Your Vehicle ..................................................................................................68
Weighing Your Loaded Adventure Van ......................................................................68
Towing With Your Adventure Van...............................................................................69
Warranties and Coverage...........................................................................................70

- SECTION 1 -
INTRODUCTION

23
SECTION 1 - INTRODUCTION
Congratulations
Welcome to the family of Storyteller Overland owners, and the world of adventure that awaits your explorations in your Storyteller Overland
MODE4x4. Before you begin your travels, please take some time to get to know your adventure van, its features, and how it works.
About This User Guide
This MODE4x4™ User Guide is written to give you information on how to care for your new adventure van, how to operate many of its features
and safety information that you will need to know to have the best experience possible. Please read through this guide completely to gain an
understanding of how your adventure van works before you begin your travels.
Note: This User Guide and its contents are general in their coverage of the vehicle components and systems. Some of the exact
equipment or functions may have been changed due to continuous product improvement programs. It is important to note that this
information may differ to some degree with your vehicle, or that some information may not be included.
Storyteller Overland reserves the right to make changes to their products, without notice, and without obligation to install the same
products previously manufactured.
In addition to this MODE4x4 User Guide, you will nd a supplemental collection of all the manufacturer’s user manuals for the various
appliances and systems incorporated into your adventure van. Many of these systems are covered in the MODE4x4 User Guide, but some
detailed information may only be found in the supplemental manufacturer’s user manuals. Please keep all of these documents with your
adventure van as an easy reference to this information should you have any questions. Additionally, many of the supplemental manuals, as well
as answers to many frequently asked questions, can be found in the MODElife Customer Care App.
Your Storyteller Overland MODE4x4 has been built on an existing vehicle chassis. You will nd references throughout this User Guide to the
vehicle chassis and the vehicle chassis manual.
Please refer to the vehicle chassis manual for information regarding the operation, safety, and maintenance of the original vehicle chassis.
Safety Messages Used in this User Guide
This User Guide is written as a guide and alerts you to common safety hazards. There are areas within this User Guide labeled with Danger,
Warning, Caution, Notice, or Note. These are meant to alert you to potential safety hazards or other items to pay particular attention to.
DANGER: Indicates a hazardous situation which, if not avoided, will result in death or serious personal injury.
WARNING: Indicates a hazardous situation which, if not avoided, will result in death or serious personal injury.
CAUTION: Indicates a hazardous situation which, if not avoided, could result in minor or moderate injury.
NOTICE: Used to address practices not related to personal injury.
NOTE: Used to point out recommendations or special information important for the use or care of an item. Be aware that operating any vehiclec
carries some level of inherent risk. Please use common sense and good judgment.
Pre-Delivery Inspection
Storyteller Overland takes pride in the quality of the products we build. To that end, we inspect every vehicle before it ships. Additionally,
your dealer is responsible for completing a pre-delivery inspection checking for, notating, and correcting any issues with the chassis or RV
components prior to delivery.
Before Driving
Familiarize yourself with all local and state laws, as different areas may have laws that apply to your adventure van.
Front Axle alignment
Once your Storyteller Overland adventure van is set up and loaded to meet your needs, you should take the vehicle in for an alignment. A
loaded vehicle will have a more compressed suspension system and sit differently. This can affect the alignment of the vehicle and should be

45
corrected to avoid erratic steering. When loading the vehicle, consider the weight distribution, from front to back and side to side. Follow the
Loading Your Vehicle section of this User Guide for more information.
Service and Assistance
We are committed to our customers well after the purchase of a vehicle. Storyteller Overland has developed a mobile application, called the
MODElife Customer Care App, to help answer questions, schedule time to talk with customer support and help in service scheduling. The
application also contains a digital version of this manual, the supplementary manuals for the individual components used in your adventure
van, and a frequently asked questions section.
Storyteller Overland has developed a network of dealers for assistance if you nd yourself in need while traveling. Contact Storyteller
Overland and we will help get you back on the road as quickly as possible.
Reporting of Safety Defects
We strive to produce safe and reliable vehicles for you. If you feel there is a safety defect that could result in a crash, injury, or death, you
should immediately contact the National Highway Safety Administration (NHTSA) as well as Storyteller Overland. If NHTSA receives similar
reports, they may choose to open an investigation, and may choose to issue a safety recall and campaign to remedy issues.
To contact NHTSA, you may either call the Vehicle Safety Hotline toll-free at 1-888-327-4236; (TTY: 1-800-424-9153) or go to
http://www.safercar.gov or write to:
Administrator, NHTSA
1200 New Jersey Avenue S.E.
Washington, D.C. 20590
Occupant and Cargo Carrying Capacity
This label has been afxed to the vehicle in the passenger’s door
area. This label shows the total weight capacity allowed for all
passengers and cargo, as well as the number of seatbelted riding
positions.
Note: Water and trailer tongue weight counts as cargo, and should be factored into your available cargo weight. A full load of water for the
vehicle is provided on the label.
If any additional accessories exceeding 100lbs. have been added to the vehicle after vehicle certication, and before the vehicle has been retail
sold, a new label with corrected occupant and cargo carrying capacities should be afxed to the vehicle.
Vehicle Certication Label
This label has been afxed to the vehicle in the driver door area. It contains the Vehicle Identication Number (VIN) label and contains important
vehicle information.
Vehicle Certication Data Explanation
1. Date of completed alterations by Storyteller Overland LLC.
2. Gross Vehicle Weight Rating
3. Gross Front Axle Weight Rating
4. Gross Rear Axle Weight Rating
5. Specied tire size for rating
6. Specied wheel size for rating
7. Vehicle Identication Number (VIN) of the chassis
8. Tire Pressure Rating
9. NHTSA designated usage classication for your motorhome. MPV signies a Multi-purpose Passenger Vehicle.
10. Product serial number of the Storyteller Overland build

67
SPECIFICATIONS AND CAPACITIES
All information is based upon the most recent data available. Visit the
Storyteller Overland web page – www.storytelleroverland.com – for the
most current product information.
1 Exterior vehicle height is measured to the top of the tallest standard
feature. The actual height of your vehicle may vary.
2 Capacities are based on measurements prior to tank installation.
Slight capacity variation is common and results from a variety of factors.
3 This is a tankless water heating system with continuous capabilities at
adjusted ow rates.
4 Actual towing capacity depends on your particular loading and towing
circumstances, which includes the GVWR, GAWR, and GCWR, as well
as adequate trailer brakes. Refer to the Sprinter Operator’s Manual for
further towing information.
Chassis Mercedes Benz Sprinter
Length 19’ 5”
Extertior Height110’ 6”
Exterior Width 7’ 8”
Awning Width 10’
Awning Extention Maximum 7’
Interior Height 6’ 3”
Interior Width 6’ 7”
Freshwater Tank Capacity221 gal
Graywater Tank Capacity224 gal
Portable Toilet Capacity 4.75 gal
Water Heater Capacity3Continuous
Wheelbase 144”
GVWR 9,050 lbs
GAWR - Front 4,410 lbs
GAWR - Rear 5,360 lbs
GCWR413,930 lbs
Fuel Capacity 24.5 gal
OWNER AND VEHICLE INFORMATION
OWNER INFO
Owner’s Name(s) _________________________________________________________________________________________
Address _________________________________________________________________________________________________
VEHICLE INFORMATION
Chassis Vehicle Identication Number (VIN) _______________________________________________________________________________________
Vehicle Mileage at Delivery _________________________________________________________________________________________
Selling Dealer Name _________________________________________________________________________________________
Address _________________________________________________________________________________________
YOUR STORYTELLER OVERLAND DEALER / SERVICE CENTER
Name _________________________________________________________________________________________
Address _________________________________________________________________________________________
Contact _________________________________________________________________________________________
Phone _________________________________________________________________________________________
CHASSIS SERVICE CENTER
Name _________________________________________________________________________________________
Address _________________________________________________________________________________________
Contact _________________________________________________________________________________________
Phone _________________________________________________________________________________________
RV INSURANCE POLICY
Company Policy Number _________________________________________________________________________________________
Agent _________________________________________________________________________________________
Phone _________________________________________________________________________________________

8
SECOND OWNER INFORMATION
SECOND OWNER INFO
Owner’s Name(s) _________________________________________________________________________________________
Address _________________________________________________________________________________________________
SECOND OWNER STORYTELLER OVERLAND DEALER / SERVICE CENTER
Name _________________________________________________________________________________________
Address _________________________________________________________________________________________
Contact _________________________________________________________________________________________
Phone _________________________________________________________________________________________
SECOND OWNER CHASSIS SERVICE CENTER
Name _________________________________________________________________________________________
Address _________________________________________________________________________________________
Contact _________________________________________________________________________________________
Phone _________________________________________________________________________________________
SECOND OWNER RV INSURANCE POLICY
Company Policy Number _________________________________________________________________________________________
Agent _________________________________________________________________________________________
Phone _________________________________________________________________________________________

9
- SECTION 2 -
SAFETY &
PRECAUTIONS

10 11
SECTION 2 - SAFETY AND PRECAUTIONS
General Warnings
All moveable or swiveling seats should be placed and locked in the
travel position while the vehicle is moving.
All seats should be placed in the proper riding position as dened in
the Sleeping and Seating Systems section of this User Guide.
While the vehicle is moving, passengers should only use seats with
seatbelts.
For pregnant women: Never place the shoulder belt behind your back
or under your arm. Adjust the lap belt across your hips/ pelvis and
below your belly. Place the shoulder belt across your chest (between
your breasts) and away from your neck.
Child restraints should be installed properly according to the
manufacturer’s instructions. See Child Restraints.
Never let passengers stand or kneel on seats while the vehicle is moving.
All movable or swiveling table tops should be stowed when the vehicle is moving.
Beds are not to be utilized while the vehicle is moving.
Inspect the re extinguisher monthly for proper charge and operating condition. This should
also be done before beginning a vacation or an extended trip.
Do not attempt to adjust the driver’s seat while the vehicle is moving.
Do not adjust tilt steering in a moving vehicle.
Do not operate the cruise control on icy or extremely wet roads, winding roads, in heavy trafc, or in any other trafc situation where a constant
speed cannot be maintained.
Use care when accelerating or decelerating on a slippery surface. Abrupt speed changes can cause skidding and loss of control.
Driving through water deep enough to wet the brakes may affect stopping distance or cause the vehicle to pull to one side. Check brake
operation in a safe area to be sure they have not been affected. Never operate any vehicle if a difference in braking efciency is noticeable.
Adverse weather conditions and extremes in terrain may affect the handling and/or performance of your vehicle. Refer to your chassis manual
for complete and related information on driving your vehicle.
Verify all doors are shut and/or stowed and latched where applicable.
Carbon Monoxide Warning
Combustion engines of motor vehicles produce carbon monoxide (CO). The best way to keep carbon
monoxide out of the vehicle cabin is by maintaining the vehicle exhaust as well as the ventilation
systems of the adventure van.
Have the exhaust system and vehicle body inspected from time to time by a qualied RV service center:
• When the vehicle is serviced
• If there is a change in the sound of the vehicle exhaust system.
• Whenever damage occurs to the exhaust underbody or rear of the vehicle.
• To allow for proper operation of the vehicle’s ventilation system, keep front grill clear of snow, leaves, or other obstructions.
DO NOT OCCUPY A PARKED VEHICLE WITH ENGINE RUNNING FOR AN EXTENDED PERIOD.
Do not run the engine in conned areas, such as a garage, except to move the vehicle into or out of the area.
WARNING
This motorhome has been designed, manufactured
and tested with concern for the protection of
it’s occupants. We recommend you perform the
following inspections for your safety and the safety of
your passengers before starting your vehicle.
1. WHEELS - Inspect for damage and check lug nuts
for tightness.
2. TIRES - Inspect for wear and damageand check for
recommended air pressure.
3. LIGHTING - Test for proper operation of all interior
and exterior lights including dash lights, headlights,
tail lights, brake lights, clearance lights, and turn
signals.
4. SEAT BELTS - Direct passengers to designated
seats, be certain swivel seats are locked into position,
and require use of a seat belt. See operator’s manual
for occupancy and weight restrictions.
5. APPLIANCES - Turn off and latch or lock doors
where provided.
6. LOOSE PARCELS - Store securely.
7. UTILITY SUPPLY LINES - Disconnect all electrical,
sewer and water lines and secure properly.
Read your Sprinter Operator’s Manual for further
precautions.
WARNING
Avoid inhaling exhaust gases, as they
contain carbon monoxide, which is a
colorless, odorless, and poisonous gas.
Death or serious injury can result.

12 13
Smoke and Carbon Monoxide Alarm
Your MODE4x4 is equipped with a smoke and a carbon monoxide (CO) alarm designed
to detect and alert you to the presence of smoke and carbon monoxide in your vehicle.
These detectors should be tested after the vehicle has been in storage, before each trip, and at least once
per week during use by pressing the Test/Reset button on each of the alarms.
NOTE: The smoke and CO alarms are not activated by Storyteller Overland. The owner is
responsible for activating the smoke and CO detectors before the vehicle is used for the rst time.
For more information on the smoke and CO detectors, see the manufacturer user guides included with
your vehicle.
Smoke and Carbon Monoxide Alarm Replacement
When replacing this alarm, we recommend replacing only with the same model, or with one that is also
listed for RV application from your Storyteller Overland dealer.
Fire Extinguisher
A dry chemical re extinguisher is located on the rear of the front passenger’s seat. Familiarize yourself with
the operating instructions on the re extinguisher.
We recommend that you inspect the re extinguisher for the proper charge at least once a month in
accordance with the National Fire Protection Association (NFPA) recommendations, as stated on the label.
If the extinguisher is past its expiration date or charge is insufcient, the re extinguisher must be replaced.
If for any reason, you must replace the re extinguisher, the replacement must be the same type and size.
We recommend obtaining a replacement only from your Storyteller Overland dealer or a reliable RV
parts supplier.
Electrical Cautions
Careless handling of electrical components can be fatal. Never touch or use electrical components or
appliances while feet are bare, while hands are wet, or while standing in water or on wet ground.
Improper grounding of the vehicle can cause personal injury. Do not plug the utility power cord into an
outlet that is not grounded and do not adapt or modify the plug to connect to a receptacle for which
it is not designed.
Do not attach an extension cord to the shore power cord.
Be sure that all electrical appliances have 3-prong plugs for proper grounding.
Avoid overloading electrical circuits. Replace fuses or circuit breakers with those of the same size and amperage rating only. Never use a higher
rated fuse or breaker.
Use caution when handling or working near energy storage systems and electrical components. Always remove any jewelry and wear protective
clothing and eye covering. Avoid creating sparks.
Loading
Store or secure all loose items inside the adventure van before traveling. Possible overlooked items such as canned goods or small appliances on
the countertop, cooking pans on the range, or free-standing furniture items can become dangerous projectiles during a sudden stop.
Be aware of GVWR, GAWR, GCWR, and individual load limit on each tire.
Never load the motorhome in excess of the gross vehicle weight rating or the gross axle weight rating for either axle.
Maintenance
Do not remove the radiator cap while the engine and radiator are still hot.
WARNING
Failure to replace this product by the
REPLACE BY DATE printed on the alarm
cover may result in death by Carbon
Monoxide poisoning.
WARNING
Test smoke alarm operation after the
vehicle has been in storage, before each
trip, and at least once per week during
use. Failure to do so can result in death or
serious injury.
WARNING
Do not test the re extinguisher by
discharging it. Partial discharge can cause
leakage of pressure or contents, which
would render the unit inoperative when
needed. When using the re extinguisher,
aim the spray at the base of the re.
California Proposition 65 Warning:
Battery posts, terminals, and related
accessories contain lead and lead
compounds, chemicals known to the state of
California to cause cancer and reproductive
harm. Wash hands after handling.

14 15
Never get beneath a vehicle that is held up by a jack only.
Do not mix different types of tires on the vehicle, such as radial, bias, or belted tires, as vehicle handling may be affected. Replace tires with the
exact size, type, and load range.
Refer to the chassis manual for complete maintenance precautions and recommendations.
Pinch Hazards
Any time items open and close, such as a door or cabinet, or move, such as a rotating or folding seat,
there is the potential to create a pinch point. Avoid any moving areas of a mechanism to prevent injury.
Formaldehyde Information
Like every home and building, some of the materials used in this recreational vehicle emit formaldehyde. Eye, nose, and throat irritation,
headache, nausea, and a variety of asthma-like symptoms, including shortness of breath have been reported as a result of formaldehyde
exposure. Reaction to formaldehyde exposure may vary among individuals. Elderly persons and young children, as well as anyone with a history of
asthma, allergies, or lung problems, may be at greater risk. Research is continuing on the possible long-term effects of exposure to formaldehyde.
Inadequate ventilation may allow formaldehyde and other contaminants to accumulate in indoor air.
Ventilation to dilute the indoor air may be obtained from a passive or mechanical ventilation system. Always be sure to thoroughly ventilate your
recreational vehicle before and during each use. High indoor temperatures and humidity may raise formaldehyde levels. When a recreational
vehicle is in areas subject to high temperatures, an air conditioning system can be used to control indoor temperature levels. If you have any
questions regarding the health effects of formaldehyde, consult your doctor or local health department.
Mold - What It Is, What Causes It, and How to Avoid It
Mold is a fungus and a natural part of our environment. It plays an important role in helping to break down dead leaves and other organic matter
into fertile soil. The very nature of your adventure van being outside will bring it into contact with mold. While mold growth is normal nearly
everywhere on earth, indoor mold growth should be avoided.
To reduce mold growth, you need to reduce the things in your adventure van that allows mold to grow. Mold only needs small amounts of
nutrients from food spills or grease, or could survive on as little as a ne layer of dirt or dust. Keep the inside of the vehicle as clean as possible.
Moisture plays a large part in mold growth, as well. Don’t allow condensation to build up inside the vehicle and keep the interior humidity levels
low. Proper ventilation helps remedy this, and using the air conditioner can help remove moisture from the air.
Avoid and repair leaks as they are a major contributing factor to mold growth. They can allow water into often unseen areas.
If mold develops, clean the area with soapy water followed by a bleach solution. If the items cannot be treated they will need to be removed.
We live in a world where mold is common and natural, but it can cause issues and irritation to some people, so do everything you can to
mitigate it in your adventure van.
Mold and Warranty Claims
If Storyteller Overland determines that mold in your adventure van was caused by a manufacturing defect that has been reported to Storyteller
Overland within the limited warranty period, Storyteller Overland will clean the affected area(s) and /or replace items it deems necessary.
This is the only circumstance in which Storyteller Overland, will cover mold under its limited warranty.
Storyteller Overland will not assume responsibility for mold deemed to be a result of a user’s lack of timely and appropriate action to mitigate
circumstances should a problem occur.
Roadside Emergency
Your adventure van is built to be rugged, but sometimes accidents happen, or things break. Due to the weight and size of the vehicles, it is
advised that you seek professional road service to help in the event of a roadside emergency such as a at tire.
If the situation requires you to change a at tire yourself, be very careful and read all the information in your Sprinter Operator’s Manual
regarding the changing of a tire.
WARNING
Keep people away from operating
mechanisms and pinch hazard areas during
use. Failure to do so could cause injury.

16 17
Never get under a vehicle that is held up by only a jack.
Check your tires for proper ination before each trip, and at least once a month, using an accurate tire gauge.
If You Get a Flat Tire
DO NOT panic.
Grip the steering wheel rmly and steer the vehicle as straight as possible. Avoid quick maneuvers. You may need to counter-steer to compensate
for pull created by the failed tire.
DO NOT stomp/slam on the brakes. This abruptly shifts the vehicle’s weight forward, making it nose-dive and pull toward the blown-out side.
DO NOT jerk your foot off the accelerator. Just ease back on the accelerator slowly and gently to continue the momentum. The deated tire will
slow the vehicle.
If you must change lanes to get to a safe stopping place, use your signals to warn other motorists and change
lanes smoothly after you are certain the lane is clear.
Let the vehicle coast to a stop, gently steering to a safe stopping place. Do not worry about damaging the tire or wheel by driving on it. A tire or
wheel replacement is cheaper than damaging the vehicle or injuring yourself.
Once you have come to a stop, activate your hazard ashers, then exit the vehicle carefully.
Set out ares or other warning devices.
Spare Tire
The wheels and tires supplied with your MODE4x4 are not the same sizes as the factory spare, but the
difference is within the allowable range for an emergency. It is not recommended to use the spare tire for
normal driving and should be used only in case of emergency.
Do not use the stylized lug bolts used with the stylized Storyteller Overland MODE4x4 wheels, when
mounting the spare tire. You must use the six chassis supplied lug bolts located in the co-driver footwell
compartment. The chassis supplied lug bolt hex is the correct size for the lug wrench.
Additionally, do not use the factory style lug bolts when attaching the stylized wheels. Use only the
stylized lug bolts that were used to mount the stylized wheel.
Recovery Towing
Due to the modied nature of an adventure van from its original chassis specications, you should notify
the operator of the towing service of the front axle weight of the vehicle as it may have an effect on how
they choose to tow or recover the vehicle. This information can be found on the Vehicle Certication
Label. Refer to the chassis manufacturer’s manual for instructions on how the manufacturer requires the
vehicle to be towed.
Storyteller Overland does not assume responsibility for damage incurred while towing this vehicle.
Engine Overheating
If you see or hear steam escaping from the engine compartment or have any other reason to suspect an
engine overheating condition, pull the vehicle over, stop the engine, and get passengers out of the
vehicle.
For information on what to do in case of overheating, consult the Sprinter Operator’s Manual.
Jump-Starting
If you wish to try jump-starting the engine using another vehicle or booster system, see the Sprinter
Operator’s Manual for connecting jumper cables to the automotive chassis electrical system.
NOTICE
Do not lift on the bumper. Damage will
result to front end body parts.
NOTICE
Do not attempt to push start this vehicle.
Damage to the transmission or other parts
of the vehicle will occur.
NOTICE
Operating a vehicle under a severe
overheating condition can result in damage
to the vehicle.
CAUTION
Do not lie beneath tire carrier while
removing a tire. The tire can fall and injury
can occur.
WARNING
DO NOT operate the vehicle with less
than all 6 lug bolts installed and properly
torqued.
WARNING
Stay out from beneath the motorhome
while it is suspended by the towing
assembly. Do not allow passengers to
occupy a towed vehicle. Death or serious
injury can result.

18 19
- SECTION 3 -
DRIVING YOUR
ADVENTURE VAN
SECTION 3 - DRIVING YOUR ADVENTURE VAN
This section refers to items in the factory cabin area, including the dash, front driver and passenger seats, and the safety functions of the rear
bench seat.
See your chassis manual for information on the factory chassis systems, included items like driving controls, instrumentation, switches, cruise
control, climate controls, gauges, wipers, lights, front seats, factory three-point safety belts, and other factory features.
Front Seats
The front seats of your vehicle are adjustable to your preference.
See your Sprinter Operator’s Manual for information on the factory seat adjustment.
Additionally, the front seats of your MODE4x4 can swivel around to become integrated into the living
area of the cabin.
NOTE: Damage to interior door panels will result if seats are swiveled toward the doors. Do not turn driver seat counterclockwise
and do not turn passenger seat clockwise.
NOTE: When the vehicle is in motion, the driver and front passenger seat should be locked in the forward position.
Seat Belts
All designated seating positions have a seat belt with a shoulder belt and should be used at all times when the vehicle is in motion. Do not sit
or lounge in other areas of the vehicle while the vehicle is in motion.
After any serious accident, all seat belts in use during the accident must be inspected and replaced if necessary.
Child Restraints
Properly installed and used child restraint systems have been shown to reduce the risk of injury to a child in the event of an accident or
WARNING
Damage to interior door panels will result
if seats are swiveled toward the doors. Do
not turn driver seat counter clockwise and
do not turn passenger seat clockwise.

20 21
sudden maneuver. If child restraint systems are used incorrectly, they may increase the risk of injury.
The rear bench seat can be used with a child restraint system if designed to be secured with lap-shoulder belt style seat belts. Refer to your
child restraint system’s instructions for installation compatibility and instructions.
NOTE: The seat must be in the full upright position if a car seat is to be used.
Factory Dash Climate Controls
The factory dash climate controls are designed to heat and cool the front cabin area while the vehicle is running. However, the dash air
conditioner and heat were not designed to heat or cool the entire cabin of the vehicle.
See factory chassis manual for details and instructions covering dash A/C, heat, and defrost functions.
See the Cabin Climate Control System section of this User Guide manual for details regarding the Storyteller Overland installed heating and
cooling systems.
Infotainment Systems and Driver Assist Features
Consult the factory chassis manual for information and operation instructions regarding your factory equipped infotainment systems including
things like radio, navigation, Bluetooth, rear-facing camera, etc.
Vehicle Maintenance
Your Storyteller Overland Vehicle is based on a vehicle manufacturer’s existing chassis, and like any other vehicle requires routine
maintenance and servicing. Please consult your factory chassis manual for information regarding your vehicle’s maintenance and servicing
requirements and intervals.
Front Axle Alignment and Tire Balancing
Fully loading a vehicle can change the front end alignment. Once you have you know what you will be taking, take the vehicle in for an
alignment.
The front suspension and steering system of this vehicle was factory aligned using highly accurate equipment prior to delivery to the
dealership. However, alignment should be checked and adjusted after you have fully loaded the motorhome according to your personal
needs. Thereafter, the alignment should be periodically inspected to help prevent uneven tire wear.
Any excessive or abnormal tire wear may indicate worn or misaligned suspension or steering, an unbalanced tire, or other tire/suspension
problems.
Alignment can be affected by worn steering/ suspension parts or by incidents that happen during driving, such as hitting a curb, pothole, or
railroad track, etc. Improper alignment can cause tires to roll at an angle and wear unevenly. It may also cause the vehicle to pull to the right
or left. Have your dealer, or RV service technician, inspect your vehicle’s suspension and steering components periodically for misalignment
or wear.
Out-of-balance tires will not roll smoothly and can lead to vibrations and uneven tread wear, such as cupping and at spots. Tires may need
to be balanced if uneven wear is detected, or if ride comfort decreases noticeably.
Refer to the chassis manual provided with your vehicle for further information.
Tires
This vehicle is equipped with wheels and tires that are different than the original equipment. There is a
modied tire and wheel label in the driver door area with information on the Storyteller Overland tire
and wheel modications. Refer to this label for information regarding the proper tire pressures.
Improper tire pressure can cause abnormal or premature wear, affect vehicle handling, and fuel economy.
Control Panels and Functions
The MODE4x4 has cabin controls in two main areas of the vehicle. The main systems controls for monitoring and operating the M-Power
Energy System, cabin climate controls, and water systems can be found on the Systems Monitor Panel on the wall above the GrooveLounge,
behind the driver’s seat. The secondary control location can be found on the forward face of the galley electric awning controls as well as the
main cabin light switch. For more details, refer to the specic system section within this User Guide.
WARNING
Make sure all replacement tires are of the
same size and rating as those shown on
your Vehicle Certication Label

22 23
- SECTION 4 -
SYSTEMS &
APPLIANCES
SECTION 4 - SYSTEMS AND APPLIANCES
M-Power™ 12kWh Energy Storage System (Powered by Volta©)
Your Storyteller Overland MODE4x4 is equipped with the M-Power 12kWh Energy Storage System, which is used to power the systems and
accessories. The M-Power Energy Storage System is housed inside the power systems cabinet. The power systems cabinet is the large cabinet
supporting the passenger side rear fold-out bed. The M-Power Energy Storage System is independent of the chassis electrical system and does
not provide power to the vehicle’s engine or chassis electrical accessories.
This electrical system is comprised of three voltage systems:
- 58V DC system
- 12V DC system
- 110V AC system
The electrical system can be charged in one of two ways:
- 30A shore power connection
- HD Auxiliary Alternator attached to the vehicle engine
See Charging the M-Power Energy Storage System section for detailed instructions.
The MODE4x4 is also equipped with solar panels that can add a supplemental amount of energy into the power system based on the
availability of sunlight. The solar energy charger should not be thought of as an effective charging source for the M-Power Energy Storage
System, but as a way to increase the time needed between system charges.
Electrical Cautions:
Careless handling of electrical components can be fatal. Never touch or use electrical components or appliances while feet are bare, while
hands are wet, or while standing in water or on wet ground.
Improper grounding of the vehicle can cause personal injury. Do not plug the utility power cord into an outlet that is not grounded, and do not

24 25
adapt or modify the plug to connect to a receptacle for which it is not designed.
Only use an RV rated 30A extension cord, no longer than 50 feet in length. Never use a standard extension cord.
Be sure that all electrical appliances to be used contain 3-prong plugs for proper grounding.
Avoid overloading electrical circuits. Replace fuses or circuit breakers with those of the same size and amperage rating only. Never use a higher
rated fuse or breaker.
Use caution when handling or working near the chassis battery or the M-Power Energy Storage System. Always remove any jewelry and wear
protective clothing and eye covering. Avoid creating sparks.
58 Volt System and Components
The M-Power Energy Storage System is based around a 58V energy storage pack. The 58V portion of the system is not compatible with 12V
electronics and accessories.
This system should never be modied, altered, or used in any way outside of how the system was designed by Storyteller Overland. Doing so
may cause damage to the system, and lead to unsafe conditions.
NOTE: The M-Power Energy Storage System Warranty may be voided if the system is altered or tampered with in any way.
12 Volt System and Components
The 12V system is powered through the converter from the M-Power Energy Storage System’s lithium-ion pack. This part of the power system
provides power to the 12V outlets, interior lights, awning, system control panels, exhaust fans, refrigerator, heating system, and other small
electrical components.
In order to run the 12V system, the M-Power Energy Storage System must be on. The converter will turn on and off automatically with the
M-Power Energy Storage System.
The system inverter does not need to be on for the 12V system to operate. See the Turn On/Off the Inverter/Charger section for detailed infor-
mation on how to turn the inverter off to save power.
110A: Refrigerator
215A: Awning
315A: Under Cabinet and Cargo Lights
420A: 12V Outlet/Speaker
510A: Exhaust Fan
615A: Rixen Furnace
7 10A: Rixen Controls
8 10A: Water Monitor
9 10A: Overhead Cabin Lights
10 20A: AUX 1
11 15A: Water Pump
12 20Aink Pump
12 Volt Fuse Panel
The 12V system has a fuse panel designed to protect the system. In the event too much power is drawn by a device plugged into the 12V
system, a fuse will blow, and power will be cut off to that circuit. The blown fuses can be removed and replaced to restore power to the circuit.
NOTE: Always replace fuses with fuses of the same size and amperage rating. Never replace with fuses of a higher amperage rating.
The fuse panel is located at the rear of the vehicle behind an access hatch labeled Fuse Panel.
Fuse Panel Layout
110V System and Components
The 110V system is powered through an inverter, either from the onboard energy storage pack or from a shore power connection.
This part of the power system supplies power to the household-style wall outlets, the appliances including the refrigerator, cooktop, rooftop air
conditioner, and microwave.
To run the 110V system, the M-Power Energy Storage System and inverter must both be on. The inverter comes on automatically when the

26 27
M-Power Energy Storage System is turned on.
The inverter can be switched off, through the inverter/charger panel, while the M-Power Energy Storage System is on. This will help conserve
power greatly, as the inverter uses a signicant amount of standby power even while no load is drawn by the 110V system.
110 Volt Breakers
The 110V system has circuit breakers designed to protect the system. In the event too much power is drawn by a device plugged into the 110V
system, a breaker will trip, and power will be cut off to that circuit. Tripped breakers can be reset to restore power to the circuit.
There are two breaker locations. The rst is located inside the Branch Breaker box mounted on the power system cabinet in the rear passenger
corner of the vehicle. The second is a set of push-button style breakers located on the rear of the inverter. The inverter is accessible through the
upper access port on the rear of the power supply cabinet.
GFI Circuits
The 110V system is protected by GFCI (Ground Fault Circuit Interrupter) built directly into the inverter.
Additionally, some outlets near water are GFCI style outlets to further protect from the risk of electric
shock. These outlets should be reset and tested monthly.
In addition to the GFCI outlets located throughout the MODE4x4, the inverter/charger has a built-in
GFCI outlet that can be accessed through the Main Breakers access port at the rear of the electrical
system cabinet.
Chassis Battery
The chassis battery is used to power the vehicle engine, vehicle dash, and other factory chassis accessories. The chassis battery and the chassis
electrical system are independent of the M-Power Energy Storage System.
Refer to your chassis manual for information on the chassis battery and chassis electrical systems.
Operating the M-Power Energy Storage System
Activating the M-Power Energy Storage System
Press in the main power switch located on the Systems Monitor Panel. The center of the power button should now be recessed into the switch
bezel. After a few moments, the switch will light up green, and the State of Charge (SOC) gauge will light up and begin reading the current
state of charge. The system will appear unresponsive for a few moments while it performs a number of systems check procedures before it
powers on. This is normal.
NOTE: Plugging the MODE4x4 into a shore power supply will automatically turn on the M-Power system regardless of the button
position being pushed in or not.
NOTE: While charging, the M-Power Energy Storage System will be active even if the power button is in the off position (not pushed
in). The 110V system will be active during this time even if the inverter is off.
NOTE: Do not rapidly cycle the M-Power system on and off. Wait at least 10 seconds before turning the system on or off.
Turning Off the M-Power Energy Storage System
Press the green illuminated main power switch. The center of the power button should be ush with the switch bezel. The system will appear
unresponsive for a few moments while it performs a number of systems check procedures before turning off. Once the system is fully powered
down, the green button light and the SOC gauge lights will turn off.
NOTE: The M-Power system will not turn off if the vehicle is running and/or the vehicle is plugged into shore power.
Inverter/Charger Panel
The inverter/charger panel allows you to control and monitor many of the features of the M-Power Energy Storage System, such as inverter
status and charger current.
Turn On/Off the Inverter/Charger
To show the inverter status, press the DISPLAY button to wake the inverter/charger panel. If the inverter is off, the panel will display DISABLED
BY LCD on the lower line. If the inverter is on, the display will show the battery voltage.
To turn the inverter on or off, press the DISPLAY button on the inverter/charger panel to wake the panel, then press the ON/OFF button on the
inverter/charger panel to toggle the inverter on or off.
WARNING
The GFCI will not completely eliminate the
risk of electrical shock. Infants and small
children may still be affected.
Other manuals for Mode 4x4
1
Table of contents
Other Storyteller Overland Caravan manuals