Ausrv X11 2021 User manual

1
Copyright © AUSRV INC 2021 All Rights Reserved
Phone: 833 632 8778
OWNER’S MANUAL
EDITION: 2021 - Version 1
X11
OFFROAD HYBRID CARAVAN
www.ausrv.com

www.ausrv.com Ph: 833 872 8778 2
Copyright © AUSRV Inc. 2020 All Rights Reserved
All les and information contained in this Owner’s Manual are copyright protected by AUSRV Campers and Caravans
Inc. (collectively, “AUSRV”), and may not be duplicated, copied, modied, or adapted, in any way without our written
permission. This Owner’s Manual may contain AUSRV service marks or trademarks as well as those of AUSRV afliates
or other companies, in the form of words, graphics, and logos. Your use of this Owner’s Manual does not constitute
any right or license for you to use AUSRV’s or any other party’s service marks or trademarks, without the prior written
permission of AUSRV or the applicable party. AUSRV’s content, as found within this Owner’s Manual, is protected under
US and foreign copyright laws. The copying, redistribution, use or publication by you of any such content, is strictly
prohibited. Your use of this Owner’s Manual does not grant you any ownership rights to the content of this Owner’s
Manual.
DISCLAIMER: This Owner’s Manual is provided in good faith, and AUSRV may amend or update this Owner’s Manual
from time to time at AUSRV’s discretion.
Use of Product
The intent and purpose of this Owner’s Manual is to assist owners in the correct use and operation of camper
trailers and caravans (the “Product”) and outline the servicing schedule to be followed in order to ensure the correct
maintenance of the Product.
Servicing
Servicing information contained in this Owner’s Manual is provided for those who have appropriate technical skills
in regard to maintenance and repairs. The servicing content of this Owner’s Manual assumes a satisfactory technical
knowledge, as well as mechanical skills and experience, therefore, it is not suitable for people who are not trained or
qualied in the subject matter with which it deals.
If you do not have the appropriate skills and experience, or if you do not have access to appropriate tools and
equipment, you may injure yourself or others around you and/or you may cause damage to the Product you are
working on, including making it unsafe.
Users of this Owner’s Manual must:
a. Read all content thoroughly. It is especially important to have a good understanding of all of the contents shown
in the INTRODUCTION and SAFETY Sections of this Owner’s Manual.
b. Use only the correct tools and equipment for all repairs and servicing.
c. If part replacement is necessary, replace the part with the same part number or equivalent part. DO NOT
replace it with a part of inferior quality. If you have any questions, please contact us at: 1-833-632-8721
d. Observe all ‘Cautions’ and ‘Notices’ to reduce the risk of personal injury during service or repair, or improper
service or repair, that may damage the Product or render it unsafe.
e. Understand that the ‘Cautions’ and ‘Notices’ in this Owner’s Manual are not exhaustive because it is impossible
to warn of all possible hazardous consequences that might result from failure to follow the instructions in this
Owner’s Manual.
f. You must carry out your own risk assessments as you work.
AUSRV does not warrant against and does not accept any or all liability (whether for personal injury, death, illness,
property damage or other losses or damages) which may arise because a user of this Owner’s Manual failed to
follow directions set forth in this Owner’s Manual or to follow other safe work methods associated with use and
maintenance of the Product. This Owner’s Manual is subject to the AUSRV Limited Warranty found at:
www.ausrv.com
Those without the required skills, knowledge, tools, and experience to work on and maintain the Product should seek
the services of a suitably qualied person or business. This Owner’s Manual is based on the latest Product information
at the time of release. However, specications and procedures are subject to change without notice. Any updates to this
Owner’s Manual may be found at:
www.ausrv.com
Ph: 833 632 8721

www.ausrv.com Ph: 833 872 8778 3
My X11 Hybrid Caravan
DISCLAIMER: By receiving this handbook, you confirm there you have read and agree
to all the terms and conditions and understood the use and maintenance care of
AUSRV Campers and Caravans Inc.
NAME:
MODEL:
VIN:
BUILD DATE:
DRY WEIGHT:
GTW:
TIRE SIZE:
DEALER PH:
ADDRESS 1:
ADDRESS 2:

www.mdcusa.com Ph: 833 632 8721 Contents
General Safety Information .............................................6
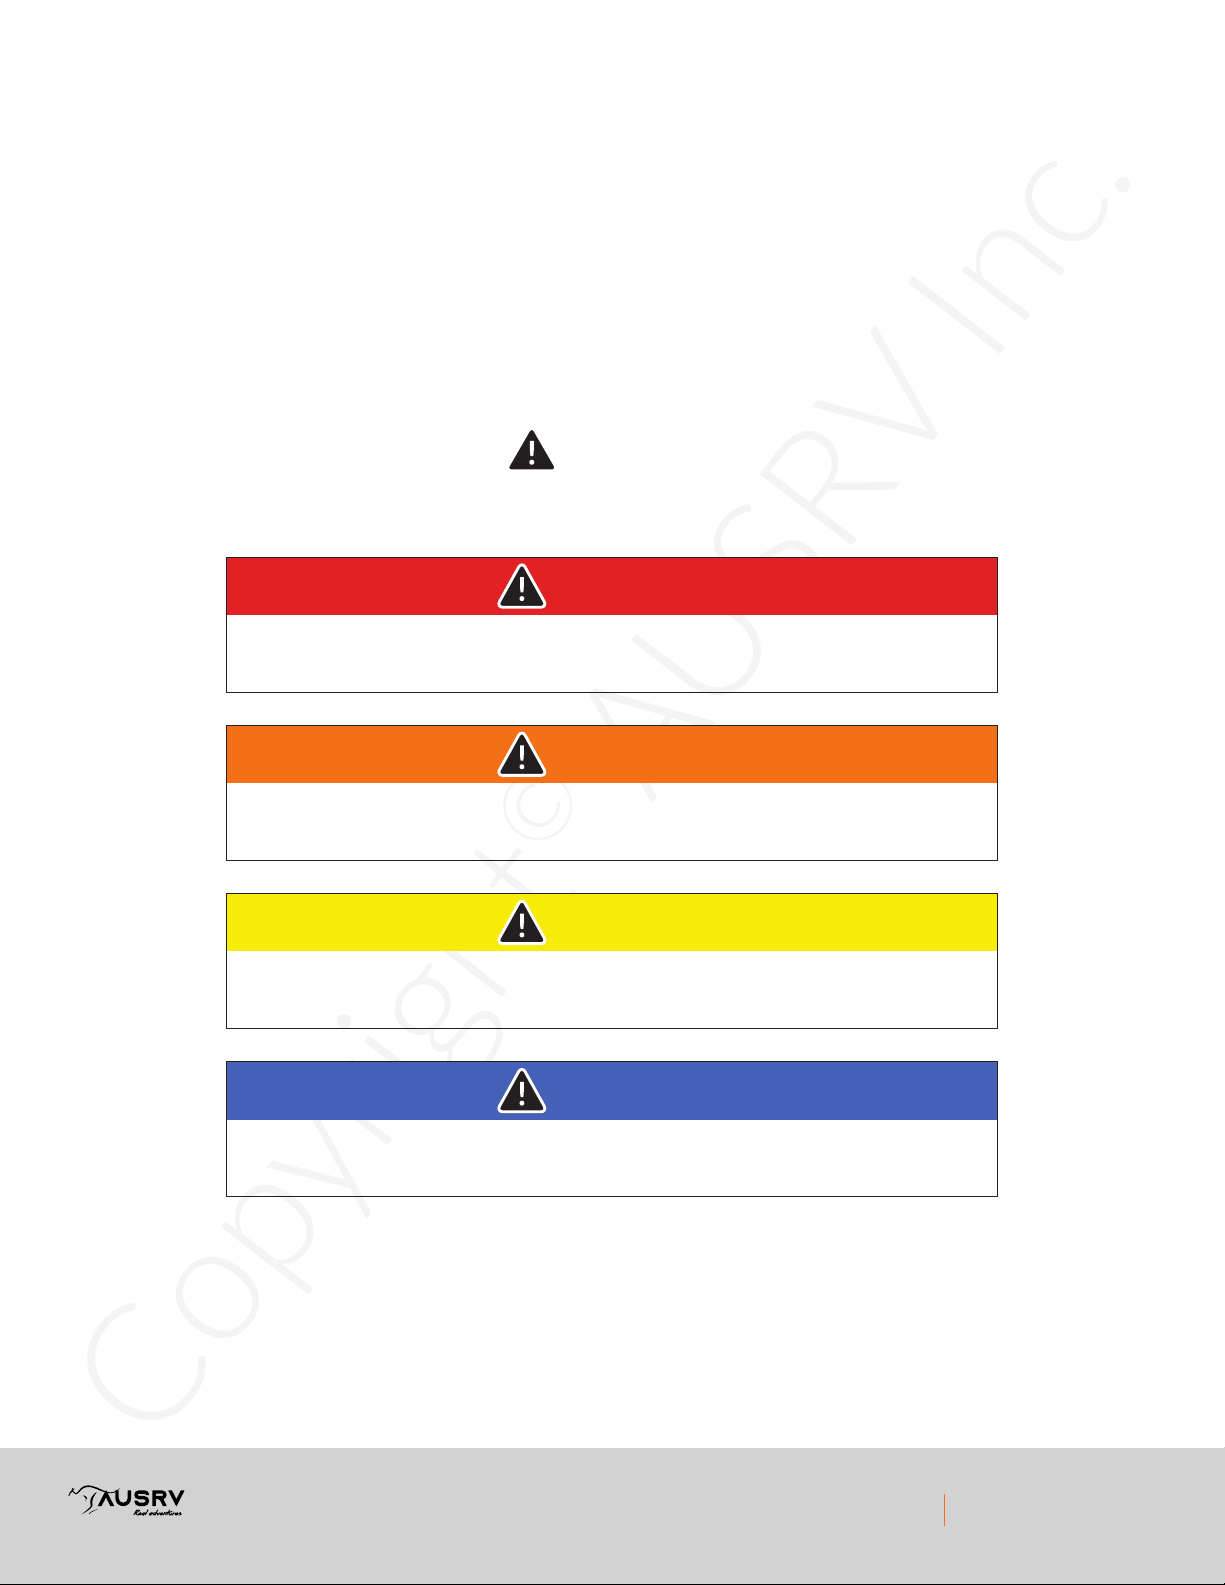
Safety Alert Symbols and Signal Words ..................6
Reporting Safety Defects .............................................7
Tow Vehicle and Trailer Compatibility .....................7
Terminology & Abbreviations ......................................8
Secondary Escape ............................................................9
Using the Secondary Escape .....................................9
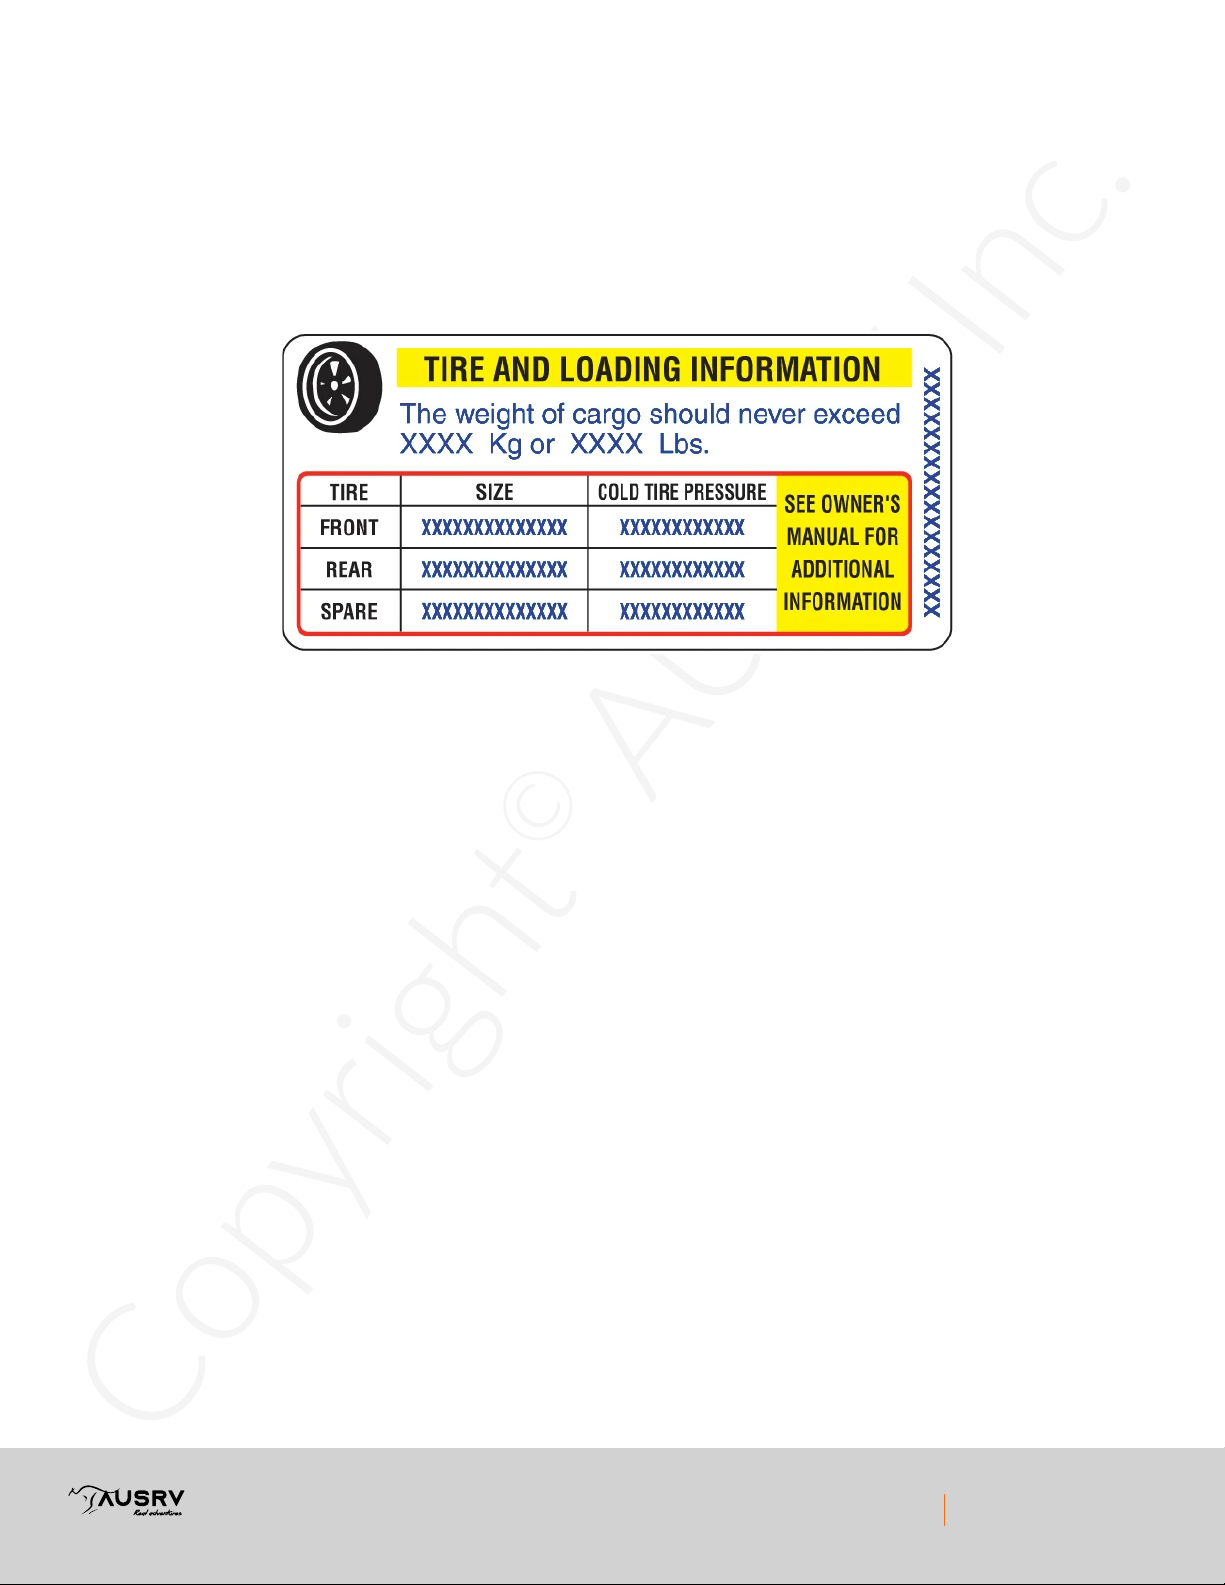
Tire Safety Information ....................................................... 10
Steps for Determining Correct Load Limit - Trailer 10
Trailers 10,000 Pounds GVWR or less ................... 10
Steps for Determining Load Limit -TOW VEHICLE 10
Tire Safety - Everything Rides on it ............................ 11
Safety First - Basic Tire Maintenance ..................... 11
Finding Your Vehicles Recommended Tire
Pressure and Load Limit .............................................. 11
Understanding Tire Pressure and Load Limits ... 11
Checking Tire Pressure ................................................ 12
Steps for Maintaining Proper Tire Pressure ........12
Tire Size .............................................................................. 12
Tire Tread ..........................................................................12
Tire balance and wheel alignment ........................... 12
Tire Repair ......................................................................... 13
Tire Fundamentals ......................................................... 13
2.3.10.1 Information on Passenger Vehicle Tires 1 3
Treadwear Number UTQGS Information ............. 14
Additional Information on Light Truck Tires ........ 15
Tire Safety Tips ...............................................................15
Propane Safety ....................................................................... 16
Gas Certication ................................................................ 16
General Safety .................................................................... 16
Propane Cylinder Safety ................................................. 17
Gas Appliance Safety ........................................................ 18
Removing Door Vent Cover ...........................................18
Isolating Appliances .......................................................... 18
Electrical Safety ..................................................................... 19
Shore Power ......................................................................... 19
GFI Safety Switch ............................................................... 19
Battery Compartment ..................................................... 19
General Safety ........................................................................ 20
Brakes .....................................................................................20
Brake Controller ............................................................. 20
Brake Maintenance and Adjustment ...................... 20
Maintenance ..................................................................... 20
Jacking Your Trailer ........................................................... 21
Dangerous Gases ............................................................... 21
Trailer Specications ............................................................ 22
AUSRV Contact Details and Stores ............................ 22
Using Your Trailer .................................................................. 23
Opening and Closing the Roof ...................................... 23
Opening the Roof ........................................................... 23
Closing the Roof .............................................................. 23
Connecting to the Tow Vehicle ..................................... 24
Towing with Trucks and Buses .................................. 24
Connecting the Hitch .................................................... 25
Connecting Wiring .........................................................30
Connecting the Safety Chains ...................................30
Connecting the Breakaway ........................................ 31
Loading Your Trailer .......................................................... 32
Pre-Trip Inspection ............................................................ 32
Operating Trailer Features ............................................. 33
Stabilizer Legs .................................................................. 33
Connecting Shore Power ............................................33
Using the Slide Out Kitchen .......................................33
12 Volt Electrical System ................................................34
Control Panel ...................................................................34
Towing Your Trailer ............................................................... 35
Speed and Road Conditions ........................................... 35
Trailer Sway .......................................................................... 35
Fatigue .................................................................................... 35
Daily Checks ........................................................................35
Correct Wiring of Tow Vehicle .....................................36
Choosing a Camp Site ....................................................... 37
Inclement Weather ........................................................ 37
Care and Maintenance of the Trailer .............................38
Protection of Finishes ......................................................38
Corrosion Protection ....................................................38
Table of Contents

www.mdcusa.com Ph: 833 632 8721 Contents
Solar Panels ......................................................................38
Sealants .............................................................................. 38
Canopy Lifting Mechanism (Pop Tops Only) ........ 39
Roof Skirt Elastic Cord .................................................39
Trailer Body Maintenance ..................................................40
Winterizing the Trailer .....................................................40
Water Heater Bypass Installed .................................40
Water Heater Bypass Not Installed ........................40
Post Winter ..........................................................................40
Winter Storage ....................................................................40
Mechanical Maintenance ................................................... 41
Wheels and Tires ................................................................ 41
Brakes ..................................................................................... 41
Brake Adjustment .............................................................. 41
Brake Cleaning and Inspection ..................................... 41
Magnets ................................................................................. 42
Shoes and Linings ............................................................... 42
Bearings and Seals ......................................................... 42
Suspension ........................................................................ 42
Handbrake ........................................................................43
Hitch ....................................................................................44
Ball Bearing Slides ..........................................................44
Plumbing and Toilet .............................................................. 45
Gray Water Tank ............................................................. 45
Fresh Water Tank ........................................................... 45
Selecting Supply Tank ................................................... 45
Connecting To City Water .......................................... 45
Toilet Care and Maintenance ..................................... 45
Truma AquaGo Hot Water System .............................46
Safety Symbols and signal words .................................46
Responsibilities of the operator ................................... 46
Safe Operation ........................................................................ 47
While Driving ....................................................................... 47
Safe handling of malfunctions .......................................48
Safe maintenance and repair .........................................48
Safety features ....................................................................48
Operating Instructions ........................................................ 49
How the appliance works ............................................... 49
Pressure relief valve .............................................................50
Access door ...........................................................................51
Removing the access door .............................................. 52
Closing the access door ................................................... 52
Starting the Appliance .....................................................53
Inspections before each use .......................................... 53
Operating Procedures ......................................................... 54
Operating modes (control panel) ................................. 56
Operating in frost conditions ............................................ 57
Winterizing ............................................................................... 58
Winterizing the appliance ..................................................58
Winterizing the RV with a winterizing uid ................. 59
Draining the water and cleaning the water
inlet lter ............................................................................... 60
Decalcication ........................................................................ 62
Appendix A - Error Codes ............................................... 68
Furnace ...................................................................................... 71
Introduction ......................................................................... 71
General Safety .................................................................... 71
Operation .............................................................................. 73
A. Turning On the Furnace ............................................. 73
B. Turning Off the Furnace ............................................. 74
Inspection And Monthly Maintenance ...................... 74
Schematics & Part Numbers ............................................. 75
Spare Part Numbers ......................................................... 75
Electrical Diagram ............................................................. 76
Battery Care ........................................................................77
Charging System - BM Pro ................................................. 78
Batteryplus Trouble Shooting ...................................... 79
Hub Assembly .....................................................................80
Trailing Arms and Bushes ................................................ 81
Service Record and Schedule ............................................ 82
Travel Record .................................................................... 104
Warranty Policy .................................................................. 106

www.ausrv.com Ph: 833 872 8778 6
General Safety Information
Safety Alert Symbols and Signal Words
This owner manual provides general information only for the model depicted. You must read, follow, and understand the
instructions of all third party tments, appliances, and accessories as well as the manufacturers information contained
in this manual.
AUSRV trailers are manufactured using many third party supplied products which have separate manuals. These manual
must be read in conjunction with this document and all instructions followed. If your trailer does not have additional
manuals included, contact AUSRV on 1-872-8778
Safety information in this manual is denoted by
Risk level is indicated by the following Signal Words.
DANGER – Immediate hazards which WILL result in severe personal injury or
death if the warning is ignored
DANGER
WARNING – Hazards or unsafe practices which COULD result in severe personal
injury or death if the warning is ignored
WARNING
DANGER – Hazards or unsafe practices which could result in minor or moderate
injury if the warning is ignored
CAUTION
DANGER – Practices that could result in damage to the trailer or other property
NOTICE

www.ausrv.com Ph: 833 872 8778 7
Reporting Safety Defects
If you believe that your vehicle has a defect that could cause a crash or could cause injury or death, you should
immediately inform the National Highway Trafc Safety Administration (NHTSA) in addition to notifying AUSRV.
If NHTSA receives similar complaints, it may open an investigation, and if it nds that a safety defect exists in a group of
vehicles, it may order a recall and remedy campaign. However, NHTSA cannot become involved in individual problems
between you, your dealer, or AUSRV.
To contact NHTSA, you may either call the Vehicle Safety Hotline toll-free at 1-888-327-4236 (TTY: 1-800-4249153),
go to http://www.nhtsa.gov; or write to: Administrator, NHTSA, 400 Seventh Street. SE., Washington, DC 20590. You
can also obtain other information about motor vehicle safety from http://www.nhtsa.gov. Call 1-833-632-8721 to reach
AUSRV INC.
Tow vehicle and Trailer Compatibility
Your tow vehicle manufacturer has applied a maximum towing capacity to the vehicle which is the Gross Trailer Weight
(GTW) and a maximum Gross Combined Weight Rating (GCWR). These specications MUST NOT be exceeded. It is
your responsibility to know, understand and follow these specications. Vehicle manufacturers may also specify or
recommend “Weight Distribution Bars” when towing under certain conditions. You MUST ensure this is compatible
with the vehicle and trailer combination.
DANGER – Exceeding manufacturer weight and combination limits can
result in loss of control leading to death or serious injury. Your tow vehicle
and hitch must be rated for the Gross Vehicle Weight of the trailer.
DANGER

www.ausrv.com Ph: 833 872 8778 8
Caravans for illustration purposes only.
Terminology & Abbreviations
Dry Weight: The total weight of the trailer (load on tires plus coupling load) with all options and ttings as supplied by
the manufacturer, with empty water tanks, excluding uids not essential for operation on public roads, and without
luggage or personal effects.
GVW (Gross Vehicle Weight) Rating: The total permissible mass of the Trailer. This includes the tongue/coupling mass
and whatever you add as payload (e.g. water, gas, luggage) up to the specied rating. The GVW Rating must not be
exceeded.
GCWR (Gross Combination Weight) Rating: The total permissible mass that can be supported by the wheels/ tires of
the Tow Vehicle and Trailer Combination. This includes whatever you add as payload (e.g. water, gas, equipment, and
luggage), and total weight of the tow vehicle. The GTM Rating must not be exceeded.

www.ausrv.com Ph: 833 872 8778 9
Terminology & Abbreviations
Tongue Weight: The downward load exerted on the tow point of the vehicle by the trailer. (Coupling Mass)
GVW (Gross Vehicle Weight): The total mass of the trailer and cargo
GVWR (Gross Vehicle Weight Rating): Maximum rated total mass of trailer and cargo.
GCWR (Gross Combination Weight Rating): This is the total allowable combined mass of tow vehicle and trailer as
determined by the tow vehicle manufacturer.
Camber: Camber angle is the measure in degrees of the difference between the wheel’s vertical alignment
perpendicular to the surface. If a wheel is perfectly perpendicular to the surface, its camber would be 0 degrees.
Camber is described as negative when the top of the tire begins to tilt inward towards the chassis rail.
Your AUSRV trailer should be 0-0.5 degrees negative camber.
Toe In/out: Negative toe, or toe out, is the front of the wheel pointing away from the centerline of the vehicle. Positive
toe, or toe in, is the front of the wheel pointing towards the centerline of the vehicle. Toe can be measured in linear units,
at the front or rear of the tire, or as an angular deection. In the case of AUSRV products, the “toe in”
is measured in degrees or 64th’s of an inch at the front of the tire from the chassis rail.
Your AUSRV trailer should have toe in set at 3/64” to 5/64” over the diameter of the tire.
Steps for Determining Correct Load Limit - Trailer
Using the Secondary Escape
The secondary escape in your trailer is marked as “EXIT” and has red release handles as shown in the photo below. This
escape must be clear and unobstructed for emergency escape should the main entry/exit door becomes inaccessible.
To use this escape:
1. Retract blinds/screen
2. Turn red handles to open
3. Escape through open window hatch
Do not utilize this RV unless fully set up because the secondary means of escape
will not be available. Failure to follow this instruction could lead to death or
serious injury.
WARNING

www.ausrv.com Ph: 833 872 8778 10
Tire Safety Information
This section of the User Manual contains tire safety information as required by 49 CFR 575.6.
Steps for Determining Correct Load Limit - Trailer
Trailers 10,000 Pounds GVWR or Less
1. Locate the statement “The weight of cargo should never exceed XXX kg or XXX lbs” on your Vehicles
placard. See gure 1-1
2. This gure equals the available amount of cargo and luggage load capacity.
Tire and Loading Information Placard - Figure 1-1
3. Determine the combined weight of luggage and cargo being loaded on the vehicle. That weight may
not safely exceed the available cargo and luggage load capacity.
The trailer’s placard refers to the Tire Information Placard attached adjacent to or near the trailer’s VIN (Certication)
label at the left front of the trailer.
Note: The following calculations in Sections 2.1.2 and 2.2 are not required by the government. For the purpose of
completeness, NATM has included these statements.
Steps for Determining Load Limit - TOW VEHICLE
1. Locate the statement, “The combined weight of occupants and cargo should never exceed XXX lbs.,” on
your vehicle’s placard.
2. Determine the combined weight of the driver and passengers who will be riding in your vehicle.
3. Subtract the combined weight of the driver and passengers from XXX kilograms or XXX pounds.
4. The resulting gure equals the available amount of cargo and luggage capacity. For example, if the “XXX”
amount equals 1400 lbs and there will be ve 150 lb. passengers in your vehicle, the amount of
available cargo and luggage capacity is 650 lbs. (1400-750 (5 x 150) = 650 lbs.).
5. Determine the combined weight of luggage and cargo being loaded on the vehicle. That weight may not
safely exceed the available cargo and luggage capacity calculated in Step # 4.
6. If your vehicle will be towing a trailer, load from your trailer will be transferred to your vehicle. Consult
the tow vehicle’s manual to determine how this weight transfer reduces the available cargo and luggage
capacity of your vehicle.

www.ausrv.com Ph: 833 872 8778 11
Tire Safety - Everything Rides on it
The National Trafc Safety Administration (NHTSA) has published a brochure (DOT HS 809 361) that discusses
all aspects of Tire Safety, as required by CFR 575.6. This brochure is reproduced in part below. It can be obtained
and downloaded from NHTSA, free of charge, from the following web site:
http://www.nhtsa.dot.gov/cars/rules/TireSafety/ridesonit/tires_index.html
Studies of tire safety show that maintaining proper tire pressure, observing tire and vehicle load limits (not
carrying more weight in your vehicle than your tires or vehicle can safely handle), avoiding road hazards, and
inspecting tires for cuts, slashes, and other irregularities are the most important things you can do to avoid tire
failure, such as tread separation or blowout and at tires. These actions, along with other care and maintenance
activities, can also:
• Improve vehicle handling.
• Help protect you and others from avoidable breakdowns and accidents.
• Improve fuel economy.
• Increase the life of your tires.
This booklet presents a comprehensive overview of tire safety, including information on the following topics:
• Basic tire maintenance
• Uniform Tire Quality Grading System
• Fundamental characteristics of tires
• Tire safety tips.
Use this information to make tire safety a regular part of your vehicle maintenance routine. Recognize that the
time you spend is minimal compared with the inconvenience and safety consequences of a at tire or other tire
failure.
Safety First - Basic Tire Maintenance
Properly maintained tires improve the steering, stopping, traction, and load-carrying capability of your vehicle.
Underinated tires and overloaded vehicles are a major cause of tire failure. Therefore, as mentioned above, to
avoid at tires and other types of tire failure, you should maintain proper tire pressure, observe tire and vehicle
load limits, avoid road hazards, and regularly inspect your tires.
Finding Your Vehicles Recommended Tire Pressure and Load Limit
Tire information placards and vehicle certication labels contain information on tires and load limits. These labels
indicate the vehicle manufacturer’s information including:
• Recommended tire size
• Recommended tire ination pressure
• Vehicle capacity weight (VCW–the maximum occupant and cargo weight a vehicle is designed to carry)
• Front and rear gross axle weight ratings (GAWR– the maximum weight the axle systems are designed
to carry).
Both placards and certication labels are permanently attached to the trailer near the left front.
Understanding Tire Pressure and Load Limits
Tire ination pressure is the level of air in the tire that provides it with load-carrying capacity and affects the
overall performance of the vehicle. The tire ination pressure is a number that indicates the amount of air
pressure– measured in pounds per square inch (psi)–a tire requires to be properly inated. (You will also nd
this number on the vehicle information placard expressed in kilopascals (kPa), which is the metric measure used
internationally.) Manufacturers of passenger vehicles and light trucks determine this number based on the
vehicle’s design load limit, that is, the greatest amount of weight a vehicle can safely carry and the vehicle’s tire
size. The proper tire pressure for your vehicle is referred to as the “recommended cold ination pressure.” (As you
will read below, it is difcult to obtain the recommended tire pressure if your tires are not cold.) Because tires are
designed to be used on more than one type of vehicle, tire manufacturers list the “maximum permissible ination
pressure” on the tire sidewall. This number is the greatest amount of air pressure that should ever be put in the
tire under normal driving conditions.

www.ausrv.com Ph: 833 872 8778 12
Checking Tire Pressure
It is important to check your vehicle’s tire pressure at least once a month for the following reasons:
• Most tires may naturally lose air over time.
• Tires can lose air suddenly if you drive over a pothole or other object or if you strike the curb when
parking.
• With radial tires, it is usually not possible to determine underination by visual inspection.
For convenience, purchase a tire pressure gauge to keep in your vehicle. Gauges can be purchased at tire
dealerships, auto supply stores, and other retail outlets.
The recommended tire ination pressure that vehicle manufacturers provide reects the proper psi when a
tire is cold. The term cold does not relate to the outside temperature. Rather, a cold tire is one that has not been
driven on for at least three hours. When you drive, your tires get warmer, causing the air pressure within them to
increase. Therefore, to get an accurate tire pressure reading, you must measure tire pressure when the tires are
cold or compensate for the extra pressure in warm tires.
Steps for Maintaining Proper Tire Pressure
• Step 1: Locate the recommended tire pressure on the vehicle’s tire information placard, certication
label, or in the owner’s manual.
• Step 2: Record the tire pressure of all tires.
• Step 3: If the tire pressure is too high in any of the tires, slowly release air by gently pressing on the
tire valve stem with the edge of your tire gauge until you get to the correct pressure.
• Step 4: If the tire pressure is too low, note the difference between the measured tire pressure and
the correct tire pressure. These “missing” pounds of pressure are what you will need to add.
• Step 5: At a service station, add the missing pounds of air pressure to each tire that is underinated.
• Step 6: Check all the tires to make sure they have the same air pressure (except in cases in which the
front and rear tires are supposed to have different amounts of pressure).
If you have been driving your vehicle and think that a tire is underinated, ll it to the recommended cold ination
pressure indicated on your vehicle’s tire information placard or certication label. While your tire may still be
slightly underinated due to the extra pounds of pressure in the warm tire, it is safer to drive with air pressure
that is slightly lower than the vehicle manufacturer’s recommended cold ination pressure than to drive with a
signicantly underinated tire. Since this is a temporary x, don’t forget to recheck and adjust the tire’s pressure
when you can obtain a cold reading.
Tire Size
To maintain tire safety, purchase new tires that are the same size as the vehicle’s original tires, or another size
recommended by the manufacturer. Look at the tire information placard, the owner’s manual, or the sidewall of
the tire you are replacing to nd this information. If you have any doubt about the correct size to choose, consult
with the tire dealer.
Tire Tread
The tire tread provides the gripping action and traction that prevent your vehicle from slipping or sliding,
especially when the road is wet or icy. In general, tires are not safe and should be replaced when the tread is worn
down to 1/16 of an inch. Tires have built-in treadwear indicators that let you when it is time to replace your tires.
These indicators are raised sections spaced intermittently in the bottom of the tread grooves. When they appear
“even” with the outside of the tread, it is time to replace your tires. Another method for checking tread depth is to
place a penny in the tread with Lincoln’s head upside down and facing you. If you can see the top of Lincoln’s head,
you are ready for new tires.
Tire Balance and Wheel Alignment
To avoid vibration or shaking of the vehicle when a tire rotates, the tire must be properly balanced. This balance
is achieved by positioning weights on the wheel to counterbalance heavy spots on the wheel-and-tire assembly.
A wheel alignment adjusts the angles of the wheels so that they are positioned correctly relative to the vehicle’s
frame. This adjustment maximizes the life of your tires. These adjustments require special equipment and should
be performed by a qualied technician.

www.ausrv.com Ph: 833 872 8778 13
P
The “P” indicates the tire is for passenger vehicles.
Next number
This three-digit number gives the width in millimeters of the tire from sidewall edge to sidewall edge. In general,
the larger the number, the wider the tire.
Next number
This two-digit number, known as the aspect ratio, gives the tire’s ratio of height to width. Numbers of 70 or lower
indicate a short sidewall for improved steering response and better overall handling on dry pavement.
R
The “R” stands for radial. Radial ply construction of tires has been the industry standard for the past 20 years.
Next number
This two-digit number is the wheel or rim diameter in inches. If you change your wheel size, you will have to
purchase new tires to match the new wheel diameter.
Next number
This two- or three-digit number is the tire’s load index. It is a measurement of how much weight each tire can
support. You may nd this information in your owner’s manual. If not, contact a local tire dealer. Note: You may
not nd this information on all tires because it is not required by law.
Tire Repair
The proper repair of a punctured tire requires a plug for the hole and a patch for the area inside the tire that
surrounds the puncture hole. Punctures through the tread can be repaired if they are not too large, but punctures
to the sidewall should not be repaired. Tires must be removed from the rim to be properly inspected before being
plugged and patched.
Tire Fundamentals
Federal law requires tire manufacturers to place standardized information on the sidewall of all tires. This
information identies and describes the fundamental characteristics of the tire and also provides a tire
identication number for safety standard certication and in case of a recall.
2.3.10.1 Information on Passenger Vehicle Tires

www.ausrv.com Ph: 833 872 8778 14
M+S
The “M+S” or “M/S” indicates that the tire has some mud and snow capability. Most radial tires have these
markings; hence, they have some mud and snow capability.
U.S DOT Tire Identication Number
This begins with the letters “DOT” and indicates that the tire meets all federal standards. The next two numbers
or letters are the plant code where it was manufactured, and the last four numbers represent the week and year
the tire was built. For example, the numbers 3197 mean the 31st week of 1997. The other numbers are marketing
codes used at the manufacturer’s discretion. This information is used to contact consumers if a tire defect
requires a recall.
Tire Ply Composition and Materials Used
The number of plies indicates the number of layers of rubber-coated fabric in the tire. In general, the greater the
number of plies, the more weight a tire can support. Tire manufacturers also must indicate the materials in the
tire, which include steel, nylon, polyester, and others.
Maximum Load Rating
This number indicates the maximum load in kilograms and pounds that can be carried by the tire.
Maximum Permissible Ination Pressure
This number is the greatest amount of air pressure that should ever be put in the tire under normal driving
conditions.
Treadwear Number UTQGS Information
This number indicates the tire’s wear rate. The higher the treadwear number is, the longer it should take for the
tread to wear down. For example, a tire graded 400 should last twice as long as a tire graded 200.
Traction Letter
This letter indicates a tire’s ability to stop on wet pavement. A higher graded tire should allow you to stop your car
on wet roads in a shorter distance than a tire with a lower grade. Traction is graded from highest to lowest as “AA”,
”A”, “B”, and “C”.
Temperature Letter
This letter indicates a tire’s resistance to heat. The temperature grade is for a tire that is inated properly and not
overloaded. Excessive speed, underination or excessive loading, either separately or in combination, can cause
heat build-up and possible tire failure. From highest to lowest, a tire’s resistance to heat is graded as “A”, “B”, or “C”.

www.ausrv.com Ph: 833 872 8778 15
Additional Information on Light Truck Tires
Please refer to the following diagram.
Tires for light trucks have other markings besides those found on the sidewalls of passenger tires.
LT
The “LT” indicates the tire is for light trucks or trailers.
ST
An “ST” is an indication the tire is for trailer use only.
Max. Load Dual kg (lbs) at kPa (psi) Cold
This information indicates the maximum load and tire pressure when the tire is used as a dual, that is, when four
tires are put on each rear axle (a total of six or more tires on the vehicle).
Max. Load Single kg (lbs) at kPa (psi) Cold
This information indicates the maximum load and tire pressure when the tire is used as a single.
Load Range
This information identies the tire’s load-carrying capabilities and its ination limits.
Tire Safety Tips
Preventing Tire Damage
• Slow down if you have to go over a pothole or other object in the road.
• Do not run over curbs or other foreign objects in the roadway and try not to strike the curb when
parking.
Tire Safety Checklist
• Check tire pressure regularly (at least once a month), including the spare.
• Inspect tires for uneven wear patterns on the tread, cracks, foreign objects, or other signs of wear
or trauma.
• Remove bits of glass and foreign objects wedged in the tread.
• Make sure your tire valves have valve caps.
• Check tire pressure before going on a long trip.
• Do not overload your vehicle. Check the Tire Information and Loading Placard or User’s Manual for
the maximum recommended load for the vehicle.

www.ausrv.com Ph: 833 872 8778 16
Propane Safety
Appliances in your trailer are fueled with propane. Propane is heavier than air which will allow it to pool in some areas
creating an explosion risk. It is mandatory to follow all manufacturer guidelines in the use of propane appliances.
The propane system and appliances installed on the trailer are designed and
installed to comply with all relevant statutes and laws. Modication or misuse
may result in explosion resulting in death or serious injury. Follow manufacturer
guidelines at all times.
IF YOU SMELL PROPANE
1. Extinguish any open ames and all smoking materials
2. Shut off propane supply at the container(s) or propane supply connection.
3. DO NOT touch electrical switches
4. Open doors and other ventilating openings
5. Leave the area until odor clears.
6. Have the propane system checked and leakage source corrected before
using again.
Ignition of ammable vapors could lead to a re or explosion resulting in death
or serious injury.
DANGER
Gas Certication
Your Caravan has been supplied gas tested and certied. Any additions or alterations to the gas system must be
performed by an authorized person and will require re-certication and testing. Also note any alterations may
affect your warranty on both the system and appliances.
General Safety
• Your Caravan may have a number of gas safety labels afxed throughout containing important
information. All instructions are to be followed and the labels shall not be removed for any reason.
• Make sure to close appliance valves before opening the cylinder valves.
• Where readily accessible, check connections at the appliances, regulator, hoses, and cylinders
periodically for leaks with soapy water (or an equivalent) – this should be done every time a cylinder
is changed or at least annually.
CAUTION – the ammonia present in some soaps and detergents can react with brass ttings and cause such
ttings to crack after a short period of time. Therefore, caution should be exercised when using soap solutions
on brass ttings and all connections should be rinsed thoroughly with fresh water as soon as possible after the
application of the soap solution.
• NEVER use a match or ame when checking for leaks.
• NEVER use cooking appliances for comfort heating.
• In the event of a re, immediately close cylinder valve if safe to do so.
• Appliances must not be altered without the authorization of the manufacturer.
• In the event of an accidental gas leak, close cylinder valve and ventilate the area using a safe method
until the air is clear.
• Flexible hoses are used between the Propane Gas Cylinder and regulator as well as between your
slide-out kitchen cooker (if tted) and the gas bayonet. These exible hoses are easily accessible and
shall be inspected regularly.

www.ausrv.com Ph: 833 872 8778 17
Propane Cylinder Safety
Discharge45˚
Cylinder
relief valve
Discharge
45˚
CarCamper
DO NOT place propane cylinders inside the vehicle.
Propane cylinders are equipped with safety devices that relieve excessive
pressure by discharging propane to the atmosphere. Propane gas is highly
ammable and can lead to a re or explosion and result in death or serious injury.
WARNING
• Propane Gas cylinders have a 12-year lifespan between inspection and re-certication. Always use
gas cylinders that are within their compliance date.
• NOTICE! For drawbar mounted cylinders (if applicable), orient the cylinder relief valves of both
cylinders discharge away from both the trailer and towing vehicle as shown.
• Always remove the propane cylinder from the trailer to rell.
• WARNING! Propane tanks may only be lled to 80% capacity. DO NOT OVER FILL. A properly lled
propane tank contains approximately 80% of its volume as liquid propane. Overlling a propane
container can result in uncontrolled propane ow, which could lead to a re or explosion resulting in
death or serious injury.
• For gas cylinders stored in a dedicated Propane Gas Locker ensure the locker is kept closed at all
times unless changing or operating the cylinders.
• Close cylinder valves when appliances are not in use or while refueling is in progress.
• Ensure cylinder valves are closed to prevent the unintended release of gas from a cylinder.

www.ausrv.com Ph: 833 872 8778 18
Gas Appliance Safety
DO NOT use gas cooking appliances for comfort heating. This can lead to carbon
monoxide poisoning, which can lead to death or serious injury
DANGER
Gas cooking appliances need fresh air for safe operation.
Before operation:
Open vents or windows slightly or turn on exhaust fan prior to using cooking
appliance. Gas ames consume oxygen, which should be replaced to ensure
proper combustion. Improper use can result in death or serious injury.
WARNING
• WARNING! Gas appliances are certied and have a ame safeguard feature to stop gas ow in the event
of the ame going out. Never interfere with this function or replace appliances with a non-certied type.
• WARNING! Slide-out kitchens with cookers should only be operated with an annex fully erected. Failing
to do so may affect the safety and operation of the gas appliance.
• WARNING! Slide-out kitchens with cookers must only be used with a exible connecting hose that is
disconnected from the gas bayonet tting when in its stored position. Under no circumstances permanently
connect this appliance.
• WARNING! Only approved and suitable gas appliances with ame safeguard systems shall be connected
to the gas bayonet (if tted).
Removing Door Vent Cover
WARNING! The door vent must be uncovered at any time the caravan is occupied.
Isolating Appliances
WARNING! Internal gas appliances have an isolation valve tted to the gas line. During travel these should be
turned to the off position where practical and always turn the valve on the active gas bottle off when towing.

www.ausrv.com Ph: 833 872 8778 19
The battery area/compartment is designed for the use of non-ventilated
batteries only.
Do NOT plate a battery that requires venting into this area/compartment
Vented batteries can release poisonous and ammable gas that could lead
to a re or explosion causing serious injury or death.
WARNING
Failure To Follow These Instructions May Result In Death Or Serious Injury!
• When working with electrical equipment or lead acid batteries, have someone nearby in case of
an emergency.
• Study and follow all the manufacturer’s specic precautions when using and servicing the
battery and connected appliances.
• Wear eye protection and gloves.
• Keep unit away from moist or damp areas.
• Avoid dropping any metal tool or object on the battery. Doing so could create a spark or short
circuit which goes through the battery or another electrical tool that may create an explosion.
WARNING
Electrical Safety
Shock Hazard! Keep Away From Children
• Avoid moisture. Never expose unit to snow, water, etc.
• Inverter Unit provides 120 VAC, treat the AC output socket the same as regular wall AC
sockets at home.
• Read and understand the information in the appliance manuals before operating this equipment
WARNING
Shore Power
Show shore power connection.
When using power leads, never coil the lead when in use. Always lay the lead out in longer sections along the ground.
Ensure leads are not a trip hazard and are in serviceable condition.
GFI Safety Switch
The Ground Fault Interrupter protects against leakage current. DO NOT BYPASS or interfere with this device. Test
every 6 months.
Battery Compartment
Later models are tted with a sealed battery compartment with non-ventilated batteries. These are marked with the
sticker below and instructions MUST be followed.

www.ausrv.com Ph: 833 872 8778 20
General Safety
Brakes
Your trailer brakes must be maintained and adjusted to operate
correctly at all times. Failure to maintain and adjust brakes as outlined
in the maintenance schedule may result in a failure causing death or
serious injury.
WARNING
Brake Controller
Your trailer is tted with drum type electric brakes. The tow vehicle MUST be tted with an appropriate brake
controller for the trailer brakes to activate and brake. The company will not hand over a trailer to be towed by a
vehicle without a suitable controller installed. Your trailer brakes are designed to work in synchronization with
your tow vehicle brakes. Never use your tow vehicle or trailer brakes alone to stop the combined load. Your trailer
and tow vehicle will seldom have the correct amperage ow to the brake magnets to give you comfortable, safe
braking unless you make proper brake system adjustments. Changing trailer load and driving conditions, as well
as uneven alternator and battery output, can mean unstable current ow to your brake magnets. It is therefore
imperative that you maintain and adjust your brakes as set forth in the controller manual, use a properly
modulated brake controller and perform the synchronization/adjustment procedure recommended by the brake
controller supplier.
Brake Maintenance and Adjustment
Your trailer is tted with electric drum type brakes. Drum brakes need regular maintenance and adjustment to
perform correctly and wear evenly. The service intervals are outlined in the maintenance schedule and must be
followed.
Maintenance
Your trailer requires regular general maintenance to keep it in roadworthy and safe condition. Overall condition
of your trailer is dependent on regularity and extent of general maintenance. Always follow the Maintenance
schedule contained in this manual. More extreme conditions may warrant more frequent maintenance in
particular, water crossings, exposure to saltwater environments and extended travel over rough terrain.
Table of contents
Other Ausrv Caravan manuals

Ausrv
Ausrv XL15-4 2021 User manual

Ausrv
Ausrv X13 2021 User manual

Ausrv
Ausrv XL13 User manual

Ausrv
Ausrv SUPERLITE 2021 User manual

Ausrv
Ausrv AUSRV LX 2021 User manual

Ausrv
Ausrv X15 2021 User manual

Ausrv
Ausrv XL15 User manual

Ausrv
Ausrv XL15 2021 User manual

Ausrv
Ausrv LX User manual

Ausrv
Ausrv GT 2021 User manual
Popular Caravan manuals by other brands

Kimberley
Kimberley KARAVAN 2021 Installation, Maintenance & Operating manual

Nucamp
Nucamp Cirrus 620 2021 owner's manual

PotteryBarn
PotteryBarn Airstream SPECIAL EDITION 2024 owner's manual

AUSTRACK CAMPERS
AUSTRACK CAMPERS TALAWANA X16B user manual

Vanmaster
Vanmaster Accolade 480 Handbook

Opus
Opus Off-Road Camper OP15 user manual