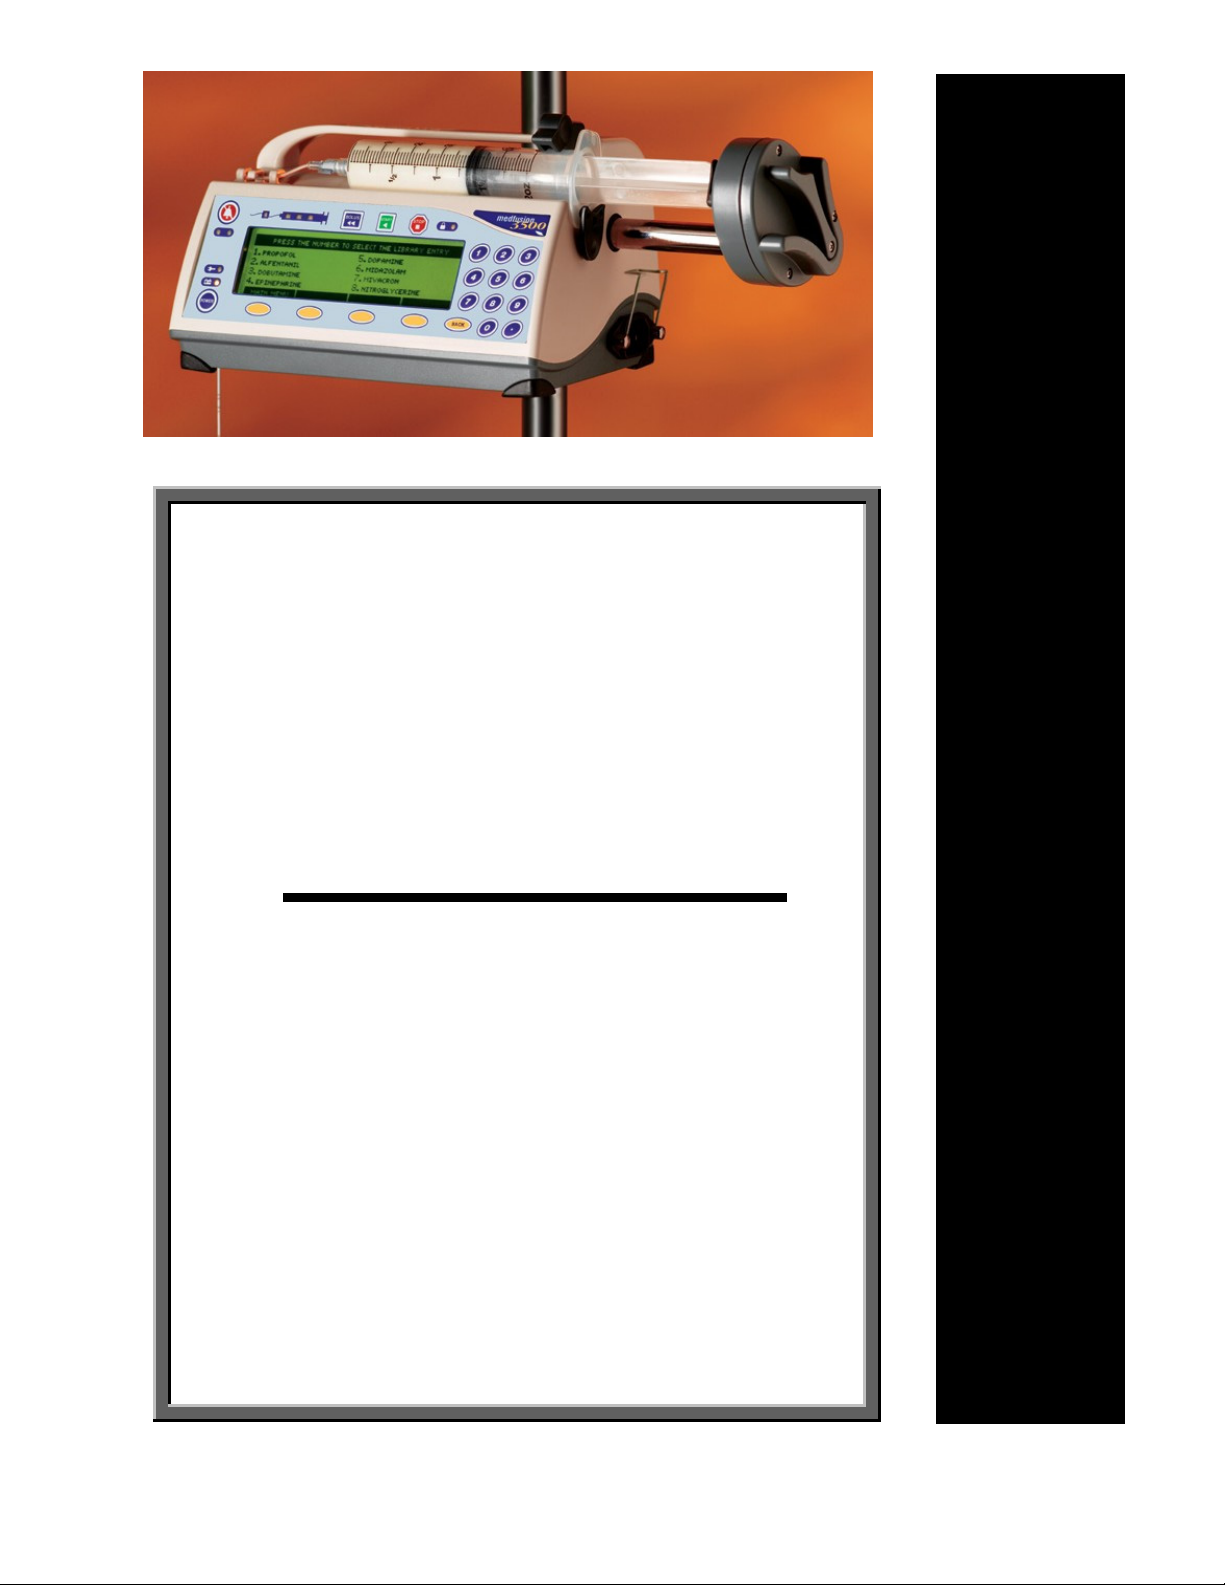
Medex MEDFUSION 3500 User manual
O
Op
pe
er
ra
at
ti
io
on
n
M
Ma
an
nu
ua
al
l
M
M
ME
E
ED
D
DF
F
FU
U
US
S
SI
I
IO
O
ON
N
N
3
3
35
5
50
0
00
0
0
S
S
SY
Y
YR
R
RI
I
IN
N
NG
G
GE
E
E
I
I
IN
N
NF
F
FU
U
US
S
SI
I
IO
O
ON
N
N
P
P
PU
U
UM
M
MP
P
P
Manufactured by:
Medex Inc.
Carlsbad, CA 92008 USA
Authorized EU Representative:
Medex Medical Ltd., Haslingden,
Rossendale, Lancashire, England BB4 4PW

MEDEX
Medfusion 3500
Medex Operation Manual Artwork GD000608 Revision 5 Page ii
Table of Contents
1. IMPORTANT NOTICES................................................................................................................................................1
2. INTRODUCTION............................................................................................................................................................2
3. INTENDED USE, FEATURES & CONTROLS........................................................................................................3
Correct Use of This Pump ....................................................................................................................... 3
Features & Controls................................................................................................................................. 4
Keypad & Functions................................................................................................................................ 5
Using Front Panel Control Buttons ......................................................................................................... 5
Understanding Front Panel Indicators ..................................................................................................... 6
What Indicators Mean ............................................................................................................................. 6
4. TECHNICAL SPECIFICATIONS & DEFINITIONS...............................................................................................7
Technical Definitions .............................................................................................................................. 8
Syringe Manufacturers & Standard Sizes................................................................................................ 9
Trademark Information ...................................................................................................................... 9
5. OPERATION WARNINGS & CAUTIONS ............................................................................................................ 10
Warnings................................................................................................................................................ 10
Cautions................................................................................................................................................. 12
6. ALARMS & REMEDIES ............................................................................................................................................ 13
Alarms / Alerts ...................................................................................................................................... 13
“Neglected Pump” Alarm...................................................................................................................... 13
“Syringe Near Empty” Alarm During Delivery .................................................................................... 13
“Syringe Empty” Alarm During Delivery ............................................................................................. 14
“Syringe Empty −Manual” Alarm During Delivery............................................................................. 14
General System Alarms & Alerts .......................................................................................................... 14
7. GUIDELINES FOR ENHANCED PUMP PERFORMANCE ............................................................................. 17
Always Use Smallest Syringe for Volume of Fluid Being Delivered.............................................. 17
Use Small Internal Diameter Tubing................................................................................................ 17
8. SETUP & LOAD SYRINGES .................................................................................................................................... 18
Turning on the Pump ............................................................................................................................. 18
What if the Pump Does Not Turn On? ............................................................................................. 18
Selecting Delivery Mode....................................................................................................................... 19
Syringe Manufacturer/Type Setup......................................................................................................... 19
What if Only One Syringe Manufacturer is Setup?.......................................................................... 19
Loading the Syringe onto the Pump ...................................................................................................... 20
Priming the System................................................................................................................................ 21
Unloading the Syringe........................................................................................................................... 22
9. STARTING & STOPPING INFUSION DELIVERY............................................................................................. 23
Start Delivery from Pause...................................................................................................................... 23
Starting Delivery from Standby............................................................................................................. 23
Making Changes During Delivery......................................................................................................... 24
Stopping Delivery.................................................................................................................................. 24
Turning Off the Pump ........................................................................................................................... 24
10. PROGRAMMING DELIVERY MODES ................................................................................................................ 25
Overview of Programming Steps .......................................................................................................... 25

MEDEX
Medfusion 3500
Medex Operation Manual Artwork GD000608 Revision 5 Page iii
Apparently Missing or Different Steps ............................................................................................ 25
A Repeated Warning ........................................................................................................................ 25
Continuous Mode: ML/HR..................................................................................................................... 26
Mass Modes........................................................................................................................................... 27
Body Weight Infusion Deliveries .......................................................................................................... 28
Volume / Time – ML/HR ........................................................................................................................ 28
Intermittent Volume / Time................................................................................................................... 30
Recall Last Settings ............................................................................................................................... 31
Custom Dilution .................................................................................................................................... 32
Types of Custom Dilution Available................................................................................................ 32
Calculating Dilutions............................................................................................................................. 32
11. BOLUS DOSING .......................................................................................................................................................... 35
Setup Bolus Dosing ............................................................................................................................... 35
Delivering a Bolus Dose........................................................................................................................ 36
12. LOADING DOSES ....................................................................................................................................................... 38
Setting a Loading Dose ......................................................................................................................... 38
Delivering a Loading Dose.................................................................................................................... 39
13. VOLUME LIMIT .......................................................................................................................................................... 40
Setting Volume Limit ............................................................................................................................ 40
14. KEEP VEIN OPEN (KVO) RATE............................................................................................................................. 42
Programming KVO Rate ....................................................................................................................... 42
Delivery at KVO Rate ........................................................................................................................... 43
15. STANDBY...................................................................................................................................................................... 44
Programming Standby ........................................................................................................................... 44
16. DELAYED START ...................................................................................................................................................... 45
Programming Delayed Start .................................................................................................................. 45
17. OVERRIDE AND TOGGLE FEATURES IN THE INFUSION PROGRAM OPTIONS............................... 46
18. DELIVERY .................................................................................................................................................................... 47
Starting Delivery ................................................................................................................................... 47
Stopping Delivery.................................................................................................................................. 47
Occlusion Trend Graph During Delivery .............................................................................................. 47
FlowSentry (Rapid Occlusion Detection).............................................................................................. 48
Post Occlusion Bolus Reduction ........................................................................................................... 49
Time to Occlusion ................................................................................................................................. 49
Flow Delivery Graphs ........................................................................................................................... 50
Flow Delivery Graphs ........................................................................................................................... 51
19. CHANGING DELIVERY RATE............................................................................................................................... 52
Titrate Rate During Delivery................................................................................................................. 52
Changing Rate During Delivery ............................................................................................................ 53
Changing Rate When Paused ................................................................................................................ 53
20. TOTAL VOLUME, PROGRAM VOLUME / DOSE DELIVERED ................................................................. 54
Displaying Program Volume Delivered / Program Dose Delivered...................................................... 54
Clearing Total Volume, Program Volume, or Program Dose Delivered Display ................................. 55
21. KEYPAD LOCK ........................................................................................................................................................... 56

MEDEX
Medfusion 3500
Medex Operation Manual Artwork GD000608 Revision 5 Page iv
22. USER DEFINED LIBRARIES ................................................................................................................................... 57
What Are Libraries? .............................................................................................................................. 57
For What Are Libraries and Templates Used? ................................................................................. 57
Who Can Use These Libraries of Templates?.................................................................................. 57
Types of Programmable Libraries.................................................................................................... 57
Library and Template Warnings & Cautions ................................................................................... 58
Using “Standard” Libraries ................................................................................................................... 58
How to Tell Whether E-Plates Are Enabled For Use ............................................................................ 59
E-Plates is Disabled.......................................................................................................................... 59
E-Plates Is Enabled........................................................................................................................... 59
Using E-Plates ....................................................................................................................................... 59
Enabling E-Plates & Standard Libraries................................................................................................ 60
Creating Library Templates................................................................................................................... 60
Saving a New Template to a Library..................................................................................................... 61
Template Naming Conventions........................................................................................................ 62
Libraries Must Be Enabled to Use ................................................................................................... 62
Transferring Libraries from Pump to Pump .......................................................................................... 63
23. BATTERY, AC & EXTERNAL DC POWER OPERATION .............................................................................. 64
Onscreen Display of Internal Battery Power Level Gauge ................................................................... 64
Battery guidelines............................................................................................................................. 64
External DC Power Option.................................................................................................................... 65
24. CLEANING AND CARE ............................................................................................................................................ 66
25. MAINTENANCE & SERVICE.................................................................................................................................. 67
Periodic Maintenance ............................................................................................................................ 67
Using Medex Service Assistance .......................................................................................................... 68
Returning a Medfusion 3500 Pump for Repair ...................................................................................... 68
Medex Limited Warranty ...................................................................................................................... 69
26. APPENDIX 1: SYRINGE FLOW RATE BY MANUFACTURER & SIZE ................................................... 70
27. APPENDIX 2: FLOW DELIVERY CALCULATIONS...................................................................................... 71
Mass modes ........................................................................................................................................... 71
Body Weight modes .............................................................................................................................. 71
Volume / Time & Intermittent modes ................................................................................................... 72
Custom Dilution Algorithm................................................................................................................... 72
The Results from the Dilution Calculation.......................................................................................72
How the Calculation is Performed ................................................................................................... 73
Goal of This Dilution Calculation .................................................................................................... 73
28. APPENDIX 3: SERIAL COMMUNICATIONS ................................................................................................... 74
Serial Conversion Box........................................................................................................................... 74
Medex Cloning Block............................................................................................................................ 74
29. APPENDIX 4: POLE CLAMP ASSEMBLY & USE........................................................................................... 75
3000 Series Pump Rotating/Detachable Pole Clamp (standard) ........................................................... 75
Assembling the 3000 Series Pump Rotating/Detachable Pole Clamp................................................... 75
3000 Series Pump Stationary Pole Clamp............................................................................................. 76
Assembling the 3000 Series Pump Stationary Pole Clamp ................................................................... 77
30. APPENDIX 5: MRI ROOM USAGE ........................................................................................................................ 78
MRI Room Usage for the Medfusion 3500 ...........................................................................................78

MEDEX
Medfusion 3500
Medex Operation Manual Artwork GD000608 Revision 5 Page v
♦Proper Placement of Pump ................................................................................................................ 78
♦Pulse Sequences for MRI when using the Medfusion 3500................................................................... 78
MEDEX
Medfusion 3500
Medex Operation Manual Artwork GD000608 Revision 5 Page 1
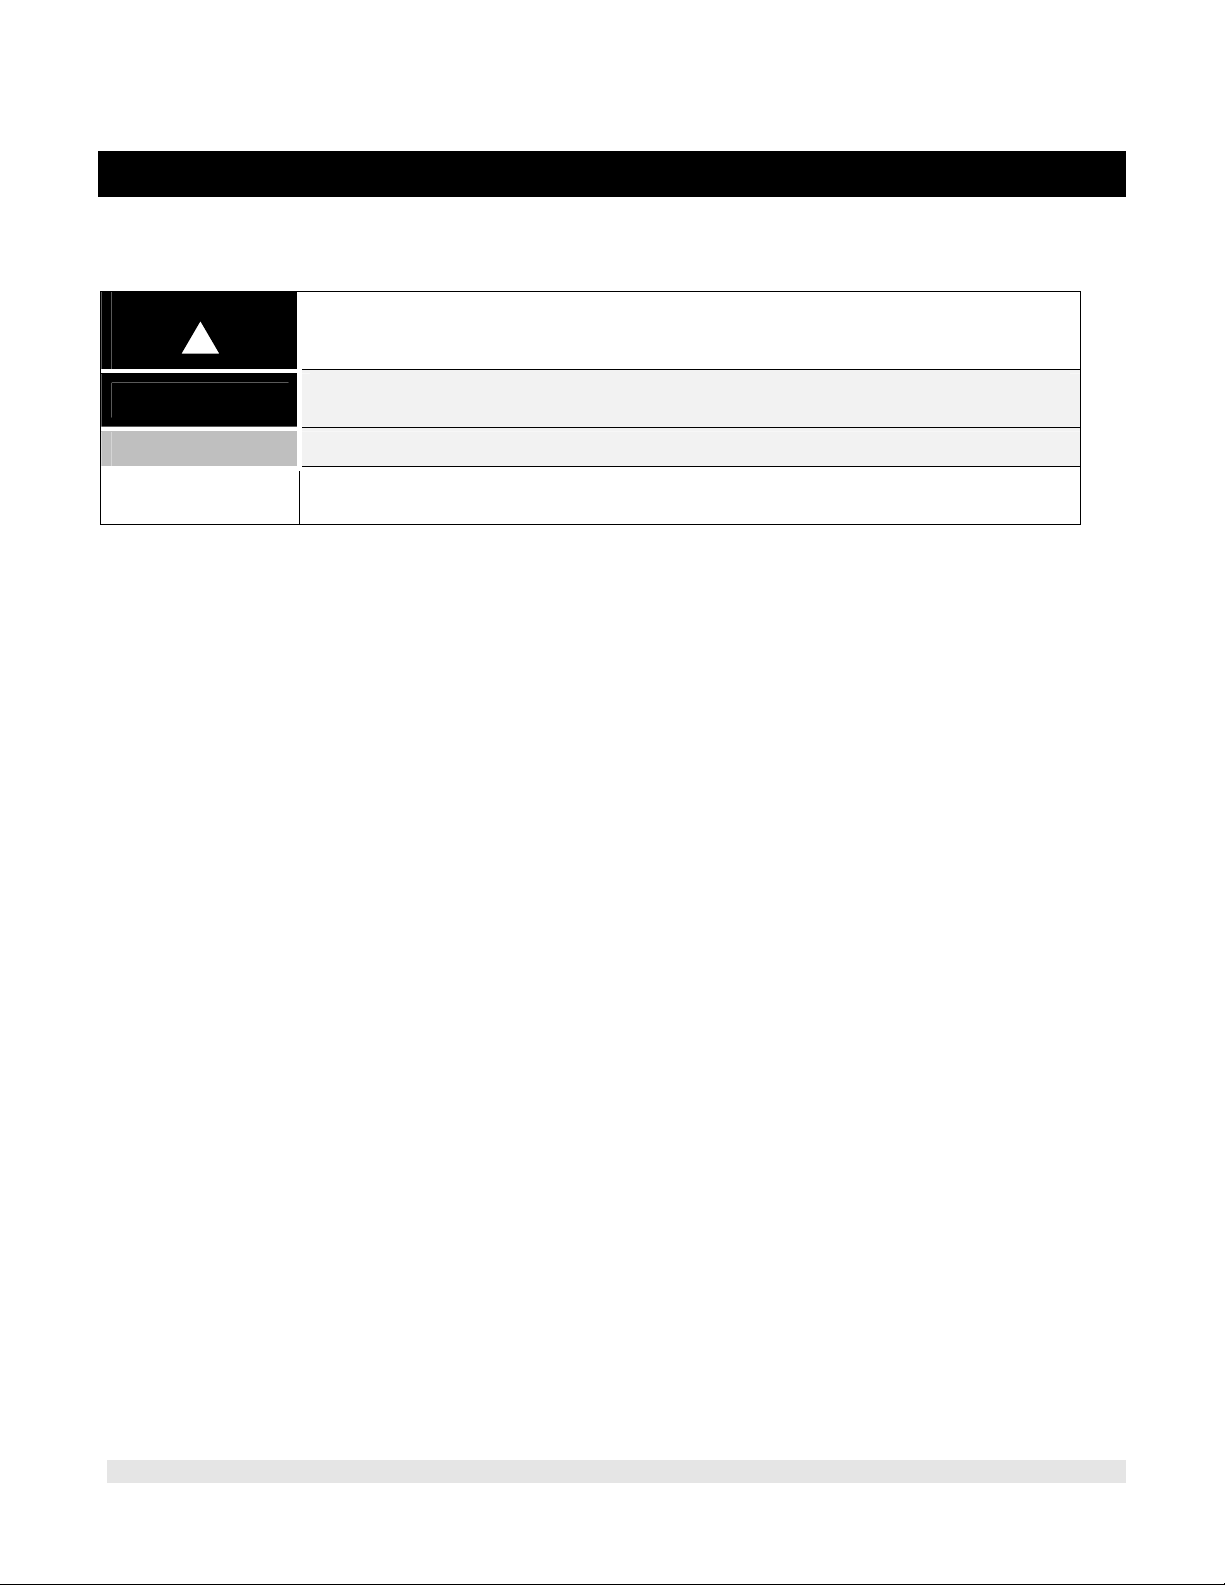
1. IMPORTANT NOTICES
The notices in the table below contain important information you need to know and understand before beginning to
use the Medfusion 3500 pump. All users of this pump are responsible for knowing this information.
!
Before using any Medfusion 3500, you the operator must be thoroughly familiar with the
contents of the operations manual, including all warnings, cautions, and instructions for use. If
you use this pump, you are responsible for knowing these things.
Warning! This syringe infusion pump is intended for use only under direction of trained medical
professionals.
Caution United States Federal law restricts this device to sale by or on the order of a physician.
Usability This manual and its contents are valid for use with all software versions starting with 3.0.x; for
example, 3.0.0, 3.0.1, etc.
©1998 −2004 by Medex Inc. All Rights Reserved.
Manufacturer: Medex Inc., Carlsbad, CA, USA Tel: 800-848-1757
Authorized EU representative: Medex Medical Ltd., St. Crispin Way, Haslingden
Rossendale, Lancashire, BB4 4PW Great Britain Tel: +44 (0) 1706-233826

MEDEX
Medfusion 3500
Medex Operation Manual Artwork GD000608 Revision 5 Page 2
2. INTRODUCTION
The Medfusion 3500 syringe infusion pump is designed for use in critical care areas for the administration of fluids
requiring precisely controlled infusion rates. Because of the pump’s simplicity and ease of use, this pump can also be
used successfully in the non-critical areas of a clinical setting.
The only people authorized to setup & monitor any infusion are nurses, physicians, or other health-care professionals
with training in infusion therapy and operation of the syringe pump.
The Medfusion 3500 syringe pump is indicated for use with the following delivery routes:
•Arterial
•Epidural
•Enteral
•Intravenous
•Spinal
•Subcutaneous
The Medfusion 3500 syringe pump is indicated for delivering the following fluids:
•Intravenous solutions
•Drug solutions
•Blood or blood products
•Enteral feedings
The Medfusion 3500 syringe pump is indicated for use with the following delivery modes
•Continuous
•Volume / Time
•Mass
•Body weight
•Custom dilution
•Intermittent Volume / Time
WARNING!
Pump Usage
This syringe infusion pump is intended for use only under direction of trained medical
professionals.
Before using any Medfusion 3500, you must be thoroughly familiar with this manual,
including all Warnings, Cautions, and instructions for use.

MEDEX
Medfusion 3500
Medex Operation Manual Artwork GD000608 Revision 5 Page 3
3. INTENDED USE,FEATURES &CONTROLS
This chapter defines basic use parameters, features, and control options of the Medfusion 3500 infusion pump.
Correct Use of This Pump
The correct use of the Medfusion 3500 infusion pump should be based on the following principles:
1. This syringe pump is intended for intravenous, subcutaneous, epidural, enteral, spinal, and arterial infusions of
critical medications or fluids requiring precisely controlled infusion rates.
2. Use only syringe manufacturers and sizes listed in the technical specifications of this manual.
3. Ensure all medications or fluids are compatible with the syringe, catheters, tubing, and fittings used in the
infusion setup.
4. Always ensure fluids are compatible with each other when infusing more than one fluid or medication through the
same infusion site. If connecting more than one pump to the same infusion site, use one-way check valves to
prevent pumps from interfering with each other. Verify that the pumps will operate together without alarming.
Warning! Failure to strictly adhere to these principles of use can cause over infusion or under
infusion, with possibility of serious injury or death.
Warning!
ECMO use
Do not use on the inlet side of Extracorporeal Membrane Oxygenation (ECMO) systems
where the negative pressure is greater than –100mm Hg as the high negative
pressures can result in uncontrolled fluid flow.
Warning!
Check Magnetic
Fields Above
150 Gauss
Never use the pump in magnetic fields above 150 gauss. Always secure the pump to a
non-moveable object. In magnetic fields above 150 gauss, the attraction of the pump
to the magnet may be a hazard.
This pump may be operated in static magnetic fields up to 150 gauss for specific MRI
devices identified in Appendix 5.
MEDEX
Medfusion 3500
Medex Operation Manual Artwork GD000608 Revision 5 Page 4
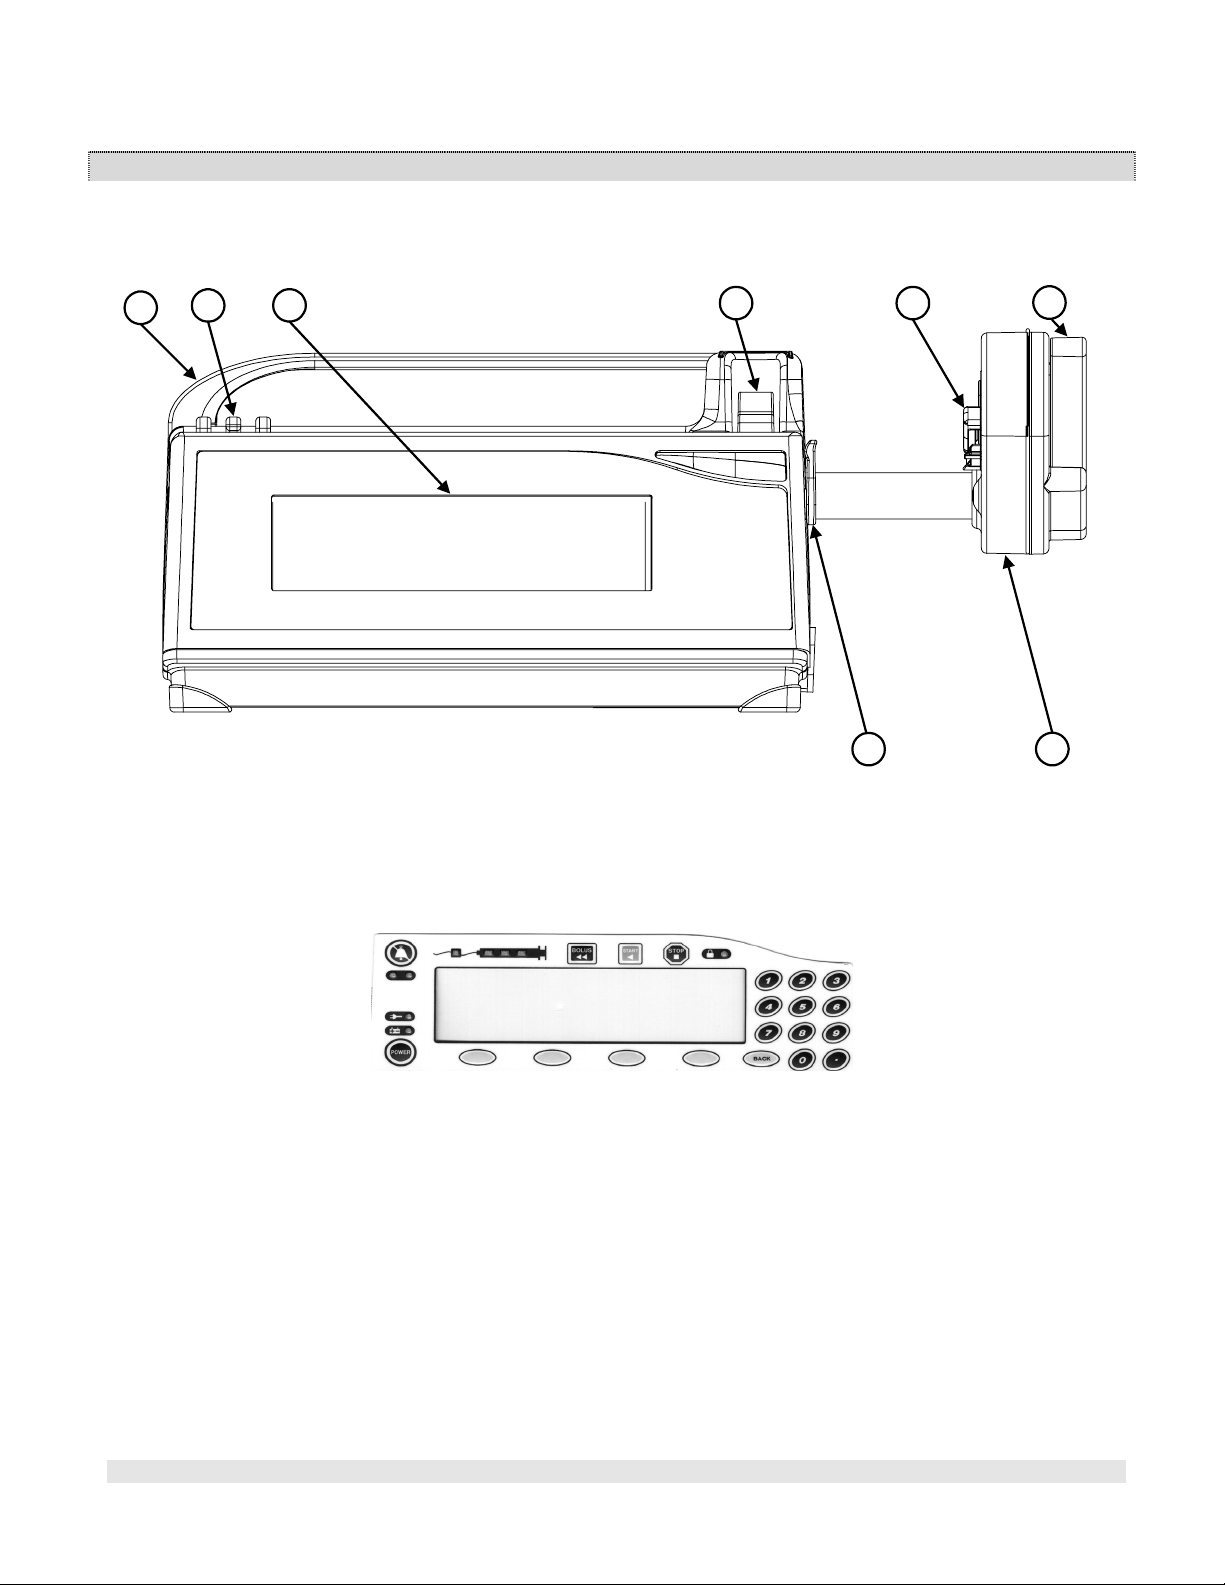
Features & Controls
Below is an illustration of the pump in a front view, with callouts identifying major elements:
A−Handle B−Tubing Holders C−Display
D−Syringe Barrel Clamp E−Syringe Plunger Holders F −Syringe Plunger Release Lever
G−Syringe Barrel Flange Clip H−Syringe Plunger Driver
ACD E F
B
G H

MEDEX
Medfusion 3500
Medex Operation Manual Artwork GD000608 Revision 5 Page 5
Keypad & Functions
Below is an illustration of the front panel of the Medfusion 3500, with tables below identifying functions and effects:
Control Button When Pump is Paused When Pump is Delivering
Power Push and hold to turn OFF pump. Push & release, then push & hold to turn OFF.
Start Starts delivery. N/A
Stop N/A Stops delivery.
Bolus Begins priming after confirmation. Begins programmed bolus after confirmation.
– Alarm Silence
Silences audible alarm. Allows
operator to switch the backlight from
bright to dim, or dim to bright
Silences audible alarm. Allows operator to switch the
backlight from bright to dim, or dim to bright
±– Lock N/A Indicates pump controls are locked.
Numerals & Decimal Set number values or selects options. Set number values or selects option.
Back Reverts to previous step or level. Reverts to previous level or step if adjusting settings.
“Menu Buttons 1-4” Function defined on screen. Function defined on screen.
Using Front Panel Control Buttons
Below is a table of the Medfusion 3500 front panel buttons and their assigned functions:
Button Function
Power
Push and hold to turn the pump ON. Push and hold to turn the pump OFF.
Pressing the power button while the pump is infusing results in a message asking you to press the
power button a second time to turn OFF power.
Start Starts an infusion after settings are made. Press this button to start infusing after all infusion
parameters have been set & reviewed.
Stop Stops an infusion. All delivery (including Keep-Vein-Open) pauses.
Bolus
Starts bolus infusion or primes the pump.
•Press Bolus button when the pump is paused to call up the PRIMING screen, then
press and hold this button to prime.
•Press Bolus button when the pump is infusing to call up the BOLUS CONFIRM screen,
and then press the menu button to confirm the bolus dose and start the bolus delivery.
Alarm Silence
Silences an alarm for a programmed delay period. The usual is 2 minutes. Any new alarms
occurring within the delay period sound immediately. When the delay period expires, any audible
portion of the highest priority alarm still present will sound.
Back Pressing this button exits the current data entry operation and reverts to previous operation screen.
Menu Buttons The four buttons directly below the display are software-defined buttons, with assigned function
varying from screen to screen. The bottom line of the display defines the function for these buttons.
MEDEX
Medfusion 3500
Medex Operation Manual Artwork GD000608 Revision 5 Page 6
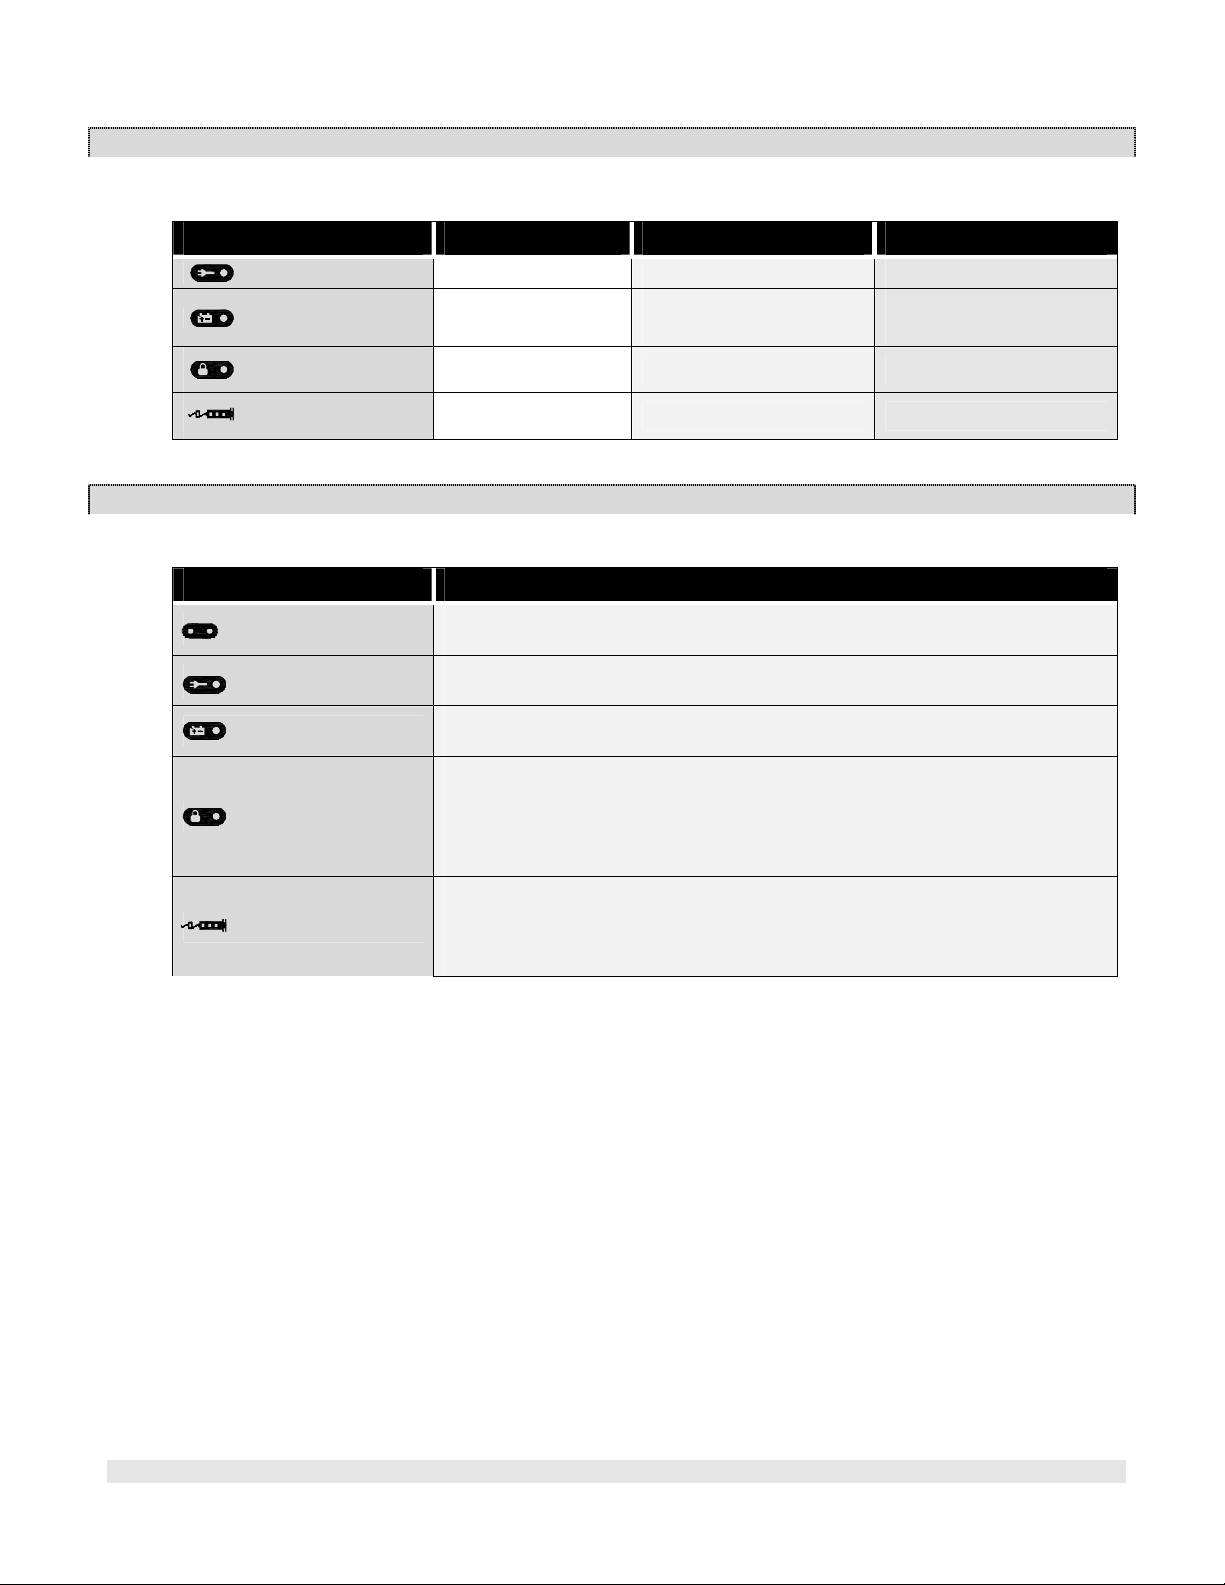
Understanding Front Panel Indicators
Below is a table of function indicators and their effects while using the pump.
Indicator Pump Off Pump Paused Pump Delivering
−AC Line Indicator ON when AC powered. ON when AC powered. ON when AC powered.
– Battery Indicator ON when charging. ON when charging.
Flashing when battery in use.
ON when charging.
Flashing when battery in use.
– Lock Indicator OFF OFF ON when keypad is locked.
−Infusing Indicator OFF OFF Flashing from right to left.
What Indicators Mean
Below is a table of front panel indicators and what each of them means:
Indicator What it means
−Alarm Indicators The ALARM indicators (yellow or red) are on whenever the pump is in an alarm condition.
The specific details of each alarm are covered in the Alarm section later in this manual.
- AC Line Indicator The AC LINE indicator (green) is ON whenever the pump is connected to “mains” line
power. It is OFF when the pump is not connected to an active AC line.
– Battery Indicator The BATTERY indicator (green) blinks ON&OFF whenever the pump is operating on
internal battery power, and remains ON when battery is charging.
– Lock Indicator
The LOCK indicator (±) tells you the pump has been locked into its current operational
mode.
While this indicator is lighted, the keypad is locked and no changes can be made to
settings. Attempting to stop or change an infusion while locked will result in an alarm and
an advisory message.
−Infusing Indicator
The Infusing indicators are 3 green lights, which illuminate in sequence right to left when
the pump is infusing.
During intermittent delivery mode, a single Infusing indicator lights during the time
between infusions.

MEDEX
Medfusion 3500
Medex Operation Manual Artwork GD000608 Revision 5 Page 7
4. TECHNICAL SPECIFICATIONS &DEFINITIONS
Below are the technical specifications of the Medfusion 3500 infusion pumps:
Category Specification
Dimensions (pump only) 10.5” wide x 5.1” high x 5.5” deep
(27 cm x 13 cm x 14 cm)
Weight (pump only) 3.8 lbs. (1.7 kg)
Accuracy Nominal ± 2% excluding syringe variations
(for infusion back pressures of -100 mm Hg to +300 mm Hg)
Flow Rate Range (depends on
syringe size) 0.01 ml/hr to 1130 ml/hr 3500
Delivery modes (user
customized)
ml/hr
Volume / Time
Mass
Body Weight
Custom Dilution
Intermittent Volume / Time
Delivery options (user
customized)
Volume Limit
Bolus Dose
Loading Dose
KVO Rate
Standby
Override Occlusion Limit
Save to Library
Toggle Rapid Occlusion
Detection
Delayed Start
Override Alarm Volume
Toggle PVD/PVD
Toggle Empty Tone
Toggle Near Empty Tone
AC power source 100-240 VAC, 50/60 Hz, 30VA
Safety Class II – Type CF
External DC power source
(Optional)
External DC Input 6 – 14 VDC, 7 Watts
Safety Class II – Type CF (must meet IEC 601-1 Medical Equipment Standards)
Internal Battery Capacity (at
25°C) Rechargeable. 10 hours at 5.0 ml/hr with 60 ml syringe −(from fully charged battery)
User-defined Delivery Libraries Four libraries with 16 profiles per library
One library option is “E-Plates” for rapid setup
Normal Operating Conditions
Temperature: 5°to 40°C (40°to 104°F)
Relative Humidity: 15 to 95% non-condensing
Ambient Pressure: 70 kPa to 106 kPa (10.2 psia to 15.4 psia)
Infusion Back Pressure: -100 mmHg to 300 mmHg

MEDEX
Medfusion 3500
Medex Operation Manual Artwork GD000608 Revision 5 Page 8
Technical Definitions
Below is a table of technical definitions as required per international standards:
Term Definition
Equipment in which protection against electrical shock relies on double or reinforced insulation
instead of basic insulation. Accessible metal components of pump enclosure use this higher level of
insulation instead of safety grounding.
Equipment in which level of protection from electrical shock is defined by leakage current (C)
exposure and insulation by isolated or floating (F) metal of pump enclosure relative to earth
grounding. Under normal conditions, users are exposed to no more than 100 microamps – when
measured though the pump, and patients to no more than 10 microamps – when measured through IV
path.
Infusion Class 4 An infusion pump that combines the functions of continuous infusion flow, intermittent flow, and
discrete bolus delivery.
Infusion Class 5 An infusion pump that functions as a profile pump, providing a programmed sequence of delivery
rates.
IPX3
Equipment that is ingress protected from fluid spraying at vertical angle from above, and from angles
to 60°on either side of vertical.
V ~ Symbol for operating voltage range for alternating current (i.e. AC or mains) power source.
Symbol for infrared serial communications port on pump.
Symbol for external DC jack connection. Tip (negative sign) is for power ground and ring (positive
sign) is for positive power connection. [See warning below.]
Warning!
External Power
must be
IEC 601-1
Certified
Any external power source connected to the DC jack must be IEC 601-1 certified for
medical equipment Type CF and meet Safety Class II. Connecting any external
power source to the pump creates a medical system. Therefore, the user is
responsible for compliance with IEC 601-1 standards. Refer all questions to the
Medex Technical Service Department.
Type
CF
Class
II

MEDEX
Medfusion 3500
Medex Operation Manual Artwork GD000608 Revision 5 Page 9
Syringe Manufacturers & Standard Sizes
Below is a table of syringe manufacturers for which the Medfusion/or 3500 has been designed, and the specific
syringe sizes programmed into the pump database for use with the pump.
Manufacturer Syringe Sizes
B. Braun Omnifix®5, 10, 20, and 50 ml Luer Lock
Perfusor®20 and 50ml Luer Lock
Becton-Dickinson Luer Lok®B-D 3, 5, 10, 20, 30, and 60 ml Luer Lock
B-D 1ml Luer Lock, and 1ml Tuberculin
Becton-Dickinson Glass 1, 2.5, 5 and 10 ml Luer Slip
Monoject®3, 6, 12, 20, 35, and 60 ml Luer Lock
1ml Slip
Terumo®3, 5, 10, 20, 30, and 60 ml Luer Lock
1ml Slip
AstraZeneca®50 ml pre-filled Diprivan®Luer Lock
Warning!
Critical Volume
The critical volume (for volume limit) which could be infused in the event of a single
point positional failure in this infusion pump is 1/100th of the syringe fill volume.
At any rate the critical volume (for rate) in this infusion pump is 1/400th of the syringe
fill volume.
TRADEMARK INFORMATION
Below is a table of registered trademarks and the manufacturers owning them:
Trademark Owner / Manufacturer
“Omnifix” and “Perfusor” B.Braun Medical AG
“B-D” Becton Dickinson and Co
“Monoject” Sherwood Medical
“Diprivan” AstraZeneca Pharmaceutical

MEDEX
Medfusion 3500
Medex Operation Manual Artwork GD000608 Revision 5 Page 10
5. OPERATION WARNINGS &CAUTIONS
This chapter contains vital information in the form of warnings and cautions that apply to operation of this infusion
pump. As an operator of this pump, you are responsible for knowing and using this information.
Warnings
Below is a table of warnings and conditions for operation of the Medfusion3500 infusion pump. Other warnings are
posted throughout this manual. A Warning defines a potentially serious life-safety hazard, specific limitations for
using this device imposed by the hazard, and the steps for avoiding the hazard.
Operational Warnings
Avoid Air Emboli Always purge all air from syringe and infusion lines before connecting to the patient. Air infused
into a patient may cause serious injury and/or death.
Flammables Never use pump in presence of flammable anesthetics, oxygen-enriched atmospheres, or explosive
gases.
Manufacturer
Guidelines
Always read manufacturer precautions and guidelines for medications or fluids infused with this
pump. Medications or fluids may interact with the plastic components of the infusion syringe and
sets. This interaction may result in serious injury and/or death to the patient.
Priming New
Syringes
Always use the Prime function on the pump when loading a new syringe in order to remove any
mechanical slack. Failure to prime correctly can delay infusion delivery and cause Total Volume
Delivered to read higher than what is actually delivered to the patient.
Don’t Prime the
Patient
Never operate the Prime function while pump is connected to the patient infusion site. Using the
pump in the Prime function may cause over-infusion, with possible serious injury or death to
patient.
Confirm All Settings Before starting ANY delivery, ALWAYS confirm correctness of ALL infusion values you just set.
Syringe Matching
Only use syringe sizes and manufacturers listed in this manual. Use of other syringe
manufacturers or sizes may possibly cause an under-infusion or over-infusion to the patient that
could result in serious injury and/or death.
Verify Syringe Make
& Size
Always confirm syringe manufacturer and syringe size displayed on the pump match the
manufacturer and syringe size loaded into the pump. Mismatching syringe make or size may
possibly cause an under-infusion or over-infusion to the patient that could result in serious injury
and/or death.
Check Magnetic
Fields Above 150
Gauss
Never use the pump in magnetic fields above 150 gauss. Always secure the pump to a non-
movable object. In magnetic fields above 150 gauss, the attraction of the pump to the magnet may
be a hazard. This pump may be operated in static magnetic fields up to 150 gauss for specific
MRI devices identified in Appendix 5.
Vertical
Displacement
Once the syringe and tubing system is connected to the patient, raising the system above the patient
(even briefly) can cause significant bolusing due to changes in hydrostatic pressure. Lowering the
system below the patient (even briefly) can cause significant interruptions in flow due to changes
in hydrostatic pressure.
Select right syringe
size
Use the smallest syringe size to deliver the fluid or medication. Running a large syringe at very
low rates may cause under-delivery, e.g. a long time to occlusion alarm. See the section on
guidelines for enhanced performance and review startup curves and time to occlusion information
when selecting a syringe.
Trained Users
Only use this pump under direction of trained medical professionals. Before using this pump, you
must become thoroughly familiar with this manual, including warnings, cautions, and instructions
for use.
Turn Off Fluid Flow
When Loading a
Syringe
Always turn OFF fluid flow to patient in tubing via clamp or stopcock before loading or unloading
syringe onto the pump. Uncontrolled fluid flow can occur when fluid set is not clamped or turned
off, and may cause serious injury and/or death.

MEDEX
Medfusion 3500
Medex Operation Manual Artwork GD000608 Revision 5 Page 11
Secure the Syringe
Always be sure to secure the syringe barrel, flange and plunger, with tubing threaded through
holding clamp. Failure to properly secure the syringe and tubing can result in uncontrolled fluid
flow into a patient, which can result in serious injury and/or death.
ECMO Use
Do Not use on the inlet side of Extracorporeal Membrane Oxygenation (ECMO) systems where
the negative pressure is greater than –100 mm Hg as the high negative pressures can result in
uncontrolled fluid flow.
Horizontal Operation
Only
Always operate this pump in horizontal position to prevent fluid leakage into the pump. If you
suspect fluid has leaked into it, remove pump from service until a trained biomedical technician
can test it.
External DC Power
must be IEC 601-1
Certified
Any external power source used with this pump must be IEC 601-1 certified for medical
equipment Type CF and meet safety class II. Connecting an external power source to the pump
creates a medical system. The user is responsible for complying with IEC 601-1 standards. Refer
all questions to Medex Technical Service Department.
AC Power
The only means of removing AC power is to disconnect the AC power cord. While the AC power
cord is attached to the pump and plugged into an AC outlet, live main voltage is present inside the
pump.
1ml Syringe
Occlusion Pressure
When a 1ml syringe is entered into the programming the occlusion pressure setting is fixed at very
high - 35psi
Service Warnings
Pump Maintenance Only trained biomedical service personnel may service this pump. Service personnel
should disconnect the AC power cord before servicing the pump.
Manufacturer Recommended
Maintenance
Always maintain this pump following manufacturer recommended instructions in the
Service Manual. Improperly maintained pumps may cause either under-infusion or over-
infusion to patient.
Never open pump case Users should never open the pump case or battery compartment for any reason. Service
personnel should always disconnect the AC power cord before servicing the pump.
System Failure Alarm Never use a pump when it has signaled a system failure alarm. Withdraw it from service
and send it to a trained biomedical technician for service.
Dropped or Damaged Pumps Never use a dropped or obviously damaged pump. Withdraw it from service until a
trained biomedical service technician can test it.

MEDEX
Medfusion 3500
Medex Operation Manual Artwork GD000608 Revision 5 Page 12
Cautions
Below is a table of Cautions and conditions related to operation of the Medfusion3500 infusion pump.
Other cautions are posted throughout this manual. An operational Caution defines any special care you must exercise
for safe & effective use of this device.
Operational Cautions
Who Can Buy This
Pump
United States of America Federal law restricts this device to sale by or on the order of a
physician.
Don’t Dunk the Pump Never immerse the pump in water or other fluids. This pump is not waterproof.
Never Autoclave NEVER sterilize the pump in a steam autoclave or gas sterilizer. Using autoclave or gas
sterilization can seriously damage the pump and void the warranty.
Avoid Strong Solvents Never use organic solvents to clean or disinfect the pump. Refer to the CLEAN &CARE section
of this manual.
Use Correct Manuals Always ensure the software version of the pump and operations manuals agree. Refer to this
manual’s front page.
Avoid Sharp Objects Never use sharp objects to depress control buttons on the pump. They may damage the pump
by rendering buttons inoperable.
Check for Leaks Always periodically check the fluid pathway and connections for leaks. As with any infusion
system, leaks may cause patient or infusate fluid loss.
Correct Disposal Follow your institution’s procedures and applicable laws regarding the proper disposal or
recycling of device components.

MEDEX
Medfusion 3500
Medex Operation Manual Artwork GD000608 Revision 5 Page 13
6. ALARMS &REMEDIES
The Medfusion3500 infusion pump has numerous alarms built into it. These are triggered by situations, as a means of
warning or advising you something is not functioning within normal parameters.
Alarms / Alerts
Below is a table of the alarms and alerts generated by the pump, including definitions and remedies:
Type Definition and Remedy
High-priority
A high-priority alarm is initiated by either any condition that halts an ongoing infusion, or any pump
system fault, which effect infusion. High-priority alarms are signaled with a flashing red indicator, a
viewing screen backlight that oscillates between bright and dim, and an audible signal. Press the Alarm
Silence button to return the viewing screen backlight to bright, and silence the audible alarm for the
programmed alarm silence period.
If the front panel controls are locked when a high-priority alarm occurs, the pump controls do unlock.
A high-priority alarm that stops delivery during loading dose or bolus will not return to the pause
screen until the alarm is silenced – allowing the user to record the bolus volume delivered
Medium-priority
A medium-priority alarm indicates any condition requiring operator intervention but does not halt
infusion. Medium-priority alarms are signaled with a flashing yellow indicator, a viewing screen
backlight that oscillates between bright and dim, and an audible signal. Pressing the Alarm Silence
button will return the viewing screen backlight to bright, and silence the audible alarm for the
programmed alarm silence period.
If the front panel controls are locked when a medium-priority alarm occurs, the pump controls do not
unlock.
Low-priority
A low-priority alarm indicates any condition not requiring immediate operator intervention.
Low-priority alarms are announced with a continuous yellow indicator, a viewing screen backlight that
oscillates between bright and dim and an audible signal – 2 Medex “Bing-Bongs”, or three international
tones (on 1 sec – off 1 sec, on 1 sec – off 1 sec, on 1 sec – off) signal
If the front panel controls are locked when a low-priority alarm occurs, the pump controls do not
unlock.
Limit Priority
A limit-priority alarm sounds a tone and displays an advisory message onscreen for 3 seconds.
If the front panel controls are locked when a low-priority alarm occurs, the pump controls do not
unlock.
“Neglected Pump” Alarm
The “Neglected Pump” alarm is a medium priority alert. It is simply reminding you to finish what you started. Once
you begin programming any infusion delivery, the pump expects you to continue until setup is complete.
If you “forget” and leave the pump paused too long (30 seconds) on a data entry screen, then the pump initiates a
medium-priority “user callback” alarm.
There are several basic resolutions:
•Press the Alarm Silence button “” or ANY button to silence the alarm for another 30 seconds.
•Go to the BEGIN INFUSION screen. There the alarm silence interval is at least 2 minutes or longer −
depending on custom configuration.
•Press the Start button to begin the infusion.
•You can cancel the infusion and return to the SELECT THE MODE screen, where no alarms sound.
•You can press & hold the Power button and turn off the pump.
“Syringe Near Empty” Alarm During Delivery

MEDEX
Medfusion 3500
Medex Operation Manual Artwork GD000608 Revision 5 Page 14
The “Near Empty”alarm is a low-priority alarm during delivery telling you the syringe is “just about” empty. The
pump sound the low priority alarm tone, displays the near empty alarm message appears on screen, and does not stop
delivery.
1. Press the Alarm Silence button “” to clear the alarm message.
2. Confirm how long you have before the infusion ends.
3. Then be prepared to load a new syringe onto the pump if necessary, and then start a new infusion.
Calculating
Near Empty
Status
Near empty status is calculated by checking the volume remaining in the syringe
against the near empty alarm time setting divided by current delivery rate.
“Syringe Empty” Alarm During Delivery
The SYRINGE EMPTY alarm is a high priority alarm advising the syringe is empty.
1. The EMPTY alarm stops delivery immediately.
2. Press the Alarm Silence button “” to clear the alarm tone & message.
3. Unload the syringe.
4. Either prepare and load another syringe, return to the SELECT THE MODE screen, where no alarms sound or
turn off the pump.
Calculating
Empty Status
Empty status is determined by measuring plunger position of syringe against the set
value for syringe size & manufacturer.
Caution
Monoject 3ml
Because of variations in syringe manufacturing, the Monoject 3ml syringe may in some
cases not fully empty. Here, the empty alarm sounds with some fluid left in the syringe.
“Syringe Empty −Manual” Alarm During Delivery
It is possible to override a “syringe empty” alarm sounded during delivery. There will be times when the pump
calculates the syringe is empty and yet there remains a residual volume of medication or fluid in the syringes. A
common cause is variation in manufacturing of syringes.
1. Press the Alarm Silence button. The pump has stopped delivery and is at the BEGIN INFUSION screen.
2. If you do not wish to deliver this remaining fluid, then:
a) Unload the syringe.
b) Either prepare and load another syringe, return to the SELECT THE MODE screen, where no alarms sound
or turn off the pump.
3. If you do wish to deliver the remaining fluid, then press the Start button.
4. The pump begins delivery, and continues until no fluid remains in the syringe.
5. As soon as the pump senses an occlusion, it halts delivery and displays the “Syringe Empty −Manual”
message onscreen.
6. Press the Alarm Silence button. The pump has stopped delivery and is at the BEGIN INFUSION screen.
7. Either prepare and load another syringe, return to the Select the Mode screen, where no alarms sound or turn
off the pump.
General System Alarms & Alerts
This section contains a table of the general system alarms you may encounter while operating the Medfusion 3500
infusion pumps. This table identifies the alarm by message and type, and provides a definition and possible remedies.

MEDEX
Medfusion 3500
Medex Operation Manual Artwork GD000608 Revision 5 Page 15
Alarm Message Priority Remedy
Battery Communication
Timeout Low
The internal battery is not working. The pump may be used on AC power
on a conditional basis. As soon as possible, remove pump from service for
repair by a trained biomedical service technician.
Battery Not Charging Low
The internal battery is not charging. The pump may be used on AC power
on a conditional basis. As soon as possible, remove pump from service for
repair by a trained biomedical service technician.
Battery Not Working Medium
The internal battery is not working. The pump may be used on AC power
on a conditional basis. As soon as possible, remove pump from service for
repair by a trained biomedical service technician.
Calculated Rate Out of
Range High The calculated rate is not valid. Verify that all infusion parameters have
been entered correctly.
Check Clutch / Plunger
Lever High The syringe is not loaded correctly. Check the plunger lever and ensure it is
all the way up.
Check Syringe Flange
Sensor High
Sensor is active when syringe is not loaded. Check the syringe flange
holder. Ensure the flange holder pulls back to the side of the case. If holder
does not operate correctly, immediately remove the pump from service for
repair.
Check Syringe Plunger
Sensor High
Sensor is active when syringe is not loaded. Check the syringe plunger
holders. Ensure the holders move freely. If they do not operate correctly,
immediately remove the pump from service for repair.
Completing System
Initialization Limit Allow pump startup to complete self-testing.
Infusion Complete High Either begin a new infusion, return to the SELECT THE MODE screen, where
no alarms sound or turn off the pump.
Low Battery (Each 1% drop
in capacity following initial
signal if power cord is not
plugged in)
Limit Plug in the power cord and run pump on AC mains while recharging the
battery.
Low Battery (Initial Signal) Medium Plug in power cord and run pump on AC mains while recharging the battery
KVO in Progress Medium Advisory message that volume limit has been reached and KVO infusion is
in progress.
Invalid Rate for Syringe Size High Advisory message in custom dilution program. Consult syringe flow
delivery tables in appendix to determine appropriate syringe size.
Invalid Syringe Size High Syringe size not recognized for the manufacturer selected. Review syringe
sizes in the technical specifications section.
Occlusion −Check Infusion
Line High Check infusion line for blockage. Clear or remedy any discovered
occlusion. Press the Start button to begin infusion.
Pressure Increasing −Check
Infusion Line Medium Check infusion line for blockage. Clear or remedy any discovered
occlusion.
Outside Range Limit Medium
The entered rate is outside of the library limits. Press Alarm Silence button
“” to continue. You may then chose to override the range limit or
change the value entered.
Pump is Locked Limit
Keypad has been locked to prevent changes during infusion. The alarm
initiated by pressing any button except Power or Unlock. Press Unlock if
you need to make changes to delivery settings. Or press Power button twice
to end delivery.
Restricted Flow – Bolus Rate
Reduced Medium
If the bolus rate is high enough to trigger an occlusion alarm, the 3500
software will reduce the bolus rate until the bolus is successfully delivered.
With each rate reduction, this process repeats. Once silenced, the audible
alarm tone will not reactivate, even if the process repeats.
Table of contents
Popular Medical Equipment manuals by other brands


Getinge
Getinge Arjohuntleigh Nimbus 3 Professional Instructions for use

Mettler Electronics
Mettler Electronics Sonicator 730 Maintenance manual

Pressalit Care
Pressalit Care R1100 Mounting instruction

Denas MS
Denas MS DENAS-T operating manual

bort medical
bort medical ActiveColor quick guide

AccuVein
AccuVein AV400 user manual


