MEDIAID 3X Series User manual
MEDIAID INC.
17517 Fabrica Way Suite H
Cerritos, CA 90703 USA
(Tel) 714-367-2848 (Fax) 714-367-2852
Email: [email protected]
Website: www.mediaidinc.com
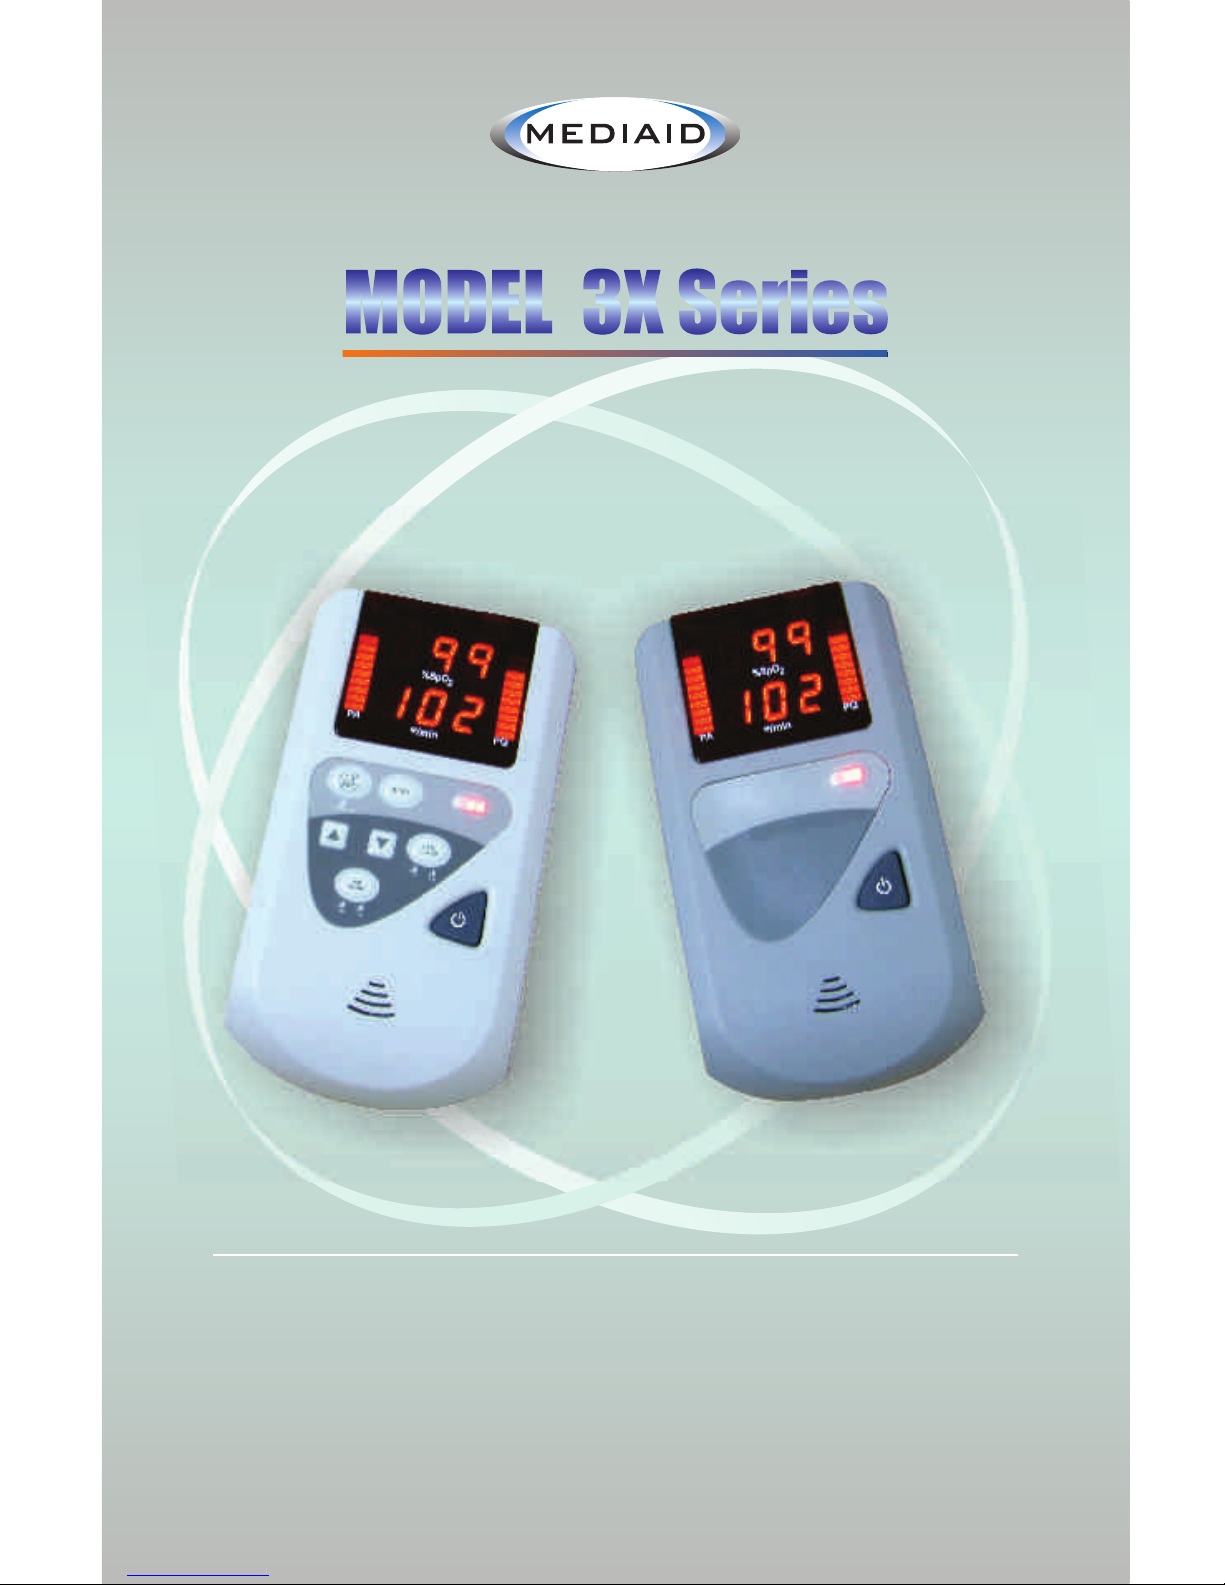
M
M
ODEL 3X Series
Pulse Oximeter with options for 24 hour Memory,
Printer & USB / Infrared Ports
User ’s Manual


1002-60056-003
© Mediaid Inc. - All rights reserved
Pulse Oximeter with options for 24 hour Memory
Printer & USB / Infrared Ports
Model 3X Series
User’s Manual
Model
30
34

ii

iii
Viewing Trend …………………………………………………………... 26
Transmitting Data to a Printer ..……………………………………..... 27
Transmitting Data to a Computer .……………………………………. 28
Getting Ready to Transmit Data .……………………………………... 28
Selecting the Computer Transmission Method ……………….…….. 28
Transmitting the Stored Data .………………………………..……..... 29
Sleep Screening Setup ………….…………………………………….. 24
Performance Considerations .………………………………………… 18
Monitoring Pulse Oximetry (Model 30 only) .……………….…........ 19
Monitoring Pulse Oximetry (Model 34 only) .…………………......... 19
Recording Data in Memory (Model 34 only) ……….....……………. 20
Unpacking and Inspection .……………………………………………. 13
Testing …..………………………………………………………………. 13
Installing the Battery …………………………………………………... 13
Charging the Battery ……………………………………………….….. 14
Powering ON the Pulse Oximeter …….……………………………… 15
Powering OFF the Pulse Oximeter ……………….………………….. 17
Pulse Oximeter Front & Back View ….……………………………....... 6
Pulse Oximeter Side & Top View …….…………………………...….... 7
Pulse Oximeter Visual Display .……………………………………....... 7
Symbology & Markings ……….……………………………………….... 8
Keypads & Definitions ..………………………………………………..... 9
Intended Uses ………………………..………………………………….. 1
Principles of Pulse Oximetry ……….…………………………………... 1
Intrinsic Calibration …….…………..……………………………………. 2
Principal Features ……………………………………………………….. 2
Cautions .…….………………………………………………………….... 2
Chapter 1: Principles of Operation …………………………………….. 1
Chapter 2: Features, Indicators, Keys and Symbols ……………….. 6
Chapter 3: Initial Setup …………………………………………………. 13
Chapter 4: Monitoring and Recording ………….………………….... 18
Chapter 5: Recording Sleep Screening Data
(Model 34 only) ………………………………………………….... 24
Chapter 6: Data Retrieval (Model 34 only) …………………………... 26
Table of Contents

iv
Contact / Customer Service Information ……………………………... 46
Product Information …………………………………………………….. 47
Applicability of Warranty ………………….……………………………. 44
Warranty Coverage …………………………………………………….. 44
Mediaid Inc. Problem Correction Plan .……….………………………. 44
Owner’s Registration ………………………………………………….... 45
Cleaning…………………………………………………………………... 41
LED Display Codes (Model 34 only)………………………......……… 41
Troubleshooting ..…………………………………………………...…... 42
Error Codes………………………………………………………….…… 42
Sensors ….…………………………………………………………….… 39
USB Cable/Connector (Model 34 only)…….……………………..….. 39
Battery Charging/AC-DC Adapter ………………………..……..…….. 39
Battery …….……………………………………………………………... 39
Infrared Printer (Model 34 only)…………..………………………........ 40
Performance ….…………………………………………………………. 37
Electrical ………………………………………….……………………... 37
Environmental …………………………………………………………….38
Physical …………………………………………………………………...38
Equipment Classification ………………………………………………..38
Power ON Function of a Key ………………………………………...... 34
Monitoring Mode ..……………………………………………………..... 33
Adjusting the Time and Date Settings..……………………………….. 31
Adjusting the Alarm Settings ……………….………………………….. 31
Chapter 7: Changing the Pulse Oximeter’s Settings
(Model 34 only) ……………………………………………….....… 31
Chapter 8: Overview of the Operating Modes …………………........ 33
Chapter 9: Special Key Functions (Model 34 only) …………........... 34
Chapter 10: Specifications ..…………………………………………..... 37
Chapter 11: Accessories ………………………………………………... 39
Chapter 12: Maintenance and Miscellaneous…………………..……. 41
Chapter 13: Mediaid Inc. Limited Warranty ………………………….. 44
Chapter 14: User References …………………………………………... 46
Warranty Registration Form ……………………………………………. 49

PAGE 1
The Mediaid Model 3X pulse oximeter is designed to measure the percentage of
functional oxygenated hemoglobin to total hemoglobin.
Noninvasive arterial oxygen saturation measurement is obtained by directing red
and infra red light through a pulsating vascular bed. The pulsating arterioles in the
path of the light beam cause a change in the amount of light detected by a photo-
diode. The pulse oximeter determines the oxygen saturation of arterial blood by
measuring the ratio of transmitted red to infrared light within the pulse waveform.
The non-pulsatile signal is removed electronically for the purpose of calculation.
Therefore,skin,bone, and other non-pulsating substances do not interfere with the
measurement of arterial oxygen saturation.
PRINCIPLES OF PULSE OXIMETRY
WARNING: The Model 3X is intended only as an adjunct in patient assess-
ment. It must be used in conjunction with clinical signs and symptoms.
WARNING: Model 3X refered through out this manual refers to the
common features of Model 30 & 34. Model 34 has more features and
hence additional instructions are given throughout this manual for proper
and safe use. They are marked as (for Model 34 only). Similarly specific
instructions pertaining to Model 30 are marked as (for Model 30 only).
WARNING: Before using the pulse oximeter,become thoroughly familiar
with the information in this manual.
IMPORTANT NOTE: The Mediaid M odel 30 pulse oximeter can be used
for spot checks only. It does not have alarm facility, storing and
retrieval of data, IR, USB features.
The Mediaid Model 3X pulse oximeters are intended to non-invasively
measure arterial oxygen saturation and pulse rate in hospitals, physician’s
offices, emergency medical facilities, or at home. The Model 34 can store
data in memory for later review and documentation and also features a
sleep mode for basic patient sleep screening.
INTENDED USES
CHAPTER 1: PRINCIPLES OF OPERATION

PAGE
2
PRINCIPLES OF OPERATION
The Model 3X is restricted to sale by or on the order of a physician. It is a
prescription device and is to be operated by qualified personnel only.
Become thoroughly familiar with the information in this user’s manual
and all the other accompanying documents before using the pulse
oximeter.
Do not attempt to modify or repair the pulse oximeter – doing so voids the
warranty.
•
•
•
General Cautions
CAUTIONS
Tags patient readings automatically with Patient number, the time and
date of the reading.
The Model 34 can retain up to 136 hours of information for a single
patient, making the device useful for treadmill and other long tests.
The Model 34 can be used in walk around test, storing more than 7200
data for up to 20 consecutive patients.
The Model 34 can also be used for sleep screening where data can be
stored every 5 seconds for up to 18 hours.
Enables data to be printed or transmitted to a computer via the INFRARED
PORT or the USB PORT.
Includes one button that allows for different modes of data storage and
the transmission of recorded data to a printer or a computer.
Performs approximately 21 hours of operation on a single rechargeable
Lithium ion battery. (Sleep Mode)
•
•
•
•
•
•
•
The Model 34
Displays SpO2percentage (%SpO2) and pulse rate (BPM - Beats per minute)
on a 3-digit, 7-segment LED Display.
Displays Perfusion Quality (PQ) & Pulse Amplitude (PA) in bargraph
displays.
Works with any Mediaid sensors with the CompuShield® connector.
Provides increased longevity and functionality to the pulse oximeter with
the removable and replaceable sensor modules.
•
•
•
•
The Mediaid Model 3X pulse oximeter is a portable, lightweight, pocket-sized
instrument that monitors both functional arterial oxygen saturation (SpO2) and
pulse rate noninvasively.
The principal features of the Model 3X pulse oximeters are as follows:
PRINCIPAL FEATURES
The light absorption by hemoglobin is wavelength-dependent. Mediaid red and
infrared LED (light emitting diode) wavelengths are tightly controlled by testing in
production.
INTRINSIC CALIBRATION

PAGE 3
PRINCIPLES OF OPERATION
Do not use the pulse oximeter in the presence of flammable agents or
flammable anesthetics.
Do not immerse in liquid and do not allow any liquid to penetrate the
pulse oximeter’s interior.
Operate the pulse oximeter in normal light conditions.
Avoid bright light or glare on the sensing area to ensure correct reading of
the displays and indicators.
Keep away from MRI (Magnetic Resonance Imaging) equipment.
Move the pulse oximeter away from other electromagnetic emitting
equipment if you experience interference problems. (This device
complies with electromagnetic compatibility standard EN60601-1-2.)
Keep away from the equipment that emits x-ray, alpha particles, beta
particles, neutrons particles, or microwave emissions.
•
•
•
•
•
•
•
Environmental Cautions
Dispose of this instrument and its accessories according to governmental
regulations.
Adhere to all cautions, stipulations, and instructions included with the
sensors used.
Explosion hazard. Do not use Model 3X in presence of flammable
anesthetics or gases. Do not use Model 3X in presence of any flammable
agents.
The use of equipment is restricted to one patient at a time.
Use accessories specified by our company only; otherwise,the device may
not function normally.
The system may not meet its performance specifications if stored or used
outside the specified temperature and humidity ranges.
Do not drop the Model 3X oximeter or its accessories which may result in
certain damage.
Do not use a Model 3X oximeter, charger, AC power cord, sensor, sensor
cable or connector and USB Cable that appears to be damaged or broken.
Failing to comply with this may result in damage or electric shock hazard
to the user/operator as mechanical/electrical integrity of the monitor
and/or its accessories could have been hampered.
Use of damaged sensor or oximeter may result in erroneous or faulty
readings or no alarm.
Do not attempt to lift the oximeter by its charger cable, usb cable or sensor
cable. Any attempt made to lift may result in the detachment of the cables
and the fall of the oximeter resulting in damage.
•
•
•
•
•
•
•
•
•
•

PAGE
4
PRINCIPLES OF OPERATION
Trim the patient’s long fingernails and remove artificial nails or thick nail
polish.
Insert the patient’s finger completely into the sensor.
Fit the sensor comfortably without constricting or compressing the
application site when using a sensor that is attached to the cable adaptor.
Do not apply the sensor to anything but a well perfused extremity.
Cold extremities can affect readings. Warm up the extremity, or move the
sensor to a different site, if necessary.
Do not apply the sensor on extremities that have blood pressure cuffs or
arterial or venous catheters.
Avoid extremity positions that could compromise venous return.
Check for intravascular dyes, which could affect pulse oximeter readings.
•
•
•
•
•
•
•
•
Preventing Device Complications and Faulty Readings
NOTE: When being used in the sleep mode or in continuous monitoring
the sensor must be checked and repositioned once every 2 or 4 hours.
Tissue damage might occur.
Removing the sensor from the Model 34 while it is in Sleep Recording
mode will power OFF the instrument after 2 minutes, ending the sleep
screening process.
When sleep screening data is gathered overnight, the sensor cord should
be placed such that the patient does not become entangled. Do not
attach the cord or the pulse oximeter in any permanent or semi-
permanent manner to the bed or furniture. The sensor cord and the pulse
oiximeter should be free to move with the patient.
•
•
Powering OFF the Model 34 while it is in the Sleep Recording mode will end the
sleep screening process. The next time that the pulse oximeter is powered ON
(with the sensor attached) will result in recording of new sleep screening data.
Sleep Screening Cautions (MODEL 34 ONLY)
Use only Li-ion batteries specified by Mediaid. Use of any other type of
battery not specifically recommended. Use of such batteries could
damage the pulse oximeter.
Never dispose of batteries into fire, short-circuit the terminals, or attempt
to disassemble or heat the battery. Doing so could damage the battery
and cause a fire, injury, or environmental contamination.
Liquid leaking from battery can cause skin burns or damage the pulse
oximeter. If a battery leaks inside the instrument, return the pulse
oximeter for servicing.
Remove the battery during shipment or if the pulse oximeter will be idle
for several weeks.
•
•
•
•
Battery Cautions

PAGE 5
PRINCIPLES OF OPERATION
Turn off very bright lights, such as surgical, bilirubin, fluorescent,or infrared
heating lights if they interfere with sensor functioning. In cases where such
lights are unavoidable, cover the sensor site with an opaque material.
Route sensor cords carefully.
Avoid applying excessive tension to the sensor or sensor cord.
Consider conditions affecting the hemoglobin dissociation curve when
interpreting pulse oximeter readings (such as intravascular dyes).
Keep patient movement to a minimum.
When not in use, do not wind the sensor cord around the pulse oximeter.
•
•
•
•
•
•
PAGE
6
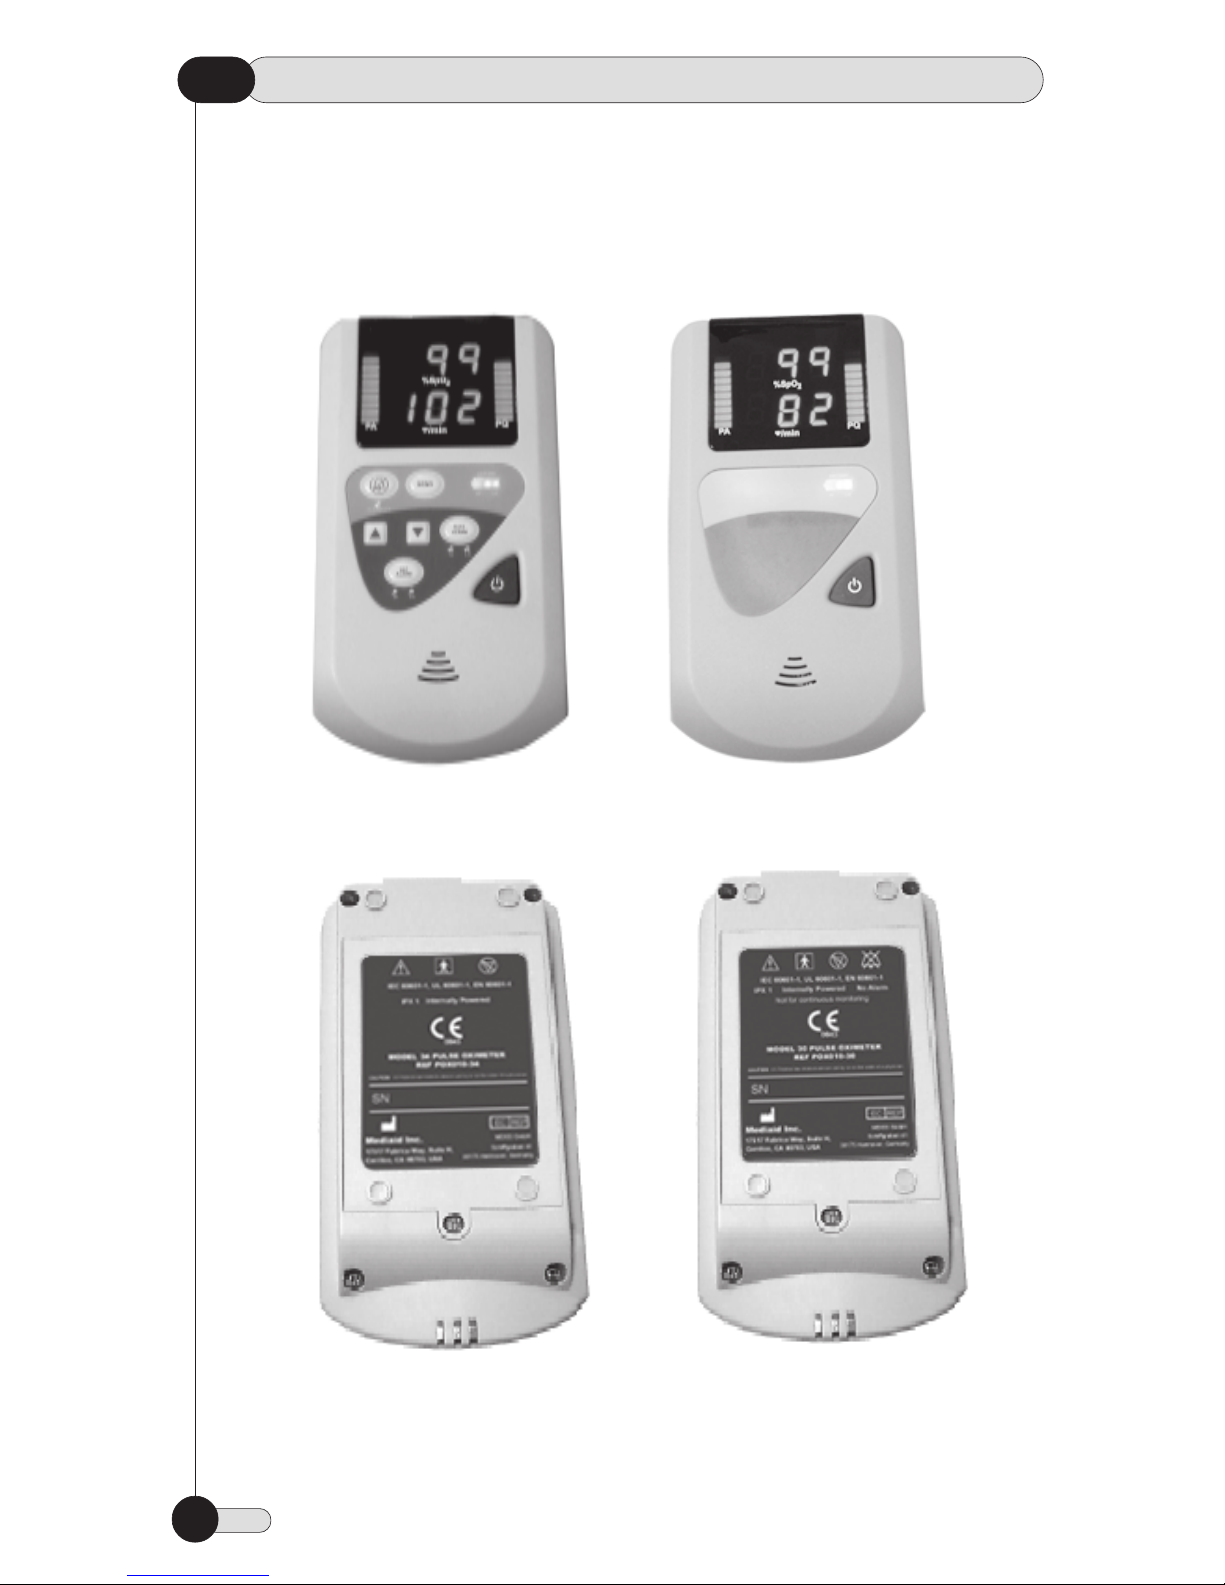
Fig. 2
Fig. 1
Model 30
Model 34
Model 30
Model 34
PULSE OXIMITER FRONT & BACK VIEW
CHAPTER 2: FEATURES, INDICATORS, KEYS
AND SYMBOLS

PAGE 7
FEATURES, INDICATORS, KEYS AND SYMBOLS
Pulse Reading (Beats per minute)
Perfusion Quality
Bargraph
Pulse Amplitude
Display
SpO2Reading
Sensor Inlet
Infrared Port / Window
(Model 34 only)
USB Port
(Model 34 only)
DC Inlet / Battery Charger
Fig.6
Fig.5
Fig.4
Fig.3
PULSE OXIMETER VISUAL DISPLAY
PULSE OXIMETER SIDE & TOP VIEW

%SpO 2
PA
PQ
SEND
RATE
ALARM
RATE
ALARM
SAT
ALARM
SAT
ALARM
PAGE
8
FEATURES, INDICATORS, KEYS AND SYMBOLS
Type BF Applied Part
Non-anesthetic Proof
Attention: Consult Accompanying Documents
DC Power Connection
USB Key Symbol
Partially Charged Battery Indicator
(2 Green or Red LED)
Fully Charged Battery Indicator
(3 Green or Red LED)
Low Battery Indicator (Blinking Red LED)
Low Oxygen Saturation Alarm
High Oxygen Saturation Alarm
Low Pulse Rate Alarm
High Pulse Rate Alarm
Decrement Key
Increment Key
Multi Function Key for Communication
Alarm Off Key and Indicator
Power On/Off
Perfusion Quality Indicator
Pulse Amplitude Indicator
Heart Beats per Minute (BPM)
Oxygen Saturation Percentage
Definition
Symbol
SYMBOLOGY & MARKINGS

3
4
2
9
5
7
1
6
8
2
1
PAGE 9
FEATURES, INDICATORS, KEYS AND SYMBOLS
Unit switches off automatically (auto-power off) when there is no sensor
connected or no finger in sensor for more than 2 minutes.
The unit power OFF with a short-depression of the Power ON/OFF Key.
display area accompanied by a long beep.
The unit powers ON with a short depression of the POWER ON/OFF KEY. A
one-second display and indicator test is performed automatically, and all the
segments of Light Emitting Diodes (LEDs) will be illuminated. The software
version number will then be displayed as “Ver” in %SpO2display area and the
version number in
1. POWER ON/OFF KEY
Model 30
Model 34
Refer respective key number below in the definitions
KEYPADS & DEFINITIONS

HI LO
SAT
ALARM
PAGE
10
FEATURES, INDICATORS, KEYS AND SYMBOLS
Short depression of the OXYGEN SATURATION ALARM KEY toggles the LED
display between the high and low alarm settings,and respective HI/LO ALARM
INDICATOR glows below the key. These alarm settings are adjusted using UP
ARROW and DOWN ARROW KEYS. The alarm settings are retained in memory
until reset by the user. (The default alarm settings are minimum of 85% for
Low limit and 100% for high limit respectively. The display reverts back to
normal monitoring after six seconds of key inactivity or Mute key press. The
high/low reading of Oxygen Saturation keeps blinking when the reading is
above the maximum preset value and when reading is below the minimum
preset value.
5. OXYGEN SATURATION ALARM KEY
The ALARM OFF INDICATOR illuminates and remains on constantly when
audible alarms are silenced.
4. ALARM OFF INDICATOR
CAUTION: Do not silence the audible alarm or decrease its volume else
the patient safety could be compromised.
A short depression of this key silences the alarm for a period of 60 seconds.
The ALARM OFF INDICATOR illuminates and remains on constantly, and the
oximeter monitors normally. Silenced alarms can be reactivated by a short
depression of the ALARM OFF KEY or automatically after a period of 60
seconds regardless of new alarms. This key can be used as enter key while
entering a data in model 34.
3. ALARM OFF (MUTE) KEY
CAUTION: Below 71% the LSB LED blinks indicating that the battery is
near depletion and the unit will shut down within 5 minutes time.
If the unit is operating in Battery mode, then the battery level indicator glows
in Red. All three LEDs (MSB,Middle,LSB) glow if the battery voltage is between
91% to 100% voltage. 2 LEDs glow (middle & LSB) if the battery voltage is in
the range of 87% to 90%. One LED (LSB) glows ON if the battery voltage is in
the range of 71% to 87%.
The Battery level indicator displays the battery level in a scale of 3.If the unit is
connected to external power supply for charging (irrespective of whether the
unit is ON or OFF),then the level indicator glows Green and displays the charg-
ing status. The LSB LED glows, if the charger is connected. The LSB & Middle
LEDs glow, if the unit is partially charged. All 3 LEDs LSB,Middle and MSB glow
if the unit is completely charged.
2. BATTERY LEVEL INDICATOR
RATE
ALARM
RATE
ALARM
SAT
ALARM
PAGE 11
FEATURES, INDICATORS, KEYS AND SYMBOLS
These indicators are located close to the OXYGEN SATURATION ALARM and
PULSE RATE ALARM keys; these indicators illuminate when the patient’s
oxygen saturation or pulse rate crosses the preset high or low alarm settings.
While setting alarm limits, the appropriate indicator is illuminated. During the
high or low reading of SpO2or pulse rate corresponding indicator would be
ON.
8. VISUAL HI/LO ALARM INDICATORS
The pulse-tone volumes are adjusted using the UP & DOWN ARROW KEYS.
There are 5 levels of audible (pulse) tone volume, and “off.” The pulse tone
volume is increased with the UP ARROW key, and decreased or silenced with
the DOWN ARROW key. Default pulse-tone volume level is 3. Alarm levels are
also adjusted with these keys during alarm condition but the alarm volume is
never zero. UP & DOWN arrows keys also used to scroll through the menu,
during mode selection (i.e. Storage mode selection, trend values, patient
number, etc.).
7. UP & DOWN ARROW KEYS
CAUTION: Each time the monitor is used, check the alarm limits to
ensure that they are appropriate for the patient being monitored.
Short depression of the PULSE RATE ALARM KEY toggles the LED display
between the high and low alarm settings and respective HI/LO ALARM
INDICATOR to glow below the key. These alarm settings can be adjusted using
UP ARROW and DOWN ARROW KEYS. The alarm settings are retained in
memory until reset by the user.The default pulse-rate alarm settings are as per
the patient type selected: High 170 BPM and Low 40 BPM. The display reverts
back to normal patient monitoring after a six-second period of key inactivity
or Mute key press.
6. PULSE RATE ALARM KEY

SEND
PAGE
12
FEATURES, INDICATORS, KEYS AND SYMBOLS
A long press of the SEND key transmits all the stored data to a computer
through USB/IR or a printer through the IR port. In Auto Mode, short press of
the SEND key starts storing the data in the memory and in Intermittent Mode,
every short press of the SEND key stores the displayed data in the memory.
9. PRINT / SEND KEY

PAGE 13
Fig. 7
Pull out the Battery
Connector
To open the battery enclosure
remove the screw indicated here
The Model 3X pulse oximeters are powered by a single Li-ion battery that will
operate for approximately 21 hours with a fully charged battery in sleep mode.
INSTALLING THE BATTERY
Before using the Model 3X in a clinical setting, verify that the unit functions
properly by following the instructions in the section on “Powering ON the Pulse
Oximeter” in this chapter.
Also check if any error codes are displayed.
TESTING
Notify the carrier if the shipping carton is damaged. Unpack the Model 3X and
components. If anything is missing or damaged, contact Mediaid Technical
Support.
UNPACKING AND INSPECTION
CHAPTER 3: INITIAL SETUP

PAGE
14
INITIAL SETUP
Connect Model 3X to the specified charger unit. Battery is charged by attaching
the given charger to the AC inlet and turning it ON. While charging the battery
level indicator glows in Green.
CHARGING THE BATTERY
CAUTION: Ensure that the battery connector is inserted correctly to avoid
reverse polarity of the battery. Trying to connect the battery in reverse
polarity may damage Model 3X and / or its components.
CAUTION: Do not remove the battery from the pulse oximeter when it is
in any of the recording modes (Automatic, Intermittent, or Sleep). Doing
so can result in the loss of stored data.
CAUTION: Always adhere to all cautions detailed in “Battery Cautions,” in
Chapter 1.
CAUTION: Follow local governing ordinances and recycling instructions
regarding disposal or recycling of device components,including batteries
of the model 3X.
CAUTION: Explosion hazard. Do not use the Model 3X handheld pulse
oximeter in the presence of flammable anesthetics.
CAUTION: As with all medical equipment, carefully route patient cabling
to reduce the possibility of patient entanglement or strangulation.
CAUTION: To ensure patient safety, do not place the monitor in any
position that might cause it to fall on the patient.
CAUTION: While replacing battery, ensure that the proper tools are used
to remove/fix the screw. Using a wrong tool may result in screw head
portion getting broken.
Unscrew the Battery cover on the rear of the oximeter.
Disconnect and Remove the battery.
Insert the new battery and attach the connector. Put back the rear cover
and tighten the screw.
1.
2.
3.
To replace the battery, complete the following steps.
This manual suits for next models
2
Table of contents
Other MEDIAID Medical Equipment manuals


Popular Medical Equipment manuals by other brands


Getinge
Getinge Arjohuntleigh Nimbus 3 Professional Instructions for use

Mettler Electronics
Mettler Electronics Sonicator 730 Maintenance manual

Pressalit Care
Pressalit Care R1100 Mounting instruction

Denas MS
Denas MS DENAS-T operating manual

bort medical
bort medical ActiveColor quick guide

AccuVein
AccuVein AV400 user manual


