Mediastar Evolution 785 User manual
1
785_QSG_Ve Part No. 200-2430 – v4
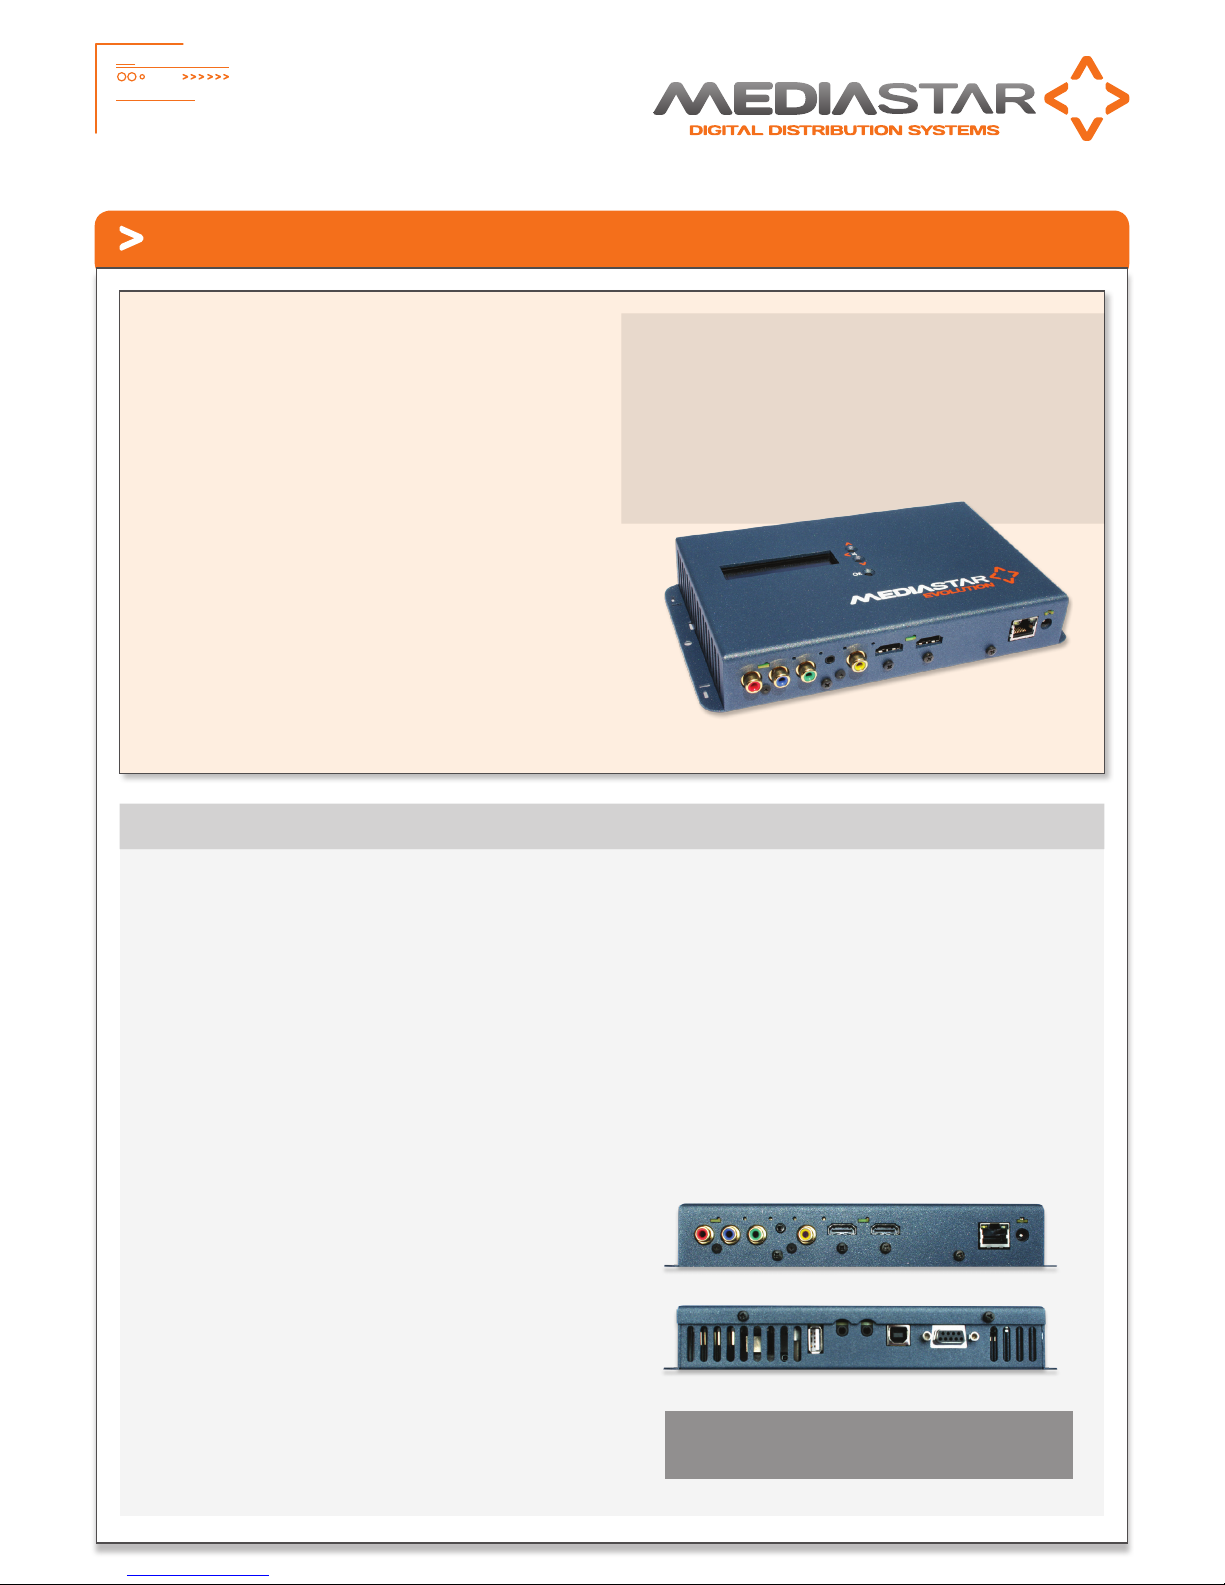
Quick Start Guide - MediaStar Evolution 785 HD Video Encoder
The MediaStar Evolution 785 encoder allows a video and audio
signal to be streamed to an unlimited number of users across
an IP network in real-time. The remote users can use software
or hardware based decoders to watch the live video and audio.
This Encoder is a standalone unit that has a variety of standard
video and audio inputs. It can be setup to use a particular
video input or it can scan all inputs and start streaming the
first video signal it detects. Basic configuration/control can be
made using an on-board display and selection buttons, while
the full range of controls can be accessed via simple-to-use
web pages.
The encoder has a variety of other features that make it
anessential part of any sophisticated AV switching system.
These include IP/RS232 control commands, network sourced
IR blasting, and an IP to RS232 pass-through comms link. It is
powered from a mains-DC plug-in power supply or via802.3af
Power-over-Ethernet (PoE). There are no moving parts within
the encoder, and it can operate reliably in all dry environments
from 0-40°C (32-104°F).
What’s in the box
•785 Encoder
•CAT5 patch cable
•HDMI lead
•3 phono video lead
•3.5mm plug to 2 phono audio lead
•RS232 lead
Important Safety Instructions
1. Read these instructions.
2. Keep these instructions.
3. Heed all warnings.
4. Follow all instructions.
5. Do not use this apparatus near water.
6. Clean only with a dry cloth.
7. Do not block any ventilation openings. Install in accordance
with the manufacturer’s instructions.
8. Do not install near any heat sources such as radiators, heat
registers, stoves or other apparatus (including amplifiers)
that produce heat.
9. Do not defeat the safety purpose of the polarised or
grounding-type plug. A polarised plug has two blades with
one wider than the other. A grounding type plug has two
blades and a third grounding prong. The wide blade or the
third prong are provided for your safety. If the provided
plug does not fit into your outlet, consult an electrician for
replacement of the obsolete outlet.
10. Protect the power cord from being walked on or pinched
particularly at plugs, convenience receptacles, and the
point where they exit from the apparatus.
11. Only use attachments/accessories specified by the
manufacturer.
12. Use only with the cart, stand tripod, bracket, or table
specified by the manufacturer, or sold with the apparatus.
When a cart is used, use caution when moving the cart/
apparatus combination to avoid injury from tip-over.
13. Unplug this apparatus during lightning storms or when
unused for long periods of time.
14. Refer all servicing to qualified service personnel. Servicing
is required when the apparatus has been damaged in any
way, such as power-supply cord or plug is damaged, liquid
has been spilled or objects have fallen into the apparatus,
the apparatus has been exposed to rain or moisture, does
not operate normally, or has been dropped.
WARNING: THERE ARE NO USER SERVICEABLE PARTS
WITHIN THE MEDIASTAR 780 UNIT.

2
785_QSG_Ve Part No. 200-2430 – v4
Quick Start Guide - MediaStar Evolution 785 HD Video Encoder
Installation
1. When locating the 785 Encoder, ensure that a clearance
distance of 25mm (1”) is maintained around the unit
to provide sufficient ventilation airflow. Items that could
accidentally block the ventilation grills or impede the cooling
airflow must not be located near the unit. The 785 must
not be installed where there is a possibility of exposure to
condensation, dripping or splashing liquids. Containers filled
with fluid should not be located in the vicinity of this unit.
Do not fix the Encoder to any surface which is a heat source
that may cause the unit to over-heat.
2. Connect the video source to the Encoder using the cables
supplied. If analogue audio is being used, connect the audio
source to the 3.5mm audio input socket.
3. Power on the encoder using the external mains-DC Power
supply or via the CAT5 network cable if using Power-over-
Ethernet (PoE).
When powering with the mains/DC power supply:
The external mains/DC power supply input rating must
meet the specifications of the mains supply at the installation
location. Only the LPS (Limited Power Source) power supply
provided with this equipment should be used. This device
must be installed using a mains (AC supply) plug and socket
that is located near the equipment, that remains operable
and be easily accessible to disconnect the unit in the case
of an emergency. Insert the DC jack plug of the mains/DC
power supply unit into the jack socket on the Encoder. Plug in
the mains/DC power supply unit, switch on and check that
the status indicator LED by the DC jack socket is lit.
When powering using PoE:
Connect the encoder to the network using the CAT5 cable
supplied or another equivalent cable of appropriate length.
The Encoder will then negotiate a class 3 power supply
connection with the PoE PS equipment. Check the status
LED by the DC jack socket is lit. If a mains/DC power supply
and PoE are used simultaneously, most power will be taken
from the DC supply and a small amount of power will be
taken from the PoE source so the link remains active.
4. The status LED (by the DC jack connector) will initially be
orange, then orange flashing as the encoder boots up.
When the LED goes green or flashing green, the encoder
is ready for use. The status LED shows the following states:
The LEDs on the network connector should illuminate to
indicate there is a valid network connection. The left-hand
green LED indicates a network link has been established,
and the right-hand orange LED is illuminated to indicate a
100Mbps connection. If the right-hand LED remains off, then
only a 10Mbps link has been established which may not be
adequate for successful video streaming.
5. The encoder is supplied in the following default state:
IP Address: 191.53.51.208
Multicast Video/Audio stream: 239.192.11.12
Video acquisition: Search mode
Encoding: MPEG2, VBR, 10Mbps for SD input, 15Mbps
for HD input.
This means that as soon as a valid video signal is input on
to any one of the video inputs, a video/audio stream will
automatically be generated on multicast stream address
239.192.11.12. This stream can now be viewed using a
suitable software or hardware decoder.
If the Encoder does not see a valid video input, it will still
output a default plain colour picture.
6. It is important to now change the IP address of the Encoder,
and its multicast output stream. If two encoders are on the
network at the same time and have the same IP address,
then accessing the browser based Encoder controls will
become impossible. If two encoders are on the network at
the same time and have the same video stream IP address,
then the picture on this stream will become un-watchable.
To change the IP address of the encoder, it is recommended
that you use the built in display and selection buttons.
However, you can also use an RS232, USB or IP serial link, or
connect to the Encoder via the network using a browser with
the Encoder’s default IP address.
Before setting the IP address of your encoder, contact your
network administrator to ensure any settings made are
appropriate for your network.
Built in Display Operation
The OLED display can be used with the three adjacent
push buttons to view status information and configure the
Encoder. The Up and Down buttons scroll up and down
the menus and change parameter values. The OK button
selects the currently displayed menu item or confirms a
parameter change. Pressing the Up and Down buttons and
releasing them together returns up a menu level, aborting
a parameter change in progress. Pressing the Up, Down
and OK buttons for 5 seconds and releasing them together
will present a unit RESET option. Pressing the OK button to
confirm will then reboot the encoder.
State LED
Reset Orange
Booting or stream disabled
(via browser page settings) Flashing orange
Awaiting a valid video source Green flashing
Streaming video Green
Updating software Red flashing
Error Condition (service required) Red

3
785_QSG_Ve Part No. 200-2430 – v4
Quick Start Guide - MediaStar Evolution 785 HD Video Encoder
The structure of the menus presented on the LCD are
as follows:
• Encoder Part number and current operating status
• Stream Information
• Video Input selection (Composite, S-Video, YPbPr, Component
(SCART), Component (SOG), HDMI1, HDMI2, Colour Bars,
Search mode)
• Picture adjustments (Brightness, Contrast, Hue, Saturation)
• IP address settings (DNS/Static, IP Address, Netmask etc.,
Network Link)
• Unit details (MAC address, Serial Number, software version)
• Help
Note: The on-board display will go blank 30 minutes after
it was last used, but the encoder will continue to operate
normally. Press any button to bring the display on again.
IP Address setting using on-board display
Scroll to the IP address settings menu using the Up and
Down buttons. Press OK to enter the IP address setting
menu. Press DOWN to move to the static IP address setting
range and then OK to edit the current setting. Select the IP
address parameter to change then press OK. Use the Up and
Down buttons to change each digit of an IP address number
and press OK to move on to the next digit. Press the Up and
Down buttons together to abort a change and move back
up a menu level. When completed, the IP address entered
will be set on the network interface. You can then access
the full Encoder configuration web-pages via a standard
web-browser over the network.
IP Address setting using an RS232 or USB
Serial Link
Connect the Encoder to your computer using either an RS232
cable or USB cable. If using a USB cable, you might have to
load appropriate comms drivers which can be downloaded
from here: www.cabletime.com/dl/USB_drivers/usb_
driver_sw.zip. Start up a terminal emulator program (such
as Hyperterminal or Putty) and connect to the appropriate
comms port with the following settings:
115200 Baud
8 bits data
No parity
1 stop bit
Type: help <CR> and you should see a list of the serial
commands supported scroll past.
Type: setipconf, dhcp=”false”, dnsaddr=””, gatewayaddr=””,
localaddr=”xxx.xxx.xxx.xxx”, localnetmask=”255.255.0.0” <CR>
where: xxx.xxx.xxx.xxx is the desired IP address of the
encoder.
This will then set the new IP address into the encoder,
which will then reboot and start using that IP address. Once
rebooted, you can then access the full Encoder configuration
web-pages via a standard web-browser over the network.
IP Address setting using an IP Serial Link
To get a serial IP link to the encoder, you must configure
you PC/Laptop so that it can reach the Encoder at its
default IP address of 191.53.51.208. To do this set a static
IP address on your device of 191.53.51.207 with a netmask
of 255.255.0.0. Leave the dns server and gateway blank.
Connect your PC/Laptop to the Encoder with a standard
CAT5 cable (no crossover required). Start-up a telnet
program (such as Putty) and create a Telnet session onto
port 2026 of the encoder.
Type: help <CR> and you should see a list of the serial
commands supported scroll past.
Set the IP address of the encoder using the setipconf
command as described above.
IP Address setting using a Web Browser
To get web-access to the encoder, you must first configure
your PC/Laptop so that it can reach the Encoder at its
default IP address of 191.53.51.208. To do this set a static
IP address on your device of 191.53.51.207 with a netmask
of 255.255.0.0. Leave the dns server and gateway blank.
Connect your PC/Laptop to the Encoder with a standard
CAT5 cable (no crossover required). Start-up you web
browser (typically Internet Explorer, Firefox, Chrome or
Safari) and enter the IP address of the encoder into the
address box. The browser will then show the configuration
web pages of the encoder. Select the Network settings
page from the left hand side. You can then fill in all the
encoder network settings on that page and then press the
APPLY button. The Encoder will then change its IP address
so no further IP communications will be possible before
you configure your PC/Laptop back to its ‘normal’ settings.
Re-start your browser and enter the new IP address of the
encoder to see the configuration web pages.
7. Use a web-browser on a PC/Laptop to fully configure the
Encoder’s settings. Start up a standard web-browser and
enter the IP address (or hostname, if configured) of the
Encoder. The Encoder’s specification page will then be
shown, with a list of all the configuration menus shown
down the left hand side. It is suggested that at least the
Encoding standard and the video inputs are properly
configured as required. Other options such as the emailing
of event logs are disabled by default, but can be enabled
if required. Full help for each of the menus is shown
on-screen if required.

4
785_QSG_Ve Part No. 200-2430 – v4
Quick Start Guide - MediaStar Evolution 785 HD Video Encoder
Video/Audio Input Indicator LEDs
There are green LEDs situated by most of the video and audio input connectors.
These indicate the current video and audio input in use, or whether the internal colour bar generator or search mode is operating.
The Encoder’s active video input is show by the following LED combinations:
Active Video Input LED indicators ON
Composite (NTSC or PAL) with analogue audio Yellow phono, 3.5mm Jack
S-Video (NTSC or PAL) with analogue audio Green phone, Blue phono, 3.5mm Jack
YPbPr or Component (SOG) with analogue audio Green phono, 3.5mm Jack
Component (SCART) with analogue audio Yellow phono, Green phono, 3.5mm Jack
HDMI 1 or 2 (with HDMI digital audio) HDMI 1 or 2
HDMI 1 or 2 (with analogue audio - DVI) HDMI 1 or 2, 3.5mm Jack
Internal colour bar generator All OFF
Search Mode (No input yet found) All ON
Web-Page Configuration Menus
The main configuration of the encoder is carried out using web-pages served by the encoder. Start by entering the IP address (or
hostname) of your encoder into the address bar in your browser. This will show the specification page of the encoder and a list of all the
configuration pages is shown down the left hand side. Click on the configuration page name to open it. The settings will then be shown
with help on the right hand side of the screen (this can be switched off if not required). Make any setting changes you require and then
press the APPLY button at the bottom of the screen to actually apply the changes.
All settings will be retained through power-offs and reboots. Please note that if accurate times are required in the event logs, the
encoder should be configured to use an external NTP time server.
A summary of the configuration pages is listed below:
Status
Shows the current status of the encoder, including:
Part number, Mac address, IP Settings, Software Version, Serial Number, Temperature, Encoder name, Video/Audio encoding standards,
Video source, Stream address and bandwidth, RS232 port status, PoE status. Please note the temperature show is the internal
temperature and anything up to 70°C (158°F) should be regarded as normal.
Video/Audio Input
Specify the video and audio inputs to use here. The indicator LEDs by the Encoder’s input connectors also indicate the video input in use
The Colour Bar generator setting will show a set of colours bars that is internally generated and so is independent of any video input
source. When this is selected, audio from the analogue audio input is streamed along with the colour bar video. Search Mode will look
at each of the video inputs in turn and use the first valid video input signal it finds. This helps facilitate easy setup and is the default
selection. When searching is selected this screen allows the user to specify various detection preferences.
Note: When a fixed video input is being used and no valid video is detected the encoder will stream a solid colour picture and muted
audio. When searching, no stream is produced.
Encoding standard
Provides the stream disable control and the ability to specify how the video and audio is encoded and streamed. Controls include:
Encoding standard, bit rate control strategy, video and audio data rates, video and audio encapsulation, stream unicast/multicast IP
address, TTL, and QoS stream tagging. Stream access URLs are also provided here.

5
785_QSG_Ve Part No. 200-2430 – v4
Quick Start Guide - MediaStar Evolution 785 HD Video Encoder
Picture Adjustment
Adjustments can be made here to the brightness, contrast, hue
and saturation of the input video signal.
Date/Time
Set the time here that is used for event logging. If good
accuracy is required, then synchronisation with an external NTP
time server should be used.
RS232 Port
The RS232 port can be configured for use as either a SIPI
command interface or as an IP to RS232 pass through interface.
SIPI allows third party control systems to control the encoder
using a simple text based command protocol. Note the same
command protocol can be used with IP commands on IP port
2026 or on the USB comms link.
IP Pass through mode allows remote third part control systems
bi-directional communications with other equipment local to the
encoder, via the encoder’s RS232 port.
USB Comms Port
The USB comms port is used as a SIPI command interface only.
Connect to the port and type help to see all the commands
supported.
IR Blaster 1 & 2
These pages provide a Sky IR remote control simulator. Select
the desired Sky handset and press the appropriate button on the
remote control. The on-board IR blaster circuit generates that IR
keypress from the corresponding IR blaster cable plugged into
the encoder. This allows remote (network based) control of a
local Sky Settop box.
Note: Other remote control codes can also be simulated via
an IP command. Also, MediaStar 780 units will read IR from
3rd party remote controls in real time and transfer that signal
across the IP network to the encoder for local re-generation and
control of third party A/V devices.
IR Blaster Repeat
This is an IR blaster setup aid. It allows the last transmitted IR
code to be repeated every half second for 15 minutes so the
optimum position of the IR blaster can be found on the front of
the IR receiver (Settop box) with a single person setup.
Network Setup
This is where the IP network address settings of the unit can
be setup.
Update Locations
The Encoder will periodically check for software upgrades or
new setup configuration files from a specific location on an HTTP
server. This menu is where the file locations are specified.
Enablement Code
New functionality can be enabled on the Encoder using a 15
digit enablement code. These codes are unit specific and you
must provide the unit’s serial number when applying for an
upgrade code. Contact your supplier for more details.
This menu also contains controls to reset the Encoder’s settings
back to defaults or reboot the encoder remotely.
Set Password
The configuration webpages can be protected from unauthorised
tampering by setting a password here. If your password
becomes lost, contact your supplier with the Encoder’s serial
number and they can then provide you with an enablement
code to clear the password.
SAP
The Encoder can be enabled to periodically produce Session
Announcement Protocol messages on the network. These
messages allow suitably enabled client software or hardware
devices to become aware of the video/audio stream, and then
automatically make them available to their users.
SNMP
The Encoder can produce SNMP Trap events when a significant
‘event’ occurs, for example an over temperature warning.
These events are also copied to the on-board event log.
The trap destinations and community classification are
specified here.
Email Logs
Any new entries in the Event logs can be periodically emailed
to a specified recipient. This is to facilitate remote, non-volatile
storage of the logs where required, and simple remote problem
notification. The Encoder can work with a with a standard SMTP
email server.
Event Log
The Event log shows all significant ‘events’ that the Encoder
has seen, this includes stream starting, changes to the encoder
configuration etc. The Event log can be downloaded using the
on-page URL link.
Locator LEDs
Turning the Locator LED function on, makes the encoder’s status
led flash between orange and green. This allows a particular
physical unit to be located easily, and is especially useful when
a number of Encoders are situated together.

6
785_QSG_Ve Part No. 200-2430 – v4
Quick Start Guide - MediaStar Evolution 785 HD Video Encoder
Technical Specifications
System Input
Video Inputs:
• CVBS – PAL, NTSC
• S-Video – PAL, NTSC (via phono connectors)
• Component RGB (SCART) – 480i, 576i
• Component YPbPr, Component RGB (Sync-on-Green) – 480i, 480p60,
576i, 576p50, 720p50/60, 1080i50/60, 1080p50/60 (streamed as
1080p25/30)
• HDMI 1.4 - 480i, 480p60, 576i, 576p50, 720p50/60, 1080i50/60,
1080p50/60 (streamed as 1080p25/30).
De-Interlacing - 480i and 576i inputs can be de-interlaced to 480p30
and 576p25 output streams.
An SD resolution internally generated colour bar stream is also available.
All video inputs are streamed out with the same video resolution, unless
otherwise specified.
Audio Inputs:
HDMI – PCM digital stereo 32, 44, 48 kHz sampling.
Analogue – 2.2V pk-pk into 10K Ohms 48 kHz sampling.
Encoding and Stream Protocols
Video Encoding:
MPEG 4-10/H.264 MP@L4, CBR/VBR encoding, 1.5 Mbps to 12 Mbps
MPEG-2 MP@ HL, CBR/VBR encoding, 1.5 Mbps to 15 Mbps
Audio Encoding:
MPEG-1 Layer 2 encoding - 64 - 384 Kbps Stereo
AAC LC encoding - 40 - 576 Kbps Stereo
Output Streams:
Multicast/Unicast UDP MPEG2-TS
Multicast RTP video and audio streams (for use with QuickTime©via
on-board RTSP server)
Network and Interfaces
LAN:
RJ45 802.3 10/100 Base-T Auto MDIX
Optional 802.3af Power over Ethernet (Class 3)
Static or DHCP IP Address
DSCP stream tagging for QoS
Network Protocols:
UDP, TCP, ARP, DHCP, ICMP, IGMP V3, HTTP, Telnet, SNMP, SAP/SDP, SMTP,
DSCP.
USB Comms:
USB 2 type A host port for software upgrades.
USB 1.1 type B port for Serial Comms for external configuration and/or
control.
RS232 Port:
Rx, Tx, CTS, RTS up to 115,200 Baud, Configured for SIPI external
configuration/control OR IP to RS232 bi-directional pass through for
external device control.
Device connected status monitoring.
Configuration and Monitoring
Configuration:
Configuration via on-board display and buttons or via Encoder hosted
web pages to a PC/Laptop/Tablet.
Control Interfaces:
SIPI textual based control commands send from 3rd party control
systems to the Encoder via RS232, USB comms or IP interface.
Monitoring:
SNMP traps for significant events such a loss of video input or changes
in configuration.
On-board Event log with web page download and remote
emailing capability.
On-board temperature sensor with over temperature SNMP trap.
RS232 device connected status.
PoE in use status.
Front panel LED indicators and on-board display.
Software Upgradability:
Fully software upgradeable in the field, from digitally signed files only.
Upgrade via USB key in USB host port, or from a remote HTTP server.
Product features are upgradable via unit-specific enablement codes.
IR Blasting
Two IR blasters with a network control interface for remote control of
local IR controlled devices.
Generation of IR commands with 30, 33, 36, 38, 40, 56 kHz IR
modulation frequencies.
On-board emulation of Sky IR Handsets.
IP control interface and text based commands for third party systems.
SAP Announcements
Generation of Session Announcement Protocol (SAP) media
announcements.
Support of custom announcement parameters.
Physical and Power
Physical
215 x 133 x 35 mm (8.5 x 5.3 x 1.4”)
500g (1.1lbs)
No moving parts
Power
7W
+5V DC, 2A via an external mains/DC power adapter
802.3af Power over Ethernet (PoE) PD class 3
Environmental
0 - 40ºC (32 - 104ºF) non-condensing, in-door use only
Approvals
FCC, CE class A device
TUV safety certification with CB extensions for USA, Canada,
Australia and others.

7
785_QSG_Ve Part No. 200-2430 – v4
Quick Start Guide - MediaStar Evolution 785 HD Video Encoder
Notes

8
785_QSG_Ve Part No. 200-2430 – v4
Quick Start Guide - MediaStar Evolution 785 HD Video Encoder
Head Office
Cabletime Ltd, 64 Greenham Road, Newbury, Berkshire, United Kingdom RG14 7HX
USA Office
Asia Office
Brought to you by
Regulatory Requirements Notices
EUROPE
Cabletime Limited declare that the products described in this manual
conform to the requirements of the following Directives:
•2004/108/EC EMC Directive
•2006/95/EC Low Voltage Directive
THE STANDARDS APPLIED ARE:
EN55022:2010 Incorporating corrigendum October 2011: Information Technology Equipment -
Radio Disturbance Characteristics
EN55024:2010 incorporating corrigendum October 2011: Information Technology Equipment – Immunity Characteristics
EN61000-3-2 + A1:2008
+ A2:2009 Harmonic current emissions
EN61000-3-3:2008: Voltage fluctuations and flicker
EN60950-1:2006+A11:2009
+A1:2010+A12:2011 Information Technology Equipment. Safety, General Requirements
IEC60950-1:2005+ A1:2009 Specification for safety of information technology equipment, including electrical
business equipment, with CB variations for US, Canada, Japan, and Australia
Also: UL60950-1:R:2011-2012, CAN/CSA C22.2 No 60950-1/A1:2011-12
UNITED STATES OF AMERICA
Cabletime Limited declares this equipment has been tested and found to comply with the limits for a Class A digital device, pursuant
to Part 15 of the FCC Rules Subpart B (15.107, 15.109). These limits are designed to provide reasonable protection against harmful
interference when the equipment is operated in a commercial environment. This equipment generates, uses, and can radiate radio
frequency energy and, if not installed and used in accordance with the instruction manual, may cause harmful interference to radio
communications. Operation of this equipment in a residential area is likely to cause harmful interference in which case the user will
be required to correct the interference at his own expense. This device complies with part 15 of the FCC Rules.
Operation is subject to the following conditions:
• This device may not cause harmful interference, and
• This device must accept any interference received, including interference that may cause undesired operation.
CORRECT DISPOSAL OF THIS PRODUCT
This marking on the product, accessories or literature, indicates that the product and its electronic accessories should not be disposed
with other household waste at the end of its working life. To prevent possible harm to the environment or human health from
uncontrolled waste disposal, please separate these items from other types of waste and recycle them responsibly to promote the
sustainable reuse of material resources.
Whilst all reasonable care has been taken to ensure the accuracy of this publication, the publishers and authors cannot accept responsibility for any
errors and omissions. Cabletime Limited reserves the right to revise this publication and to make changes in the content from time to time without
notice. Copyright © Cabletime 2013. All rights reserved. No part of this guide may be reproduced, stored in a retrieval system or transmitted in any
form or by any means (electronic, mechanical, photocopying, recording or otherwise) without prior written permission of Cabletime Ltd.
Table of contents
Other Mediastar Evolution Media Converter manuals


