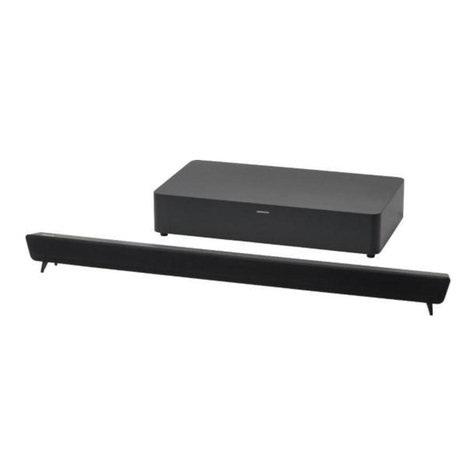
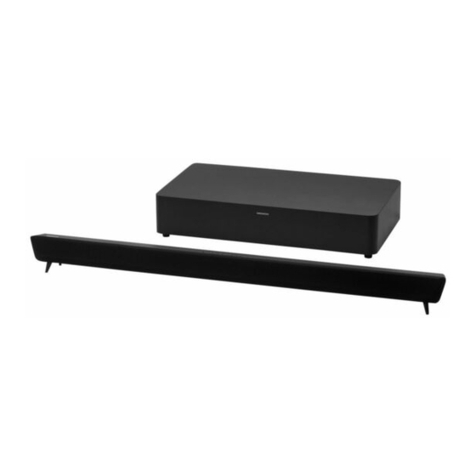
Medion MD 43590 User manual

ID: #07177
m
y
h
a
n
s
e
c
o
n
t
r
o
l
.
c
o
m
C
E
R
T
I
F
I
E
D
User-friendly
Manual
User Manual
Manual
del usuario
English .....03
Español .... 23
2.1 SOUNDBAR WITH
BUILT-IN SUBWOOFER
BARRA DE SONIDO 2.1 CON
SUBWOOFER INTEGRADO

Dok./Rev.-Nr. 43590 ML ALDI US 5007 1248 Cover Final
RL
DC-24V-IN AUX-IN LINE-IN OPTICAL-IN
USB-IN
RL
HDMI
ARC/CEC
1
25
66
3 4
7 8 9 10 11 12
14
13
15 16
17 18 19 20
21
30
29
27
26
22
23
24
28
25
31

Contents
3
Contents
1Display
2On/off button
3Vol –/previous button
4Vol +/next button
5Mode/Bluetooth button
6Mounting hole, 2×
7Power input jack
8AUX input jacks
9Line input jack
10 Optical input port
11 USB input port
12 HDMI ARC/CEC input port
13 Power connector
14 Power adapter
15 Line-in cable (with 3.5 mm jacks)
16 RCA audio cable
17 Optical cable
18 Wall anchor, 2×
19 Screw, 2×
20 Battery (AAA), 2×
21 Remote control
22 Mode button
23 Volume buttons
24 Treble buttons
25 Battery compartment cover
(underside)
26 Equalizer/Display on/off button
27 Bass buttons
28 Play/pause/mute button
29 Forward/backward buttons
30 On/off button
31 Indicator light
Required tools (not included) (for wall mounting)
32 Electric drill
32
33 Phillips screwdriver
33
The product contents include 2 type AAA, 1.5 V batteries.

Table of contents
4
Table of contents
Contents .................................................................................................. 3
Required tools (not included) (for wall mounting) ................................... 3
General information ...............................................................................5
Reading and storing the user manual ........................................................ 5
Proper use........................................................................................................ 5
Explanation of symbols ..........................................................................5
Safety.......................................................................................................6
Signal symbol/word definitions ................................................................... 6
General safety instructions ........................................................................... 6
Product description .............................................................................. 10
First use ..................................................................................................11
Checking the product and package contents............................................11
Basic cleaning..................................................................................................11
Setup.......................................................................................................11
Installing or replacing the batteries............................................................11
Audio connections......................................................................................... 12
Power connection..........................................................................................13
Wall mounting (optional)..............................................................................13
Operation .............................................................................................. 14
Turning the product on or off ......................................................................15
Selecting the mode for audio playback ....................................................15
Adjusting the volume....................................................................................15
Bluetooth connection ...................................................................................15
Bluetooth/USB playback...............................................................................16
Connecting audio devices via HDMI (ARC).................................................16
Muting sound .................................................................................................16
Selecting the Equalizer (EQ) setting ........................................................... 17
Adjusting the bass and treble levels........................................................... 17
Turning on or off the display........................................................................17
Faults and troubleshooting...................................................................17
Cleaning and maintenance .................................................................. 18
Cleaning ..........................................................................................................19
Storage ............................................................................................................19
Technical data ....................................................................................... 19
FCC statement........................................................................................20
Disposal ..................................................................................................21
Disposing of the packaging .........................................................................21
Disposing of the product ..............................................................................21
General information
5
General information
Reading and storing the user manual
This user manual accompanies this 2.1 soundbar with built-in
subwoofer (hereafter referred to as the “product”), and contains
important information on setup and handling.
Before using the product, read the user manual carefully. This
particularly applies to the safety instructions. Failure to do so may result in
personal injury or damage to the product.
Store the user manual for further use. Make sure to include this user manual
when passing the product on to other parties.
Proper use
The product is exclusively designed for sound reproduction of audio devices. It
is only intended for personal use and not suitable for commercial purposes.
Only use the product as described in this user manual. Any other use is
considered improper and may result in damage to property or persons and/or
void the warranty.
The manufacturer or supplier cannot be held liable for damages or injury
incurred through improper or incorrect use.
Explanation of symbols
The following symbols are used in this user manual, on the product or on the
packaging.
This symbol provides you with useful additional information on
setup and handling.
This FCC mark certifies that the electromagnetic interference
from the device is under the limits approved by the Federal
Communications Commission in the US.
4007225
C
The ETL Listed Mark is proof that the product has been
independently tested and meets the applicable published
standard.
Products marked with this symbol have positive polarity.
Alternating current
This symbol identifies voltage and the current rating for direct
current.
Devices marked with this symbol are only suitable for household
use (dry indoor rooms).

Safety
6
The international efficiency mark indicates that the power
supply meets the level VI requirements.
Safety
Signal symbol/word definitions
The following symbols and signal words are used in this user manual.
WARNING! This signal symbol/word designates a hazard
with moderate risk, which may result in
death or severe injury if not avoided.
NOTICE! This signal word warns of possible damage
to property.
General safety instructions
IMPORTANT SAFEGUARDS
Whenusingelectrical appliances,basicsafety precautionsshould
always be followed, including the following:
WARNING!
Risk of injury!
Improperhandlingofthe productmayincreasethe riskof injury.
− Read all instructions in the user manual. Keep these
instructions for future reference. Follow all instructions.
− Heed all warnings on the product and in all product
documentation.
− The product is for household use only.
− To protect against risk of electrical shock, do not put the
product in water or other liquids.
− Do not block any ventilation openings. Install the product
in accordance with the manufacturer’s instructions.
− Do not install the product near any heat sources such
as radiators, heat registers, stoves, or other apparatus
(including amplifiers) that produce heat.
− Protect the power cord from being walked on or pinched

Safety
7
particularly at plug, convenience outlet, and the point
where it exits from the product.
− Only use attachments/accessories specified by the
manufacturer.
− Unplug the product during thunderstorms or when
unused for long periods of time.
− Refer all servicing to qualified service personnel. Servicing
is required when the product has been damaged in some
way, such as power cord or plug is damaged, liquid has
been spilled or objects have fallen into the product, the
product has been exposed to rain or moisture, does not
operate normally or has been dropped.
− No naked flame sources, such as lit candles, should be
placed on the product.
− Dispose of used electrical products and batteries safely
according to your local regulations.
− The product shall not be exposed to dripping or splashing
liquids and no objects filled with liquid, such as vases,
shall be placed on the product.
− The power plug is used to disconnect the product and it
should remain readily operable during intended use. In
order to disconnect the product from the power supply
properly, disconnect the power plug from the power
outlet completely.
− The product should be operated only with the type of
power source indicated on the marking label or in this
user manual.
− Do not attempt to service this product yourself. Opening or
removing covers may expose you to dangerous voltages or
other hazards.
− Do not operate the product if the power cord or plug has
been damaged or malfunctioned in any way.
− Unplug the product from the power outlet when not in use
and before cleaning, servicing, maintenance or moving the
product.

Safety
8
− The product is not intended to be operated by an external
timer or separate remote control system.
− Do not place the product too close to ears. It may cause
damage to ear drums, especially in young children. Use the
product only for its intended use as described in this user
manual.
− This product can be used by children aged 8 years and
above and persons with reduced physical, sensory or
mental capabilities or lack of experience and knowledge
if they have been given supervision or instruction
concerning the use of the product in a safe way and
understand the hazards involved. Children shall not play
with the product. Cleaning and user maintenance shall
not be made by children without supervision.
− Keep the product away from children during installation.
Small parts are included. They may cause suffocation if
swallowed or inhaled.
− Make sure that children do not play with the plastic
wrapping. They may get caught in it when playing and
suffocate.
WARNING!
Health hazards!
Children and animals may swallow and choke on batteries.
− Store batteries in places that are out of reach of children
and pets.
− Dispose of any discharged batteries immediately
according to locally applicable regulations.
− Immediately consult a physician or a veterinarian if a child
or pet has swallowed a battery.

Safety
9
WARNING!
Risk of leaking or explosion!
Improper handling of batteries may increase the risk of leaking
or explosion.
− Store batteries in a cool, dry place. Do not expose batteries
to excessive heat (e.g. direct sunlight) and do not throw
them into fire.
− Replace the batteries only with batteries of the same type.
− Make sure that the batteries are inserted the right way
around by checking if the polarity (+ and –) is correct.
− Always use high-quality batteries. Low quality batteries
could leak and cause damage.
− Before inserting the batteries, ensure that the contacts
in the battery compartments and on the batteries
themselves are clean and intact. Clean these if necessary.
− Remove the batteries from the product when they
are dead. Likewise, remove the batteries if you do not
intend to use the product for a prolonged period of time.
Otherwise the batteries may leak and cause damage.
− Remove the batteries before disposing of the product.
− Non-rechargeable batteries are not to be recharged.
− Different types of batteries or new and used batteries are
not to be mixed.
− The supply terminals are not to be short-circuited.
− If the batteries leak, do not remove battery fluid with
your bare hands. Do not allow battery fluid to come
into contact with skin, eyes or mucous membranes. Use
normal household washing gloves. If, however, your
skin has come into contact with battery fluid, wash the
corresponding area of your skin immediately and consult
a physician if necessary.

Product description
10
− Wipe the leaked battery fluid up with a damp cloth. You
can wash the cloth and reuse it or dispose of it with your
household trash.
NOTICE!
Risk of damage!
Improper handling of the product may result in damage to the
product.
− Stop using the product if its plastic parts exhibit cracks or
breaks or become deformed.
− Always place the product on a stable and level surface or
securely mount it on a wall. It can be damaged if dropped.
− Keep the product away from open fire and hot surfaces.
− To avoid moisture in the product through condensation,
do not expose the product to extreme temperatures. If the
product was exposed to severe temperature fluctuations,
wait approximately 2 hours until the product has reached
ambient temperature.
− Do not cover the product during operation.
− Never submerge the product in water or other liquids.
− Do not open the housing; instead, have a qualified
professional perform repairs.
Product description
The product is exclusively designed for sound reproduction of audio devices.
A

First use
11
First use
Checking the product and package contents
NOTICE!
Risk of damage!
If you are not cautious when opening the packaging with a
sharp knife or other pointed object, you may quickly damage
the product.
− For this reason, be very careful when opening it.
1. Take the product out of the packaging.
2. Check to make sure that all parts are included (see chapter “Contents”).
3. Check whether the product or individual parts are damaged. If this is the
case, do not use the product. Contact the manufacturer via the service
address indicated on the warranty card.
Basic cleaning
1. Remove the packaging material and all plastic wrappings.
2. Clean all parts of the product before first use as described in the chapter
“Cleaning and maintenance”.
Setup
Installing or replacing the batteries
1. Slide open the battery compartment cover 25 on the underside of the
remote control 21 .
2. Insert the provided AAA batteries 20 into the battery compartment.
Make sure the polarity (+/–) is correct.
For battery replacement, remove the old batteries first.
3. Close the battery compartment cover.

Setup
12
Audio connections
The product allows you to play audio output from various connected audio
devices. You can make one or more connections according to your audio
settings. Use the connectors and cables indicated in the table below to make
audio connections.
1
DC-24V-IN AUX-IN LINE-IN OPTICAL-IN
USB-IN
RL
HDMI
ARC/CEC
8 9 10 11 12
Connector (see Fig. 1)Cable/device Use examples
AUX input jacks 8
(see note 1)
RCA audio cable 16 TV, DVD player, satellite
receiver
Line input jack 9Line-in cable
15 MP3 player
Optical input port 10
(see note 2)
Optical cable 17 TV, digital receiver
USB input port 11
(see note 3)
USB flash drive
(not provided)
Playback of audio files
(format: MP3 and WAV)
HDMI ARC/CEC input
port 12 (see note 4)
HDMI cable (not provided) TV, DVD player
Bluetooth (see note 5)(notrequired) Smartphone
Note:
1. Make sure the red connectors of the RCA audio cable are connected to
the right (R) channels and the white connectors to the left (L) channels of
the AUX input jacks of the product and the AUX output jacks of your audio
device.
2. On your audio device, make sure the audio setting is set to “PCM” or optical
audio.
3. Do not use the USB input port as a charging port for external devices.
4. On your audio device, make sure the audio setting is set to “ARC” or “HDMI
audio”.
If you are using the product with a TV for the first time, make sure the TV
audio setting is set to “PCM/2-CH”.
See chapter “Connecting audio devices via HDMI (ARC)” for more details.
5. See chapter “Bluetooth connection”.

Setup
13
Power connection
Ensure all cable connections (see chapter “Audio connections”)
are made before connecting the product to a power outlet.
1. Fully unwind the cable of the power adapter 14 .
2
DC-24V-IN AUX-IN LINE-IN OPTICAL-IN
USB-IN
RL
HDMI
ARC/CEC
7
2. Insert the power connector 13 into the power input jack 7of the
product (see Fig. 2).
3. Connect the power adapter 14 to a power outlet.
Wall mounting (optional)
Ideally, install the product in the center directly below your TV.
You can place the product on a piece of furniture or mount it to
a wall. For a better sound experience, install the product at the
same height as your ears while sitting in front of the TV.
Follow the steps below to mount the product to a wall:
1. Select a wall with sufficient load-bearing capacity for mounting the
product. Determine the installation location.
3
RL
31.90 in (810.0 mm)
16.04 in (407.5 mm)
66
2. Transfer the dimensions of the main unit and mounting holes 6onto a
piece of paper (see Fig. 3).

Operation
14
4
3. Line up the paper with the desired mounting location and mark (with a
pencil) on the wall the positions of the mounting holes 6(see Fig. 4).
Make sure the mounting holes are marked horizontally.
4. Using an electric drill 32 , drill holes in the wall at the marked locations.
5
0.2 in (5 mm)
18 19
5. Insert the wall anchors 18 into the drilled holes and drive the screws 19
into the wall anchors using a Philips screwdriver 33 (see Fig. 5).
Leave no more than 0.2 inches (5 mm) between the heads of the screws and
the wall (see Fig. 5). This minimizes the inclination angle of the product.
6. Mount the product on the wall by guiding the heads of the screws into the
mounting holes 6.
Operation
• Make sure all desired cable connections and the power
connection are properly made before operation (see chapter
“Audio connections” and “Power connection”).
• The indicator light 31 of the remote control 21 blinks once
when a button is pressed. Make sure there is no obstruction
between the product and the remote control during use. The
maximum distance between the two parts should not be
greater than 33 feet (10 meters).

Operation
15
Turning the product on or off
− Press the on/off button 2/30 to turn on or off the product.
Selecting the mode for audio playback
− Press the mode button 5/22 repeatedly until the desired audio playback
mode appears on the display 1. The audio output from the connected
audio source is then played through the product.
− The display shows the current mode during operation:
Mode Display
AUX AUH
HDMI ARC/CEC Hd
Line-in LInE
Bluetooth bt
Optical OPt
USB (music playback time)
Adjusting the volume
− On the remote control 21 , press the volume buttons 23 to adjust the
volume.
On the main unit, press the vol +/next button 4or vol –/previous
button 3to increase or decrease the volume.
− The display 1shows the current volume level (0–32) while adjusting.
Bluetooth connection
The product remembers your last paired Bluetooth device. Once
the Bluetooth device is turned on, the product automatically
connects with it when the Bluetooth mode is selected.
Bluetooth pairing
1. Press the mode button 5/22 repeatedly until “bt” appears on the
display 1.
The display shows a blinking light at the bottom left corner, indicating that
no Bluetooth device is connected.
2. Refer to the user manual of your Bluetooth device to turn on the Bluetooth
feature and select “MD 43590” from the list of available devices to pair.
When the Bluetooth pairing is done, you hear a signal sound and the light at
the bottom left corner of the display stops blinking and remains lit.
3. Start playback using the remote control 21 or your connected Bluetooth
device (see chapter “Bluetooth/USB playback”).

Operation
16
Unpairing the connected Bluetooth device
− On the main unit, press and hold the Bluetooth button 5in Bluetooth
mode.
Unpairing is done when you hear a signal sound and the light at the bottom
left corner of the display 1starts to blink.
Bluetooth/USB playback
• USB mode is automatically selected once a USB flash drive
is inserted into the USB input port 11 . Playback also starts
automatically if compatible audio files (MP3/WAV) are detected.
• In Bluetooth mode, playback can also be controlled on the
connected Bluetooth device.
− On the remote control 21 , press the forward/backward buttons 29 to skip
forward or backward a track during playback.
On the main unit, press and hold the vol +/next button 4or vol –/previous
button 3to skip forward or backward a track during playback.
− Press the play/pause/mute button 28 to pause or resume playback.
Connecting audio devices via HDMI (ARC)
An HDMI cable (not provided) is required for this connection.
1. Set the volume level of your audio device (e.g. TV) to medium.
2. Using an HDMI cable, connect the HDMI ARC/CEC input port 12 of the
product with the HDMI IN ARC connection of your audio device.
3. Activate the ARC and CEC functions of your audio device and switch the
audio output to PCM.
ARC not only enables audio signals to be received via HDMI when two
devices are connected but also allows them to be sent back via the same
cable.
NOTE: ARC only works with devices that are HDMI ARC capable as well as
with an HDMI 1.4 cable (and higher).
CEC (Consumer Electronics Control) enables communication with all devices
connected via HDMI. Using this connection you can control, for example, the
volume and mute function with the TV remote control.
Muting sound
− Press the play/pause/mute button 28 to mute or resume the sound output
(except in Bluetooth and USB modes).

Faults and troubleshooting
17
Selecting the Equalizer (EQ) setting
The product is equipped with 3 preset equalizer settings (E1, E2 or E3).
− Press the equalizer button 26 repeatedly to select the desired EQ setting.
The display 1shows the current equalizer setting while selecting.
− E1 = movie, E2 = dialog, E3 = music (In all three modes, the bass and treble
levels can be further adjusted to your needs; see chapter “Adjusting the
bass and treble levels”)
Adjusting the bass and treble levels
− Press the bass buttons 27 or treble buttons 24 to increase or decrease the
bass or treble levels, respectively.
− The display 1shows the current bass or treble level (-4–+4) while
adjusting.
Turning on or off the display
− Press and hold the display on/off button 26 to turn on or off the display 1
during operation.
Faults and troubleshooting
Problem Possible reason Solution
The product
does not turn
on.
The power
connection is not
properly made.
Make sure the power connector 13
and power adapter 14 are properly
connected (see chapter “Power
connection”).
There is no
sound.
The audio connection
is not made correctly.
Make sure the desired audio
connection is properly made (see
chapter “Audio connections”).
The audio setting of
the connected device
is not correctly set.
Make sure the audio setting is
correctly set (see chapter “Audio
connections”).
The sound output is
muted.
Press the play/pause/mute button 28
to make sure the sound output is not
muted.

Cleaning and maintenance
18
Problem Possible reason Solution
The remote
control 21
does not
respond.
The battery power is
low.
Make sure the installed batteries 20
are not discharged. Replace them if
necessary (see chapter “Installing or
replacing the batteries”).
The remote control is
too far away from the
product.
Make sure there is no obstruction
between the two parts and they are
within the transmission distance
(max. 33 feet/10 meters).
Bluetooth
pairing is not
successful.
The Bluetooth device
is too far away from
the product.
Make sure the distance between
the Bluetooth device and product is
within the effective range
(max. 33 feet/10 meters).
Another Bluetooth
device is already
connected to the
product.
Unpair the connected Bluetooth
device from the product (see chapter
“Unpairing the connected Bluetooth
device”) and pair again.
There are too many
Bluetooth devices
near the product.
Turn off the Bluetooth function
on the unused devices to avoid
interference.
There is
no sound
from the
connected
Bluetooth
device.
There may be a
bad Bluetooth
connection.
Unpair the Bluetooth device and
pair again (see chapter “Bluetooth
connection”).
Cleaning and maintenance
NOTICE!
Risk of short circuit!
Water or other liquids that have penetrated the housing may
cause a short circuit.
− Make sure that no water or other liquids penetrate the
housing.
− Never immerse the product in water or other liquids.

Technical data
19
NOTICE!
Risk of damage!
Improper handling of the product may result in damage to the
product.
− Do not use any abrasive cleaners, brushes with metal or
nylon bristles, or sharp or metallic cleaning utensils such
as knives, hard scrapers and the like. They could damage
the surfaces.
Cleaning
− Use a damp cloth to wipe off the product. Then let all parts dry completely.
Storage
All parts must be completely dry before being stored.
− If you are not going to use the product for a long period of time, remove the
batteries 20 from the remote control 21 . Keep the batteries away from
children and animals.
− Always store the product in a dry area.
− Protect the product from direct sunlight.
− Store the product so that it is not accessible to children.
Technical data
Model: MD 43590
Power input: 100–240 V~ 50/60 Hz 1.5 A
Power output: 24 V 2,000 mA
Model (power adapter): GKYZC0200240US
Acoustic performance
Soundbar: 2 × 16 Watts RMS
Subwoofer: 42 Watts RMS
Channel: 2.1 CH
Frequency response: 60 Hz–20 KHz
Bluetooth version: 5.0
Bluetooth effective distance: approx. 33 feet (10 meters)
Dimensions: 31.89" × 2.76" × 4.13" (81 × 7 × 10.5 cm)
Weight: 4.0 lb (1.8 kg)

FCC statement
20
FCC ID: FCC ID: 2AOCR-MD43590
Product code: 708014
USB® is a registered trademark of USB Implementers Forum, Inc.
The Bluetooth word mark and logos are registered trademarks owned by
Bluetooth SIG, Inc.
All other names and products may be trademarks or registered trademarks of
their respective owners.
FCC statement
This device complies with Part 15 of the FCC Rules. Operation is subject to the
following two conditions: (1) this device may not cause harmful interference,
and (2) this device must accept any interference received, including
interference that may cause undesired operation.
Warning: Changes or modifications to this unit not expressly approved by the
party responsible for compliance could void the user’s authority to operate the
equipment.
NOTE: This equipment has been tested and found to comply with the limits
for a Class B digital device, pursuant to part 15 of the FCC Rules. These limits
are designed to provide reasonable protection against harmful interference
in a residential installation. This equipment generates, uses and can radiate
radio frequency energy and, if not installed and used in accordance with the
instructions, may cause harmful interference to radio communications.
However, there is no guarantee that interference will not occur in a particular
installation. If this equipment does cause harmful interference to radio or
television reception, which can be determined by turning the equipment off
and on, the user is encouraged to try to correct the interference by one or more
of the following measures:
− Reorient or relocate the receiving antenna.
− Increase the separation between the equipment and receiver.
− Connect the equipment into an outlet on a circuit different from that to
which the receiver is connected.
− Consult the dealer or an experienced radio/TV technician for help.
To maintain compliance with FCC’s RF Exposure guidelines, this equipment
should be installed and operated with minimum distance of 20 cm between the
radiator and your body. Use only the supplied antenna.
Table of contents
Languages:
Other Medion Speakers System manuals

Medion
Medion LIFE P64377 Use and care manual

Medion
Medion Life P61220 User manual

Medion
Medion LIFE P61800 User manual

Medion
Medion LIFE P61450 User manual

Medion
Medion Life P69042 (MD 83436) User manual

Medion
Medion LIFE S61388 User manual

Medion
Medion MD 42491 User manual

Medion
Medion P69099 User manual

Medion
Medion LIFE P61080 User manual

Medion
Medion LIFE E61400 User manual