Meditech Electronic Audio-Trainer 3000 Owner's manual

Audio-Trainer 3000
Main Manual
2
1. Background information
© 2000/2008, MediTECH Electronic GmbH, Langer Acker 7, D-30900 Wedemark
Audio-Trainer — GBA-UK-Main Manual V06
This device corresponds to DIN EN 60601.
Table of contents
Table of contents
1. Background information
1. 1 Introduction .......................................................... 3
1. 2 Product overview................................................... 4
1. 3 Security instructions .............................................. 5
1. 4 General training information.................................. 7
1. 5 Supplied accessories ............................................ 7
2. Getting started
2. 1 Program start ........................................................ 8
2. 2 End of the program ............................................... 9
2. 3 Program sequence................................................ 9
2. 4 Desired function choice....................................... 10
2. 5 Difficulty level .......................................................11
3. Functions
3. 1 Order-v – Function ......................................... 12
3. 2 Order-a – Function ......................................... 14
3. 3 Bearing – Function ........................................ 16
3. 4 Pitch – Function ............................................. 18
3. 5 Rhythm – Function ......................................... 20
3. 6 Reaction – Function ....................................... 22
3. 7 Sequence – Function .................................... 24
3. 8 Duration – Function ........................................ 26
3. 9 Result analysis .................................................... 28
3. 10 Evaluation menu ................................................. 30
4. Individual settings.................................................. 32
5. Maintenance and technique
5. 1 Trouble shooting.................................................. 34
5. 2 Battery change.................................................... 35
5. 3 Cleaning .............................................................. 36
5. 4 Storage................................................................ 36
5. 5 Sewage and refuse disposal .............................. 36
5. 6 Technical details ................................................. 37
5. 7 Model identification plate..................................... 38
6. Service
6. 1 Contact................................................................ 39
6. 2 Warranty and EC-Declaration of Conformity....... 40
6. 3 Your results ......................................................... 42
Content

3
1. Background information
1. Background Information
In this chapter you will find some general information about
the Audio-Trainer.
1. 1 Introduction
The Audio-Trainer has been developed to test and train the
central processing and perception of the human brain.
The brain is a wonder of the human body. It controls im-
portant life-functions like the heartbeat or breathing. It also
plays an important role in central perception of stimuli – not
only the ears are involved in the hearing process!
Auditory nerves receive auditory stimuli and lead them to
the brain where they will be processed. From than on, they
can be understood “for the first time”. This intense process
requires a lot of brain work:
- sounds have to be recognized and to be combined to
words
- word stresses have to be distinguished to be able to
understand the meaning of a sentence.
- A single speaker has to be distinguished from a back-
ground murmuring.
This understanding has to be as quick and accurate as pos-
sible, so that the sentences can be easily implemented and
reacted upon This is also applicable for visual stimuli.
The better the brain is trained, the faster and the easier un-
derstanding will be. You can test and train your abilities with
six easy functions, combined in this Audio-Trainer.
The following two terms are very important for these func-
tions:
Auditory stimuli – tones or sounds which are heard and
processed in the brain.
Visual stimuli – light signs or movements which are seen
and processed in the brain.
Introduction
4
1. Background information
The proven concept behind the Audio-Trainer is to test and train
the complicated elements of brainwork easily. These instruc-
tions shall help you to use the device just as easily.
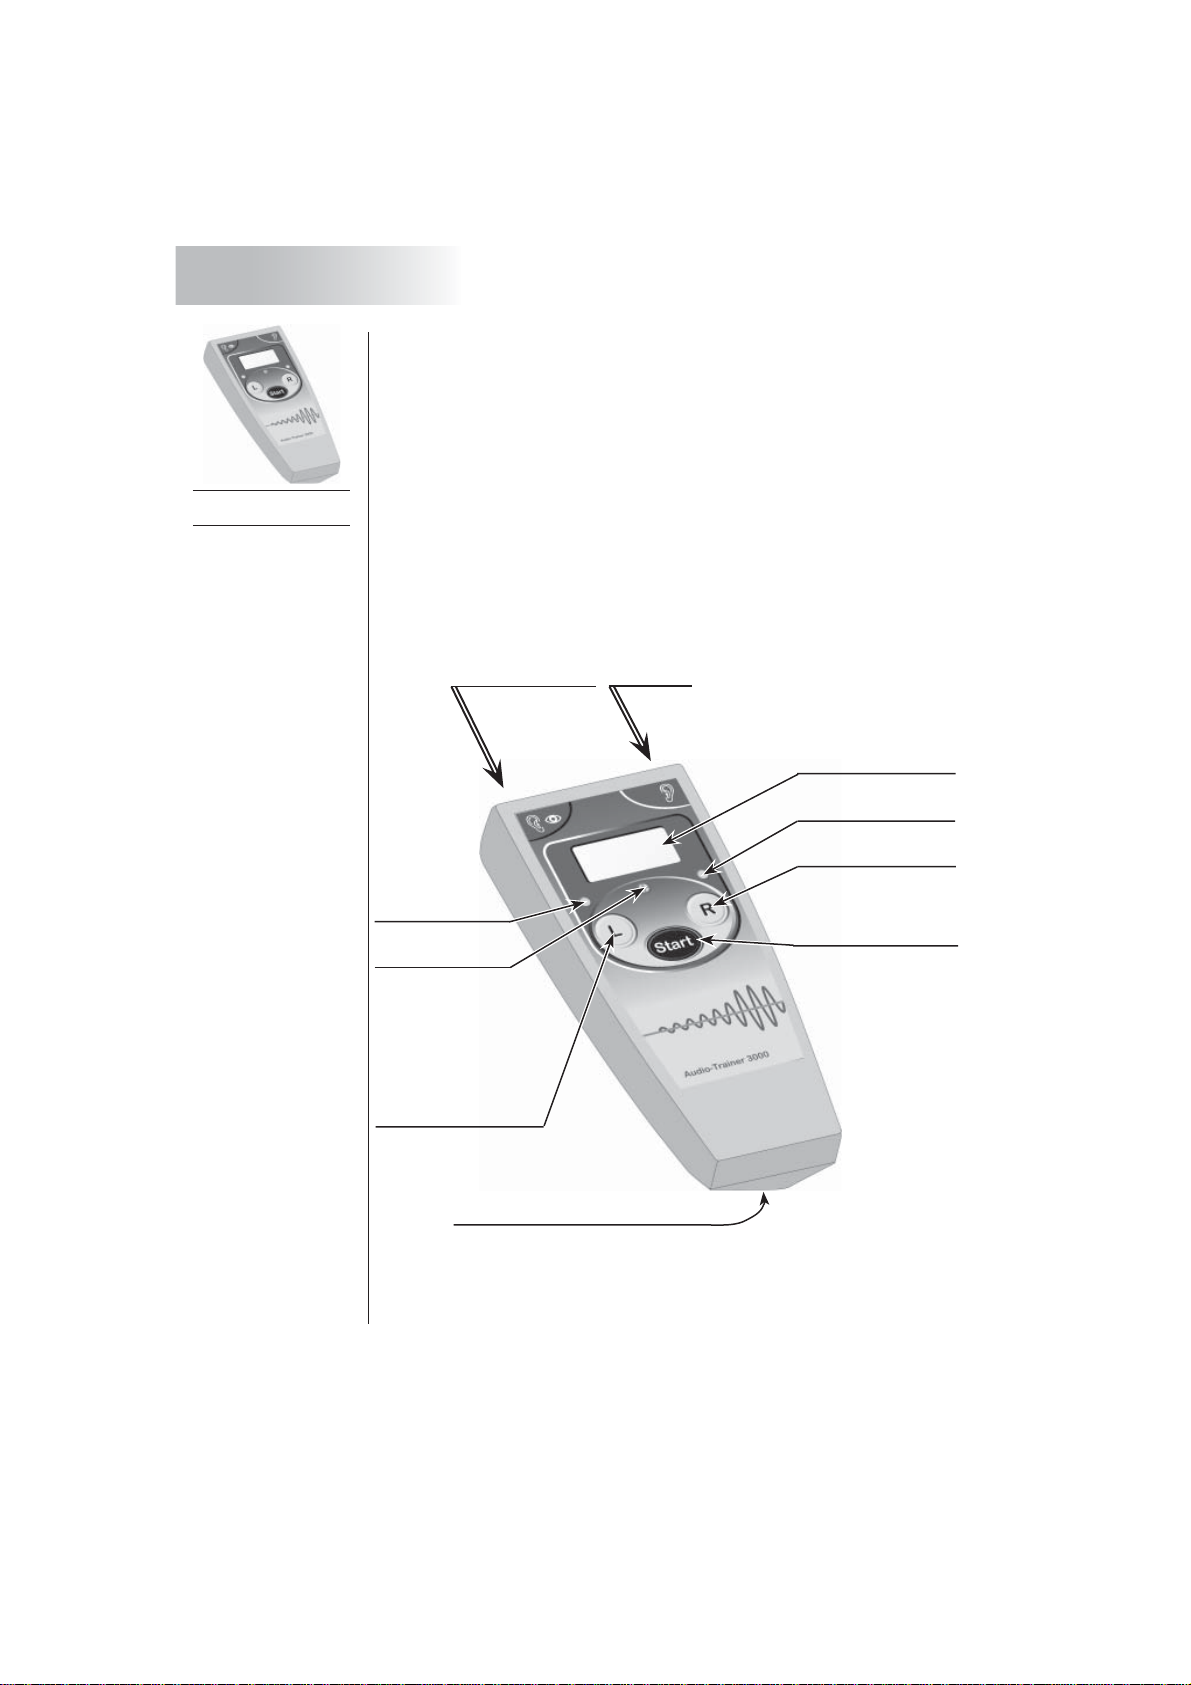
1. 2 Product Overview
The following graphic shows all elements of the Audio-Trainer
you need to use it. Take your device into your hand and com-
pare the elements.
The three buttons are used to operate a menu which offers
you eight different functions.
Product Overview
Display
Connecting socket for headphones
left
(auditory and visual)
right
(auditory)
Left button
Right button
Left LED
Right LED
Case for battery
Start button
Fixation object /
OK-LED
5
1. Background information
1. 3 Safety Instructions
The Audio-Trainer helps to train and test different elements of
processing and perception of the human brain.
Each use which does not serve this purpose is not intended
and therefore not permitted!
With appropriate installation, correct usage according to the
instructions and maintenance advice, safety or health of the
user or third parties is not endangered. For this reason, this
active medical product can be brought into circulation and be
used for short time.
Attention:
Do not use the Audio-Trainer inside rooms where you may
find the following materials:
- inflammable gas mixtures combined with anesthesia and air
- inflammable gas mixtures combined with anesthesia and
oxygen or laughing gas.
These materials could catch fire.
Attention:
Use the device exclusively with provided MediTECH-head-
phone, MT-HS 16.
The applied special design ensures the legal requirements
for minimal electric distance. It prevents potentially danger-
ous currents from passing over to the ear.
Attention:
Protect the device and the batteries against ultrasonic baths,
significant humidity and chemical detergents The device
could be destroyed.
Attention:
Do not open the appliance on your own!
Do not repair defects on your own!
The device could be damaged permanently!
Attention:
Protect the Audio-Trainer against rough shocks.
The device could be damaged!
Safety Instructions

6
1. Background information
Safety Instructions
Attention:
Store or transport the Audio-Trainer only in the original pack-
aging in which it has been delivered.
Thus the equipment is sufficiently secured against vibrations
during a transport.
Attention:
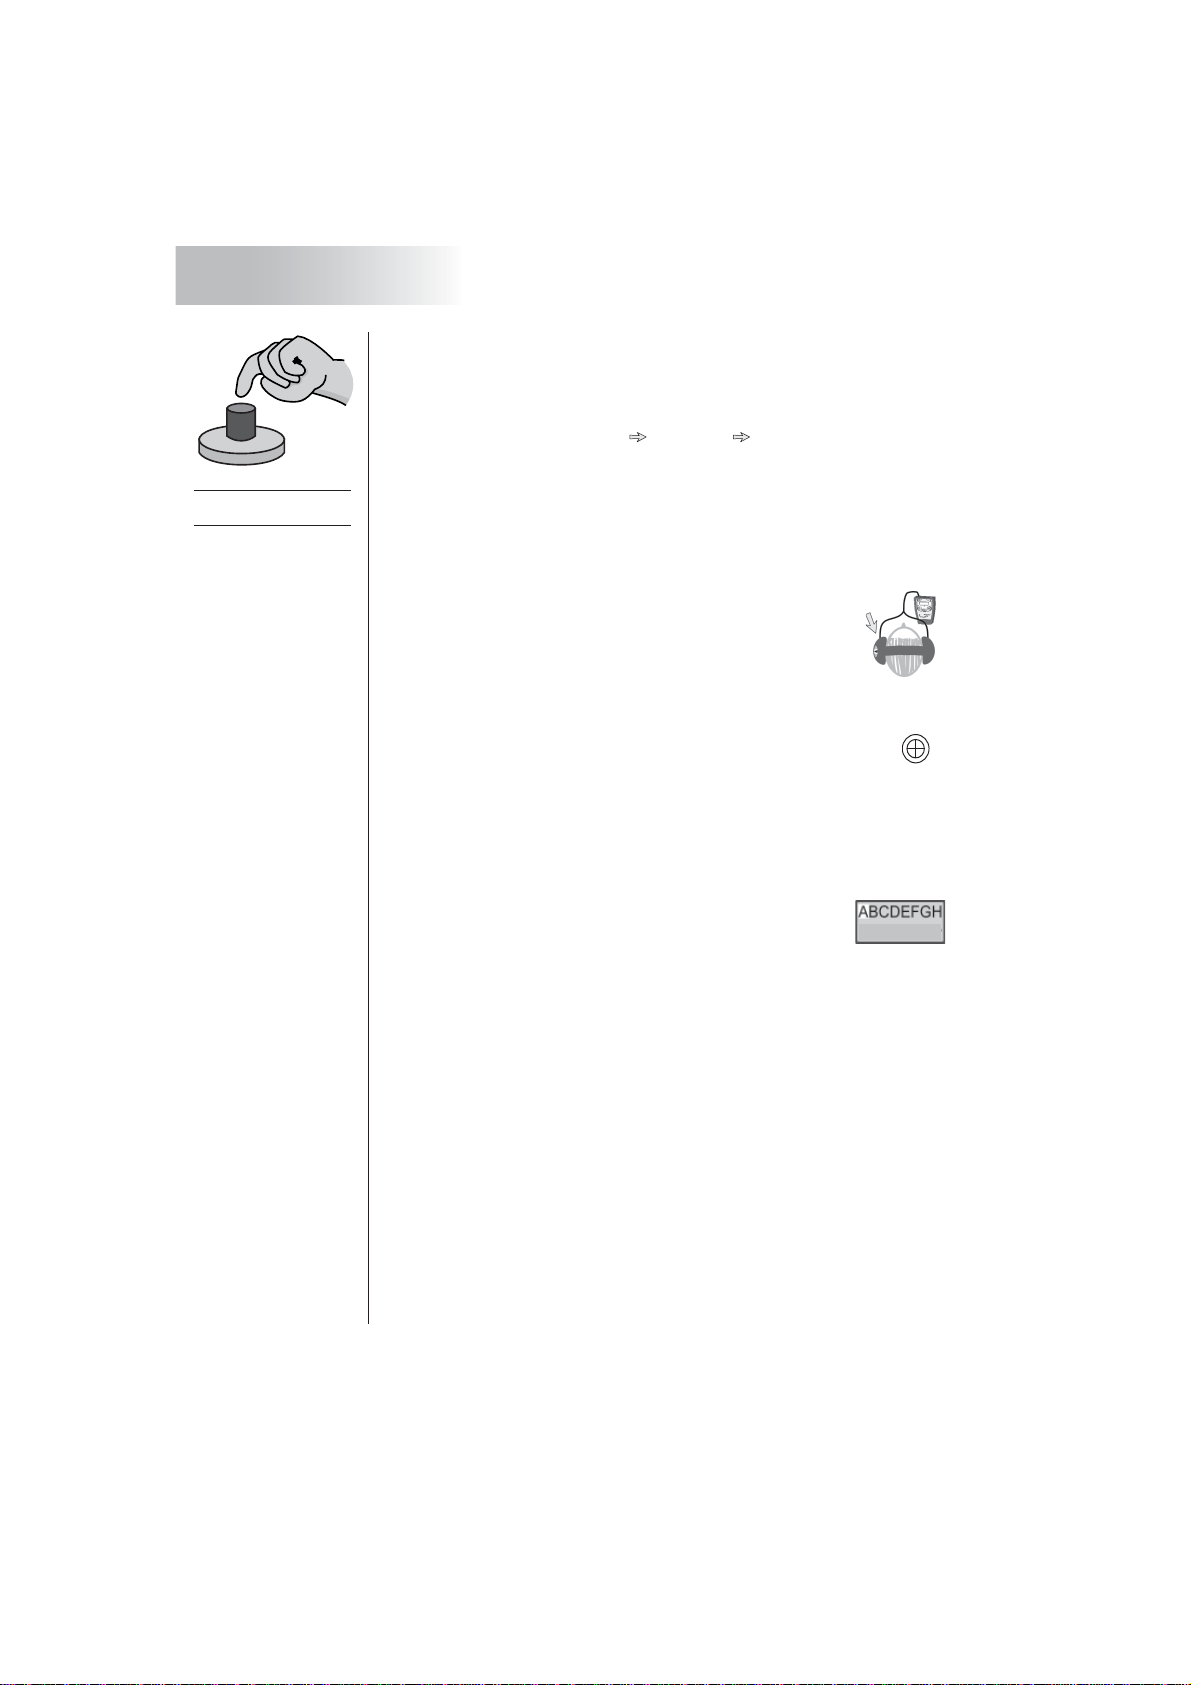
The battery compartment should not to be opened by chil-
dren!
If the wires are torn out, the device could be damaged!
Attention:
Clear the Audio-Trainer before the first use.
Follow the instructions in chapter 5.3.
Attention:
With too intensive training, a light headache or feeling of diz-
ziness may occur.
These symptoms will disappear as soon as you choose a
lower difficulty level or interrupt the training temporarily.
Attention:
For medical reasons the color red is necessary for the light
emitting diodes (LED) for using with the Audio-Trainer (even
if according to DIN EN 60601-1 paragraph 7.9, this color is
designated only to show danger or the necessity of urgent
action). The Audio-Trainer does not contain any dangerous
situation, which would have to be indicated in this way.
Attention:
We do not take any liability for damages caused by inappro-
priate use or breach of the safety indications.

7
1. Background information
1. 5 Supplied Accessories
The scope of delivery contains:
• Audio-Trainer with 9V battery.
• MediTECH-headphones MT-HS-16-II - suitable for training
Attention: The Audio-Trainer is only to be used with the
delivered MT-headphone or an identically constructed ones,
supplied by MediTECH.
• Main Manual
In general
1. 4 General Training Information
The principal item of the Audio-Trainer is the menu with six
independent functions:
In each function you will hear clicks or tones over a head-
phone and/or see the flash of the LEDs. You have to react
differently to these stimuli. Your answers will give information
about:
- the temporal interval between stimuli which you recognize
- the pitch interval between tones you can distinguish
- time sequences which you can follow
Recommendations:
During the first three to four weeks the trainer should press
the corresponding buttons for the trainee. This ensures that
the trainee is not distracted by the additional task of entering
his/her answers into the device. The two functions “Rhythm”
and “Reaction” cannot be handled in this way as they measure
motorical capabilities of the individual trainee.
You can slow down the Audio-Trainer. Press the buttons for
a longer time. The next items will be provided not before you
release the buttons again. This helps to make the training much
stressless and calm.
Recommended
strategy:
1. Train combined
with auditory and
visual stimuli (left
headphone socket)
2. Continue with a plain
auditory reinforce-
ment run (right
headphone socket)
Handle each training
function correspon-
dingly, possibly on a
daily basis.
8
2. Getting started
Start
2. Getting started
In this chapter we will explain the steps you should carry out and
pay attention to before you begin to use the Audio-Trainer.
Switch on Choose Go!
This general process is valid for any of the functions.
1. Switch the device on.
2. Choose a function and decide upon the difficulty level.
3. Start the Function.
To train, you should always be concentrated and
relaxed. Make sure that you can practice in a quiet
room. where background noises can be avoided.
When using the headphones, make sure you put
them on correspondingly to the description of the
headphone. The side with the sticker has to be on
your left ear.
When looking at the light signs while using, please
look at the circle above the start button.
2. 1 Program start
Press the start Button in the middle of the device.
This is how you start the program. If you let go of
the button, you already ”are” in the function se-
lection area. The display shows the following:
Suggestion: In order to get acquainted with the device, we
recommend to only use the Audio-Trainer as described on
the following pages.
In a submenu you can adjust individual settings, ie. Volume,
verbal instructions and commendments (on/off), personal
greeting of the trainee.
If you wish to adjust these settings, please continue in chapter
4. There you can learn about the corresponding steps. To keep
usage of the Audio-Trainer extremely simple, there are no fur-
ther comments on these extensive additional options.
Order-v
9
2. Getting started
2. 2 End of the Program
In order to keep the Audio-Trainer as simple as possible, we
decided to do without an off-button.
Instead, the device switches itself off automatically, therefore
you do not have to do anything:
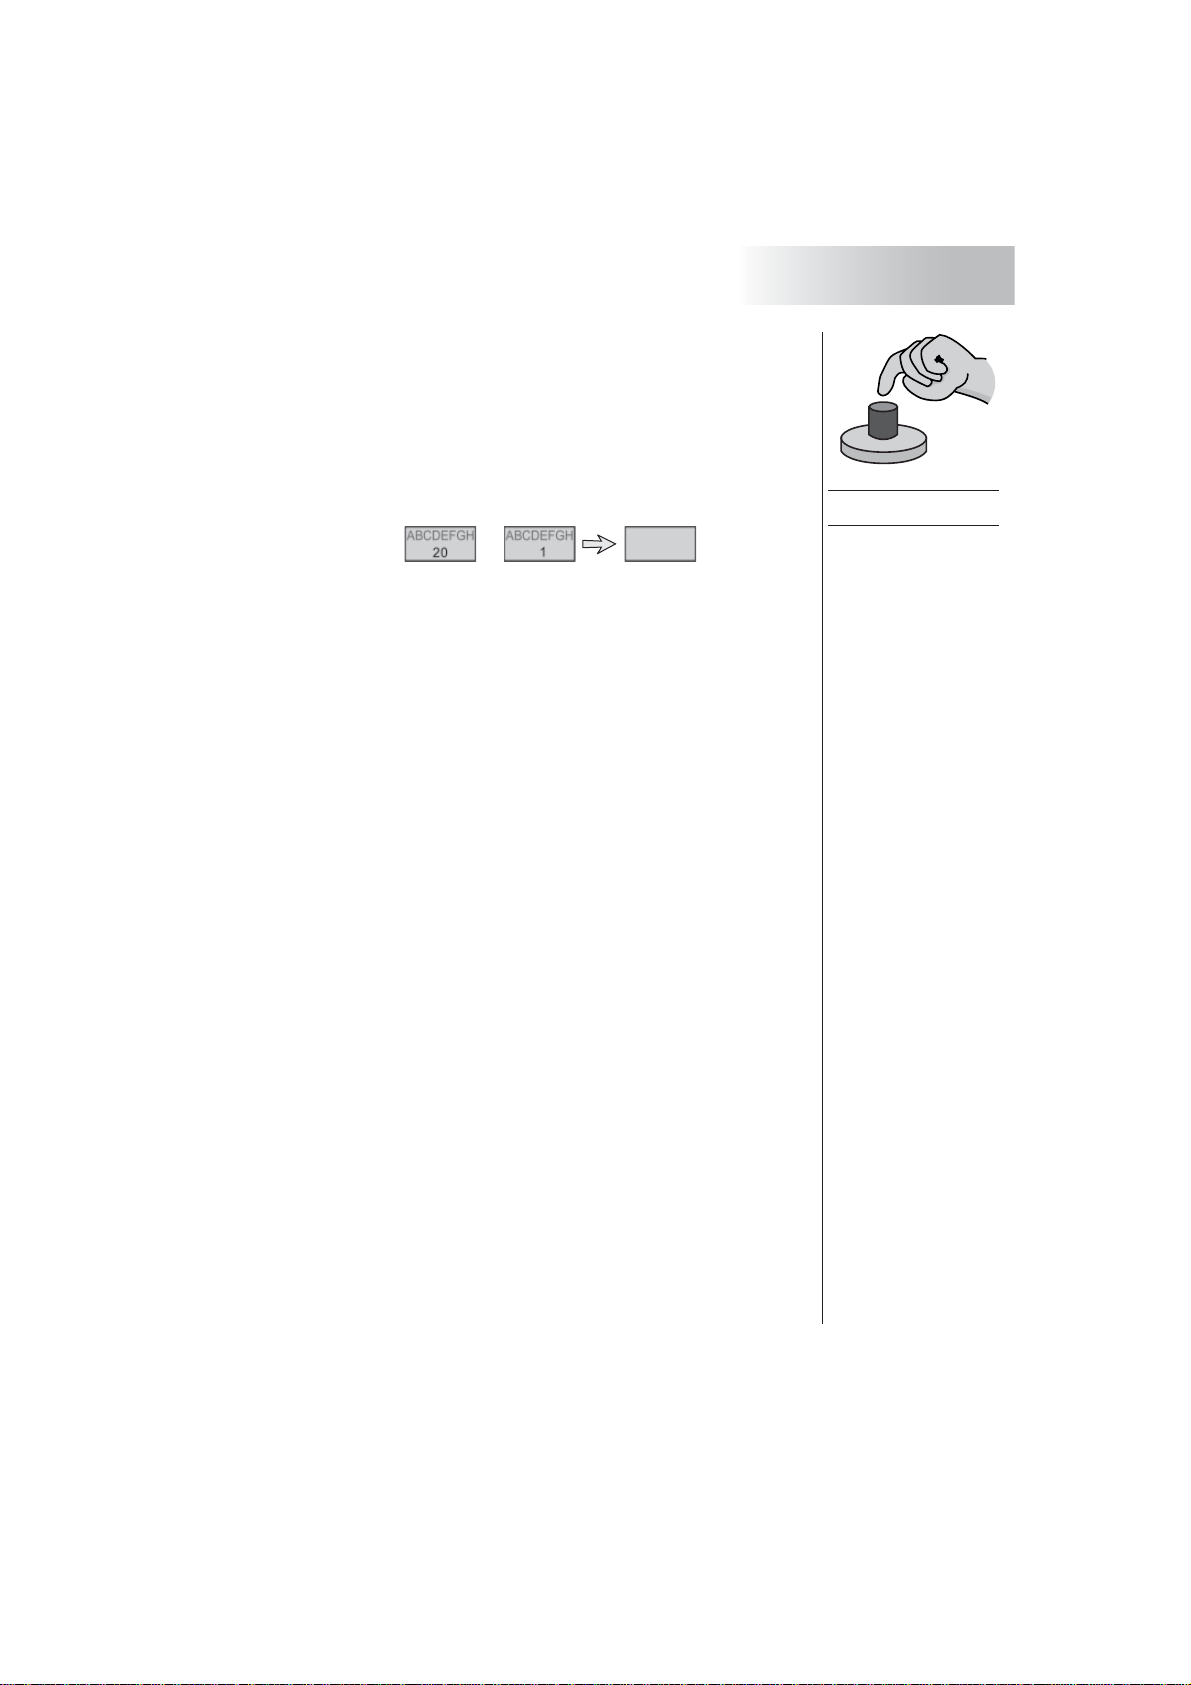
- If you do not press a button for about 10 seconds, the pro-
gram will show the number 20: this number will be counted
backwards to 1 before the device switches itself off.
...
- If you press a button within the 20 seconds, the program
continues normally.
As you see, you will have enough time for your answer. You
do not have to get nervous if the numbers appear suddenly
in the display.
Hint: Read the instructions for a function completely and
follow them step by step. This way you will get an extensive
overview about the function and can concentrate on the
function and the stimuli.
2. 3 Program Sequence
You will find an overview of the control program on the
folded rear cover page. As the program is exactly explained
on the following pages, you can use this overview for orien-
tation. Simply open the back of the cover and compare the
already described parts:
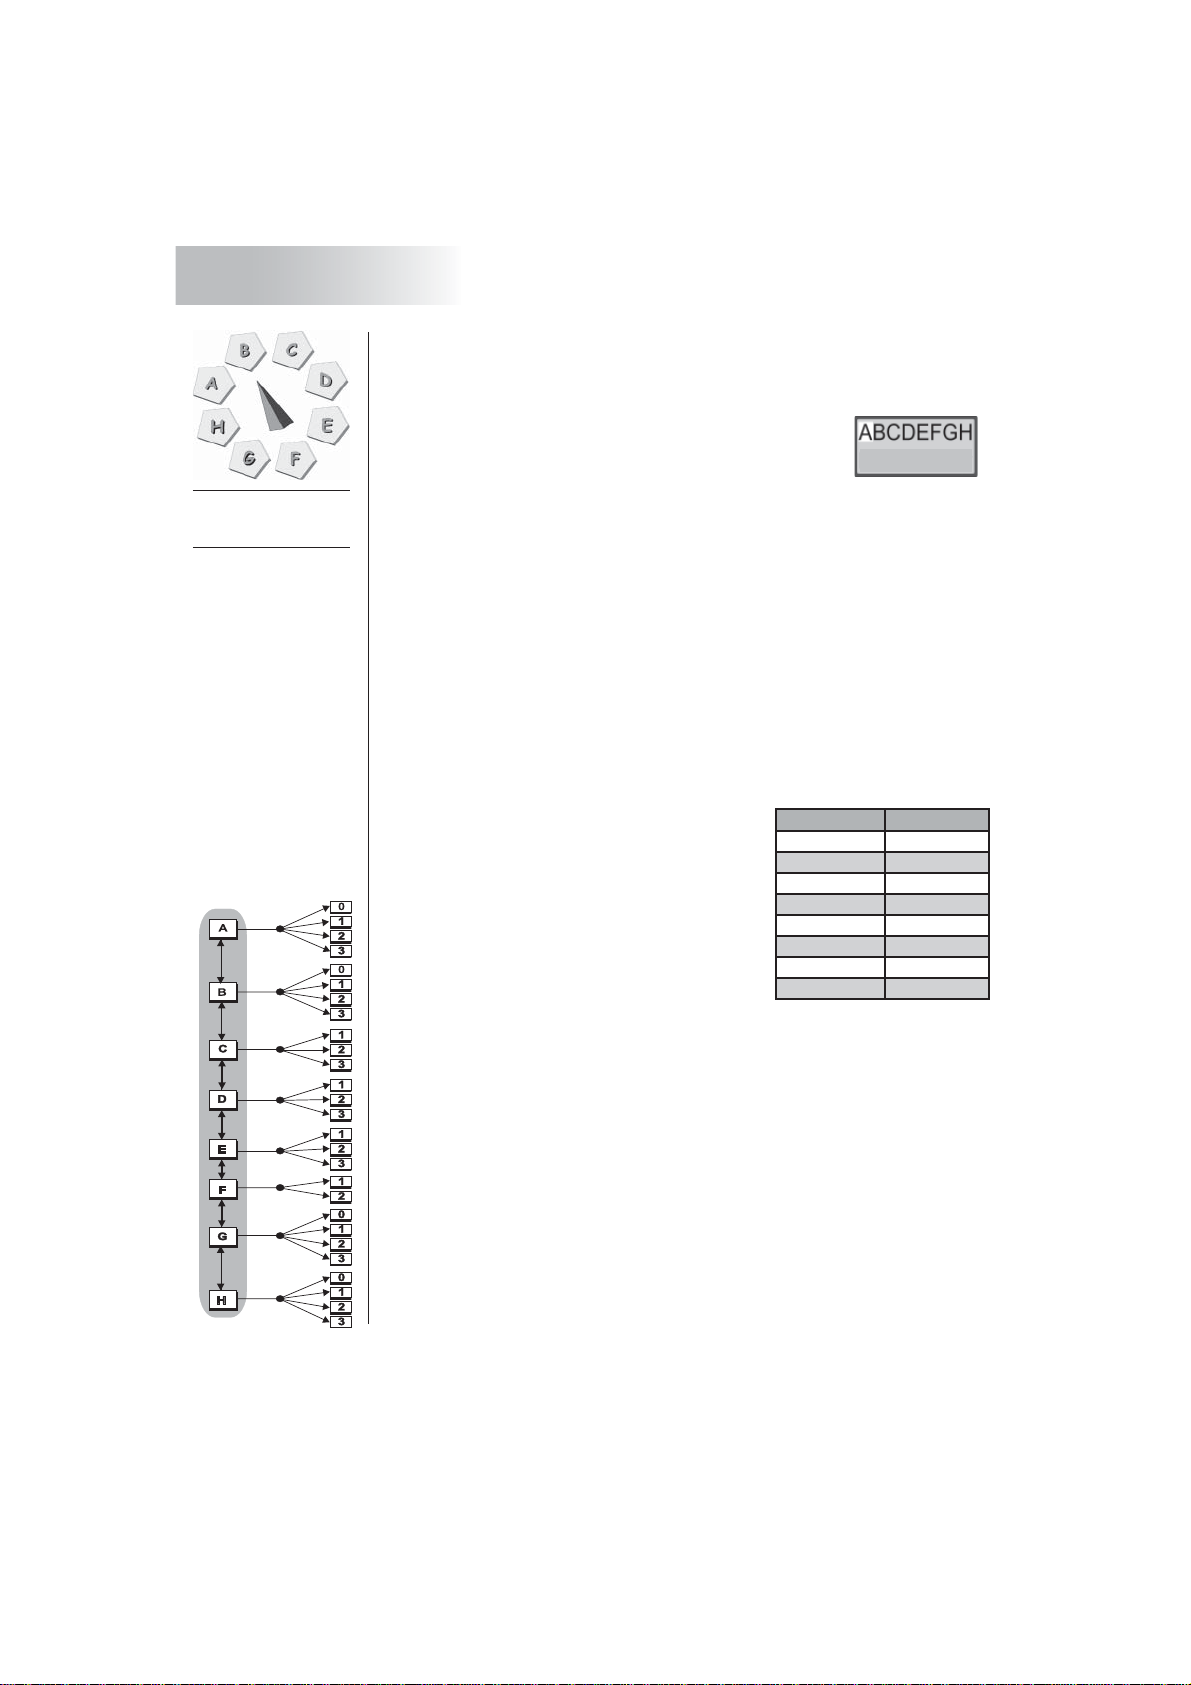
- The first column shows all the functions in a certain or-
der. You can choose them with the gray buttons.
The second column shows how many difficulty levels are
available for each function. The numbers tell the starting
value for the task. A low difficulty level means an easy start-
ing value for the task. You choose these as well with the
gray buttons. It will be shown which part of the program you
are currently in by giving a small overview on the following
pages at the side.
- In addition, the possible difficulty levels and the possible
start value are shown on the right sides of the function
descriptions.
Sequence
10
2. Getting started
Desired Function
Choice
2. 4 Desired Function Choice
To choose a function, the Audio-Trainer has to be switched on.
1. Press the start button in the center of the
device. Like this, you can start selecting the
desired function.
You can see the following in the display:
Each letter in the top line of the display stands for a different func-
tion. The blinking frame shows the actual choice. The lower line
shows the name of the chosen function, in this case it is Order-v.
If the headphones are plugged in and you have put them on, the
names of the functions will be announced for you.
Would you like to start at once?
2. Press the start button and continue with the next chapter
(difficulty level).
Or would you like to try another function?
1. Mark a different function with the but-
tons on the left or on the right:
(Have a look at the table)
- Press the button L. The blinking
frame goes one position to the left.
- Press the button R. The blinking
frame goes one place to the right.
2. Press the buttons L / R as often as needed until you have
marked the desired function.
3. Press the start button. Like this you choose the function and
can now fix the difficulty level. (Look at the following chapter
difficulty level)
General hint: Hold the Audio-Trainer in such a way, that you can
use the buttons L / R with two fingers. This will make operation
easier.
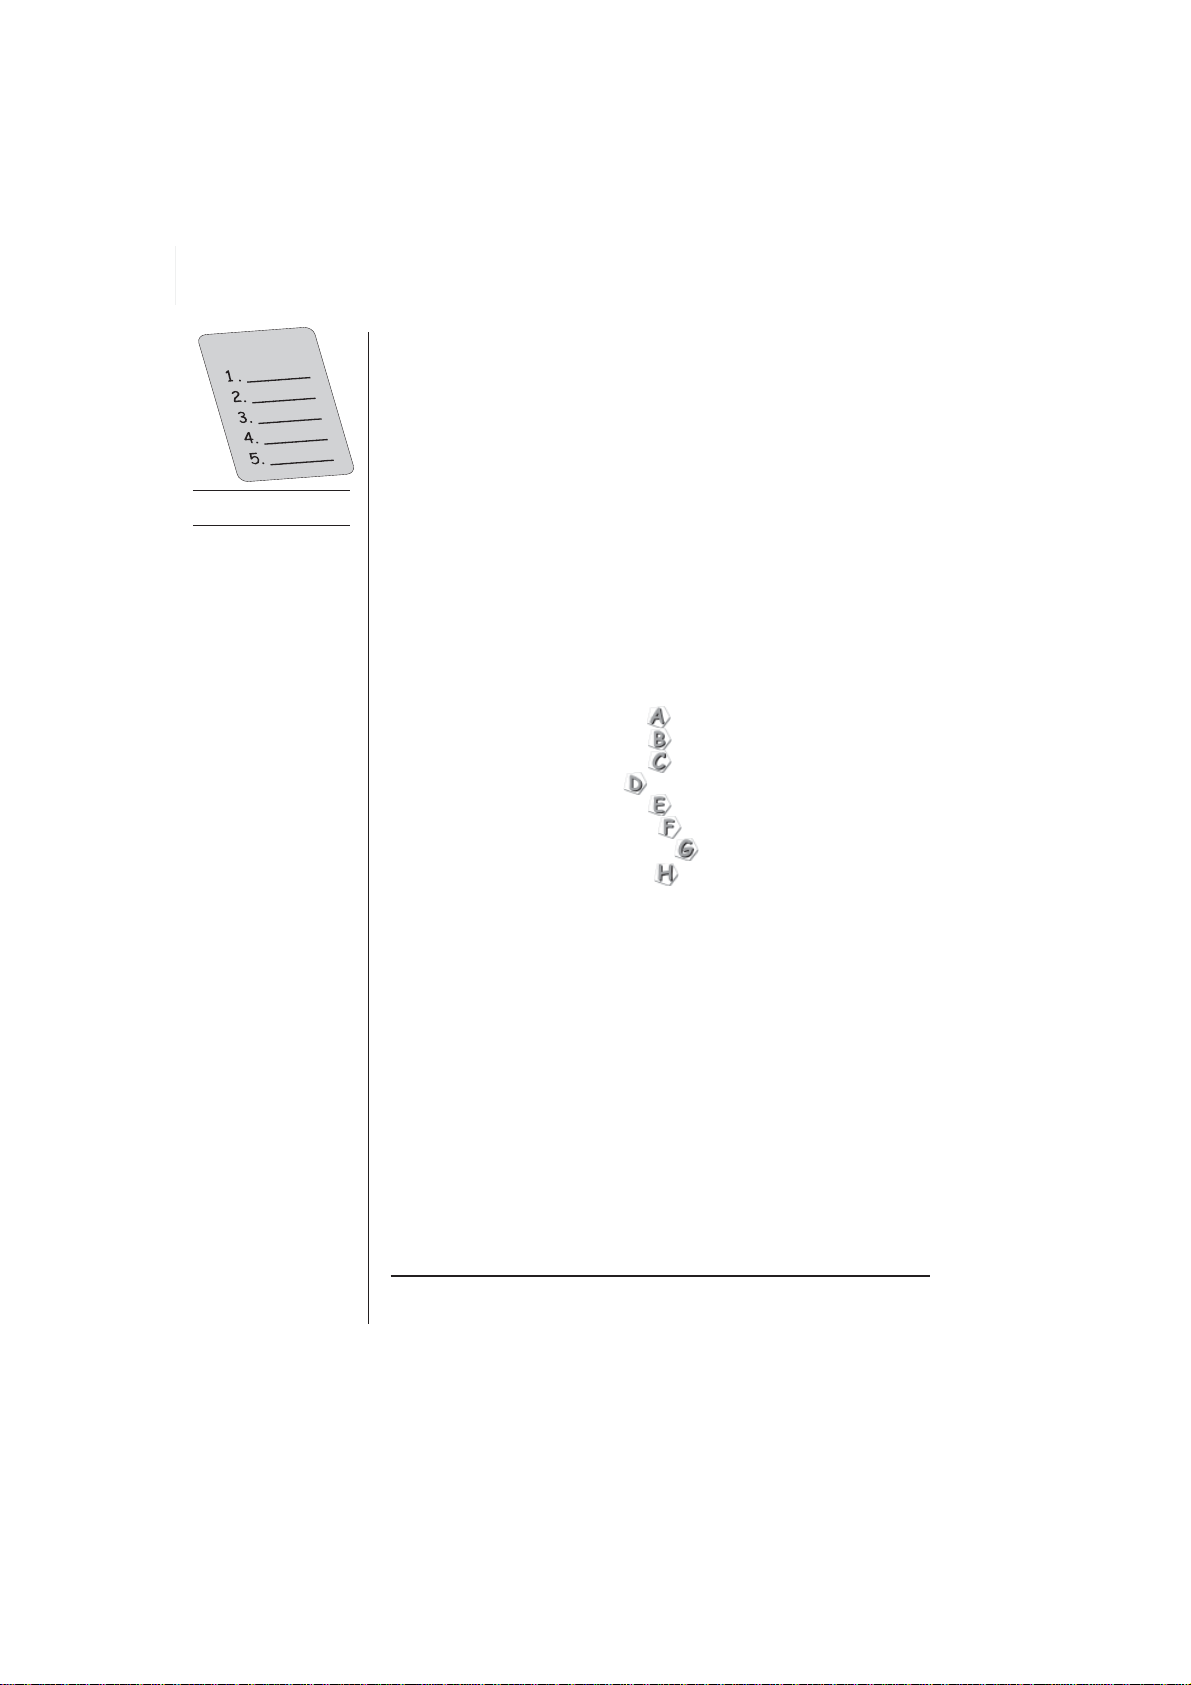
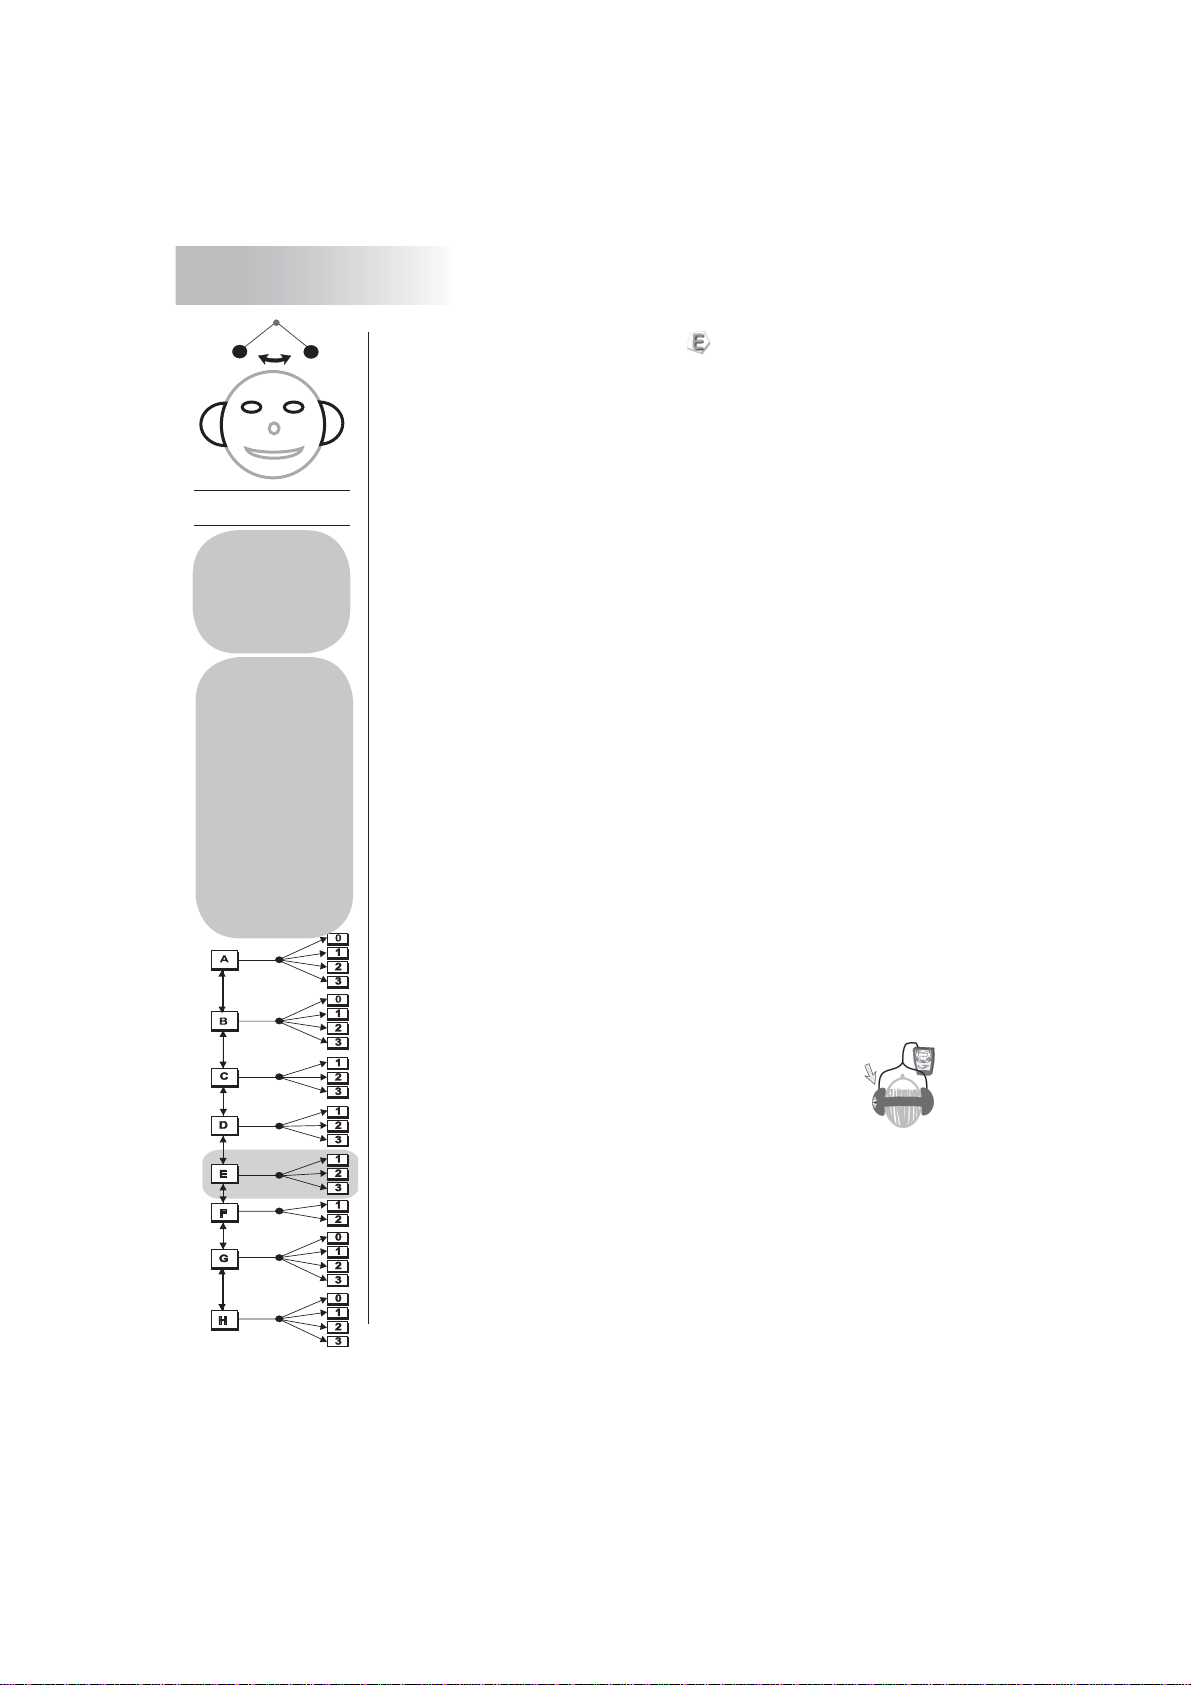
Letter Function
A Order-v
B Order-a
C Bearing
D Pitch
E Rhythm
F Reaction
G Sequence
H Duration
Order-v
11
2. Getting started
2. 5 Difficulty Level
Before you can choose the difficulty level of a function, you
have to choose the specific function. For that, follow the
steps in the previous chapter: Selecting the desired function.
After having chosen a function, in this ex-
ample Order-v, the display shows the fol-
lowing.
The top line of the display shows the name of the chosen
function, the lower line shows the possible difficulty levels.
Order-v, for example has four.
Here as well, the blinking frame shows the marked choice.
The single difficulty levels have different meanings (have a
look at the table):
1. Choose left or right with the buttons L / R.
- Press the button L.
The blinking frame goes one
place to the left.
- Press the button R. The blink-
ing frame goes one place to the
right.
Which difficulty level stands for which starting level, you can
see on the table at the back of the cover.
Hint: If you are trying a function for the first time, you
should start with a lower difficulty level. The tasks
within by the functions will become more difficult au-
tomatically , if you give the right answer.
2. Press the buttons L / R as often as many times as need-
ed, until you have selected the desired level.
3. Now press the start button to confirm your choice and
start the function. The first set of stimuli starts after a
three second countdown once you released the button
- so please be attentive.
3. Functions
On the following pages you will find specific descriptions to learn
how to practice with the different Audio-Trainers’ functions!
Difficulty Level
Digit Meaning
0 very easy
1 simple
2 difficult
3 very heavy
12
3. Functions
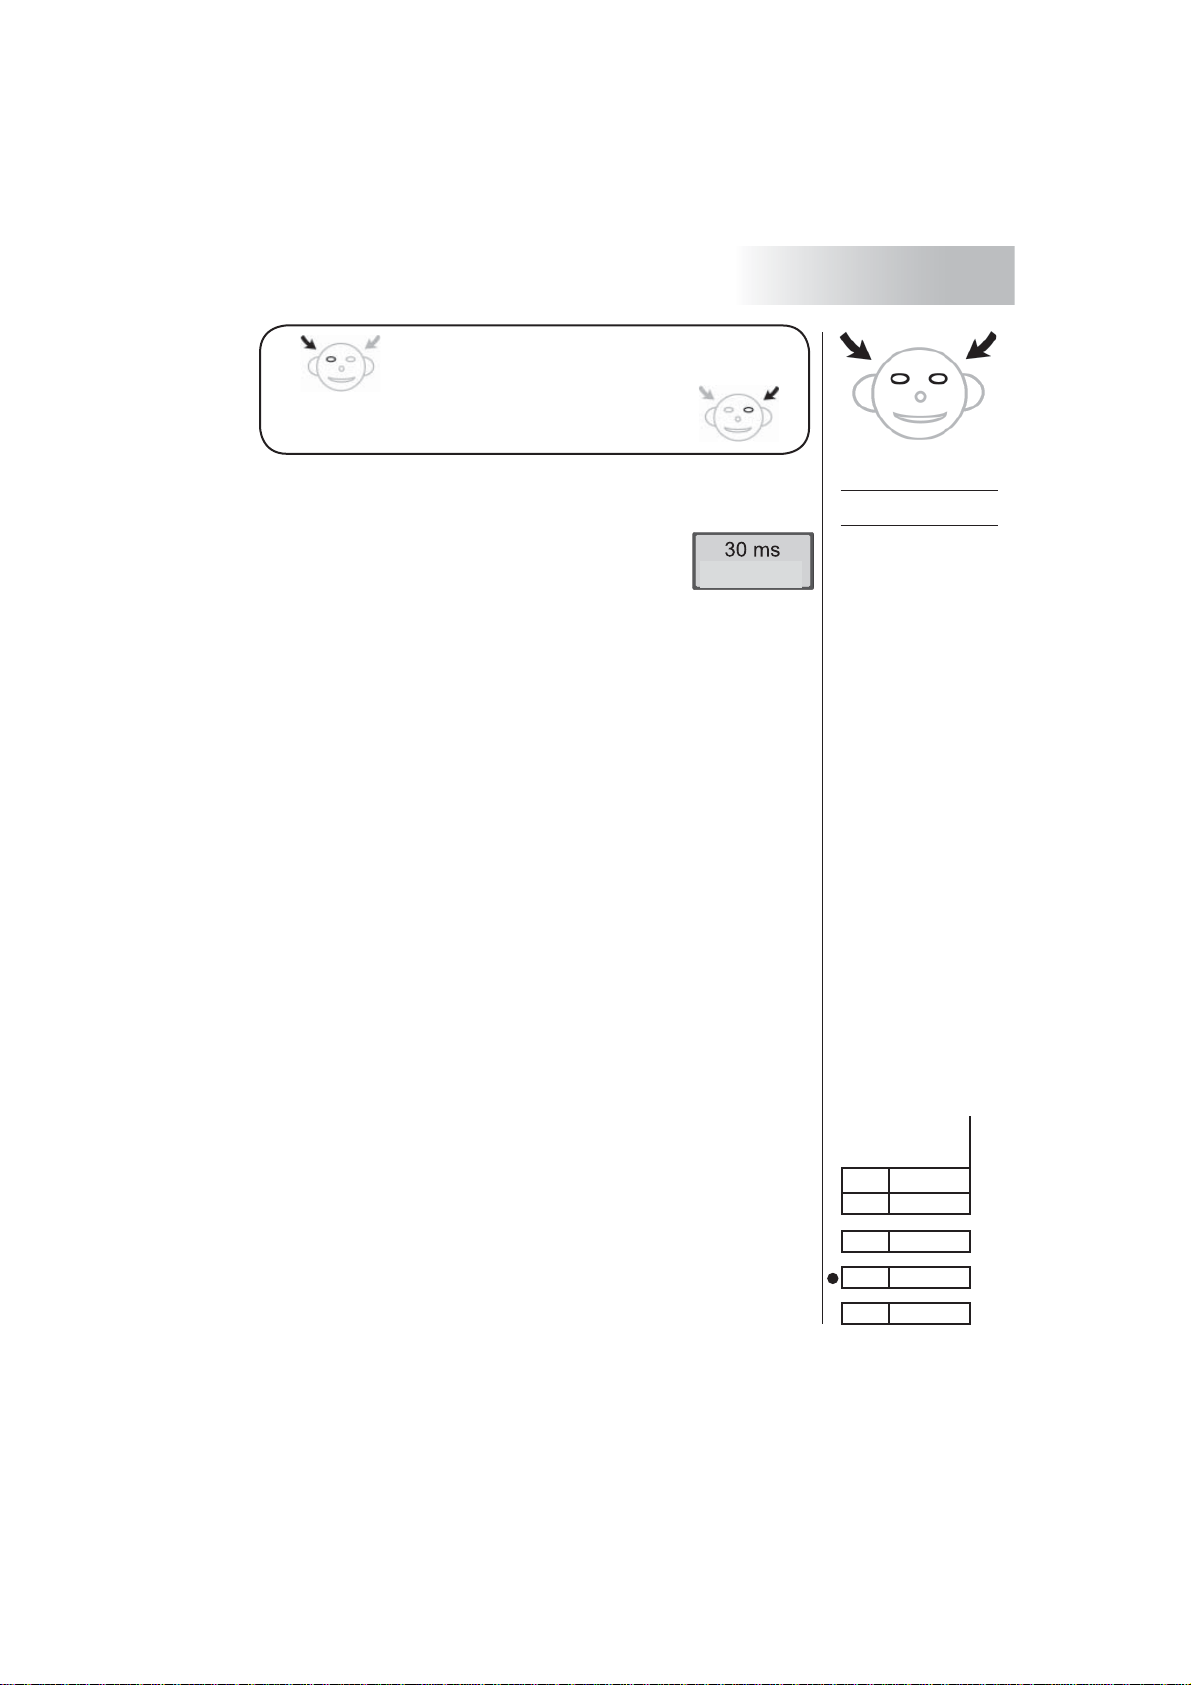
3. 1 Order-v – Function
While using Order-v, you test and train the tact frequency
of your brain at seeing (i.e. its processing speed) - the so
called order threshold. It indicates the time measure of the
ability to distinguish signals with only a brief pause interval
and to put them in order. This ability is very important for
digesting written information.
During the training you will perceive different stimuli:
-auditory order threshold: You hear two short clicks.
-visual order threshold: You see two short light signals.
-auditory and visual order threshold: You hear and see both
kinds of sensual stimuli.
What is your training goal?
The long-term goal is to increase the speed of the brain´s
capability to digest and process information.
How do you practice?
1. Put the plug of the headphones tightly into the following
connecting socket.
- visual training (with auditory help): left socket
- visual testing: no headphones
2. For training put on the headphones corresponding to the
description on the headphones. The headphone side with
the sticker has to be on your left ear.
3. Start the function Order-v. Follow the instructions
on page 10 and 11.
4. Exactly pay attention to the clicks and/or light
signals – the order is important! You have 30 seconds
time to give the answer. You may calmly decide at which
side you perceived the first stimulus.
5. Press one of the buttons L / R depending, on which signal
came first.
Order-v
Recommended
strategy:
1. Train combined
with auditory and
visual stimuli (left
headphone socket)
2. Continue with a plain
visual reinforcement
run (no headphones)
Handle each training
function correspon-
dingly, possibly on a
daily basis.
13
3. Functions
Did you see the first light at the
left side? Then press the button L.
Did you see the first light at the
right side? Then press the button R.
If you answer correctly, the device will praise you and in-
crease the difficulty level for the next pair of stimuli. The two
stimuli will follow each other more quickly each
time, so please pay attention!
If your answer was incorrect, you can try again
on a lower difficulty level. The stimuli will fol-
low each other more slowly.
In the topline the display the order threshold value you have
reached is shown, then it changes to the next value. And you
already see and/or hear the pair of stimuli.
End of Training
a. Early Program Termination
You may terminate the training any time and return to the
next menu step.
- Keep the start button pressed for at least one second.
This will interrupt the training and return you to the main
menu. Prior to that your achieved score will be shown as
your “endscore”.
b.Automatic Program Termination
If you make three mistakes in a sequence of seven pairs of
stimuli, the device terminates the program on its own. The
display will show the accomplished value before the first
wrong answer as the top value.
- Write this result into a copy of the result table on page
42. Compare your results to the table file on page 28.
Furthermore, the device finishes the function automatically
if: You fall short of 5 ms or exceed 800 ms. That is when you
have reached one of the program boundaries The display
shows the words endvalue or topscore. After 30 seconds the
function selection becomes available again. You can speed
up returning to the main menu by pressing the start button.
Order-v
Great
level start value
0 400 ms
1 200 ms
2 100 ms
3 50 ms

14
3. Functions
3. 2 Order-a – Function
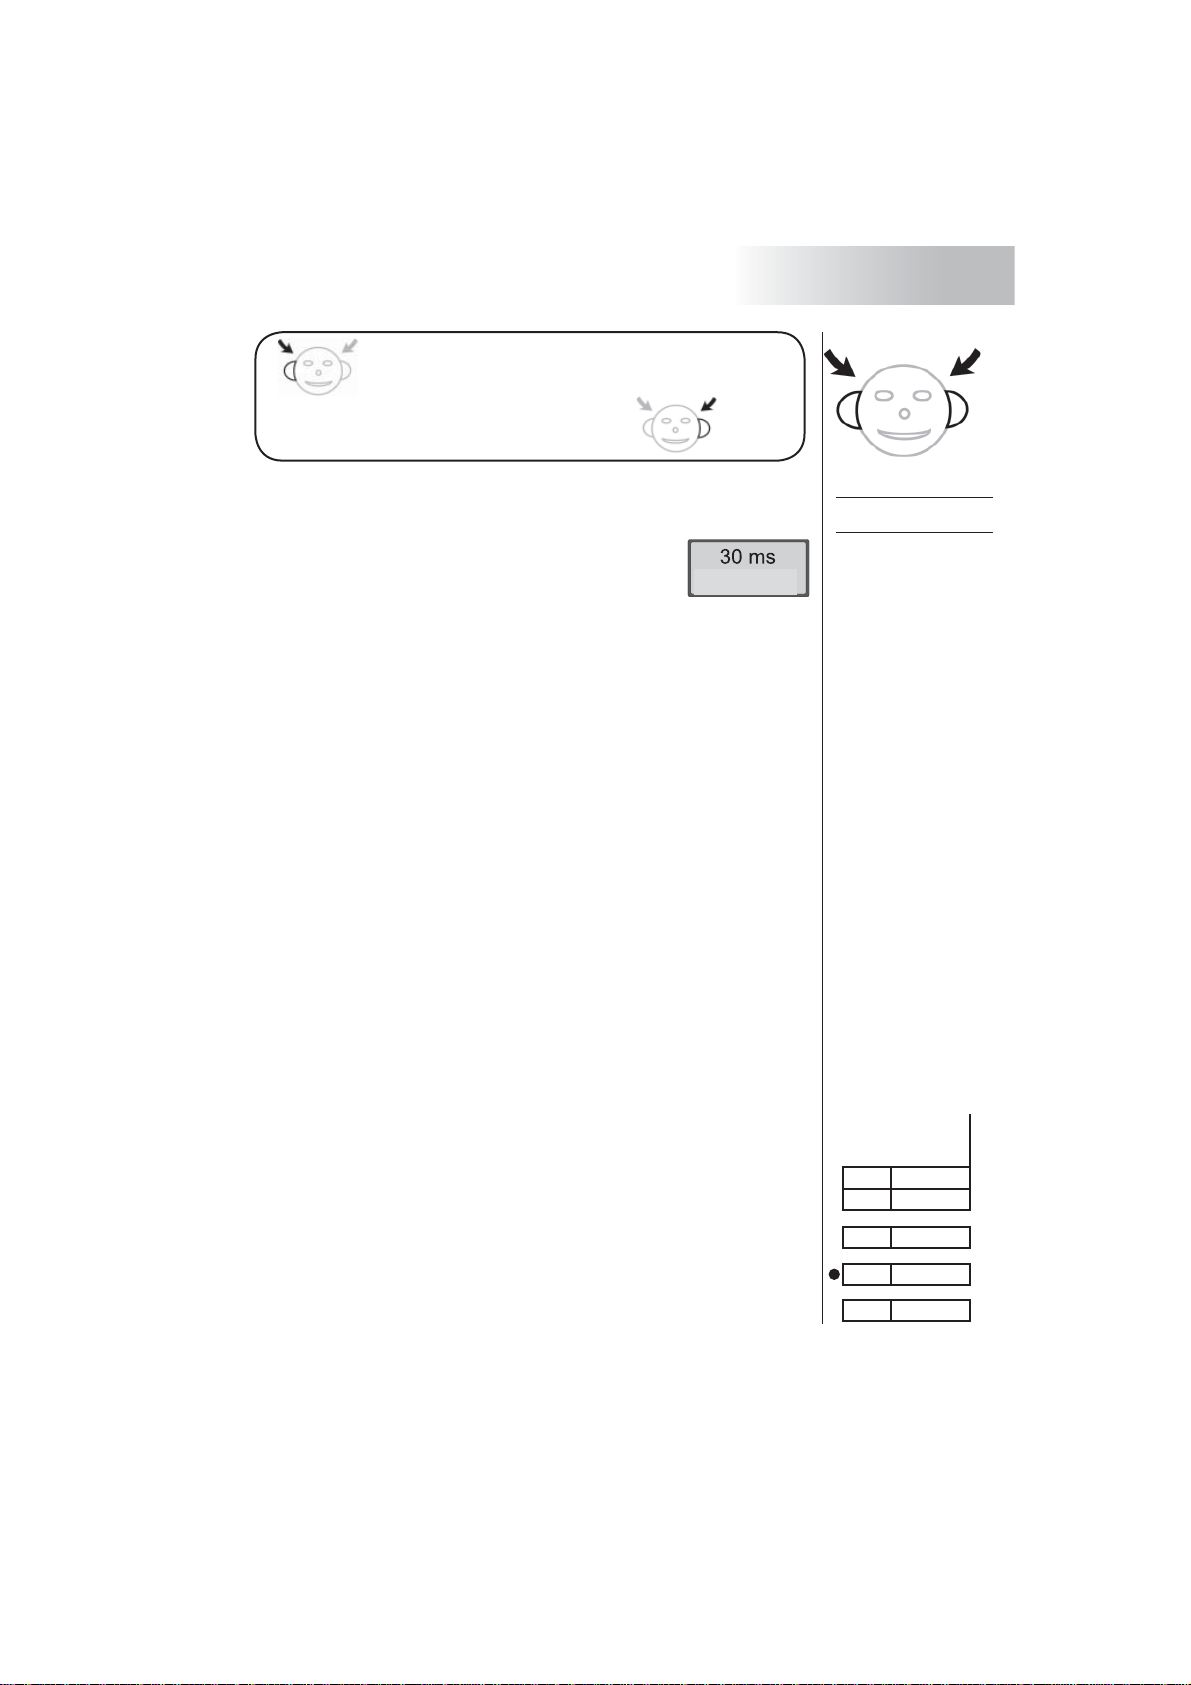
While using Order-a you test and train the tact frequency
of your brain at hearing (i.e. its processing speed) - the so
called order threshold. It indicates the time measure of the
ability to distinguish signals with only a brief pause interval
and to put them in order. This ability is very important for
spoken language information.
During the training you will perceive different stimuli:
-auditory order threshold: You hear two short clicks.
-auditory and visual order threshold: You hear and see both
kinds of sensual stimuli.
What is your training goal?
The long-term goal is to increase the speed of the brain´s
capability to digest and process information.
How do you practice?
1. Put the plug of the headphones tightly into one of the two
connecting sockets.
- auditory training (with visual help): left socket
- auditory testing: right socket
2. For test and training put on the headphones correspond-
ing to the description on the headphones. The head-
phone side with the sticker has to be on your
left ear.
3. Start the function Order-a. Follow the instruc-
tions on page 10 and 11.
4. Exactly pay attention to the clicks and/or light signals
– the order is important! You have 30 seconds time to
give the answer. You may calmly decide at which side
you perceived the first stimulus.
5. Press one of the buttons L / R depending, on which signal
came first.
Order-a
Recommended
strategy:
1. Train combined
with auditory and
visual stimuli (left
headphone socket)
2. Continue with a plain
auditory reinforce-
ment run (right
headphone socket)
Handle each training
function correspon-
dingly, possibly on a
daily basis.
15
3. Functions
Did the first click come from the left?
Then press the button L.
Did the first click come from the right?
Then press the button R.
If you answer correctly, the device will praise you and increase
the difficulty level for the next pair of stimuli. The two stimuli
will follow each other more quickly each time,
so please pay attention!
If your answer was incorrect, you can try again
on a lower difficulty level. The stimuli will follow
each other more slowly.
In the topline the display the order threshold value you have
reached is shown, then it changes to the next value. And you
already see and/or hear the pair of stimuli.
End of Training
a. Early Program Termination
You may terminate the training any time and return to the next
menu step.
- Keep the start button pressed for at least one second. This
will interrupt the training and return you to the main menu.
Prior to that your achieved score will be shown as your
“endscore”.
b.Automatic Program Termination
If you make three mistakes in a sequence of seven pairs of
stimuli, the device terminates the program on its own. The dis-
play will show the accomplished value before the first wrong
answer as the top value.
- Write this value into a copy of the result table at the back
of the cover. Compare your results to the table file on
page 28.
Furthermore, the device finishes the function automatically if:
You fall short of 5 ms or exceed 800 ms. That is when you
have reached one of the program boundaries The display
shows the words endvalue or topscore. After 30 seconds
the function selection becomes available again. You can
speed up returning to the main menu by pressing the start
button.
Order-a
Great
level start value
0 400 ms
1 200 ms
2 100 ms
3 50 ms

16
3. Functions
3. 3 Bearing – Function
While using Bearing you test and train your directional hear-
ing. This is very important to be able to perceive directly
sounds and especially language from different directions, to
be able to assign them and to overhear them as well.
You will hear two stimuli – really. But if you perceive only one
click it is absolutely normal. The temporal interval between
the stimuli is so small that you really cannot hear them.
A sound in a room will be perceived temporarily separated
by one’s ears. The Bearing simulates this situation with two
stimulies. The minimal temporal difference is enough for the
brain to be able to ascertain the direction the sounds came
from quite exactly.
What is your training goal?
The aim is to be able to locate sounds as exactly as possible
in the room without any visual help.
How do you practice?
1. Put the plug of the headphones tightly into one of the two
connecting sockets.
- auditory training (with visual help): left socket
- auditory testing: right socket
2. For test and training put on the headphones
corresponding to the description on the head-
phones. The headphone side with the sticker has
to be on your left ear.
3. Start the function Bearing. Follow the instructions on
page 10 and 11.
4.Pay exactly attention to the click – the side is important!
You have 30 seconds time to give the answer. You may
calmly decide at which side you heard the click.
Hint: The click seems to be very near to the centre of the
head – please pay attention!
Bearing
Recommended
strategy:
1. Train combined
with auditory and
visual stimuli (left
headphone socket)
2. Continue with a plain
auditory reinforce-
ment run (right
headphone socket)
Handle each training
function correspon-
dingly, possibly on a
daily basis.

17
3. Functions
5.Press one of the buttons L / R correspondingly to the side
where you perceived the click signal.
Did the click come from the left?
Then press the button L.
Did the click come from the right?
Then press the button R.
If you answer correctly, the device will praise
you. The following click seems to be nearer to
the centre of the head. The difficulty level of the
tasks increases.
If your answer was incorrect, you can try again at a lower dif-
ficulty level. The following click will be further away from the
centre of the head.
The display shows shortly the reached temporal difference
reached and continues with the following value.
And you already hear the next click.
End of training
a. Early Program Termination
You may terminate the training any time and return to the next
menu step.
- Keep the start button pressed for at least one second. This
will interrupt the training and return you to the main menu.
Prior to that your achieved score will be shown as your
“endscore”.
b.Automatic Program Termination
If you make three mistakes in a sequence of seven pairs of
stimuli, the device terminates the program on its own. The dis-
play will show the accomplished value before the first wrong
answer as the top value.
- Write this result into a copy of the result table on page 42.
Compare your results to the table file on page 28.
Furthermore, the device finishes the function automatically
if: You fall short of 18 μs or exceed 600 μs. That is when you
have reached one of the program boundaries The display
shows the words endvalue or topscore. After 30 seconds the
function selection becomes available again. You can speed up
returning to the main menu by pressing the start button.
Bearing
Super
1 280 μs
2 140 μs
3 75 μs

18
3. Functions
3. 4 Pitch – Function
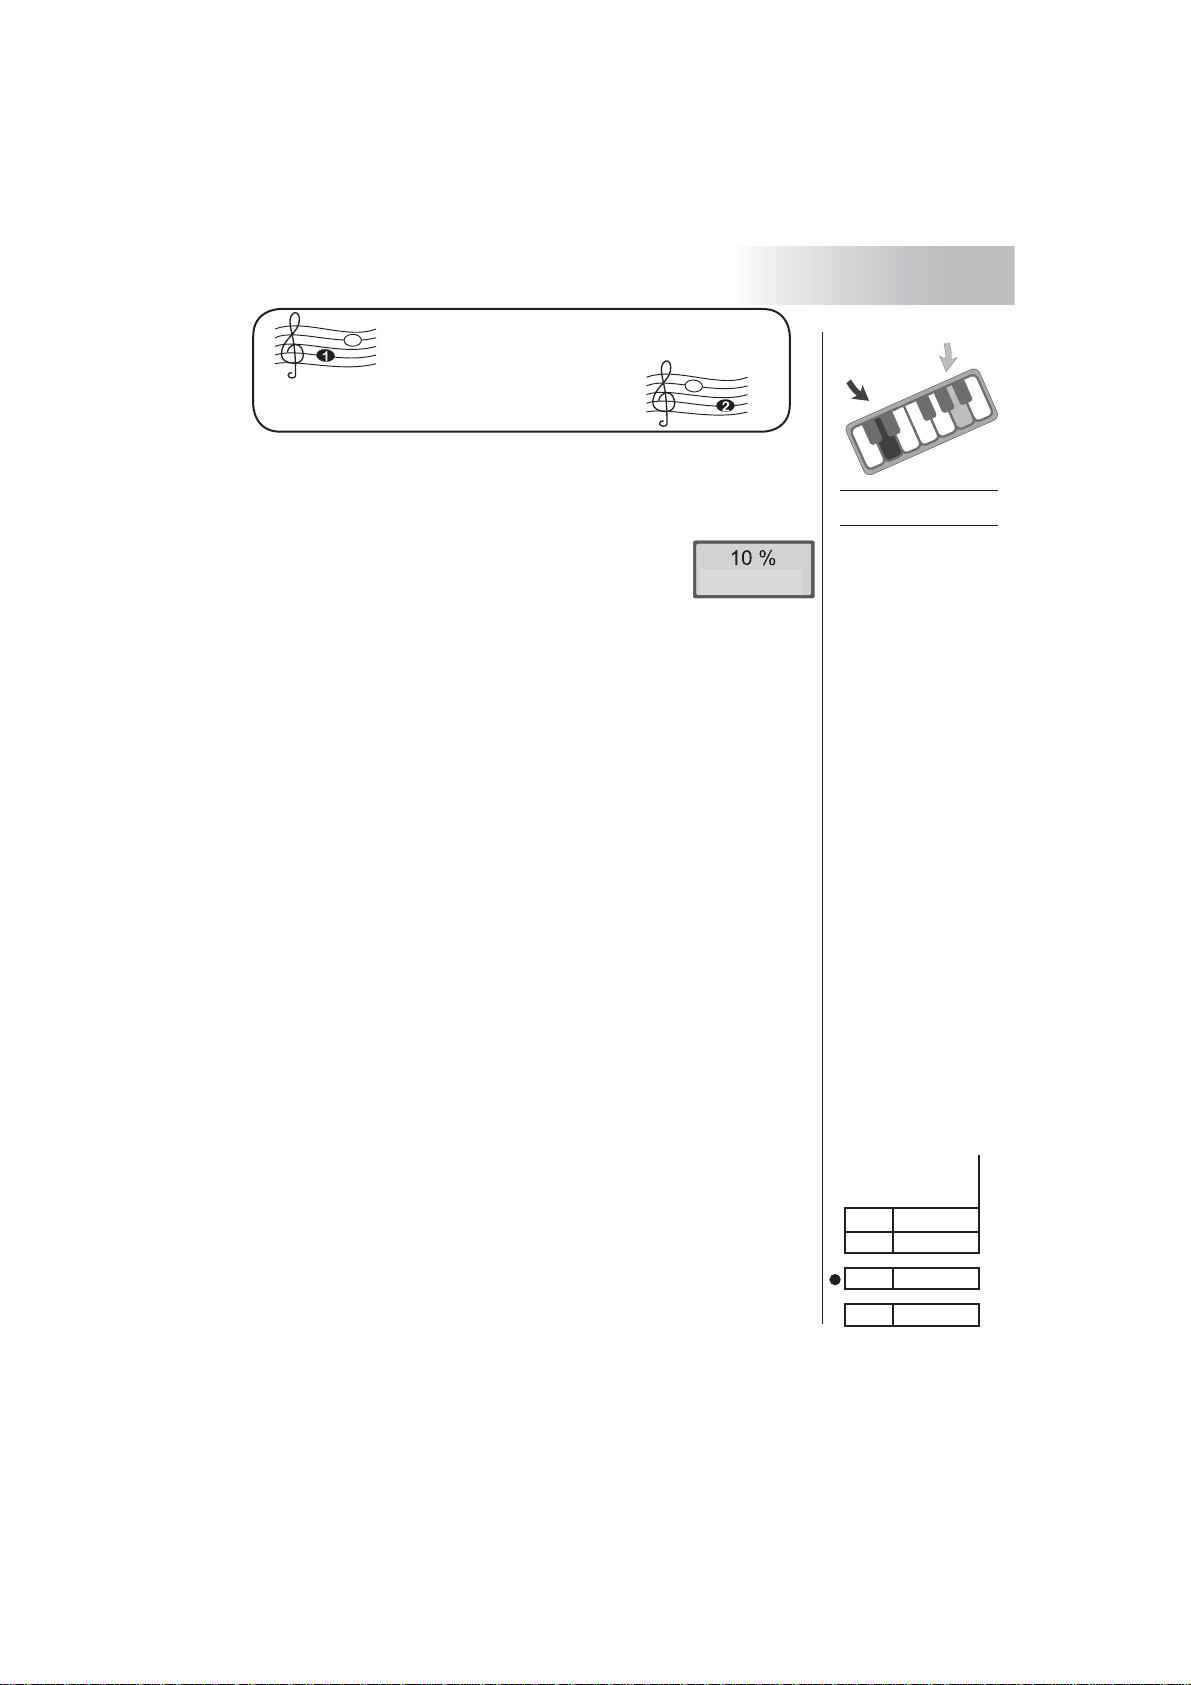
While using Pitch you test and train the ability to distinguish
between tones with very small pitch differences. This is ex-
tremely important for speaking as well as for understanding
a language.
A decisive aspect of speaking is to recognize the word stress
of the pronunciation. The most important prerequisite is of
course to be able to recognize small tone differences.
Emphases in spoken speech transport ”hidden” messages.
If these messages are overheard, there does not necessarily
need to be a “mean intention” behind it. Frequently, empha-
ses are simply not perceived.
In this function you will hear two sounds which differ only in
their pitch.
What is your training goal?
The long-term aim is to be able to distinguish between the
pitch of two tones as exactly as possible.
How do you practice?
1. Put the plug of the headphones tightly in one of the two
connecting sockets.
- auditory training (with visual help): left socket
- auditory testing: right socket
2. Put the headphones on.
3. Start the function Pitch. Follow the instructions on page
10 and 11.
4. Listen to the tones, this time, the order is important, it
depends on the deeper tone!
For the answer, you have 30 seconds time. You may think
calmly which of the tones has been the deeper one.
5. Press one of the buttons L / R depending on which pitch
came first:
Pitch
Recommended
strategy:
1. Train combined
with auditory and
visual stimuli (left
headphone socket)
2. Continue with a plain
auditory reinforce-
ment run (right
headphone socket)
Handle each training
function correspon-
dingly, possibly on a
daily basis.
19
3. Functions
Was the first tone deeper?
Then press the button L.
Was the second tone deeper,
then press the button R.
If you answer correctly, the device will praise you. The inter-
val between the two tones will become smaller. The difficulty
level increases.
If your answer was incorrect, the interval
will become a bit wider, you may try again
at a lower difficulty level. The display
shows the tone difference reached, and
continues to the next value.
And you already hear the next pair of tones.
End of training
a. Early Program Termination
You may terminate the training any time and return to the next
menu step.
- Keep the start button pressed for at least one second. This will
interrupt the training and return you to the main menu. Prior to
that your achieved score will be shown as your “endscore”.
b.Automatic Program Termination
If you make three mistakes in a sequence of seven pairs of stim-
uli, the device terminates the program on its own. The display will
show the accomplished value before the first wrong answer as
the top value.
- Write this result into a copy of the result table on page 42.
Compare your results to the table file on page 28.
Furthermore, the device finishes the function automatically if: You
fall short of 1% or exceed 65%. That is when you have reached
one of the program boundaries The display shows the words
endvalue or topscore. After 30 seconds the function selection be-
comes available again. You can speed up returning to the main
menu by pressing the start button.
Pitch
Good
level start value
1 40 %
2 20 %
3 10 %
20
3. Functions
3. 5 Rhythm – Function
While using Rhythm you test and train the ability to digest
perceived stimuli and to convert them into movements as
quickly as possible. Especially the temporarily assimilation of
information plays a very important role for thinking, speaking
and writing.
Auditory and visual information have to be perceived, to be
taken apart, erranged and to be analysed by the brain. To be
able to react quickly to words information, a fast temporal as-
similation in the brain is extremely important.
During the training, clicks in a constant order will be offered to
you: left, right, left, ...
Auditory digestion: you will hear short clicks
Visual digestion: you see short light flashes.
Auditory and visual digestion: You see and hear both stimuli.
What is your training goal?
The aim is to locate auditory stimuli as exactly as possible
without any visual assistance.
How do you practice?
1. Put the plug of the headphones tightly in one of the two
connecting sockets.
- auditory training (with visual help): left socket
- auditory testing: right socket
- visual testing: no headphones
2. For test and training put on the headphones
corresponding to the description on the head-
phones. The headphone side with the sticker has
to be on your left ear.
3. Start the function Rhythm. Follow the instructions on
page 10 and 11.
4. Pay attention to the stimuli, the clicks and / or the light
signs.
Rhythm
Recommended
strategy:
1. Train combined
with auditory and
visual stimuli (left
headphone socket)
2. Continue with a plain
auditory reinforce-
ment run (right
headphone socket)
Handle each training
function correspon-
dingly, possibly on a
daily basis.
Hint:
The training with
Rhythm should not be
started before reached
values corresponding
to the age at Order-a-
training
This manual suits for next models
1
Table of contents


