Meditrac Vertetrac and DBS User manual
Vertetrac and DBS
User Manual
1
© All rights reserved to Meditrac Ltd.

TABLE OF CONTENTS:
2
3Introduction1.
5Parts of the Vertetrac2.
7Instruction for Use of the Vertetrac3.
10Notes on the Vertetrac4.
11Additional Options5.
12Treatment Sessions6.
13Recommended Treatment Techniques7.
14Care and Maintenance of Your Vertetrac8.
15Parts of the D.B.S.9.
16Instruction for Use of the D.B.S.10.
19Notes about the D.B.S.11.
21Care and Maintenance of Your D.B.S.12.
22Contact Information13.

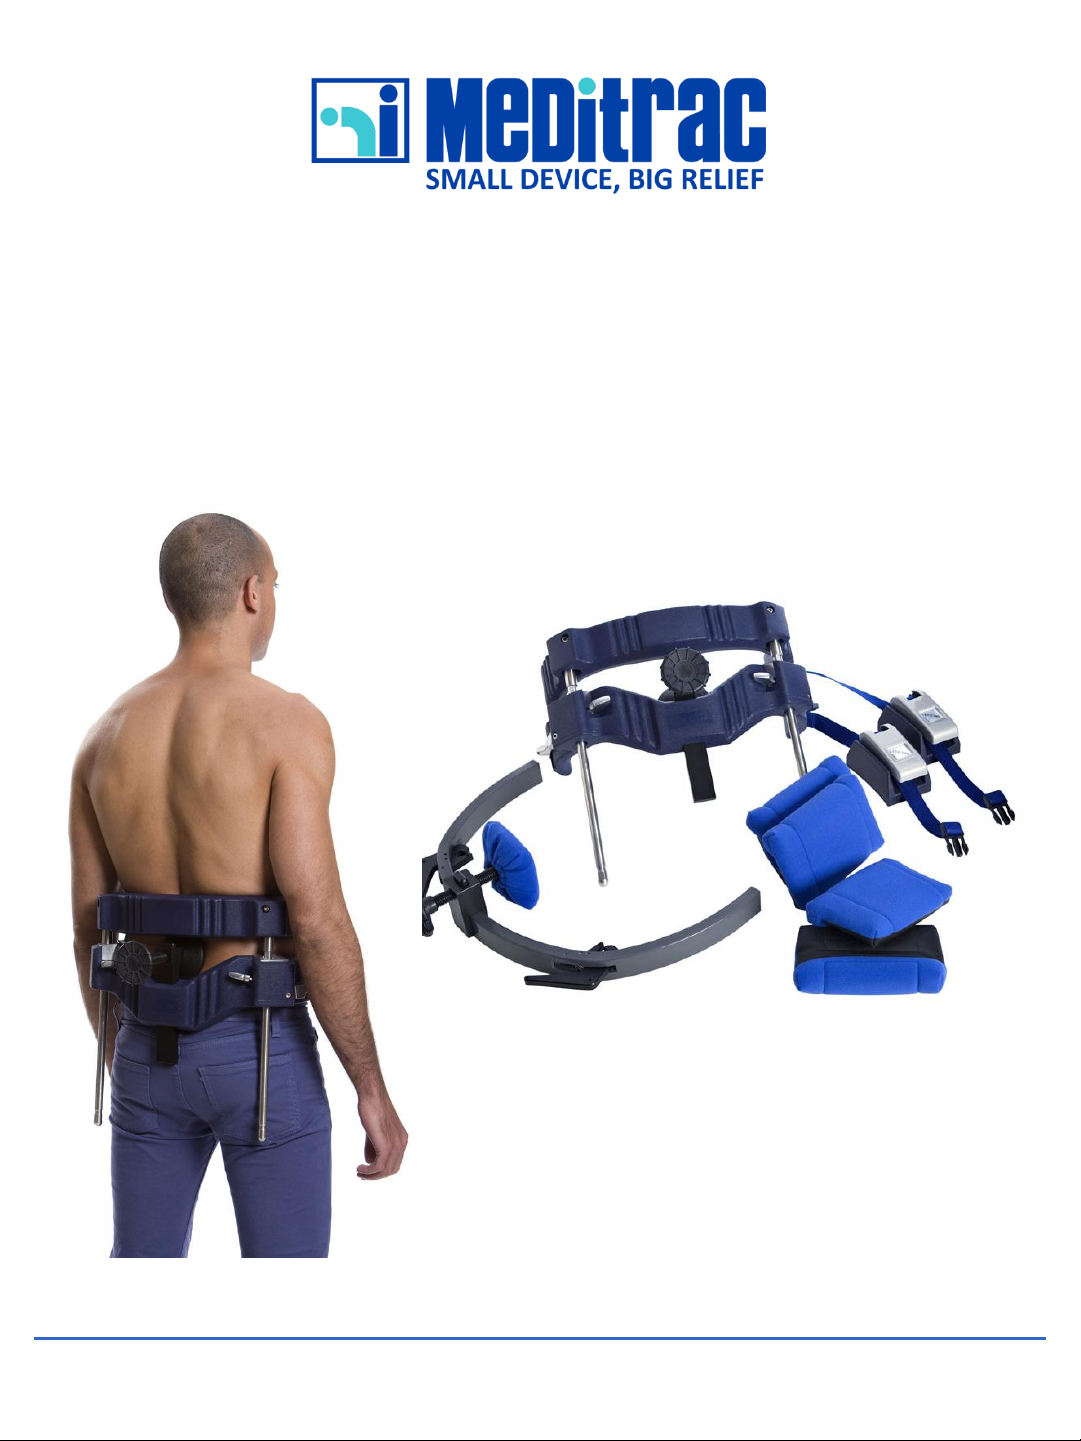
1. INTRODUCTION
Congratulations on purchasing the latest concept in lumbar spine treatment –the
Vertetrac. Offering safe, simple, compact, and effective treatment of lumbar spine
disorders, the Vertetrac brings to both the patient and physician a means of
powerful, dynamic traction with simultaneous, three-dimensional action without
the need for traction beds or restrictive braces. Thus, the Vertetrac allows the
patient maximum mobility with minimal restrictions or discomfort during
treatment. Designed with the patient in mind, the Vertetrac facilitates the
treatment of the patient by the health service professional while also allowing
chronic sufferers to administer self-treatment under qualified medical supervision.
We wish you good luck and good health with your Vertetrac.
FOR YOUR OWN HEALTH AND SAFETY
Please read the following and familiarize yourself with all of the instructions
before using your Vertetrac.
Indications for use of the Vertetrac:
Lumbar disc disorders of primary origin
•Lumbar disc disorders of secondary origin
•Sciatica
•Spinal stenosis due to disc herniation
•Herniated disc
Indications for use of the Vertetrac with the D.B.S.:
•Idiopathic scoliosis (juvenile, adolescent, or adult)
3

Contra-indications for use of the Vertetrac:
•Do not allow contact between the device and open wounds.
•Cauda Equina Syndrome
•Pott’s Disease and all infective or inflammatory diseases of the vertebrae
•Cardiac or circulatory disease and severe respiratory problems
•Pregnancy after the fourth month
•Contusions and stretching injuries of the lower back (damage of muscles,
tendons, vessels, and nerves can be aggravated by traction)
•Post-operative patients within 3 months of back surgery
•Vertebral fracture within 6 months of initial injury
•Fusion with internal fixation.
•Neoplasms.
Adverse Reactions:
Although extremely uncommon, if any of the reactions listed below are
experienced, immediately discontinue use of the Vertetrac and contact the
administering medical professional.
•Dizziness
•Breathing difficulties
•Abnormal fatigue
•Aggravation of symptoms
4
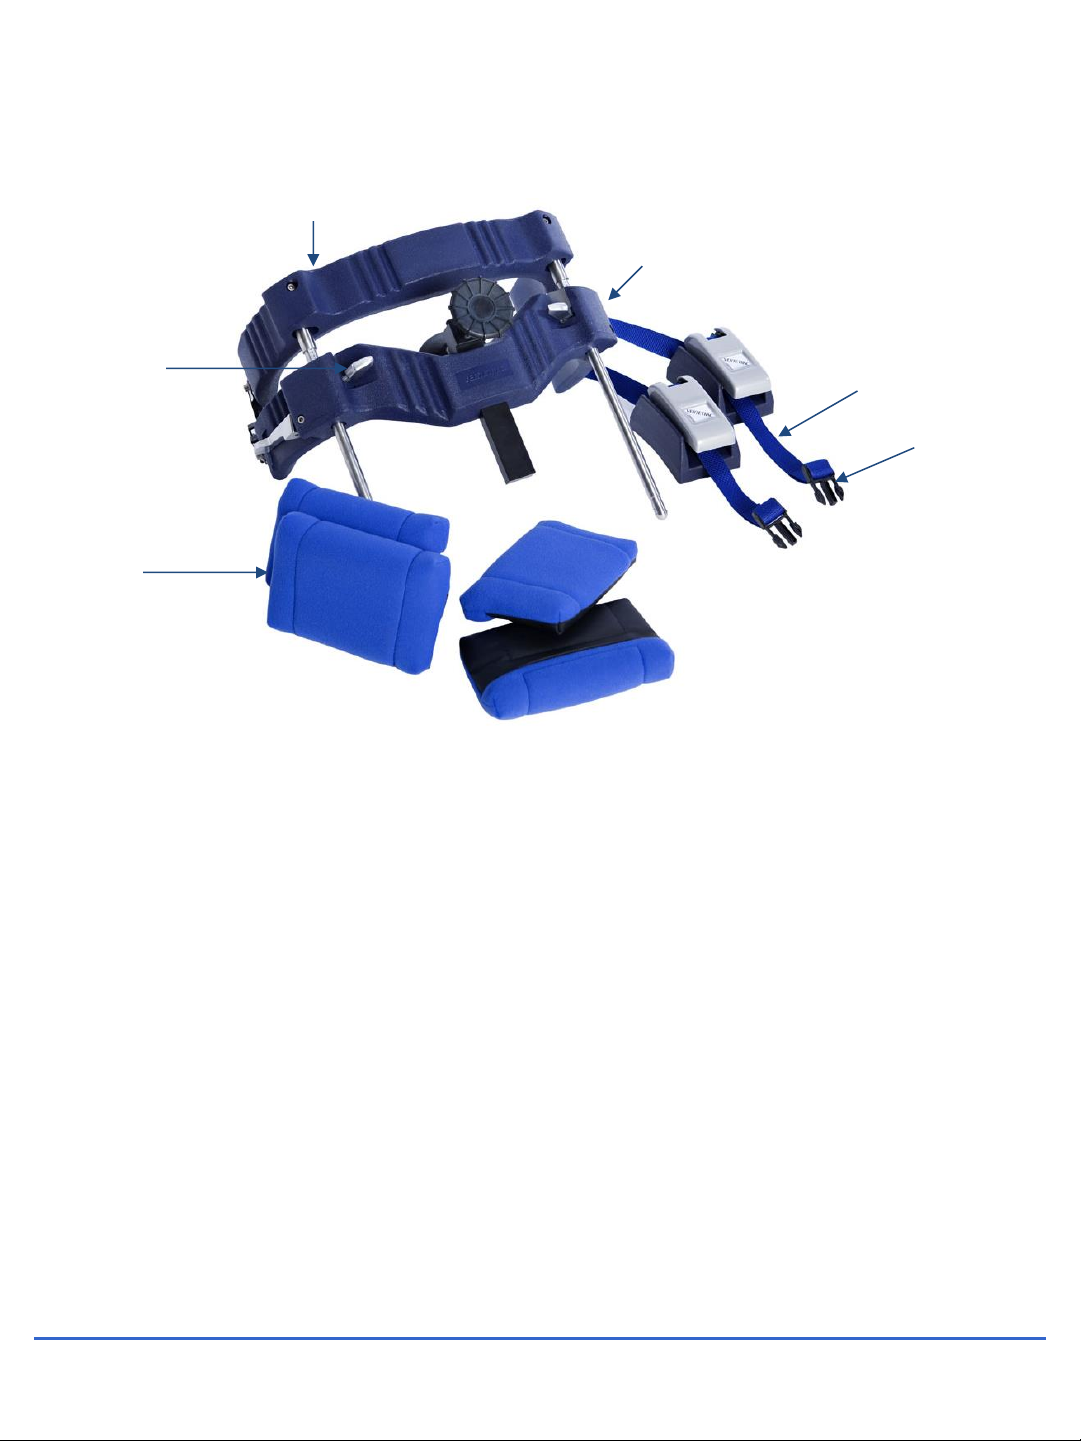
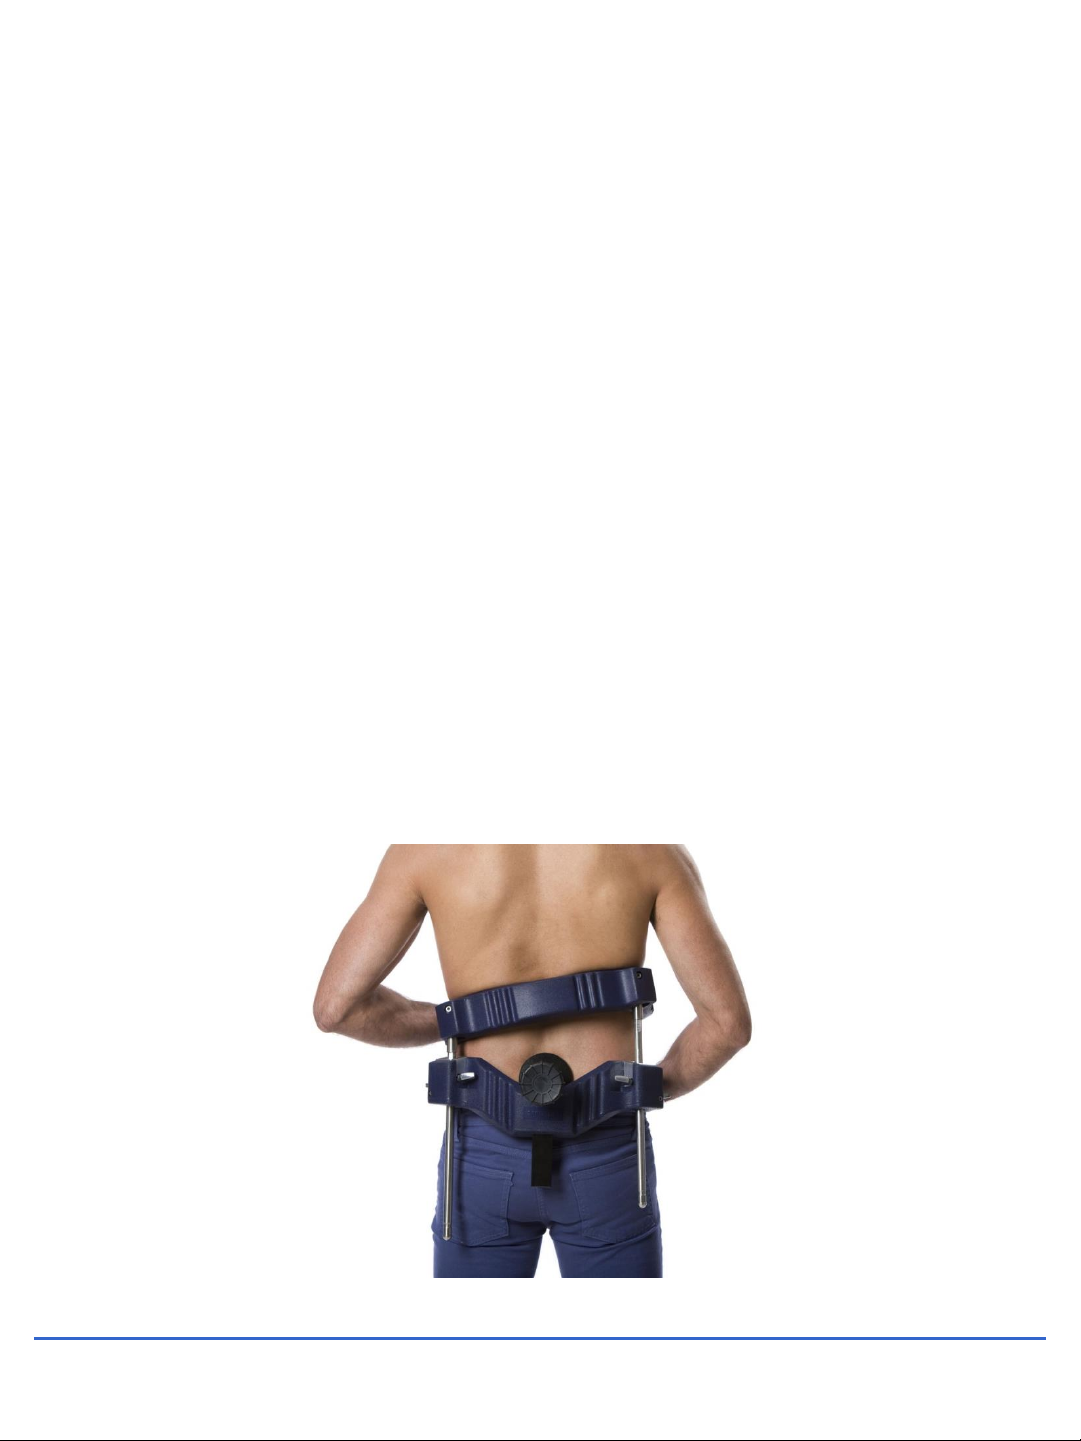
2. PARTS OF THE VERTETRAC
5
3
2
1
4
5
6
Upper frame Lower frame
Traction release
lever Belt
Belt clips
Horizontal pressure
screw
Horizontal pressure
pad
Horizontal pressure
shaft
Horizontal screw
release button Ratchet
Ratchet handle Traction rod
Traction lever Comfort pads
Upper frame Lower frame
Traction release lever Belt
Belt clips
Horizontal pressure screw Horizontal pressure pad
Horizontal pressure shaft
Horizontal screw release button Ratchet
Ratchet handle Traction rod
Traction lever Comfort pads
Upper frame Lower frame
Traction release lever Belt
Belt clips
Horizontal pressure screw
1. Upper frame
2. Lower frame
3. Traction release lever
4. Belt
5. Belt clips
6. Comfort pads
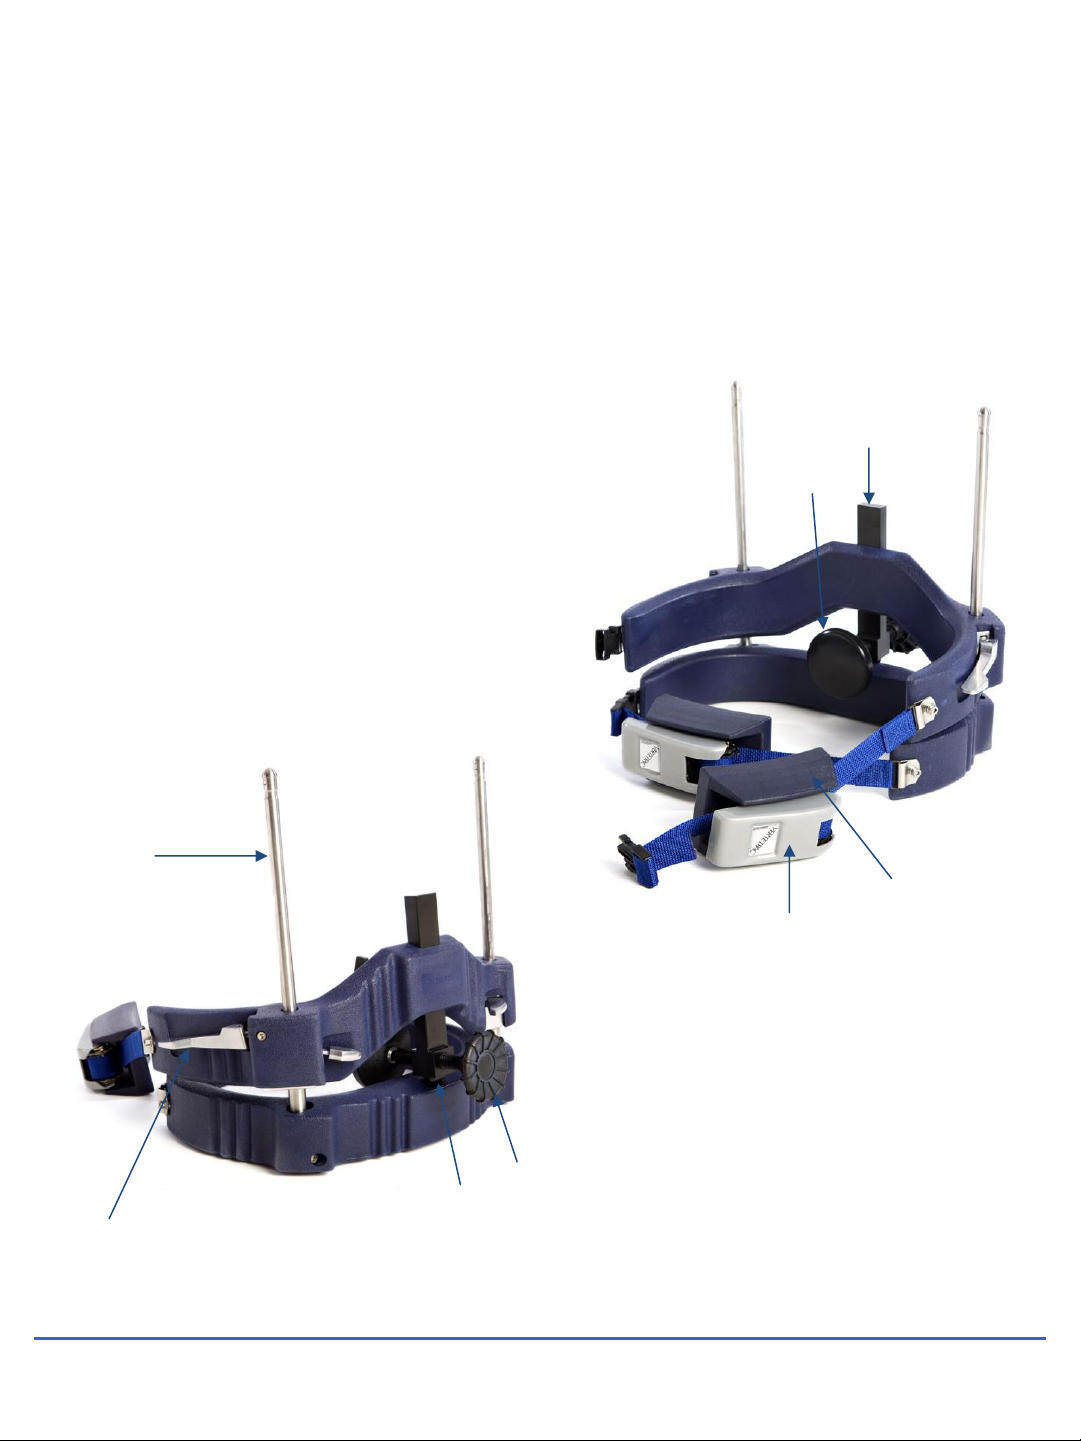
7. Horizontal pressure screw
8. Horizontal pressure pad
9. Horizontal pressure shaft
10. Horizontal screw release button
11. Ratchet
12. Ratchet handle
13. Traction rod
14. Traction lever
7
8
9
10
12
11
14
13

3. INSTRUCTION FOR USE OF THE
VERTETRAC
Step 1: Begin with the Vertetrac in the “Zero Position” by
inverting the Vertetrac unit on a horizontal surface and
pressing the traction release levers and bringing the upper
frame and lower frame to their closest possible position
(Fig. 1). Return the Vertetrac to the upright position.
Step 2: Open the two belt fasteners and retract the
horizontal pressure pad fully by depressing the screw
release button and pulling the horizontal force screw so
that the Vertetrac may be placed on the patient’s body.
With the patient holding the lower frame, place it directly
above the iliac crests (pelvis), with the horizontal force
screw centered behind the spine.
Step 3: When the Vertetrac is properly positioned, fasten
the lower belt fastener (Fig. 2) and begin tightening the
lower ratchet so that the ratchet rests loosely in the
middle of the patient’s body. Tighten the belt by moving
the ratchet handle in a left-to-right motion, repeating until
the appropriate amount of tension has been applied (Fig.
3). Do the same for the upper belt fastener. The upper
frame should fit around the patient’s rib cage with no
clothing, body parts, or other obstructions between the
frame and the ribcage. Please note that when treating
large-breasted patients, the patient’s breasts should be
resting above the upper frame and not trapped between
the frame and the body.
7
Fig. 1
Fig. 3
Fig. 2

Step 4: Begin adjusting the lower belt so that it fits tightly
around the body. The lower belt should be sufficiently
tight to prevent slipping of the apparatus during the
treatment. It is recommended to center the ratchet
horizontally on the belt, but this position may be changed
as different patients may require a different position.
Tightening of the upper belt should ensure that the upper
frame is well pressed against the body, so that no space
remains between the upper frame and the skin. Use the
comfort pads if the patient feels excessive pressure
beneath the sternum or on ribs or iliac crests (Fig. 4). For
small-bodied patients, it may be necessary to use the
comfort pads in order to allow the upper and lower frames
to be tightened sufficiently.
**If the belt is tightened excessively and the patient feels
extreme discomfort, the tension may be released by
opening the belt fasteners (on the left side).
Step 5: Apply lumbar traction by simultaneously jacking
both traction levers at a consistent rate (Fig. 5) until the
skin is tightly stretched between the upper and lower
frames and there is considerable resistance to the
movements of the handles (approximately 20 kg./45 lbs. of
traction force on each side). The skin below the upper
frame should be taut so that it cannot be caught between
the fingers. The skin above the upper frame should be
folded (Fig. 6).
**When asymmetrical traction is recommended, apply
simultaneous traction to the point where the patient feels
a moderate traction force and then apply additional
traction on the appropriate side (Fig. 7).
8
Fig. 4
Fig. 5
Fig. 6
Fig. 7

Step 6: When horizontal force is recommended, place the
horizontal force pad at the desired level –L3, L4, or L5 (Fig.
8). Apply horizontal force by turning the horizontal
pressure screw clockwise to the point where the patient
feels relief from leg pain (Fig. 9).
Step 7: After treatment session has been completed,
release the horizontal force by turning the horizontal force
knob counter-clockwise. Release the vertical traction on
the spine by lifting both release levers (Fig. 10), then open
the upper and lower belt fasteners. To loosen the belt,
pull the ratchet lever as far to the right as possible while
lifting the U-shaped retaining clip. When the ratchet lever
is locked in the open position (180 degrees) (Fig. 11) the
ratchet can slide from side to side on the belt. Unlock the
ratchet lever by pulling on the retaining clip in the ratchet
handle and partially closing the handle.
Step 8: Remove the apparatus from the body of the
patient. To prepare the Vertetrac for further use, lift the
releasing levers and bring the upper frame to its lowest
position (“Zero Position”). It is recommended to store the
unit inverted and resting on the upper frame.
9
Fig. 8
Fig. 11
Fig. 9
Fig. 10
4. NOTES ON THE VERTETRAC
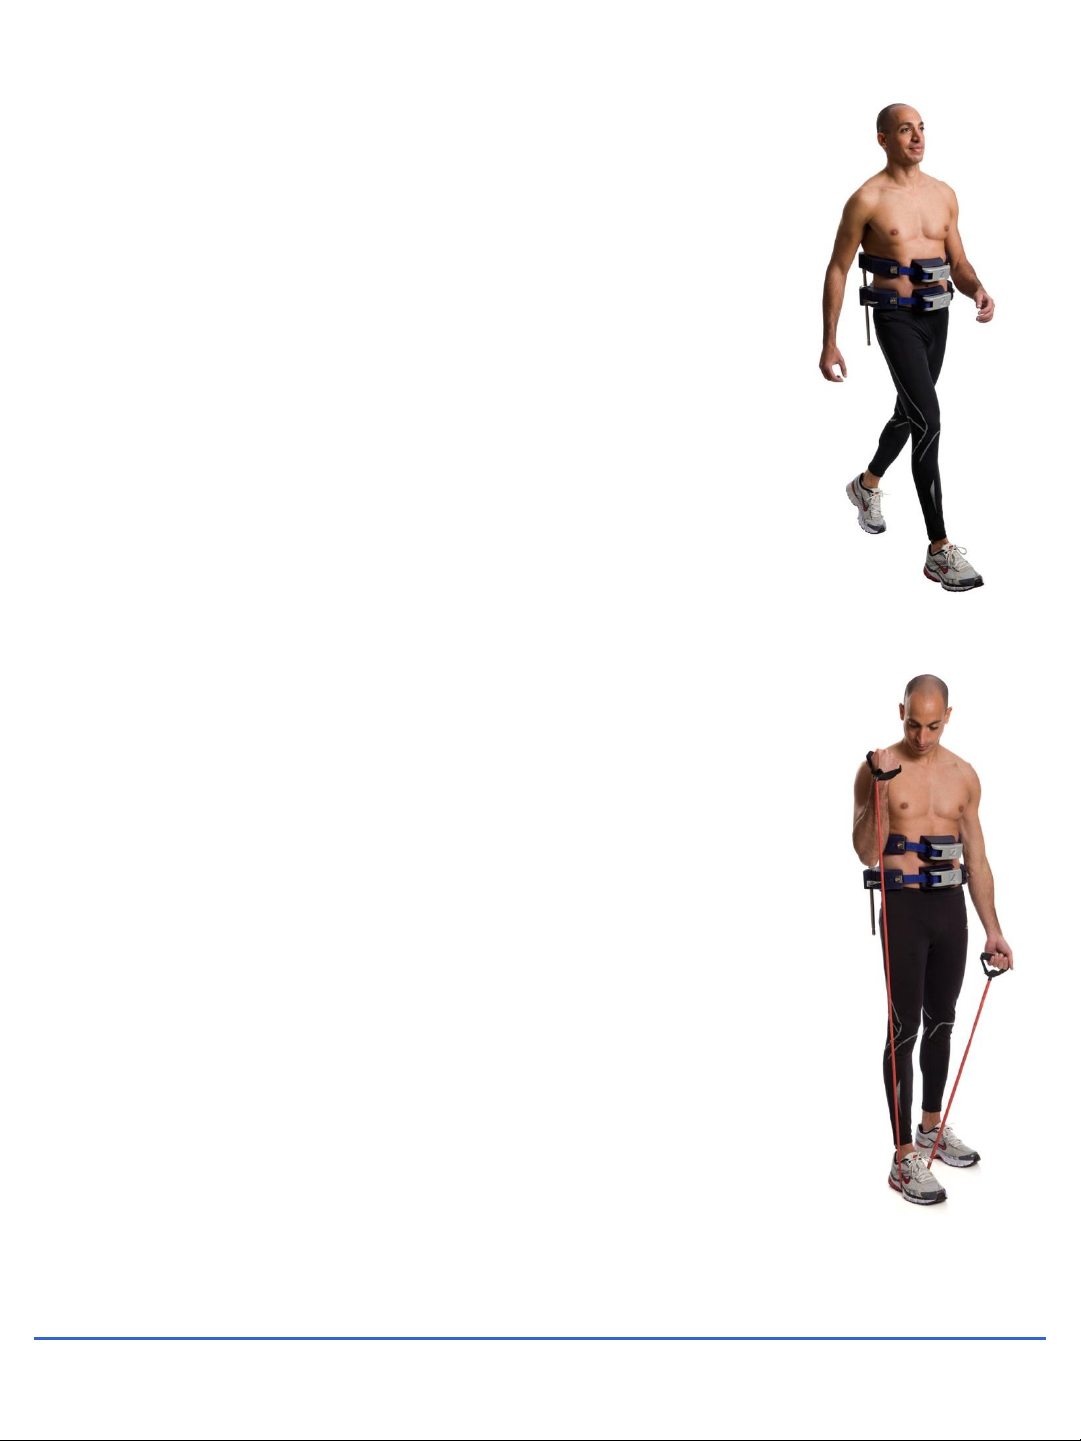
•Treatment session is 30 minutes, but may be varied
slightly according to the tolerance of the patient. The
patient should be examined every ten minutes and
the traction increased when necessary. It is
recommended for the patient to walk or participate in
active exercises during the treatment session (i.e. on
a treadmill or using elastic bands).
•If, at any time during the treatment, the patient feels
excessive pressure and/or extreme discomfort, lower
the upper frame immediately by pressing the release
handles and open both the upper and lower belt
fasteners.
•Comfort Pads
In general, each unit has four extra padding units –
two soft pads for the iliac crest and two rigid pads to
put under the ratchet. Use the comfort pads in
accordance with patient needs to prevent discomfort
during treatment. The extra padding should be
installed before traction is commenced.
•The use of padding is especially important for very
thin patients, where there is a risk of rib fracture if a
suitable amount of padding is not used.
10
5. ADDITIONAL OPTIONS
•Self Treatment
The patient should be instructed in the proper and
safe use of the Vertetrac. Once the patient is
comfortable with the use and maintenance of the
unit, the patient may begin performing self-
treatment. The patient should follow a treatment
schedule outlined by the physician. Long-term
patients should be examined monthly by the
physician in order to gauge the patient’s condition
and progress.
•Active rehabilitation with treadmill or elastic bands
•Asymmetrical traction
When asymmetrical traction is recommended, apply
simultaneous traction to the point where the patient
feels a moderate traction force and then apply
additional traction on the appropriate side.
11

6. TREATMENT SESSIONS
•It is recommended to apply treatment with the Vertetrac as soon as
possible after the onset of pain and diagnosis by the administering medical
professional. All treatments should be performed as outlined by the
administering medical professional.
•The amount of traction applied will always be dictated by the administering
medical professional’s diagnosis and the tolerances of the patient.
•Monitoring of the patient’s response will help to determine the amount of
traction force needed. The effectiveness of treatment should be evaluated
according to relief of pain during treatment and not according to the
magnitude of force applied.
•In certain cases, such as patients with sciatica, the use of the horizontal
traction may be recommended. If applied and no change is experienced,
stronger traction should be applied and the horizontal force readjusted.
Occasionally (in less than 10% of patients), the patient may feel more pain
with the use of horizontal force. In such cases, immediately discontinue the
use of the horizontal force and continue with vertical traction.
•The procedure should be applied daily for 25-30 minutes. In severe cases, it
may be applied twice daily.
•During the treatment, one or two adjustments in traction power are
generally required to prevent slackening of traction and to maintain relief of
pain.
•In chronic cases, the response to treatment may be less immediate and
additional physiotherapy or other treatments may be required. Chronic
patients will normally require more then 15 treatments.
•If, after three treatment sessions, the patient is not experiencing any
improvement, discontinue treatment and re-evaluate the patient's condition.
The patient may not be appropriate for this treatment.
12

7. RECOMMENDED TREATMENT TECHNIQUES
•Malalignments of the apophyseal joints
Only one or two treatments are needed.
•Mild or moderate disc disorders, without sciatica
Apply treatment immediately after onset of symptoms. A course of 12-15
daily treatment sessions is usually required. When the first treatment is
applied two weeks or more after the onset of symptoms, or in cases with
sciatica, 12 traction treatments are usually needed. In such cases, even if the
patient is free of pain after the first few treatments, the treatment should be
repeated at least 12 times in order to reduce the possibility of recurrence.
•Long-standing cases with severe sciatica
15 to 20 daily traction treatment sessions may be needed. If this treatment
gives only partial relief, additional forms of treatment should be considered.
13

8. CARE AND MAINTENANCE OF YOUR VERTETRAC
While the Vertetrac applies powerful traction forces to the lumbar spine, it is a
precision device that needs proper care. Make sure to follow these simple steps:
•Be sure to handle the device gently.
•Keep the device properly stored in the “zero position” in its original carrying
bag when not in use.
•Avoid exposing the device to water, excess humidity, or direct sunlight for
extended periods of time.
•Clean the device by wiping the plastic, polyurethane, and stainless steel
parts with alcohol.
In a clinical environment, it is recommended that spare sets of pads be kept on
hand for convenience and comfort for the patient. You can order them from your
D.B.S. and Vertetrac representative or directly from Meditrac.
14
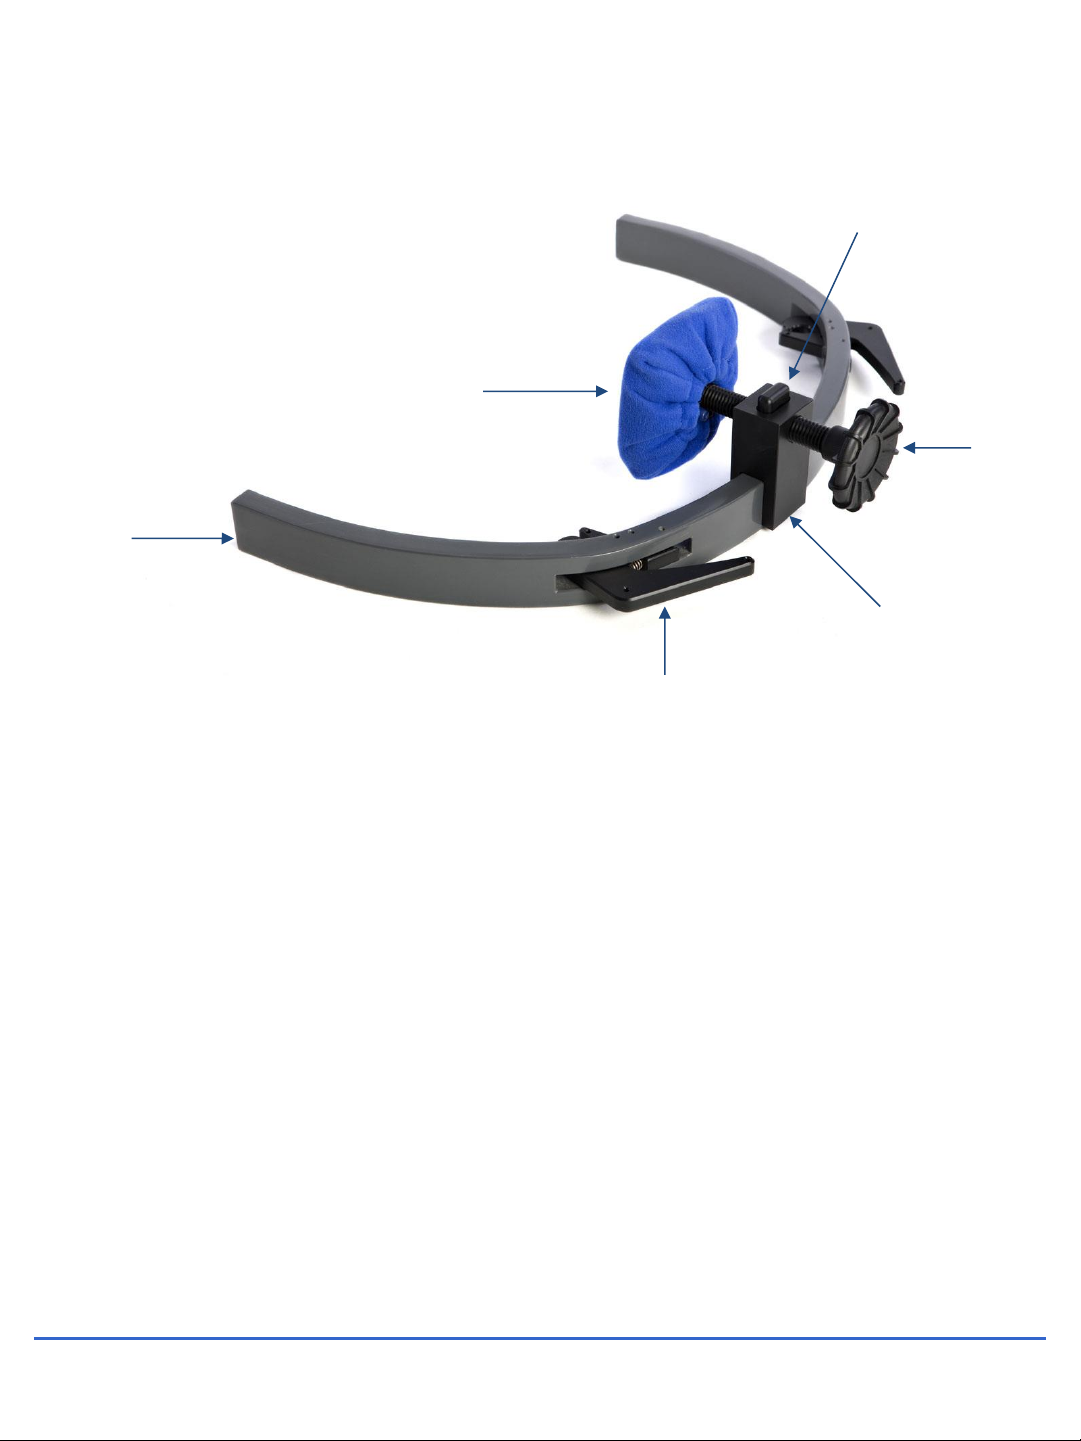
9. PARTS OF THE D.B.S.
15
1
2
1. D.B.S. rail
2. Jaw clamps
3. Horizontal pressure screw
4. Horizontal pressure pad
5. Horizontal pressure bracket
6. Screw release button
3
4
5
6
10. INSTRUCTION FOR USE OF THE D.B.S.
Step 1: Remove the horizontal screw assembly of the
Vertetrac by raising the upper frame and pulling the
screw assembly upwards until it slides out of the lower
frame. Place the horizontal screw assembly in the
Vertetrac carrying case so that is readily available for the
next use. Return the Vertetrac to the “Zero Position”.
Step 2: Attach the horizontal pressure bracket to the
D.B.S. rail in the fully retracted “Zero Position”.
Step 3: Fasten the Vertetrac to the body according to
the scoliosis level and begin applying vertical traction
with the Vertetrac according to the Vertetrac instruction
manual and the patient’s needs. Apply traction until the
patient feels strong traction but little discomfort.
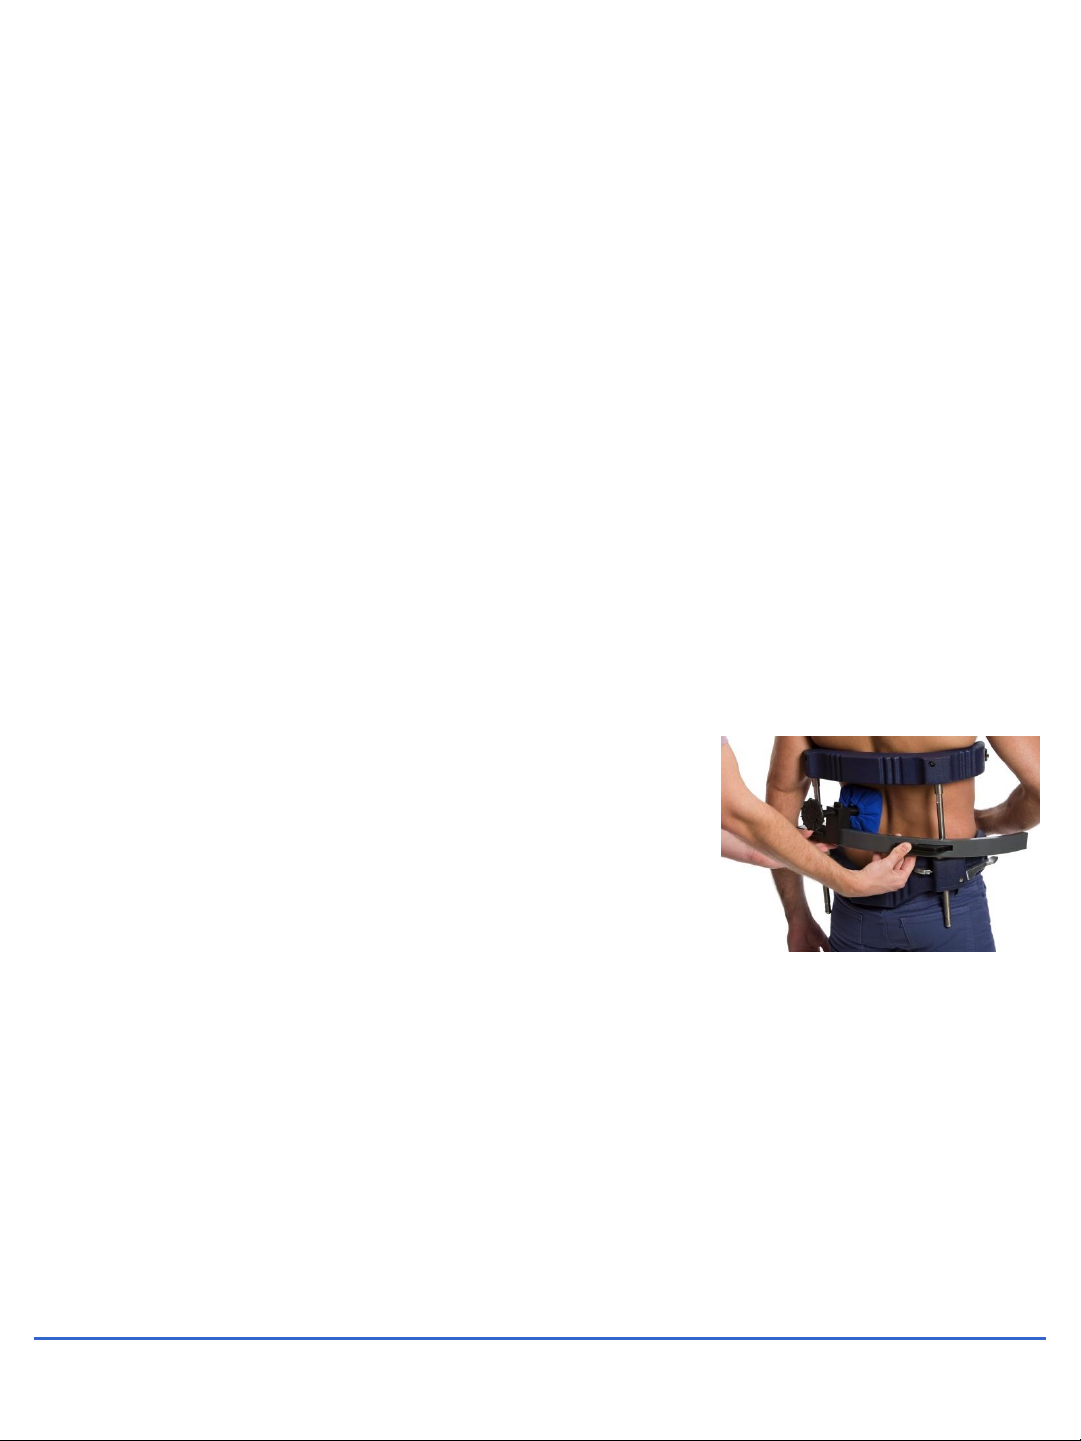
Step 4: Attach the D.B.S. rail to the Vertetrac by opening
the two jaw clamps and placing the open jaws of the
D.B.S. on the vertical traction rods of the Vertetrac in the
position prescribed by the administering physician (Fig.
12). Allow the jaws to close firmly on the rods and apply
a mild pulling force to check that it is securely
positioned.
16
Fig. 12

Step 5: Adjust the vertical level of the D.B.S. rail and then
make adjustments to the horizontal position of the
horizontal pressure pad according to the patient’s
condition (Fig. 13), using the guidelines regarding
treatment duration and frequency as previously outlined.
Center the D.B.S. pad over the apex of the hump or over
the convex side and use the horizontal pressure knob to
apply force according to the tolerance of the patient (Fig.
14).
•C-Scolioses
Apply asymmetrical traction force to ensure that the
spine is straight during treatment. Place the
horizontal pressure pad directly over the convex side
(on the apical vertebra).
•S-Scolioses/Double Compound
Apply symmetrical traction force as firmly as possible.
•Apical Vertebra at T-9 r Lower
The upper frame of the Vertetrac should reach the
angulus of the scapulae.
•Apical Vertebra Above T-9
The upper frame of the Vertetrac should reach the
axillar fossa during traction (approximately Th-4).
Supplementary cervical traction may be required in
some cases.
** In complex cases or in cases where there is doubt that
the D.B.S. treatment has been properly administered, it is
recommended that the patient be X-rayed during the first
treatment only. The spine should be at a level of 60-80%
improvement.
17
Fig. 13
Fig. 14

Step 6: After treatment, carefully release the pressure of
the pad by slowly turning the horizontal pressure screw
counter-clockwise. After the pressure has been removed,
release the traction forces of the Vertetrac according to
the guidelines in the Vertetrac instructions. When the
traction has been alleviated, open the jaw clamps and
detach the D.B.S. rail from the vertical traction rods and
remove the Vertetrac unit from the torso. Replace the
Vertetrac horizontal screw assembly by inserting its
vertical post into the slot in the bottom frame. Return the
Vertetrac to the "Zero Position" so that it is ready for the
next use.
18

11. NOTES ABOUT THE D.B.S.
It is imperative that the administering physician carefully read and become
familiar with the preceding section of Vertetrac User’s Guide before beginning
treatment with the D.B.S.
The treatment of idiopathic scoliosis depends upon a number of factors, including
the physiological age of the patient, the size and location of the curve, and the
progress of the curve. Recommended treatment using the D.B.S. varies
accordingly. Apply treatment based on the following criteria:
•Curves of less than 10°should not be considered idiopathic scoliosis.
•It is recommended to treat curves of less than 20°with the D.B.S. only when
the patient suffers from continued lower back pain. In these cases,
treatment is recommended once a day for 30 minutes, until the
elimination of pain (about 15-20 treatments). An X-ray should be taken six
months after the end of the treatment to ensure that the curve has not
progressed.
•For curves of 20°-30°in children who have no pain or other complaints, it is
recommended to apply the D.B.S. treatment 2-3 times daily until maturity of
the spine is reached. For these curves in children who do report pain, it is
recommended to apply the D.B.S. treatment 3 times daily until the child
reports no pain or until maturity of the spine is reached. For adults who
report pain, it is recommended to apply the D.B.S. treatment once a day.
Adults with curves of 20°-30°who do not report pain should not receive the
D.B.S. treatment. Patients should continue to receive treatments once a day
for 2-3 years to prevent regression.
19

•Patients with curves of 30°-40°should begin D.B.S. treatment immediately, 3
times daily for 30 minutes until maturity of the spine is reached. Patients
should continue to receive treatment 1-2 times daily for an additional 6
months, and once a day for 2-3 additional years.
•In all cases, X-rays should be taken every 3 months to monitor the progress of
the treatment. If progression of the curve greater than 5°is discovered at
any time, the patient should immediately begin to receive 3 daily treatments
of 30 minutes each for 3 months. At the end of this time another X-ray
should be taken, and if progression of the curve greater than 5°is discovered
again, the administering medical professional should immediately re-
evaluate the case.
•When applying traction with the Vertetrac and the D.B.S., apply as much
traction as possible within the tolerances of the patient.
20
Table of contents
Other Meditrac Medical Equipment manuals


