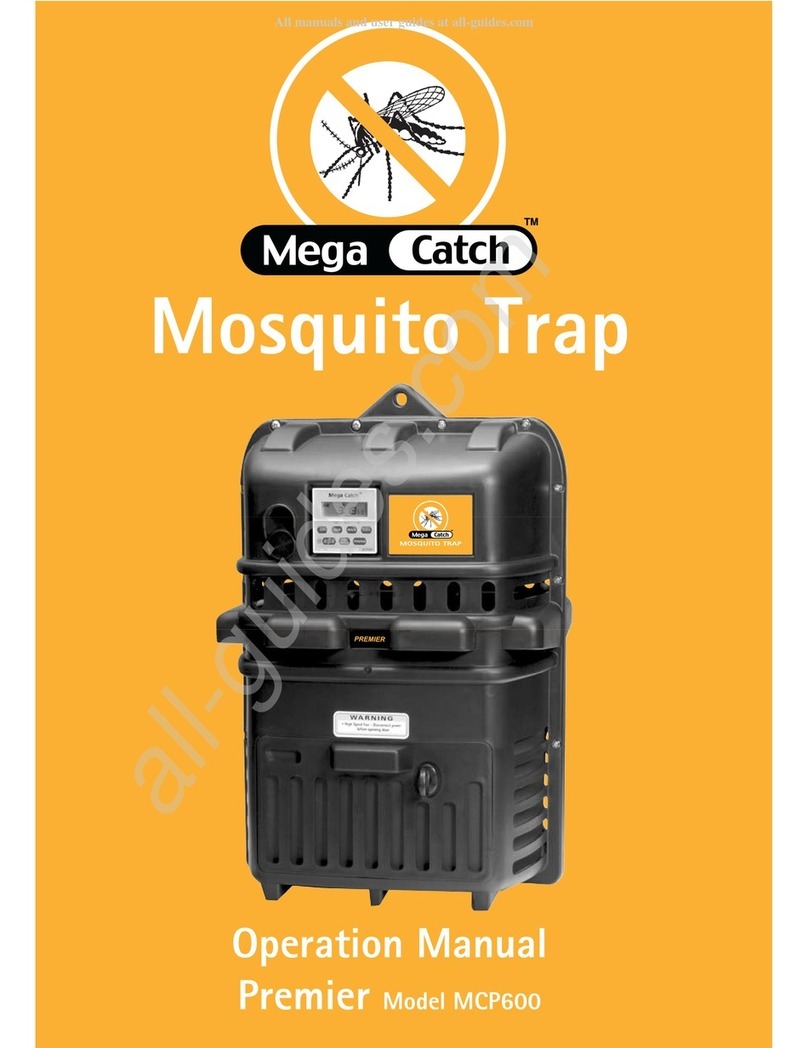
Mega Catch MCU800 User manual

Mosquito Trap
Operation Manual
Ultra Model MCU800
Pub. No: Canadian Version U1106
All manuals and user guides at all-guides.com
all-guides.com

Contents Page
Important Safety Instructions 1
Introduction 2
eatures of Mega-Catch ULTRA Mosquito Trap 2
Initial Set Up Instructions 3-4
What Your Mega-Catch Mosquito Trap Will Do 5
Installing and Siting the Mega-Catch Mosquito Trap 5-6
Mega-Catch Trolley 7-8
Stand Assembly Instructions 9
Mega-Catch Variable Quantity Slow CO2 Gas Release System 10
Connecting the ULTRA to the CO2 Gas Supply 11-12
Operation of Variable Quantity Slow CO2 Gas Release System 12-13
CO2 Gas Suppliers 13
Operation of the Programmable Timer 14-15
Mosquito Catching Systems 16
Using the Liquid Catch Container 16
Using the Catch Bag 17
itting of External Skirt 18
Care of Your Trap 19-20
Replacement of U.V. Bulb 20
Mega-Catch Octenol ragrance Strip 21
Optional Accessories 22
Maintenance and Repair of Your Trap 23-25
Removal of Timer 26
requently Asked Questions 27
Problem Solving 28
Specifications 28
Parts List 29
All manuals and user guides at all-guides.com

Important Safety Instructions
1
Do not operate the Trap indoors.
Keep children and pets away from the Trap.
When the Trap is not in use disconnect power, turn off CO2 gas and store the Trap
and Gas Cylinder out of reach of children.
Always disconnect power before cleaning, servicing or inspecting the inside of the
Trap.
To avoid injury from the High-Speed an inside the Trap, always disconnect power
before opening the Door. Keep the Door locked and remove the Key while the Trap
is operating.
Plug the Power Cord into a properly grounded electrical outlet protected from
weather.
Do not allow the Trap, Transformer, Power Cord or plug to be immersed in water.
Do not operate the Trap with a damaged Transformer, Power Cord or plug.
Do not use any extension cord other than the Extension Cord supplied with the
Trap.
Ensure Power Cords are placed carefully to avoid causing a tripping hazard.
Ensure the Trap is properly installed in accordance with this operation manual.
Before installing or removing the CO2 Gas Regulator, always ensure that the CO2
gas is turned off at the Gas Cylinder.
Read and follow instructions in this operation manual carefully before operating
the Trap.
Your Mega-Catch Mosquito Trap should be used in conjunction with other sensible
control measures designed to manage mosquito problems:
Eliminate standing water in low spots, ditches, gutters and similar areas.
Empty receptacles that collect water (e.g. bird baths and pot plant saucers).
Reduce breeding sites by keeping grass mown.
Mosquito netting/screens can be used to provide mosquito-free areas.
Light coloured clothing is less attractive to some mosquito species and if tightly
woven, can give some protection against biting.
DEET is considered the most effective mosquito repellent, but should not be used
too heavily.
All manuals and user guides at all-guides.com

Introduction
2
Mosquitoes have been described as the most dangerous creatures on Earth.
Aedes mosquitoes may carry yellow fever and dengue fever. Culex mosquitoes may carry several
strains of encephalitis (including St. Louis Encephalitis, Eastern Equine Encephalitis and West
Nile Virus), and Anopheles mosquitoes may carry malaria.
Male mosquitoes do not bite. The real risk is from female mosquitoes which bite when in search
of blood to provide protein for their eggs.
Scientific research over the past 50 years has shown that female mosquitoes find their prey
using a combination of sensory cues including light, shape, color, heat, vibration, sweat and
other by-products of human activity.
Using that research and with the benefit of extensive field testing (including tests by the United
States Department of Agriculture in Gainesville, lorida), Mega-Catch has developed one of
the worlds most advanced mosquito traps: the Mega-Catch Mosquito Trap.
Features of Mega Catch ULTRA Mosquito Trap
The Mega-Catch ULTRA Mosquito Trap has been designed for outdoor use only. The ULTRA
can operate unattended for long periods. It can be programmed to start and stop according
to peak mosquito activity in your area. It features an electronically controlled diode lighting
system that produces intermittent light at oscillating frequencies selected to coincide with
spectral sensitivity peaks for many mosquito species. It also features a low-intensity U.V. or
black light Bulb.
Mosquitoes attracted to the ULTRA by visual and other cues seek to land on and probe specially
designed surfaces and enter the Trap where they are collected in the Catch Bag or Liquid Catch
Container.
The ULTRA also features the Mega-Catch Variable Quantity Slow CO2 Gas Release System.
Use of this attractant system is entirely optional. The system enables the ULTRA to replicate
a key element of human respiration by releasing small quantities of carbon dioxide (CO2) gas
at an exponentially decaying (negative) rate over fixed intervals to produce a concentration
gradient in the air plume emanating from the lower part of the Trap. The CO2 plume will, in
optimum conditions, attract mosquitoes from a distance of up to 150 feet (45 meters).
Mosquitoes are able to navigate their way to the Trap by following the CO2 gas plume up wind.
CO2 is a natural product and is used extensively in the beverage industry to aerate (put bubbles
into) the likes of beer, softdrinks and sparkling mineral water. CO2 is able to be purchased from
gas supply outlets throughout the U.S.A. and elsewhere (see page 13, CO2 Gas Suppliers section).
Quantities of CO2 gas released by the ULTRA can be adjusted between 5 settings by a simple
touch of the Gas Select Button on the Programmable Timer. A 20lb (9kg) CO2 Gas Cylinder
used at the recommended settings should last for up to 4 months (see page 12-13, Operation
of Variable Quantity Slow CO2 Gas Release System section).
All manuals and user guides at all-guides.com

Initial Set Up Instructions
3
Before attempting operation of your ULTRA Trap, follow these instructions:
1. Remove the Trap from the carton.
2. Remove the box containing the Stand from the carton.
3. Assemble the Stand (see Page 9 - Stand Assembly Instructions section).
4. Remove the box marked Accessories from the base of the carton.
5. it the External Skirt to the outside of the Trap by sliding the skirt on from the top of
the Trap so that the opening is directly in front of the Door (see Page 18 - Fitting of
External Skirt section).
Note: ailure to position the Skirt correctly will result in a NIL mosquito catch.
6. Your ULTRA Trap has two mosquito collection methods: a dry-catch system using a
Catch Bag and a wet catch system using a Catch Container. In most circumstances the
wet-catch system offers superior catch performance to the dry-catch system. The dry-
catch system using the Catch Bag is better for mosquito species identification.
7. If you wish to catch mosquitoes using the Catch Bag, then attach the Catch Bag to the
base of the an inside the Trap. The Catch Bag has an elastic top to facilitate attachment
(see Page 16, Mosquito Catching Systems section).
8. If you wish to catch mosquitoes using the wet-catch system, fill the Liquid Catch
Container two-thirds full with fresh water. Add 2 or 3 drops of liquid detergent / soap
to break the surface tension of the water. Also add 3 or 4 teaspoons of a non-diet
(sugar-based) soft drink. Then place the Liquid Catch Container in the Trap using the
locating feet on its base.
9. Remove the Mega-Catch Octenol ragrance Strip from its pouch being careful not to
touch the exposed holes on its surface. Place the strip inside the Trap (see Page 22,
Mega Catch Octenol Fragrance Strip section). Wash your hands after this procedure
has been completed.
10. Reinstall the Door by locating the base of the Door in the Trap and then pushing firmly
until Door clicks into place. Lock the Door using one of the two Keys provided with the
Trap and then remove the Key. (NOTE: Removing and reinstalling the door is designed
to require a reasonable amount of force to make it difficult for children.)
11. Hang the Trap from the hook on the Stand in the direction shown in the Stand Assembly
Instructions. To achieve this, hold the Trap in an upright position so that the top of the
Trap is next to the hook on the stand. Then swing the bottom of the Trap outwards
(through an arc of about 45 degrees) and you will see that the top of the Trap will fit
through the gap in the hook. This is a design feature to prevent the Trap falling off the
stand accidentally.
All manuals and user guides at all-guides.com

4
12. The ULTRA Trap comes with the Mega-Catch Variable Quantity Slow CO2 Gas Release
System. Use of this system is entirely optional (see page 10, Mega Catch Variable
Quantity Slow CO2 Gas Release System section). If using the Mega-Catch Variable
Quantity Slow CO2 Gas Release System then you will first need to obtain a CO2 cylinder
(see page 13, CO2 Gas Suppliers section). Having obtained a CO2 cylinder, connect the
Low-Pressure Gas Regulator (supplied with the Trap) to the Gas Cylinder ensuring
beforehand that the O ring on the Gas Regulator is properly in place and undamaged.
Then connect the Regulator to the Trap (see page 11, Connecting the ULTRA to the
CO2 Gas Supply section). Slowly turn on the CO2 gas checking for leaks. Set the gas
setting using the Gas Select button on the Programmable Timer (see page 12-13,
Operation of Variable Quantity Slow CO2 Gas Release System section). Setting #1
is low. Setting #5 is high. (NOTE: you will need to reset the gas setting if the power
is turned off).
13. Your ULTRA Trap comes with a low-voltage transformer and a 60-foot (18-meter) low-
voltage extension cord with weatherproof connectors. Plug the extension cord into the
Trap connection turning the connector clockwise until tight. Plug the extension cord
into the transformer cable turning the connector clockwise until tight. Then plug into
the power supply. (NOTE: The connectors are designed to be a tight fit to ensure that
they are weatherproof.)
14. Turn on the power. A display should appear on the face of the Timer. (If it does not,
see Page 14-15, Operation of the Programmable Timer section). Set the Timer to
"ON" for continuous running or to "AUTO" to program operating times. See Page 14-
15, Operation of the Programmable Timer section for programming instructions.
15. If the U.V. Bulb inside the Trap is not on then turn it on by touching the switch on the
Programmable Timer which is marked U.V. Tube. When the Trap is operating, the an
should be running, the four Diode Lights should be flashing intermittently, the U.V. Bulb
should be on (unless switched off) and the Trap should click every 75-80 seconds. If
the Trap is not operating correctly then re-read these instructions or refer to page 28
All manuals and user guides at all-guides.com
all-guides.com

Installing and Siting the Mega Catch Mosquito Trap
5
Installation of Trap:
Your Mosquito Trap comes fully assembled. To install, first follow the instructions on Page 3
- Initial Set Up Instructions section.
The Initial Set Up Instructions assume that you have decided to install your Mega-Catch
Mosquito Trap on the Stand that is supplied with the Trap.
Alternatively, you may choose to install the Trap on a Mega-Catch Trolley which can be
purchased as an optional extra (see page 7-8, Mega Catch Trolley section).
Alternatively you may decide to hang the Trap from a tree or a fixed post using a chain, nylon
rope or wire connected to the attachment hole at the top of the Trap. We recommen a height
of around 3 feet (1 meter) from the ground to the top of the Mega-Catch Mosquito Trap.
However, you may need to adjust the Traps height depending on the type of mosquitoes you
are catching.
Your Mega-Catch Mosquito Trap is supplied with a 60-foot (18-meter) low-voltage extension
cord with weatherproof fittings. To avoid the cord posing a tripping hazard or being damaged,
(e.g. by a lawn mower) we recommend that, if possible, it be placed 2-3 inches (50-75 mm)
underground. This can be easily achieved by using a spade which is inserted into the ground
and moved backwards and forwards to create a shallow slit trench into which the cord can
be pushed before the ground is replaced by standing on the top of the slit trench.
What Your Mega Catch Mosquito Trap Will Do
Your Mega-Catch Mosquito Trap is designed to reduce mosquito populations, but it will not
permanently eliminate them. Operate the Mega-Catch Mosquito Trap daily for several weeks.
Over this time you should notice a decline in mosquito numbers. This means your Trap is doing
its job. (NOTE: Rain will probably result in a new infestation.)
The Mega-Catch Mosquito Trap is not designed to compete with humans in close proximity
eg: at a barbecue. If you are planning an outdoor function, operate the Trap for several days
before the function.
NOTE: Your Mega-Catch Mosquito Trap should be used in conjunction with other sensible
control measures designed to manage mosquito problems.
All manuals and user guides at all-guides.com

or the best performance from your Mega-Catch Mosquito Trap, first determine the source
of the mosquito nuisance (Mosquitoes breed in wet areas like streams, marshland, wooded
areas and gardens). Then use these rules to site the Trap:
6
Rule 1: Place the Trap between the mosquito source and areas of human activity.
Rule 2: Place the Trap as far away from people and as close to the mosquito source as possible.
(Attract them to the Trap and not to you.)
Rule 3: Place the Trap upwind of the mosquito source but only if you can comply with Rule
1. (Mosquitoes sometimes use the wind to navigate.)
Rule 4: Place the Trap in a predominantly shaded area. (Most mosquitoes avoid direct sunlight.)
Rule 5: Place the Trap in a location protected from rain and strong wind. (Mosquitoes dont
fly in strong winds.)
Rule 6: If severe weather conditions are predicted then store the Trap out of the weather.
Trap
Prevailing
Wind Direction
Mosquito
source
Siting of Trap:
FIG 1 Trap Positioning
All manuals and user guides at all-guides.com

7
Mega Catch Trolley
The Mega-Catch Trolley is an optional extra for use in conjunction with the ULTRA Trap.
Assembly of the Mega-Catch Trolley is a simple procedure if you follow the directions shown
in figures 2.1 to 2.3 below:
FIG 2.1 Trolley Assembly
When trolley assembly is complete, hang trap
from hook through fitting on top of the unit,
then connect powerplug and gas line.
4
Tighten bolt to lock handle
Chain to secure gas cylinder
Transformer
holder
2
Tighten bolts both sides
to lock frame to base
3
Insert handle
into frame
1
Insert
frame into
base unit
U.S.DesignPatentN
o449,091
All manuals and user guides at all-guides.com

8
The Mega-Catch Trolley has been designed
to hold a 20lb (9kgs) CO2 Gas Cylinder for use
in conjunction with the ULTRA Trap.
If you wish to install a Mega-Catch Mosquito
Trap on a Mega-Catch Trolley without a CO2
Gas Cylinder in place then the handle on the
Trolley should be reversed. We also recommend
that a stability weight (e.g. a cement/cinder
block of at least 10lbs (4.5kg) be placed on the
Trolley in the manner shown in figure 2.4 below.
While your Mega-Catch Trolley is zinc-plated
and powder-coated, when not in use, we
recommend that it be stored out of the weather.
FIG. 2.2 Trolley assembly
Complete with CO2 cylinder
and transformer installed
FIG. 2.3 Trolley assembly
Complete with
weatherproof
cover fitted
FIG. 2.4 Trolley assembly option
or use without CO2 gas cylinder
it trolley handle
opposite to normal so
that trap unit hangs
over stability weight
All manuals and user guides at all-guides.com

Stand Assembly Instructions
9
To assemble the Stand supplied with the Trap, follow the instructions shown in figure 3.1
below.
NOTE: or optimum performance place the trap in a predominantly shaded area (located between
your dwelling and the source of the mosquitoes) which is protected from rain and wind. (Mosquitoes
do not fly in strong winds or severe weather conditions.)
or maximum stability the 'U' shaped leg at the back of the stand should be pointed in the direction
of prevailing winds. The wire staples supplied with the trap (or a cinder block placed on the back of
the stand) can be used to increase stability.
*
it top section over bottom section of upright - then fit bolt
and tighten firmly
Assemble stand base components as illustrated here - fit all bolts and
washers before tightening bolts firmly. Screw feet into bottom of stand base.
3 x 4" Wire staples are supplied to secure frame to ground.
Wind
direction
FIG 3.1 Trap Assembly Instructions
ix external skirt then tip the Trap on its side and slide onto hook.
U.S. Design Patent No 449,091
All manuals and user guides at all-guides.com
all-guides.com

10
Mega Catch Variable Quantity Slow CO2 Gas Release System
Mosquitoes find their prey using a vast array of sensory signals including light, shape, color,
heat, vibration and various chemical compounds produced by humans and other animals. One
of these compounds is carbon dioxide or CO2. Most conventional traps rely on CO2 gas to attract
mosquitoes. They usually achieve this by burning flammable liquids like propane. Carbon dioxide
gas is one by-product of that combustion process.
Mega-Catch Traps on the other hand need no CO2 to attract mosquitoes. Using advanced
design features and sophisticated electronic components, Mega-Catch Traps exploit a wide
range of sensory signals to attract mosquitoes.
Mega-Catch also offers its own carbon dioxide attractant system using its patented Variable
Quantity Slow CO2 Gas Release System. The latest version of this system is now a standard
feature on all Mega-Catch ULTRA model Traps.
Use of this attractant system is entirely optional i.e. while the system is designed to increase
capture rates it is not essential to the effective operation of the Trap. Even without the system,
or with the system turned off, your Mega-Catch ULTRA Mosquito Trap will catch significant
numbers of mosquitoes and other biting insects.
Conventional Traps which burn propane release CO2 gas in a continuous stream as part of the
exhaust gases from the propane combustion process. Mega-Catchs Variable Quantity Slow
CO2 Gas Release System is designed to replicate a key element of human respiration by releasing
quantities of pure CO2 gas at an exponentially decaying (negative) rate over fixed intervals to
produce a concentration gradient in the air plume emanating from the lower part of the Trap.
Mosquitoes use this concentration gradient to navigate their way to the Trap.
The Mega-Catch system is able to release more CO2 (and in a cleaner and purer form) than
propane burning traps by using carbon dioxide in the same cylinders as those used by the
beverage industry to aerate (put bubbles into) the likes of beer, softdrinks and sparkling mineral
water. CO2 gas in this form is able to be purchased from hundreds of gas supply outlets
throughout the U.S.A. and elsewhere (see page 13, CO2 Gas Suppliers section).
ATTENTION: DO NOT OPERATE THE ULTRA TRAP INDOORS
All manuals and user guides at all-guides.com

Connecting the ULTRA to the CO2 Gas Supply
11
Before attempting to use the Variable Quantity Slow CO2 Gas Release System you must first
follow these instructions (also see figure 3.2 below):
1. The ULTRA comes with a low-pressure CO2 gas regulator and a length of low pressure
gas line to connect the Regulator to the Trap.
2. Check to ensure that the O-ring on the Gas Regulator is properly in place and
undamaged. (Note: the gas pressure setting of the Gas Regulator has been set in the
factory and cannot be adjusted. or this reason the knob on the Gas Regulator is
redundant, i.e. turning the knob has no effect on the operation of the Gas Regulator).
3. Attach the Gas Regulator onto the threaded section of the Gas Cylinder and tighten
firmly using a suitable sized wrench. Note: if the threads do not match then contact
your gas supplier (see page 13, CO2 Gas Suppliers section).
ATTENTION: Do not turn on the CO2 gas supply from the Gas Cylinder until you have
fitted the low pressure Gas Regulator. Direct contact with liquid CO2 may result in injury.
CO2 Gas Cylinders (empty or full) which do not have a low pressure Regulator firmly
connected should be securely locked away out of reach of children. We recommend that
CO2 Gas Cylinders be moved around using a Mega Catch Trolley which has been specially
designed for this purpose.
FIG 3.2 Connection of trap to CO2 gas cylinder
Push gas line firmly into black collet fitting
in panel on rear of Mega Catch unit
Wheel to turn gas flow on / off
Gas Cylinder
Push gas line firmly
into orange collet fitting
on regulator unit
Low pressure
CO2 gas regulator
All manuals and user guides at all-guides.com

12
4. Push one end of the gas line firmly into the orange collet fitting on the Gas Regulator
unit. Push the other end of the gas line firmly into the black collet fitting in the panel
on the rear of the Mega-Catch unit (see figure 3.2). Gradually turn on the CO2 gas by
turning the wheel on the top of the Gas Cylinder in an anti-clockwise direction.
5. Check for gas leaks from the Gas Cylinder, the Regulator and the gas line using a small
quantity of liquid detergent/soap thoroughly stirred in some water (simply brush or pour
this over the items to be checked). A gas leak can be detected by the appearance of
bubbles. If a leak is detected then turn off the CO2 gas by turning the wheel on the Gas
Cylinder clockwise. Then disconnect the Gas Regulator and check that the O ring seal
is in place and is undamaged and then repeat the process. If there is still a leak from
the Gas Cylinder or the Gas Regulator refer to your gas supplier (see page 13, CO2 Gas
Supplier section.) or email us ([email protected]).
6. To remove the gas line simply use two fingers to push the sides of the plastic collet
fitting inwards then, using the other hand, firmly pull the gas line out of the collet
fitting. If the line is damaged replace it. If however the damage is restricted to the end
of the line simply cut out the damaged area. (Note: the collets are the orange fitting
at the Regulator connection and the black fitting at the Trap connection). See figure
3.2.
ATTENTION: BEFORE INSTALLING OR REMOVING THE GAS REGULATOR ALWAYS ENSURE
THE GAS IS TURNED OFF BY TURNING THE ON/OFF WHEEL ON THE GAS CYLINDER
CLOCKWISE.
Operation of Variable Quantity Slow CO2 Gas Release System
You can adjust the quantity of CO2 gas being released from the ULTRA Trap by a simple touch
of the GAS SELECT button on the Programmable Timer. When the power is first turned on the
Trap automatically selects setting # 1 which is the lowest gas usage quantity. The GAS SELECT
button should be touched once to move to the next setting (indicated by the red light glowing
on the setting chosen). Touch the GAS SELECT button for the number of times necessary to
move to the setting # you wish to select.
Remember to reset the setting # after each time the power is switched off.
On setting # 1, a 20lb (9kgs) CO2 Gas Cylinder can be operated continuously (i.e. 24 hours per
day) for over 6 months. Continuous use of the Trap on higher settings can waste CO2 gas. We
recommend that the Trap be operated for no more than 8 hours a day at times so as to coincide
with peak mosquito activity. This might be increased to 12 hours a day if you are experiencing
a particularly heavy infestation of mosquitoes.
All manuals and user guides at all-guides.com

CO2 Gas Suppliers
13
If you operate your Mega-Catch Mosquito Trap in accordance with our recommendation of
no more than 8 hours per day, then you can expect a 20lb (9kgs) CO2 Gas Cylinder to last as
follows:
Mega-Catch Mosquito Traps equipped with the Variable Quantity Slow CO2 Gas Release
System (standard on the ULTRA) use CO2 gas which can be purchased from hundreds of gas
supply outlets throughout the U.S.A. (and elsewhere). Major gas distributors include PraxAir,
Air Products, BOC Gases and Air Liquide. Refer to our website: www.megacatch.com for store
locations of major CO2 gas distributors in the U.S.A. Alternatively, look in your Yellow Pages
under Industrial Gases or Welding Supplies.
We recommend that you purchase CO2 in 20lb (9kg) aluminium cylinders.
We recommend that you choose setting # 2 or # 3 for normal Trap operation. In preparing for
an outdoor function, you might wish to operate the Trap on setting # 4 or # 5 for a limited
period, e.g. 12 hours per day for 2 or 3 days.
Gas Select # Approximate Duration
# 1 In excess of 1 year
# 2 125 days
# 3 45 days
# 4 30 days
# 5 22 days
All manuals and user guides at all-guides.com

14
Your Mega-Catch Mosquito Trap is equipped with a high tech Programmable Timer. The Timer
enables you to program the Trap to operate at times when mosquitos are most active in your
area.
The timer is equipped with an automatically recharging battery. This battery can operate`for
up to three months when fully charged.
Your Mega-Catch Mosquito Trap may need several hours of running to charge up the battery
upon initial use.
NOTE: If no display appears on the Programmable Timer when the power is switched on, the
battery may be discharged. To fully recharge the battery, run the Trap for 24 hours.
You can choose to operate the Mega-Catch Mosquito Trap in 3 ways:
1. ON The Mega-Catch Mosquito Trap will run 24 hours a day while connected to a
power source.
2. O the Mega-Catch Mosquito Trap will not operate.
3. AUTO you can program when the Mega-Catch Mosquito Trap will start and stop.
Operation of the Programmable Timer
AM
12:33
33
Mega Catch
Fr
R
RESET
RECALL
AM
1
ON
_ _ _ _
Mega Catch
Mo Tu We Th Fr Sa Su
R
RESET
RECALL
FIG 4.1
FIG 4.2
How to Program:
IRST SET THE TIME.
To set the day and time, press and hold the CLOCK button while
pressing the DAY or HOUR or MINUTE button (as the case
requires). This is the only function that requires two buttons to
be pressed at once.
THEN PRESS PROGRAM TO START PROGRAMMING.
Start time program 1. Enter start time with HOUR/MINUTE
buttons. or 7 days per week operation select the DAY display,
which shows all 7 days.
or individual day operation select the DAY display desired, e.g.
Su for Sunday.
THEN PRESS PROGRAM.
Stop time program 1. Enter stop time with HOUR/MINUTE buttons.
THEN PRESS PROGRAM.
All manuals and user guides at all-guides.com
all-guides.com

15
Start time program 2. Enter start time with
HOUR/MINUTE buttons.
THEN PRESS PROGRAM.
Stop time program 2. Enter stop time with
HOUR/MINUTE buttons. To enter more programs (up to 6)
repeat previous steps.
THEN PRESS CLOCK TO RETURN TO NORMAL OPERATION.
Press the ON/AUTO/O button to change position of the
mode indicator.
ON = system will be operating at all times.
AUTO = system will be operating only during programmed
times.
O = system will not operate at all
NOTE: If the Trap does not operate when the program mode
is set to AUTO it may be in "stop time program." To check,
switch the program mode to ON, which should start the Trap,
before returning the program mode to AUTO.
*
AM
2
ON
_ _ _ _
Mega Catch
Mo Tu We Th Fr Sa Su
R
RESET
RECALL
AM
1
OFF
_ _ _ _
Mega Catch
Mo Tu We Th Fr Sa Su
R
RESET
RECALL
AM
2
OFF
_ _ _ _
Mega Catch
Mo Tu We Th Fr Sa Su
R
RESET
RECALL
AM
12:33
33
Fr
Mega Catch
R
RESET
RECALL
FIG 4.3
FIG 4.4
FIG 4.5
FIG 4.6
All manuals and user guides at all-guides.com

16
Your Mega-Catch Mosquito Trap comes complete with a Catch Bag and a Liquid Catch
Container. You may choose to collect mosquitoes using either of these systems.
Our research has shown the Liquid Catch Container system to be more effective. This is because
when the Mega-Catch Mosquito Trap is operated using a Liquid Catch Container, the air
plume emanating from the bottom of the Trap is humidity enriched.
Depending on local temperatures, evaporation may mean that it is necessary to replenish water
in the Liquid Catch Container weekly or even more frequently. The Catch Bag system requires
less frequent attention and therefore may be your preferred mosquito catching system. Smaller
biting insects (eg: no-see-ums) are best caught using the Liquid Catch Container because the
mesh size on the standard Catch Bag may be too large to capture them.
Using the Liquid Catch Container
To prepare your Mega-Catch Mosquito Trap, follow these steps:
1. Ensure that the Trap is switched off by disconnecting the power
(Attention: High Speed Fan inside the Trap may cause injury if the power is not
disconnected.)
2. Unlock and remove the Lockable Door.
3. Slide the Liquid Catch Container out from beneath the an. This container has locating
feet on its base.
4. ill the container with water until it is approximately two-thirds full. Add 3 or 4 drops
of liquid detergent/soap and stir thoroughly. This breaks the surface tension of the water
ensuring that mosquitoes drown upon capture.
5. Add 3 or 4 teaspoons of a non-diet (sugar-based) soft drink. This duplicates the fructose
content of nectar on which mosquitoes feed.
6. Reinstall the Liquid Catch Container into the Mega-Catch Mosquito Trap. Replace and
lock the Door and remove the Key for child safety. Reconnect power.
7. Before removing the Liquid Catch Container, remember to disconnect the power to your
Mega-Catch Mosquito Trap so that the an is not operational. Dispose of the contents
well away from your dwelling so as to not attract ants.
It may be necessary to replenish or replace the water solution in the Liquid Catch Container
at weekly or more frequent intervals to take account of evaporation. This will depend on
relevant climatic conditions.
Mosquito Catching Systems
All manuals and user guides at all-guides.com

17
Using the Catch Bag
To prepare your Mega-Catch Mosquito Trap, follow these steps:
1. Ensure that the Trap is switched off by disconnecting the power (Attention: High
Speed Fan inside the Trap may cause injury if the power is not disconnected.)
2. Unlock and remove the Lockable Door.
3. Reach inside the Trap and stretch the open neck of the Catch Bag around the corners
of the base of the an just above the an Safety Guard (see figure 5). The Catch Bag
has an elastic neck to facilitate attachment.
4. Replace and lock the Door and remove the Key for child safety. Reconnect power.
5. Before removing the Catch Bag, remember to disconnect the power to your Mega-
Catch Mosquito Trap off so that the an is not operational. Then pull the drawstring
tight so that any mosquitoes that remain alive cannot escape. Crush the top of the
Catch Bag down on its base to kill any mosquitoes that do remain alive. Dispose of the
contents well away from your dwelling so as not to attract ants.
Mosquitoes collected in the Catch Bag will usually die very quickly without access to
moisture. In cooler climates they may live for a longer period. In times of heavy infestations
of mosquitoes, it may be necessary to empty the Catch Bag on a regular basis in order
to ensure optimum operation of the Trap.
an Housing
Trap
Catch Bag
Stretch open neck of
Catch Bag over corners
of fan housing base.
FIG 5 Fitting of Catch Bag
Catch Bags should be hand washed in warm soapy water from time to time. Catch Bags are
a consumable item and replacements are available from your Authorized Distributor.
All manuals and user guides at all-guides.com

18
Your Mega-Catch Mosquito Trap comes with an External Skirt which fulfils two important
functions. irst its color and texture provides a visual attractant for several species of mosquitoes.
Secondly, it acts as a baffle directing the air plume out of the bottom of the Trap.
There are two methods which you can use to fit the Skirt (Method One is the easiest):
Fitting of External Skirt
U.S. Design Patent No 449,091
Hook-and-loop fastening
External Skirt
FIG 6 Fitting External Skirt
Method One:
1. Place the Mega-Catch Mosquito Trap on a table or other flat surface.
2. Slide the Skirt on from the top of the Trap (over 2 corners initially) with the elastic band
at the top.
3. The Skirt is properly fitted when the elastic band is seated over the lower horizontal
rib, just below the inlet holes (see figure 6). The opening in the Skirt should be located
at the front of the Trap so as to facilitate removal of the Door without having to remove
the Skirt. The hook-and-loop fastening on this opening should be closed when the Trap
is running.
Method Two:
1. Hang the Mega-Catch Mosquito Trap from the Stand (see Page 3 - Initial Setup
Instructions section - paragraph 11).
2. Slide the Skirt up from the bottom of the Trap (over 2 corners initially) with the elastic
band at the top.
3. The Skirt is properly fitted when the elastic band is seated over the lower horizontal
rib, just below the inlet holes (see figure 6). The opening in the Skirt should be located
All manuals and user guides at all-guides.com
Other manuals for MCU800
2
This manual suits for next models
1
Table of contents
Other Mega Catch Insect Control Equipment manuals
Popular Insect Control Equipment manuals by other brands
Taurus
Taurus MOSQUITO HUNTER manual
ThermaCell
ThermaCell Max Life Directions for use
Chemtex
Chemtex ULV FOGGER Operation and maintenance manual
Isotronic
Isotronic Black & White Instructions for use

ThermaCell
ThermaCell Patio shield Bristol Lantern Directions for use
Moskitrap
Moskitrap PEST-N-TROL Start guide
