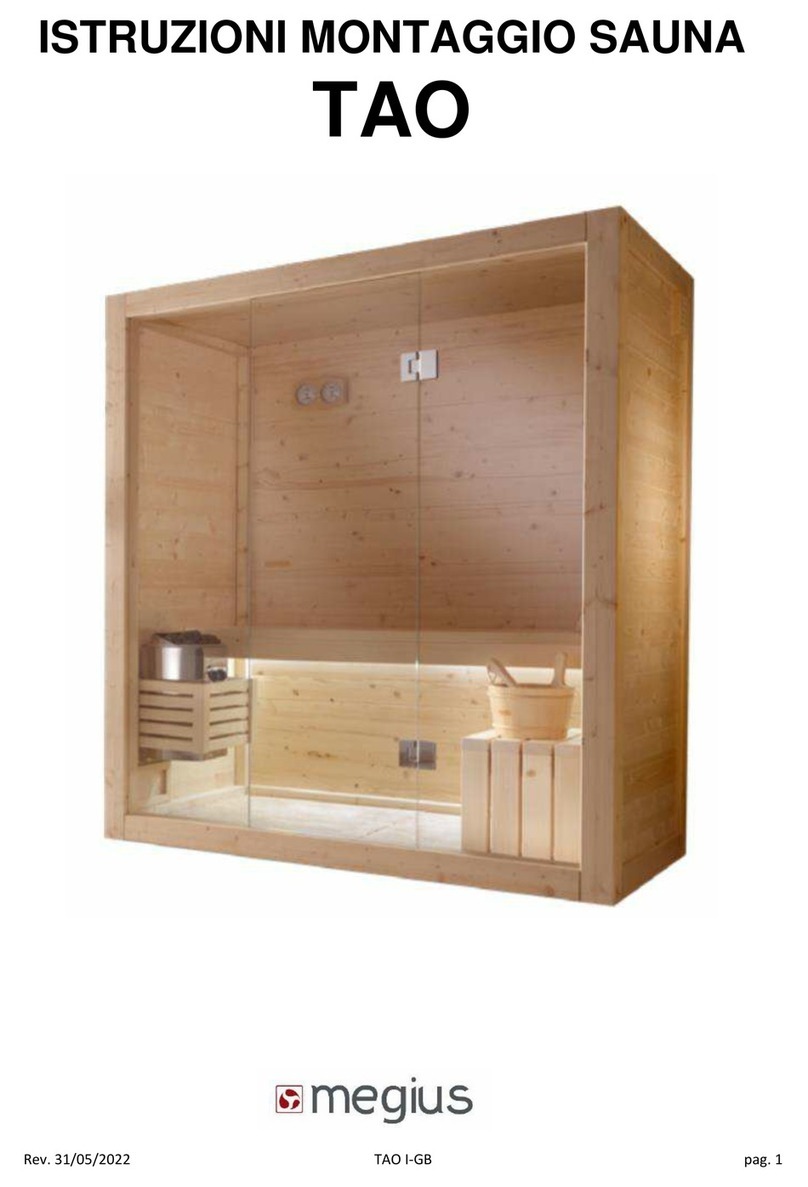
Megius EXEN User manual

Rev. 12/05/2021 EXEN I-GB pag. 1
ISTRUZIONI MONTAGGIO SAUNA
EXEN

Rev. 12/05/2021 EXEN I-GB pag. 2
AVVERTENZE
Prima di installare, leggere attentamente il presente manuale in ogni sua parte.
•Conservare il presente manuale per tutta la vita del prodotto.
•Non utilizzare il prodotto per scopi diversi da quelli per i quali è stato concepito.
•Non apportare modifiche al prodotto, e non eseguire nessun tipo di intervento non autorizzato. La
presenza di parti in tensione, e di superfici potenzialmente a temperatura elevata richiedono che
ogni intervento sia eseguito da personale qualificato.
•L’utilizzo di questo prodotto è riservato alle persone. Non è inteso per l’uso da parte di soggetti
con ridotte capacità fisiche, sensoriali o mentali, o con insufficiente esperienza o conoscenza, a
meno che non siano sotto sorveglianza o abbiano ricevuto istruzioni sull’uso dell’apparecchio da
parte di una persona responsabile della loro sicurezza.
•Collegare il dispositivo alla rete elettrica tramite un connettore di protezione adeguato.
•Effettuare la connessione elettrica conformemente ai dati di targa riportati sull’apparecchio nella
etichetta.
Megius S.p.A. declina ogni responsabilità, sia per danni diretti o indiretti provocati a persone,
animali o cose, quando:
•L’installazione non è eseguita da: personale tecnico specializzato, qualificato ed abilitato.
•Non sono applicate le norme, i regolamenti e le leggi del Paese in cui è installato questo prodotto.
•Le istruzioni per l’installazione e/o la manutenzione contenute nel presente manuale non sono
state seguite.
•Sono impiegati materiali e/o ricambi non originali, o non idonei, o non certificati.
ATTENZIONE: per una corretta resa del prodotto, il locale destinato alla SAUNA deve essere ben
coibentato ed isolato per garantire una temperatura
minima ambientale di circa 20°C.
WARNINGS
•Before installing, please read carefully this manual in all its parts.
•Please keep this manual for the life of your product.
•Do not use the product for purposes other than those for which it was conceived.
•Do not make any modifications to the product, and do not perform any unauthorized intervention.
The presence of powered parts and potentially high temperature surfaces require that each
operation be carried out by qualified personnel.
•The use of this product is reserved for people. It is not intended for use by subjects with reduced
physical, sensory or mental capabilities, or with insufficient experience or knowledge, unless they
are under surveillance or have received instructions on the use of the device by a responsible
person of their safety.
•Connect the device to the power supply via an appropriate protected electrical connection.
•Make the electrical connection according to the technical specifications printed on the product
label.
Megius S.p.A. denies all responsibility when:
•Installation is carried out by unqualified personnel, and/or unauthorized to certify the work carried
out.
•Installation is not compliant with current norms and legal provisions regarding electric and
plumbing systems in the country in which the product is installed.
•The instructions for installation and maintenance contained in this manual are not followed.
•Unsuitable and/or non-certified materials are used for installation.
CAUTION: to ensure a correct performance of the product, the room intended for the SAUNA must
be well insulated to ensure a minimum roomtemperature of about 20°C (68°F).

Rev. 12/05/2021 EXEN I-GB pag. 3
• Prima dell’installazione del prodotto verificare che la zona dove verrà installato, sia sufficientemente
livellato, che ne possa sopportare il peso, (vedi predisposizioni per l’installazione) e che vi siano le
predisposizioni tecnologiche necessarie.
• La manutenzione e la messa a punto del prodotto, deve essere eseguita esclusivamente da personale
specializzato.
• Si ricorda che dopo ogni intervento di manutenzione o regolazione, si devono rimontare le parti di
ispezione e protezione, prima dell’utilizzo del prodotto.
• Le fasi di assemblaggio e messa in opera del prodotto, a causa dei pesi e degli ingombri elevati, non vanno
eseguite da una sola persona.
• Non manomettere o inibire o disconnettere i dispositivi del prodotto.
• Per nessuna ragione creare by-pass per utilizzi a fi ni diversi da quelli stabiliti e consentiti dal prodotto.
• Non togliere o manomettere volutamente le parti di ispezione, ne rimuovere o nascondere le etichette di
identificazione del prodotto.
• L’installazione di dispositivi elettrici (prese, interruttori, lampade, ecc.) dentro la sala da bagno nel quale
verrà installata l’apparecchiatura, deve essere conforme alle norme vigenti in materia.
• È assolutamente vietato utilizzare qualsiasi tipo di apparecchio elettrico all’interno e nelle immediate
vicinanze del prodotto durante l’utilizzo.
• Before installing the product, check that the floor where it will be installed is sufficiently levelled, that it
can support its weight (see installation preparations) and that all necessary inlets and outlets have been
provided.
• Product maintenance and setup must be performed exclusively by specialised service personnel only.
• Please note that after every maintenance or adjustment operation, the inspection and protection parts
must be put back in place before using the product.
• Due to its weight and size, the appliance must be assembled installed by more than one person. • Do not
tamper, disable or disconnect the product devices.
• Do not, under any circumstances, create by-passes for uses other than those established and permitted by
the product.
• Do not remove or tamper with the inspection panels and do not remove or conceal the product identifi
cation labels.
• Installation of electrical devices (sockets, switches, lamps, etc.) inside the bathroom where the appliance is
to be installed must be in compliance with current regulations.
• It is absolutely forbidden to use any type of electrical appliance inside or next to the product during use.

Rev. 12/05/2021 EXEN I-GB pag. 4
ATTENZIONE.
Leggere attentamente il manuale in ogni sua par te prima di utilizzare il prodotto.
• Conservare il presente manuale per consultazioni future.
• Il manuale è concepito per differenti modelli e versioni, pertanto, l’estetica del pro dot to potrà essere
differente da come viene illustrato nelle immagini. Nonostante ciò le istruzioni rimangono invariate.
• La Ditta costruttrice si riserva il diritto di apportare tutte le modifiche ritenute opportune senza obbligo di
preavviso o sostituzione.
• Questo prodotto può essere destinato solo al l’uso per il quale è stato concepito. Il costruttore non è
responsabile per eventuali danni derivati da utilizzi impropri.
• Assicurarsi che il pavimento, circostante al prodotto, sia sempre pulito e asciutto in modo da evitare
scivolamenti e cadute in entrata e uscita dal prodotto stesso.
• ATTENZIONE ALLE PEDANE CHE POTREBBERO ESSERE SCIVOLOSE, IN QUANTO RIMOVIBILI PER LE PULIZIE.
• Prestare molta attenzione nell’avvicinarsi alle apparecchiature che generano grande calore e temperature
elevate (stufa/ pannelli radianti).

• L’utilizzatore della sauna, dovrebbe sottoporsi periodicamente a visite mediche di controllo al fine di
salvaguardare il proprio stato di salute.
• E’ vietato l’uso della sauna alle persone che sono affette da cardiopatie, infiammazioni interne, malattie
contagiose, epilessia e chi è portatore di pace-maker.
• Le persone affette da obesità, disturbi cardiaci o di pressione sanguigna, problemi al sistema circolatorio,
diabete, anziani o a donne in stato di gravidanza dovrebbero consultare il medico prima di utilizzare il
prodotto.
• Le persone che fanno uso di medicinali dovrebbero consultare il medico prima di utilizza re il prodotto
poiché alcuni farmaci possono indurre sonnolenza, influire sul battito cardiaco, sulla pressione sanguigna e
sulla circolazione.
• E’ vietato l’uso di alcolici, droghe o medicinali prima e durante l’utilizzo del prodotto perché potrebbe ro
portare alla perdita di coscienza.
• L’apparecchio non è destinato ad essere usato da persone (inclusi i bambini) le cui capacità fisiche,
sensoriali o mentali siano ridotte, oppure con mancanza di esperienza o di conoscenza, a meno che esse
abbiano potuto beneficiare, attraverso l’intermediazione di una persona responsabile della loro sicurezza,
di una sorveglianza o di istruzioni riguardanti l’uso dell’apparecchio.
• Chi si appresta ad utilizzare la sauna deve essere edotto ed informato sul funzionamento d’ uso.
• Documentarsi sulle avvertenze di pericolo nonché su tutte le norme di sicurezza emanate dagli enti
preposti della propria nazione di residenza e rispettarle diligentemente.
• Quando il prodotto non viene utilizzato scollegare l’alimentazione elettrica mediante l’interruttore
bipolare posto a monte dell’apparecchio. Tutte le misure indicate sono espresse in mm.

Rev. 12/05/2021 EXEN I-GB pag. 5
WARNING.
• Read the manual carefully in all its parts before using the product. • Keep this manual for further
consultation.
• The manual is intended for different models and versions, so the product may look different from the
manual illustrations. However the instructions remain unchanged.
• The company reserves the right to make any changes considered suitable without notice or replacement. •
This product is intended only for the use for which it has been designed. The manufacturer is not responsible
for any damage caused by improper use.
• Ensure that the floor around the product is always dry and clean, to avoid slips or falls entering or editing
the product itself.
• BE CAREFUL OF THE BOARDS, WHICH MAY BE SLIPPERY, SINCE THEY CAN BE REMOVED FOR CLEANING
PURPOSES.
• Be very careful near the equipment as it generates a lot of heat and high temperatures (stove/radiant
panels).
• Pay maximum attention when the surrounding floor is wet, as there will be a potentially high risk of
slipping. this, mainly, when using soaps, shampoos, clearing detergents, etc..
• It is not advisable to use the shower cabin with water that is too hot. Use water with a maximum
temperature of 38°C.
• Sauna users should have a periodic medical check-up to ensure they continue to enjoy good health. •
Persons suffering from any heart disease, internal inflammation, contagious diseases or epilepsy or are
fitted with a pacemaker must not use the sauna.
• People affected by obesity, weak heart condition or blood pressure disorders, circulation problems,
diabetes, elderly people or pregnant women should consult a doctor before using the product.
• People who take medicines should consult a doctor before using the product as some medicines may
cause sleepiness, affect heart beat, blood pressure and circulation.
• Do not use alcoholic substances, drugs or medicines before and during the use of the product as they could
cause unconsciousness.
• This product is not intended to be used by persons (including children) with reduced physical, sensory or
mental capabilities or lack of experience or knowledge, unless they have been given appropriate supervision
or instruction concerning use of the appliance by a person responsible for their safety.
• Whoever uses a sauna must be properly informed about its operation and functions.
• Do research on the hazard alerts as well as on all the safety standards and regulatory requirements issued
by the relevant authorities in your country of residence and meticulously comply with them.
• When the product is not used, disconnect it completely by turning off the double-pole switch installed on
upstream the appliance

Rev. 12/05/2021 EXEN I-GB pag. 6
PREDISPOSIZIONI PER L’INSTALLAZIONE
IMPORTANTE:
Per la connessione elettrica alle scatole di potenza, utilizzare un cavo del tipo H07 RN-F adeguato alla
corrente assorbita. La sauna deve essere collegata alla rete attraverso un interruttore differenziale (30 mA)
e magnetotermico adeguato all’assorbimento del prodotto, con apertura dei contatti di 3 mm.
E’ richiesto un efficiente impianto di dispersione a terra avente sensibilità secondo quanto previsto dal le
normative.
STUFA
Riempire la stufa con i sassi a corredo. Le pietre vengono fornite già lavate. Ciononostante consigliamo di
lavarle nuovamente prima di inserirle all’interno del generatore di calore. Le pietre più piccole devono
essere collocate nel fondo del telaio, quelle più grandi in superficie. Le pietre non devono essere troppo
vicine le une alle altre, in quanto è importante garantire la corretta circolazione dell’aria. Le pietre inoltre
devono essere inserite una sull’altra senza coprire completamente le resistenze della stufa. Consigliamo di
riposizionare le pietre almeno una volta l’anno, preferibilmente due volte l’anno. Durante questa
operazione si scarteranno le pietre più piccole e quelle che si saranno rotte. In questo modo si garantisce la
corretta circolazione dell’aria all’interno della stufa e s’impedisce il surriscaldamento delle resistenze e
quindi la loro rottura. Le pietre devono avere dimensioni pari a 3-5 cm.
ATTENZIONE: la mancanza di ventilazione attraverso le pietre poste all’interno della stufa può provocare
guasti alle resistenze stesse.
ATTENZIONE PERICOLO D’INCENDIO: non versare sulla stufa concentrati di oli essenziali senza abbondante
diluizione in acqua, CIRCA 3 GOCCE PER OGNI lt DI ACQUA. NON RISCALDARE SENZA PIETRE.
PRIMO AVVIAMENTO ATTENZIONE: Le verifiche preliminari ed eventuali regolazioni dell’impianto devono
essere eseguite da personale qualificato. Accendere il prodotto attivando l’interruttore generale
dell’impianto. Verificare le funzionalità della sauna.
SAUNA.
Per un corretto utilizzo della sauna è consigliabile non superare i 15-20 minuti, iniziando con tempi più
brevi, per evitare disturbi della pressione arteriosa. Dopo la sauna è appropriato fare una doccia fredda per
riportare la temperatura ad un livello normale e per avere un effetto rassodante sulla pelle. Per poter usare
la sauna è necessario avviare la stufa almeno1 ora prima dell’utilizzo effettivo. Accertarsi che all’interno
non vi sia materiale infiammabile né oggetti appoggiati sulla stufa, prima dell’accensione.
IN OCCASIONE DEI PRIMI UTILIZZI POTREBBE CONDENSARSI DEL VAPORE LUNGO LA SUPERFICIE INTERNA
DEI CRISTALLI DELLA SAUNA, DOVUTO ALL’EFFETTO TEMPORANEO DELL’UMIDITA’ DEL LEGNO, DESTINATO
AD ESAURIRSI IN BREVE TEMPO.
NON APPOGGIARE NULLA SOPRA LA STUFA DELLA SAUNA, PER PERICOLO DI INCENDIO.
Dopo aver finito di usare la sauna è buona regola lasciarla raffreddare, tenendo la porta bene aperta. E’
consigliabile inoltre aerare bene anche il locale in cui si trova.

Rev. 12/05/2021 EXEN I-GB pag. 7
PRE-INSTALLATION REQUIREMENTS
IMPORTANT: Use a cable of the type H07 RN-F, suitable for the input, for connection to the power boxes.
The sauna must be connected to the mains electricity supply through a thermomagnetic residual current
circuit breaker (30 mA) suitable for the input of the product (see Technical Notes) and having a contact
separation of at least 3 mm. An efficient earth-leakage system is required having a sensitivity in accordance
with wiring regulations and standards.
STOVE
Fill the stove with the stones provided. The stones that are provided have already been washed, however we
recommend washing them again before inserting them inside the heat generator. The smallest stones must
be placed in the bottom of the frame and the largest ones on the surface. The stones must not be placed too
near each other, as it is important to guarantee correct circulation of air. The stones must also be inserted
one on top of the other without completely covering the heating elements of the stove. We recommend re-
positioning the stones at least once a year although preferably twice a year, at which time the smallest
stones and any that are broken will be discarded. This is done to ensure correct air circulation inside the
stove and to avoid overheating of the heating elements and consequent failure. The stones must be sized 3-
5 cm.
CAUTION: lack of ventilation through the stones positioned inside the stove can cause malfunction of the
heating elements.
WARNING FIRE HAZARD: do not pour essential oil concentrates onto the stove without diluting it with lots of
water, APPROX. 3 DROPS FOR EVERY litre OF WATER. DO NOT HEAT WITHOUT STONES.
FIRST TIME OF SWITCHING ON CAUTION: qualified personnel only must carry out the preliminary checks and
make any adjustments to the installation. Switch on the product by putting the installation master switch to
on. Check the sauna functions.
SAUNA
It is recommended not to exceed 15-20 minutes in the sauna at a time, remaining for shorter times at the
beginning to avoid alterations to blood pressure. After the sauna it is usual to take a cold shower to bring
body temperature back to a normal level and to have a firming effect on the skin. In order to use the sauna
one must start the stove at least 1 hour before it is actually used. Make sure that there is no flammable
material inside the stove or objects resting on it before switching on.
WHEN USING THE SAUNA FOR THE FIRST FEW TIMES, STEAM COULD CONDENSATE ON THE INTERNAL
SURFACE OF THE GLASS DUE TO THE MOISTURE IN THE WOOD. THIS TEMPORARY EFFECT OF
CONDENSATION WILL STOP IN A VERY SHORT TIME.
DO NOT REST ANYTHING ON TOP OF THE SAUNA STOVE TO AVOID THE RISK OF FIRE.
After using the sauna it is a good rule to let it cool down by leaving the door open. It is also advisable to
ventilate the room where the sauna is installed.

Rev. 12/05/2021 EXEN I-GB pag. 8
MANUTENZIONE ORDINARIA E STRAORDINARIA
PRIMA DI PULIRE O MANUTENZIONARE LA SAUNA ASSICURARSI CHE L’INTERRUTORE GENERALE A MONTE
DELLA STESSA SIA SCOLLEGATO.
Date le alte temperature controllare regolarmente l’integrità della struttura sia all’interno che all’esterno
con esame visivo; IN PARTICOLARE IL TETTO.
NON salire sul tetto della sauna quando si effettuano i controlli e durante gli interventi di manutenzione.
Dopo ogni utilizzo della sauna si consiglia di pulire sia le pedane a pavimento che le panche adoperate dall’
utente così da garantire, fra i vari aspetti, anche un corretto assetto igienico del prodotto.
Le superfici in legno della sauna non devono mai venir chimicamente trattate in alcun modo, neanche con
della comune vernice. Il contrario comprometterebbe le caratteristiche naturali del legno e quindi da una
parte si renderebbe del tutto inefficacie la sauna, dall’ altra si rischierebbero gravi ustioni corporee.
Pulire la sauna con un panno di cotone umido ed asciugarla con un panno asciutto e pulito. La pulizia deve
essere eseguita regolarmente per garantire la massima longevità della sauna. Il legno potrebbe causare una
lieve trasudazione di resina. Eventuali residui di resina indurita possono essere rimossi con carta abrasiva fi
ne. Alcune imperfezioni naturali del legno come lievi differenze cromatiche o piccole crepe non possono
essere motivo di reclamo.
La manutenzione straordinaria deve essere effettuata da personale qualificato. In caso di guasto o cattivo
funzionamento del prodotto, per l’operatività della garanzia, se attuale, rivolgersi esclusivamente a
personale tecnico autorizzato. Il costruttore non risponde di eventuali danni causati da prodotti manomessi
o riparati impropriamente.
ROUTINE AND SPECIAL MAINTENANCE
BEFORE CLEANING OR CARRYING OUT MAINTENANCE ON THE SAUNA, ENSURE THAT THE MASTER SWITCH
INSTALLED BETWEEN THE INSTALLATION AND THE POWER OUTLET IS PUT TO OFF.
Because of the high temperatures, regularly carry out a visual inspection of the structure both inside and
outside; ESPECIALLY THE ROOF.
DO NOT climb on the roof of the sauna when performing inspections or during maintenance. Each time the
sauna is used, we recommend cleaning both the slatted floorboards and the benches that have been used so
as to guarantee, among other things, correct hygiene of the product.
The wooden surfaces of the sauna must never be chemically treated, not even with common varnish or
paint, since it would negatively affect the natural characteristics of the wood and on the one hand would
make the sauna totally ineffective and on the other would give rise to the risk of severe burns to the body.
Clean the sauna cabin with a wet cotton cloth and dry it with a clean, dry cloth. Regular cleaning ensures
the long life of the sauna. There could be a slight oozing of resin from the wood. Any drops of hardened
resin can be removed using fi ne sandpaper. No complaints are accepted in respect of certain natural
imperfections in the wood such as slight colour tone variations or small cracks or splits.
Special maintenance must be carried out by qualified personnel. In case of failures or malfunctioning of the
product, contact only authorised technicians to avoid losing warranty rights. The manufacturer shall not be
held responsible for any damage caused by products that have been tampered with or repaired wrongly

Rev. 12/05/2021 EXEN I-GB pag. 9

Rev. 12/05/2021 EXEN I-GB pag. 10
\
min 200

Rev. 12/05/2021 EXEN I-GB pag. 11

Rev. 12/05/2021 EXEN I-GB pag. 12
NOTE
1
Assemblare parti 1
e 2
2
Usare viti L.70mm
Use screws L.70
mm
3
Fare attenzione
che il foro sia
parallelo al terreno
Take care that the
hole must be
parallel to the
ground

Rev. 12/05/2021 EXEN I-GB pag. 13
NOTE
Unire parti 3 e 4
alle parti 1 e 2
Connect parts 3
and 4 to parts 1
and 2
4
Unire parti 5 e 6
alle parti 1 e 2
Con viti L. 50mm
Connect parts 5
and 6 to parts 1
and 2 with screws
L.50mm

Rev. 12/05/2021 EXEN I-GB pag. 14
NOTE
5
Fissare barra led
(7) con 4 viti torx L.
40
Led verso il basso
Fix led bar (7) with
4 screws torx L. 40
LED direct to the
ground.
Passare il cavo di
alimentazione led
nell’intercapedine
Put led cable into
back wall
Collegare barra led
Connect led bar
Connettere
alimentazione
230V
Telecomandi
azionano la luce
led
Connect power
supply 230V.
Remote control
switch on led light
6
Assemblare
traverso frontale
inferiore (12) con 1
traversi laterali
Controllare
planarità traversi
inferiore.
Eventualmente
spessorare
Assemble frontal
frame (12) with
side frame.
Check planarity
and in case correct
with wedges

Rev. 12/05/2021 EXEN I-GB pag. 15
NOTE
7
Assemblare i vetri
laterali 8 e 9 nei
traversi inferiori e
nella parete
utilizzando delle
ventose
Assemble side
glasses in the side
frame and in the
back wall using
some suckers
8
Assemblare I
traversi laterali
superiori 10 e 11
Assemble upper
side frame 10 and
11
9
Assemblare il fisso
porta 13 nel
traverso frontale
inferiore 3
utilizzando delle
ventose
Fermare il vetro
momentaneamente
con del nastroa
desivo
Assemble frontal
fix glass (13) in the
lower frontal frame
3 using some
suckers. Hold the
glass with
adhesive tape

Rev. 12/05/2021 EXEN I-GB pag. 16
NOTE
10
Connettere il
traverso superiore
12 e fissarlo
Connect upper
frontal frame and
fix it
11
Fissare il vetro al
traverso superiore
con le viti e le
boccole
Fix frontal glass to
the upper frontal
frame with screws
12
Fissare il fine corsa
Con viti 2,9x13
Fix the stopper
with screw 2,9x13

Rev. 12/05/2021 EXEN I-GB pag. 17
NOTE
13
Con le ventose
inserire la porta
(14) nel traverso
inferiore (3).
Sollevarla e fissare
gli scorrimenti
presenti nel profilo
superiore (12)
With suckers insert
door (14) into the
lower frontal frame
(3). Lift it and fix it
to the upper profile
(12)
14
Installare la panca
superiore (17)
Install upper bench
(17)
15
Installare il
sostegno stufa (19)
collegandolo alla
panca superiore
usando la parte
(18)
Install stove
support (19)
connecting it to the
upper bench (17)
using part 18

Rev. 12/05/2021 EXEN I-GB pag. 18
NOTE
Fissare parte 17
con le viti 80mm
Fix part 17 with
screws L.80mm
COLLEGARE
ALIMENTAZIONE
ALLA STUFA
SEGUIRE LE
INDICAZIONI
RIPORTATE SUL
MANUALE DELLA
STUFA
CONNECT
POWER SUPPLY
TO THE STOVE
FOLLOWING
STOVE’S
INSTRUCTION
Collegare la stufa
al support metallico
con il deflettore
Inserire le pietre
come indicato nel
manuale della
stufa
Connect the stove
to the support
using the deflector.
To insert stones
like shown in the
stove’s instruction
manual

Rev. 12/05/2021 EXEN I-GB pag. 19
NOTE
16
Togliere copertura
cavo dalla parte di
sostegno panche
(5 o 6)
Remove cable
cover from bench
supports (5 or 6)
Far passare il cavo
di alimentazione
stufa dal sostegno
stufa (19) e
all’interno della
parete posteriore
uscendo nella
parte superiore
Insert cable in the
stove support (19)
and after inside the
back wall, going
out over the roof
Rimettere la
copertura del cavo
Re- install cable
cover

Rev. 12/05/2021 EXEN I-GB pag. 20
NOTE
19
Fissare le due viti
L.30mm sul
supporto stufa (19)
e agganciare il
copri stufa (21)
Fix two screws
(L.30mm) on stove
support (19) and to
hook stove cover
(21)
5mm
Table of contents
Other Megius Plumbing Product manuals
Popular Plumbing Product manuals by other brands

Blue Mountain
Blue Mountain Rain Harvesting Mozzie Stoppa TAT061 Installation and specification guide

newform
newform X-Trend 2270E instructions

DIAQUA
DIAQUA Bilbao Slow Down Operating and installation instructions

BK RESOURCES
BK RESOURCES MSHS-72W1 Assembly instructions

Elkay
Elkay EWMA4820SBC Specifications

Maier
Maier DP Series operating instructions