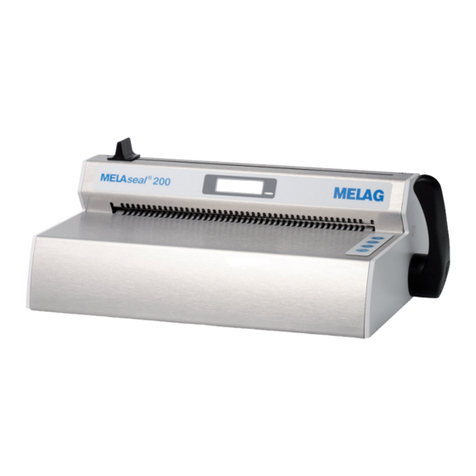
MELAG MELAseal Pro User manual

User Manual
MELAseal® Pro
Sealing device
from software version 1.02.03
EN
Dear customer,
We thank you for your confidence demonstrated by the purchase of this MELAG product. As an owner-run and operated
family concern founded in 1951, we have a long history of successful specialization in hygiene products for practice-
based use. Our focus on innovation, quality and the highest standards of operational reliability has established MELAG
as the world’s leading manufacturer in the instrument reprocessing and hygiene field.
You, our customer are justified in your demand for the best products, quality and reliability. Providing “competence in
hygiene” and “Quality – made in Germany”, we guarantee that these demands will be met. Our certified quality
management system is subject to close monitoring: one instrument to this end is our annual multi-day audit conducted in
accordance with ENISO13485. This guarantees that all MELAG products are manufactured and tested in accordance
with strict quality criteria.
The MELAG management and team.


Contents
Contents
1 General guidelines ...............................................................................................................................................................5
Symbols used ......................................................................................................................................................................5
Formatting rules...................................................................................................................................................................5
Disposal ...............................................................................................................................................................................5
2 Safety.....................................................................................................................................................................................6
3 Description of the device.....................................................................................................................................................7
Intended use ........................................................................................................................................................................7
Scope of delivery .................................................................................................................................................................7
Views of the device..............................................................................................................................................................8
Symbols on the device.........................................................................................................................................................8
Operating and display field ..................................................................................................................................................9
4 Commissioning...................................................................................................................................................................10
Requirements of the installation location ...........................................................................................................................10
Connecting the sealing device...........................................................................................................................................10
Setting the clearance between the cutting edge and the packaging ................................................................................. 10
Switching on the sealing device.........................................................................................................................................11
5 Sealing.................................................................................................................................................................................12
Sealing procedure..............................................................................................................................................................12
Automatic sealing counter .................................................................................................................................................12
Display of the daily batches ...............................................................................................................................................13
Resetting the daily batch counter ......................................................................................................................................13
6 Logging ...............................................................................................................................................................................14
Documenting the sealing process......................................................................................................................................14
Storage structure of the log files ........................................................................................................................................15
Structure of the log files .....................................................................................................................................................15
7 Settings ...............................................................................................................................................................................17
Date and time ....................................................................................................................................................................17
Language...........................................................................................................................................................................17
Sealing temperature ..........................................................................................................................................................18
8 Maintenance........................................................................................................................................................................19
Cleaning and regular checks .............................................................................................................................................19
Maintenance ......................................................................................................................................................................19
Validation ...........................................................................................................................................................................19
9 Pause times ........................................................................................................................................................................20
Pause times .......................................................................................................................................................................20
Transport and storage .......................................................................................................................................................20
10 Optional accessories .......................................................................................................................................................21
Work table Standard ..........................................................................................................................................................21
Work table Comfort............................................................................................................................................................21
Reel dispenser...................................................................................................................................................................21
Foot for the wall mounted reel dispenser...........................................................................................................................21

Contents
11 Malfunctions .....................................................................................................................................................................22
12 Manufacturer's recommendation for routine operation ...............................................................................................24
Performing the peel test.....................................................................................................................................................24
MELAG seal seam stability test .........................................................................................................................................24
13 Standard specifications...................................................................................................................................................25
14 Technical Data ..................................................................................................................................................................26
15 Accessories and spare parts ..........................................................................................................................................27

1 General guidelines
5
1 General guidelines
Please read this user manual carefully before commissioning the device. The manual includes important safety instruc-
tions. Make sure that you always have access to digital or printed version of the user manual.
Should the manual no longer be legible, is damaged or has been lost, you can download a new copy from MELAG down-
load centre at www.melag.com.
Symbols used
Symbol Explanation
Indicates a dangerous situation, which if not avoided, could entail slight to life-threatening
injuries.
Draws your attention to a situation, which if not avoided, could result in damage to the
instruments, the practice fittings or the device.
Draws your attention to important information.
Formatting rules
Example Explanation
Universal-
Program
Words or phrases appearing on the display of the device are marked as display text.
Prerequisites for the following handling instruction.
Refer to the glossary or another text section.
Information for safe handling.
Disposal
MELAG devices are synonymous with high quality and a long life-span. When you eventually need to decommission your
MELAG device, the required disposal of the device can take place with MELAG in Berlin. Simply contact your stockist.
Dispose of accessories and consumption media which you no longer require in the appropriate manner. Comply with all
relevant disposal specification in terms of possibly contaminated waste.
The packaging protects the device against transport damage. The packaging materials have been selected for their envi-
ronmentally-friendly disposability and can be recycled. Returning the packaging to the material flow reduces the amount
of waste and saves raw materials.

2 Safety
6
2 Safety
When operating the device, comply with the following safety instructions as well as those contained in
subsequent chapters. Use the device only for the purpose specified in these instructions. Failure to comply
with the safety instructions can result in injury and/or damage to the device.
Qualified personnel
nOnly competent and trained personnel may use the device.
nThe operator must ensure that the users are regularly trained in the operation and safe handling of the device.
Setup, installation and commissioning
nCheck the device after unpacking for any damage suffered during transport.
nThe device is not suitable for operation in explosive atmospheres.
nInstall and operate the device in a frost-free environment.
nThe device is conceived for use outside the patient area. The device should be located a minimum of 1.5m radius
away from the treatment area.
Power cable and power plug
nOnly the power cable included in the scope of delivery may be connected to the device.
nThe power cable may not be replaced by a cable determined to be insufficient.
Danger of short circuit
nLiquids may not be permitted to reach the interior of the device. This could result in an electrical shock or short circu-
iting.
Repair
nNever open the device housing. Incorrect opening and repair can compromise electrical safety and pose a danger to
the user. The guarantee and warranty are forfeited as soon as the device is opened by anyone other than a MELAG-
authorised technician.
Fan
nThe fan in the device floor must be free at all times and may not be allowed to become blocked or congested. Failure
to comply with this provision can result in the overheating of the electrical components in the interior of the device
and malfunctions.
nCheck the fan grating regularly for cleanliness in order to prevent it from becoming clogged with dust and thereby
preventing insufficient cooling.
Light sensor for automatic in-feed
nEnsure that small components (e.g. from instrument) do not enter the in-feed with the sterilization packaging to be
sealed. The small components could cause damage to the transport mechanism of the device, the sterilization mate-
rial and the sterilization packaging.
nNever introduce any objects into the sealing device other than the packaging materials specified in the user manual.

3 Description of the device
7
3 Description of the device
Intended use
This sealing device is designed for application in a medical context, e.g. clinics and medical and dental practices. It was
developed especially for the heat sealing of instruments in sterilization packages and complies with the stand-
ardENISO11607-2 and the German standard DIN1)58953-7.
The rotary sealing device MELAseal Pro is not a medical device as defined by the Medical Device Regulation.
Suitable materials
For the heat sealing of transparent sterilization packages in accordance with EN868-5 e.g. MELAfol reels and pouches
are suitable. Should you wish to use any other packaging materials, please consult your stockist or contact MELAG di-
rectly.
Unsuitable materials
Sterilization package that is not compatible with the requirements of EN868-5, is incompatible with this device. The
following materials are not suitable:
▪ Pure hose film (double-sided film), as these tends to become adhere to the sealing rail, and can restrict the
functionality of the sealing device.
▪ Polyethylene film
▪ Soft PVC film
▪ Hard PVC film
▪ Polyamide film
▪ Polypropylene film
NOTICE
The use of unsuitable packaging materials carries the risk of damage to or malfunction of the device.
nComply with the manufacturer’s recommendations for the sealing temperatures suitable for each type of
packaging material.
Scope of delivery
Please check the scope of delivery before setting up and connecting the device.
Standard scope of delivery
▪ Rotary sealing device MELAseal Pro
▪ User manual
▪ Checklist for installation and record of installation
▪ Declaration of conformity
▪ Warranty certificate
▪ Test and calibration protocol
▪ Power cable
1) DIN=Deutsches Institut für Normung

3 Description of the device
8
Views of the device
View from front
1
2
1 Operating and display panel
2 Conveyor belt
View from left
3
4
3 Adjustment wheel for adjusting the
clearance between the seal seam to the
packaging cutting edge
4 Guide rails
View from rear
5678
5 Type plate
6 Serial interface (RS232)
7 Power cable connection
8 Power switch (On/Off)
Symbols on the device
Type plate
Manufacturer of the product
Date of manufacture of the product

3 Description of the device
9
REF
Article number of the product
SN
Serial number of the product
Observe user manual or electronic user manual
Do not dispose of product in household waste
CE marking
Electrical connection of the product: Alternating current (AC)
Symbols on the power switch
Switching on device
Switching off device
Operating and display field
Key Description
TEMP
TEMP
Setting the temperature
Reverse key – removing the sterilization packaging upon a blockage of the conveyor belt
COUNT
COUNT
Setting the total number of batches of a day
ON
OFF
Switch signal tone on and off upon the pre-set total number of batches having been reached

4 Commissioning
10
4 Commissioning
Requirements of the installation location
CAUTION
Failure to comply with the set-up conditions can result in injuries, malfunctions and/or damage to the
device.
nComply with all the specifications of this chapter for initial commissioning.
nThe device is not suitable for operation in explosive atmospheres.
nThe device is only intended for use in interior spaces.
nThe device is conceived for use outside the patient area. The device should be located a minimum of 1.5m radius
away from the treatment area.
nInstall the device in a dry and dust-protected location.
nMaintain sufficient clearance to the surrounding surfaces in order to ensure sufficient ventilation.
nEnsure that the sealing device is located away from direct sunshine and outside the range of other sources of heat.
nSet-up the device protected against blows or vibrations.
PLEASE NOTE
In rare cases, direct light can result in the activation of the sealing device conveyor belt which is
controlled by a light-sensitive sensor.
Connecting the sealing device
üThe sealing device has been switched off.
üThe power cable, delivered in the scope of delivery, is present.
uConnect the IEC plug of the power cable to the rear side of the sealing device and connect the power plug in the
power socket.
Setting the clearance between the cutting edge and the packaging
The sealing device permits individual setting of the clearance of the seal seam to the cutting edge of the packaging. An
adjusting screw in a slot is located on the left-hand side of the sealing device.
uLoosen the screw a little in order to slide the guide rail forwards or
backwards.
The scale next to the adjusting screw on the right displays the overhang in millimeters (measured from the outer edge of
the sealed seam).

4 Commissioning
11
Switching on the sealing device
üThe sealing device is connected to the power supply.
uSwitch on the sealing device at the power switch.
ÊAfter switching on the sealing device, the display shows the messageHeating up. It takes approx. 3-5min before
the pre-set sealing temperature of 180°C is reached.
Operational readiness
As soon as the set sealing temperature has been reached, two tones will be issued and the display will change to Sta-
tus: OK. The sealing device is ready for operation.
Temp:180°C #:000
Status: OK

5 Sealing
12
5 Sealing
Sealing procedure
NOTICE
Inserting the packaging incorrectly can result in the adhesion of film residue to the sealing rail.
nAlways guide the packaging into the device with the film side pointing upwards.
PLEASE NOTE
When sealing MELAfol pouches with a side gusset, ensure compliance with the manufacturer’s
specifications (e.g. Instructions for handling MELAfol pouches with side gusset) especially when
wishing to seal cassettes.
The following must be fulfilled or present:
üThe sealing temperature has been reached.
uInsert the transparent sterilization package in the guide rail on the left-hand side of the device.
ÊThe transport belt begins to turn as soon as the internal optical sensor recognises the packaging. The packaging is
then guided through the sealing device automatically.
Should you wish to perform a specific number of sealing procedures one after each other, you can set an automatic
counter which issues a signal tone once a set number of sealing procedures have been reached (see Automatic sealing
counter [}page12]).
PLEASE NOTE
With pouches with side gussets, perform weekly checks of the seal seam using an ink test (e.g.
MELAcontrol Ink Test).
Automatic sealing counter
It is possible to set a signal tone to control the number of packages to be sealed. It will sound after the pre-set number of
seals has been completed. This function is useful when needing to seal a larger quantity of packages.
To set the counter to a particular number, proceed as follows:
1. Press the key
COUNT
for approx. 2s until the display switches to Counter: xxx.
2. Press and hold
COUNT
or
COUNT
for starting the counter running to a maximum of 999.
3. Release the key when the required number of packages to be sealed has been reached.
The number set will be saved automatically. Set the number to 000 to reset the sealing counter.

5 Sealing
13
Display of the daily batches
The daily batch counter#: 000 is displayed in the upper right-hand corner of the display: It counts the number of seals
performed in the course of one day. If the sealing device is switched off, the counter is reset to 000.
PLEASE NOTE
This does not reset the total batch counter.
Resetting the daily batch counter
The following must be fulfilled or present:
üThe sealing device remains activated in between the sealing runs.
1. Switch on the sealing device.
2. Press the key
COUNT
for some seconds.
ÊThe daily batch counter is reset to #: 000.
PLEASE NOTE
Switching the sealing device off and then on, also resets the daily batch counter to 000. This does not
reset the total batch counter.

6 Logging
14
6 Logging
Documenting the sealing process
ENISO11607-2 requires that the sealing process is monitored and documented in order to satisfy the requirement for
compliance with the specifications contained in part 2 of the standard. As a result, you are able to record the logs of the
sealing procedures, to output and archive them on the following output media:
▪ MELAprint 42/44 log printer
▪ MELAflash CF card printer (from software version1.9)
▪ Computer with documentation software e.g. MELAview/MELAtrace (from software version2.2)
Using the log printer as an output medium
Should you wish to use the MELAprint42/44 log printer as an output medium, connect it as follows:
1. Connect the serial connection cable of the MELAprint42/44 log printer to the RS232 interface on the rear of the
sealing device.
2. Connect the power cable included in the scope of delivery of the log printer in accordance with the appropriate user
manual.
ÊThe sealing device recognizes the MELAprint42/44 log printer automatically.
ÊThe log printer outputs a log row consecutively for every sealing procedure performed.
Using the MELAflash CF-Card-Printer as an output medium
The MELAflash CF-Card-Printer saves the logs on a CF card. The logs can be outputted from the CF card on the prac-
tice computer using a card reader. A CF card and the card reader are included in the scope of delivery of the MELAflash
CF-Card-Printer. MELAflash CF-Card-Printers from software version 1.9 and above support the recording of logs from
the MELAsealPro sealing device.
Connect the MELAflash CF-Card-Printer as follows:
1. Connect the serial connection cable of the MELAflash CF-Card-Printer to the RS232 interface on the rear of the
sealing device.
2. Connect the power cable included in the scope of delivery of the CF card printer in accordance with the appropriate
user manual.
ÊThe MELAflash CF-Card-Printer is automatically recognised by the sealing device.
ÊA daily log is saved on the CF card in the MELAflash CF-Card-Printer after the first sealing procedure of the day.
Here a log row is written for every further sealing procedure of the same day.
PLEASE NOTE
Complete documentation
Ensure that the CF card is inserted in the MELAflash CF-Card-Printer during every sealing procedure.
Using the computer as an output medium
The following must be fulfilled or present:
üThe computer is connected to the rear of the sealing device via the serial interface.
üThe documentation software MELAview/MELAtrace is used to output the log.
uTake from the documentation software the information as to how you operate the MELAview/MELAtrace program
and output this via the program logs.
ÊA daily log is saved on the CF card in the MELAflash CF card printer after the first sealing procedure of the day.
Here a log row is written for every further sealing procedure of the same day.

6 Logging
15
PLEASE NOTE
The daily log is continued even if the sealing device is switched on and off once; i.e. a new daily log is
not started.
Storage structure of the log files
A directory with the encrypted sealing device serial number will be created on the CF card and the computer. The folder
name consists of five characters identical with the first five characters of every log, e.g. 9K0EQ. This directory contains a
sub-directory with the month of log generation e.g. 10_2009. This contains all logs generated by the sealing device in this
month.
Logs
MELAseal Pro
9K0EQ
07_2020
PLEASE NOTE
Never store logs from different months in a common folder as the daily logs for the various months have the
same file name.
Structure of the log files
The log files are simple text files and can be opened with the text editor of the computer. The ending of the log file is ini-
tially unknown to the computer. After assigning a file ending to a text program you can open this file type with a double-
click. Alternatively, you can open the log files with the documentation software MELAview/MELAtrace.
Position 1 2 3 4 5 6 7 8 X X X
Example
9
K
0
E
Q
-
1
2
.
M
S
E
Meaning Five-digit code Day Log file ending
Explanation Five-digit number which includes the device
type, serial number and year of construction
in encrypted form
The day on which the log
was generated (the date
set on the sealing device
is counted)
MSE = file ending
The daily logs are saved in English.
Example of a log with several sealing procedures:
--------------------
MELAG MEDIZINTECHNIK
--------------------
10 MELAG MELAseal Pro
25 Date: 06.01.2010
80 SerNr: 2009SPF0001
| |Time |Charge|Tmp|Prs|Vel|Limits |CRC
|--|-----|------|---|---|---|-----------------------|----
|OK|09:19| 00012|180|098|087|185-175 120-090 120-078|F228(PC)
|!!|09:19| 00013|180| + |086|185-175 120-090 120-078|F25D(PC)
|OK|09:20| 00014|179|098|086|185-175 120-090 120-078|F25C(PC)

6 Logging
16
Key:
Row 10 - Designation of the sealing device
Row 25 - Date of sealing procedures (dd.mm.yyyy)
Row 80 - Serial number of the sealing device
OK / !! - Sealing procedure successful / sealing procedure unsuccessful
Time - Time of the sealing procedure
Batch - Total number of charges
Tmp - Sealing temperature (in °C)
Prs - Pressure with which the packaging was sealed (sealing force, in N)
Vel - Speed of the conveyor belt in (dm/min.)
Limits - Parameter thresholds: Sealing temperature (175-185°C), sealing force (120-120N), speed
(120-120dm/min)
CRC - Coded proof of log authenticity
(PC) - Indication that the log was produced on the computer via MELAview/MELAtrace
Example of a log row from a log printer:
01161; 2009SPF1000; 09-12-15;14:28;180;099;88;185-175 120-090 120-078|F300
Key: The example above shows the following parameters in this order:
Total number of batches; serial number; date (yy-mm-dd); time; sealing temperature; sealing force; speed; thresholds |
CRC-Code
Sealing procedure successful
A log includes all printing procedures of one day. A row in the log is written for every sealing procedure. If an output is
made via the MELAflash CF card printer or MELAview/MELAtrace, a successful sealing procedure is marked in the log
row with an “OK”.
Unsuccessful sealing procedure
If a malfunction occurs during a sealing procedure, this is recorded in the log with two exclamation marks !!. A value will
not be recorded in the log row for the parameter for which the malfunction occurred. Instead, this space will be marked
with “+” if the respective value has been exceeded. If the value has fallen below the relevant value, the space will be
marked with “-”.

7 Settings
17
7 Settings
Date and time
The date and time must be set correctly so that the time of the sealing procedure can be logged correctly and a clear al-
location to the time of sealing can be established.
Date
To set the current date, proceed as follows:
1. Switch on the sealing device at the power switch.
2. Press
OFF
as soon as the display shows the current software version.
3. Press
ON
repeatedly to access the menu item Date.
4. Press
TEMP
to set the value.
ÊTwo arrows will appear behind the currently selected parameters.
5. Press
TEMP
or
TEMP
to navigate between the parameters Day, Month and Year.
6. Press
COUNT
or
COUNT
to set the selected parameter.
ÊThe value will be saved after setting.
7. Press
ON
to leave the menu item Date.
8. Press
OFF
to leave the setup menu entirely.
Time
To set the current time, proceed as follows:
1. Press
OFF
as soon as the display shows the current software version.
2. Press
ON
repeatedly to access the menu item Time.
3. Proceed in a fashion similar to the setting the date.
Language
To change the currently set language proceed as follows:
1. Switch on the sealing device at the power switch.
2. Press
OFF
as soon as the display shows the current software version.
3. Press
TEMP
. Two arrows will appear behind the language.
4. Press
COUNT
or
COUNT
to select the preferred language.
5. Press
ON
to save the setting and leave the menu entirely.

7 Settings
18
Sealing temperature
The sealing temperature is determined by the type of sterilization packaging. The sealing temperature for MELAfol reels
and pouches is 170-190°C. MELAG recommends a sealing temperature of 180°C. When using MELAfol transparent
sterilization package retain the works setting sealing temperature of 180°C. When using sterilization packages from oth-
er manufacturers, comply with their specifications. Set the sealing temperature at the sealing device if the material has a
recommended sealing temperature other than 180°C.
To alter the pre-set sealing temperature proceed as follows:
1. Depress one of the two keys
TEMP
or
TEMP
for approx. 2s until two arrows are displayed on the right-hand border
of the display.
2. Holding one of the keys depressed initiates the temperature display. The temperature range ranges from
100-199°C.
3. Release the key when the required sealing temperature has been reached.

8 Maintenance
19
8 Maintenance
Cleaning and regular checks
Note the following:
nSwitch off the sealing device at the power switch and remove the power plug before cleaning.
nThe cleaning cloth may never be allowed to become entirely wet in order to prevent water from entering the interior
of the sealing device.
Interval Measure
When necessary
and every 6 months
Clean the exterior of the sealing device with a dry or damp, non-fuzzing cloth and where
necessary with a neutral fluid cleaner or spirit. Only at persistent soiling, use a mild stainless steel
cleaning agent with a pH value between 5 and 8.
Annually Clean the fan on the base of the sealing device with a dry or damp, non-fuzzing cloth in order to
prevent it from becoming clogged with dust and insufficient cooling.
Maintenance
MELAG recommends regular maintenance vital to ensure reliable operation and value retention of the device. Arrange
for regular maintenance every 50,000 program cycles or at the latest after 2 years.
NOTICE
Continuing operation beyond the maintenance interval can result in malfunctions in the device!
nMaintenance should only be performed by trained and authorised technicians.
nMaintain the specified maintenance intervals.
Carry out maintenance with an original maintenance set prepared by MELAG. Only original MELAG spare parts may be
used.
Validation
Your sealing device complies with all standard requirements for the validation of the sealing procedure in accordance
with EN ISO 11607-2. Conformity is confirmed with the declaration of conformity included in the scope of delivery.

9 Pause times
20
9 Pause times
Pause times
The sealing device can remain switched on over longer operating pauses of many hours. MELAG recommends switching
off the device during long operating pauses to save energy.
Transport and storage
NOTICE
Damage to the housing and the device interior as a result of using unsuitable transport packaging.
nOnly transport the device in its original packaging or other suitable packaging.
Note the following:
nStore and transport the device frost-free.
nAvoid strong shocks/vibrations.
nStore the device in a fashion protected against moisture.
Other manuals for MELAseal Pro
1
Table of contents
Other MELAG Kitchen Appliance manuals