Menda 35840 Service manual
TB-4013 Page 1 of 3 © 2022 DESCO INDUSTRIES INC
Employee Owned
MENDA - 3651 Walnut Avenue, Chino, CA 91710 • (909) 627-2453 • Website: MendaPump.com
Blow Vac
Operation and Maintenance
Description
The MENDA Blow Vac is a compact, dual function unit
which is totally made up of ESD Safe housing parts
and accessories. It is designed for precise removal
and collection of dry dust particles and debris from
equipment that is sensitive to electrostatic discharge
(ESD). Dissipative thermoplastic rubber stretch
hose with a steel conductive spring wire to remove
electrostatic charges via the dissipative housing and
ground wire plugged into a three-wire AC electrical
outlet.
The Blow Vac can also be converted in seconds into a
powerful blower for dust removal in areas otherwise not
accessible. You simply need to attach the optional two
part blow assembly attachment, MENDA Part Number
35836. The Blow Vac has been specially made with a
dissipative housing and attachments/accessories. All are
groundable per S20.20 <1 x 10⁹Static Dissipative.
The Blow Vac and its accessories are available as the
following item numbers:
Item Description
35840 Blow Vac, 120 VAC
35841 Blow Vac with Adjustable Airflow, 120 VAC
35843 Blow Vac with Adjustable Airflow, 230 VAC
35834 Replacement Hose
35835 Mini Attachment Set
35836 Two-Part Blow Assembly
35837 Replacement HEPA Filter
35838 Replacement Filter
35839 Replacement Filter Bag, 10 Pack
September 2022
Packaging
1 Dissipative stretch hose – Extends over 4'
1 Soft Dissipative Rubber Nozzle
1 Hard Dissipative Crevice Nozzle
1 Low Charging Carrying Strap
1 Power Cord, North America (8') (35840 & 35841 only)
1 35838 Filter
1 35839 Filter Bag
Operation
1. Slide one end of the dissipative stretch hose into
suction opening Airow inlet (vacuum) or Airow
Outlet (blower).
2. Press the desired nozzle onto the hose end.
3. Install any of the other appropriate attachments
to the other end of the hose. The Two Part Blow
Assembly attachment (35836) is recommended for
use if the Blow Vac will be used to blow debris.
4. Place the rocker switch in o position. For the
adjustable airow unit further place the knob
electronic control onto the Medium power setting.
5. Plug appliance coupling end of the power cord into
rear power inlet Blow Vac. Plug the 3-pin/blade
power plug into an electrical outlet that is properly
grounded in accordance with all local codes and
ordinances. Start Blow Vac by pressing the power
switch to “ON” position.
TECHNICAL BULLETIN TB-4013
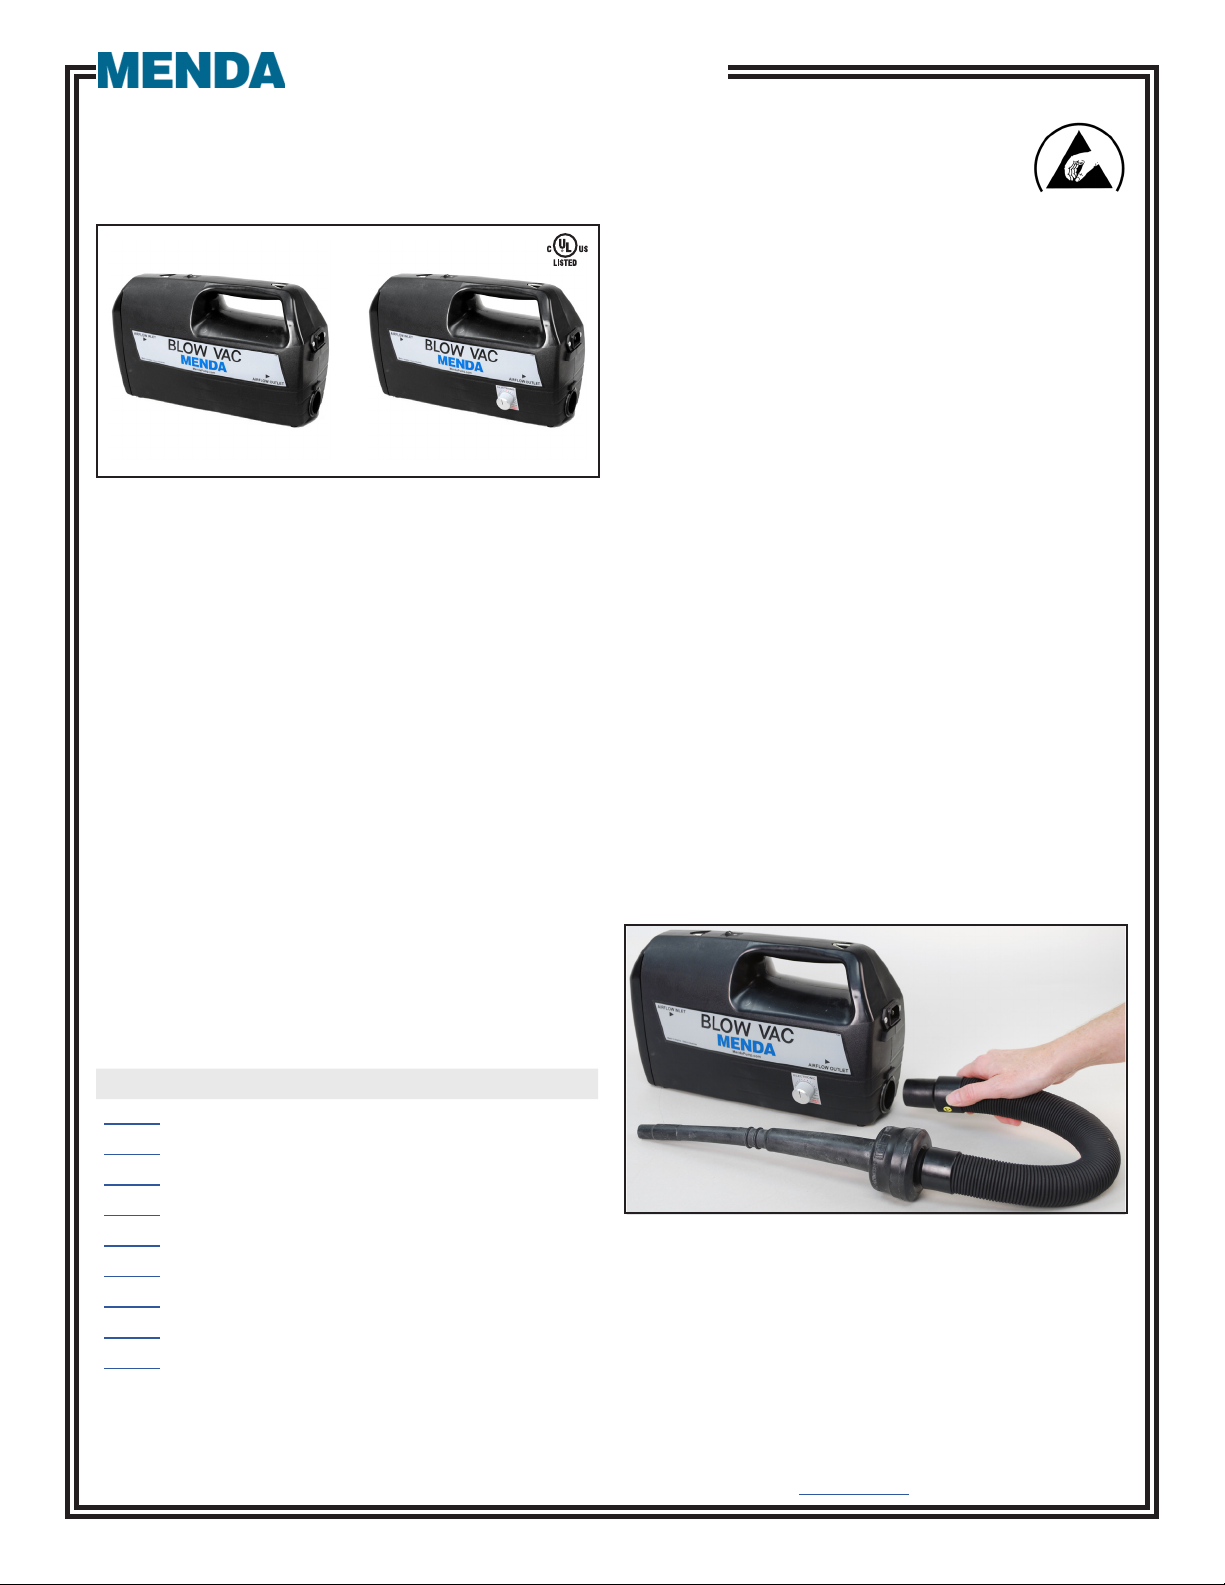
Figure 1. MENDA 35840 and 35841 Blow Vac
35840 35841
Figure 2. Connecting the hose to the airow outlet

TB-4013 Page 2 of 3 © 2022 DESCO INDUSTRIES INC
Employee Owned
MENDA - 3651 Walnut Avenue, Chino, CA 91710 • (909) 627-2453 • Website: MendaPump.com
Maintenance
To retain dust and ne dry particles down to 0.3 micron,
the Blow Vac is tted with a special double-layer paper
lter bag, combined with an electro-static charged micro
lter. If there is substantial loss of suction and/or blow
pressure, follow the below steps:
1. Switch-O appliance and disconnect plug from
electrical outlet.
2. Verify the nozzle or hose have not become blocked.
3. Lift the metal lock on the bottom of the Blow Vac and
remove the front cover.
4. Remove and dispose the lter bag (35839) and
replace it with a new one.
5. HEPA Filters: We recommend changing the HEPA
micromotor lter (35837) with every 2nd changing of
the lter bag (35839).
6. Non-HEPA Filters: We recommend changing the
micromotor lter (35838) every 5th changing of the
paper lter bag (35839).
Safety Warning
• The Blow Vac is designed for indoor use and should
be stored in a dry place.
• It is NOT designed to collect liquids, or health
endangered dust such as asbestos.
• Unplug the Blow Vac when it is not in use.
• Never use the appliance without the paper lter bag
(35839) and micromotorlter (35838) in place.
• Thermal Protection - Automatic Shut-O
• Not recommended for use for toner pick up.
Figure 3. Connecting the hose to the airow inlet
Figure 4. Releasing the lter
Figure 5. Changing the lter

TB-4013 Page 3 of 3 © 2022 DESCO INDUSTRIES INC
Employee Owned
MENDA - 3651 Walnut Avenue, Chino, CA 91710 • (909) 627-2453 • Website: MendaPump.com
Specifications
Construction Durable and highly solvent
resistant volume dissipative
polypropylene housing
Motor 1.15 hp
Energy Consumption 880 W max
Suction 80 W.G.
(measured at orifice motor)
Sound Level 72 dB @ 1 m
Weight 4.8 lbs.
Dimensions 12.5" x 5" x 7.5"
Speed Simple bleeding valve
(35840)
Stepless electronic regulator
(35841, 35842)
Filter Bag Advanced 5-Stage Filter System
Replace filter bag approximately
5 times before having to change
micromotorfilter
HEPA (pre-moto)
micromotorfilter
1.2 L multilayer filter bag
Hose Dissipative thermoplastic rubber
stretch hose
Nozzle Dissipative soft rubber snorkel
nozzle
Tools Dissipative hard crevice tool
Accessories Low charging leather shoulder
strap
Certications cULus, CE
Country of Origin Netherlands
Limited Warranty, Warranty Exclusions, Limit
of Liability and RMA Request Instructions
See the MENDA Warranty -
MendaPump.com/Limited-Warranty.aspx
This manual suits for next models
2
Table of contents
Other Menda Vacuum Cleaner manuals


