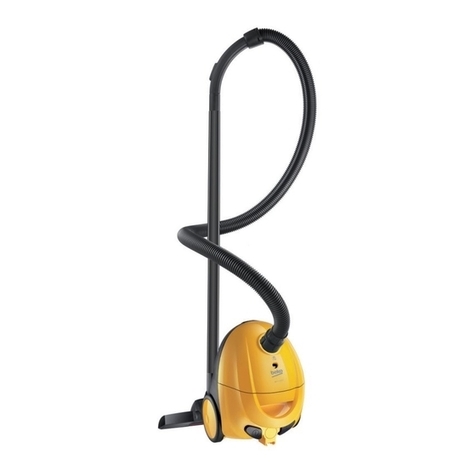
Beko BKS 5422 D User manual

Vacuum Cleaner
User Manual
EN DE TR RO RU BG
BKS 5422 D

Please read this user manual first!
Dear Customer,
Thank you for preferring a Beko product. We hope that you get the best results from
your product which has been manufactured with high quality and state-of-the-art
technology. Therefore, please read this entire user manual and all other accompanying
documents carefully before using the product and keep it as a reference for future use.
If you handover the product to someone else, give the user manual as well. Follow all
warnings and information in the user manual.
Meanings of the symbols
Following symbols are used in the various section of this manual:
C
Important information and useful
hints about usage.
A
Warnings for dangerous situations
concerning the safety of life and
property
This product has been produced in environmentally-friendly, state-of-the-art facilities.
This appliance conforms to the
WEEE regulation.
It does not contain PCB.
Made in P.R.C.

Vacuum cleaner / User manual
3 / 57 EN
CONTENTS
1 Important nstructons for
safety and envronment 4-5
1.1 General safety . . . . . . . . . . . . . . . . . . . . . . . . . . . . . . 4
1.2 Complance wth the WEEE Drectve
and dsposal of waste products . . . . . . . . . . . . . . . 5
1.3 Package nformaton . . . . . . . . . . . . . . . . . . . . . . . 5
2 Your vacuum cleaner 6
2.1 Overvew . . . . . . . . . . . . . . . . . . . . . . . . . . . . . . . . . . . 6
2.2 Techncal data. . . . . . . . . . . . . . . . . . . . . . . . . . . . . . 6
3 Operaton 7-8
3.1 Intended use . . . . . . . . . . . . . . . . . . . . . . . . . . . . . . . .7
3.2 Attachng/removng the hose. . . . . . . . . . . . . . .7
3.3 Attachng/removng the telescopc tube . . .7
3.4 Attachng/removng the
parquet/carpet brush . . . . . . . . . . . . . . . . . . . . . . . . . . .7
3.5 Adjustng the parquet/carpet brush . . . . . . . .7
3.6 Operaton . . . . . . . . . . . . . . . . . . . . . . . . . . . . . . . . . . .7
3.6.1 Adjustng the sucton power . . . . . . . . . . . . . 8
3.7 Accessores. . . . . . . . . . . . . . . . . . . . . . . . . . . . . . . . . 8
3.8 Swtchng off the vacuum
cleaner and parkng feature . . . . . . . . . . . . . . . . . . . 8
4Cleanng and mantenance 9
4.1 Dschargng the dust contaner . . . . . . . . . . . . 9
4.2 Cleanng the flters. . . . . . . . . . . . . . . . . . . . . . . . . 9
4.2.1 Ar outlet flter. . . . . . . . . . . . . . . . . . . . . . . . . . . 10
4.2.2 Hepa flter. . . . . . . . . . . . . . . . . . . . . . . . . . . . . . . 10
4.2.3 Foam flter . . . . . . . . . . . . . . . . . . . . . . . . . . . . . . 10
4.3 Storage. . . . . . . . . . . . . . . . . . . . . . . . . . . . . . . . . . . . 10
01M-8831723200-1415-01

4 / 57 EN
Vacuum cleaner / User manual
Ths secton contans safety
nstructons that wll help protect
from rsk of personal njury or
property damage.
Falure to follow these nstructons
nvaldates the granted warranty.
1.1 General safety
•Ths applance comples wth the
nternatonal safety standards.
•Ths applance can be used by the
chldren who are at the age of 8 or
over and by the people who have
lmted physcal, sensory or mental
capacty or who do not have
knowledge and experence, as
long as they are supervsed wth
regard to safe use of the product
or they are nstructed accordngly
or understand the rsks of usng
the product. Chldren should not
play wth the applance. Cleanng
and mantenance works should
not be performed by chldren
unless they are supervsed by an
adult.
•Do not use t f the power cable or
the applance tself s damaged.
Contact an authorzed servce.
•Your mans power supply should
comply wth the nformaton
suppled on the ratng plate of the
applance.
•The mans supply of the applance
must be secured wth a mnmum
16 A fuse.
•Do not use the applance wth an
extenson cord.
•Prevent damage to the power
cable by not squeezng, bendng,
or rubbng t on sharp edges.
•Do not touch the plug of the
applance wth damp or wet hands.
•Do not pull the power cable when
unpluggng the applance.
•Do not vacuum flammable
materals and when vacuumng
cgarette ashes make sure that t
got cold.
•Do not vacuum water or other
lqud materals.
•Protect the applance from ran,
humdty and heat sources.
•Never use the applance n or near
to combustble or nflammable
places and materals.
•Unplug the applance before
cleanng and mantenance.
•Do not dp the applance or ts
cable n water to clean t.
•Check the hose of the applance
regularly. Do not use f t s
damaged and contact an
authorzed servce.
1Important nstructons for safety and envronment

Vacuum cleaner / User manual
5 / 57 EN
•Do not attempt to dsmantle the
applance.
•Only use the orgnal parts or
parts recommended by the
manufacturer.
•Do not use the applance wthout
flters; otherwse t can get
damaged.
•When vacuumng the stars, the
applance should be located below
the user.
•If you keep the packagng
materals, store them out of the
reach of chldren.
1.2 Complance wth the WEEE
Drectve and dsposal of
waste products
Ths applance does not nclude harmful
and prohbted materals specfed n the
“Regulaton for Supervson of the Waste
Electrc and Electronc Applances” ssued
by the Mnstry of Envronment and Urban
Plannng. Comples wth the WEEE Drectve. Ths
applance has been manufactured wth hgh
qualty parts and materals whch can be reused
and are sutable for recyclng. Therefore, do not
dspose the applance wth normal domestc
waste at the end of ts servce lfe. Take t to a
collecton pont for the recyclng of electrcal and
electronc equpment. Ask the local authorty n
your area for these collecton ponts. Contrbute to
the preservaton of envronment and natural
sources by takng the used products to the
recyclng ponts.
1.3 Package nformaton
Package of the product s made of
recyclable materals n accordance wth
our Natonal Legslaton. Do not dspose
of the packagng materals together wth
the domestc or other wastes. Take them to the
packagng materal collecton ponts desgnated
by the local authortes.
1Important nstructons for safety and envronment
6 / 57 EN
Vacuum cleaner / User manual
2.1 Overvew
The values which are declared in the markings affixed on your appliance or the other printed documents supplied with it represent the values which
were obtained in the laboratories pursuant to the pertinent standards. These values may vary according to the usage of the appliance and ambient
conditions.
2Your vacuum cleaner
1. Hose
2. Power cable re-wndng button
3. Sucton power adjustment and dust contaner
removal button
4. Carryng handle
5. Park channel
6. On/Off button
7. Wheel
8. Dust contaner
9. The hose cap
10. Dust contaner carryng handle
11. Upper cover
12. Parquet/carpet brush
13. Parquet/carpet brush adjustment latch
14. Telescopc tube
15. Telescopc tube adjustment latch
16. Accessory carrer
17. Sucton control
18. Handle
2.2 Techncal data
Ths applance comples wth the
European Drectves numbered
2004/108/EC, 2006/95/EC,
2009/125/EC and 2011/65/EU.
Nom. power :
1200 W
Supply voltage :
230 V~, 50 Hz
Dust container volume :
1.8 L
Rghts to make techncal and desgn changes are
reserved.
1
2 3
4
5
6
7
89
10
11
12
13
14
15
16
18
17

Vacuum cleaner / User manual
7 / 57 EN
3Operaton
3.1 Intended use
The applance was desgned to be used n houses,
and s not ft for ndustral use.
3.2 Attachng/removng the
hose
1. To attach the hose (1) pull the hose cap (9) n
the drecton of arrow untl t s algned wth the
housng.
•The tabs on the hose cap (9) must be seated
correctly.
2. To remove the hose (1) press on the tabs on the
hose cap (9) and pull t.
3.3 Attachng/removng the
telescopc tube
1. Attach the telescopc tube (14) to the handle
(18).
2. Pull the telescopc tube (14) from the handle
(18) to remove t.
3. Push the telescopc tube adjustment latch (15)
and pull the telescopc tube (14) to adjust ts
length.
3.4 Attachng/removng the
parquet/carpet brush
1. Attach the parquet/carpet brush (12) to the
telescopc tube (14) n the drecton of the
arrow.
2. You can remove the telescopc tube (14) from
the parquet/carpet brush (12) by pullng t.
3.5 Adjustng the parquet/
carpet brush
By pressng the adjustment latch (13) located on
the parquet/carpet brush (12);
•To vacuum on frm ground and parquet, extend
the brush before vacuumng.
•vacuum on carpets and rugs, retract the brush
before vacuumng.
3.6 Operaton
1. Plug the applance after pullng the power plug
located at the back of the applance.
A
WARNING:
Stop pullng the
applancecable when t comes to the
yellow mark located on t. After the
yellow mark the red mark comes. Do
not pull any more after reachng the
red mark.
2. Press on/off button (6) to swtch on your
applance.

8 / 57 EN
Vacuum cleaner / User manual
3.6.1 Adjustng the sucton
power
You can adjust the sucton power of the applance
by turnng the sucton power button (3) located on
the body of the devce clockwse accordng to the
type of the surface to be cleaned. To decrease the
sucton power turn the button counterclockwse.
3.7 Accessores
There s an accessory carrer (16) on the
telescopc tube (14) of the applance. You can use
t by attachng 2 accessores suppled wth the
applance.
C
If you do not want to use accessory
carrer (16), unscrew t wth the ad
of a screwdrver and remove t from
the telescopc tube (14).
Crevce tool
Suitable for the cleaning of the
surfaces which are difficult
to clean, such as the areas
remaining under the sofas and
furniture.
Upholstery Brush
Suitable for the cleaning of the
floorings, stair steps, inside of
the cars, sofas, armchairs etc.
Dust brush
Suitable for the cleaning of
curtains, and sensitive and
fragile objects.
AWARNING:
Do not make cleanng
by usng the handle's (18) end part.
3.8 Swtchng off the vacuum
cleaner and parkng feature
1. Swtch off the applance wth the on/off button
(6) and unplug t.
2. Wnd the electrc cable nsde the applance
by gently pullng and releasng the cable (the
applance wll automatcally take the cable
nsde) or by pressng the cable re-wndng
button (2)
Vertcal parkng
Insert the hook of the parquet/carpet brush (12)
nto the parkng channel located at the bottom
secton of the applance.
Horzontal parkng feature
Insert the hook of the parquet/carpet brush (12)
nto the parkng channel (5) located at the rear
secton of the applance.
3. You can carry the applance by holdng t from
the carryng handle (4).
3Operaton

Vacuum cleaner / User manual
9 / 57 EN
4Cleanng and mantenance
Swtch off and unplug the applance before
cleanng t.
AWARNING:
Never use gasolne,
solvent, abrasve cleanng agents,
metal objects or hard brushes to
clean the applance.
4.1 Dschargng the dust
contaner
When the dust contaner s full, the dust ndcator
“ ” llumnates.
1. Press the dust contaner removal button (3) to
remove the dust contaner (8) and remove the
dust contaner n the drecton of the arrow by
holdng from the Dust contaner carryng handle
(10).
2. Remove the upper cover (11) from the dust
contaner (8) by pushng t n the drecton of
the arrow.
3. Grp the dust contaner from ts carryng handle
(10) and turn t upsde down to dscharge.
4. Close the applance's upper cover (11).
5. Insert the dust contaner (8) nto ts place by
holdng t from the handle (18).
4.2 Cleanng the flters
Foam
flter
Ar outlet
flter
Hepa
flter
AWARNING:
Do not use applances
producng hot ar such as har dryer
or heater to dry the flters.

10 / 57 EN
Vacuum cleaner / User manual
A
WARNING:
Do not nstall the
flters wthout completely dryng
them; otherwse smell of mosture
may occur durng the use, water can
leak from the back of the applance
or the flters may get damaged.
AWARNING:
When the flters dry,
replace them nto ther postons.
4.2.1 Ar outlet flter
1. Open the ar outlet flter's cover located at the
back of the applance.
Ar outlet
flter
cover
2. Remove the ar outlet flter by holdng t from
the handle located on t.
3. Renstall t after shakng t off.
4.2.2 Hepa flter
1. Remove the dust contaner (8) (see 4.1).
2. Remove the hepa flter by holdng t from the
handle located on t.
3. Wash t under runnng water after shakng t
off.
4. Leave the hepa flter to dry after washng t.
4.2.3 Foam flter
1. After removng the hepa flter, you can see the
foam flter located behnd t.
2. Remove and wash the foam flter.
3. After washng the foam, gently wrng t and
leave t to dry.
4.3 Storage
•If you do not ntend to use the applance for a
long tme, store t carefully.
•Pull the applance's plug out.
•Keep the applance out of the reach of chldren.
4Cleanng and mantenance

Bitte lesen Sie zuerst diese Anleitung!
Werter Kunde,
Danke, dass Sie sich für ein Produkt der Marke Beko entschieden haben. Wir hoffen,
dass Sie mit diesem Produkt, das mit den höchsten Qualitätsanforderungen und der
modernsten Technologie hergestellt wurde, beste Ergebnisse erzielen. Bitte lesen Sie
diesegesamte Bedienungsanleitungund alleanderenBegleitdokumenteaufmerksam,
bevor Sie das Produkt verwenden; bewahren Sie sie zum künftigen Nachschlagen
sicher auf. Wenn Sie das Produkt an einen Dritten weitergeben, händigen Sie bitte
auch diese Anleitung aus. Befolgen Sie alle Warnhinweise und Informationen in dieser
Anleitung.
Symbole
Folgende Symbole werden in verschiedenen Abschnitten dieser Anleitung verwendet:
C
Wichtige Informationen und nützliche
Tipps in Bezug auf die Verwendung.
A
Warnhinweise zu gefährlichen
Situationen im Hinblick auf die
Sicherheit von Leib, Leben und
Eigentum.
Dieses Produkt wurde in umweltfreundlichen, hochmodernen Einrichtungen hergestellt
Das Gerät erfüllt de Vorgaben
der WEEE-Rchtlne. Es enthält ken PCB.
Hergestellt n: P.R.C.

12 / 57 DE
Staubsauger / Bedienungsanleitung
INHALT
1 Wchtge Scherhets- und
Umweltanwesungen 13-14
1.1 Allgemene Scherhet . . . . . . . . . . . . . . . . . . . . . 13
1.2 Konformtät mt der WEEE-Rchtlne
und Entsorgung von Altprodukten . . . . . . . . . . . 14
1.3 Informatonen zur Verpackung . . . . . . . . . . . 14
2 Ihr neuer Staubsauger 15
2.1 Überscht . . . . . . . . . . . . . . . . . . . . . . . . . . . . . . . . . . 15
2.2 Technsche Daten. . . . . . . . . . . . . . . . . . . . . . . . . 15
3 Bedenung 16-17
3.1 Bestmmungsgemäße Verwendung . . . . . . 16
3.2 Schlauch anbrngen und abnehmen . . . . . . 16
3.3 Teleskoprohr anbrngen und abnehmen. . 16
3.4 Parkett/Teppchbürste anbrngen
und abnehmen. . . . . . . . . . . . . . . . . . . . . . . . . . . . . . . . 16
3.5 Parkett-/Teppchbürste enstellen . . . . . . . 16
3.6 Betreb . . . . . . . . . . . . . . . . . . . . . . . . . . . . . . . . . . . . 16
3.6.1 Sauglestung anpassen . . . . . . . . . . . . . . . . . 17
3.7 Zubehör . . . . . . . . . . . . . . . . . . . . . . . . . . . . . . . . . . . 17
3.8 Staubsauger abschalten und parken . . . . . 17
4Rengung und Wartung 18-19
4.1 Auffangbehälter leeren . . . . . . . . . . . . . . . . . . . 18
4.2 Flter rengen . . . . . . . . . . . . . . . . . . . . . . . . . . . . . 18
4.2.1 Luftaustrttsflter . . . . . . . . . . . . . . . . . . . . . . . 19
4.2.2 HEPA-Flter . . . . . . . . . . . . . . . . . . . . . . . . . . . . . 19
4.2.3 Schaumflter . . . . . . . . . . . . . . . . . . . . . . . . . . . . 19
4.3 Aufbewahrung. . . . . . . . . . . . . . . . . . . . . . . . . . . . 19

Staubsauger / Bedienungsanleitung
13 / 57 DE
Deser Abschntt erklärt
Scherhetsanwesungen, de
bem Schutz vor Personen- und
Sachschäden helfen.
Be Nchtbeachtung deser
Anwesungen erlscht de gewährte
Garante.
1.1 Allgemene
Scherhet
•Deses Gerät stmmt
mt nternatonalen
Scherhetsstandards überen.
•Deses Gerät kann von Kndern
ab 8 Jahren sowe von Personen
mt reduzerten physschen,
sensorschen oder mentalen
Fähgketen oder Mangel an
Erfahrung und/oder Wssen
benutzt werden, wenn se
beaufschtgt oder bezüglch des
scheren Gebrauchs des Gerätes
unterwesen wurden und de
daraus resulterenden Gefahren
verstanden haben. Knder dürfen
ncht mt dem Gerät spelen.
Rengung und Benutzer-Wartung
dürfen ncht durch Knder
durchgeführt werden, es se denn,
se snd beaufschtgt.
•Verwenden Se das Produkt
ncht, falls Netzkabel oder Gerät
selbst beschädgt snd. Wenden
Se sch an enen autorserten
Servcemtarbeter.
•Ihre Stromversorgung muss mt
den Angaben am Typenschld des
Gerätes überenstmmen.
•De Stromversorgung des Gerätes
muss mt ener Scherung von
mndestens 16 A abgeschert
werden.
•Gerät ncht mt enem
Verlängerungskabel verwenden.
•Zur Vermedung von Schäden am
Netzkabel scherstellen, dass das
Kabel ncht engeklemmt, verdreht
oder über scharfe Kanten geführt
wrd.
•Berühren Se Stecker und Gerät
ncht mt feuchten oder nassen
Händen.
•Bem Trennen des Gerätes ncht
am Netzkabel selbst zehen.
•Kene brennbaren Materalen
aufsaugen; Zgarettenasche nur
dann aufsaugen, wenn dese
defntv kalt st.
•Saugen Se weder Wasser noch
andere Flüssgketen auf.
1Wchtge Scherhets- und Umweltanwesungen

14 / 57 DE
Staubsauger / Bedienungsanleitung
•Gerät vor Regen, Feuchtgket und
Wärmequellen schützen.
•Gerät nemals an oder n der Nähe
von Stellen benutzen, an denen
sch lecht brennbare oder gar
explosve Materalen befnden.
•Vor Rengung und Wartung den
Netzstecker zehen.
•Gerät und Kabel zur Rengung
ncht n Wasser tauchen.
•Schlauch des Gerätes regelmäßg
prüfen. Be Schäden ncht
verwenden; wenden Se
sch an enen autorserten
Servcemtarbeter.
•Ncht versuchen, das Gerät zu
demonteren.
•Nur Orgnaltele und vom
Hersteller empfohlene Tele
verwenden.
•Gerät nchtohne Flter verwenden;
andernfalls können Schäden
auftreten.
•Bem Saugen von Treppen
sollte sch das Gerät unter dem
Anwender befnden.
•Be Aufbewahrung der
Verpackungsmateralen dese
von Kndern fernhalten.
1.2 Konformtät mt der WEEE-
Rchtlne und Entsorgung von
Altprodukten
Deses Produkt enthält kene der n der
vom Mnsterum für Umwelt und
Städteplanung ausgestellten
„Regulerung zur Überwachung von
elektrschen und elektronschen Altgeräten“
angegebenen gefährlchen und verbotenen
Materalen. Deses Gerät stmmt mt der WEEE-
Rchtlne überen. Deses Produkt wurde aus
hochwertgen Telen und Materalen hergestellt,
de wederverwendet werden können und zum
Recyclng geegnet snd. Deshalb darf das Gerät
am Ende sener Ensatzzet ncht mt dem
normalen Hausmüll entsorgt werden. Geben Se
das Gerät be ener Sammelstelle für das Recyclng
von elektrschen und elektronschen Geräten ab.
Erkundgen Se sch be der örtlchen Behörde n
Ihrer Regon nach desen Sammelstellen. Lesten
Se Ihren Betrag zur Schonung von Umwelt und
natürlchen Rohstoffen, ndem Se Altprodukte zu
entsprechenden Recyclngstellen brngen.
1.3 Informatonen zur
Verpackung
De Verpackung des Produkts wurde
gemäßunserernatonalenGesetzgebung
aus recyclngfähgen Materalen
hergestellt. Entsorgen Se de
Verpackungsmateralen ncht mt dem Hausmüll
oder anderem Müll. Brngen Se se zu von den
lokalen Behörden beretgestellten Sammelstellen.
1Wchtge Scherhets- und Umweltanwesungen

Staubsauger / Bedienungsanleitung
15 / 57 DE
2.1 Überscht
Die am Gerät oder in der Dokumentation angegebenen Werte wurden nach maßgeblichen Standards unter Laborbedingungen ermittelt. Diese Werte
können je nach Einsatz- und Umgebungsbedingungen variieren.
2Ihr neuer Staubsauger
1. Schlauch
2. Taste zur Kabelwcklung
3. Sauglestungsenstellknopf und
Auffangbehälter-Fregabetaste
4. Tragegrff
5. Parkkanal
6. En-/Austaste
7. Rad
8. Auffangbehälter
9. Schlauchanschlussstück
10. Auffangbehälter-Tragegrff
11. Obere Abdeckung
12. Parkett-/Teppchbürste
13. Enstellregel der Parkett/Teppch-Bürste
14. Teleskoprohr
15. Teleskoprohrverstellung
16. Zubehörhalter
17. Saugregler
18. Grff
2.2 Technsche Daten
Deses Gerät erfüllt de Vorgaben
der europäschen Rchtlnen
2004/108/EC, 2006/95/EC,
2009/125/EC und 2011/65/EU.
Nennleistung :
1200 W
Versorgungsspannung :
230 V
Wechselspannung, 50 Hz
Auffangbehältervolumen:
1,8 L
Technsche und optsche Änderungen
vorbehalten.
1
2 3
4
5
6
7
89
10
11
12
13
14
15
16
18
17

16 / 57 DE
Staubsauger / Bedienungsanleitung
3Bedenung
3.1 Bestmmungsgemäße
Verwendung
Deses Gerät st ausschleßlch zum Ensatz m
Haushalt, ncht für ndustrelle oder kommerzelle
Zwecke vorgesehen.
3.2 Schlauch anbrngen und
abnehmen
1. Zum Anschleßen des Schlauches (1) scheben
Se das Schlauchanschlussstück (9) bs zum
Anschlag n das Gehäuse.
•De Laschen des Schlauchanschlussstücks (9)
müssen rchtg stzen.
2. Zum Trennen des Schlauches (1) drücken Se
de Sperren am Schlauchanschlussstück (9) en
und zehen den Schlauch heraus.
3.3 Teleskoprohr anbrngen
und abnehmen
1. Teleskoprohr (14) am Grff (18) anbrngen.
2. Teleskoprohr (14) zum Entfernen aus dem Grff
(18) zehen.
3. Teleskoprohrverstellung (15) drücken und
das Teleskoprohr (14) anschleßend auf de
gewünschte Länge auszehen.
3.4 Parkett/Teppchbürste
anbrngen und abnehmen
1. Parkett/Teppch-Bürste (12) n Pfelrchtung
am Teleskoprohr (14) anbrngen.
2. Se können das Teleskoprohr (14) durch Zehen
von der Parkett/Teppch-Bürste (12) entfernen.
3.5 Parkett-/Teppchbürste
enstellen
Drücken Se den Enstellregel (13) auf der Parkett/
Teppch-Bürste (12);
•Fahren Se de Bürsten aus, wenn Se festen
Boden oder Parkett absaugen möchten.
•bem Saugen von Teppchen und Läufern Bürste
vor dem Saugen enfahren.
3.6 Betreb
1. Gerät nach Herauszehen des Netzkabels an der
Rücksete des Gerätes anschleßen.
A
WARNUNG:
Zehen Se das
Netzkabelnchtweterheraus,wenn
de gelbe Markerung erschent.
Nach der gelben Markerung folgt
ene rote Markerung. Zehen Se
das Kabel kenesfalls über de
rote Markerung hnaus aus dem
Gehäuse.
2. Zum Enschalten des Gerätes de En-/Austaste
(6) drücken.

Staubsauger / Bedienungsanleitung
17 / 57 DE
3.6.1 Sauglestung anpassen
Se können de Sauglestung des Gerätes
entsprechend der zu rengenden Oberfläche
anpassen, ndem Se den Sauglestungsknopf (3)
am Gehäuse des Gerätes m Uhrzegersnn drehen.
Zum Verrngern der Sauglestung drehen Se den
Knopf gegen den Uhrzegersnn.
3.7 Zubehör
Am Teleskoprohr (14) des Gerätes befndet
sch en Zubehörhalter (16). Mt hm können 2
mtgeleferte Zubehörtele am Gerät befestgt
werden.
C
Wenn Se den Zubehörhalter
(16) ncht verwenden möchten,
entfernen Se hn mt Hlfe
enes Schraubenzehers vom
Teleskoprohr (14).
Fugendüse
Zum Rengen schwerg
errechbarer Stellen,
bespelswese zwschen
Polstern, n Ecken und unter
Möbeln.
Polsterdüse
Geegnet zum Saugen von
Böden, Treppenstufen,
Fahrzeugnnenräumen, Sofas,
Armlehnen etc.
Staubbürste
Egnet sch für de Rengung
von Vorhängen, empfndlchen
und zerbrechlchen
Gegenständen.
AWARNUNG:
Ncht mt Hlfe
des Abschlusstels des Grffs (18)
saugen.
3.8 Staubsauger abschalten
und parken
1. Gerät über de En-/Austaste (6) ausschalten
und Netzstecker zehen.
2. Wckeln Se das Netzkabel auf – dazu zehen
Se das Kabel sanft en Stückchen heraus
und lassen es dann los (das Gerät wckelt das
Kabel selbsttätg auf) oder drücken enfach de
Kabelaufwcklungstaste (2).
Aufrecht abstellen
Haken der Parkett/Teppch-Bürste (12) n
den Parkkanal an der Untersete des Gerätes
ensetzen.
Waagerechtes Abstellen
Haken der Parkett/Teppch-Bürste (12) n den
Parkkanal (5) an der Rücksete des Gerätes
ensetzen.
3. Mt dem Tragegrff (4) können Se Ihr Gerät
bequem transporteren.
3Bedenung

18 / 57 DE
Staubsauger / Bedienungsanleitung
4Rengung und Wartung
Vor der Rengung Gerät abschalten und
Netzstecker zehen.
A
WARNUNG:
Rengen Se
das Gerät nemals mt Benzn,
Lösungsmtteln, Scheuermtteln,
Metallgegenständen, harten
Bürsten oder ähnlchen Hlfsmtteln.
4.1 Auffangbehälter leeren
Wenn der Auffangbehälter voll st, leuchtet de
Staubanzege „ “.
1. Auffangbehälter-Fregabetaste (3) zum
Entfernen des Auffangbehälters (8)
drücken; Auffangbehälter durch Halten
am Auffangbehälter-Tragegrff (10) n
Pfelrchtung herausnehmen.
2. Entfernen Se de obere Abdeckung (11)
vom Auffangbehälter (8), ndem Se se n
Pfelrchtung drücken.
3. Nehmen Se den Auffangbehälter vom
Tragegrff (10) und drehen Se hn zum
Entleeren um.
4. Schleßen Se de obere Abdeckung (11) des
Gerätes.
5. Auffangbehälter (8) ensetzen, dabe am Grff
(18) halten.
4.2 Flter rengen
Schaumstoffflter
Abluftflter HEPA-Flter
A
WARNUNG:
Versuchen Se
ncht, das Trocknen der Flter
mt Haartrocknern, Hezungen
oder ähnlchen Hlfsmtteln zu
beschleungen.

Staubsauger / Bedienungsanleitung
19 / 57 DE
A
WARNUNG:
Installeren
Se de Flter erst dann weder,
wenn dese komplett getrocknet
snd. Andernfalls können sch
unangenehme Gerüche blden,
Wasser kann an der Rücksete des
Gerätes austreten, de Flter können
beschädgt werden.
AWARNUNG:
Setzen Se de Flter
weder en, wenn dese vollständg
getrocknet snd.
4.2.1 Luftaustrttsflter
1. Abdeckung des Luftaustrttsflters an der
Rücksete des Gerätes öffnen.
Luftaustrtt
Flterabdeckung
2. Entfernen Se den Luftaustrttsflter, ndem Se
hn am Grff halten.
3. Bauen Se hn weder en, nachdem Se hn
abgeschüttelt haben.
4.2.2 HEPA-Flter
1. Auffangbehälter (8) entfernen (sehe 4.1).
2. HEPA-Flter durch Halten am Grff entfernen.
3. Nach dem Lösen unter fleßendem Wasser
rengen.
4. HEPA-Flter nach dem Rengen trocknen
lassen.
4.2.3 Schaumflter
1. Nachdem Se den HEPA-Flter entfernt
haben, können Se den dahnter befndlchen
Schaumflter sehen.
2. Entfernen Se den Schaumflter.
3. Nach dem Waschen, wrngen Se den Flter
sanft aus und lassen Se hn trocknen.
4.3 Aufbewahrung
•Verstauen Se das Gerät sorgfältg, falls Se es
längere Zet ncht benutzen sollten.
•Zehen Se den Netzstecker aus der Steckdose.
•Halten Se das Gerät von Kndern fern.
4Rengung und Wartung

Lütfen önce bu kılavuzu okuyun!
Değerli Müşterimiz,
Beko ürününü tercih ettiğiniz için teşekkür ederiz. Yüksek kalite ve teknoloji ile üretilmiş
olan ürününüzün size en iyi verimi sunmasını istiyoruz. Bunun için, bu kılavuzun
tamamını ve verilen diğer belgeleri ürünü kullanmadan önce dikkatle okuyun ve bir
başvuru kaynağı olarak saklayın. Ürünü başka birisine verirseniz, kullanma kılavuzunu
da birlikte verin. Kullanma kılavuzunda belirtilen tüm bilgi ve uyarıları dikkate alarak
talimatlara uyun.
Sembollerin anlamları
Bu kullanma kılavuzunun çeşitli kısımlarında aşağıdaki semboller kullanılmıştır:
C
Cihazın kullanımıyla ilgili önemli
bilgiler ve faydalı tavsiyeler.
A
Can ve mal güvenliğiyle ilgili tehlikeli
durumlar konusunda uyarılar.
Bu ürün çevreye saygılı modern tesislerde doğaya zarar vermeden üretilmiştir.
AEEE Yönetmeliğine Uygundur. PCB içermez.
Menşei: P.R.C.
Other manuals for BKS 5422 D
1
Table of contents
Languages:
Other Beko Vacuum Cleaner manuals

Beko
Beko VCO32801AR User manual

Beko
Beko BKS 1410 User manual

Beko
Beko VCC 44821 AR User manual

Beko
Beko VCO 6325 AB User manual

Beko
Beko VCO 62607 AD User manual

Beko
Beko BKS 2125 User manual

Beko
Beko BKS 2226 User manual

Beko
Beko BKS 1248 User manual

Beko
Beko VRT 74225 VI User manual

Beko
Beko VRT 84225 VI User manual

Beko
Beko BKS 9220 T User manual

Beko
Beko BKK 1182 P User manual

Beko
Beko VCO 32801 AF User manual

Beko
Beko VCS 6135 AR User manual

Beko
Beko 01M-8912603200-3822-03 User manual

Beko
Beko VRT 61814 VR User manual

Beko
Beko 01M-8837973200-0819-03 User manual

Beko
Beko VCC 6480 T User manual

Beko
Beko VRT 82821 BV User manual

Beko
Beko VRW 80318 VB User manual