Merach MR-R07 User manual

USER MANUAL
MERACH MR-R07 SQUAT RIDER MACHINE
Questions or Concerns?
IMPORTANT!
Please read all details before use, and keep this user manual for future reference.
PLEASE CONTACT US BEFORE THE RETURN: Mon-Fri,9:00 am-5:00 pm PST/PDT
Please read the entire manual carefully
before installing and using the machine,
and save for further use.
Safety Instructions··························································01
Specifications································································03
Parts List······································································04
Parts and Accessories List···············································05
Assembly Instructions·····················································06
Instructions for the Monitor···············································11
Adjustment Instructions···················································12
Folding Instructions························································13
Warm-up······································································14
Warranty Informations·····················································15
Contents
Contents

Please keep this manual in a safe place for future reference.
It is very important to read the entire manual thoroughly before installing and using
the machine. Safe and effective training can only be achieved if the machine is
properly assembled, properly maintained and used. Make sure all users are familiar
with all warnings and precautions of this machine.
Please consult your physician to determine if you have any medical or physical
conditions that could put your health and safety at risk or prevent you from using
the equipment properly. Your physician's advice is essential if you are taking
medication that affects your heart rate, blood pressure, or cholesterol level.
Please always pay attention to your body signals, improper use of the machine may
affect your health. If you experience any symptoms (including headache, chest pain,
irregular heartbeat, shortness of breath, dizziness, or any discomfort), stop
exercising immediately and consult your physician, get the permission before
training again.
Always keep children and pets away from the machine. The machine is for adult use
only.
Please use this machine on stable and horizontal ground level, and put a protective
layer on the floor or carpet to prevent a floor from damaging. Make sure the distance
between the machine and each obstacle is at least 1.6 ft (0.5m).
Please check all screws and nuts are properly tightened before using the machine.
The safe use of the machine can only be guaranteed if the regular maintenance and
repairs of undertaken, and worn out and broken parts are changed.
Please follow the instructions in this manual to use this machine. Please stop using
and operating immediately when you find any defective parts or hear any abnormal
sound. Make sure all issues are resolved before using it again.
Please wear sports clothes, sports shoes, or other proper clothes. Loose-fitting
clothing is not recommended, as loose clothing may get caught in the machine,
hindering operation and possibly causing an injury.
This machine is only for home use. The Maximum user weight is 243 lbs.
SafetyInstructions
01
02
This machine is not for professional medical treatment.
This product is only for family use.
The overall performance of the machine and all moving parts must be checked
regularly to ensure the safety of the machine.
If the moving parts are damaged, please do not use the machine until the parts
are repaired.
Keep the children away from the machine. The equipment is not for children to use
or play with. They can injure themselves accidentally.
Care & Maintenance
Do not store the machine in a place exposed to direct sunlight, wind and rain,
or with high humidity. If needed, please pack the machine to keep children away
from touching or playing with it.
Please check if there’s rust or cracks after long-term storage.
Please understand that for the consumable parts, the wear and tear may also occur
even with proper maintenance.
For long-term use of this machine, please wipe the dust regularly. Do not water it
directly, or wipe it with gasoline, abrasive powder, etc. Otherwise, it might cause
cracks on the parts or main body, electric shock or fire. Please use Dilute neutral
detergent for maintenance.
Before starting any training, please consult your physician,
especially for those who are over 35 years old or with
pre-existing health conditions. Please read all
instructions before using the machine.
SafetyInstructions
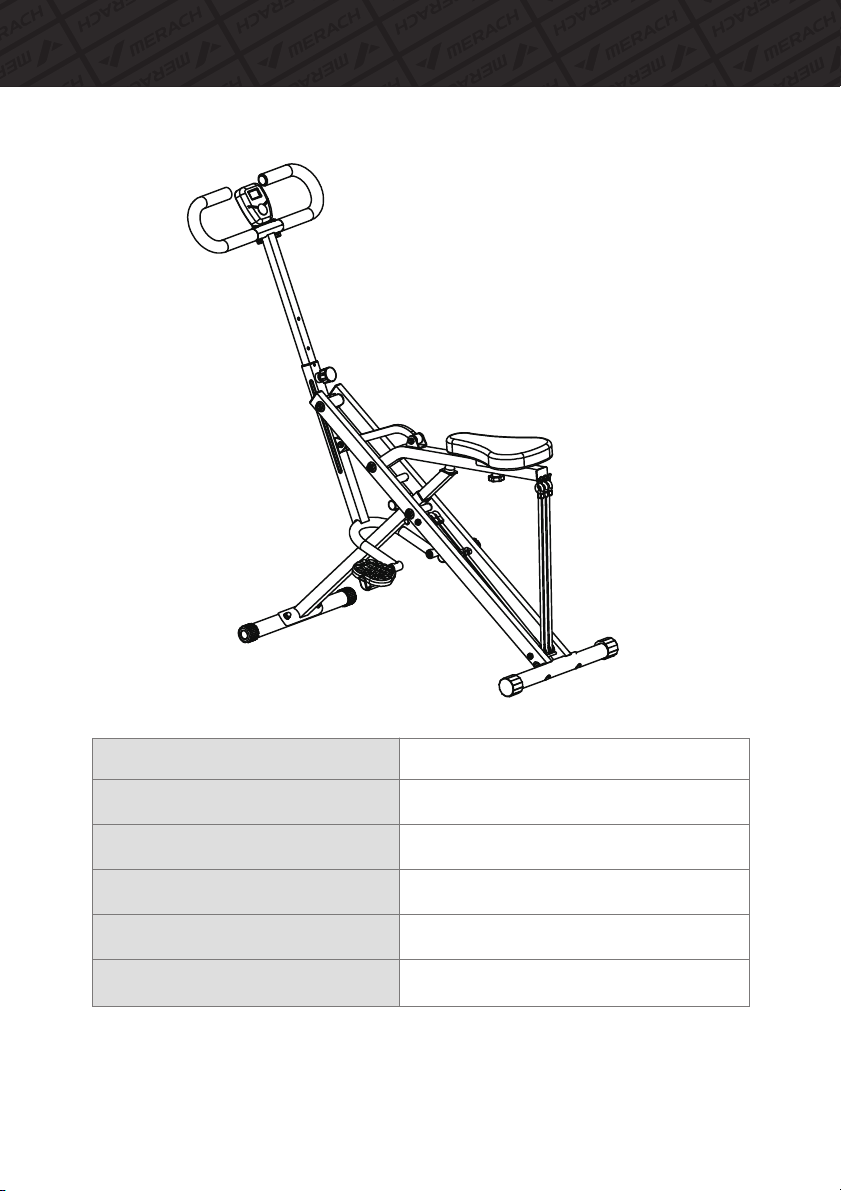
ProductName:
Model:
Max.UserWeight:
ItWeight:
ItemDimensions:
ItemPackageDimensions:
Specifications
SquatRiderMachine
MR-R07
243lbs
11kg(24.4pounds)
43.3*19.3*49inch
43.9*8.07*7.87inch
03
Table of contents
Other Merach Fitness Equipment manuals

Popular Fitness Equipment manuals by other brands


G-FITNESS
G-FITNESS AIR ROWER user manual

CAPITAL SPORTS
CAPITAL SPORTS Dominate Edition 10028796 manual

Martin System
Martin System TT4FK user guide

CIRCLE FITNESS
CIRCLE FITNESS E7 owner's manual

G-FITNESS
G-FITNESS TZ-6017 user manual

Accelerated Care Plus
Accelerated Care Plus OMNISTIM FX2 CYCLE/WALK user manual


