Ruris 732 ACC User manual

EN
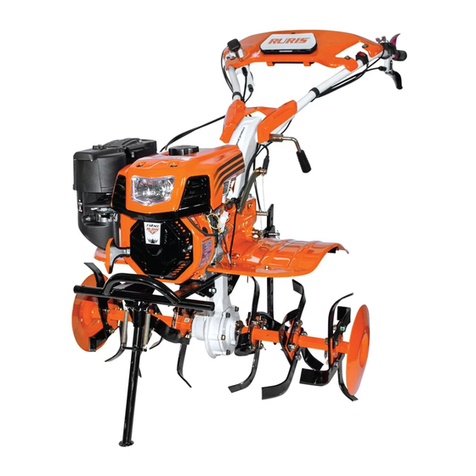
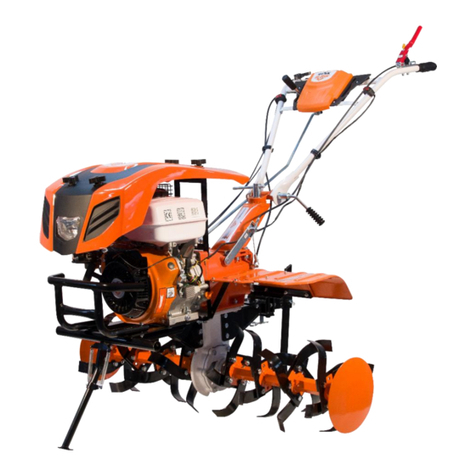
PROFESSIONAL TILLER
RURIS 732 ACC

EN
CONTENT
1. Introduction ......................................................................................4
2. Safety instructions ...........................................................................5
2.1 Warnings per machine ...................................................................................... 5
3. Overview machine Overview ...........................................................9
4. Technical data .............................................................................. 10
5. Assembly ...................................................................................... 11
6 Fuel and oil supply. ........................................................................ 18
6.1 Oil supply ........................................................................................................ 18
6.2 Fuel supply ..................................................................................................... 20
7. Pre-operative checks .................................................................... 20
8. Run in period ................................................................................ 21
9 Commissioning. ............................................................................. 21
10. Symptomatic starting problems .................................................. 24
11. Maintenance ............................................................................... 24
12. Packing and storage of equipment ............................................. 25
12.1 Packing .........................................................................................................25
12.2 Storage ......................................................................................................... 25
13. Accessories compatible with the machine .................................. 26
14. Coupling accessories .................................................................. 28
14.1 Plow coupling ................................................................................................ 28

EN
3
14.2 Coupling potato peeler ..................................................................................28
14.3 Cultivator coupling .........................................................................................29
14.4 Adjustable rar coupling ..................................................................................29
14.5 Tow coupling .................................................................................................30
14.7 SEED DRILL coupling on 3 rows TS3 ............................................................30
14.8 PTS2 high precision seed drill coupling .........................................................31
14.9 Deep control coupling and DITCHER ............................................................31

EN
4
1. INTRODUCTION
Dear customers!
Thank you for your decision to buy a RURIS product and for your trust in our company!
RURIS has been on the market since 1993 and during all this time has become a strong
brand, which has built its reputation by keeping its promises, but also by continuous
investments designed to help customers with reliable, efficient and quality solutions.
We are convinced that you will appreciate our product and enjoy its performance for a
long time. RURIS not only offers its customers equipment, but complete solutions. An
important elementin the relationship withthe customer is the advice both before sale and
after sales, RURIS customers having at their disposal a whole network of partner stores
and service points.
To enjoy the product you bought, please browse with attention manual use. By following
the instructions, you will be guaranteed a long use.
RURIS works continuously for thedevelopment of its products andtherefore reserves the
right to change, among other things, their shape, appearance and performance, without
having to communicate this in advance.
Thank you once again for choosing RURIS products!
Customer information and support:
Phone: 0351.820.105
e-mail: info@ruris.ro

EN
5
2. SAFETY INSTRUCTIONS
2.1 WARNINGS PER MACHINE
Warning ! Danger !
Attention ! Flammable material .
Beware of rotary cutters. Keep your hands and feet away while the
machine is operating.
Careful! Asphyxiating atmosphere. Do not start the machine in closed
spaces..
Careful! Hot surfaces.
Careful! Risk of bodily injury to people near the machine.

EN
6
Careful! Start the cutters only with the guards installed.
Careful! Keep your distance.
The operator must wear Personal Protective Equipment (PPE). If the
machine is in use, you must wear protective glasses against objects
projected in the air, you must wear hearing protection such as an
acoustically insulated helmet.
Read the instruction manual before use.
Do not touch the moving parts of the machine.
Do not dispose of the machine or its components in household waste.
Do not insert the hand.

EN
7
2.2 WARNINGS
Practice :
a) Read the instructions carefully. Familiarize yourself with the controls and proper use
of the machine.
b) Never allow children or persons unfamiliar with these instructions to use the machine.
c) Never work when people, especially children or pets are nearby.
d) The user is responsible for accidents or dangers that occur to other people or their
property..
Training:
a) Always wear safety shoes and long pants when working. Do not use the machine
when you are barefoot.
b) Carefully inspect the area where the equipment will be used and remove all
objects that can be thrown from the machine.
c) WARNING - Gasoline is highly flammable:
- store fuel in specially designed containers.
- only refuel outdoors and do not smoke while refueling.
- add fuel before starting the engine. Never remove the tank cap or add gasoline
while the engine is running or when the engine is hot.
- if petrol has been spilled on the machine, do not try to start the engine, move the
machine away from the spill area and avoid creating any source of ignition until
the petrol vapors have evaporated.
- make sure the tank cap seals tightly when tightened. If it is damaged, replace it.
d) If the muffler is damaged, replace it.
e) Before use, always visually check the component parts of the machine. Replace
worn or damaged elements and screws.

EN
8
Operation :
a) Do not start the engine inenclosed spaces where dangerous carbon monoxide vapors
may accumulate.
b) Work only in daylight or in spaces with good artificial light.
c) While using the machine, walk after it, do not run.
d) Be extremely careful when changing direction on slopes. Do not use the machine on
slopes greater than 10°.
e) When working on a slope, keep the fuel tank slightly above half to minimize the risk of
fuel spillage.
e) Be extremely careful when using the machine in reverse or when pulling it towards
you.
f) Start the engine carefully, according to the manufacturer's instructions and with your
feet away from the cutting blades.
g) Do not put your hands or feet near or under the moving parts of the machine.
h) Stop the engine before refueling or when leaving the machine.
i) Do not block the clutch engagement lever or engine stop lever. Before use, make sure
it is working properly.
j) Do not use other types or sizes of tires than those recommended by the manufacturer.
k) All operations related to maintenance, adjustment and service must be carried out with
the engine of the machine stopped.

EN
9
3. OVERVIEW MACHINE OVERVIEW
Tiller is composed of the following elements:
Fuel tank
Knives
Air filter
Engine stop lever
Clutch coupling lever
Oil bath cap
Starter
Gearbox cap
Toolbox
Gear switch lever
Support
Hexagon axis
Working depth
adjustment support
Handlebar height
adjustment lever
Handlebar frame

EN
10
4 . TECHNICAL DATA
WARNING:
The tiller is not delivered with oil in the engine unit. Before commissioning, check and fill
with engine-recommended oil according to the instructions in the manual.
In the engine oil bath there is oil below the level, which is only for preservation and not
for operation.
Motor
General Engine
Operating cycle
4 times
Power net
7.5 hp
Power Maxim
8.5 hp
Cylindrical capacity
208 cc
Ignition system _
Electronic
Lever stop expedite
Standard equipment
Starting
manually
System enLIGHTENment
-
Gear shifter _
Comfort - fast
Transmission
gears in the oil bath
HOUSING transmission
Nodular Cast Iron
operation cable
Mechanics
speeds
2 forward + 1 backward
Working width
560-830 mm
Working depth
Max 340 mm
Combustible
Benzine lead free
Tank capacity
3.6l
Consumption environment
combustible
1l/h
Engine oil bath
0.6l
Oil bath _ transmission
2.2l
Weight
86 kg

EN
11
Surface average work
600-1000 sq/h
Guarantee
24 months
NOTES: Maximum power is the engine power, at the bench, without air filter andmuffler.
Net power is the engine power with air filter and muffler.
Change the engine oil every 25 hours of operation, and on transmission every 50
hours of operation or 6 months.
5. ASSEMBLY
The video montage can be viewed at: https://www.ruris.ro/filme-montaj
Component parts

EN
12
Mount the horns in position, fixing with the horn tightening lever.

EN
13
Mount the support / depth adjustment leg, securely fixing the bolt.
Adjust the cable voltage for the gearbox.

EN
14
Insert the bushing and engage the cable with the gearbox lever, securely fixing it to the
bolt.
Connect the gearbox cable with the lever, fixing them with the bolt and safety.
Mount the back support of the wings, fixing it with the 2 screws.

EN
15
Mount the front supports of the wings.
Place the wings in position and secure.
Attach the table cable to the tank holder.

EN
16
Mount the horn ornament and secure it to the screws.
For the hull mounting the unscrewing of the cap is necessary.

EN
17
Connect the cable of the engine-stop safety lever and secure the ground cable on the
tank support.
Connect the group of cable-headlight to the engine and to the on-off command button

EN
18
Fully assembled machine.
The images are for information purposes, the supplier reserves the right to make
structural and functional changes to the machine presented in this manual.
6 FUEL AND OIL SUPPLY.
6.1 OIL SUPPLY
Engine oil supply
Before starting the engine, power the engine with RURIS 4T-MAX oil or an API: CI-4 / SL
or higher.
Engine oil bath capacity 0.6L
Oil level
The tiller is not delivered with oil in the engine, reducer and transmission.

EN
19
ATTENTION! Before each use, check the oil level in the engine oil bath (Fig. 4) and from
the transmission assembly (Fig. 5) and top up to be at the maximum level.
Fig. 5 - Checking the oil level on the engine
Fig. 5 - Check the oil level of the transmission
If you do not check the oil level (engine and transmission) you risk destroying the engine
and transmission.
Always, before each start, gently pull the starter string from the engine (at most 4 times
the start button on the OFF position ) for the oil to enter all cylinder holes, valves.
Otherwise, if you try to start the engine suddenly by pulling the starter directly, you risk
gripping the engine or severely damaging it.
Oil supply of the transmission
The capacity of the oil bath of the transmission is 2200 ml.

EN
20
Use RURIS G-Tronic transmission oil or API: GL-4 times its size. The maximum oil level
of the reducer is at the bottom of the feed hole located on the right side of the reducer.
The tiller is not delivered with oil in the reducer bath.
THE TRANSMISSION OIL EXCHANGE IS DONE AT EACH 50 FUNCTIONING HOURS
OR 6 MONTHS
6.2 FUEL SUPPLY
Use quality fuel from authorized Peco stations.
Fuel BENZINE WITHOUT LEAD of the highest quality, using a metal funnel, in open
spaces and away from sources of fire or sparks, which could cause a fire.
ATTENTION!
Do not feed on the ground or near plants, as you risk damaging the environment.
7. PRE-OPERATIVE CHECKS
1. Check that all screws are tightened and adjust them if necessary.
2. Check each handlebar handle (acceleration lever, gearbox and reverse) to
check their functionality. If the positions of the handles are incorrect, adjust
them to be in the appropriate positions.
3. Move the gearbox to the neutral position.
4. Oil completion.
- Fill the engine oil bath with lubricating oil RURIS 4T-MAX .
- Place the machine on a flat surface while feeding with transmission
oil in the gearbox.
- To check the oil level use the oil dipstick, the oil must be at its
maximum level.
- Check for oil spills.
- Check the air filter decanter glass.
- Add oil to the air filter.
Other manuals for 732 ACC
1
Table of contents
Other Ruris Tiller manuals