4 — English
Do not hang unit so that the switch trigger is depressed.
Battery tools do not have to be plugged into an electrical
outlet; therefore, they are always in operating condition.
Be aware of possible hazards when not using your bat-
tery tool or when changing accessories. Following this
rule will reduce the risk of electric shock, fire, or serious
personal injury.
Do not charge battery tool in rain, or damp or wet location.
Following this rule will reduce the risk of electric shock.
Do not use battery-operated appliance in rain.
Remove or disconnect battery before servicing, cleaning
or removing material from the gardening appliance.
Use battery only with charger listed. For use with 18V
nickel-cadmium and lithium-ion battery packs. See Tool/
Appliance/BatteryPack/ChargerCorrelationSupplement
987000-432.
Do not dispose of the batteries in a fire. The cell may
explode. Check with local codes for possible special
disposal instructions.
Donot openor mutilatethe batteries.Released electrolyte
is corrosive and may cause damage to the eyes or skin.
It may be toxic if swallowed.
Do not place battery tools or their batteries near fire or
heat. This will reduce the risk of explosion and possibly
injury.
Batteries can explode in the presence of a source of
ignition, such as a pilot light. To reduce the risk of seri-
ous personal injury, never use any cordless product in
the presence of open flame. An exploded battery can
propel debris and chemicals. If exposed, flush with water
immediately.
Do not crush, drop or damage battery pack. Do not
use a battery pack or charger that has been dropped or
received a sharp blow. A damaged battery is subject to
explosion. Properly dispose of a dropped or damaged
battery immediately.
Exercise care in handling batteries in order not to short the
battery with conducting materials suchas rings, bracelets,
and keys. The battery or conductor may overheat and
cause burns.
For best results, your battery tool should be charged in
a location where the temperature is more than 50°F but
less than 100°F. To reduce the risk of serious personal
injury, do not store outside or in vehicles.
Under extreme usage or temperature conditions, battery
leakage may occur. If liquid comes in contact with your
skin, wash immediately with soap and water. If liquid gets
into your eyes, flush them with clean water for at least 10
minutes,thenseek immediate medicalattention.Following
this rule will reduce the risk of serious personal injury.
Save these instructions. Refer to them frequently and
use them to instruct others who may use this power tool.
If you loan someone this power tool, loan them these
instructions also.
Do not operate the machine without wearing adequate
outer garments. Avoid loose garments or jewelry that
could get caught in moving parts of the machine or its
engine.
Do not put hands or feet near or under tines.
Always refer to the operator’s manual for important details
if the cultivator is to be stored for an extended period.
Do not use near underground electric cables, telephone
lines, pipes, or hoses. If in doubt, contact your utility or
telephone company to locate underground services.
If the unit strikes a foreign object, stop the motor, discon-
nect the battery pack, thoroughly inspect the machine for
any damage, and repair the damage before restarting and
operating the machine.
Stop the motor and disconnect the battery pack before
unclogging the tines and when making any repairs, ad-
justments, or inspections.
Do not overload the machine capacity by cultivating too
deep in a single pass or at too fast a rate.
Stay alert. Watch what you are doing. Use common sense.
Do not operate cultivator when you are tired, ill, or upset.
Be aware that the equipment may unexpectedly bounce
upward or jump forward if the tines should strike buried
obstacles such as large stones, roots, or stumps.
Do not use any attachments or accessories not recom-
mended by the manufacturer of this product.
Never operate the equipment on a slope.
Use extreme caution when pulling the machine towards
you.
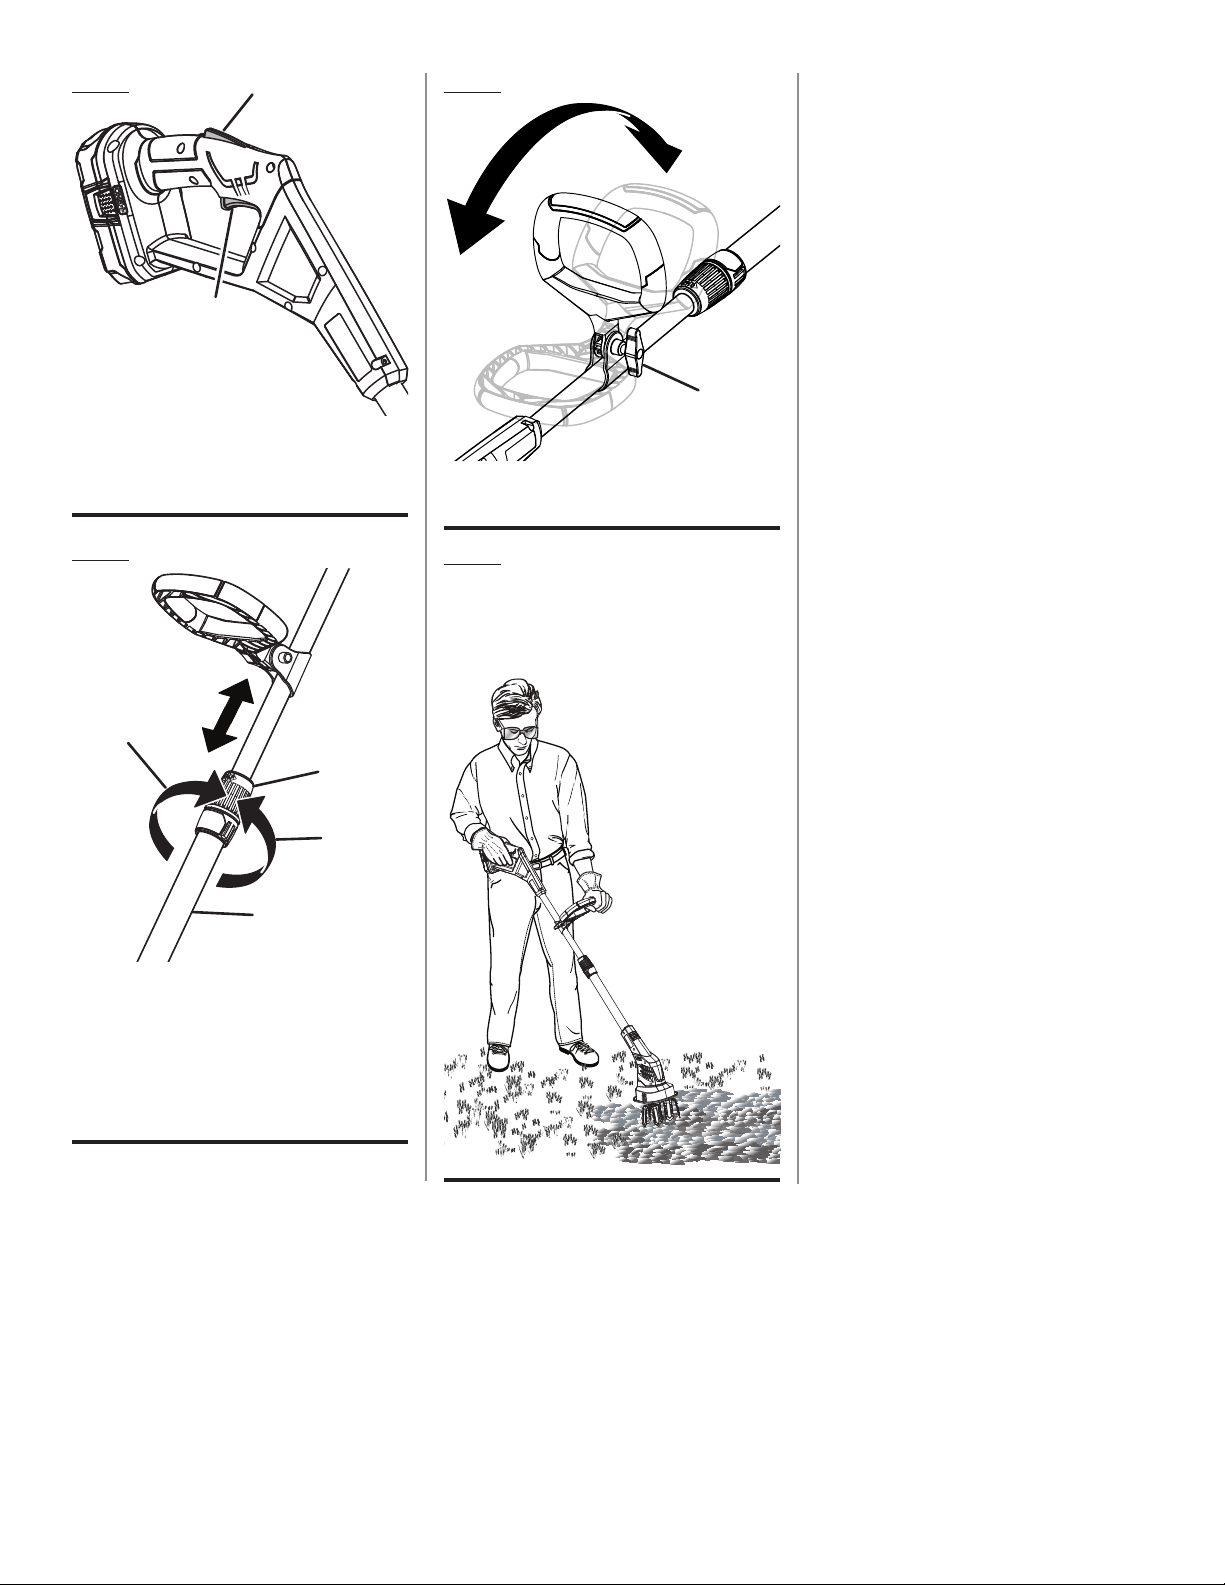
Start the unit carefully according to instructions from a
normal operating position and with feet well away from
the tines. Do not force cultivator. It will do the job better
and with less likelihood of a risk of injury at the rate for
which it was designed.
Maintain cultivator with care. Keep tines clean for best
performance and reduce the risk of injury. Follow instruc-
tions for lubrication and changing accessories. Inspect
tines periodically and, if damaged, have them replaced.
Keep handles dry, clean, and free from grease and lubri-
cant.
Check damaged parts. Before further use of this cultivator,
a guard or other part that is damaged should be care-
fully checked to determine that it will operate properly
and perform its intended function. Check for alignment
of moving parts, binding of moving parts, breakage of
parts, mounting, and any other condition that may af-
fect its operation. A guard or other part that is damaged
should be properly repaired or replaced by an authorized
service center unless otherwise indicated elsewhere in
this manual.
Stop the unit and disconnect the power source when not
in use. Carry the unit with the motor stopped.
Store out of the reach of children.
IMPORTANT SAFETY INSTRUCTIONS