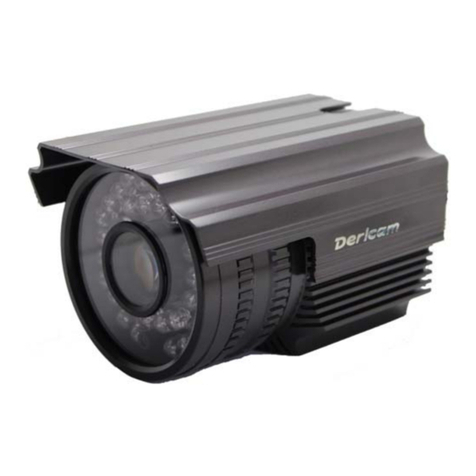
Messoa Maven Series User manual

User
Manual
201502 A4
Network Camera
Maven Series

1
Table of Contents
1 Network Deployment 4
1.1 Network Topology 4
1.2 Connection 5
1.2.1 Checking Appearance 5
1.2.2 Default IP address 5
1.2.3 Connecting from a computer & Viewing Preparation 5
1.3 IP Finder 9
2 Administration and Conguration 10
2.1 Live View 10
2.1.1 Model Reference Table 12
2.2 Conguration 13
2.2.1 Information 13
2.2.2 Image Parameter 13
2.2.3 Network Settings 21
2.2.4 Account Management 26
2.2.5 Event Settings 27
2.2.6 Record Settings 30
2.2.7 System Settings 32
2.2.8 Event Log 34
Appendix A: Specications of Indoor Dome Network Camera (Manual Focus Model) 35
Appendix B: Specications of Indoor Dome Network Camera (Motorized Lens Model) 37
Appendix C: Specications of Indoor IR Dome Network Camera(Fixed Lens Model) 39
Appendix D: Specications of Outdoor IR Dome Network Camera 41
Appendix E: Specications of Fixed Network Camera 43
Appendix F: Specications of IR Bullet Network Camera 45
Appendix G: Specications of Flat Mini Dome Network Camera 47

2
WARNING
●The unit operates at DC 12V/AC 24V/ PoE (for Indoor Dome & Fixed Network Camera), AC 24V/ PoE (for Outdoor IR Dome
& IR Bullet Network Camera), DC12V/PoE (for Flat Mini Dome Network Camera), PoE(for Indoor IR Dome Network Camera).
●Installation and service should be performed only by qualied and experienced technicians and comply with all local
codes and rules to maintain your warranty.
●To reduce the risk of re or electric shock, do not expose the product to rain or moisture.
●Wipe the camera with a dry soft cloth. For tough stains, slightly apply with diluted neutral detergent and wipe with a dry
soft cloth.
●Do not apply benzene or thinner to the camera, which may cause the surface of unit to be melted or lens fogged.
●Avoid aligning the lens to very bright objects (example, light xtures) for long periods of time.
●Avoid operating or storing the unit in the following locations:
• Extremely humid, dusty, or hot/cold environments [ Recommended operating temperature: -10°C to +50°C, (for Indoor
Dome, Indoor IR Dome Network Camera & Fixed Network Camera), -40°C to +50°C (for IR Bullet Network Camera), -50°C
to +50°C (for Outdoor IR Dome Network Camera)]
• Close to sources of powerful radio or TV transmitters
• Close to uorescent lamps or objects with reections
• Under unstable or ickering light sources
WEEE (Waste Electrical and Electronic Equipment). Correct disposal of this product (applicable in the
European Union and other European countries with separate collection systems). This product should be
disposed of, at the end of its useful life, as per applicable local laws, regulations, and procedures.
Get Started
This user manual is designed as a reference for the installation and manipulations of the unit including the camera’s features,
functions, and detailed explanation of the menu tree. Please read this manual thoroughly and save it for future use before
attempting to connect or operate the unit. The reader is supposed to be able to get the following information in this manual.
●Product Overview: the main functions and system requirements of the unit.
●Installation and Connection: instructions on unit installation and wire connections.
●Administration and Conguration: the main menu navigation and controls explanations.

3
FCC Compliance Statement
Information to the user: This unit has been tested and found to comply with the limits for a Class B
digital device pursuant to Part 15 of the FCC Rules. Operation is subject to the following two conditions:
(1) this device may not cause harmful interference, and (2) this device must accept any interference
received, including interference that may cause undesired operation. These limits are designed to provide
reasonable protection against harmful interference in a residential installation. This unit generates, uses, and can radiate
radio frequency energy and, if not installed and used in accordance with the manual, may cause harmful interference to radio
communications. However, there is no guarantee that interference will not occur in a particular installation.
If this unit does cause harmful interference to radio or television reception, which can be determined by turning the unit o
and on, the user is encouraged to try to correct the interference by one or more of the following measures:
●Reorient or relocate the receiving antenna.
●Increase the separation between the unit and receiver.
●Connect the unit to an outlet on a circuit dierent from that to which the receiver is connected.
●Consult the dealer or an experienced radio/TV technician for help.
CE Statement
Operation is subject to the following two conditions: (1) this device may not cause harmful interference,
and (2) this device must accept any interference received, including interference that may cause undesired
operation. The manufacturer declares that the unit supplied with this guide is compliant with the essential
protection requirements of EMC directive and General Product Safety Directive GPSD conforming to
requirements of standards EN55022 for emission, EN 55024 for immunity, EN 300 and EN 328 for WIFI.
Caution Changes or modications not expressly approved by the party responsible for compliance could void the
user’s authority to operate the unit.

4
1.1 Network Topology
The unit, which is equipped with Ethernet RJ-45 network interface, can deliver video images and audio in real time via either
Internet or Intranet. Please refer to the skeleton drawings shown below for understanding. (Here takes Indoor Dome Network
Camera as the example in the illustration.)
Figure 1 - 1: Network Topology Type 1
Figure 1 - 2: Network Topology Type 2
1 Network Deployment

5
1.2.1 Checking Appearance
Below table lists the minimum requirement to implement and operate the unit. No hardware/software component inferior to
the requirements is recommended.
Table 1 - 1: System Requirements
System Hardware
CPU Intel Pentium 4 2.4GHz or equivalent
RAM 1 GB or above
Display NVIDIA GeForce 6 Series or ATI Mobility Radeon 9500
System Software
Operating System Microsoft Windows XP, Windows Vista, or Windows 7
Browser Internet Explorer 8 or above, Chrome, Firefox
Unit
Power Supply
DC 12V / AC 24V / PoE (for Indoor Dome Network Camera & Fixed Network Camera)
AC 24V/ PoE (for Outdoor IR Dome Network Camera & IR Bullet Network Camera)
DC12V/PoE (for Flat Mini Dome Network Camera)
PoE (for Indoor IR Dome Network Camera)
Networking
Wired** 10/100BASE-T Ethernet (RJ-45 connector)
*a switch is required for surveillance on multiple units.
Note
Caution
All the installation and operations should comply with your local electricity safety rules.
To avoid damage to the unit, never connect more than one type of power supply (PoE IEEE802.3
Ethernet Class 0, DC 12V / AC 24V or AC24V power plug) at the same time. If using PoE, this unit must be
connecting only to PoE networks without routing to heterogeneous devices.
1.2.2 Default IP address
Since this is a network-based unit, an IP address must be assigned at the very first. The unit’s default IP address is
192.168.1.30 and sub mask is 255.255.255.0. However, if you have a DHCP server in your network, the unit would obtain
an IP address automatically from the DHCP server so that you don’t need to change the camera’s IP address. But be sure to
enable DHCP in "Network Settings".
1.2.3 Connecting from a computer & Viewing Preparation
Connecting from a computer
1. Make sure the unit and your computer are in the same subnet.
2. Check whether if the networking available between the unit and the computer by executing ping the default
IP address. To do this, simply start a command prompt (Windows: from the Start Menu, select Program.
Then select Accessories and choose Command Prompt.), and type“Ping 192.168.1.30”. If the message
“Reply from…”appears, it means the connection is available.
3. Start Internet Explorer and enter IP address: 192.168.1.30. A login window should pop up. In the window,
enter the default user name: admin and password: 1234 to log in.
Further administration on the unit can be found in“2. Administration and Conguration".
1.2 Connection

6
Figure 1 - 3: Login Window
Viewing Preparation
Images of the unit can be viewed through Microsoft Internet Explorer 8 or above. Before viewing, follow these steps to
enable the display.
1. Enable Cookies as instructions below
In Internet Explorer, click Internet Options on the Tools menu.
On the Privacy tab, move the settings slider to Low or Accept All Cookies.
Click OK.
2. When a proxy server is used, click Internet Options on the Tools menus of Internet Explorer, select Connect
tab, click LAN button, and set proxy server.
3. Change Security in Internet options as instructions below
On tool menu, click Internet Option.
Press the Security tab.
If the camera operates inside of the intranet, click the Intranet icon.
If the camera operates outside of the intranet, click the Internet icon.
Click Custom Level. This will open the Security Settings – Internet Zone screen.
Figure 1 - 4: Security Settings 1/4

7
Scroll down to the ActiveX controls and plug-ins radio buttons and set as follows:
【Download signed ActiveX controls】 Prompt (recommended)
【Download unsigned ActiveX controls】 Prompt
【Initialize and script ActiveX not marked as safe for scripting】 Prompt
Figure 1 - 5: Security Settings 2/4
【Automatic prompting for ActiveX controls】Enable
Figure 1 - 6: Security Settings 3/4

8
【Run ActiveX controls and plug-ins】Enable
【Script ActiveX controls marked safe for scripting*】Enable
Figure 1 - 7: Security Settings 4/4
Press OK to save the settings.
Close all Microsoft Internet Explorer Windows and restart a new window. This will allow the new settings taking eect.
Type your setting IP address into the browser.
Then you should be able to see the camera image screen.

9
IP Finder is a utility program that helps users locate the unit in the local area network which the computer is connected to.
Please note that IP Finder works only on Microsoft Windows XP, Microsoft Windows Vista, and Microsoft Windows 7. Steps to
get the utility program running are listed below.
1. Download IP Finder from MESSOA Website to the computer.
2. Double click on IPFinder.exe in the IP Finder folder, and the IP Finder window should pop out.
3 The window would list information of units in operation at present. Press FIND CAMERA to nd more units.
4. Locate and double-click one of the cameras in the list you want to congure the network settings. If you have multiple
cameras connected to your local network, locate the MAC address on the camera to distinguish the target camera from
others.
5. Congure the following settings as needed.
• NAME: Enter a descriptive name for the camera.
• NETWORK SETTINGS: If you have a DHCP server on your network to assign IP addresses to network devices, enable the
DHCP option. Otherwise, manually enter the IP ADDRESS, NET MASK and GATEWAY values.
• USERNAME & PASSWORD: Manually setup preferred username and password.
• SET: Whenever you make revision of camera settings, click“SET” to take eect.
• SW DEFAULT: To perform the factory defaults excluding network settings of the selected camera.
• HW DEFAULT: To perform the factory defaults of the selected camera.
• RESET: To reboot the selected camera.
Click Save to enable the settings and click Exit to exit the utility.
Figure 1 - 8: IP Camera Finder
1.3 IP Finder

10
2 Administration and Conguration
2.1 Live View
Figure 2 - 1: First Login Page
After accessing and login to the IP address of the unit, the screen will be shown as the above screenshot. There are 2 main
options on the upper left side: “Live View” and “Conguration”. While the upper right side indicates your current login user
level with “Logout” option which enables you to log out after pressing. We mainly focus on “Live View” functionalities in this
chapter and will detail“Conguration” in the “2.2 Conguration”later.
Figure 2 - 2: Live View
After clicking “Live View”, you will be led to real-time live view screen, the left dropdown menu is for user interface language
changing and the “Stream” lets users toggle among each stream settings for better adaptation in different network
condition, for which you may refer to“Edit Proles & Streams”for more details.
The following icons within the table, which are on the top of live view screen, are for some functions activating and alarm
warning status. Please refer to the detailed denitions below for more understanding (Flat Mini Dome Series have some
dierences with other network cameras).
Mouse scrolling up and down can zoom out and in live view screen respectively.

11
Icon Denition
The“Snapshot” button is for taking a snapshot saved in a user-preferred le path.
The“Fit” button is for users to display a xed size live view screen.
The“1:1” button is for users to display a real size streaming live view screen.
The“Full Screen” button is for users to display a full screen live view display. (Press Esc to back)
The "Manual Recording" is for users to start recording and store image les in a specic path.
The“Audio Input” button is for users to toggle on/o the audio input function.
(1M Flat Mini Dome Network Camera Excluding)
The“Audio Output” button is for users to toggle on/o the audio output function.
(1M Flat Mini Dome Network Camera Excluding)
The vibration-like icon indicates motion(s) being detected in camera coverage.
The siren-like icon indicates that alarm input event is triggered.
(1M/3M Flat Mini Dome Network Camera Excluding)
Table 2 - 1: Live View Icon Denition
Figure 2 - 3: Live View Right-Clicking Controls
Right clicking on the live view screen can pop up more functions to select.
●Version
Click to view the version details.
Note Keep the zoom level of IE as 100% to display normal live view.
Mouse scrolling up and down can zoom out and in live view screen respectively.

12
2.1.1 Model Reference Table
Below table tells the model dierences that can be seen on the home page. “√” indicates functions which can be found on
the model.“A-F” each indicates a model type,“a-d”indicates dierent lens as shown below:
A. 1MP/3MP/5MP Indoor Dome Network Camera
B. 3MP/5MP Outdoor IR Dome Network Camera
C. 3MP/5MP Fixed Network Camera
D. 3MP/5MP IR Bullet Network Camera
E. 1MP Flat Mini Dome Network Camera
F. 3MP Flat Mini Dome Network Camera
G. 5MP Indoor IR Dome Network Camera
(*) a. Manual Focus Lens; b. Motorized Lens; c. CS Mount; d. Fixed Focal Lens
Model
Function A B C D E F G
a b a b c a b d d d d
Snapshot √ √ √ √ √ √ √ √ √ √ √
Motion Detection √ √ √ √ √ √ √ √ √ √ √
Alarm I/O √ √ √ √ √ √ √ √ - - -
SD Recording √ √ √ √ √ √ √ √ - √ √
Audio √ √ √ √ √ √ √ - - √ -
Remote Lens
Control Zoom Control - √ - √ - - √ - - - -
Focus Control - √ - √ - - √ - - - -
Power
Requirement DC 12V √ √ - - √ - - - - √ -
AC 24V √ √ √ √ √ √ √ √ - - -
PoE √√√√√√√√√√√
Operating
Temperature -10ºC ~ 50ºC
(-14ºF ~ 122ºF) √ √ - - √ - - - - - √
-40ºC ~ 50ºC
(-40ºF ~ 122ºF) - - √ √ - √ √ √ √ √ -
Defrost - - √ √ - - - - - - -

13
After clicking the “Conguration”option, the screen will be shown as below with several menu options for users to congure
on the left side. We will thoroughly introduce them one by one in the following chapters.
Figure 2 - 4: Congure
2.2.1 Information
Users can view, after clicking “Information”, the detailed information related to the unit including Firmware Version, MAC
Address and Model Name in the middle of the screen.
Figure 2 - 5: Information
2.2.2 Image Parameter
The Image Parameter contains several basic display settings like resolution, codec, FPS, GOP and so on. In addition, it has
some extending settings including exposure, color, and white balance for the unit. Also, users can set preferred privacy zone
under this menu tree as well.
Codec
●Edit Proles & Streams:
Basically, this unit oers two choices of video codec for real-time viewing: H.264 or MJPEG. By default, there are up to
6 proles, which have own respective sub settings including Resolution, Codec, Frame Rate, GOP Length, QoS (DSCP)
Codepoint, Rate Control and Bit Rate, can be chosen. And each prole contains up to 3 streams arrangement depending
on your settings: Stream1, Stream2, and Stream3, which can be configured separately to send video signals for
simultaneous triple streams with optimized quality and bandwidth based on your network environment. After setting up,
please be sure to click“Save”to have the desired settings take eect.
• Current Prole: To choose one of the 6 proles for implementing, click“Save Prole”after selecting.
• Edit Prole: Select one of 6 proles for editing the sub options.
• MJPEG: While selecting this codec, you can then select sub menu including Frame Rate & Quality.
• H.264: If choosing this codec, there will be more sub menu for you setting. Frame Rate, GOP Length, QoS (DSCP)
Codepoint, Rate Control, which contains 2 kinds including CBR & VBR, and each has its specic Bit Rate value control.
For more details in terms of sub settings under Codec, please refer to the tables listed below.
2.2 Conguration

14
Table 2 - 2: Edit Prole Options
Item Option Description
Video Codec MJPEG
H.264
MJPEG: Each video frame is individually compressed as single jpeg image with full-scale
contents itself and can be retouched freely with ease. However, due to completeness of
each frame, it brings about larger le size and thus easily tends to lose frames under limited
network bandwidth.
H.264: The latest best-renowned video compression format, it adopts intelligent technology
to record variation in each frame rather than record each full frame. As a result, less network
bandwidth it requires and le size is prone to be smaller compared with MJPEG.
Resolution
5M Model: 5M(2592x1944), 3M(2048×1536) ,
1080P(1920×1080) , SXGA(1280×960) , 720P(1280×720),
SVGA(800×600), VGA(640×480), VGA (640x360),
QVGA(320x240), QVGA (320x180)
5M Model:
5M(2592x1944) is the highest resolution
QVGA (320x180) is the lowest resolution.
3M Models:
3M(2048×1536) is the highest resolution
QVGA (320x180) is the lowest resolution.
1M Model:
720P(1280×720) is the highest resolution
QVGA (320x180) is the lowest resolution.
Note: 5M (2592x1944) can be only selected under H.264 codec mode.
3M Models: 3M(2048×1536) , 1080P(1920×1080) ,
SXGA(1280×960) , 720P(1280×720), SVGA(800×600),
VGA(640×480), VGA (640x360), QVGA(320x240), QVGA
(320x180)
1M Model: 720P(1280×720), SVGA(800×600),
VGA(640×480), VGA (640x360), QVGA(320x240), QVGA
(320x180)
Frame Rate (fps) NTSC: 1~30
PAL: 1~25
The utmost fps settings for 2 systems varies as the following:
NTSC: H.264 single stream: 2592×1944@12fps; H.264/MJPEG single stream:
2048×1536@15fps; H.264/MJPEG single stream: 1920×1080 to 320x180@30fps
PAL: H.264 single stream: 2592×1944@12fps; H.264/MJPEG single stream: 2048×1536@15fps;
H.264/MJPEG single stream: 1920×1080 to 320x180@25fps
GOP (Group Of
Pictures) Length
NTSC: 1~60
PAL: 1~50
Select the GOP length number from NTSC: 1 to 60 / PAL: 1 to 50. Less number means the
distance between 2 I-frames is smaller, which needs more network bandwidth with better
image. By contrast, larger number consumes less bandwidth but is hard to be recovered. The
available length number options of GOP will vary based on frame rate settings.
QoS (DSCP)
Codepoint 0 ~ 63
To classify and manage network trac and provide quality of service (QoS) on modern IP
networks, Dierentiated Services Code Point (DSCP) is a computer networking architecture
that specifies resources allocation to each device on a priority-based pattern for ideal
bandwidth management. The bigger value, the higher priority it will be.
Bit Rate Mode CBR: Constant Bit Rate
VBR: Variable Bit Rate
Choose the bit rate control selection based on user requirements. Higher bit rate values will
result in better quality with bigger le size and thus consume more network bandwidth.
CBR stands for constant mode with certain xed rate by user denition, while VBR means
variable mode in which users can set a range of upper and lower limits respectively for bit
rate control.
Figure 2 - 6: Basic Parameter

15
Table 2 - 3: Correlations of Resolution/Streams/FPS/Codecs – NTSC
Resolution Single stream Double stream Triple stream
2592x1944
(for 5M Models)
2592x1944 @ 12fps
(H.264)
2592x1944 @ 12fps, 800x600 @ 12fps
2592x1944 @ 12fps, 640x480 @ 12fps
2592x1944 @ 12fps, 640x360 @ 12fps
2592x1944 @ 12fps, 320x240 @ 12fps
2592x1944 @ 12fps, 320x180 @ 12fps
(H.264, H.264/MJPEG)
2592x1944 @ 12fps, 800x600 @ 12fps, 640x480 @ 12fps
2592x1944 @ 12fps, 640x480 @ 12fps, 640x480 @ 12fps
2592x1944 @ 12fps, 640x360 @ 12fps, 640x480 @ 12fps
2592x1944 @ 12fps, 320x240 @ 12fps, 640x480 @ 12fps
2592x1944 @ 12fps, 320x180 @ 12fps, 640x480 @ 12fps
(H.264, H.264/MJPEG, MJPEG)
2048×1536
(for 3M/5M Models)
2048×1536 @ 15fps
(H.264/MJPEG)
2048x1536 @ 15fps, 1280x720 @ 15fps
2048x1536 @ 15fps, 800x600 @ 15fps
2048x1536 @ 15fps, 640x480 @ 15fps
2048x1536 @ 15fps, 640x360 @ 15fps
2048x1536 @ 15fps, 320x240 @ 15fps
2048x1536 @ 15fps, 320x180 @ 15fps
(H.264/MJPEG, H.264/MJPEG)
2048x1536 @ 15fps, 1280x720 @ 15fps, 640x480 @ 15fps
2048x1536 @ 15fps, 800x600 @ 15fps, 640x480 @ 15fps
2048x1536 @ 15fps, 640x480 @ 15fps, 640x480 @ 15fps
2048x1536 @ 15fps, 640x360 @ 15fps, 640x480 @ 15fps
2048x1536 @ 15fps, 320x240 @ 15fps, 640x480 @ 15fps
2048x1536 @ 15fps, 320x180 @ 15fps, 640x480 @ 15fps
(H.264/MJPEG, H.264/MJPEG, MJPEG)
1920x1080
(for 3M/5M Models)
1920x1080 @ 30fps
(H.264/MJPEG)
1920x1080 @ 30fps, 640x480 @ 30fps
1920x1080 @ 30fps, 320x240 @ 30fps
1920x1080 @ 30fps, 352x180 @ 30fps
(H.264/MJPEG, H.264/MJPEG)
1920x1080 @ 30fps, 640x480 @ 30fps, 640x360 @ 10fps
1920x1080 @ 30fps, 320x240 @ 30fps, 640x360 @ 10fps
1920x1080 @ 30fps, 352x180 @ 30fps, 640x360 @ 10fps
(H.264/MJPEG, H.264/MJPEG, MJPEG)
1280×960
(for 3M/5M Models)
1280x960 @ 30fps
(H.264/MJPEG)
1280x960 @ 30fps, 1280x720 @ 30fps
1280x960 @ 30fps, 800x600 @ 30fps
1280x960 @ 30fps, 640x480 @ 30fps
1280x960 @ 30fps, 640x360 @ 30fps
1280x960 @ 30fps, 320x240 @ 30fps
1280x960 @ 30fps, 320x180 @ 30fps
(H.264/MJPEG, H.264/MJPEG)
1280x960 @ 30fps, 1280x720 @ 30fps, 640x480 @ 10fps
1280x960 @ 30fps, 800x600 @ 30fps, 640x480 @ 10fps
1280x960 @ 30fps, 640x480 @ 30fps, 640x480 @ 10fps
1280x960 @ 30fps, 640x360 @ 30fps, 640x480 @ 10fps
1280x960 @ 30fps, 320x240 @ 30fps, 640x480 @ 10fps
1280x960 @ 30fps, 320x180 @ 30fps, 640x480 @ 10fps
(H.264/MJPEG, H.264/MJPEG, MJPEG)
1280×720
(for 1M/ 3M/5M Models)
1280x720 @ 30fps
(H.264/MJPEG)
1280x720 @ 30fps, 1280x720 @ 30fps
1280x720 @ 30fps, 800x600 @ 30fps
1280x720 @ 30fps, 640x480 @ 30fps
1280x720 @ 30fps, 640x360 @ 30fps
1280x720 @ 30fps, 320x240 @ 30fps
1280x720 @ 30fps, 320x180 @ 30fps
(H.264/MJPEG, H.264/MJPEG)
1280x720 @ 30fps, 1280x720 @ 30fps, 640x360 @ 10fps
1280x720 @ 30fps, 800x600 @ 30fps, 640x360 @ 10fps
1280x720 @ 30fps, 640x480 @ 30fps, 640x360 @ 10fps
1280x720 @ 30fps, 640x360 @ 30fps, 640x360 @ 10fps
1280x720 @ 30fps, 320x240 @ 30fps, 640x360 @ 10fps
1280x720 @ 30fps, 320x180 @ 30fps, 640x360 @ 10fps
(H.264/MJPEG, H.264/MJPEG, MJPEG)
Table 2 - 4: Correlations of Resolution/Streams/FPS/Codecs – PAL
Resolution Single stream Double stream Triple stream
2592x1944
(for 5M Models)
2592x1944 @ 12fps
(H.264)
2592x1944 @ 12fps, 800x600 @ 12fps
2592x1944 @ 12fps, 640x480 @ 12fps
2592x1944 @ 12fps, 640x360 @ 12fps
2592x1944 @ 12fps, 320x240 @ 12fps
2592x1944 @ 12fps, 320x180 @ 12fps
(H.264, H.264/MJPEG)
2592x1944 @ 12fps, 800x600 @ 12fps, 640x480 @ 12fps
2592x1944 @ 12fps, 640x480 @ 12fps, 640x480 @ 12fps
2592x1944 @ 12fps, 640x360 @ 12fps, 640x480 @ 12fps
2592x1944 @ 12fps, 320x240 @ 12fps, 640x480 @ 12fps
2592x1944 @ 12fps, 320x180 @ 12fps, 640x480 @ 12fps
(H.264, H.264/MJPEG, MJPEG)
2048×1536
(for 3M/5M Models)
2048×1536 @ 15fps
(H.264/MJPEG)
2048x1536 @ 15fps, 1280x720 @ 15fps
2048x1536 @ 15fps, 800x600 @ 15fps
2048x1536 @ 15fps, 640x480 @ 15fps
2048x1536 @ 15fps, 640x360 @ 15fps
2048x1536 @ 15fps, 320x240 @ 15fps
2048x1536 @ 15fps, 320x180 @ 15fps
(H.264/MJPEG, H.264/MJPEG)
2048x1536 @ 15fps, 1280x720 @ 15fps, 640x480 @ 15fps
2048x1536 @ 15fps, 800x600 @ 15fps, 640x480 @ 15fps
2048x1536 @ 15fps, 640x480 @ 15fps, 640x480 @ 15fps
2048x1536 @ 15fps, 640x360 @ 15fps, 640x480 @ 15fps
2048x1536 @ 15fps, 320x240 @ 15fps, 640x480 @ 15fps
2048x1536 @ 15fps, 320x180 @ 15fps, 640x480 @ 15fps
(H.264/MJPEG, H.264/MJPEG, MJPEG)
1920x1080
(for 3M/5M Models)
1920x1080 @ 25fps
(H.264/MJPEG)
1920x1080 @ 25fps, 640x480 @ 25fps
1920x1080 @ 25fps, 320x240 @ 25fps
1920x1080 @ 25fps, 352x180 @ 25fps
(H.264/MJPEG, H.264/MJPEG)
1920x1080 @ 25fps, 640x480 @ 25fps, 640x360 @ 12.5fps
1920x1080 @ 25fps, 320x240 @ 25fps, 640x360 @ 12.5fps
1920x1080 @ 25fps, 352x180 @ 25fps, 640x360 @ 12.5fps
(H.264/MJPEG, H.264/MJPEG, MJPEG)
1280×960
(for 3M/5M Models)
1280x960 @ 25fps
(H.264/MJPEG)
1280x960 @ 25fps, 1280x720 @ 25fps
1280x960 @ 25fps, 800x600 @ 25fps
1280x960 @ 25fps, 640x480 @ 25fps
1280x960 @ 25fps, 640x360 @ 25fps
1280x960 @ 25fps, 320x240 @ 25fps
1280x960 @ 25fps, 320x180 @ 25fps
(H.264/MJPEG, H.264/MJPEG)
1280x960 @ 25fps, 1280x720 @ 25fps, 640x480 @ 12.5fps
1280x960 @ 25fps, 800x600 @ 25fps, 640x480 @ 12.5fps
1280x960 @ 25fps, 640x480 @ 25fps, 640x480 @ 12.5fps
1280x960 @ 25fps, 640x360 @ 25fps, 640x480 @ 12.5fps
1280x960 @ 25fps, 320x240 @ 25fps, 640x480 @ 12.5fps
1280x960 @ 25fps, 320x180 @ 25fps, 640x480 @ 12.5fps
(H.264/MJPEG, H.264/MJPEG, MJPEG)
1280×720
(for 1M/ 3M/5M Models)
1280x720 @ 25fps
(H.264/MJPEG)
1280x720 @ 25fps, 1280x720 @ 25fps
1280x720 @ 25fps, 800x600 @ 25fps
1280x720 @ 25fps, 640x480 @ 25fps
1280x720 @ 25fps, 640x360 @ 25fps
1280x720 @ 25fps, 320x240 @ 25fps
1280x720 @ 25fps, 320x180 @ 25fps
(H.264/MJPEG, H.264/MJPEG)
1280x720 @ 25fps, 1280x720 @ 25fps, 640x360 @ 12.5fps
1280x720 @ 25fps, 800x600 @ 25fps, 640x360 @ 12.5fps
1280x720 @ 25fps, 640x480 @ 25fps, 640x360 @ 12.5fps
1280x720 @ 25fps, 640x360 @ 25fps, 640x360 @ 12.5fps
1280x720 @ 25fps, 320x240 @ 25fps, 640x360 @ 12.5fps
1280x720 @ 25fps, 320x180 @ 25fps, 640x360 @ 12.5fps
(H.264/MJPEG, H.264/MJPEG, MJPEG)

16
Exposure
Figure 2 - 7: Exposure
●Exposure Mode
It controls the light intensity of picture. There are 2 modes, Manual Exposure and Auto Exposure for adjustment depending on
dierent conditions. When in Manual mode, Shutter Speed is adjustable.
●Advanced Exposure
Advanced exposure section is for users to modify more detailed options related to exposure.
• EV Compensation: It is the exposure compensation telling the unit by setting value from -2.0 to 2.0 with intervals of per 0.5
for scenes to be either darker or brighter. (Unavailable when exposure mode is manual)
• Noise Reduction: It is the process of removing noises from a signal and be set from 0-255 to decrease noise on the screen.
• BLC: Set an area for Backlight Compensation. Backlight Compensation is a function that achieves the brightness of a selected
area to optimal image level. This function is necessary when an auto iris lens tends to close due to an intense light coming
from back of object in the area wished to view so that the area is too dark and dicult to see. In this case, users may set the
area corresponding to the portion wished to see. (Unavailable when exposure mode is manual)
• WDR: It is intended to provide clear images even under backlight circumstances where intensity of illumination can vary
excessively, namely where there are both very bright and very dark areas simultaneously in the eld of view. WDR enables
the capture and display of both bright and dark areas in the same frame, in a way that there are details in both areas, i.e.
bright areas are not saturated, and dark areas are not too dark.
• Day & Night: Set Day/night function by selecting Auto/Color/BW mode. Select Auto to allow the camera to switch between
Color and BW automatically. If selected Color mode, the unit is forced to stay in Day (Color) mode and BW for Black & White
(Night) mode at all times.
• Day to Night Threshold: Use ‘-’ or ‘+’ or enter a value from 0-99 to manually adjust the threshold of when the camera switches
from Color to BW.
• Night to Day Threshold: Use ‘-’ or ‘+’ or enter a value from 1-100 to manually adjust the threshold of when the camera
switches from BW to Color.
• Switch Delay Time: Use‘-’ or ‘+’or enter a value from 1-10 to manually adjust how long the switch will be delayed.
• A light spectrum shows where each of the thresholds sets in relation to one another and to the current value detected.
Note Settings will be restored to the factory defaults if pressing“Reset to default”.

17
White Balance
To set the white balance values to meet ambience condition for best color rendition with 2 modes:
Figure 2 - 8: White Balance Settings
●Auto
It automatically controls color temperature ranging from 2500°K to 10000°K
●Manual
To manually set preferred gain values including the following:
• R (Red) Gain: It allows users to adjust red color in the image ranging from 0 to 255.
• G (Green) Gain: It allows users to adjust green color in the image ranging from 0 to 255.
• B (Blue) Gain: It allows users to adjust blue color in the image ranging from 0 to 255.
Note Settings will be restored to the factory defaults if pressing“Reset to default”.
Basic Color
Figure 2 - 9: Basic Settings
●Brightness
Set image brightness from level -255 to 255. The 255 indicates the brightest image.
●Contrast
Set image contrast from level 0 to 255. The 255 provides the highest contrast.
●Hue
Set picture hue from level -15 to 15. Selecting 15 provides the deepest hue.
●Saturation
It describes the dierence of a color from the gray of the same lightness. Increasing saturation deepens the colors of your
images, making reds redder and blues bluer. Users can adjust picture saturation level from 0 to 255. Decreasing saturation
brings the image closer to a grayscale (that is, monochrome or black-and-white) image. Selecting 255 provides the highest
image saturation.
●Sharpness
Increasing the sharpness value will sharpen the edges and small feature of viewing images. If the edges appear too
smooth or blurred, increase the sharpness; otherwise, decrease the sharpness. Sharpness value can be set from 0 to 15.
The 15 oers the sharpest image.

18
●Gamma Correction
Set gamma correction between 1 and 0.45.
●Video Orientation
Set image to be left right reversal, upside down or both by selecting “Mirror”, “Flip” and “Both” individually. Selecting “OFF”
will deactivate video orientation function.
Note Settings will be restored to the factory defaults if pressing“Reset to default”.
Remote Lens Control
(For Motorized Lens Model)
Figure 2 - 10: Remote Lens Control
●Zoom Control
• Use the zoom bar to zoom in and out, or click on a position on the bar to zoom to that position. The number indicates the
current zoom level.
• Use the focus bar to set focus, or click on a position on the bar to set focus at that position. The number indicates the current
focus level.
• The buttons < and > move the zoom/focus position one step in either direction. The buttons << and >> move the zoom/
focus position in multiple steps in either direction.
• Click“Start Focus”to have the lens focus automatically immediately.
• Click“Start Calibration”to have the lens calibrate and focus auto simultaneously at once.
Note Settings will be restored to the factory defaults if pressing“Reset to default”.
Smart Encoding
On the Smart Encoding page you can specify a specic region of the video as more important. When a smart encoding area
is specied, the camera will assign a higher number of bits to the encoding region to deliver better video quality than other
regions.
Figure 2 - 11: Smart Encoding Setting

19
To dene a smart encoding area, you need rst to turn ON one of the Smart Encoding Regins and adjust by pressing with
left click and dragging to outline a desired region, Click anywhere on the image to cancel the current dened region. Click
“Save Window”to make settings take eect. If you intend to delete settings, click“Clean Window” to wipe out smart encoding
region settings.
Note Settings will be restored to the factory defaults if pressing“Reset to default”.
Privacy Zone
Privacy Zone enables users to black out a specic portion of the screen for privacy concern. There are up to 8 sets of privacy
zones for users to dene. After setting up a privacy zone, the live view screen will appear a frame, whose color, size and
position can be customized by users’preference.
Figure 2 - 12: Privacy Zone Setting
To set up a privacy mask, you need rst to turn ON one of the eight privacy zones (multiple available) and adjust the privacy
mask size by pressing with left click and dragging to outline a desired privacy frame. Also, users can select a desired color
(Black, Grey or White) for privacy zone. Press “Save Mask zone” to make settings take eect. If you intend to delete settings,
click“Clean Mask zone”to wipe out privacy zone settings.
Note It is recommended to set the privacy zone slightly larger than the actual area to ensure that privacy area is
not revealed during movement.
Table of contents
Other Messoa IP Camera manuals
