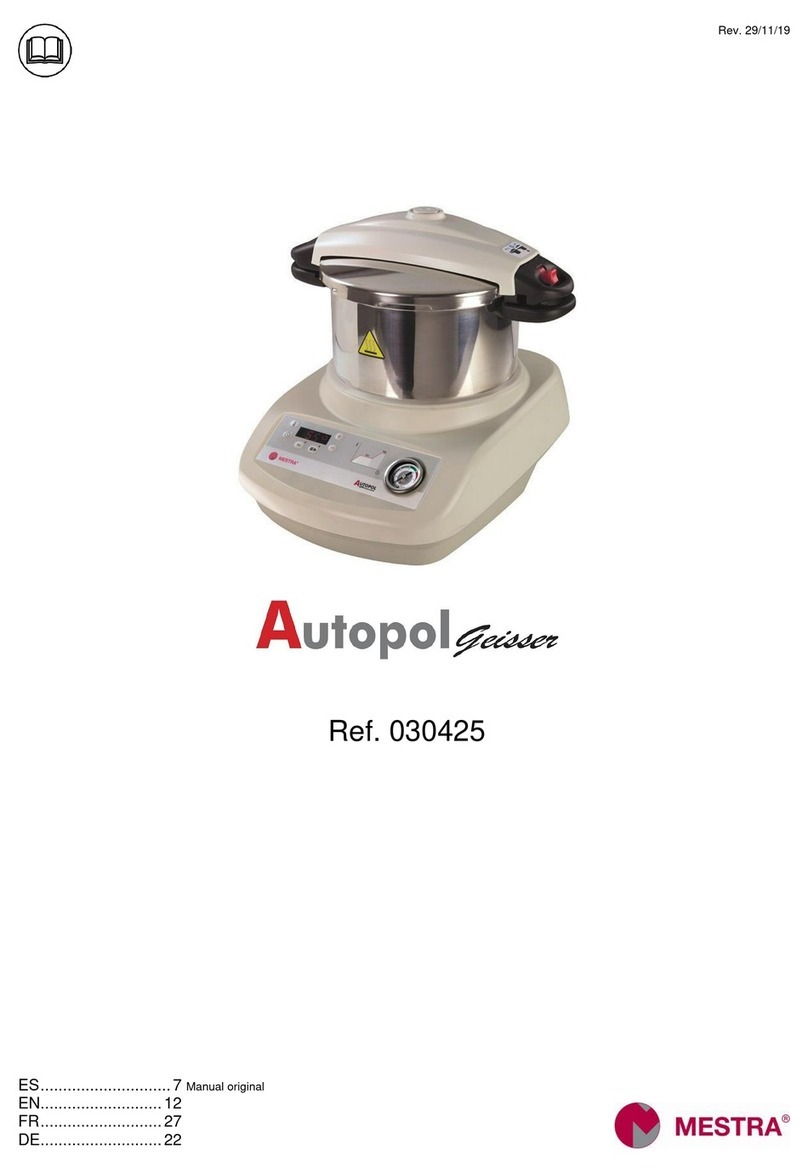
Mestra Autopol Geisser User manual

Rev. 14/11/17
R-030425
EN .............................4

2
A
B
C
D
E
F G
H I J
K

3
ALid
BTank
CKeypad
DLid opening
EPressure Gauge
FWater tap
GWater outlet
HAir inlet
IAir outlet
JElectrical connection
KMain switch

4
Automatic polymerisation pot
EN
NOTE: Read this manual carefully. It contains impor-
tant information about safety during installa-
tion, use and maintenance. If the equipment is
utilized in a manner not indicated by the manu-
facturer, the safety provided by the equipment
may be adversely affected.
Meaning of the symbols used in rela-
tion to the machine
Danger. Danger of injuries.
Read these instructions in their en-
tirety before putting the device into
operation.
Risk of electric shock.
Caution: the surface of the lid
and the pot, the water and the
steam at 00 °C, can cause burns.
Use suitable protection.
Water outlet connection.
Pressurised air inlet connection.
Outlet of steam at 00 ºC / 2 2 ºF.
Precautions
Keep this manual in a suitable place for future refer-
ence.
Check the general conditions of the device immedia-
tely after removing the packaging.
Breakdown caused by incorrect installation or inco-
rrect use of the device is excluded from the guaran-
tee.
To avoid the risk of electric shock, this device must
only be connected to a power supply with proper
earthing. Before connecting the device, check that the
identification label indicates the correct voltage. The
installation must comply with all applicable safety
standards.
Remove any remains of dirt or water from the con-
nection of the cable.
Avoid excessive traction, twisting or folding of the
cable for connection to the electricity grid.
Do not touch the device or the cable with wet or
moist hands.
Install the product away from sources of heat, dust,
high humidity, and from splashing of water or infla-
mmable material (alcohol, solvents, etc.).
Unplug the device immediately if you detect noise,
smells or smoke.
Ensure that children and unspecialised staff do not
handle the device.
If in doubt, do not put the device into operation. Con-
tact a qualified and authorised repairer.
Do not disassemble, repair or modify the device.
Unplug the device if there is a storm, and when out of
use for a long time.
Unplug the device before cleaning it, do not wet it di-
rectly, and do not use chemical products.
Contact your distributor if you have any questions or
for detailed information about problem solving.
Before using the device, ensure that it is positioned
on a firm and solid base.
The cable can only be replaced by one with identical
characteristics to that supplied by the manufacturer.
Protect yourself properly; use gloves and safety glas-
ses.
Do not allow anybody to bridge the safety systems.
Do not use the machine for any use other than its in-
tended purpose.
Intended use
The R-030425 is a polymerisation pot, easy to handle
and especially designed for the polymerisation of pros-
theses and other elements within the dental prosthesis
sector.
Installation
1. Carefully unpack the unit. Check that it has not suffe-
red any deterioration during transport.
2. Place the device on a firm, flat surface away from
any focus of heat or vibrations.
3. Connect one end of the Ø 4x6 tube to the air inlet
(H). Connect the other end to a source of pressurised
air (minimum 3 bar).
4. Choose a position for the drainage bottle in a place
located at least 20 cm below the bottom of the ma-
chine. The water expelled from the tank is at boiling
temperature, which means that an accidental fall of
the bottle can cause an accident. Therefore, take care
that the position of the drainage bottle ensures opti-
mum stability and safety. Once the bottle is in posi-
tion, connect the Ø 6x8 drainage tube to the outlet
(G), and insert the other end into the upper orifice of
the bottle.

5. To discharge water, open the water valve (F) situated
on the right side of the machine (as long as the bottle
has been correctly connected).
6. The device has four rubber blocks as feet. Special
care has been taken in the design to give the device
sufficient weight and robustness to prevent it from
moving during handling, so it is not necessary to use
additional fixation elements.
7. Connect the device to a suitable electrical connection
with proper earthing.
Use of the keys
Program selection.
Edition of time and temperature values.
Access to edition of temperatures.
When the cycle is underway, holding
the button down for 3 seconds enables
you to visualise the current temperatu-
re.
Access to edition of times.
When the cycle is underway, holding
the button down for 3 seconds enables
you to visualise the time remaining for
the phase underway.
Short push: cycle startup.
Long push: end of cycle.
Activate and deactivate the entry of
pressure.
Polymerisation programs
There are three types of program: short, long and con-
tinuous.
Short programs:
Consist of a consigned polymerisation temperature ºC1
and a maintenance time t ºC1.
Long programs:
Consist of a preheating temperature ºC1,
a maintenance time t ºC1,
a temperature rise slope r ºC2,
a consigned polymerisation temperature ºC2
and a maintenance time t ºC2.
Short program: if ºC2 is programmed lower than ºC1.
Long program: if ºC2 is programmed higher than ºC1.
Continuous program:
This is a short program which keeps temperature in or-
der to let any user starting a new polymerisation cycle at
any time.
Default programs
The pot leaves the factory with the following programs:
Nº Pressure
ºC1 t ºC1 r ºC2 ºC2 t ºC2
P1 Auto 45 0h15 - - -
P2 Auto 55 0h15 - - -
P3 Manual 100 0h30 - - -
P4-L
Manual 70 1h30 0h30 100 0h30
Pc Auto 55 0h15 - - -
Pc
This is the continuous program (see in its section).
P3
Means that the program P3 is short (one tempera-
ture sign).
P4-L
Means that the program P4 is long (two tempera-
ture signs).
Program selection
1. Press the main switch (K) and wait until the display
stabilises.
P1
45º
Program selected (short).
Consigned temperature.
P4-L
70oC
100oC
Program selected (long).
Consigned temperature ºC1.
Consigned temperature ºC2.
Water outlet
Air inlet
230 V

2. Use keys and to select one of the 5 pro-
grams (Pc, P1, P2, P3 or P4-L).
Pc
This is the continuous program (see in its sec-
tion).
P3
Means that the program P3 is short (one tem-
perature sign).
P4-L
Means that the program P4 is long (two tem-
perature signs).
Modification of temperatures
Not
NotNot
Note
ee
e:
::
: Programs cannot be edited whilst underway.
1. Select the program you wish to modify.
2. Press the key to modify the temperature ºC1 of
the program selected.
oC1
70o
Consigned temperature.
1. Press the key again to modify the second tem-
perature ºC2.
oC2
100o
Consigned second temperature.
3. Use the keys and to modify the values.
4. Press the key again to return to program se-
lection. The values modified will be saved in the
memory automatically.
Not
NotNot
Note
ee
e:
::
:
If you have selected a short program and you
wish to program a long one, hold down the
key whilst ºC is showing in order to
gain access to ºC2.
Program a ºC2 temperature higher than ºC ,
and you will gain access to the rest of the pa-
rameters for the long program.
Modification of times
Not
NotNot
Note
ee
e:
::
: Programs cannot be edited whilst underway.
2. Select the program you wish to modify.
3. Press the key to modify the maintenance time t
ºC1.
toC1
1h30
Maintenance time for the first tempe-
rature.
4. Use the keys and to modify time t ºC1.
5. Press the key again to modify the rise slope to
the second temperature r ºC2.
roC2
0h30
Time for temperature rise slope to the
second temperature.
6. Press key again to modify the maintenance
time t ºC2.
toC2
0h30
Maintenance time for the second tem-
perature.
7. Use the keys and to modify the values.
8. Press the key again to return to program selec-
tion. The values modified will be saved in the
memory automatically.
Not
NotNot
Note
ee
e:
::
:
If you have selected a short program and you
wish to program a long one, hold down the key
whilst ºC is showing in order to gain ac-
cess to ºC2.
Program a ºC2 temperature higher than ºC ,
and you will gain access to the rest of the pa-
rameters for the long program.
Operation
1. Open the lid and pour water into the tank.
To open the lid, press
the red button on the
handle and turn to the
right.
2. Activate the main switch located on the back of the
device (K). The green light will come on.
3. Select the program you wish to run.
4. Press key . The program will start up.
The pilot light next to key will blink, indicat-
ing that it is heating up, and will remain with a con-
stant light once the consigned temperature is reached.
5. To terminate a program which is underway, hold
down the key for a few seconds.
When the cycle is underway, holding the
key down for 3 seconds enables you to
visualise the current temperature.
When the cycle is running, holding the
key down for 3 seconds enables you to
visualise the time remaining for the pha-
se underway.

6. When the assigned temperature is reached, a beep
will sound and the machine will show the message
LoAd
LoAdLoAd
LoAd.
Insert the material for polymerisation and close the
lid of the pot.
Caution: the surface of the lid and
Caution: the surface of the lid and Caution: the surface of the lid and
Caution: the surface of the lid and
tank
tanktank
tank, the water and the steam at
, the water and the steam at , the water and the steam at
, the water and the steam at
00
0000
00
°C can cause burns. Use suitable
°C can cause burns. Use suitable °C can cause burns. Use suitable
°C can cause burns. Use suitable
pr
prpr
pro
oo
otect
tecttect
tection.
ion.ion.
ion.
Press to continue the cycle.
7. When the polymerisation temperature is reached,
proceed to manual or automatic pressurisation (see
the following section “Pressurisation”).
8. When the time is complete, the depressurisation
phase will begin and the message
dEPr
dEPrdEPr
dEPr
will be
shown.
Not
NotNot
Note
ee
e:
::
:
To discharge water, open the water valve (F)
situated on the right side of the machine (as
long as the bottle has been correctly con-
nected).
9. After 2 minutes of depressurisation, a beep will
sound and the machine will show the message
End
EndEnd
End.
10.Before opening the lid, check that the water discharge
is fully complete and that the pressure indicated on
the pressure gauge is 0.
Caution: the surface of the lid and
Caution: the surface of the lid and Caution: the surface of the lid and
Caution: the surface of the lid and
tank
tanktank
tank, the water and the steam at
, the water and the steam at , the water and the steam at
, the water and the steam at
00
0000
00
°C can cause burns. Use suitable
°C can cause burns. Use suitable °C can cause burns. Use suitable
°C can cause burns. Use suitable
prote
proteprote
protec
cc
ction.
tion.tion.
tion.
11.Press to erase the message
End
EndEnd
End.
12.Once the job is complete, turn off the switch (K).
Presurisation
The unit is equipped to regulate the pressure to approxi-
mately 2 bars (it does not matter if this varies slightly).
Not
NotNot
Note
ee
e:
::
:
A small outlet of air from the covering of the lid
can be observed. This is completely normal. This
is from a valve which regulates the pressure in-
side the tank.
Automatic pressurisation
If the consigned polymerisation temperature is equal to
or less than 60 °C, pressurisation will be automatic (as
long as the temperature has been reached and the user
has indicated that the item for work has been inserted).
Manual pressurisation
If the polymerisation temperature is higher than 60 °C,
the user will have to carry out the pressurisation manual-
ly.
At the suitable moment, a beep will sound and the ma-
chine will show the message
bAr
bArbAr
bAr.
The user will have to press the key to introduce
the pressurised air into the tank.
Do not pressurise the
Do not pressurise the Do not pressurise the
Do not pressurise the tank
tanktank
tank
with the lid
with the lid with the lid
with the lid
o
oo
open.
pen.pen.
pen.
Continuous program operation
(Pc)
This is a short program which keeps temperature in or-
der to let any user starting a new polymerisation cycle at
any time.
Not
NotNot
Note
ee
e:
::
:
The maximum temperature allowed in the Pc
program is limited to 75 °C to reduce the possi-
bility of the tank running out of water due to
evaporation.
Limit time of continuous operation
Since the Pc program starts, the temperature will be
maintained for a time limit of 10 hours. If you wish, you
can modify this value between 0 and 15 hours:
1. Select the program Pc.
2. Press the key to modify the maintenance time t
ºC1.
toC1
0h15
Maintenance time for the first tem-
perature.
3. Now, keep pressing the key to modify the lim-
it time of continuous operation tPc.
tPc
10
Limit time of continuous operation
(hours).
4. Use the keys and to modify values.
5. Press the key again to return to program selec-
tion. The values modified will be saved in the
memory automatically.
Cycle end warning – ºC/ºF
By default, the machine will emit an audible warning for
5 seconds at the end of the polymerization.
1. Simultaneously press keys and for 2
seconds.

bEEP
5
Cycle end warning time (seconds).
2. Use the keys and to modify values (0-30
sec). If you select the value “ON”, warning will the
warning will remain indefinitely until a key is
pressed.
3. Press again the key to validate the value and
move on to the next parameter.
dE9r
oC
Temperature in Celsius degrees.
4. Use the keys and to change between ºC and
ºF.
5. Press again the key to validate the value.
Error messages
E-01
Broken interior thermal probe. *
E-02
Broken resistor sensor. *
E-10
The safety thermostatic switch actu-
ated.
*
E-20
Interior overheating *
E-21
Resistor overheating *
E-22
Electronic controls overheating *
E-80
Electricity supply cut **
E-81
Lack of water **
E-82
Excessive waiting time **
* Technical service actuation is needed.
** Press any key to erase the error message.
Safety elements
The machine has the following safety elements:
Air inlet pressure regulator.
Pressure relief valve on lid.
Safety valve on lid.
Interior safety valve.
Detection of anomalies by electronic control.
Resistor temperature sensor.
Safety thermostat.
Maintenance and cleaning
To ensure optimum reliability and long life of the
device, we recommend:
After each use, we recommend cleaning away remains
of materials from inside the tank with normal washing
up liquid. In order to do so, remove the plastic plate
from the bottom of the tank and clean the inside of the
tank, taking care not to damage the temperature probe.
Rinse the inside of the tank with abundant water.
To prevent remains of material from obstructing the
exit from the tank, clean the inside of the tank
periodically (approx. every 5 uses). To do so, heat the
water to a temperature of 100 °C. Then empty the tank
through to the drainage bottle.
Periodically, and depending on water hardness, clean
away remains of limescale which may have been
deposited on the bottom of the tank.
Do not use solvents or any other inflammable product.
Proceed with caution when handling the lid in order
not to bash it (there are safety valves inside).
Replace the rubber seal of the lid periodically. For this
operation, we recommend using original MESTRA
replacements.
If you feel excessive resistance when turning the lids,
or it does not seal well, you can clean the rubber seal
and lubricate it lightly with talcum powder.
Technical characteristics
Height: ...................................................................35 cm
Width: ....................................................................36 cm
Depth: ....................................................................40 cm
Weight: ..................................................................5,5 kg
Pressure:...................................................................2 bar
Maximum temperature:.........................................100 ºC
Tank capacity:............................................................ 6 L
Tank dimensions:........................................Ø22 x 15 cm
Heating power:......................................................600 W
UE statement of conformity
The company Talleres Mestraitua S.L.
with social address: Txori-erri Etorbidea, 60
48150 Sondika - Bilbao - Spain
hereby declares that the product
Automatic polymerisation pot R-030425
Meets the requirements set out in the following direc-
tives:
2014/35/UE (low voltage)
2014/30/UE (electro magnetic compatibility)
2006/42/CE (machinery safety)
Ignacio Mestraitua
Managing Director
Sondika, 2017-11-27

Your trusted brand
Talleres Mestraitua S.L.
Txori-erri Etorbidea, 60
T: (+34)944530388 - F: (+34)944711725
48150 SONDIKA
-
BILBAO
-
ESPAÑA
Other manuals for Autopol Geisser
1
Table of contents
Other Mestra Laboratory Equipment manuals
