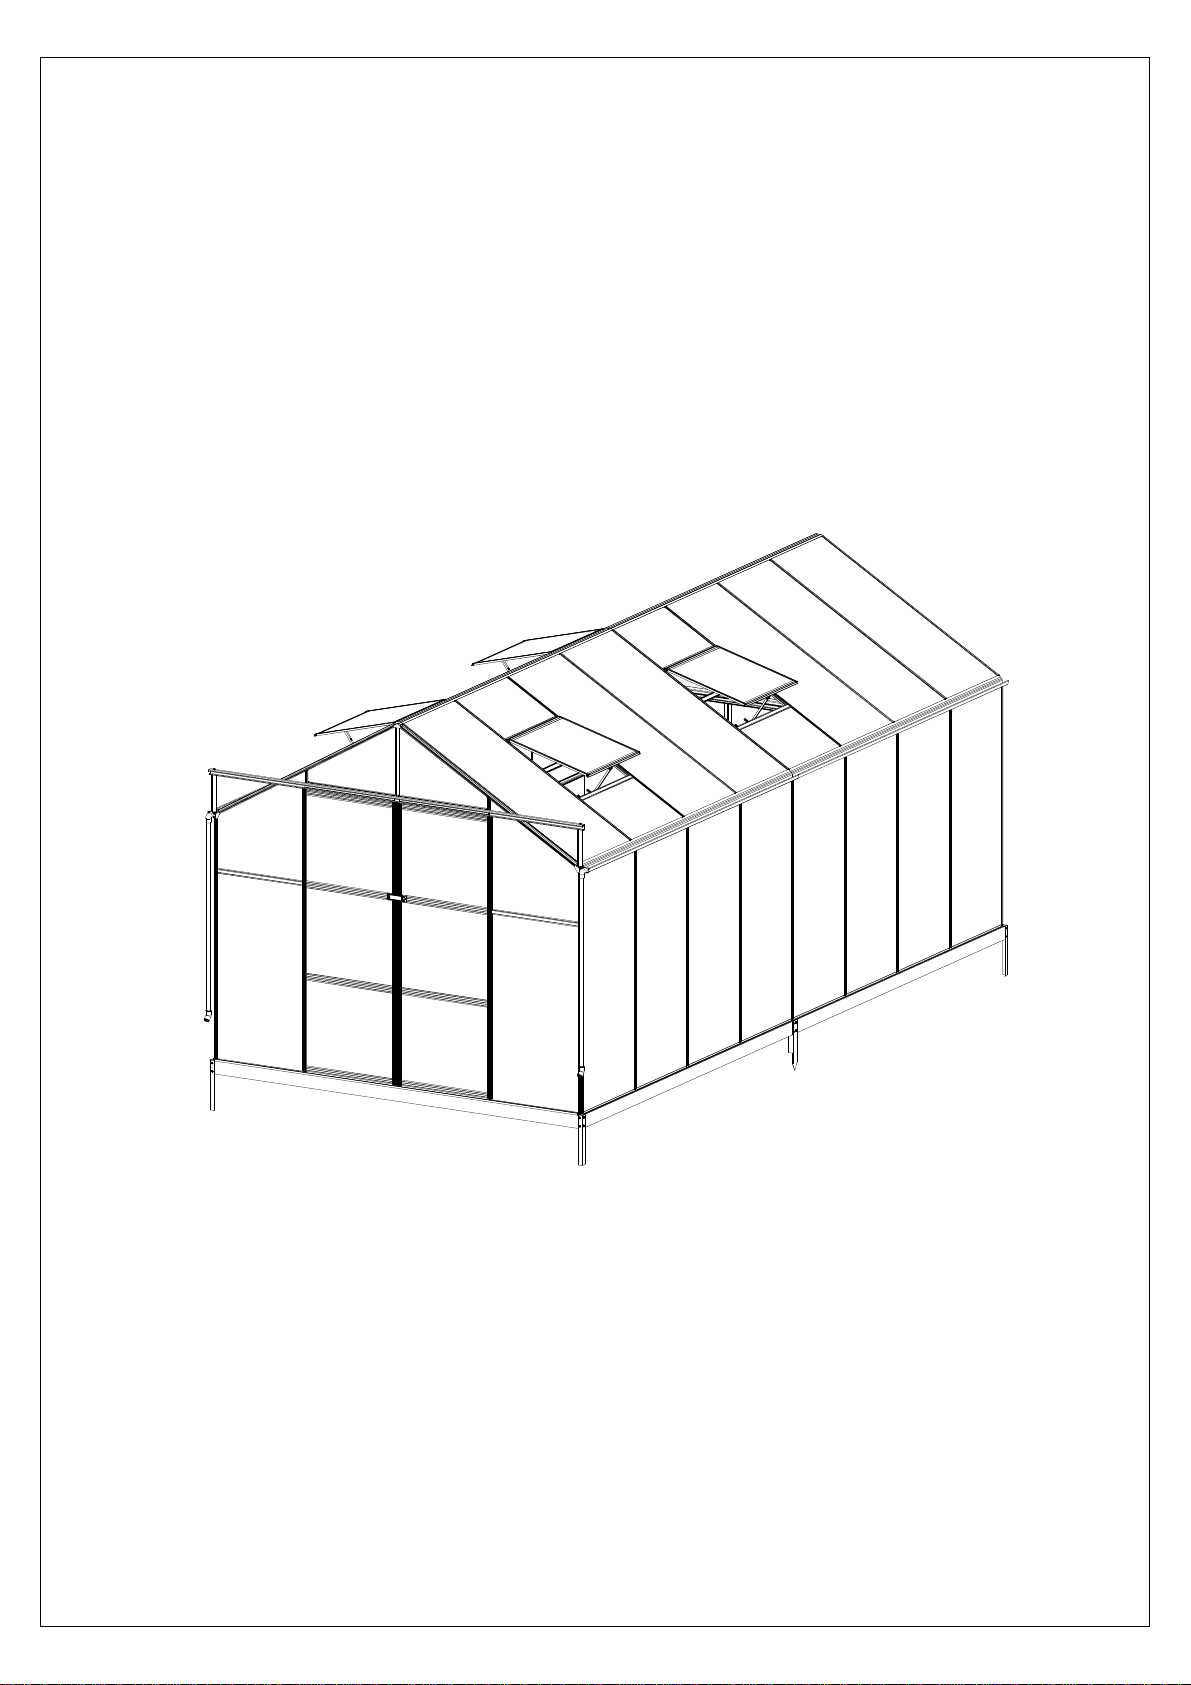
Metalcraft GP938 User manual
Assemblyinstruction
PRODUCTSIZE(LxWxH):
PLEASEREADCAREFULLYBEFOREASSEMBLY
MODEL:GP938 494 X 250 X 228CM

CONTENTS
1. Assembly Advice ................................................................Page 1
2. Product Features ................................................................Page 2
3. Parts List .............................................................................Page 3
6. Base Assembly ...................................................................Page 8
7. Framework & Glazing Assembly .......................................Page 9 - 22
5. Roof Vent Assembly ..........................................................Page 6 - 7
4. Door Assembly ...................................................................Page 4 - 5
11
Rubber is not provided if you choose polycarbonate sheet as glazing panel.
Important:
Assembly and Maintenance Advice
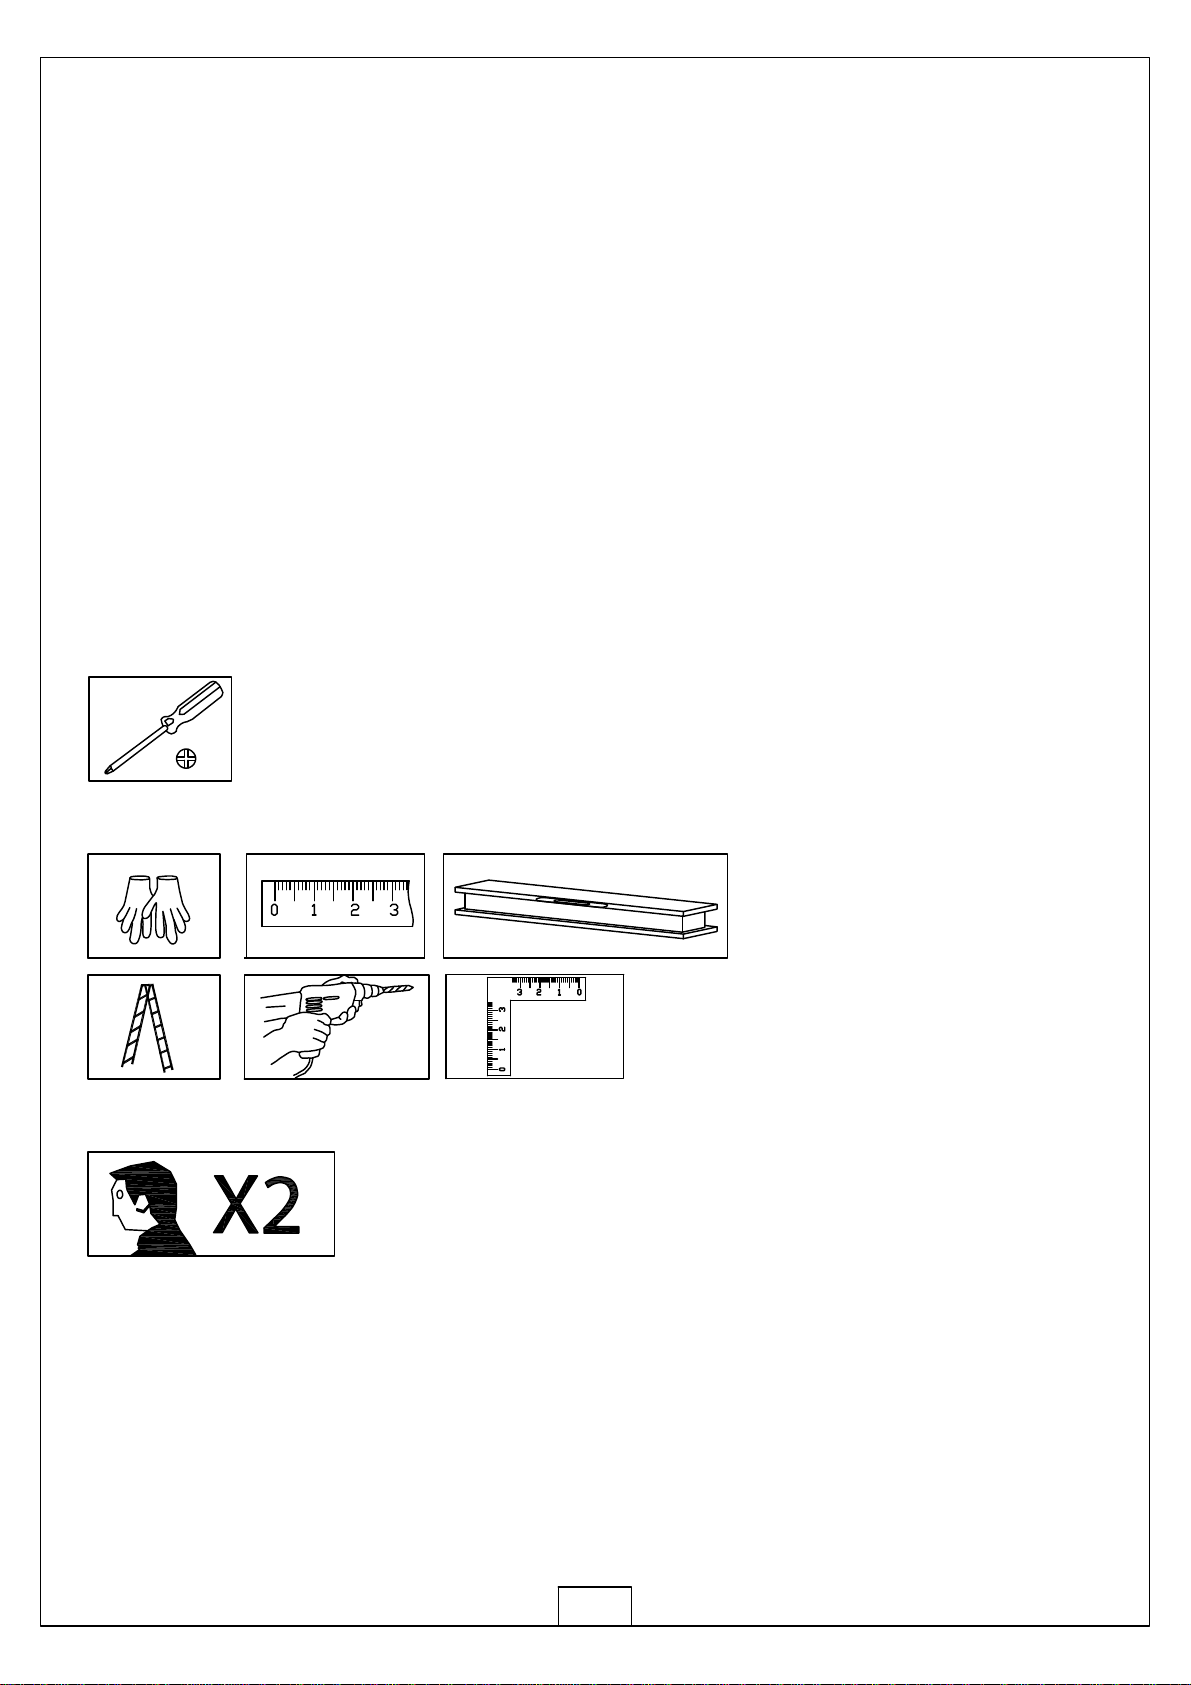
1. For safety purposes, we strongly recommend that this product is assembled by at least
two people.
2. Some components have sharp metal edges. Please be careful when handling metal
components. Please wear gloves, shoes and safety goggles during assembly.
3. Lay all of the components on a soft carpet or blanket to avoid any scratches or damages.
4. DO NOT climb or stand on the roof. Heavy articles should not be leaned against
the greenhouse.
5. Keep the roof and gutter clear of snow, dirt & leaves. Allowing snow to build up on
the roof may damage the product.
6. Unlike steel, if the paint finish is scratched this will not harm the aluminium underneath.
7. When your product needs cleaning, use a mild detergent solution and rinse with cold
clean water. Do not use acetone, abrasive cleaners or strong detergents to clean
the panels.
FreeTool
Tools Provided:
Tools Required when Assembly (Not Provided)
Assembly at least by two Persons

2
Functions and Features:
1. The strong two part eaves beam includes an integral gutter. Downpipes are also included
as standard so you can collect rainwater.
Automatic Opener
GM80001
Manual Opener
2. Manual window handles are included as standard with the roof vents. If required,
automatic roof vent openers are available as an inexpensive optional extra.
GM80001 is sold separately
3. Remove approximately 2 inches of film from all sheet edges before installing and remove
all film immediately after the construction is completed. Please ensure that the side
with the white film faces outwards.
4. This quality greenhouse features self-tapping screws to provide strong joints. As the name
suggests, the screws tap their own thread. Driving in self-tapping screws requires more
force than conventional screws. A powered screwdriver is therefore recommended.

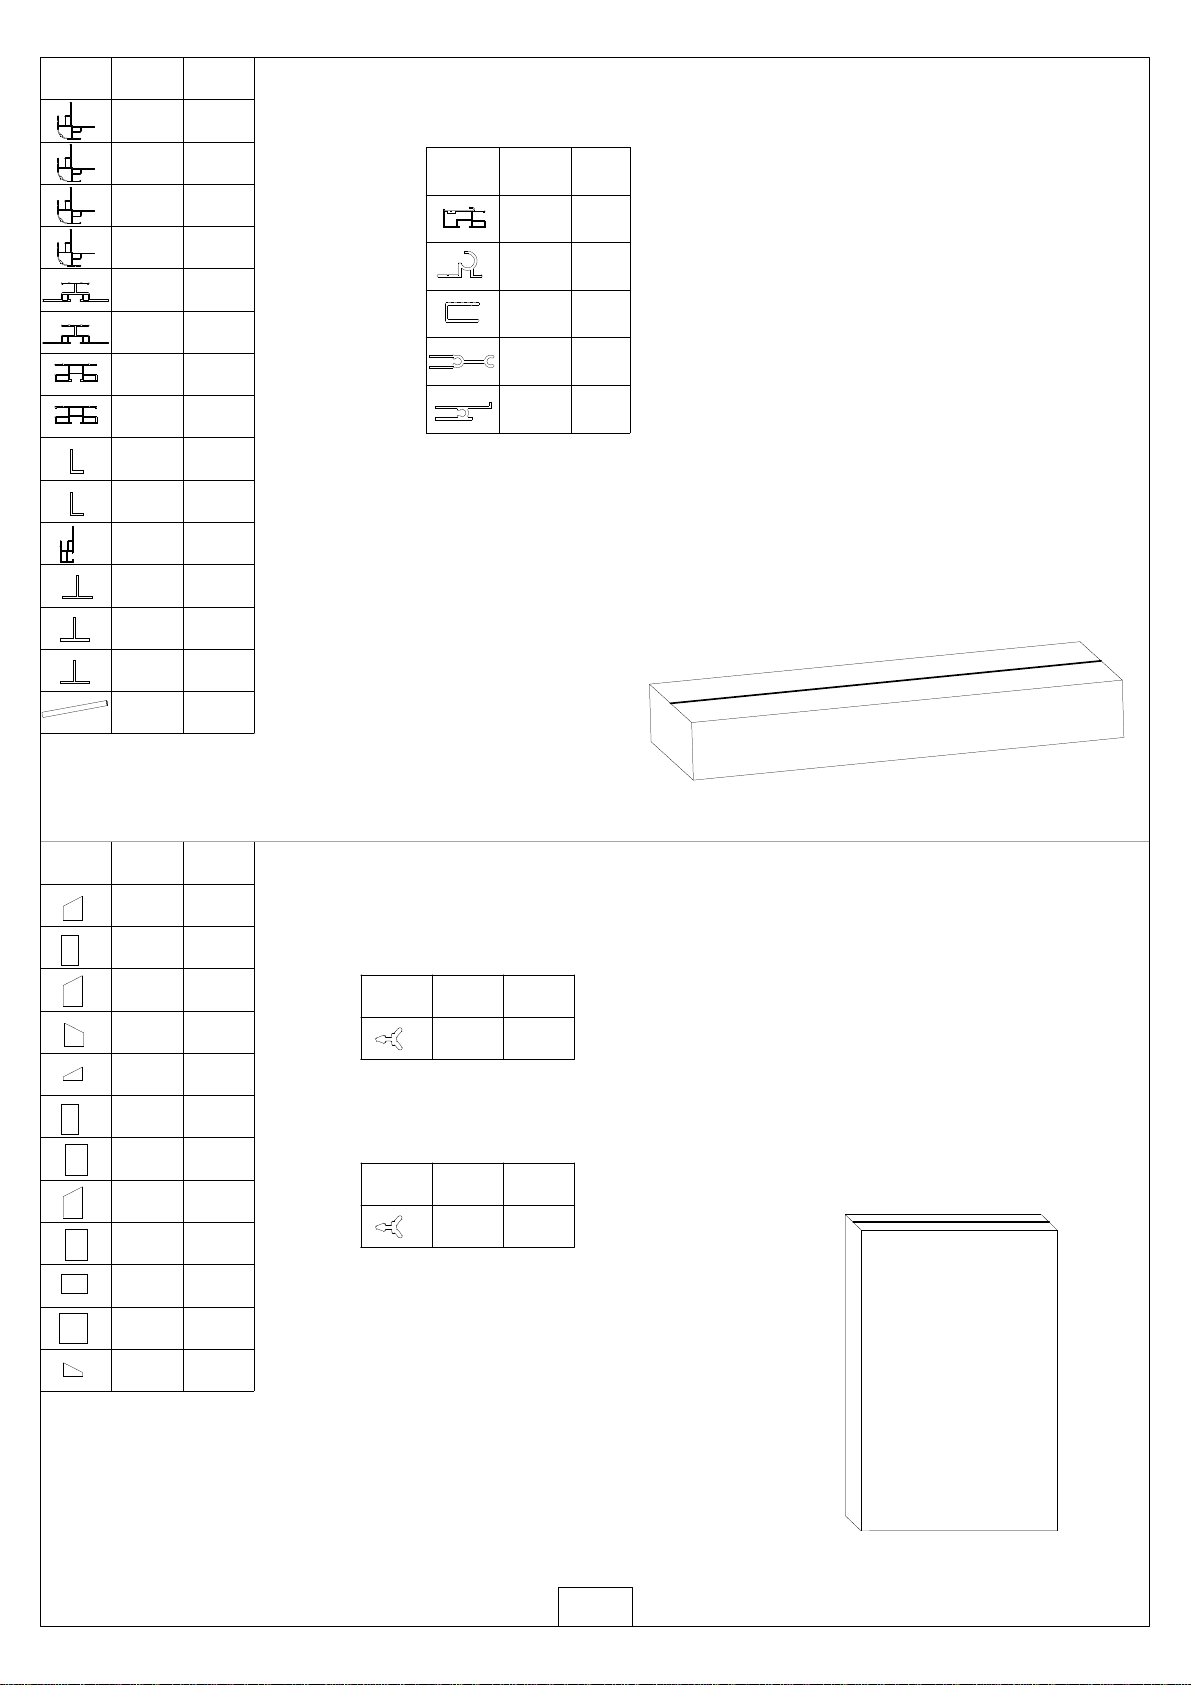
J07 4
J08 4
J01 2
2
2
J02R
J02L
32
4X16D
Z02
J05 4
J03R
J03L
1
1
10
4X10
Z03
L09D 4
W08 4
L03B 2
L06D 2
PART NO QTY
W01 8
W02 4
L03A 2
L08D 5
L10 1
L02C 1
L02D 1
L02E 1
L02F 1
L02G 1
L07D 4
9
L23D
4
W06
1
L14
NO.
Part QTY.
3
L16B
2
L15
3
L18A
2
L17
32
4X25
Z01
1
L16A
1
L18B
door
14
M4.2X16
Z04
M01
M6
S01
M6X12 314
317
S02
M6X20 3
PART NO QTY
S01
M6X12 24
M01
M6 24
1
W07
W011 2
44
M4.2X16
Z04
1
ALU.BOXNO.1
ALU.BOXNO.2
PART NO QTY
PART NO QTY
PART NO QTY
GMDJ-101
GMDJ-102
GMDJ-103
4
2
2
D1 2
PART NO QTY
D2 4
L25 4
L23F 2
L04B 1
L13A 1
10
L04A
2
L23A
L05A 4
L05B 18
8
L19
4
L20
4
L21
Part NO. QTY.
4
L11A
4
L12A
windowsX4
L23E 6
PART NO QTY
8
16
6
4
6
2
Y1
1
2
1
1
1
Y2
Y3
Y4
Y5
Y6
Y7
Y8
Y9
Y10
Y11
Y13
12
PC/Glass
N0.1
2
ALU.BOXNO.3
PART NO QTY
L02B 12
L01C 2
L01D 2
L01A 2
L01B 2
L02A 12
PART NO QTY
159.6M
J11
PART NO QTY
J11
Rubber for walls & roof
(Provided for glass only)
Rubber for walls only
(Provided for glass only)
Rubber
99.7M
4
NO.
Part QTY.
1
L15
2
L18A
1
L17
3
Y11
NO.
Part QTY.
16
4X25
Z01
1
L16B
1
L16A L15
L16B
L16A
L17
L18A
Z01
Z01
Z01
L18A
Z01
Z01
Z01
Y11
Y11
Y11
Left Door
5
1
L15
1
L18A
1
L17
3
Y11
16
4X25
Z01
2
L16B
L15
L16B
L16B
L17
L18B
Z01
Z01
Z01
L18A
Z01
Z01
Z01
Y11
Y11
Y11
1
L18B
Right Door
NO.
Part QTY. NO.
Part QTY.
Y10
Z02
Y10
Z02
Z03 Z03
Z02
W06
Z02
L19
Step1
Step2
Step3
L19
2
L19
1
L20
1
L21
1
W06
4X10
6
2
6
1
Y10
4X16D
Z02
1
L11A
1
L12A
M4.2X16
Z03
Z04 2
NO.
Part QTY. NO.
Part QTY.
Windows Assembly
7
L11A
L12A Z04
L11A
L12A
Z02
L11A is factory fitted
to L12A already
Four windows are standard

DJ101
D1
D1
D2
D2
S01
DJ102
DJ103 a
b
ab
=
8
L06D
L07D
L08D
L05D
L05D
L06D
L07D
L08D
L05D
L05D
L06D
L07D
L08D
L05D
L05D
L06D
L07D
L08D
L05D
L05D
GMDJ-101
GMDJ-102
GMDJ-103
4
2
2
D1 2
PART NO QTY
D2 4
S01
M6X12 24
M01
M6 24
BACK
FRONT
51150
50 511 511 511
100
511 511511 511 511 511 511
44
M4.2X16
Z04
511
About 100mm distance
between two Z04
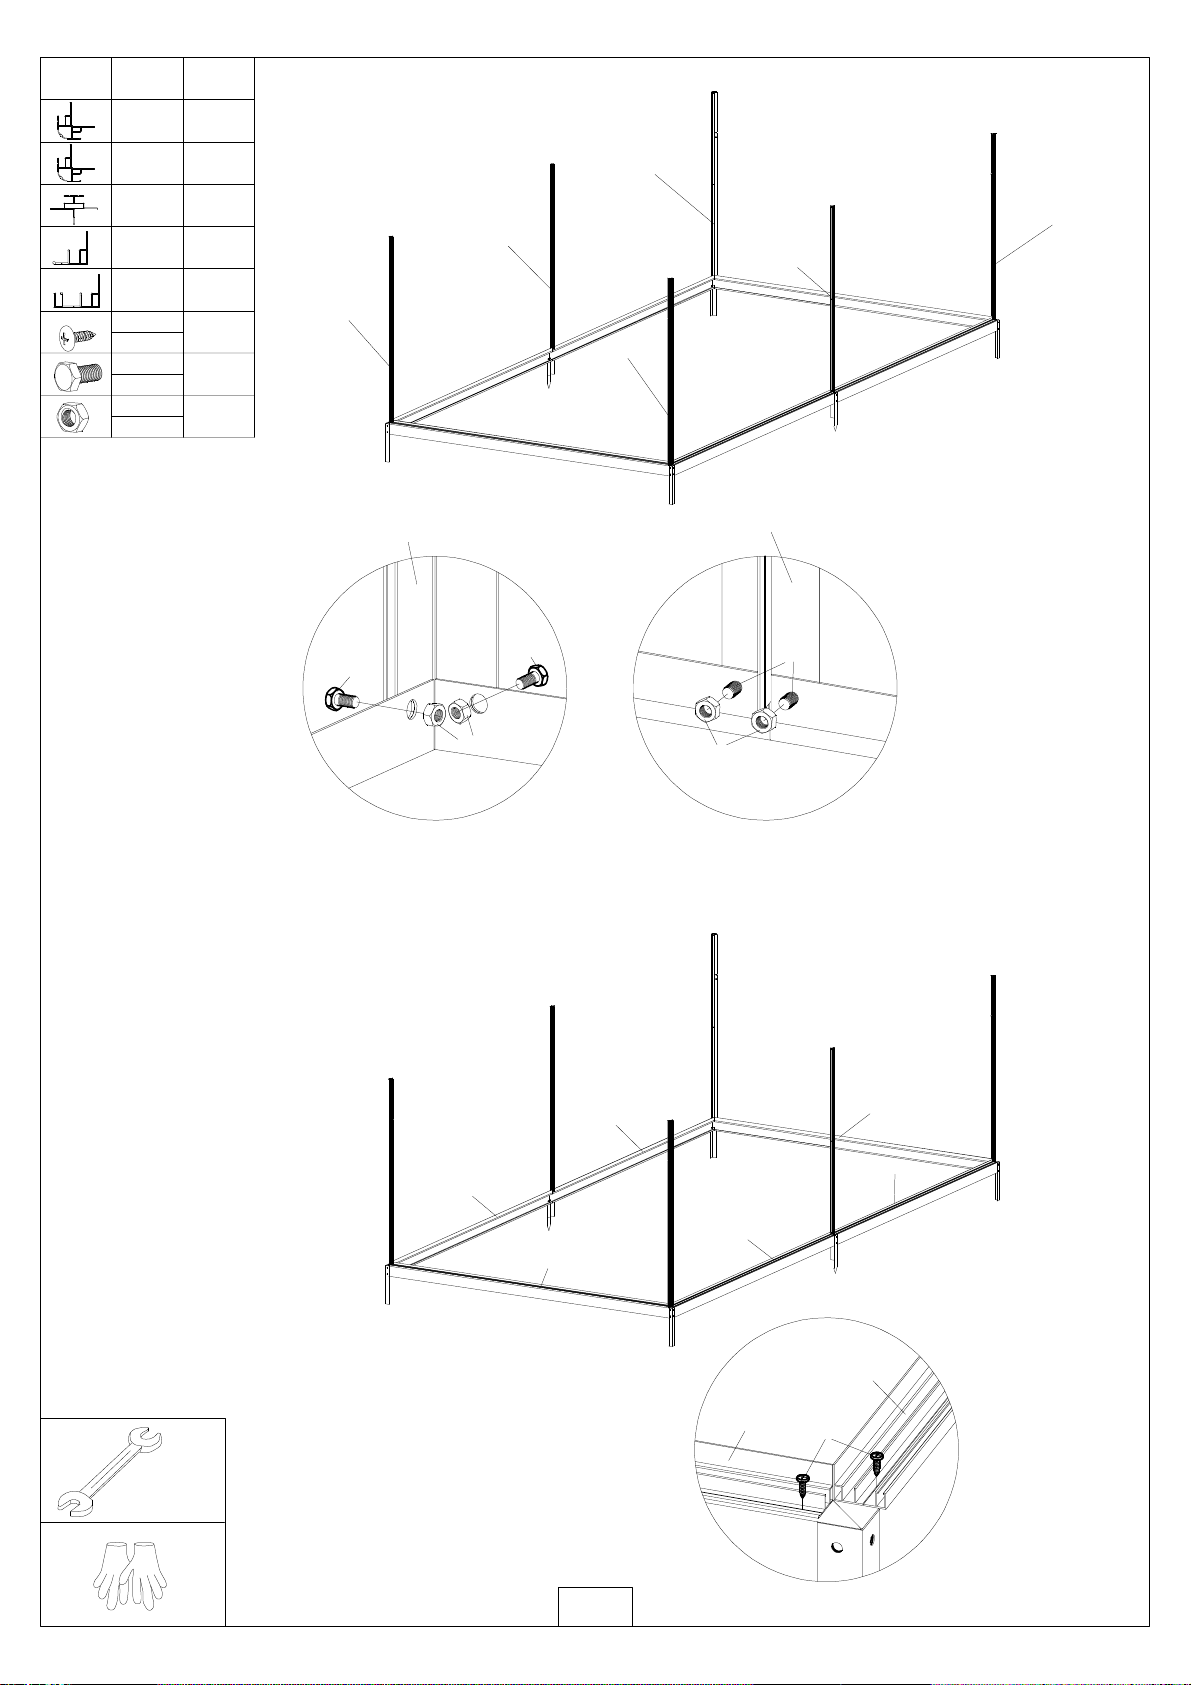
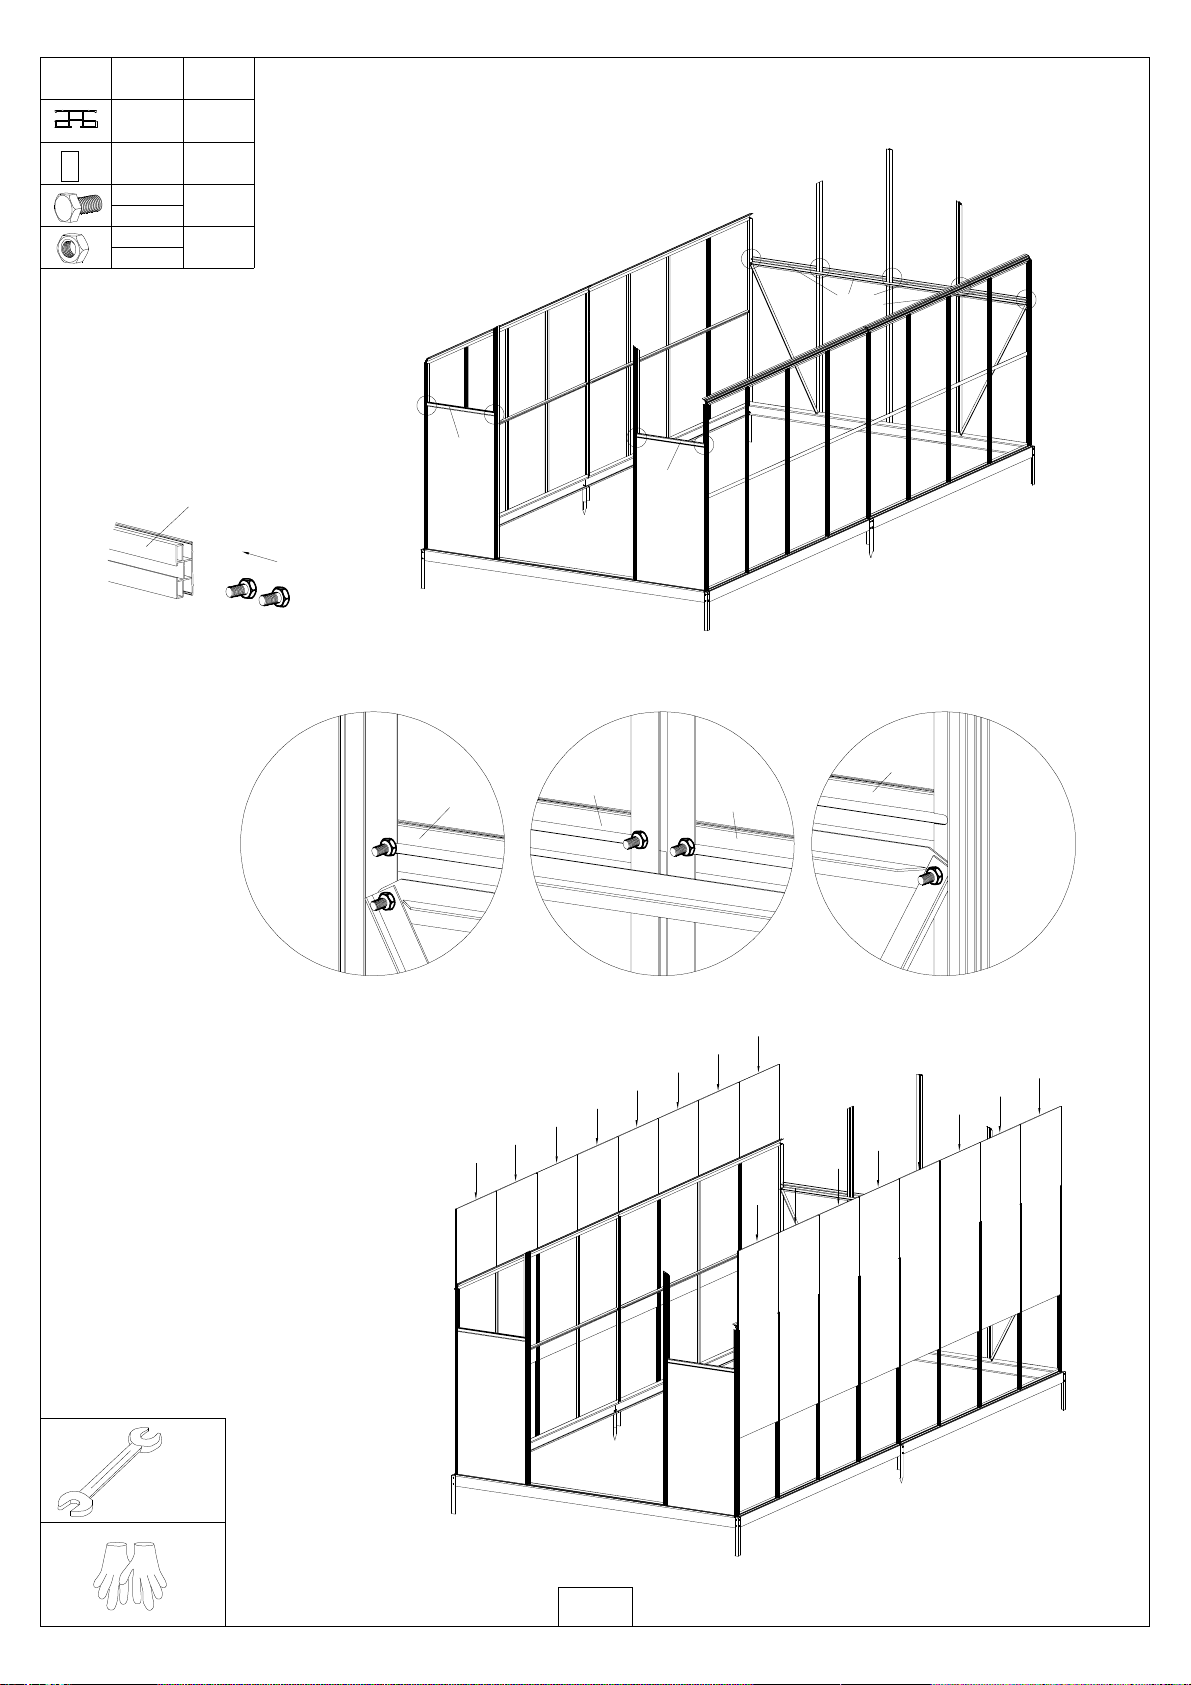
GP938
Fix the base before assembly
the greenhouse. This is the
way to fix the base.
9
Y4
Y1
Y11
Y11
Y2
Y5
Y9
Y6 Y6
Y10 Y7
Y6 Y6
Y7
Y9
Y10
Y9
Y9
8
16
6
4
6
2
Y1
1
2
1
1
1
PART NO QTY
Y11
Y11
Y11
Y11
Y13
Y1
Y4 Y8
Y2
Y2 Y2 Y2 Y2
Y3
Y6
Y7
Y6
Y7
Y9
Y6
Y10
Y6
Y9
Y10
Y9
Y9
Y6
Y7
Y6
Y7
Y6
Y7
Y6
Y7
Y2
Y3
Y4
Y5
Y6
Y7
Y8
Y9
Y10
Y11
Y13
Y6
Y7
Y6
Y7
12
Y6
Y7
Y6
Y7
GP938
Attention:
If glass is chosen, please seal it with
rubber(J11) provided after the whole
assembly is finished.
Rubber is not provided if you choose
polycarbonate sheet as glazing panel.
M01
S01 S01
L01A&B
L01A
L01A
L01B
L01B
10
PART NO QTY
12
M01
M6
S01
M6X12 12
L03A 2
L01A 2
L01B 2
M01
S01
L03A L03A
L03A
Z04
44
M4.2X16
Z04
L08
L10
L08D 5
L10 1
L08D
L08D
L08D L08D
L08D
L10
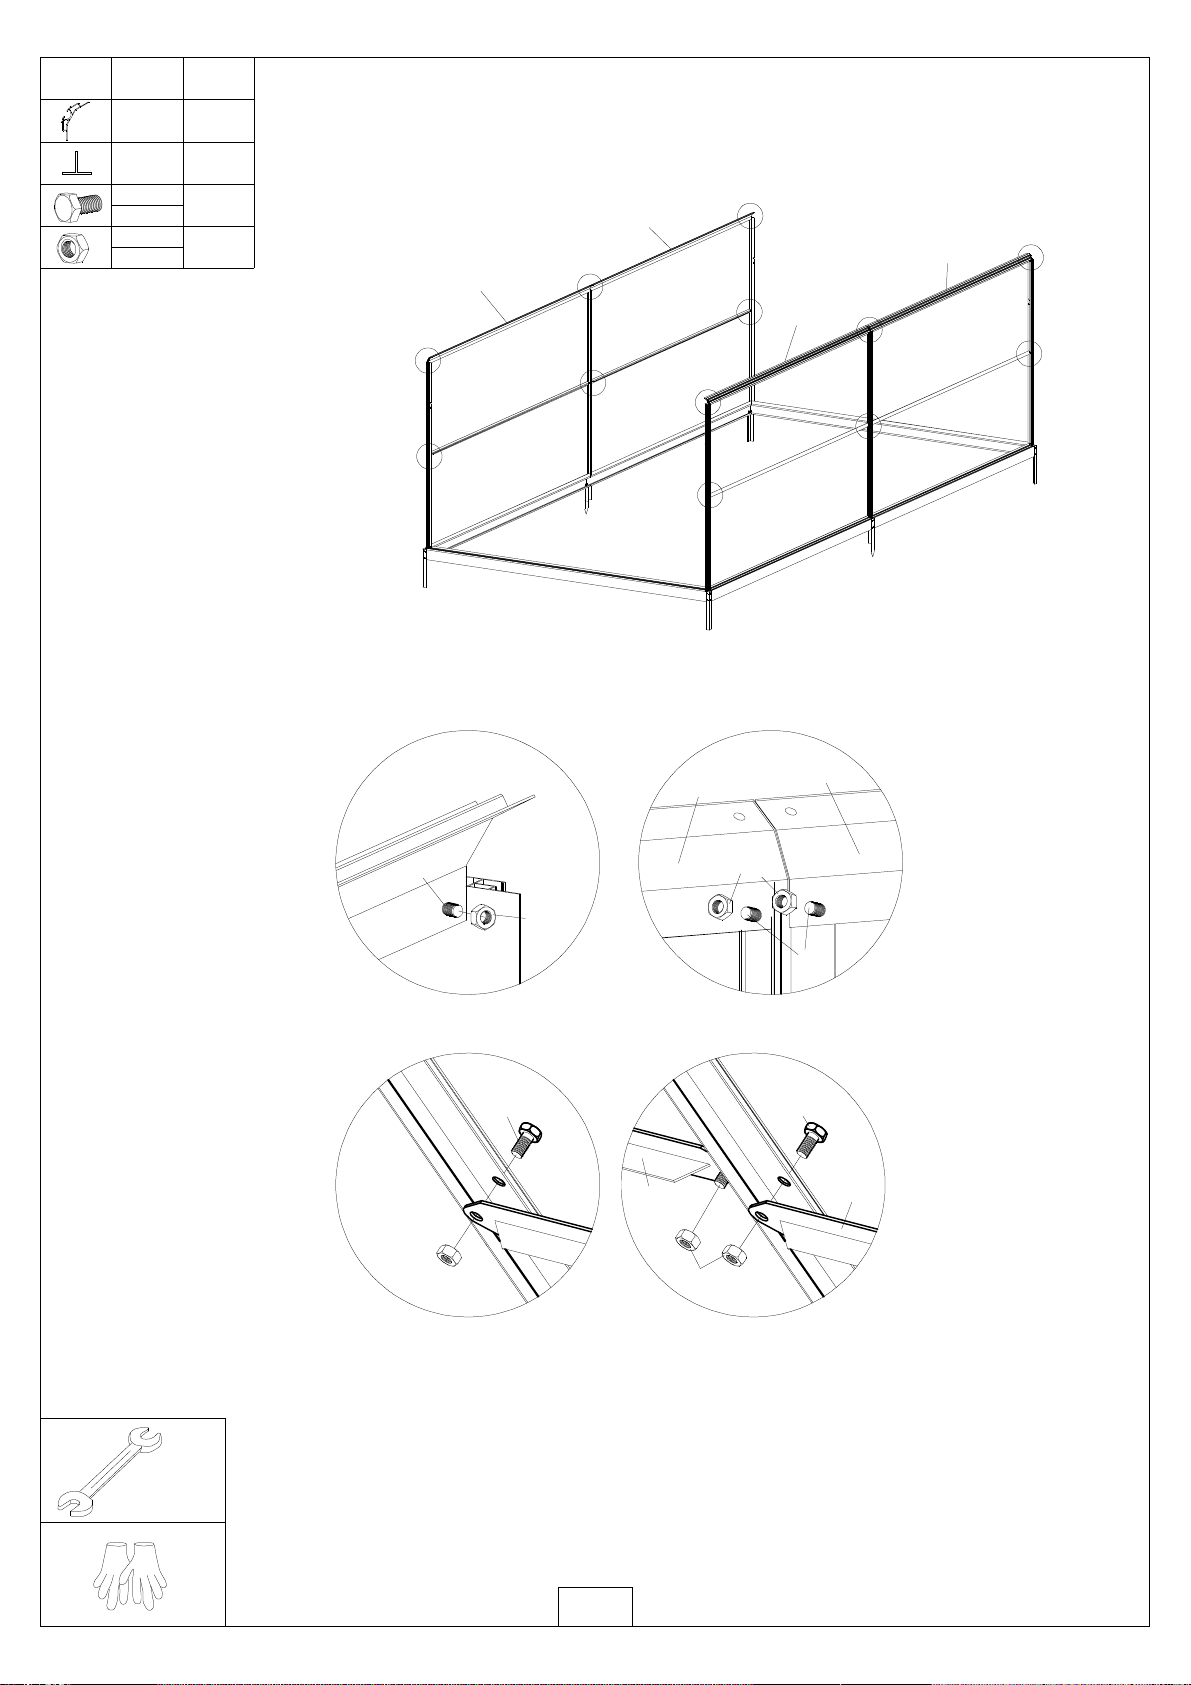
1. Fix the glazing bars (2 x L01A, 2 x L01B and 2 x L03A) to the cills (L10 and L08D)
with S01 & M01 provided.
2. Fix the cills to the base with Z04, using a powered screwdriver. See Page No. 8 for details.
11
PART NO QTY
16
M01
M6
S01
M6X12 16
L07D 4
L07D
L07D L07D
L07D
4
L23D
S01
M01
L07D L07D
2
1
S01
M01
34
L23D
L23D
M01
S01S01
M01
1
1
1
1
22
3
3
3
34
4
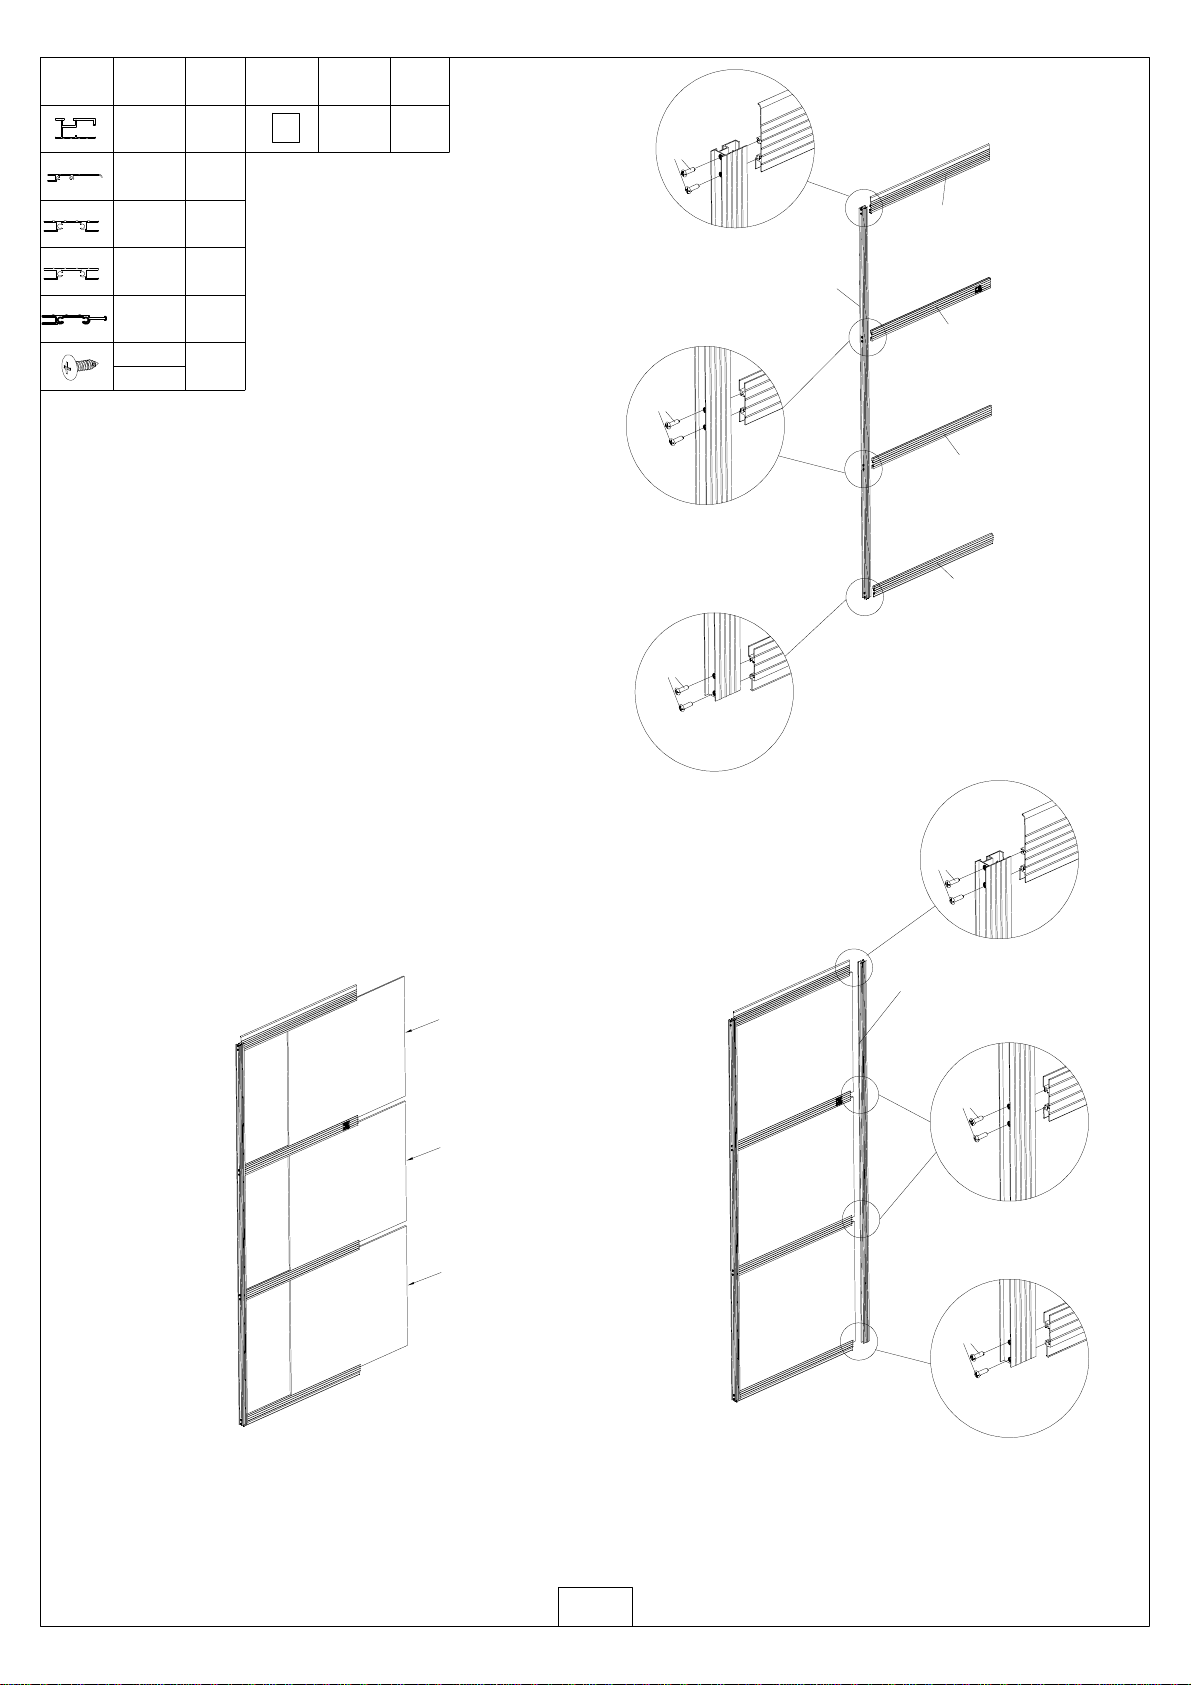
1. Fix 4 x L07D eaves to L01A/L01B and L03A, using S01 & M01.
2. Fix 4 x L23D to L01A/L01B and L03A, using S01 & M01.
12
PART NO QTY
1
234
1
L23D
L02C&D&E&F
S01
L02G
S01
S01
S01 S01
M01
M01 M01 S01
M01
S01
M01
L02C&D&E&F&G
L05A
L05A L05A
2
L23A
L23A L23A
L23D
1
1
22
222
3
3
44
44
L02C L02D
L02E
L02F L02G
L02C 1
L02D 1
L02E 1
L02F 1
L02G 1
19
M01
M6
S01
M6X12 20
L05A 4
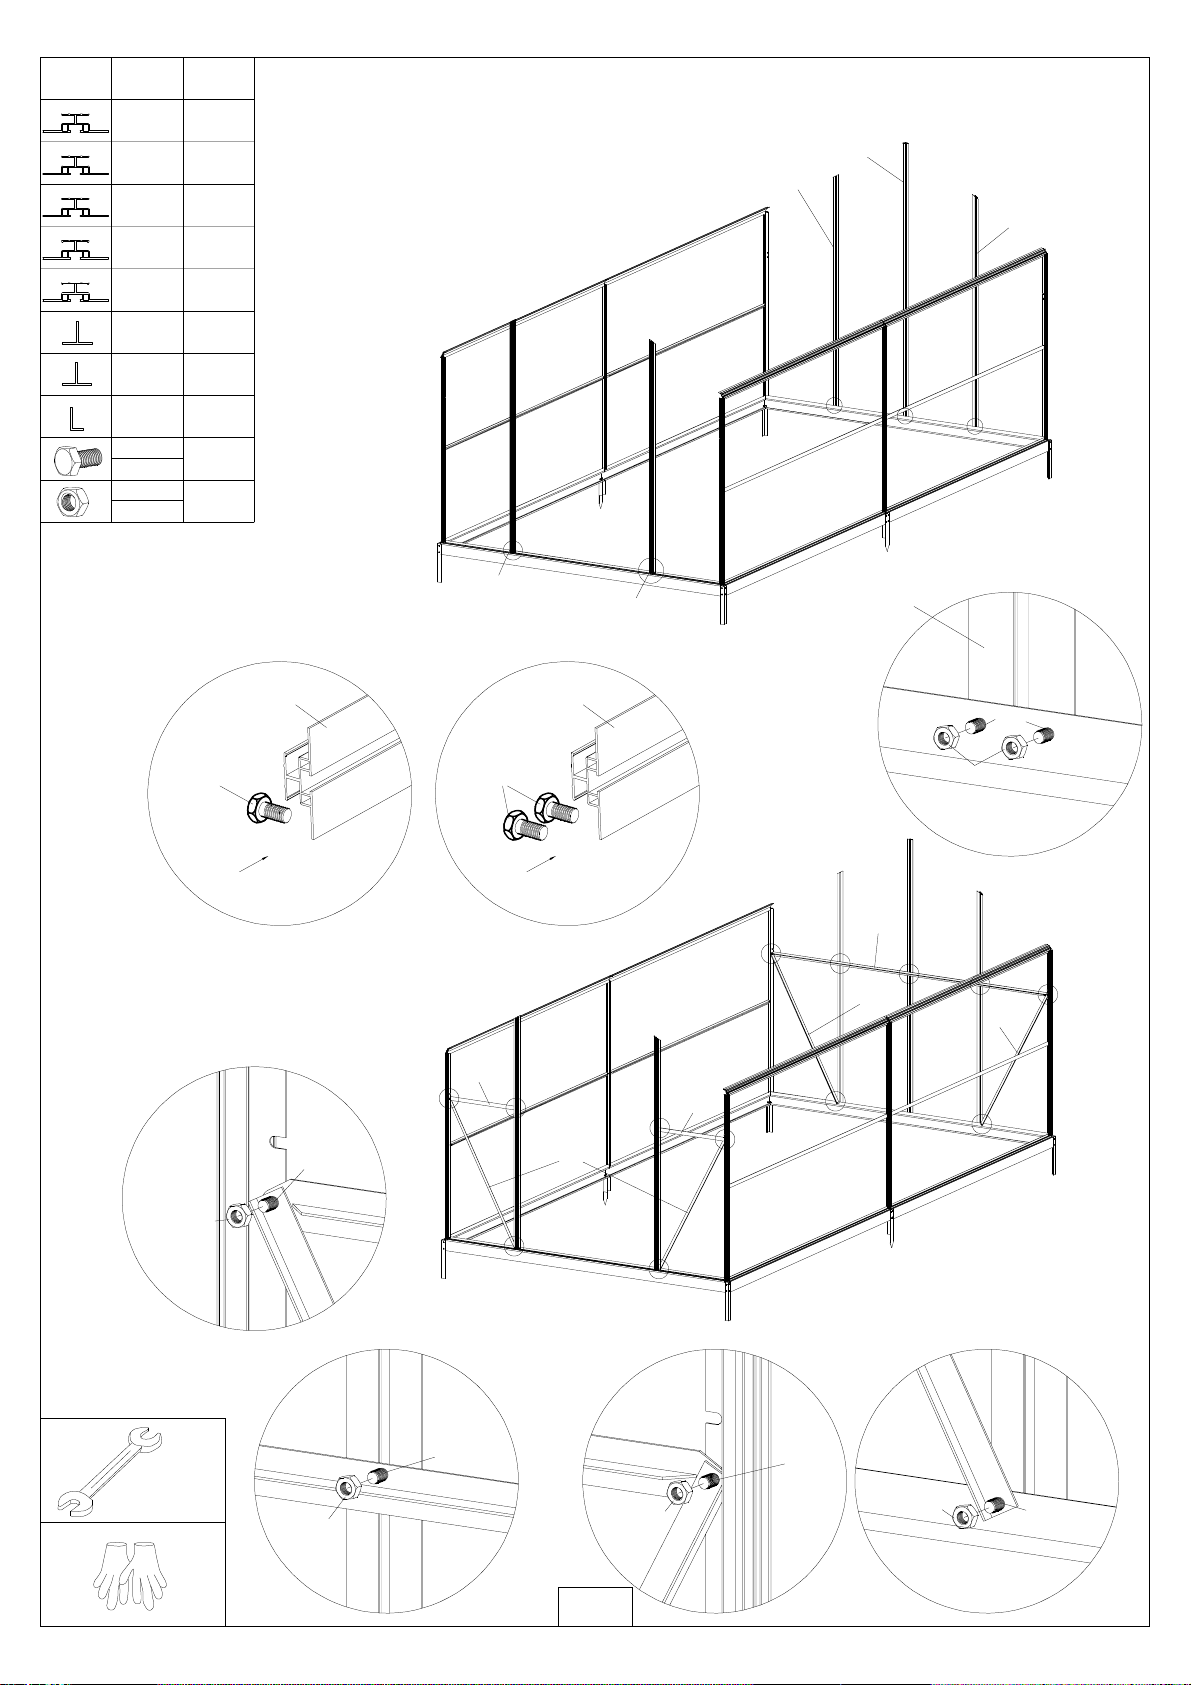
Fix L02C & L02D to cill L10; L02E, L02F
and L02G to cill L08D, using S01 & M01.
Slide 2 * S01
into L02G bolt
channel.
Fix bracings 4 x L05A, 2 x L23A and
1 x L23D as below, using S01 & M01
13
PART NO QTY
Y2 6
60
M01
M6
S01
M6X12 72
Y2 Y2
Y2
Y2
Y2
Y2
L02A
S01
111111
111111222222
222
222
333333
333
333
S01
M01
L02A
1
L07D
2
M01
S01
L02A 12
Fix L02A (12pcs) to L08D
and L07D using S01 & M01.
L02A
3
S01
M01
Slide 2 bolts (S01) into each L02A bolt
channel. One is to fix L23D, the other is
to be used later for fixing L05B
14
PART NO QTY
12
M01
M6
S01
M6X12 12
Y6 16
6
L04A
L04A
L04A
L04A L04A L04A L04A
123
L04A
S01X2
L04A
Y6 Y6 Y6 Y6 Y6 Y6 Y6 Y6
Y6 Y6 Y6 Y6 Y6 Y6 Y6 Y6
3
1
1
3
22
222
Fix bracings L04A (6pcs) as above, using S01 & M01.
Slide the glazing panel Y6
into positions

15
Y1 Y4
Y1
Y5 Y13
Y4 Y3
Y8
PART NO QTY
9
M01
M6
S01
M6X12 10
L04B 1
L13A 1
12
3
4
L02C L02D
12
L13A L13A
L13A
5
L04B
L02E L02F
34
S01X2
L04B
L04B
S01
M01
S01
M01
S01
M01
S01
M01
S01
M01
5
S01X2
L13A
2
Y1
1
Y3
2
Y4
1
Y5
1
Y8
1
Y13
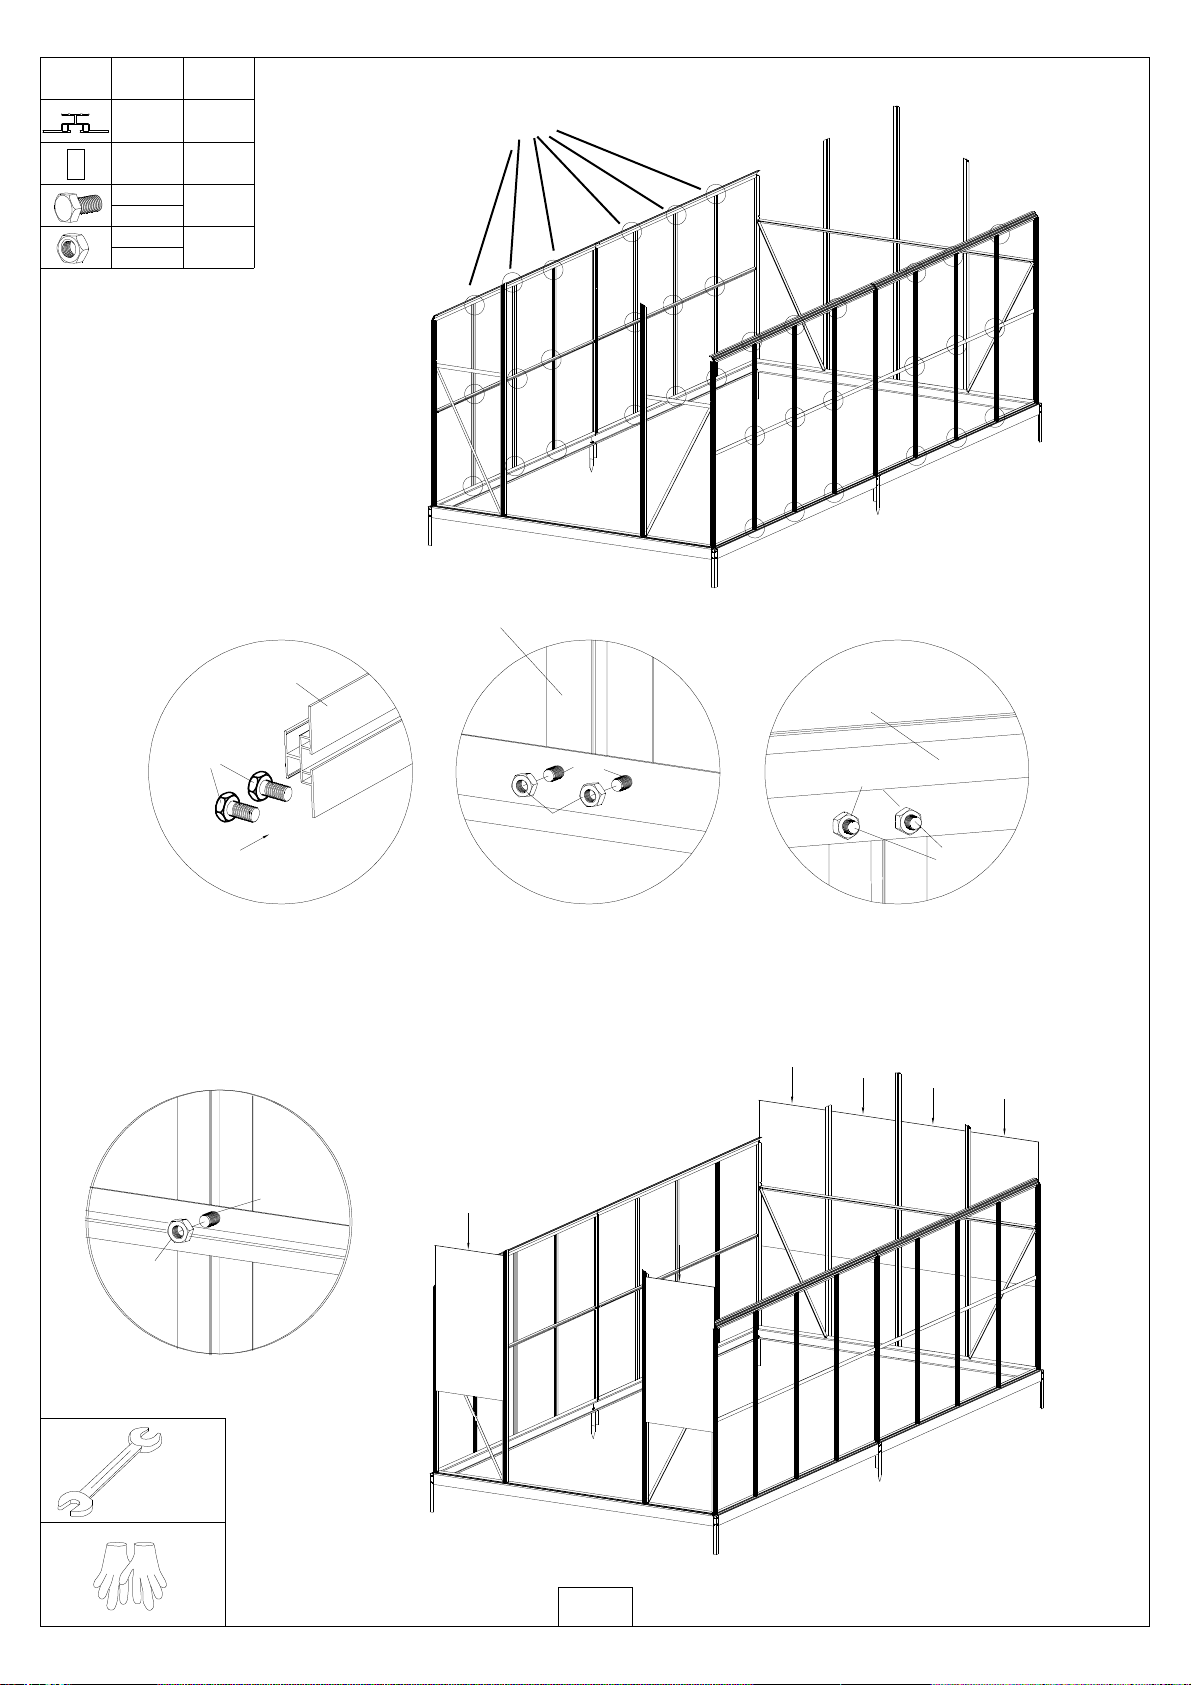
Fix L13A to L02C & L02D
with S01 & M01.
Slide 2*S01 into
the channel of L04B
Preload the bolts
S01 & M01 to L02E
& L02F before
sliding the panels
into positions.
Slide the glazing panels Y1, Y3, Y4
Y5, Y8 and Y13 into positions.

16
PART NO QTY
22
M01
M6
S01
M6X12 20
L01C 2
W01 2
M01 W02
W01
M01
1
1
22
22
3
3
44
44
L01D 2
L01C
L01C
L01D
L01D
W02 4
S01
M01 M01
S01
12
L01C&D L01C&D
34
M01
S01
L01C&D
5
1. Preload S01 & M01 on L01C and L01D before fixing
them to L01A/L01B. See figue 1 & 2.
2. Bolt L01C and L01D with plate W01, using S01 & M01
preloaded. And then fix them to L04B and L02G,using
S01 & M01.
3. Fix L01C & L01D to L02C & L02D/L02E & L02F with
the plate W02, using the S01 and M01 preloaded
above.
4. Fix L01C & L01D to L01A & L01B,using S01 & M01.

L03A&B
L23E
3
L23E 6
17
PART NO QTY
22
M01
M6
S01
M6X12 22
L03B 2
W01 6
W01
W01
S01
M01
M01
S01
L07D
L07D
S01 M01
W01
L03B
L03B L03B
W01
W01
W01
1
2
1
333
3
2
1
Fix plates W01 (2pcs)
to L03A & L03B using
S01 & M01.
Fix glazing bars L03B (2pcs)
to the eaves and the ridge
profiles using S01 & M01
Fix plates W01 (2pcs)
to the two L03B using
S01 & M01.
Fix L23E(6pcs) to L03A
and L03B using S01 & M01.
Other Metalcraft Greenhouse Kit manuals


Popular Greenhouse Kit manuals by other brands

Flower House
Flower House StarterHouse manual

Summer Garden Buildings
Summer Garden Buildings GREENHOUSE 185 Assembly instructions

Palram Applications
Palram Applications BeIIa 8x8 instructions

Alton
Alton VICTORIAN 6' WIDE Extension instruction manual

OLT
OLT 8x8 Cedar Assembly manual

harvst
harvst S14 Setup guide


