Metro Therm SPLIT BOX 6 kW User manual

SPLIT BOX FOR AIR-WATER HEATPUMP
MANUAL
SPLIT BOX 6 kW
SPLIT BOX 8/12 kW
SPLIT BOX 16 kW
08:211-1805

2
TABLE OF CONTENTS
Introduction ............................................................................ 3
1. About the product.................................................................... 3
2. Transport, Handling and Delivery .................................................... 8
3. Positioning ........................................................................... 9
4. Water Circuit ........................................................................11
5. Refrigerant Circuit . . . . . . . . . . . . . . . . . . . . . . . . . . . . . . . . . . . . . . . . . . . . . . . . . . . . . . . . . . . . . . . . . . 12
6. Electrical Connections . . . . . . . . . . . . . . . . . . . . . . . . . . . . . . . . . . . . . . . . . . . . . . . . . . . . . . . . . . . . . . 12
7. Control and Operation...............................................................13
8. Maintenance ........................................................................13
9. Disassembly and Decommissioning.................................................13
10. Troubleshooting and Repair .......................................................13
11. Declaration of Conformity.........................................................15
12. Product and Installer Information .................................................15

3
INTRODUCTION
The aim of this manual is to give information, instructions and warnings on the split
box for air to water heat pumps. The manual is to be used by installers and plumbers as
well as by end users, since it contains important safety indications.
The manual is a part of the split box and it is to be conserved with care, since it
contains important installation and maintenance instructions that can be useful to
assure a long life time and an efficient operation.
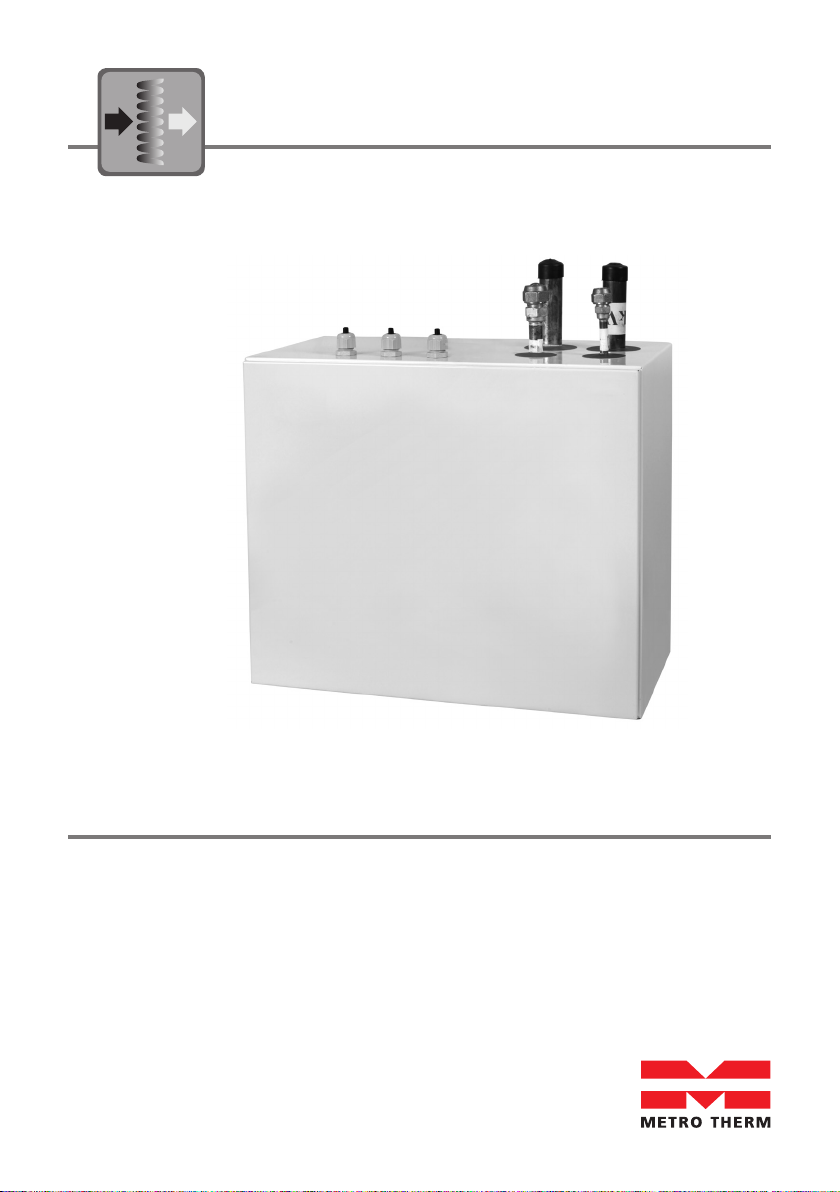
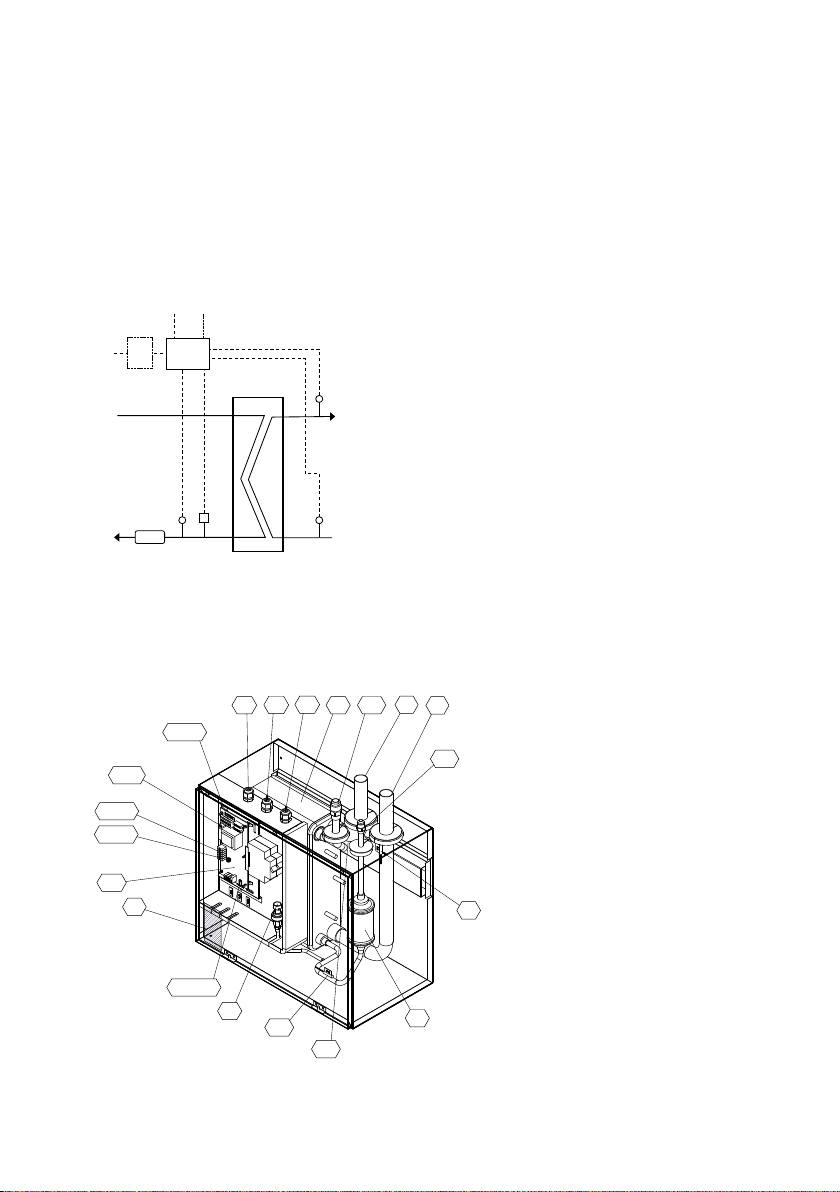
1. ABOUT THE PRODUCT
The product is an indoor condenser unit that has been designed according to EU
directives. The product is intended for co-operation with an air to water heat pump for
space heating and hot water production for domestic use. The unit has been designed
to be ready for installation. The unit is intended for refrigerant R410A.
The unit is delivered with the refrigerant circuit charged with nitrogen to avoid
contamination and ingress of water.
The unit is equivalent to the HBS 05 in terms of performance.
1.1. Safety precautions
• The product shall be installed, commissioned, repaired only by qualified technicians.
• Incorrect installation can result in damages of properties and injuries to people and
animals.
• The unit shall be disconnected from the power supply when the cover is off.
• The unit shall not be used by children or people with limited physical or mental
capacity.
• Children should be supervised to ensure that they do not play with the appliance.
• Cleaning and maintenance shall not be made by children without supervision.
• Do not place flammable materials in contact or close to the unit.
• The water system and the refrigerant system should be installed as stated in the
manual.
• When in service, the unit should not be placed in sub-zero temperature areas.
• When not in service, the unit can be placed in sub-zero temperature areas, but all the
water in the heat exchanger and associated pipe work should be removed.
• The unit should be used only for its specified use. The manufacturer is not liable for
any damages due to failure to observe this manual.
• Take all the possible precautions to avoid incidents.
• The product is intended for R410.

4
1.2. Safety instructions - Cooling circuit
• Only skilled and trained technicians shall carry out repair and service of the heat
pump circuit.
• Before opening the cooling circuit, discharge the refrigerant to a level that allows
safe working conditions.
• The refrigerant can be toxic if inhaled or if in high concentrations.
• Special attention should be given if the work is carried out with an open flame.
1.3. Serial number
The serial number can be found on the nameplate which is located under the front
cover of the split box.
1
1
2
2
3
3
4
4
5
5
6
6
A A
B B
C C
D D
990300010 Splitbox serienummer
Figure 1. Name plate and serial number.

5
1.4. Technical data
The split box is composed of a plate heat exchanger which transfer heat from
condensing refrigerant to a water circuit. Required temperature sensors, refrigerant
filter and pressure transmitter together with control board ensures correct operation
of the unit.
1.4.1. Process and Instrumentation Diagram
A: Refrigerant flow
B: Refrigerant return
C: Space heating return
D: Space heating flow
1: Condenser
2: Filter
3: Pressure sensor
4: Temp. sensor, refrigerant return
5: Temp. sensor, space heating return
6: Temp. sensor, space heating flow
7: Print control board (PCB)
8: Supply power
9: Signal cable to outdoor heat pump
10: Residual current device (RCD) (optional)
11: Cable for heat tracing (optional)
A
B
D
C
1
2
3
45
6
7
A: Refrigerant flow
B: Refrigerant return
C: Space heating return
D: Space heating flow
1: Condenser
2: Filter
3: Pressure sensor
4: Temp. sensor, refrigerant return
5: Temp. sensor, space heating return
6: Temp . sensor, space heating flow
7: Print control board
8: Supply power
9: Signal cable to outdoor heat pump
10: Residual current device (RCD)
(optional)
11: Cable for heat tracing (optional)
9
10
8
11
Figure 2. Process and instrumentation diagram.
1.4.2. Component location
1
1
2
2
3
3
4
4
5
5
6
6
A A
B B
C C
D D
990300015 Splitbox komponentplacering
XL1 XL2
XL53
XL52
HZ2
EP2
PF3
UB1 UB2 UB3
BT15
BT3
BP4
AA23
AA23-X100
AA23-X4
AA23-S3
A23-F3
AA23-X1
BT12
Figure 3. Component location

6
A ( 1 : 2 )
A
1
1
2
2
3
3
4
4
5
5
6
6
A A
B B
C C
D D
990300016 Splitbox elektrisk komponenter
AA23
AA23-X100
AA23-F3
AA23-X1
AA23-S3
AA23-X4
Figure 4. Electrical component location.
Pipe connections
XL1 Climate system supply
XL2 Climate system return
XL52 Connection, gas line
XL53 Connection, liquid line
Valves etc.
EP2 Heat exchanger
HQ1 Particle filter (supplied)
HZ2 Drying filter
Electrical components
AA23 Communication board
AA23-F3 Fuse for external heating cable
AA23-S3 DIP switch, addressing of outdoor unit
AA23-X1 Terminal block, incoming supply, connection of KVR
AA23-X4 Terminal block, communication with indoor module/control module
AA23-X100 Terminal block, communication with outdoor unit
X1 Terminal block, incoming supply

7
Sensor, thermostats
BP4 Pressure sensor, high pressure
BT3 Temperature sensor, heating medium, return
BT12 Temperature sensor, condenser, supply
BT15 Temperature sensor, fluid pipe
Miscellaneous
UB1 Cable gland
UB2 Cable gland
UB3 Cable gland
Nomenclature according to standard IEC 81346-1 and 81346-2.
1.4.3. Main technical data
The main technical data are collected in the following figures and table.
6 kW 8/12 kW 16 kW
Dimensions (LxBxH) mm 460x250x400
Weight kg 16 18 23
Water connections (compression fittings) mm ⌀22 ⌀28 ⌀28
Refrigerant hot gas inlet (flow) ” 1/2 5/8 5/8
Refrigerant condensate outlet (return) ”1/4 3/8 3/8
Maximum allowed water pressure MPa 1,0
Maximum allowed water temperature °C 90
Maximum allowed refrigerant pressure MPa 4,15
Maximum allowed refrigerant temperature °C 110
Electrical connections 230V ~50Hz
Recommended fuse rating A 6
Ingress protection rating IP21
Water quality, climate system ≤EU-directive no. 98/83/EF

8
1
1
2
2
3
3
4
4
5
5
6
6
A A
B B
C C
D D
990300019 Splitbox dimensioner
460
135
60
239
294
349
80
155
200
250
XL2
XL1
XL53
XL52
1
1
2
2
3
3
4
4
5
5
6
6
A A
B B
C C
D D
125
102,5 255 102,5
460
400
10
990300011 Splitbox ophæng 1
Figure 5. Dimensions.
2. TRANSPORT, HANDLING AND DELIVERY
Immediately upon receipt, the unit must be examined to make sure that it is intact and
undamaged. If not, the shipping company must be informed immediately. The recipient
has the responsibility for all the shipments unless otherwise agreed.
2.1. Delivery mode
The appliance is delivered with a ball valve with particle filter for the water circuit.
Figure 6. Ball valve with particle filter.
The unit is delivered purged with nitrogen in the refrigerant circuit.

9
2.2. Storage
The unit must be stored and transported free of water and within its packaging.
Transport and storage may take place at temperatures between -10 °C and +50 °C. If
the unit has been transported or stored at sub-zero temperatures the unit should be
left at room temperatures for 24 hours before commissioning.
3. POSITIONING
• It is recommended that the split box is installed in a room with existing floor
drainage, most suitably in a utility room or boiler room.
• The bracket for the split box is mounted to the wall by use of appropriate screws.
• Route pipes so they are not fixed to an internal wall that backs on to a bedroom or
living room.
• Ensure that there is approx. 800 mm free space in front of and sufficient space
above the product for any future service. Ensure that there is sufficient space
above the machine for pipework and valves.
1
1
2
2
3
3
4
4
5
5
6
6
A A
B B
C C
D D
125
102,5 255 102,5
460
400
10
990300011 Splitbox ophæng 1
Figure 7. Mounting of the split box.

10
1
1
2
2
3
3
4
4
5
5
6
6
A A
B B
C C
D D
990300012 Splitbox placering
Min.200 mm Min.200 mm
Min.300 mm
Figure 8. Recommendation for positioning on wall.
1
1
2
2
3
3
4
4
5
5
6
6
A A
B B
C C
D D
990300013 Splitbox placering vinkel
Min.400 mm
Min.400mm
Figure 9. Recommendation for positioning in corner.

11
1
1
2
2
3
3
4
4
5
5
6
6
A A
B B
C C
D D
990300014 Splitbox afmontering dæksel
2
3
T20
1
Figure 10. How to remove the front cover.
4. WATER CIRCUIT
Pipe installation must be carried out in accordance with current norms and directives.
The split box is not equipped with shut off valves on the water side (XL1 and XL2),
these must be installed to facilitate any future servicing.
When operating the split box free flow in the climate system is recommended for
correct heat transfer. This can be achieved by use of a bypass valve. If free flow
cannot be ensured, it is recommended that a buffer tank is installed.
Install the supplied ball valve with particle filter on the climate system return pipe,
XL2, to protect the heat exchanger in the split box.

12
1
1
2
2
3
3
4
4
5
5
6
6
A A
B B
C C
D D
990300017 Splitbox rørtilslutning
XL1 XL2
XL52 XL53
XL1 Climate system supply
XL2 Climate system return
XL52 Connection, gas line
XL53 Connection, liquid line
NOTE
The pipe work must be flushed before the heat pump is connected, so that any
contaminants do not damage the components.
5. REFRIGERANT CIRCUIT
Install the refrigerant pipes (XL52 and XL53) between the outdoor module and the
split box.
Installation must be carried out in accordance with current norms and directives.
Observe the maximum pipe length, maximum high differences, pipe materials, pipe
diameters and other instructions as given in the installation manual for the outdoor
unit.
Install, test and commission the pipes between the split box to the outdoor unit
according to the guidance and instructions in the outdoor unit installation manual.
6. ELECTRICAL CONNECTIONS
Electrical installation and service must be carried out under the supervision of a
qualified electrician. Electrical installation and wiring must be carried out in
accordance with local rules and current norms and directives.
Connect the split box to the outdoor unit according to the instructions in the outdoor
unit installation manual.
Figure 11. Pipe connections.

13
7. CONTROL AND OPERATION
Control and Operation shall be in accordance with the instructions for the outdoor
unit.
8. MAINTENANCE
The particle filter in the supplied ball valve shall be cleaned after installation. Turn the
handle to off-position and undo the filter cap. Clean the filter cartridge, reassemble
and turn the handle to on-position.
9. DISASSEMBLY AND DECOMMISSIONING
The unit has to be decommissioned in the most environmentally proper manner. When
the product is discarded, please observe the local municipal waste removal
regulations.
10. TROUBLESHOOTING AND REPAIR
The condenser and associated pipes and pipe components is fully casted into high
efficient poly-urethane foam to ensure excellent insulation and heat preservation
properties. Therefore, component replacement is limited to the electrical control
board, pressure transmitter and temperature sensors.
10.1. Replacing temperature sensors BT3 and BT12 for the water pipes
• Leave the existing sensor in place.
• Install new sensor on the relevant pipe, BT3 on XL2 (Climate system return) and
BT12 on XL1 (Climate system supply) right above the spit box.
• Ensure good contact between sensor and pipe and good insulation.
• Guide the sensor cable to the control board by use of a spare cable gland (UB1, UB2
or UB3).

14
1
1
2
2
3
3
4
4
5
5
6
6
A A
B B
C C
D D
990300015 Splitbox komponentplacering
XL1 XL2
XL53
XL52
HZ2
EP2
PF3
UB1 UB2 UB3
BT15
BT3
BP4
AA23
AA23-X100
AA23-X4
AA23-S3
A23-F3
AA23-X1
BT12
Uusi
BT12
Uusi
BT3
10.2. Replacing temperature sensor BT15 for the condensate
return pipe (XL53)
• Carefully cut away insulation material in the indicated squared box in front of the
temperature sensor.
• Remove the old sensor, clean the pipe and make space to the replacement sensor.
• Install the sensor. The sensor shall be located ABOVE the pipe.
• Insure good contact between sensor and pipe and good insulation.
• Guide the sensor cable to the control board behind the front cover.
BT15
Figure 13. Temperature sensor BT15 location.
Figure 12. General temperature sensor location.

15
11. DECLARATION OF CONFORMITY
The Declaration of Conformity can be downloaded at www.METROTHERM.dk
12. PRODUCT AND INSTALLER INFORMATION
Installed model:
Serial number:
Accessories:
Installers
Pipe installation
Date:
Company:
Name:
Phone number:
Electrical installation
Date:
Company:
Name:
Phone number:
Commissioning
Date:
Company:
Name:
Phone number:
This manual suits for next models
2
Table of contents