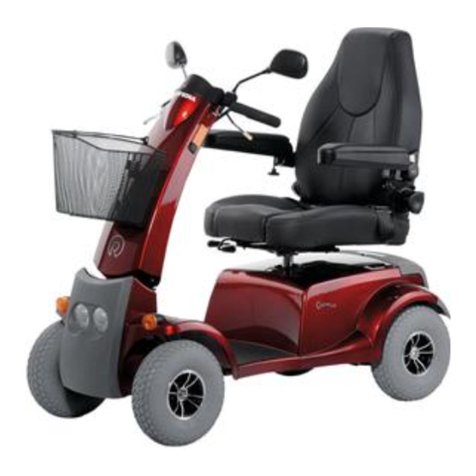
Meyra-Ortopedia Cityliner 415 XL User manual

OPERATING MANUAL
SCOOTER, Control panel with LCD-
display
GB
We move people.

2
Contents
Introduction .................................................................................................. 3
Specifications/ utilisation ............................................................................ 3
Use....................................................................................................................3
Adjustment ......................................................................................................3
Overview ....................................................................................................... 4
Keyboard .........................................................................................................4
LCD-Display......................................................................................................4
Pre-operation checks.................................................................................... 5
Battery charge condition............................................................................. 6
Battery gauge .......................................................................................................6
Battery-symbols...............................................................................................6
Evaluation........................................................................................................7
Pre-selectable maximum speed...........................................................................8
Keys and symbols......................................................................................... 9
Position of driving key 1 ......................................................................................9
Position of driving key 2 ....................................................................................10
Daily kilometre counter .....................................................................................16
Resetting the daily kilometre gauge...........................................................16
Total kilometre count.........................................................................................16
User menu ................................................................................................... 17
Basic setting ........................................................................................................17
Selecting the user menu ....................................................................................17
Menu navigation................................................................................................17
Language ............................................................................................................19
Code key..............................................................................................................19
Clock ....................................................................................................................19
Horn signal phase...............................................................................................19
Back-lighting.......................................................................................................19
Light sensor.........................................................................................................19
Menu structure: ..................................................................................................20
Service ......................................................................................................... 23
Repairs.................................................................................................................23
Service .................................................................................................................23
Error list....................................................................................................... 23

3
INTRODUCTION
The SCOOTER is steered through the
control panel.
☞Note:
Please note that the options and
accessories are not a part of the
standard scope of supply!
Improper use of the control panel or
its accessories will endanger you and
others. The correct handling must
therefore be learned.
This operating manual is designed to
help you get accustomed to the han-
dling of the control panel and to pre-
vent accidents.
!
Attention:
Read and observe this manual be-
fore first operation:
– this operating manual,
– the safety information < Electron-
ic-wheelchairs > as well as
– the operating manual of the vehi-
cle.
☞Note:
Children should read this operat-
ing manual as well as the Safety
information < Electronic wheel-
chairs > before first operation to-
gether with their parents, resp. a
supervisor or accompanying per-
son.
SPECIFICATIONS/ UTILI-
SATION
Use
The control panel is an inherent part
of the SCOOTER and gives the user im-
portant information through the LCD-
display before and during the ride.
Adjustment
!
Attention:
You should only allow a specialist
dealer to carry out adjustments or
settings.

1
2
3
4
5
1918
17
16 15 14 13 12
11
10
9876
27 26 25 24 22
2120
23
4
OVERVIEW
1 LCD-Display
2 Light sensor
3 Control panel
4 Control panel housing
Keyboard
5 Right indicator ON/OFF
6 Horn key
7 Hazard warning signal ON/OFF
8 Lighting ON/OFF
9 Horn key
10 Left indicator ON/OFF
11 Right indicator ON/OFF
12 Driving direction reverse for-
ward/backward
13 Preselection walking speed ON/
OFF
14 Speed preselection controller
15 Economical speed ON/OFF
16 Drive/push mode
17 Left indicator ON/OFF
LCD-Display
18 Display left indicator
19 Display walking speed
20 Display shows speed
– Display daily kilometres
21 Display right indicator
22 Display battery capacity
23 Display shows total kilometres
24 Display time
25 Display economical speed
26 Display driving direction back-
wards
27 Display lighting
– Display hazard warning signal
(18) + (21)

1
5
PRE-OPERATION CHECKS
After switching the scooter on the
electronic runs through a system test.
☞Note:
During the system test the logo
< MEYRA ORTOPEDIA > appears
and the director may not be acti-
vated.
The electronic is ready when the dis-
play is completed [1]. As a standard
the daily kilometres, total kilometres,
time and charging condition of the
batteries are displayed.

E55
1
2
3
4
5
6
6
BATTERY CHARGE CON-
DITION
Battery gauge
The battery gauge shows the battery
symbol with changing degree of the
filling status of the battery charge
condition.
Battery-symbols
(1) fully charged (complete charge)
– maximum driving range can be
achieved under optimal condi-
tions.
(2) partially discharged (3/4 full) –
about 75 % battery capacity re-
maining.
(3) half discharged (half full) – about
50 % battery capacity remaining.
(4) almost discharged (1/4 full) –
about 25 % battery capacity re-
maining.
☞ Batteries should be charged.
(5) completely discharged – about 5
% battery capacity remaining.
☞ Recharge batteries as soon as
possible!
(6) deep discharged (symbol (5)
blinks) – Error code E55 instead
of the speed display.
☞ The scooter is shut down by the
control electronic.
☞ Further operation is impossible!
☞ Recharge battery immediately!
☞ The charging procedure is shown
as a running light within the bat-
tery symbol.

7
Evaluation
The display of the battery charging
condition is tuned to the discharge
characteristics of the batteries sup-
plied by us. Other types of batteries
or batteries from other manufactur-
ers can show other characteristics and
therefore decrease the exactness of
the display.
The exactness further depends on the
temperature, age and strain on the
battery is therefore subject to certain
restrictions.
The absolute range of the scooter
should occasionally be checked under
different conditions, in order to ob-
tain accurate statements to the possi-
ble driving performance (range) with
regard to the battery charging status
gauge.

1
1 2
8
Pre-selectable maximum
speed
The maximum speed is adjusted con-
tinuously through the turning knob
(1).
With increasing clockwise turn of the
knob the maximum speed is adjusted
accordingly from slow to the model
specific maximum speed.
!Attention:
Danger of accidents due to inad-
equate limitation of the maximum
speed!
Select a lower maximum speed for
driving situations in which you feel
insecure, (e.g. driving in tight areas,
downhill, on ramps, or in pedestrian
areas).
!Attention:
The maximum speed should be
preselected to suit the personal
circumstances and the respective
driving situation!
The speed is to be adjusted accord-
ingly to the slope when driving
downhill. Never exceed the per-
mitted max speed. – Danger of
accident!
☞1. Situation example:
Use in the home.
Required setting: low speed prese-
lection (1).
☞ Result of a pre/selection that is
too high:
Small movements of the director
result in quick acceleration. – The
driver loses the control in the con-
fined space of the home.
– Danger of accident!
☞2. Situation example:
Crossing a road junction.
Required setting: high speed prese-
lection (2).
☞ Result of a pre/selection that is
too low:
The road junction is not crossed
quickly enough.
– Danger of accident due to on-
coming vehicles!

1
2
3
9
KEYS AND SYMBOLS
☞With the driving key extracted or
when switched off (driving key po-
sition 0) the button key < Warning
signal > (3) blinks every 10 seconds
and thus signal the activated anti-
theft function.
Automatic switch-off period
The scooter features an automatic
switch-off period.
Is the director not moved within the
set switch-off period and no other
key of the control panel is pressed the
scooter automatically turns off.
☞Note:
☞To continue driving, switch the
scooter off and back on again.
☞The automatic switch-off period
is at a standard setting of 10 min-
utes.
☞The specialist workshop can adjust
the switch-off period from 1 to 20
minutes or completely turn it off
through the service program.
Position of driving key 1
☞Also observe the operating manual
< Scooter >!
The driving key is inserted at a 45° an-
gle in the driving lock (1).
☞The LCD-display is off (2).
– The pushing mode is preselected.
– The scooter is not ready for use.

2
1
10
Position of driving key 2
☞Also observe the operating manual
< Scooter >!
The driving key is inserted at a 90° an-
gle in the driving lock (2).
☞The drive mode is activated. – The
LCD-display shows the operational
status (1).
Push mode
As long as the < Drive-/Push mode >
key is pressed down, the vehicle can
be pushed.
Horn
A signal is sounded as long as the
< Horn > key is pressed.
☞Therefore also observe chapter
< Warning signal >!

11
Right indicator
Switches the turn signal on or off
when the < Right turn signal > key is
pressed.
☞The symbol for the right turn sig-
nal blinks in the LCD-display.
☞Note:
A defective turn signal bulb is in-
dicated by a higher blinking fre-
quency of the right turn signal
symbol.
Left indicator
Switches the turn signal on or off
when the < Left turn signal > key is
pressed.
☞The symbol for the left turn signal
blinks in the LCD-display.
☞Note:
A defective turn signal bulb is in-
dicated by a higher blinking fre-
quency of the left turn signal sym-
bol.

12
Hazard warning signal
Switches the warning signal on or off
when the < Warning signal > key is
pressed.
☞Both symbols – turn signal and
warning signal appear in the LCD-
display and blink from slightly red
to bright red.
☞Note:
If the driving key is turned into the
0 position and pulled when the
warning signal is activated, it re-
mains active, the LCD-display goes
off.
☞Switching the warning signal off
again by pressing the key can only
be achieved after switching the
scooter back on.
Lighting
Switches the lights on or off when the
< Lighting > key is pressed.
☞The LCD-display shows the symbol
– lights.
☞Therefore also observe menu item
< Back-lighting > in the user menu!

13
Travel direction reversing
☞Note:
Only in combination with the
optional directors < Gas turning
knob > or < Foot gas >.
Switches the driving direction from
forward motion to backward motion
when the key is depressed < Reverse
driving direction > .
☞The LCD-display shows the symbol
– reverse driving direction.

14
Preselection of walking
speed
Switches the walking speed on or off
when the key < Preselection walking
speed > is pressed.
☞The LCD-display shows the symbol
– walking speed.
The key < Preselection walking
speed > enables a targeted activa-
tion of a permitted maximum speed
for driving on pedestrian walkways or
shopping zones.
☞Note:
An activation of the key < Preselec-
tion walking speed > while driving,
depending on the preselected final
speed, can lead to a sudden reduc-
tion of speed.

15
Economical speed
Switches the speed control (only in
forward driving direction) on or off
when the < Economical speed > key
is pressed.
!Attention:
Only use the speed control on
clearly laid out routes.
Activation:
After reaching the desired speed, acti-
vate the speed control by pressing the
< Economical speed > key.
☞Note:
The speed control can only be ac-
tivated if your vehicle is equipped
with drum brakes (optionally avail-
able depending on the type of ve-
hicle).
☞The director must be guided back
(released) into the zero-posi-
tion within 2 sec. after the key is
pressed.
☞The LCD-display shows the symbol
– Economical speed.
☞Note:
If the symbol does not appear in
the LCD-display, the director was
not released in time. – The process
must be repeated.
Deactivation:
The speed control can be deactivated
by:
– Pressing the – speed control key,
– Moving the director,
– Using the hand brakes.
☞Symbol in the LCD-display goes off
– Economical speed.

2
3
1
16
Daily kilometre counter
During stillstand of the scooter the
daily kilometres will be displayed in-
stead of the speed gauge (1).
☞The daily kilometre gauge can be
reset on demand.
Resetting the daily kilometre
gauge
In order to reset the daily kilometre
counter to < Zero > the < Reverse driv-
ing direction > key (2) must be held
down for more than 3 sec. while the
vehicle is standing.
☞The LCD-display shows the daily
kilometre count < 0.0 km >.
Total kilometre count
The total kilometres (3) are shown
underneath the daily kilometres resp.
speed gauge. This display cannot be
deleted.

User menu
Language
Code key
Clock
Audible warning
Backlight
Light sensor
User menu
Language
Code key
Clock
Audible warning
Backlight
Light sensor
17
USER MENU
The following menus can be selected
through the user menu:
Language
Code key
Clock
Audible warning
Backlight
Light sensor
Basic setting
The delivery condition includes the
following functions/settings:
Language: English
Code key: disengaged
Clock: Active
Audible warn-
ing:
Indicator+ back-
ward
Backlight: on
Light sensor: on
Selecting the user menu
1. Switch off the vehicle.
2. Keep the key for the lighting
pressed down and
3. switch the vehicle back on.
☞The text of the menu appears in
the respective selected language.
The arrow in front of each menu
item signals the active menu item.
Menu navigation
Menu up
With each pressing of the < Left in-
dicator > the arrow goes up by one
menu item.
Menu down
With each pressing of the < Right in-
dicator > the arrow goes down by one
menu item.

User menu
Language
Code key
Clock
Audible warning
Backlight
Light sensor
Clock
on ✓
off
adjust
User menu
Language
Code key
Clock
Audible warning
Backlight
Light sensor
18
Menu selection Enter /
Confirm
With the < Lighting > key the sub-
menu is selected.
After confirming the corresponding
parameters by pressing the < Light-
ing > key the selection is stored. At the
same time you switch into the next
higher menu.
Active items are symbolised with a
check mark.
Abort / leave menu
By pressing the < Reverse driving di-
rection > key the process is aborted
and the previous menu appears.
If a selection has been changed it is
discarded.
By pressing the < Reverse driving di-
rection > key in the user menu, you
exit the menu and return to the regu-
lar display.
☞The vehicle is ready for use.

19
Language
The menu < Language > offers a se-
lection of several languages for the
menu guide.
Code key
The code lock can be activated against
unpermitted use of the scooter.
For reactivation a 4-digit code, that
can be selected freely (greater than
< 0000 >), must be entered.
☞By pressing the keys < Walking
speed > resp. < Cruise control > the
digit is counted up or down.
☞Should you have forgotten the
code, your specialist dealer can re-
set the code.
☞When the code lock is activated,
the code is required after each
switching on of the scooter. – Use
of the scooter is only possible after
entering the correct code!
Clock
The time display can be switched on,
off or set new again, e.g. for switch-
ing from summer to winter time.
☞The LCD-display shows the time.
☞By pressing the keys < Walking
speed > resp. < Cruise control > the
digit is counted up or down.
Horn signal phase
While signalling as well as while driv-
ing backwards an intermittent horn
signal can sound.
☞The warning signal can be switched
on or off.
Back-lighting
The Back-lighting for the keys and the
display of the control panel can be ac-
tivated when the lighting is switched
on.
☞The Back-lighting can be switched
off resp. on and dimmed in four
stages.
The menu item < on/off > refers to the
Back-lighting during daylight.
Light sensor
With activated light sensor the vehicle
lighting is automatically switched on
by a light sensor with increasing dark-
ness.
☞The LCD-display shows the symbol
– lights.

User menu
Language
Code key
Clock
Audible warning
Backlight
Light sensor
Language
User menu
Language
Code key
Clock
Audible warning
Backlight
Light sensor
Code key
enable
disable
Code
0 0 0 0
= Plus
= Minus
Code
0 0 0 0
User menu
Language
Code key
Clock
Audible warning
Backlight
Light sensor
. . .
20
Menu structure:
Table of contents
Other Meyra-Ortopedia Scooter manuals
Popular Scooter manuals by other brands

Denver Electronics
Denver Electronics DBO-6550 MK2 Original instruction

PIAGGIO
PIAGGIO MSS X10 500ie Executive Service station manual

DOCYKE
DOCYKE S-05 Construction manual

Xiaomi
Xiaomi Mi Notebook Pro user manual

Ace Sports
Ace Sports Arrow 1502 owner's manual

HOMCOM
HOMCOM AA1-091 Assembly & instruction manual