MiaMilt Hipster User manual
INSTRUCTIONS
MANUAL

WARNING
• Read all instructions before assembling and using the HIPSTER™carrier
• Keep instructions for future use
• Check to assure all buckles, snaps, straps and adjustments are secure before each use
• Check for ripped seams, torn straps or fabric, or damaged fasteners before each use
• Ensure proper placement of child in HIPSTER™ for safety and leg placement
• Child must face towards you until he or she can hold head upright
• Premature infants, infants with respiratory problems, and infants under 4 months old are at risk of suocation
–
for safety reasons, be sure to check with your doctor if HIPSTER™ is suitable for use with your baby
• Never use the HIPSTER™ carrier when balance or mobility is impaired due to exercise, drowsiness, or medical
conditions
• Never use the carrier while engaging in activities such as cooking and cleaning which involve a heat source or
exposure to chemicals
• Never wear the carrier while driving or being a passenger in a motor vehicle
• This carrier is not suitable for use during sporting activities
FALL HAZARD
–
Infants can fall through a wide leg opening or out of carrier.
• Before each use, make sure all buckles, snaps, and straps are secure
• Take special care when leaning forward
• Never bend at waist, bend at knees
• Only use this carrier for children between 9 lbs and 45 lbs
• Hold your baby close at all times when using HIPSTER™ without carrier straps
SUFFOCATION HAZARD
–
Infants under 4 months old can suocate if face is pressed too tight against your body.
• Do not strap the baby too tight against your body
• Always allow room for head movement
• Keep infant’
s face free from obstructions at all times
WARNING
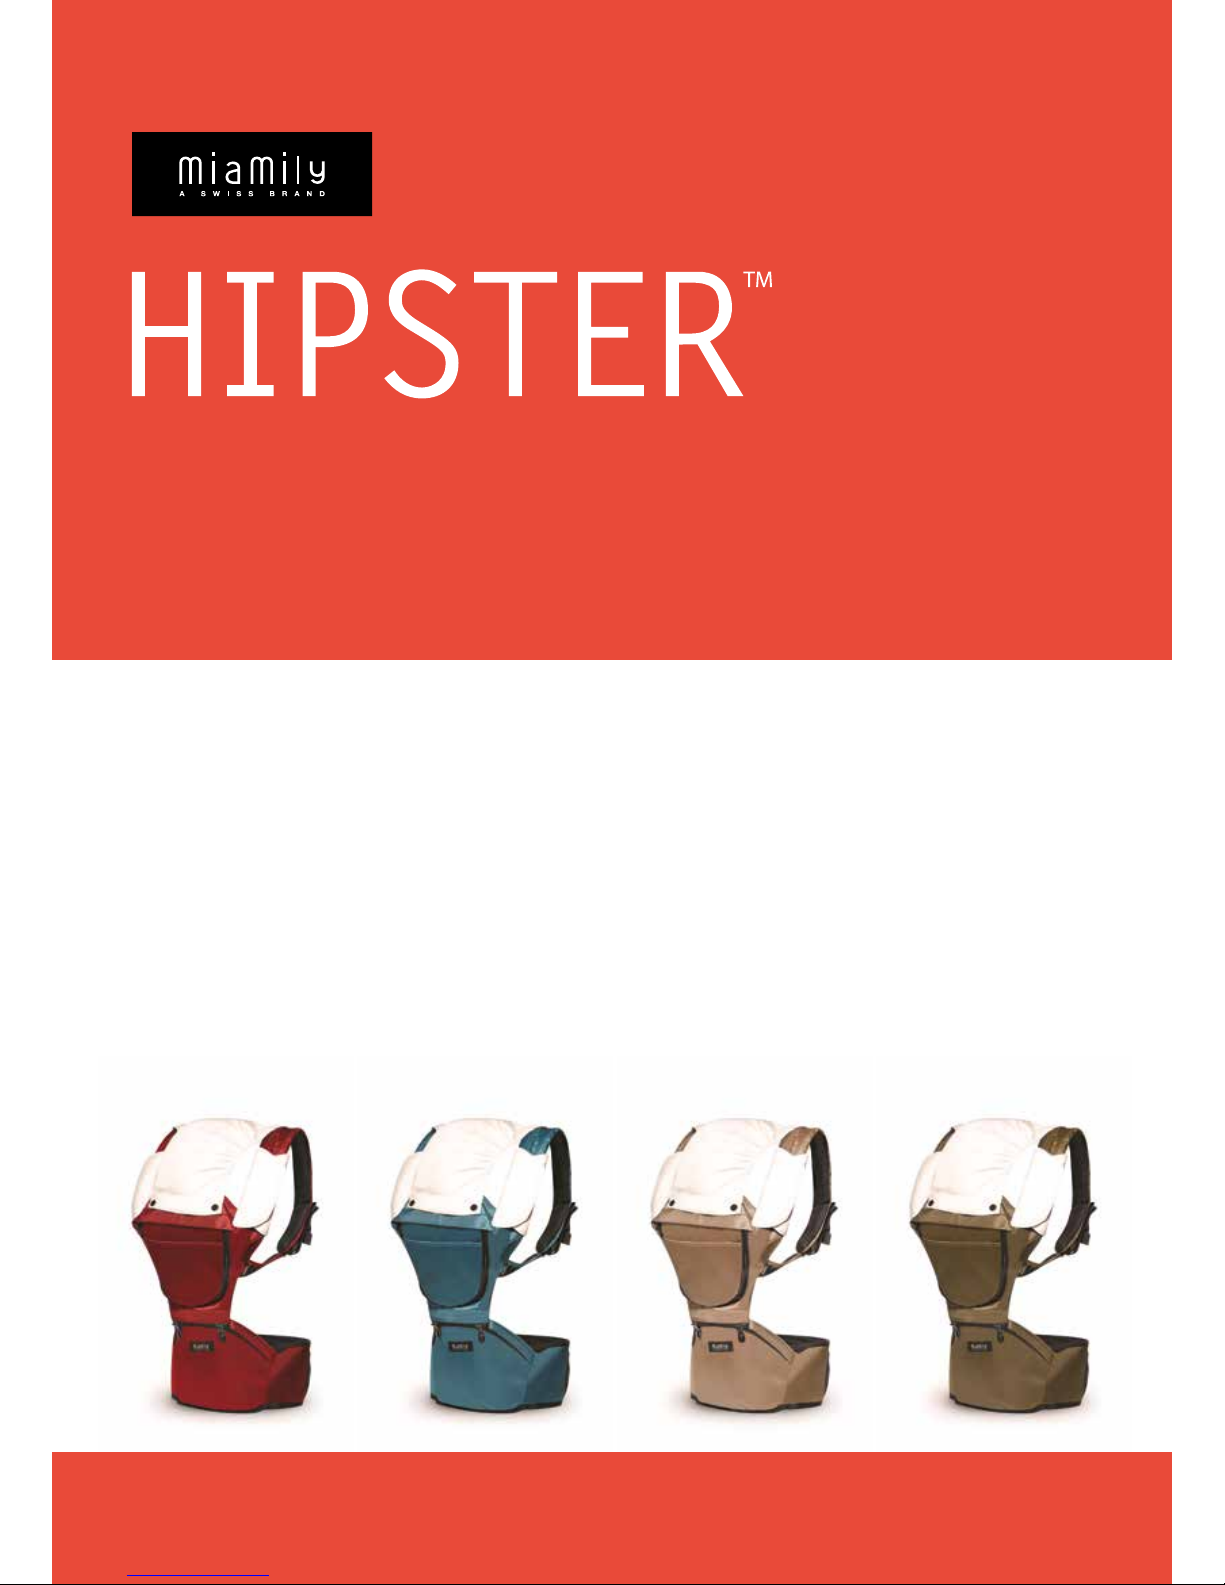
HIPSTER™
—
the new way to carry your baby, in 9
DIFFERENT WAYS. No more achy arms and sore backs.
HIPSTER™ is a unique, ergonomic baby carrier with an
integrated hip seat to help you carry your little one
signicantly longer, more comfortably and eortlessly.
When used with the interchangeable carrier systems
(included), HIPSTER™ allows your baby more breathing
room to explore the world without feeling enclosed in.
Its wider belt provides optimal ergonomic back support,
distributing your baby’
s weight evenly throughout the
lower back and shoulders to help minimize any long
term effects from bad posture and fatigue. Designed
with a safe but quick release system, one simple
movement is all that is needed to get your little one
in and out in seconds, or even with just one hand.
For further details and instructions, please visit:
www.miamily.com/instructions
or contact us at:
FALL & SUFFOCATION HAZARD
CONTENTS
1. hip seat base
2. extender belt
3. single shoulder top carrier
4. double shoulder top carrier (with front pocket layer removed)
5. removable front pocket layer (easily attached with zipper)
6. teething pads ( Ⅹ2 )
7. head cover
8. MiaMily
“Change the World”Foldable Travel Bag
MiaMily 03MiaMily 02
1.
2.
3.
4.
5.
6.
7.
8.

FOR THE HIPSTER™ HIP SEAT DOUBLE
SHOULDER
TOP
CARRIER
SIMPLE
STEPS
1. Wrap the HIPSTER™ belt around your waist, with the seat positioned on your side, above your hips.
2. Secure the HIPSTER™ velcro belt so that it is snug; the tighter the belt, the more support it will provide
your back.
3. Make sure you slide the buckle through the elastic safety loop on the belt before closing the buckle
together as an extra security measure.
4. Fasten your belt with the adjustable security buckle strap. Listen for the
“click”sound to make sure the
buckle is securely engaged. Pull and adjust the security buckle strap until it is snug around your hips.
5. Place baby on the HIPSTER™ hip seat facing in or facing out or on your side
※For step-by-step video instructions, please visit: www.miamily.com/instructions
1. zipper attachment
2. security button for zipper
3. adjustable back strap
4. straps for shoulder strap adjustment
5. removable front pocket layer
6. teething pads ( Ⅹ2 )
7. head cover
1.
4.
3.
2.
5.
6.
7.
1. hip seat base
2. security button for zipper
3. elastic safety loop
4. adjustable security buckle
5. side pocket
1.
4.
2.
5.
MiaMily 05MiaMily 04
3.

1. Once you have put on the HIPSTER™ hip seat base (see 4
Simple Steps for the HIPSTER™ Hip Seat), zip the top of the
Hip Seat to the bottom of the Double Shoulder Top Carrier.
2. Make sure to button the 2 security buttons at the beginning
and at the end of the zipper (which connects the Double
Shoulder Top Carrier and Hip Seat )as a second security measure.
3. With the Double Shoulder Top Carrier hanging down in front
of you, place your baby on the hip seat base facing towards
your chest (for the Face-In Carry position) or facing outwards
(for the Face-Out Carry position). Make sure your baby’
s
legs are properly positioned on each side of the hip seat.
4. Using your left hand to support your baby for safety, use
your right hand to reach for the right shoulder strap, put
your arm through the loop and place the shoulder strap
over your right shoulder.
5. Using your right hand to support your baby for safety, use
your left hand to reach for the left shoulder strap, put your
arm through the loop and place the shoulder strap over
your left shoulder.
6. Reach over your shoulder with both hands over your head
behind your neck, and buckle in the adjustable back strap.
The adjustable back strap should sit right below your neck
along the shoulder blades. If the back strap is too low and
you cannot reach, adjust it higher on the shoulder strap. If it
is too dicult to adjust with your baby on the hip seat, adjust
the height of the back strap before you place your baby in.
7. Adjust the length of the shoulder straps with the adjustable
shoulder straps under your arms. Do not strap the baby
too tight against your body and always allow room for
head movement. Keep your baby’
s face free from any
obstructions at all times.
8. Make a nal check to assure all straps and buckles are secured.
9. For step-by-step video instructions, please visit:
www.miamily.com/instructions
FACE-IN
CARRY +
FACE-OUT
CARRY
HOW TO USE HOW TO USEDOUBLE SHOULDER TOP CARRIER DOUBLE SHOULDER TOP CARRIER
BACK
CARRY
1. Once you have put on the HIPSTER™ hip seat base (see 4
Simple Steps for the HIPSTER™ Hip Seat), zip the top of the
Hip Seat to the bottom of the Double Shoulder Top Carrier.
2. Make sure to button the 2 security buttons at the beginning and
at the end of the zipper (which connects the Double Shoulder
Top Carrier and Hip Seat) as a second security measure.
3. Let the top carrier part hang down in the front and slide
the hip seat to your right hip. Place your baby on the hip
seat base facing towards your chest.
4. With the Double Shoulder Top Carrier hanging down in
front of you, slide the hip seat to your right hip.
5. Place your baby on the hip seat base, facing towards your
chest.
6. Using your left hand to support your baby, pull up the
Double Shoulder Top Carrier with your right hand against
your baby’
s back.
7. Use your left hand to reach behind you for the left shoulder
strap, loop your arm through, and place the left shoulder
strap over your left shoulder. Be sure to keep supporting
your baby with your right hand.
8. Lean slightly forward to have your baby leaning against
you, and slide the hip seat base to your back.
9. Slide your right hand into the right shoulder strap, and
loop your right arm through the shoulder strap.
10. Reach both hands in front of your chest to secure the
adjustable back strap. The back strap should sit in front of
your chest. If it’
s too low or too high, you can adjust the
back strap on the shoulder strap
11. Adjust the length of the shoulder straps with the adjustable
shoulder straps under your arms. Do not strap the baby
too tight against your body and always allow room for
head movement. Keep your baby’
s face free from any
obstructions at all times.
12. Make a nal check to assure all straps and buckles are secured.
13. For step-by-step video instructions, please visit:
www.miamily.com/instructions
BREASTFEEDING
1. Follow the instructions of Double Shoulder Top Carrier:
Face-In Carry but wear the hip seat lower on your hip so
that your baby’
s face is at breast level. Loosen the shoulder
straps if necessary to give your baby more room.
2. Nurse baby in the carrier and cover with the head cover for
more privacy.
USING
THE
HEAD
COVER
1. When your baby is asleep or when you want to keep out
distractions, attach the head cover to the carrier, buttoning
the two bottom buttons rst.
2. Take the left side of the head cover and extend it to cover
your baby’
s head. Button the buttons on the left shoulder
strap. You can adjust the height of the head cover by using
the dierent buttons.
3. Repeat with the right side of the head cover.
USING
THE
TEETHING
PADS
1. Wrap the teething pads around each shoulder strap.
2. Adjust the teething pads by using the velcro pads. Adjust
teething pads to the height of your baby’
s mouth.
3. Wash teething pads regularly.
MiaMily 07MiaMily 06
TIP ╱This is a more advance carry position and is suitable
for babies 18 months old who can hold on to the parent
while adjusting the carrier. Baby must have full control of
his head and can look over parent’
s shoulder. Please watch
our video instructions at www.miamily.com/instructions
and have someone help you when you try this position for
the first time.
BACK CARRY
FACE IN
FACE OUT

1.
3.
2.
4.
SINGLE
SHOULDER
TOP
CARRIER
1. zipper attachment
2. security button for zipper
3. padded single shoulder strap
4. removable front pocket layer
1. Once you have put on the HIPSTER™ hip seat base (see 4
Simple Steps for the HIPSTER™ Hip Seat), zip the top of the
Hip Seat to the bottom of the Single Shoulder Top Carrier.
2. Make sure to button the 2 security buttons at the beginning
and at the end of the zipper (which connects the Single
Shoulder Top Carrier and Hip Seat) as a second security
measure.
3. Let the top carrier part hang down in the front and slide
the hip seat to your left hip.
4. Place your baby on the hip seat base facing towards your
chest (for the side position). Make sure your baby’
s legs are
properly positioned on each side of the hip seat.
5. Using your left hand to support your baby for safety,
use your right hand to lift the single shoulder strap over
your head and rest it on your neck and slide your left arm
through the single shoulder strap.
6. If it is more comfortable for your baby, lift your baby’
s arms
above and out of the carrier part.
7. Adjust length of the neck strap. Do not strap the baby
too tight against your body and always allow room for
head movement. Keep your baby’
s face free from any
obstructions at all times.
8. Make a final check to assure all straps and buckles are
secured.
9. For step-by-step video instructions, please visit:
www.miamily.com/instructions
HOW TO USE SINGLE SHOULDER TOP CARRIER
SIDE
CARRY
1. Once you have put on the HIPSTER™ hip seat base (see 4
Simple Steps for the HIPSTER™ Hip Seat), zip the top of the
Hip Seat to the bottom of the Single Shoulder Top Carrier.
2. Make sure to button the 2 security buttons at the beginning
and at the end of the zipper (which connects the Single
Shoulder Top Carrier and Hip Seat) as a second security
measure.
3. With the Single Shoulder Top Carrier hanging down in front
of you, place your baby on the hip seat base facing towards
your chest (for the Face-In Carry position) or facing outwards
(for the Face-Out Carry position). Make sure your baby’
s
legs are properly positioned on each side of the hip seat.
4. Using your left hand to support your baby for safety,
use your right hand to lift the single shoulder strap over
your head and rest it on your neck and slide your left arm
through the single shoulder strap.
5. Adjust the length of the shoulder straps with the adjustable
shoulder straps under your arms. Do not strap the baby
too tight against your body and always allow room for
head movement. Keep your baby’
s face free from any
obstructions at all times.
6. Make a nal check to assure all straps and buckles are secured.
7. For step-by-step video instructions, please visit:
www.miamily.com/instructions
FACE-IN
CARRY +
FACE-OUT
CARRY
SIDE CARRY ╱FACE IN ╱FACE OUT
MiaMily 09MiaMily 08
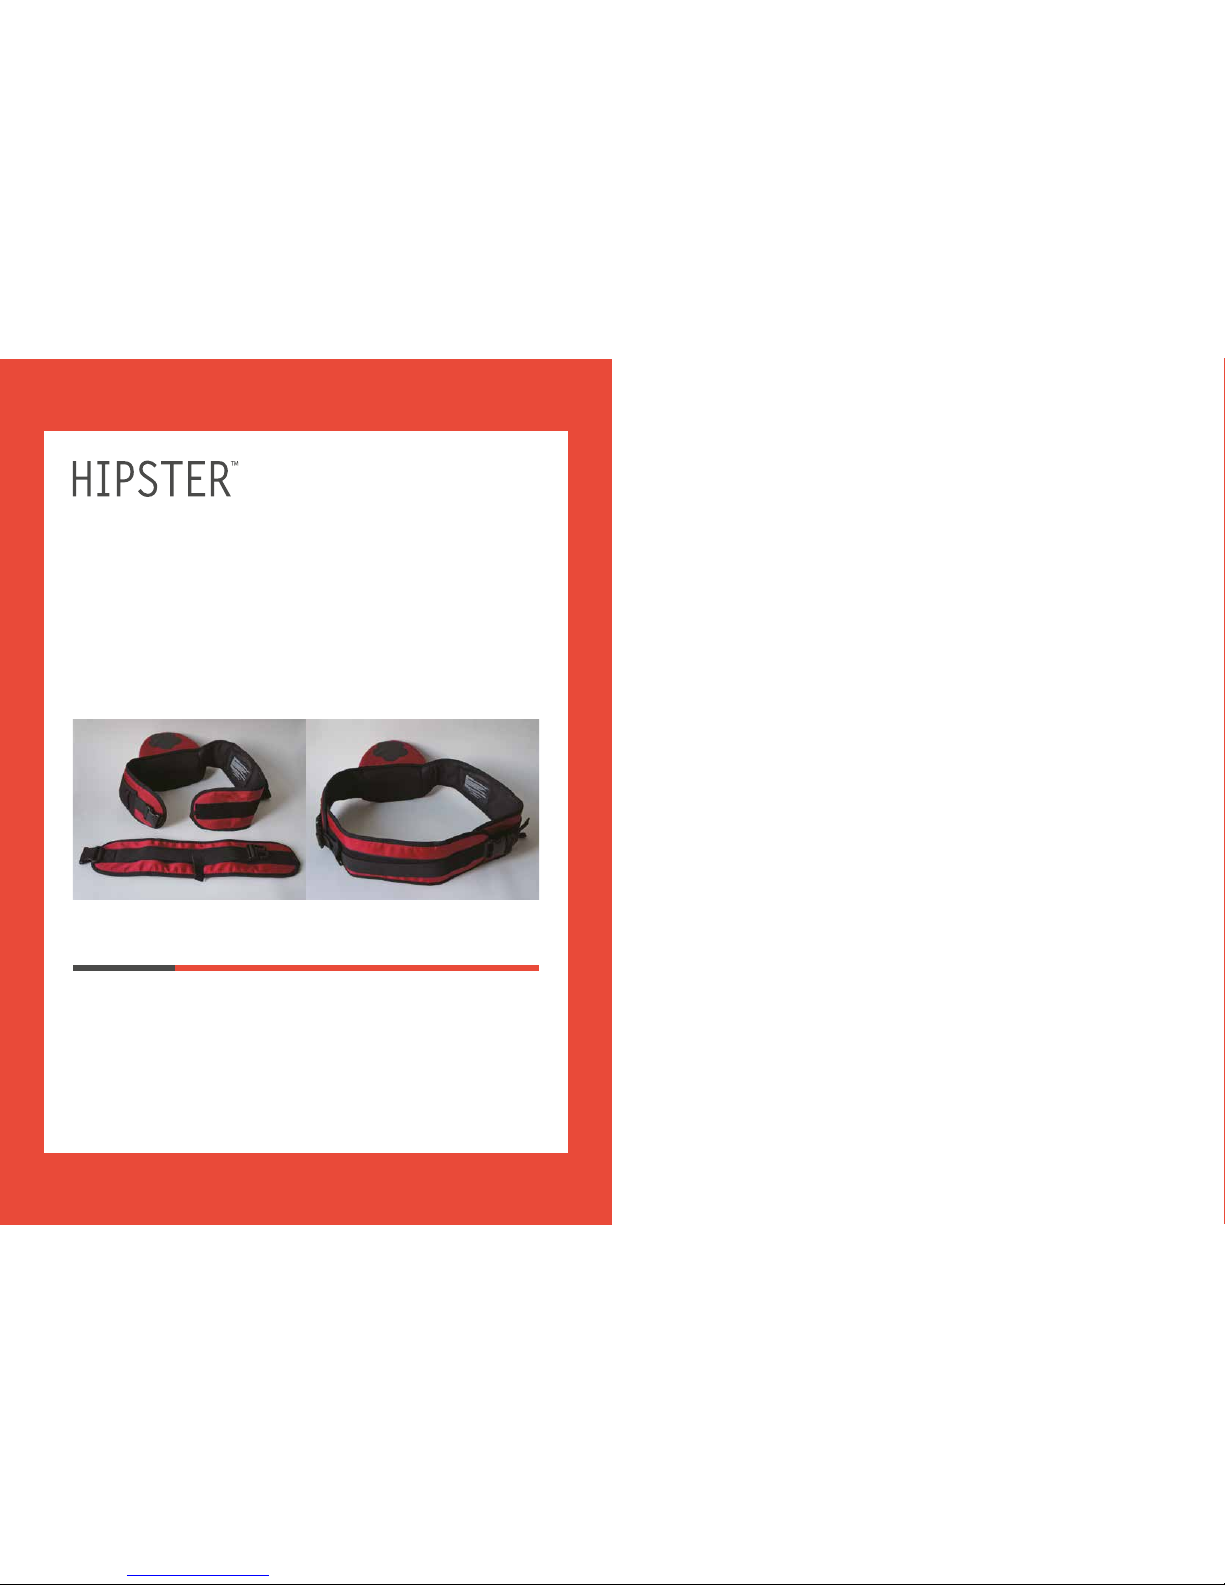
EXTENDER
BELT
HIPSTER™ has been submitted and approved by global wide safety standards.
For the US/ CANADA: HIPSTER™ meets the US safety standard ASTM F2236
and CPSIA 2014, and the Consumer Product Safety Improvement Act of 2014.
For EUROPE: HIPSTER™ meets the EN71-3 standard.
GLOBALLY: HIPSTER™ meets the EN13209-2:2005 and 6P safety standard.
SAFETY
TESTING
MiaMily warrants that our products are free from any manufacturing defects
in material or workmanship for a period of one (1) year from the original date
of purchase. If you are in need of warranty or repair for an MiaMily product,
please [email protected]
WARRANTY
HIPSTER™ is made with 100% nylon, stain resistant material, and is machine
washable. Remove hip seat’
s foam insert before washing. Use with cold
water in gentle cycle ONLY. Air dry, DO NOT PUT HIPSTER™ IN DRYER. For light
cleaning, simply wipe with a wet towel.
HIPSTER™
CARE
Overtea Sagl
Via Cantonale 40, Porza, 6948, Switzerland
CONTACT
US
1. Wrap the HIPSTER™ belt around your waist, with
the hip seat positioned at your back (above your
hips).
2. Attach the extender belt by connecting the security
buckle of the original belt to the security buckle of
the extender belt.
3. Attach and connect the two velcro straps together
for extra support.
4. Wrap the belt around your waist and adjust so that
the belt ts snugly around your waist. The tighter the
belt, the more support it will provide to your back.
5. Connect the extender belt to the original belt and
listen for the
“click”sound to make sure the buckle
is securely engaged
6. Pull the security buckle strap until it is snug.
7. Place baby on the HIPSTER™ seat.
HOW TO USE EXTENDER BELT
MiaMily 11MiaMily 10

www.miamily.com
No.0415
February, 2nd, 2015
Table of contents


