Michelin 12264 User manual

使用說明書 12264
12264
謝謝您購買米其林輕量型數位顯示打氣機。
1. 使用前請詳細閱讀使用說明,不當使用可能會造成機件或人車損害。
2. 使用時請務必確認車輛停妥,在不會影響個人及車輛安全的地點,且手
煞車已拉上。
■ 本機的設計主要是為了補打不足氣壓,而非灌打完全無氣輪胎,請勿打
氣超過50PSI。
■ 本機補打氣壓請使用在汽車、重機、機車及腳踏車輪胎上,球類及充氣
玩具亦可充氣(不適用於卡車)。
■ 正常使用最大功率: 4.0 AMP / 50 WATTS。
■ 每次使用前請先測量胎壓。
■ 連接上12V點菸插頭後,請勿閒置不管。
■ 運作時請勿將出氣管線糾結或是堵塞。
■ 如果有任何零件已破損、扭曲或潮濕,請勿使用。
■ 請只使用本機隨附的配件。
■ 本機內無消費者可以自行維修的零件,勿拆解本機。
■ 不可讓孩童使用打氣機。
■ 打氣機運作中不可離開。
■ 不可過度充氣。
■ 請在安全且遠離交通的地方使用。
■ 不可連續運作超過8分鐘,每8分鐘讓機器充分冷卻。
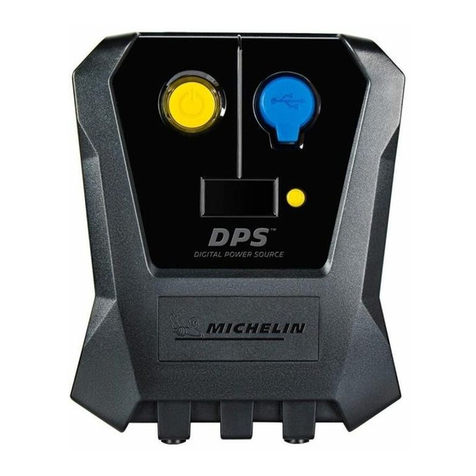
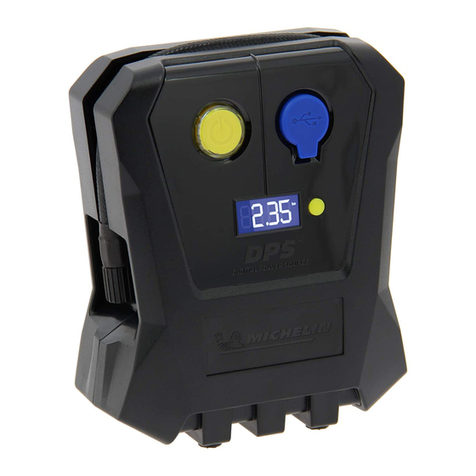
● 開關
● 白光液晶顯示幕
● 16公分高壓出氣管
● 5V USB 插座
● PSI、BAR、kPa單位轉換 / 重設按鈕
● 可分離式電源線插入端口
1
2
3
4
5
6
■ 12V插頭是否確實插上插座
■ 檢查12V電源插頭(保險絲)
■ 汽車鑰匙是否有將電門打開
■ 出氣管連接至輪胎氣門嘴時和按壓開關前,請
確認胎壓計顯示目前輪胎胎壓
■ 將出氣管及 12V插頭全部移除連接,待至少 5
秒後再重新連接電源
■ 按壓黃色重設按鈕直到顯示幕數字全顯後,又
回到「0.0」後鬆開按鈕
■ 再將出氣管連接至輪胎氣門嘴
■ 出氣管跟氣門嘴是否確實連接
■ 確認氣門嘴有確實連接並鎖緊
■ 如果電源線是捲起的,請全部拉開
■ 檢查插座是否清潔,內部無任何碎屑、碎片
■ 檢查插座是否清潔,且整體牢固
最大氣壓:汽車輪胎40PSI
壓力準確度:+/-1 PSI
壓力顯示單位:PSI/BAR/Kpa
最大功率:4.0 AMPS / 50 WATTS
保險絲:10 AMP
出氣管長度:概約長度16公分
電源線長度:概約長度180公分
數位顯示螢幕
1. 將開關●調至關閉狀態,將電源線連接雙頭插座●並將12V插頭插入汽車
12V插座數秒後,數位顯示螢幕會出現「0」。請注意:開關按鍵在關閉
狀態時,按鍵會些微比本體凸出,在開啟狀態時,按鍵會與本體等高。
2. 按壓單位轉換鍵●來選擇欲使用的氣壓單位。
3. 將出氣管●連接鎖至輪胎氣門嘴,查看數位顯示螢幕上的胎壓。如果顯
示螢幕為0或是Err,請查看"故障排除"章節。如果連接正確,則顯示螢幕
上的壓力即是此一輪胎的目前胎壓。如果顯示胎壓與車主手冊上建議胎
壓相同,則不需充氣,可以直接移除打氣機的連接。
16
5
3
4. 按壓開關按鍵●開始充氣。
5. 數位顯示螢幕●上的壓力數字會開始增加,因為壓力偵測的敏感度設計
,當您充氣至欲達到的壓力而關閉充氣功能時,顯示螢幕上的壓力數字
可能會再些微減少。如有類似情況發生,請再充至稍高胎壓,關機並再
檢查。
6. 如果要充氣多個輪胎,則循環3~5步驟進行。每次進行,請確認12V插頭
確實連接插座,如果在充氣中電力中斷,請依故障排除中的步驟進行。
1
3
■ 更換12V電源插頭保險絲,將接頭環逆時針方向旋開。
■ 更換保險絲(最大15A),旋回接頭環。
備註:保險絲不在保固範圍內
逆時針方向旋開
保險絲
胎壓讀取錯誤或胎
壓顯示 0.0 或 ERR
胎壓不顯示,按壓
開關也無動作
電源線或插頭變熱
機器運作但是輪胎
未充氣
出氣管已連接但是
胎壓未顯示
1
2
4
3
5
6
1. 數位動力電源:米其林打氣機內建一組5V USB插座。
2. USB端口:在機體右手邊●有5V USB端口,可供手機、MP3播放器充電使
用,最大額定值0.5AMP (不可在打氣時同時使用)。
3. 使用本產品時,請先發動引擎,再插入點菸插頭開始使用。
4. 正確胎壓對行車安全非常重要,胎壓不足或過飽都可能造成危險。
5. 每周請根據車主手冊上建議的胎壓值來做檢查(含備胎),長途行車前也
建議檢查。
6. 不建議在長途行車後立即檢查胎壓。
4
6
■ 本機附轉接配件,供氣墊床、運動球類、充氣玩具打氣之用。
■ 避免過度充氣,請依不同產品製造商的指示來做充氣。
充氣玩具用 高壓自行車胎 球針
米其林 迷你數位顯示打氣機
操作注意事項
12V 電源插頭
產品外觀
輪胎充氣
轉接頭
故障排除
產品規格
操作說明
安全注意事項
台灣地區 客服專線 02-2226-1668
一手投資顧問有限公司
地址:新北市中和區建康路176號11樓
網址:www.first-sources.com
客服信箱:[email protected]

User Guide 12264
12264
Micro Tyre Inator
Thank you for purchasing the Michelin Tyre Inator. This inator utilises some of the lastest
compressor motor technology currently available today.
CAUTION
■ Inspect tyre inator before each use.
■ Do not leave connected to 12v DC socket unattended.
■ Do not kink or block the air hose while the compressor is working.
■ Do not use the compressor if bent, broken, melted, burnt, wet or any of the
components are damaged.
■ The compressor contains no user serviceable parts – Do not open.
Please read the operating instructions carefully before using your tyre inator.
Improper use of the inator can cause damage to property and possibly harm the
user. When using the inator ensure the vehicle is parked in a safe location, o the
road with the vehicle handbrake on and where your personal safety is not at risk.
Only suitable for vehicles with a negative earth. Check your vehicle owner’s
manual.
■This inator is designed for topping-up pressure, not inating from at. Do not
inate over 50 PSI.
■When topping-up vehicle tyres this inator should ONLY be used for car tyres and
bicycle tyres.
Max power requirement during normal use: 4.0 AMPS / 50 WATTS.
WARNING! COMPRESSED AIR CAN BE DANGEROUS
■ Never allow children to use this tyre inator.
■ Never leave unattended when running.
■ Never over inate.
■ Always use in a safe area away from trac and other dangers.
■ Never run for more than 8 minutes. After each 8 minute run, allow inator to
cool down.
WARNING! ENSURE CORRECT TYRE PRESSURES
■ Correct tyre pressure is vital for road safety.
■ Under or over inated tyres can be dangerous.
■ Always ensure that regular weekly checks are carried out to the vehicle
manufacturer’s recommended pressures including the spare, but excluding
space saver tyres. Check always before a long journey or after loading or
unloading vehicle.
■ Always check pressure in an ambient temperature, never immediately after a
long journey.
12v POWER PLUG
TO REPLACE FUSE IN 12V PLUG: Undo knurled ring anticlockwise.
Replace fuse and knurled ring. (Max’ 10A)
OPERATING FEATURES
●On/O button
●White L.C.D digital display
●16cm (approx) high pressure air hose with tyre valve connector
●5V USB outlet source
●PSI, BAR & KPa button / Reset button
● Input for 180cm (approx) detachable power cord
1
2
3
4
5
6
TROUBLE SHOOTING
Power lead/
plug becomes hot
■ Check that plug is fully inserted into 12v socket.
■ Check internal plug fuse (10 amp glass type).
■ Your car may require the ignition key to be turned to the
accessory position.
■ If power lead is coiled uncoil to full length.
■ Ensure 12v socket is clean with no debris in it.
■ Ensure 12v plug components are tight and clean.
■ When the tyre valve connector is attached, before
switching the unit on, ensure the gauge is reading your
current tyre pressure.
■ Disconnect valve connector from the tyre. Remove plug
from power source for at least 5 seconds, reconnect to
power.
■ Press and hold yellow reset button until display shows all
the digits the returns to 0.0.
■ Connect valve connector to tyre.
■ Check that the tyre valve adaptor is correctly tted to tyre
valve.
■ Ensure tyre valve is correctly connected to the tyre valve
adaptor.
40 PSI for car tyres
Backlit pressure gauge (+/- 1 PSI up to 50 PSI)
PSI / BAR /KPa
4.0 AMPS / 50 WATTS
10 AMP glass
16cm (approx)
180cm (approx)
SPECIFICATIONS
Max pressure:
Pressure accuracy:
Pressure resolution:
Max current:
Fuse size:
Hose length:
Power cord:
USB PORT
Under the right hand cover is a single 5v USB port ●suitable for charging mobile phones /
MP3 players with a maximum rating of 0.5 amp
4
TYRE INFLATION
1. With the On/O button ●in O position, unwind power cord and plug the small end
into the input ●and the 12v power plug into your vehicle’s 12v power plug socket. Wait
a few seconds until digital display shows zero. Please note – when the On/O button is in
the O position, it protrudes from the the unit slightly. When in the On position the
button is ush to the unit.
2. Press the PSI, BAR & KPa button ●to select desired pressure format. Lift up the high
pressure hose and screw the tyre valve connector ●onto the tyre valve. Always connect
the 12v power plug before connecting the high pressure hose to the tyre. Check the tyre
pressure shown on the display. If the display reads 0.00 or Err then refer to the Trouble
Shooting guide. When connected correctly the gauge will display the current pressure in
the tyre. If this is the pressure as stated in your vehicle’s handbook, you can simply
remove the tyre valve connector ●.
1
6
5
5
5
3. To start inating press On/O button ●.
4. You will now see the pressure increasing on the display ●. Due to the sensitive nature
of the tyre pressure measuring system, you may nd that when you switch the tyre
inator o at the required pressure the gauge may drop back slightly. If this happens,
switch back on and inate to a slightly higher pressure. Switch o and re-check.
5. If you are inating multiple tyres then follow the procedure stated from 3 to 4 above.
If the 12v power supply is disconnected then always reconnect the 12v power supply
before connecting the high pressure hose to the tyre valve. If there is a power
interruption during the ination cycle, please follow the reset procedure outlined in the
Trouble Shooting guide.
1
3
ADAPTORS
To avoid over-ination, always follow manufacturer’s instructions on the items to be
inated.
---Small Toy Inator adaptors ---Sports Ball adaptors
---Presta Valve adaptor (High Pressure cycle tyres)
DIGITAL POWER SOURCE(D.P.S) FEATURES
This Michelin tyre inator incorporates a 5v USB port.
1
2
4
3
5
6
6
Customer Enquiries:0800-888-748
1st Sources Investment Consulting Co., Ltd
11F., No.176, Jiankang Rd., Jhonghe District,
New Taipei City 235, Taiwan
http ://www.rst-sources.com
E-mail:Services@rst-sources.com
Gauge does not
illuminate Unit fails
to run with switch in
‘On’ position
Gauge does not
display when tyre
valve is connected
Gauge appears to
read incorrectly or is
unreadable Gauge
reads 0.0 or ERR
Unit is running but
tyre is not inating
Other Michelin Power Tools manuals
