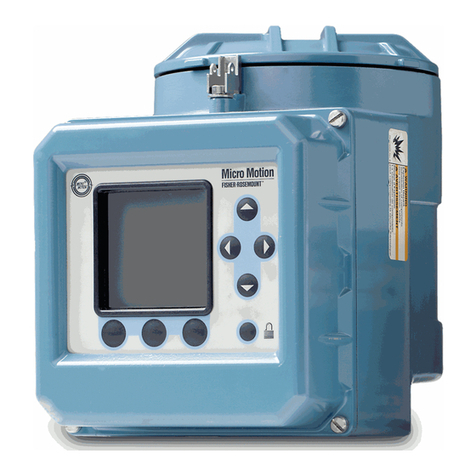
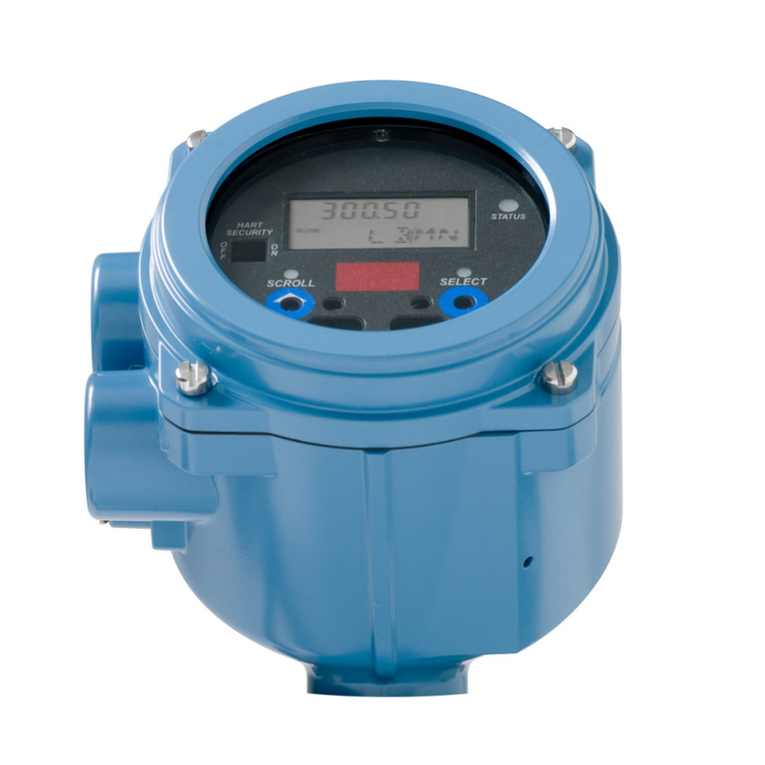
Micro Motion Fisher-Rosemount RFT9709 User manual

Model RFT9709
Transmitter
Instruction Manual
March 1999
09front2.fm Page 1 Tuesday, March 2, 1999 11:18 AM

09front2.fm Page 2 Tuesday, March 2, 1999 11:18 AM

Model RFT9709
Transmitter
Instruction Manual
For technical assistance, phone the Micro Motion Customer
Service Department:
• In the U.S.A., phone 1-800-522-6277, 24 hours
• Outside the U.S.A., phone 303-530-8400, 24 hours
• In Europe, phone +31 (0) 318 549 443
• In Asia, phone 65-770-8155
Copyright ©1999, Micro Motion, Inc. All rights reserved.
Micro Motion, ELITE, BASIS and ProLink are registered trademarks of Micro Motion,
Inc., Boulder, Colorado. Rosemount and SMART FAMILY are registered trademarks
of Rosemount, Inc., Eden Prairie, Minnesota. HART is a registered trademark of the
HART Communication Foundation, Austin, Texas. Modbus is a registered trademark
of Modicon, Inc., North Andover, Massachusetts.
09front2.fm Page 3 Tuesday, March 2, 1999 11:18 AM

09front2.fm Page 4 Tuesday, March 2, 1999 11:18 AM

RFT9709 Transmitter Instruction Manual
i
Table of Contents
Before You Begin. . . . . . . . . . . . . . . . . . . . . . . . . . . . . . . . . . . . 1
About this manual . . . . . . . . . . . . . . . . . . . . . . . . . . 1
About the transmitter. . . . . . . . . . . . . . . . . . . . . . . . 1
Configuration and calibration . . . . . . . . . . . . . . . . . 1
Proving the Coriolis flowmeter . . . . . . . . . . . . . . . . 2
Step 1 Mounting . . . . . . . . . . . . . . . . . . . . . . . . . . . . . . . . . . 3
1.1 Location requirements. . . . . . . . . . . . . . . . . . . . . . . 3
Hazardous area installations. . . . . . . . . . . . . . . . . . 3
1.2 Mounting options. . . . . . . . . . . . . . . . . . . . . . . . . . . 4
1.3 Installation in user-supplied enclosure . . . . . . . . . . 4
1.4 Optional NEMA-housing installation . . . . . . . . . . . . 5
Step 2 Wiring. . . . . . . . . . . . . . . . . . . . . . . . . . . . . . . . . . . . . . 7
2.1 General guidelines . . . . . . . . . . . . . . . . . . . . . . . . . 7
2.2 Power supply wiring and grounding . . . . . . . . . . . . 8
2.3 Sensor wiring . . . . . . . . . . . . . . . . . . . . . . . . . . . . . 9
Cable types. . . . . . . . . . . . . . . . . . . . . . . . . . . . . . . 10
Remotely-installed temperature detector . . . . . . . . 11
Cable connections to sensor and RFT9709 . . . . . . 12
2.4 Output wiring. . . . . . . . . . . . . . . . . . . . . . . . . . . . . . 17
Primary and secondary mA outputs . . . . . . . . . . . . 18
HART multidrop network wiring. . . . . . . . . . . . . . . . 19
RS-485 output. . . . . . . . . . . . . . . . . . . . . . . . . . . . . 20
Frequency/pulse output. . . . . . . . . . . . . . . . . . . . . . 21
Control output . . . . . . . . . . . . . . . . . . . . . . . . . . . . . 22
External zero switch wiring . . . . . . . . . . . . . . . . . . . 23
Viscosity measurement or pressure
compensation . . . . . . . . . . . . . . . . . . . . . . . . . . 24
Step 3 Startup. . . . . . . . . . . . . . . . . . . . . . . . . . . . . . . . . . . . . 27
3.1 Initialization . . . . . . . . . . . . . . . . . . . . . . . . . . . . . . . 27
3.2 Flowmeter zeroing. . . . . . . . . . . . . . . . . . . . . . . . . . 27
Zeroing procedure. . . . . . . . . . . . . . . . . . . . . . . . . . 28
Diagnosing zero failure . . . . . . . . . . . . . . . . . . . . . . 28
3.3 Event registers . . . . . . . . . . . . . . . . . . . . . . . . . . . . 29
3.4 Totalizer reset . . . . . . . . . . . . . . . . . . . . . . . . . . . . . 30
3.5 Process measurement . . . . . . . . . . . . . . . . . . . . . . 30
09__a.TOC Page i Monday, March 1, 1999 4:20 PM

ii
RFT9709 Transmitter Instruction Manual
Table of Contents
continued
Troubleshooting . . . . . . . . . . . . . . . . . . . . . . . . . . . . . . . . . . . 31
4.1 General guidelines. . . . . . . . . . . . . . . . . . . . . . . . . . 31
4.2 Transmitter diagnostic tools. . . . . . . . . . . . . . . . . . . 32
Diagnostic LED . . . . . . . . . . . . . . . . . . . . . . . . . . . . 32
Fault outputs . . . . . . . . . . . . . . . . . . . . . . . . . . . . . . 32
4.3 Interrogation with the ProLink®program . . . . . . . . . 33
Output test and trim. . . . . . . . . . . . . . . . . . . . . . . . . 33
4.4 Power supply. . . . . . . . . . . . . . . . . . . . . . . . . . . . . . 35
4.5 Wiring . . . . . . . . . . . . . . . . . . . . . . . . . . . . . . . . . . . 35
4.6 Master reset. . . . . . . . . . . . . . . . . . . . . . . . . . . . . . . 37
4.7 Customer service. . . . . . . . . . . . . . . . . . . . . . . . . . . 37
Appendixes
Appendix A RFT9709 Specifications . . . . . . . . . . . . . . . . . . 39
Appendix B Ordering Information . . . . . . . . . . . . . . . . . . . . . 45
Appendix C Switch Settings . . . . . . . . . . . . . . . . . . . . . . . . . 47
Appendix D Open Collector Configuration . . . . . . . . . . . . . . 53
Appendix E Decontamination and Return Goods
Policy – USA. . . . . . . . . . . . . . . . . . . . . . . . 55
Appendix F Decontamination and Return Goods
Policy – Europe. . . . . . . . . . . . . . . . . . . . . . 57
Index . . . . . . . . . . . . . . . . . . . . . . . . . . . . . . . . . . . . . . . . . . . . . . . 59
09__a.TOC Page ii Monday, March 1, 1999 4:20 PM

RFT9709 Transmitter Instruction Manual
iii
Table of Contents
continued
Tables
Table 2-1 Sensor-wiring terminal designations. . . . . . . . . 13
Table 2-2 Output-wiring terminal designations . . . . . . . . . 17
Table 2-3 Sensors affected by pressure. . . . . . . . . . . . . . 24
Table 3-1 Parameters that affect event registers . . . . . . . 29
Table 4-1 Conditions indicated by diagnostic LED . . . . . . 32
Table 4-2 Normal resistance for flowmeter circuits. . . . . . 36
Table 4-3 Input and output ratings . . . . . . . . . . . . . . . . . . 36
Table 4-4 Default values after a master reset. . . . . . . . . . 38
Table A Performance specifications. . . . . . . . . . . . . . . . 39
Table B RFT9709 model number matrix . . . . . . . . . . . . 45
Table C-1 Communications configuration . . . . . . . . . . . . . 48
Table C-2 Security modes. . . . . . . . . . . . . . . . . . . . . . . . . 49
Figures RFT9709 components . . . . . . . . . . . . . . . . . . . 2
Figure 1-1 RFT9709 approvals tag . . . . . . . . . . . . . . . . . . 3
Figure 1-2 RFT9709 dimensions . . . . . . . . . . . . . . . . . . . . 4
Figure 1-3 Factory-supplied NEMA-housing dimensions. . 6
Figure 2-1 RFT9709 wiring terminals. . . . . . . . . . . . . . . . . 7
Figure 2-2 Power-supply wiring and grounding
connections . . . . . . . . . . . . . . . . . . . . . . . . 8
Figure 2-3 Cable types. . . . . . . . . . . . . . . . . . . . . . . . . . . . 10
Figure 2-4 Terminating flowmeter cable. . . . . . . . . . . . . . . 10
Figure 2-5 RFT9709 terminals for sensor wiring . . . . . . . . 13
Figure 2-6 Wiring to ELITE®CMF sensors . . . . . . . . . . . . 14
Figure 2-7 Wiring to BASIS®F, Model D, and
DL sensors. . . . . . . . . . . . . . . . . . . . . . . . . 15
Figure 2-8 Wiring to Model DT sensors . . . . . . . . . . . . . . . 16
Figure 2-9 Terminating output-wiring shields and drains. . 17
Figure 2-10 mA output terminals . . . . . . . . . . . . . . . . . . . . . 18
Figure 2-11 Typical HART®network wiring . . . . . . . . . . . . . 19
Figure 2-12 RS-485 wiring. . . . . . . . . . . . . . . . . . . . . . . . . . 20
Figure 2-13 Frequency/pulse output terminals. . . . . . . . . . . 21
Figure 2-14 Control output terminals . . . . . . . . . . . . . . . . . . 22
Figure 2-15 Remote-zero switch wiring . . . . . . . . . . . . . . . . 23
Figure 2-16a Pressure transmitter wiring, internally
powered . . . . . . . . . . . . . . . . . . . . . . . . . . . 25
Figure 2-16b Pressure transmitter wiring, externally powered
(multidrop network) . . . . . . . . . . . . . . . . . . 25
Figure 3-1 Diagnostic LED and zero button. . . . . . . . . . . . 27
Figure 4-1 Diagnostic LED. . . . . . . . . . . . . . . . . . . . . . . . . 32
Figure 4-2 ProLink®PC-Interface connections . . . . . . . . . 34
Figure 4-3 Power-supply wiring and grounding terminals . 35
Figure C-1 Switches . . . . . . . . . . . . . . . . . . . . . . . . . . . . . . 47
Figure C-2 Diagnostic LED and zero button. . . . . . . . . . . . 51
Figure D-1 Configuring open collector mode . . . . . . . . . . . 53
09__a.TOC Page iii Monday, March 1, 1999 4:20 PM

iv
RFT9709 Transmitter Instruction Manual
09__a.TOC Page iv Monday, March 1, 1999 4:20 PM
RFT9709 Transmitter Instruction Manual
1
Wiring Startup TroubleshootingBefore You Begin Mounting
Before You Begin
About this manual This instruction manual explains how to install the Micro Motion®Model
RFT9709 transmitter for use with Micro Motion Coriolis flow sensors. For
more information about the sensor, see the appropriate sensor
instruction manual.
About the transmitter The Model RFT9709 transmitter is a microprocessor-based transmitter
for fluid process measurement. The transmitter works with Micro Motion
sensors to measure mass or volume flow, density, and temperature.
Components of the transmitter are illustrated on the following page.
Configuration and calibration An RFT9709 transmitter and a sensor are ordered together as a Coriolis
flowmeter. The factory can provide any of three standard configuration
options:
• Gross volume, API table 5A
• Gross standard volume, API table 5A
• Not configured
For specific configuration details, see the calibration certificate that is
shipped with the sensor. To meet API requirements, the user must
supply an external RTD that is accurate to ±0.1°F. The external RTD
calibration must be configured in the transmitter. The factory can
configure the transmitter if the RTD calibration is provided.
Changes to the configuration are possible with a custom version of
Micro Motion’s ProLink®software program, designed specifically for the
RFT9709.
• The standard ProLink software cannot be used with the RFT9709.
Contact the factory for additional ProLink information.
• The Rosemount®hand-held HART®Communicator cannot be used
with the RFT9709.
CAUTION
Improper installation could cause measurement error
or transmitter failure.
For personal and system safety, follow all instructions to
ensure transmitter will operate correctly.
09begin.fm Page 1 Monday, March 1, 1999 4:24 PM

2
RFT9709 Transmitter Instruction Manual
Before You Begin
continued
Proving the Coriolis flowmeter Proving Micro Motion flowmeters can be accomplished using
conventional proving methods. Micro Motion publishes a comprehensive
applications manual, which describes in detail how to prove Coriolis
meters. For additional information, contact the Micro Motion Customer
Service Department:
• In the U.S.A., phone 1-800-522-MASS (1-800-522-6277)
• Outside the U.S.A., phone 303-530-8400
• In Europe, phone +31 (0) 318 549 443
• In Asia, phone 65-770-8155
RFT9709 components
Output wiring
connector
Mounting boss
Channel for
routing
sensor cable
Power-supply
wiring terminals
Sensor cable
wiring connector
Mounting
boss
Configuration switches
Zero button
Slots for cable tie
Wiring
access
cover
shown
open
16-pin connector for
future application
Diagnostic LED
09begin.fm Page 2 Monday, March 1, 1999 4:24 PM

RFT9709 Transmitter Instruction Manual
3
Wiring Startup TroubleshootingBefore You Begin Mounting
Installation
Step 1 Mounting
1.1 Location requirements • Mount the RFT9709 in a user-supplied or factory-supplied NEMA-4
(IP65) enclosure.
• Locate the RFT9709 where it is accessible for service.
• Locate the RFT9709 where the ambient temperature remains between
–40 and 122°F (–40 and 50°C).
• Locate the RFT9709 where humidity is less than 90%.
• Total length of cable from the sensor to the RFT9709 must not exceed
1000 feet (300 meters).
• In hazardous areas, install the RFT9709 as described below.
Hazardous area
installations Read the RFT9709 approvals tag before installing the transmitter. The
approvals tag is attached to the RFT9709 housing. See Figure 1-1.
• For a complete list of approvals, see
Hazardous area approvals
,
page 43.
• For an intrinsically safe or hazardous area installation, use this manual
with Micro Motion UL-D-IS Installation Instructions.
Figure 1-1.
RFT9709 approvals tag
WARNING
Failure to comply with requirements for intrinsic
safety in a hazardous area could result in an
explosion.
• Install the RFT9709 in an environment that is compatible
with the hazardous area specified on the approvals tag.
• For installations that require intrinsic safety, use this
document with Micro Motion UL installation instructions.
Approvals tag
09mount.fm Page 3 Monday, March 1, 1999 4:28 PM

4
RFT9709 Transmitter Instruction Manual
Mounting
continued
1.2 Mounting options The RFT9709 has these installation options for mounting on any flat
surface:
• For mounting in a user-supplied NEMA-4 (IP65) enclosure
• Pre-installed by the factory in an optional NEMA-4 (IP65) enclosure
1.3 Installation in user-
supplied enclosure • Install the RFT9709 with two screws to a flat mounting surface. Micro
Motion does not supply mounting screws.
• Install with wiring terminals facing away from the mounting surface.
• RFT9709 dimensions are provided in Figure 1-2.
Figure 1-2. RFT9709 dimensions
1 13/16
(46)
Dimensions in inches
(mm)
1 11/32
(34)
3 5/32
(80)
Mounting boss
Use #8-32 (M4)
screws with flat
washers and lock
washers for
mounting
2X
6 1/8
(156)
2 15/16
(74)
3 1/4
(83)
2X
2X
5 9/16
(141)
Minimum
clearance
to open
access cover
5 1/4
(134)
Mounting
boss
2X
09mount.fm Page 4 Monday, March 1, 1999 4:28 PM

RFT9709 Transmitter Instruction Manual
5
Mounting
continued
Wiring Startup TroubleshootingBefore You Begin Mounting
1.4 Optional NEMA-housing
installation An optional NEMA-4 (IP65) housing is available from the factory, or the
enclosure may be user-supplied.
Factory-supplied housing
If the RFT9709 is ordered with the factory-supplied NEMA-4 (IP65)
housing, Micro Motion installs the transmitter in the enclosure.
• Install the NEMA enclosure with four bolts. Micro Motion does not
supply mounting bolts.
• Mount to any flat, stable surface.
• NEMA housing dimensions are provided in Figure 1-3, page 6.
User-supplied housing
Any user-supplied NEMA-4 (IP65) enclosure of an appropriate size may
be used to house the RFT9709. Dimensions of the RFT9709 are
provided in Figure 1-2, page 4.
Conduit openings
Whether the optional NEMA housing is supplied by the user or the
factory, the user must add three conduit openings for power-supply
wiring, input wiring, and output wiring.
• Locate the housing so these openings are accessible for installation of
wiring and so the housing cover can be fully opened for access to the
RFT9709 inside.
• To help prevent moisture from entering the housing, install the housing
so conduit openings are pointed downward, if possible. To maintain the
enclosure’s NEMA rating, all conduit openings must be fully sealed
after wiring is installed.
• Recommended size for conduit openings is 3/4-inch (20 mm).
CAUTION
Failure to protect the RFT9709 from moisture could
cause a short circuit, which would result in
measurement error or flowmeter failure.
To avoid risk of condensation of excessive moisture in the
NEMA housing:
• Seal all conduit openings.
• Install drip legs in cable or conduit.
• Close and fully tighten all NEMA-housing covers.
09mount.fm Page 5 Monday, March 1, 1999 4:28 PM

6
RFT9709 Transmitter Instruction Manual
Mounting
continued
Figure 1-3. Factory-supplied NEMA-housing dimensions
Dimensions in inches
(mm)
5 5/16
(136)
Mounting feet can be installed in
optional orientation as shown
9 3/16
(234)
10 7/16
(266)
2X
7 3/16
(183)
Minimum
clearance
to open
access cover
11 7/8
(301)
9 11/16
(247)
2X
7 11/16
(196)
2X 11 11/16
(297)
5 11/16
(145)
2X
8 7/16
(215)
2X 0.31
(8)
4X Ø
1/4
(6)
2X
1 3/8
(35)
4X
4X 5/16-18 UNC
flat head screw
for mounting feet
(included)
cover-access
screw
2X
Cover hinge
Housing requires installation of three conduit openings
for power-supply wiring, input wiring, and output wiring.
Recommended opening size: 3/4-inch (20 mm).
09mount.fm Page 6 Monday, March 1, 1999 4:28 PM

RFT9709 Transmitter Instruction Manual
7
Wiring Startup TroubleshootingBefore You Begin Mounting
Installation
Step 2 Wiring
2.1 General guidelines Figure 2-1 illustrates the locations of the terminals for power-supply
wiring, wiring to the sensor, and output wiring.
• Terminal blocks may be unplugged from the RFT9709 (after removing
two screws) for easier installation of wiring. Always tighten screws after
re-installing terminal blocks.
• Install all conduit, cable and wiring to meet local code requirements.
For an RFT9709 installed in a NEMA enclosure:
• The RFT9709 may be installed in a user-supplied or factory-supplied
NEMA-4 (IP65) enclosure, as described in Section 1.4, page 5. The
enclosure requires three separate conduit openings for power-supply
wiring, sensor wiring, and output wiring.
• Conduit openings must remain sealed to maintain the NEMA-4 (IP65)
rating. Use conduit seals or cable glands that provide a complete seal
with the conduit openings.
Figure 2-1. RFT9709 wiring terminals
Output wiring
connector
Channel for
routing
sensor cable
Power-supply
wiring terminals
Sensor cable
wiring connector
Slots for cable tie
Wiring
access
cover
shown
open
16-pin connector for
future application
09wire.fm Page 7 Monday, March 1, 1999 4:31 PM

8
RFT9709 Transmitter Instruction Manual
Wiring
continued
2.2 Power supply wiring and
grounding
For power-supply wiring and grounding, follow these guidelines:
• The RFT9709 requires an 11 to 30 VDC power supply.
• Do not install unfiltered DC power cable in the same conduit or cable
tray as sensor cable or output wiring.
• If the sensor installation must comply with UL standards, refer to
Micro Motion UL-D-IS Installation Instructions.
• Refer to the wiring diagram presented in Figure 2-2.
Figure 2-2. Power-supply wiring and grounding connections
WARNING
Failure to comply with requirements for intrinsic
safety in a hazardous area could result in an
explosion.
Power-supply wiring is not intrinsically safe.
• Keep power-supply wiring separated from intrinsically
safe sensor wiring and output wiring.
• For intrinsically safe sensor installations, use this
document with Micro Motion UL installation instructions.
CAUTION
Installation with power supply on could cause
transmitter damage or failure.
Turn off power before connecting power supply wiring.
11–30 VDC power supply
Terminal Function
23 DC–
24 DC+
25
#6-32 ground nut #6-32 ground nut
Mounting boss
If equipment ground is not established via
mounting, connect a low-impedance ground at
either ground nut.
If national standards are not in effect, adhere to these standards for
ground wiring:
•
Use copper wire, 14 AWG (2.5 mm²) or larger wire size for grounding.
•
Keep all ground leads as short as possible, less than 1 ohm impedance.
•
Connect power-supply ground lead directly to earth ground, or follow plant
standards if a separate high-integrity intrinsically safe ground scheme is used.
09wire.fm Page 8 Monday, March 1, 1999 4:31 PM

RFT9709 Transmitter Instruction Manual
9
Wiring
continued
Wiring Startup TroubleshootingBefore You Begin Mounting
2.3 Sensor wiring The instructions in this section explain how to connect a fully prepared
Micro Motion flowmeter cable to the RFT9709 and a sensor. The sensor
can be a Model D, DL, DT, ELITE®, or BASIS®sensor.
• The procedure for preparing Micro Motion flowmeter cable and cable
glands is described in the instructions that are shipped with the cable.
• Install cable and wiring to meet local code requirements.
• Use Micro Motion color-coded cable.
• Total length of cable from the sensor to the RFT9709 must not exceed
1000 feet (300 meters).
WARNING
Failure to comply with requirements for intrinsic
safety in a hazardous area could result in an
explosion.
Sensor wiring is intrinsically safe.
• Keep intrinsically safe sensor wiring separated from
power-supply wiring and output wiring.
• For intrinsically safe sensor installations, use this
document with Micro Motion UL installation instructions.
CAUTION
Improper installation of cable or conduit could cause
inaccurate measurements or flowmeter failure.
Keep sensor cable away from devices such as
transformers, motors, and power lines, which produce
large magnetic fields.
09wire.fm Page 9 Monday, March 1, 1999 4:31 PM

10
RFT9709 Transmitter Instruction Manual
Wiring
continued
Cable types Micro Motion supplies 9-wire jacketed, shielded, or armored cable, as
illustrated in Figure 2-3.
• All cable types are acceptable for cable tray installation.
• All cable types must have the jacket extend under the wiring terminals
access cover, as illustrated in Figure 2-4.
• Shielded and armored cable must have the braided shield terminated
as illustrated in Figure 2-4.
Figure 2-3.
Cable types
Figure 2-4.
Terminating flowmeter
cable
Braided shield
Jacketed cable
Shielded or
armored cable
Jacket
Outer jacket
Jacket
For shielded or
armored flowmeter
cable, connect
braided shield at
mounting boss Jacket must extend
under access cover
Mounting boss
Braided shield
09wire.fm Page 10 Monday, March 1, 1999 4:31 PM

RFT9709 Transmitter Instruction Manual
11
Wiring
continued
Wiring Startup TroubleshootingBefore You Begin Mounting
Remotely-installed
temperature detector A temperature signal is transmitted to the RFT9709 from a temperature
detector (RTD) on the flow tube inside the sensor case. This signal is
carried by three wires of the flowmeter cable: the yellow, orange and
violet wires (see Table 2-1, page 13).
To meet API requirements, a user-supplied external temperature
detector can be installed remotely by the user. This external temperature
detector, instead of the RTD inside the sensor, is wired to the RFT9709.
• The external RTD must be accurate to ±0.1°F (±0.05°C).
• RTD calibration information must be configured in the RFT9709.
Requirements for installing a user-supplied external temperature
detector:
• Locate the external temperature detector as close to the sensor as
possible.
• Use an individually shielded 3-wire cable of 22 AWG (0.3 mm²) or
larger wires to connect the external temperature detector to the
flowmeter.
• Wiring diagrams are provided in Figure 2-6, Figure 2-7, and Figure 2-8
on pages 14 through16.
Procedure for installing the user-supplied external temperature
detector:
1. At the sensor junction box, before connecting the flowmeter cable,
identify the yellow, orange and violet wires that come from inside the
sensor.
2. Disconnect these wires from the terminal block, and tie all three
together with a wire nut to protect exposed wire ends.
3. Connect three wires from the external temperature detector to the
terminals, as illustrated in Figure 2-6, Figure 2-7, or Figure 2-8. If the
temperature detector has a fourth wire, it remains unconnected.
4. Make flowmeter cable connections as illustrated in Figure 2-6,
Figure 2-7, or Figure 2-8.
09wire.fm Page 11 Monday, March 1, 1999 4:31 PM

12
RFT9709 Transmitter Instruction Manual
Wiring
continued
Cable connections to
sensor and RFT9709 Wiring connections from the sensor to the RFT9709 are made at the
RFT9709 terminals indicated in Figure 2-5. Instructions for wiring the
sensor and transmitter are provided below and on the following pages.
The wiring procedure is the same for the sensor and RFT9709. Refer to
the wiring diagrams on pages 14 through 16, and follow these steps:
1. Insert the stripped ends of the individual wires into the terminal
blocks. No bare wires should remain exposed.
• At the sensor, connect wiring inside the sensor junction box.
• At the RFT9709, connect wiring to the intrinsically safe terminals for
sensor wiring, indicated in Figure 2-5. The flowmeter cable outer
jacket must extend under the RFT9709 wiring terminals access
cover.
• For easier connection of wiring, terminal blocks can be unplugged
from the RFT9709. Two captive screws hold each terminal block in
place.
2. Locate the wires by color as indicated in Table 2-1.
3. Tighten the screws to hold the wires in place.
4. Tightly close all housing covers.
• Tighten the sensor junction-box cover. Tighten all four cover screws.
• Close the RFT9709 sensor-wiring access cover and tighten the
screw that holds it in place.
• If the RFT9709 is installed in a NEMA enclosure, tightly close all
NEMA housing covers.
CAUTION
Exposing the RFT9709 to moisture, or failure to seal
the sensor junction box, could cause a short circuit.
A short circuit would result in measurement error or
flowmeter failure.
To avoid risk of condensation or excessive moisture:
• Seal all conduit openings.
• Install drip legs in cable or conduit.
• Fully tighten sensor junction box cover.
• Close and tighten all NEMA housing covers.
09wire.fm Page 12 Monday, March 1, 1999 4:31 PM
Table of contents
Other Micro Motion Transmitter manuals
Popular Transmitter manuals by other brands

JUMO
JUMO 907021/30 instructions

Minicom
Minicom CAT5 VGA/DATA Transmitter installation guide

HK Instruments
HK Instruments DPT-MOD Series installation instructions

Kingspan
Kingspan SENSiT installation manual

Endress+Hauser
Endress+Hauser Cerabar S PMP71 operating instructions

Hitachi
Hitachi EC701HP Operation manual