Microgem Sal6830 User manual

User Guide
MicroGEM Sal6830 Point of Care PCR System
For Use with MicroGEM Sal6830 SARS-CoV-2 Saliva Test
For Use under an Emergency Use Authorization Only M0248 Rev4.3

02
WARNINGS AND SAFE USE
03#
1 INTRODUCTION 05#
2MicroGEM Sal6830 Point of Care PCR System AT A GLANCE 09#
3 GETTING STARTED - SETUP 11#
4 SETTINGS MENU 13#
5 RUNNING A TEST 16#
6 EXPORT RESULTS 17#
7 SOFTWARE UPDATES 20#
8 ERRORS AND WARNINGS 21#
9 SYMBOLS 23#
10 ORDERING AND CONTACT INFORMATION 23#
11 WARRANTY 24#

WARNINGS AND SAFE USE
03
The following warnings are to be used as an aid in risk mitigation.
Caution: This product has not been FDA cleared or approved but has been authorized for
emergency use by FDA under an EUA for use by authorized laboratories.
Caution: The emergency use of this product is only authorized for the duration of the declaration
that circumstances exist justifying the authorization of emergency use of in vitro diagnostics for
detection and/or diagnosis of COVID-19 under Section 564(b)(1) of the Federal Food, Drug and
Cosmetic Act, 21 U.S.C. § 360bbb-3(b)(1), unless the declaration is terminated or authorization is
revoked sooner.
Caution: Laboratories within the United States and its territories are required to report all results
to the appropriate public health laboratories
Caution: Use only the power supply and adaptor that are provided with the system. The correct
power supply and adaptor are required to maintain the safety and electromagnetic compatibility
of the system. The power supply and adaptor are not serviceable.
Caution: The power supply and adaptor that are provided should only be used with the MicroGEM
Sal6830 Point of Care PCR System.
Hot Surfaces: Do not insert any part of the body into the Test Cartridge slot. Internal components
may be hot.
Hot Surfaces: The Test Cartridge may be hot when removing from the system following a test.
Biological Hazard: This equipment is intended to be used with potentially infectious samples. Use
appropriate PPE when using this equipment and handling samples.
Caution: Always operate the system on a clean, flat, level, and stable surface that is not in direct
sunlight. Do not drop the system. Ensure that air flow to the ventilation openings located on the
front and back of the system is not restricted.
Caution: Never move the system while a test is in progress.
Caution: Follow proper infection control guidelines for handling all specimens and related items.
Properly dispose of all contaminated waste according to federal, state, and local requirements.

WARNINGS AND SAFE USE (Continued)
04
Caution: Do not disassemble or attempt to repair the MicroGEM Sal6830 Point of Care PCR System
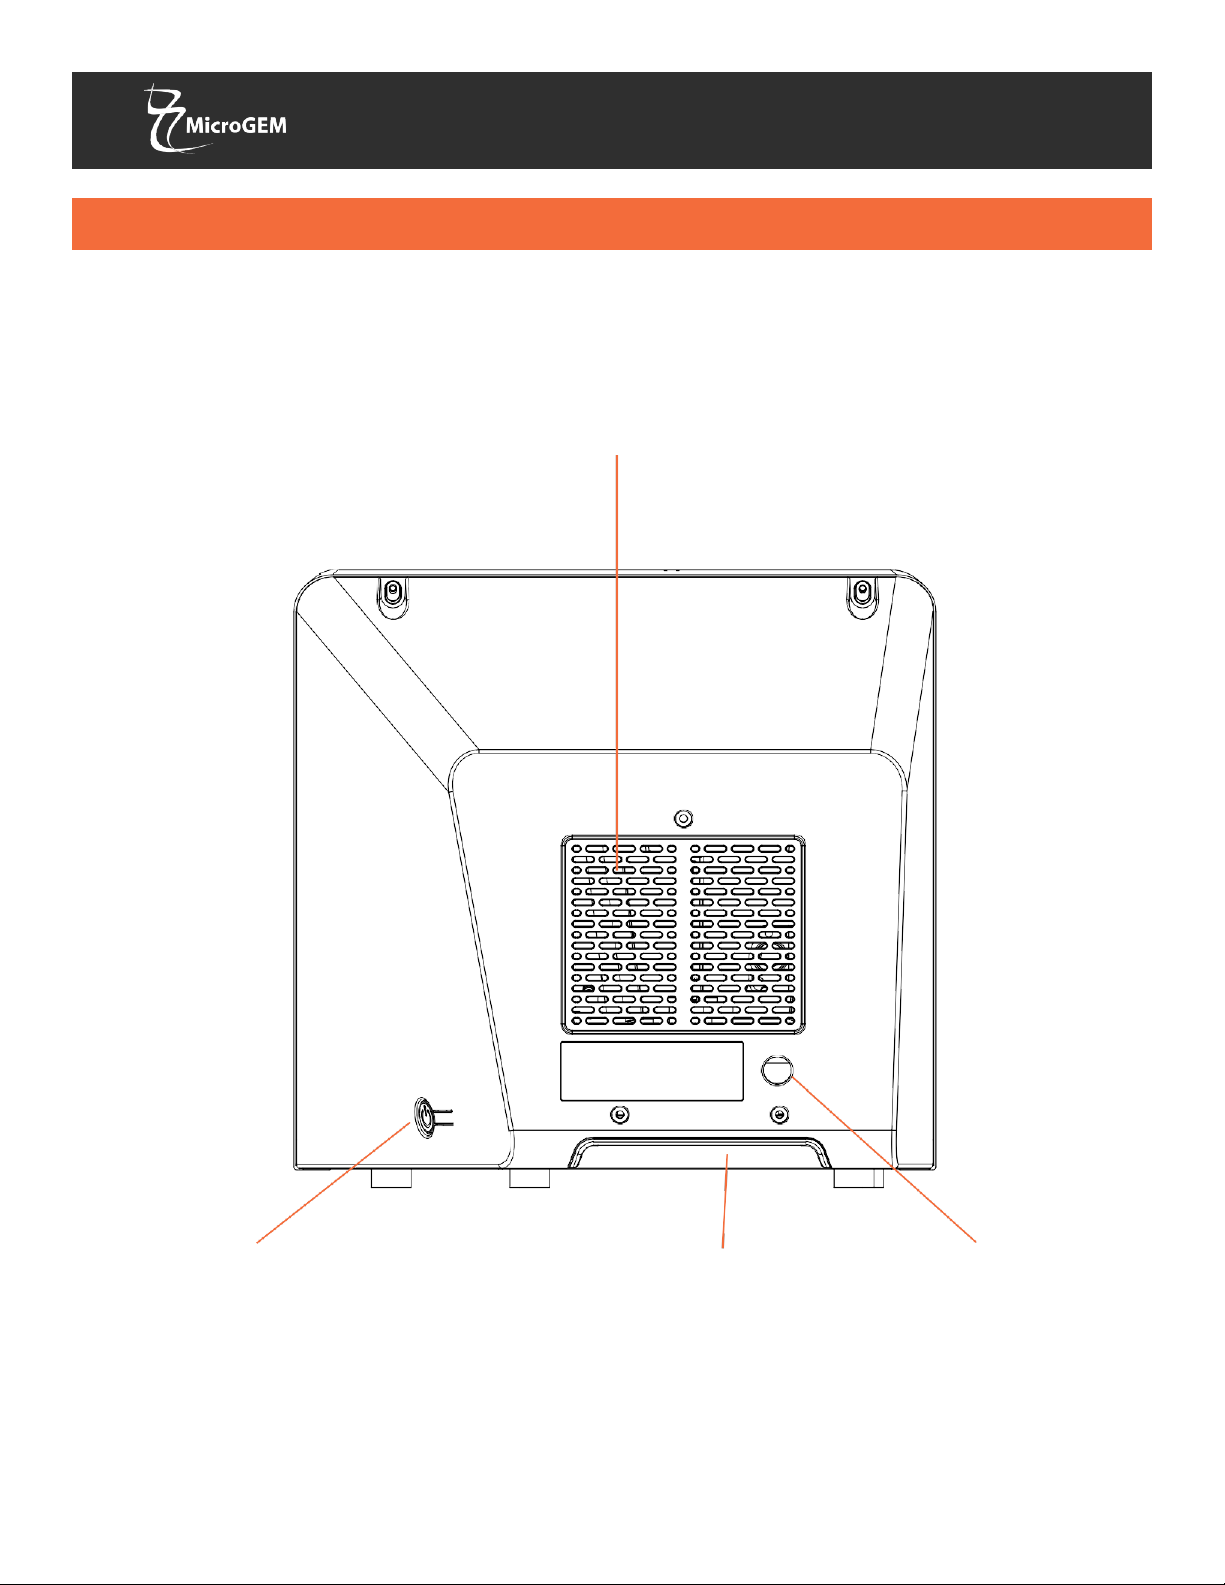
as there is a risk of damage to the system. This system does not contain serviceable parts and should
be returned for repair. Disassembling the system will also void the warranty.
Caution: Only operate the system for its intended purpose and in accordance with this User Guide
and warnings. If the system is used in a manner not specified in the User Guide, protection
provided by the equipment will be impaired. This system (including power supply) is designed to
operate within the manufacturer’s specifications. Do not exceed the manufacturer specifications
when in use.
Caution: Position the system with clear access to connectors. Keep connected cables clear of work
areas such that tripping or catching will not pull the unit off its work bench. The main socket outlet
intended for use with the MicroGEM
Sal
6830 Point of Care System power supply should be located
near the system and be readily
accessible. MicroGEM recommends that cables are disconnected
when not in use for an extended period.
Caution: USB interface. If intended for connection to external equipment, please ensure that
interfaces of such equipment are separated from mains by double or reinforced insulation and
present no risk of electrical shock.
Caution: If any assay components are dropped, cracked, found to be damaged or open when
received, DO NOT USE and discard.
Caution: Contamination of the work area with previous positive samples may cause false positive
results. Manage human samples according to standard clinical practices. Clean system and
surrounding surfaces according to instructions provided in Section 1.6, Maintenance & Cleaning.
Caution: To avoid contamination, do not move the MicroGEM Sal6830 Point of Care PCR System
during a run or until all assay components have been removed from the system.
Caution: Always check the expiration date of consumables prior to running a test.
Caution: Keep wireless devices at least 11.81” (30cm) away from the system.
Caution:
The MicroGEM Sal6830 Point of Care PCR System should not be exposed to the
elements, such as sunlight, rain etc.
Caution: Do not dissemble the test cartridge. Dispose the test cartridge when the test is complete.
Treat as human biohazardous material.

1 INTRODUCTION
05
1.1 Intended Use
The MicroGEM Sal6830 Point of Care PCR System is a fluorescence-based detection system for the
automated processing and analysis for use with the MicroGEM Sal6830 SARS-CoV-2 Saliva Test.
This document describes the setup, configuration, and operation of the MicroGEM Sal6830 Point
of Care PCR System.
Caution: Please ensure that the system is operated and used according to the CLIA requirements
of the test.
1.2 Product Description
The MicroGEM Sal6830 Point of Care PCR System, for use with the MicroGEM Sal6830 SARS-CoV-2
Saliva Test, is an integrated sample processing, nucleic acid extraction and amplification system.
Consumables such as the Test Cartridge, Saliva Cup, Cap, and ID barcodes are required to run the
system.
The Test Cartridge and Saliva Cup are pre-loaded with all reagents needed for extraction and
amplification of the target nucleic acid, as well as internal controls to monitor the various assay
steps.
To perform a test, the user deposits a specific amount of sample into the Saliva Cup and places
the cap on the saliva cup. The operator then seals the saliva cup with the locking Cap and inserts it
into the Test Cartridge. The fully assembled Test Cartridge is then inserted into the system ready
for testing. Extraction, amplification, and detection is carried out by the system and results are
automatically displayed on the system screen.
Additional MicroGEM Sal6830 SARS-CoV-2 Saliva Test information and workflows are detailed in
the Instructions for Use (IFU).

1 INTRODUCTION (Continued)
06
1.3 System Specifications
1.3.1 System
Color Touch Screen
3.4 x 6” (86 x 154 mm)
Communications
1x USB port for data export
Data Storage
10,000 test results – 64GB Export via USB
Power Requirements
24V – 180W
Dimensions
15.8” W x 15.7” H X 13.8” D
(403 mm W x 399 mm H x 348 mm D)
Weight
33lb (15 kg)
Operating Environment
Temperature range: 15-30°C (59-86°F)
Humidity range: 20-80% relative humidity
Altitude: 0-6,561.7’ (0-2000 m)
Storage Environment
Temperature range: 15-30°C (59-86°F)
Humidity range: 20-80% relative humidity

1 INTRODUCTION (Continued)
07
1.3 System Specifications (Continued)
1.3.2 24V Power Supply and Adaptor
Rated Input Voltage
100 - 240 VAC
Rated Input Frequency
50/60 Hz
Rated Input Current
2.5-1.3 Amps
Operating Environment
As per system
Storage Environment
As per system
Output Voltage
24V
Output Current
9.2 Amps
1.4 Unpacking
Unpack the MicroGEM Sal6830 Point of Care PCR System, taking care when lifting the
system. There are carrying features at the front and rear of the system for assistance.
Place on a clean, flat, level, and stable surface within reach of an electrical outlet. Place
System in a location where the air vents located in the back of the instrument will not be
blocked, at least 3.94” (10cm) from the nearest wall or blocking surface. Avoid placing the
system in direct sunlight. Inspect for any obvious signs of damage. Report any damage
immediately to MicroGEM technical support at [email protected]. Allow
the system to sit at operating temperature for at least 30 minutes before powering on.
1.5 System Calibration
The MicroGEM Sal6830 Point of Care PCR System is factory calibrated and does not
require any further calibration and verification by the user.

1 INTRODUCTION (Continued)
08
1.6 Maintenance & Cleaning
The MicroGEM Sal6830 Point of Care PCR System is maintenance-free and has no user
serviceable parts. In case of system failure or damage, contact MicroGEM technical
support at [email protected].
MicroGEM recommends that the exterior system surfaces and the surfaces visible
behind the door be cleaned after use.
The system should be cleaned with 70% isopropanol - available in commercial wipes or on
a damp, lint free cloth.
Do not spray or pour solution directly onto system when cleaning. Ensure no excess liquid
is used when cleaning as it may damage the system.
Clean system and surrounding areas immediately after possible patient sample spills or
contamination with 10% bleach on a damp, lint free cloth followed by 70% isopropanol
available in commercial wipes.
Clean barcode reader using 10% bleach on a damp, lint free cloth.
Do not use any other type of cleaner on the barcode reader.
Do not disassemble the system for cleaning.
Do not immerse in water or cleaning solutions.
Do not clean with soap or other solutions except for those listed above.
1.7 Components
The following items are supplied with the MicroGEM Sal6830 Point of Care PCR System:
• Power Supply and Adaptor
• MicroGEM Sal6830 Point of Care PCR System Quick-Start-Card

2 MicroGEM Sal6830 Point of Care PCR System AT A GLANCE
09
MicroGEM Sal6830 Point of Care PCR System, Front View
Door Barcode Scanner
Touch Screen
USB
Connection
Latch
Front Lifting
Feature
Test Cartridge Slot
Airflow Ventilation
Feet

2 MicroGEM Sal6830 Point of Care PCR System AT A GLANCE (Continued)
10
MicroGEM Sal6830 Point of Care PCR System, Rear View
Airflow Ventilation
Power Button Rear Lifting Feature Power Supply
Connection

3 GETTING STARTED – SETUP
11
3.1 Initial Setup
Connect the 24V power supply to the system. Plug the
adaptor into an appropriate electrical outlet (1).
Power Up: Once the power is connected,
press the Power Button on the right side of the
system to power up and start the system (2).
Power Down: Once the system is running, it may be
turned off (shut down) by selecting SHUT DOWN from
the Home Screen (3).
System Optimization: When the system has been
powered off for more than 12 hours, the system will
automatically start a SYSTEM OPTIMIZATION
program (4). No interaction with the system is
required during this step and a countdown timer will
be displayed. The optimization step takes ~20
minutes to complete. It is recommended to keep the
door closed during the System Optimization process
as some interior surfaces are warm but opening the
door will not affect the process.
Leaving the system powered on or having it off for
less than 12 hours will avoid the need for the system
to run the optimization program. When the system
is powered and idle, a background process ensures
optimal operation. This process uses very little
energy and is compatible with battery operation.
1
4
2 and 3

3 GETTING STARTED – SETUP (Continued)
12
3.2 User Interface
Touch Screen
Operation control of the MicroGEM Sal6830 Point of Care PCR System is performed using the
system Touch Screen (5).
3.3 Home Screen
Home Screen (6) displays buttons for access to:
• Start New Test
• Shut Down
• Settings
3.4 Before Running Your First Test
Before running your first test, it is important that the system is set up correctly. In
order to do this, ensure that the system time and date have been updated
(instructions on how to do this can be found on page 14).
5
6

4 SETTINGS MENU
13
Settings Home > Settings
The Settings screen allows users to configure
the instrument (7). Settings are saved even when
power is off. Settings include:
• Display Brightness
• Volume Control
• Version & Licensing
• Admin Functions
• Advanced Settings:
- Time
- Date
- Time Zone
Adjust Display Brightness
Use the touch slider to adjust the display brightness
Adjust Volume Control
Use the touch slider to adjust the system volume
View Licensing
Select VIEW LICENSING if access to licensing is needed
Admin Functions Home > Settings > Admin
Functions The Admin Functions page allows the
user to configure the instrument (8). Settings are
saved even when power is off.
Settings include:
• Export Results
• Export Support Logs
• Update Software
Data Export
For exporting results, see section 6 on page 17
Software Update
For software update, see section 7 on page 20
7
8

4 SETTINGS MENU (Continued)
14
Advanced Settings Home > Settings > Advanced Settings
The Advanced Settings page allows the user
to adjust Time and Date (9). Settings are
saved even when power is off.
Settings include:
• Time
• Date
• Time Zone
Adjust Time
Press the Time box on the Advanced Settings
page to bring up the System Clock (10).
Touch the screen to change the time and
choose between AM and PM
Press off the Clock to return to the Advanced Settings page.
AM
9
10
30 Aug 2021

4 SETTINGS MENU (Continued)
15
Adjust Date
Press the Date box on the Advanced Settings page to
bring up the System Calendar (11).
Touch the screen to change the date and move between
months. Press off the Calendar to return to the
Advanced Settings page.
Time Zone
Press the Time Zone box on the Advanced Settings page
to bring up the Time Zone Selection List (12).
Select the desired Time Zone.
Press off the Time Zone Selection List to return to the
Advanced Settings page.
When the above steps have been completed, the system should be powered down and turned
back on. Confirm the settings are correct.
11
12

5 RUNNING A TEST
16
From the Home Screen, select the “Start New
Test” button and follow the prompts (13).
It is essential that the on-screen prompts are
followed throughout the testing process. See
specific test product inserts for further
information.
13

6 EXPORT RESULTS
17
6.1 Export Results via USB download.
Test results can be downloaded from the MicroGEM Sal6830 Point of Care PCR System via a USB Flash
Memory Drive.
Download Sequence
STEP 1 From the Home Screen, select Settings>Admin Functions to load the Admin Functions
screen.
STEP 2 Attach USB flash memory drive via the USB port located on the right side of the System.
STEP 3 Upon USB flash memory drive insertion, a message will appear in the EXPORT
RESULTS section of the Admin Functions Screen.
If a valid USB Flash Memory Drive is inserted a “USB device detected, ready to
export data” message will be shown.
STEP 4 Select EXPORT RESULTS; this will load the Results Export page.
STEP 5 From the Results Export page, select NEW RESULTS
to export all results since the last export and ALL
RESULTS to export all results on the system (14).
Upon selection, exporting will begin. Do not remove
the USB Flash Memory Drive during this process.
STEP 6 When complete, select OKAY to return to
the Admin Functions Screen.
STEP 7 Remove the USB flash memory drive.
14

6 EXPORT RESULTS (Continued)
18
6.2 Export via QR Code
Individual test results can be downloaded from the MicroGEM Sal6830 Point of Care
PCR System by scanning the QR code on the VIEW RESULTS PAGE (15) after the test is
complete.
The QR code (15) may be scanned by an optional scanner available from Horiba Instruments to
export into their Lite DM ver 3.0 middleware connectivity software. The results can also be
exported to a USB device. Follow your facility procedures to report results.
15

6 EXPORT RESULTS
19
6.3 Export Service Logs via USB Download
Service logs for technical support troubleshooting can be downloaded from the MicroGEM
Sal6830 Point of Care PCR System via a USB Flash Memory Drive.
Download Sequence
STEP 1 From the Home Screen, select Settings>Admin Functions to load the Admin
Functions screen.
STEP 2 Attach USB flash memory drive to the system via the USB port located on the
right side of the system.
STEP 3 Upon USB Flash Memory Drive insertion, a message will appear in the EXPORT
SERVICE LOGS section of the Admin Functions Screen.
If a valid USB Flash Memory Drive is inserted a “USB device detected, ready to
export data” message will be shown.
STEP 4 Select EXPORT SERVICE LOGS, this will load the Support Logs Export page
STEP 5 From the Support Logs Export page select TROUBLESHOOTING DATA to export
device data for troubleshooting and SERVICE LOGS to export service logs for
technical support.
Upon selection, exporting will begin. Do not remove the USB Flash Memory
Drive during this process.
STEP 6 When complete, select OKAY to return to the Admin Functions Screen.
STEP 7 Remove the USB flash memory drive.

20
16
USB Software Update
Update Sequence
STEP 1 Prior to software update, export test results stored on the system.
STEP 2 From the Home screen, select Settings>Admin Functions to load
the Admin Functions screen.
STEP 3 Attach USB Flash Memory Drive with the selected software update to the
system via the
USB port located on the right side of the system.
STEP 4 Upon USB Flash Memory Drive insertion, a message will appear in the
SOFTWARE UPDATE section of the Admin Functions Screen (16).
If a valid USB Flash Memory Drive is inserted a “USB contains a valid
software update” message will be shown.
If a “USB does not contain valid update package” message is shown, remove the
USB Flash Memory Drive and insert correct USB Flash Memory Drive.
STEP 6 Select UPDATE DEVICE.
STEP 7 Select INSTALL to begin the software update.
STEP 8 When complete, the system will reboot.
STEP 9 Remove the USB Flash Memory Drive.
STEP 10 From the Home screen, select Settings and
confirm the Software Version number has
updated to the new version being installed
(17).
7 SOFTWARE UPDATES
Caution: Stored test data may be deleted during the software update process.
Test results stored on the MicroGEM Sal6830 Point of Care PCR System must be
exported prior to performing a software update.
Caution: DO NOT REMOVE USB DRIVE DURING SOFTWARE UPDATE.
USB Flash Memory Drive can be removed from the MicroGEM Sal6830 Point of
Care System as per the software update sequence below.
17
Table of contents
Popular Medical Equipment manuals by other brands

ERT
ERT MasterScope WSCS01 Instructions for use

Orliman
Orliman ACTIUS ACP901 manual

Vatech
Vatech PaX-i Insight installation manual

Airssential Home
Airssential Home AiroMax AI-MAX instruction manual

Datex-Ohmeda
Datex-Ohmeda S/5 M-PT Technical Reference Manual Slot

Invacare
Invacare SOLO 2 Quick reference guide

Ossur
Ossur TOTAL KNEE 1900 Instructions for use

Masimo
Masimo Rad-G Directions for use

Comftech
Comftech HOWDY BREATH User manual and maintenance

VivaQuant
VivaQuant Rhythm Express RX-1 user manual

medi
medi M.4X-lock Instructions for use

MGE UPS Systems
MGE UPS Systems SAM 35 Operating and maintenance manual