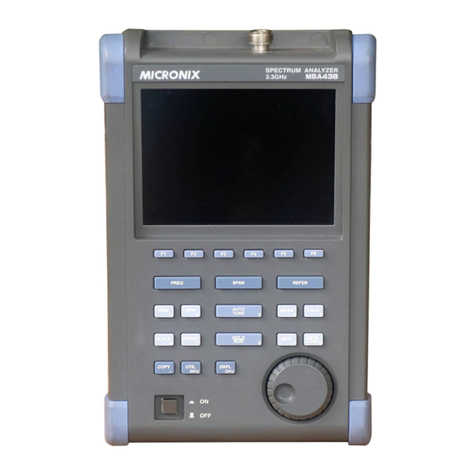
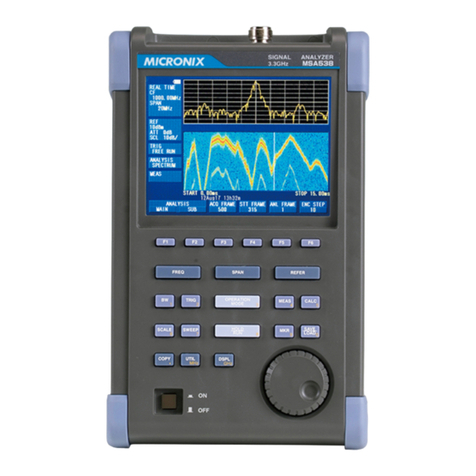
Micronix MSA338 User manual

Ver.1.9/Apr./2014
MICRONIX CORPORATION
3.3GHz/8.5GHzSpectrum Analyzer
MSA338(E/TG)/MSA358
Operating manual
OM-040058E

–I–
Before Starting to Use the Unit
· When you use the unit, please observe the following notes listed on the rear of the body.
· For you to use it safely
1) When abnormal sounds, abnormal smell and smoke were confirmed, remove the battery and AC adapter
and stop the use.
2) Never use with hands that got wet, because doing so may cause damage, fire and electric shock to the
unit.
3) Never use it under the thunder. There is a possibility of receiving a thunderbolt.
4) Never use an AC adapter other than the one specified, because doing so may cause damage to the unit.
For static electricity protection, ground the unit by connecting the three cores if possible. Not grounding
the unit can damage it and the object measured.
5) Never use a battery other than the one specified, because doing so may cause damage to the unit.
When removing or installing the battery, be sure to do it after you turn off the unit and disconnect the
AC adapter.
6) When replacing the fuse, disconnect the AC adapter, open the battery cover on the back and remove
battery, and then take sufficient care to perform the replacement. Use 5A/250V fuse (IEC127-2 sheet 3,
slow-blow type).
Never use a fuse not specified because doing so may cause damage to the unit.

–II–
· Guarantee of quality
Guarantee period
Guarantees that it will repair any failure free of charge if it occurs because of our responsibility within
one year after delivery. However, the above guarantee does not apply to such a failure that:
1) is caused by a fire, natural disasters, etc.
2) is caused by inappropriate handling of the unit, such as dropping it while moving it after
purchasing.
3) is caused by handling counter to the instructions or precautions listed in the operating manual.
4) is caused by modifying the unit or by being considered to be your responsibility because of
inappropriate use.
We will not be responsible for direct or indirect damage caused by use of this product or by a failure of
this product.
Warm-up time
In order to stabilize the electric performance at the time of turning on the unit, please perform
warming-up for at least 10 minutes.
The LCD may flicker on conditions of the low temperature and the dark backlight.
In that case, adjust the LCD backlight control BLCTR to be bright.
However, do not be bright too much in order to keep battery operation time longer.
Precautions for storage
1) Strictly observe the storage conditions specified for this unit, such as avoiding direct sunlight and dust.
2) Store this unit in a place where -20°C to 60°C, less than 60°C/70%RH, variations in temperature and
humidity are small.
After service
If you have any question about the contents of this product or how to operate it, please contact us at:
MICRONIX CORPORATION
2987-2, KOBIKI-CHO, HACHIOJI-SHI, TOKYO 193-0934 JAPAN
TEL. +81-426-37-3667 FAX. +81-426-37-0227
URL: http://www.micronix-jp.com/ E-mail: micronix_e@micronix-jp.com

1. Outlines
--------------------------------------------------------------------------------------------------------- 1
1.1 Product outlines --------------------------------------------------------------------------------------- 1
1.2 Standard accessories ---------------------------------------------------------------------------------- 2
1.3 Optical accessories ------------------------------------------------------------------------------------ 2
2. Specifications
------------------------------------------------------------------------------------------------- 3
2.1 Performances ------------------------------------------------------------------------------------------ 3
2.2 Outline -------------------------------------------------------------------------------------------------- 6
3. Description of Panel
--------------------------------------------------------------------------------------- 7
4. Description of Screen
------------------------------------------------------------------------------------10
5. Function Key Menu
--------------------------------------------------------------------------------------11
5.1 List of the function key menus ---------------------------------------------------------------------11
5.2 Menu tree ---------------------------------------------------------------------------------------------12
6. Preparing for Operation
-------------------------------------------------------------------------------17
6.1 Stand ---------------------------------------------------------------------------------------------------17
6.2 Connection to power supply ------------------------------------------------------------------------17
6.3 Replacing the fuse -----------------------------------------------------------------------------------18
6.4 Installing the battery ---------------------------------------------------------------------------------18
6.5 Soft carrying case ------------------------------------------------------------------------------------18
7. Center Frequency <FREQ>
--------------------------------------------------------------------------19
7.1 Setting with the step keys ---------------------------------------------------------------------------19
7.2 Setting with the encoder ----------------------------------------------------------------------------19
7.3 Setting with the numeric keys ----------------------------------------------------------------------19
7.4 According to the marker position ------------------------------------------------------------------20
8. Frequency Span <SPAN>
-----------------------------------------------------------------------------20
9. Reference Level <REFER>
---------------------------------------------------------------------------21
9.1 Setting the reference level --------------------------------------------------------------------------22
9.2 Switching units of amplitude axis -----------------------------------------------------------------22
9.3 Reference level setting range for each unit -------------------------------------------------------22
9.4 Relation between the reference level and ATT·AMP -------------------------------------------23
9.5 Setting the offset level -------------------------------------------------------------------------------23
9.6 Setting the input impedance correction -----------------------------------------------------------23
Contents

10. Display Scale <SCALE>
-----------------------------------------------------------------------------24
10.1 Setting with the keys -------------------------------------------------------------------------------24
10.2 Setting with the encoder ---------------------------------------------------------------------------24
11. Resolution Bandwidth <RBW>
-------------------------------------------------------------------25
11.1 MANUAL mode -----------------------------------------------------------------------------------25
11.2 AUTO mode ----------------------------------------------------------------------------------------25
11.3 ALLAUTO mode ----------------------------------------------------------------------------------25
12. Video Bandwidth <VBW>
---------------------------------------------------------------------------26
12.1 MANUAL mode -----------------------------------------------------------------------------------26
12.2 AUTO mode ----------------------------------------------------------------------------------------26
12.3 ALLAUTO mode ----------------------------------------------------------------------------------26
13. Sweep Axis · Detection mode <SWEEP>
------------------------------------------------------26
13.1 MANUAL mode -----------------------------------------------------------------------------------27
13.2 AUTO mode ----------------------------------------------------------------------------------------27
13.3 ALLAUTO mode ----------------------------------------------------------------------------------27
13.4 Setting the detection mode ------------------------------------------------------------------------27
14. AUTO Tuning <AUTO TUNE>
-------------------------------------------------------------------27
15. Hold/Run <HOLD/RUN>
----------------------------------------------------------------------------27
16. Calculation Function <CALC>
--------------------------------------------------------------------28
16.1 NORM mode ---------------------------------------------------------------------------------------28
16.2 MAX HOLD mode --------------------------------------------------------------------------------28
16.3 MIN HOLD mode ---------------------------------------------------------------------------------28
16.4 AVERAGE mode -----------------------------------------------------------------------------------29
16.5 OVER WRITE mode ------------------------------------------------------------------------------29
16.6 SPURIOUS FREE mode --------------------------------------------------------------------------29
17. Marker · Peak Search <MKR>
--------------------------------------------------------------------30
17.1 Moving the marker ---------------------------------------------------------------------------------31
17.2 Setting the peak search <PEAK SEARCH> ---------------------------------------------------31
17.3 Changing the unit of marker point ---------------------------------------------------------------31

18. Save/Load <SAVE/LOAD>
--------------------------------------------------------------------------32
18.1 Save/Load (MSA338(E/TG)) ---------------------------------------------------------------------32
18.2 Save/Load (MSA358) -----------------------------------------------------------------------------34
19. Measuring Function <MEAS>
---------------------------------------------------------------------36
19.1 Channel power measurement <Ch Power> -----------------------------------------------------37
19.2 Adjacent channel leakage power measurement <Adj Ch Pw> -------------------------------38
19.3 Occupied frequency bandwidth measurement <Occ Bw> -----------------------------------39
19.4 Electric field strength measurement <E/F ANT> ----------------------------------------------40
19.5 Magnetic field strength measurement <M/F PROBE> ---------------------------------------45
19.6 Frequency counter <Freq COUNT> (factory option) -----------------------------------------47
20.EMI test
20.1 Additional function for EMI test----------------------------------------------------------------------48
20.2 EMI test ----------------------------------------------------------------------------------------------49
21. Screen Control <DSPL>
------------------------------------------------------------------------------52
21.1 Adjusting the contrast ------------------------------------------------------------------------------52
21.2 Switching ON and OFF the LCD backlight ----------------------------------------------------52
21.3 Adjusting the brightness of the LCD backlight -------------------------------------------------52
21.4 Inverting the display -------------------------------------------------------------------------------52
21.5 Enable or disabling the beep ----------------------------------------------------------------------52
22. Tracking Generator Mode
---------------------------------------------------------------------------- 53
22.1 Specification only for T.G. function --------------------------------------------------------------53
22.2 Description of I/O connector ----------------------------------------------------------------------53
22.3 Switching ON and OFF the T.G. function -----------------------------------------------------54
22.4 Normalizing of wave form ----------------------------------------------------------------------54
23. Printing <PRINT> (optional)
-----------------------------------------------------------------------55
23.1 Hard copy of the screen ----------------------------------------------------------------------------55
24. Data Output <RS232C>
-------------------------------------------------------------------------------56
24.1 Selecting the trace to transfer ---------------------------------------------------------------------56

24.2 Selecting the communication speed (baud rate) ------------------------------------------------56
24.3 Transfer the data ------------------------------------------------------------------------------------56
25. RS-232C Interface
---------------------------------------------------------------------------------------58
25.1 RS-232C specifications ----------------------------------------------------------------------------58
25.2 How to connect -------------------------------------------------------------------------------------58
25.3 Command description -----------------------------------------------------------------------------59
25.4 Input the frequency ---------------------------------------------------------------------------------64
25.5 Writing of original compensation data -----------------------------------------------------------64
25.6 Sample Programs -----------------------------------------------------------------------------------66
26. PC Software (optional)
---------------------------------------------------------------------------------67
27. Basis Performance Test
------------------------------------------------------------------------------67
27.1 Frequency characteristics --------------------------------------------------------------------------68
27.2 Accuracy of reference level -----------------------------------------------------------------------69
27.3 The display accuracy of the center frequency --------------------------------------------------69
27.4 The display accuracy of the frequency span ----------------------------------------------------70
27.5 Linearity of the amplitude axis -------------------------------------------------------------------70

–
1
–
1. Outlines
1.1 Product outlines MSA338(E/TG)/MSA358
MSA338(E/TG)/MSA358 is an authentic spectrum analyzer providing performance and functions that
are comparable to those of large-size bench type equipment, in a compact, lightweight and inexpensive
model.
1) Compact and lightweight, 1.8 kg(MSA338(E/TG)/MSA358)
The external dimensions are as small as 162 (W) × 70 (H) × 260 (D) (mm), and the weight is only 1.8 kg
including the battery. It is very convenient for outdoors use and while on business trips.
2)Measuring frequency bandwidth 50kHz to 3.3GHz(MSA338)/50kHz to 8.5GHz(MSA358)
This bandwidth covers those of W-CDMA, CDMA, PDC, PHS, GSM, wireless LAN, Bluetooth, etc.
3) Operation with battery for 150 minutes
When battery MB300 (optional) is fully charged, MSA338(E/TG)/MSA358 works for about 150
minutes (with the back light turned off). It is extremely convenient for outdoor use and for use in the
survey of wireless LAN installation environment.
4) Performance that is comparable to that of large-size bench type equipment
MSA338(E/TG)/MSA358 guarantees a highly stable frequency axis by PLL synthesizer system. The
center frequency setup resolution is 100kHz. Furthermore, the mean noise level is -110dBm or less. Thus,
a broad dynamic range is secured and the reference level can be set in 1 dB steps.
5) Abundant functions
·
Measuring functions··· Channel power measurement, Adjacent channel leakage power measurement,
Occupied frequency bandwidth measurement, Electric field strength
measurement, Magnetic field strength measurement (optional), Frequency
counter (factory option).
·
Electric field strength measurement: Optimum for measurement of cellular phone and
wireless LAN working environment.
·
Magnetic field strength measurement: Optimum for EMI design of printed circuit boards
and for evaluation of signal quality.
·
Calculation functions··· MAX HOLD, MIN HOLD, AVERAGE, OVER WRITE
·
Marker & peak search
·
Save/load
6) Auto tuning
The center frequency is set at the spectrum of the maximum level in the 3.3GHz(MSA338(E/TG))
/8.5GHz(MSA358) band, and in addition, optimum reference level, resolution bandwidth, video
bandwidth and sweep time are set when the AUTO TUNE key is pressed. This function is very
convenient for measurement of an unknown signal.
7) Auto range motion
The resolution bandwidth, video bandwidth and sweep time are set automatically based on the set
frequency span. It is also possible to set auto range motion only one out of resolution bandwidth,
video bandwidth and sweep time.
8) Hard copy of the image
Connect a printer (optional) and press the [PRINT] key on MSA338(E/TG)/MSA358. The image on the
screen is printed as it is.

–
2
–
9) High resolution display on the PC screen
The trace is displayed at high resolution, 1001 points in the horizontal axis, on the PC screen when “PC
Software MAS300” (optional) is used.
1.2 Standard accessories
1. AC adaptor MA300
2. Soft carrying case
3. Accessory pouch
4. Fuse (It has been installed in the inside)
5. Operating manual
1.3 Optional accessories
1. Antenna M301, M302, M303, M304, M305, M306, M307
(Refer to “19.4 Electric field strength measurement” for details.)
2. Magnetic field probe CP-2S with a dedicated double shielded coaxial cable
(Refer to “19.5 Magnetic field strength measurement” for details.)
3. Ni-MH battery MB300 (Refer to “6.4 Installing the battery” for details.)
4. PC software MAS300 (Refer to “26. PC Software” for details.)
5. Operating software for EMI test MAS230 (Refer to the operating manual of MAS230)
6. RS-232C cable MI180 (Refer to “25. RS-232C Interface” for details.)
7. Frequency counter (factory option) (Refer to “19.6 Frequency counter” for details.)
8. RS-232C/GP-IB converter ZS-61447
9. Battery charger MBC300
10. Printer with AC adaptor. 4pcs of AA batteries, a roll paper (Refer to “23. Printing” for details.)
11. Roll paper for optional printer (with 10 rolls)
12. SMA coaxial cables
Model Connector Cable length Frequency range
MC301 SMA(P)/SMA(P) 0.5m DC to 10GHz
MC302 SMA(P)/SMA(P) 1.0m DC to 10GHz
MC303 SMA(P)/SMA(P) 1.5m DC to 10GHz
MC304 SMA(P)/N(J) 0.2m DC to 4GHz
MC305 SMA(P)/N(P) 0.2m DC to 4GHz
MC306 SMA(P)/BNC(J) 0.2m DC to 2GHz
MC307 SMA(P)/BNC(P) 0.2m DC to 2GHz
* All impedance is 50Ω.
* Performances change by bending and deteriorate by repeating the insertion and extraction
13. Coaxial adapters
Model Connector Impedance Frequency range
MA301 BNC(P)/BNC(J) 50Ω/75ΩDC to 2GHz
MA302 BNC(P)/N(J) 75Ω/75ΩDC to 1.8GHz
MA303 BNC(P)/N(P) 75Ω/75ΩDC to 1.8GHz
MA304 BNC(P)/F(J) 75Ω/75ΩDC to 1.8GHz
MA305 BNC(P)/F(P) 75Ω/75ΩDC to 1.8GHz

–3–
2.Specifications
2.1 Performances
·
Frequency section
MSA338(E/TG) MSA358
Frequency range 50kHz to 3.3GHz 50kHz to 8.5GHz
Frequency
range
Frequency
band
Harmonic
order
50k~3.5GHz
Base band 1
3.3G~6.3GHz
Band 1- 1
―――
6.1G~8.5GHz
Band 1+ 1
Center frequency
Setting
resolution
100kHz
Allows Rotary encoder, numeric key and function key
Accuracy
within ±(30+20T)kHz±1dot
@frequency span: 200kHz to 10MHz,
RBW: 3kHz, 23±5°C
within ±(60+300T)kHz±1dot
@frequency span: 20MHz to 3.3GHz,
RBW: 100kHz, 23±5°C
T: Sweep time(s)
within ±(30+20T)kHz±1dot
@frequency span: 200kHz to 10MHz,
RBW: 3kHz, 23±5°C
within ±(60+300T)kHz±1dot
@frequency span: 20MHz to 8.5GHz,
RBW: 100kHz, 23±5°C
T: Sweep time(s)
RBW
frequency
error
within ±4kHz @ RBW: 3kHz,10kHz, 30kHz
within ±20% of RBW @ RBW: 100kHz, 300kHz
within ±10% of RBW @ RBW: 1MHz, 3MHz
Frequency span
Setting range
0Hz(zero span),
200kHz to 2GHz(1-2-5step) and
3.3GHz(full span)
0Hz(zero span), 200kHz to 5GHz
(1-2-5step) and 8.5GHz(full span)
Accuracy within ±3%±1dot
@
one step slower sweep time than AUTO, 23±5°C
Display resolution Frequency span/250
Frequency span/1000 (only the measurement by RS-232C
Display dot number 251dots, 1001dots (only the measurement by RS-232C communication)
(The unit displays data in 251 horizontal dots, but it internally captures the trace in
1001 dots)
Resolution bandwidth
3dB bandwidth (6dB for MSA338E @9kHz, 120kHz)

–4–
Setting range
3kHz to 3MHz(1-3step) and AUTO
(MSA338E: 3kHz, 9kHz, 30kHz, 120kHz, 300kHz, 1MHz, 3MHz)
Accuracy within ±20%
Selectivity 1:12 (typical)@ 3dB : 60dB
Video bandwidth 100Hz to 1MHz (1-3step), AUTO
SSB phase noise -90dBc/Hz (typical) @100kHz offset, RBW: 3kHz, VBW: 100Hz, Sweep time: 1s
Spurious response less than -60dBc
Harmonics less than -40dBc@100MHz to 3.3GHz less than -40dBc@100MHz to 8.5GHz
· Amplitude section
MSA338(E/TG) MSA358
Reference level
Setting range
+10 to -60dBm (1dB step)
Accuracy
within ±0.8dB±1dot
@center frequency: 100MHz, RBW: 3MHz, VBW: 1MHz, ATT: 0dB, 23±5°C
Unit
dBm, dBV, dBmV, dBμV, dBμV/m, dBμA/m
(dBμV/m and dBμA/m is used in the measuring function)
Average noise level
-117dBm (typical)
@center freq: 1GHz, RBW: 3kHz, VBW: 100Hz
Frequency
Characteristic
Within ±2.0dB±1dot@50kHz to100MHz
Within ±1.0dB±1dot@100MHz to 3.3GHz
Within ±2.0dB±1dot@50kHz to 100MHz
Within ±1.0dB±1dot@100M
H
z to 8.5GHz
Input impedance 50Ω
Input VSWR less than 2.0
Input attenuator
Operating range
0 to 25dB (1dB step), coupled with reference level
Switching error within ±0.6dB@100MHz
RBW switching error
within ±0.6dB
Display dot number 201dots
Scale 10dB/div, 2dB/divDisplay
scale Accuracy
within ±0.8dB/10dB±1dot
within ±0.2dB/2dB±1dot
within ±1.6dB/70dB±1dot
Input damage level +27dBm(CW average power), 25VDC
· Sweep section
MSA338(E/TG) MSA358
Sweep time
Setting range
10ms to 30s and AUTO(1-3step)
@frequency span: 0 to 2GHz
10ms to 30s and AUTO (1-3step)
@frequency span: 0 to 2GHz

–5–
30ms to 30s and AUTO (1-3step)
@frequency span: full span
30ms to 30s and AUTO (1-3step)
@frequency span: 5GHz, full span
Accuracy
within ±0.1%±1dot@ frequency span: 0
to 2GHz
within ±1.5%±1dot@ frequency span:
full span
within ±0.1%±1dot@frequency span: 0
to 5GHz
within ±2.5%±1dot@frequency span:
full span
Trigger mode AUTO(frequency span: zero span)
Detection mode Positive peak, Negative peak, Sample
MSA338E only: Quasi peak, Average
· Functions
MSA338(E/TG) MSA358
Marker
NORM: displays frequency (7digits max) and level (4digits max) at marker point.
DELTA: displays differential frequency and level between 2 markers.
Peak search
NORM: searches a peak point within 10div. Available NEXT peak (10max).
ZONE: searches a peak point within a zone designated by center and width.
Marker moves to a peak point each sweep.
Calculation NORM, MAX HOLD, MIN HOLD, AVERAGE, OVER WRITE
MAX/MIN HOLD: 2 to 1024 times, AVERAGE: 2 to 256
Measuring
Channel power, Adjacent channel leakage power, Occupied frequency bandwidth,
Electric field strength (needs antenna), Magnetic field strength (needs optional
magnetic field probe) measurement, Frequency counter.
AUTO tuning
When pushing AUTO TUNE key, the
maximum level spectrum within 3.3GHz
bandwidth is adjusted to center, and
reference level, RBW, VBW and sweep
time are adjusted to optimum values.
When pushing AUTO TUNE key, the
maximum level spectrum within 8.5GHz
bandwidth is adjusted to center, and
reference level, RBW, VBW and sweep
time are adjusted to optimum values.
Save Saves 100 traces and 100 setupsSave/
Load
Load Loads 1 trace and 1 setup
· General
MSA338(E/TG)/358 common
Immunity of radiated
interference
Level display at 10V/m
Less than -35dBc (reference level: 10dBm)
Immunity to cabled
interference
Level display at
transient interference
of 4.0kV
Less than -30dBc (reference level: 10dBm)
Input connector SMA(J)

–6–
Communication
Interface RS-232C
Baud rate 2,400 to 38,400bps
Hard copy Allows direct hard copy with an optional printer.
Display LCD
Backlight CFL backlight
Display
Resolution 320 (H) × 240 (V) dots
Power source
Battery Ni-MH battery (optional)
External DC source DC jack, +4.75 to +5.25VDC/4A
· Other
MSA338(E/TG)/358 common
Operating temperature 0 to 50°C (Guaranteed at 23±10°C, without soft carrying case)
Operating humidity
less than 40°C/80%RH
(Guaranteed at less than 33°C /70%RH, without soft carrying case)
Storage temperature -20 to 60°C, less than 60°C/70%RH
Dimensions 162 (W) × 70 (H) × 260 (D) mm (exclude projections and stand)
Weight approx. 1.8kg (include battery), approx. 1.5kg (without battery)
*Refer to ”22.Tracking Generator Mode” for T.G. Specification
2.3 Outline
[Unit: mm]
* MICRONIX Corporation reserves the right to make changes in design, specification and other information without prior notice
.

–
7
–
3. Description of Panel

–
8
–
1) LCD screen
This is a large liquid crystal display with 240 (V) × 320 (H) dots. It simultaneously displays traces (8 div
× 10 div), various setting values, measured values, etc.
2) Input connector
SMA (J) connector.
3) Input connector for DC power source
Connects AC adaptor MA300.
4) RS-232C connector
Connects PC and printer, by using RS-232C cable MI180.
5) Function keys (F1 to F6)
Functions change according to operation. Have functions corresponding to the on-screen displays.
6) Center frequency key
MSA338(E/TG):
Use this key to set the center frequency. It can set between 0 to 3.3GHz (100kHz step).
MSA358: Use this key to set the center frequency. It can set between 0 to 8.5GHz (100kHz step).
7) Frequency span key
MSA338(E/TG): Use this key to set the frequency span. It can set between 200kHz to 2GHz,
ZERO SPAN and FULL SPAN (3.3GHz).
MSA358: Use this key to set the frequency span. It can set between 200kHz to 5GHz, ZERO SPAN
and FULL SPAN (8.5GHz).
8) Reference level key
Set the reference level, etc. Reference level can set between +10dBm and -60dBm (1dB step).
9) Resolution bandwidth key
Use this key to set the resolution bandwidth. It can set between 3kHz and 3MHz.
10) Video bandwidth key
Use this key to set the video bandwidth. It can set between 100Hz and 1MHz.
11) AUTO tuning key
Tune up to the maximum level in 3.3GHz(MSA338(E/TG))/8.5GHz(MSA358) zones, and display by
the optimal setup. This does not operate normally when the signal level is lower than -40dBm , or when
the input frequency is below 50MHz, or when the frequency span is ZERO SPAN or FULL SPAN.

–
9
–
12) Measuring function key
Available for Channel power, Adjacent channel leakage power, Occupied frequency bandwidth, Electric
field strength and Magnetic field strength measurement (optional), Frequency counter (factory option)
13) Calculation function key
Available for Max hold, Min hold, Average and Over write.
14) Display scale key
Use this key to select the display scale of amplitude axis from 2dB/div or 10dB/div.
15) Sweep key
Use this key to set the sweep time between 10ms to 30s or set the detection mode.
16) Hold/Run key
Stops or restarts the measurement.
17) Marker & Peak search key
Use this key to set and move a marker.
18) Save/Load key
Saves 100traces and 100setups, and loads 1trace and 1setup.
19) Print key
When pressing this key, the image is printed with a printer (optional) as it is.
20) RS-232C key
Sets baud rate and transfers a current or saved trace.
21) Display control key
Sets contrast, backlight ON/OFF, brightness of backlight, invert display and buzzer ON/OFF.
22) Rotary encoder
Use this to make various settings
.
23) Power switch
Use this to turn the power ON or OFF.

–
10
–
4. Description of Screen
Trace display
10div × 8div
Display for function keys
Frequency axis setting values display
Center frequency, Frequency span,
Resolution bandwidth, Video bandwidth
Amplitude axis setting values display
Reference level, Input attenuator,
Display scale
Sweep axis setting
values display
Sweep time,
Detection mode
Calculation function display
Measuring function display
Operating information display
Loaded trace information display
* This is also used as a setting values display
when the measuring function is used. Measured values display

–
11
–
5. Function Key Menu
5.1List of the Function key menus
The types of function keys are shown in the table below. For description of each function, see the detailed
pages. For the flow of change in the function key display, refer to “5.2 Menu tree”.
Function key menus Key flow Detailed
page
Function key menus Key flow Detailed
Page
Adj Ch OFS MEAS→(F2)→F2 38
Adj Ch Pw MEAS→F2 38
M)
MODE MEAS→(F1~3)→F1 37,38
39
Adj Ch WIDTH MEAS→(F2)→F3 38
NORM CALC→F1 28
ANT MEAS→(F4)→F1 41
NORM ※1 SAVE/LOAD→F6→F1 48
A)
AVER CALC→F4 28
N)
NUM FREQ→F5 19
B)
B.L. DSPL→F2 52
Occ BW MEAS→F3 39
BACK SPACE FREQ→F5→F6 20
O)
OFSdB REFER→F5 23
BAND CNTR MEAS→(F1)→(F1)→F2 37
OVRWR CALC→F5 29
BAND WIDTH MEAS→(F1)→(F1)→F3 37
PEAK SEARCH CNTR MKR→(F3)→F4 31
BAUD RS232C→F2 54
P)
PEAK SEARCH NEXT MKR→(F3)→F5 31
BLCTR DSPL→F3 52
PEAK SEARCH NORM
MKR→(F3)→F3 31
BUZZR DSPL→F5 52
PEAK SEARCH PEAK MKR→(F3)→F4 31
C)
CENTER FREQ → FREQ→F1 19
PEAK SEARCH WIDTH
MKR→(F3)→F5 31
CENTER FREQ ← FREQ→F2 19
PEAK SEARCH ZONE
MKR→(F3)→F3 31
Ch Power MEAS→F1 37
PRE SET SAVE/LOAD→F6 33
CLEAR FREQ→F5→F5 19
PROBE MEAS→(F5)→F1 45
CLEAR SAVE/LOAD→F3 33
RATIO MEAS→(F3)→F2 39
CONV MKR→F6 31
R)
RBW ALL RBW→F3 25
CTRS DSPL→F1 52
RBW AUTO RBW→F2 25
D)
DET SWEEP→F4 27
RBW MANU RBW→F1 25
DISP CLEAR SAVE/LOAD→F4 33
REFERENCE CNTR MEAS→(F2)→F4 38
E)
E/F ANT MEAS→F4 40
REFERENCE WIDTH MEAS→(F2)→F5 38
EncST FREQ→F4 19
SAVE SAVE/LOAD→F1 32
EXEC RS232C→F3 56
S)
SCALE 10dB SCALE→F1 24
EMI-C ※1 SAVE/LOAD→F6→F2 49
SCALE 2dB SCALE→F2 24
EMI-R ※1 SAVE/LOAD→F6→F3 49
SET MKR FREQ→F6 20
F)
Freq COUNT MEAS→F6 47
SPURI ※2 CALC→F6 29
I) IMP REFER→F6 24
SWEEP ALL SWEEP→F3 27
INVT DSPL→F4 52
SWEEP AUTO SWEEP→F2 26
K)
KeyST FREQ→F3 19
SWEEP MANU SWEEP→F1 26
L)
LOAD SAVE/LOAD→F2 32
T.G.MODE SWEEP→F6 53
M)
M/F PROBE MEAS→F5 45
T)
TRACE RS232C→F1 56
MAXHD CALC→F2 28
U)
UNIT REFER→F1~4 22
MEAS OFF MEAS→(F1~5)→F6 36
V)
VBW ALL VBW→F3 26
MINHD CALC→F3 28
VBW AUTO VBW→F2 26
MKR DELTA MKR→F2 30
VBW MANU VBW→F1 26
MKR NORM MKR→F1 30
※1 MSA338E only ※2 MSA358 only ※3 MSA338TG only
M)

–
12
–
5.2 Menu tree
The displayed items on the bottom of the screen correspond to the function keys under them, as shown in
the figure below:
“Displayed items on the bottom of the screen”
Ch Adj Occ E/F M/F Freq
Power Ch Pw
BW
ANT
PROBE
COUNT
CENTER FREQ KeyST EncST SET
100M
0.1M
NUM
MKR
BACK
CLEAR
SPACE
UNIT OFSdB IMP
dBm dBμV dBmV dBV
0.0
50Ω
RBW
MANU AUTO ALL
FREQ
REFER
RBW
F1 F2 F3 F4 F5 F6
: Set the center frequency
: Set the reference level
: Set the RBW
* Refer to “7. Center Frequency” for details
* Refer to “9. Reference Level” for details
* Refer to “11. Resolution Bandwidth” for details

–
13
–
VBW
MANU AUTO ALL
Ch Adj Occ E/F M/F Freq
Power Ch Pw
BW
ANT
PROBE
COUNT
MODE BAND MEAS
BAND CNTR WIDTH
OFF
MODE Adj Ch Pw REFERENCE MEAS
TOTAL OFS WIDTH
CNTR WIDTH
OFF
MODE RATIO MEAS
N% 99.5%
OFF
ANT MEAS
M301
OFF
VBW
MEAS
(1/2)
: Set the VBW
: Set the parameter
: Set the parameter
: Set the parameter
* Refer to “12. Video Bandwidth” for details
* Refer to “19. Measuring Function” for details
This manual suits for next models
3
Table of contents
Other Micronix Measuring Instrument manuals
Popular Measuring Instrument manuals by other brands

VTI Instruments
VTI Instruments EX1629 user manual

COMAC CAL
COMAC CAL FLOW 38 BATCH Installation and technical conditions

KTS
KTS GOLD SCAN III user manual

PCE Health and Fitness
PCE Health and Fitness PCE-MFI 400 user manual

Leuze electronic
Leuze electronic ASM1/1 manual

EXFO
EXFO FTB-2 Quick reference guide