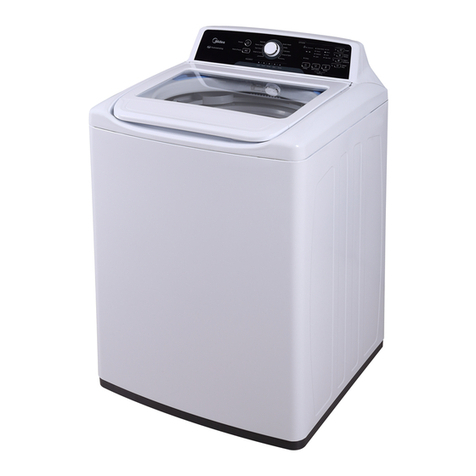
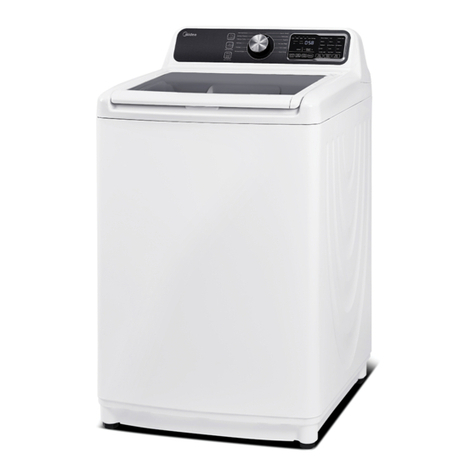
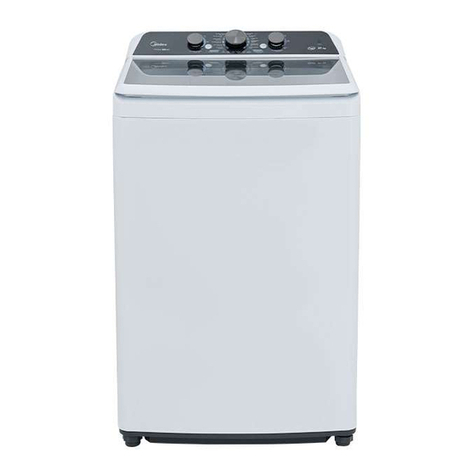
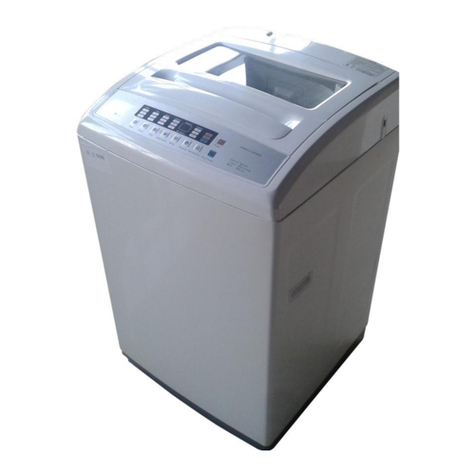
Midea MAV160-A2808PS/01FM-US User manual

Laundry
Top-loading WASHING MACHINE
Service Manual
Models:
MAV160-A2808PS/01FM-US
CAUTION
READ THIS MANUAL CAREFULLY TO DIAGNOSE TROUBLES CORRECTLY BEFORE OFFERING SERVICE.

Service manual for Washing Machine
-------------------------------------------------------------------------------------------------------------------------------------------------------
- 2 -
CONTENTS
1. PRECAUTION .........................................................................................................3
1.1 Safety precaution.................................................................................................................3
1.2 Warning................................................................................................................................3
1.3 Caution.................................................................................................................................6
2. How to use...............................................................................................................8
2.1 Controls and functions.........................................................................................................8
2.2 Cycle guide with option settings ........................................................................................10
2.3 Detergent............................................................................................................................11
3. DIMENSION and INSTALLATION .........................................................................12
3.1 Unit dimension ...................................................................................................................12
3.2 Installation..........................................................................................................................13
4. TROUBLE SHOOTING..........................................................................................16
4.1 Test mode by Control.........................................................................................................16
4.2 Test modes ........................................................................................................................16
4.3 Error codes.........................................................................................................................17
4.4 Wiring diagram and terminals............................................................................................19
4.5 Trouble shooting ................................................................................................................21
5. HOW TO DISASSEMBLY THE UNIT.....................................................................33
6. EXPLODED VIEWS ..............................................................................................44
7. SPARE PARTS ......................................................................................................47
8. SPECIFICATION ...................................................................................................49

Service manual for Washing Machine
-------------------------------------------------------------------------------------------------------------------------------------------------------
- 3 -
1. PRECAUTION
1.1 Safety precaution
To prevent injury to the user or property damage, the following instructions must be followed.
Incorrect operation due to ignoring instruction will cause harm or damage.
Before servicing unit, be sure to read this service manual at first.
1.2 Warning
Read all instructions before using the
appliance.
Use this appliance only for its intended
purpose as described in this owner’s
Manual.
Before use, the washer must be properly
installed as described in this manual.
ALWAYS follow the fabric care instructions
supplied by the garment manufacturer.
Do not wash or dry articles that have been
previously cleaned in, washed in, soaked
in, or spotted with gasoline, dry-cleaning
solvents, other flammable or explosive
substances as they give off vapors that
could ignite or explode.
Do not allow children to play on or in the
appliance.
Close supervision of children is necessary
when the appliance is used near children.
Before the appliance is removed from
service or discarded, remove the lid of the
washing or drying compartment.
Do not reach into the appliance if the
basket is moving.
Do not install or store this appliance where
it will be exposed to the weather or freezing
temperatures.
Do not tamper with the controls.
Do not repair or replace any part of the
appliance or attempt any servicing unless it
is specifically recommended in the user-
maintenance instructions or in published
user-repair instructions that you understand
and have the skills to carry out.
Do not add gasoline, dry-cleaning solvents,
or other flammable or explosive substances
to the wash water. These substances give
off vapors that could ignite or explode.
Under certain conditions, hydrogen gas
may be produced in a hot water system that
has not been used for 2 weeks or more.
HYDROGEN GAS IS EXPLOSIVE. If the
hot water system has not been used for 2
weeks or more, before using a washer or
combination washer-dryer, turn on all hot
water faucets and let the water flow from
each for several minutes. This will release
any accumulated hydrogen gas. As the gas
is flammable, do not smoke or use an open
flame during this time.
Keep the area underneath and around your
appliances free of combustible materials
(lint, paper, rags, etc.), gasoline, chemicals
and other flammable vapors and liquids.
Do not place items exposed to cooking oil
in your washer. Items contaminated with
cooking oils may contribute to a chemical
reaction that could cause a load to catch
fire.
This washer is not designed for maritime
use or for mobile installations such as in
RVs, aircraft, etc.
Turn off the water faucets and unplug the
washer if the machine is to be left for an

Service manual for Washing Machine
-------------------------------------------------------------------------------------------------------------------------------------------------------
- 4 -
extended period of time, such as during
vacations.
Packaging material can be dangerous for
children. There is a risk of suffocation! Keep
all package away from children.
Always check the inside of the washer for
foreign objects before loading laundry.
Keep the lid closed when not in use.
Plug the power cord into an AC 120V/60Hz
wall socket rated at 15amps or higher. Use
the socket for this washer only.
Do not use an extension cord.
- Sharing a wall socket with other
appliance, using a power strip, or extending
the power cord may result in electric shock
or fire.
- Do not use an electric transformer. It may
result in electric shock or fire.
- Ensure that the power voltage, frequency,
and current match the
product’specifications. Failing to do so may
result in electric shock or fire.
Have this appliance installed by a qualified
technician or service company.
- Failing to do so may result in electric
shock, fire, explosion, problems with the
product, or injury.
Remove all foreign substances such as
dust or water from the power plug terminals
and contact points using a dry cloth on a
regular basis.
- Unplug the power plug and clean it with a
dry cloth.
- Failing to do so may result in electric
shock or fire.
Plug the power plug into the wall socket in
the right direction so that the cord runs
towards the floor.
- If you plug the power plug into the socket
in the opposite direction, the electric wires
within the cable may be damaged and this
may result in electric shock or fire.
Plug the power plug into the wall socket
firmly. Do not use a damaged power plug,
or loosen wall socket.
- This may result in electric shock or fire.
Do not pull or excessively bend the power
cord.
Do not twist or tie the power cord.
Do not hook the power cord over a metal
object, place a heavy object on the power
cord, insert the power cord between
objects, or push the power cord into the
space behind the appliance.
- This may result in electric shock or fire.
Do not pull the power cord when
unplugging the power plug.
- Unplug the power plug by holding the
plug.
- Failing to do so may result in electric
shock or fire. If the power plug or power
cord are damaged, contact your nearest
service center.
This appliance must be properly grounded.
Do not ground the appliance to a gas pipe,
plastic water pipe, or telephone line.
- Improper grounding may result in electric
shock, fire, explosion, or problems with the
product.
- Never plug the power cord into a socket
that is not grounded correctly. Make sure
the socket you use is grounded in
accordance with local and national codes.
Do not install this appliance near a heater
or inflammable material.
Do not install this appliance in a humid, oily,
or dusty location, or in a location exposed
to direct sunlight or water (rain drops).
Do not install this appliance in a location
where gas may leak.
- This may result in electric shock or fire. If
the washer is moved to a new location,
have it checked and re-installed by a
qualified service technician.
- Failing to follow this warning may result in
electric shock or fire.

Service manual for Washing Machine
-------------------------------------------------------------------------------------------------------------------------------------------------------
- 5 -
If the appliance is flooded, cut the power
immediately and contact your nearest
service center.
If the appliance emits a strange noise, a
burning smell, or smoke, unplug the power
plug immediately and contact your nearest
service center.
- Failing to do so may result in electric
shock or fire.
In the event of a gas leak (such as propane
gas, LP gas, etc.), ventilate the area
immediately. Do not turn any appliance or
light on or off.
- Do not use a ventilating fan.
- A spark may result in an explosion or fire.
Do not wash items contaminated with
gasoline, kerosene, benzene, paint thinner,
alcohol, dry cleaning detergent or other
flammable or explosive substances.
- This may result in electric shock, fire, or
an explosion.
Do not force the washer lid open while the
washer is operating (high-temperature
washing / drying / spinning).
- Water flowing out of the washer may
cause burns or cause the floor to be
slippery. This may result in injury.
- Forcing the lid open can damage the
product or cause injury.
Make sure to remove the packaging
(sponge, styrofoam) attached to the bottom
of the washer before using it.
Do not insert your hand or a metal object
under the washer.
- This may result in injury.
Do not attempt to operate this appliance if it
is damaged, malfunctioning, partially
disassembled, or has missing or broken
parts, including a damaged cord or plug.
- This may result in electric shock, fire or
death.
Do not touch the power plug with wet
hands.
- This may result in electric shock.
Do not turn the appliance off by unplugging
the power plug while the washer is in
operation.
- Plugging the power plug into the wall
socket again may cause a spark and result
in electric shock or fire.
Keep all packaging material well out of the
reach of children, as packaging materials
can be dangerous to children.
- If a child places a bag over its head, it
may suffocate.
Do not let children or infirm persons use
this washer unsupervised.
- Failing to do so may result in electric
shock, burns or injury.
Do not attempt to repair, disassemble, or
modify the appliance yourself.
- Do not use any fuse (such as cooper,
steel wire, etc.) other than the standard
fuse.
- If you need to repair or reinstall the
appliance, contact your nearest service
center.
- Failing to do so may result in electric
shock, fire, problems with the product, or
injury.
If any foreign substance such as water
enters the appliance in any area other than
the tub, unplug the power plug and contact
your nearest service center.
- Failing to do so may result in electric
shock or fire.
If the water supply hose comes loose from
the faucet and floods the appliance, unplug
the power plug.
- Failing to do so may result in electric
shock or fire.
Do not mix chlorine bleach with ammonia or
acids such as vinegar.
- Incorrect usage can produce poisonous
gas, result in serious injury.
Do not reach into the washer while parts
are moving. Before loading, unloading, or

Service manual for Washing Machine
-------------------------------------------------------------------------------------------------------------------------------------------------------
- 6 -
adding items, press the START/PAUSE
button and allow the basket to come to
complete stop before reaching inside.
- Failing to do so may result in electric
shock, injury or fire.
Do not allow children to play on or in the
washer. Close supervision of children is
necessary when the washer is used near
children. As children grow, teach them the
proper, safe use of all appliances.
- Failing to do so may result in serious
injury to persons.
Keep laundry products out of children’s
reach. Observe all warnings on product
labels and follow to do.
- Failing to do so may result in serious
injury to persons.
Disconnect this appliance from the power
supply before attempting any user
maintenance. Turning the controls to the
OFF position does not disconnect this
appliance from the power supply.
- Failing to do so may result in electric
shock, injury or fire.
Do not clean the appliance by spraying
water directly onto it.
Do not use benzene, thinner, or alcohol to
clean the appliance.
- This may result in discoloration
deformation, damage, electric shock or fire.
1.3 Caution
Do not install on carpet. Install washer on a
level and solid floor that can support its
weight.
- Failing to do so may result in abnormal
vibrations, noise, or problems with the
product.
The washer is heavy. Two or more people
may be needed to install and move the
appliance.
- Failing to do so may result in bodily or
other injuries.
Store and install the washer where it will not
be exposed to temperatures below freezing
or exposed to outdoor weather conditions.
- Failing to do so may result in serious leak
damage.
Position the appliance so that the power
plug is easily accessible.
- Failing to do so may result in electric
shock or fire due to electric leakage.
To reduce the risk of injury to persons,
adhere to all industry recommended safety
glasses.
- Failing to follow all of the safety warnings
in this manual may result in property
damage, or injury to persons.
Unplug the power plug when the appliance
is not being used for long periods of time or
during a thunder/lightning storm.
- Failing to do so may result in electric
shock or fire.
Keep hands and foreign objects clear of the
lid and latch area when closing the lid.
- Failing to do so may result in personal
injury.
If the washer is contaminated by a foreign
substance such as detergent, dirt, food
waste, etc., unplug the power plug and
clean the washer with a damp, soft cloth.
- Failing to do so may result in
discoloration, deformation, damage or rust.
The clear portion of the lid can be broken
by a strong impact. Take care when using
the washer.
- If the clear portion is cracked or broken, it
may result in injury.
After a water supply failure or when

Service manual for Washing Machine
-------------------------------------------------------------------------------------------------------------------------------------------------------
- 7 -
reconnecting the water supply hose, open
the faucet slowly.
Open the faucet slowly after a long period
of non-use.
- The air pressure in the water supply hose
or the water pipe may result in damage to a
part or in water leakage.
If a drain error occurs during an operation,
check if there is a draining problem.
- If the washer is used when it is flooded
because of a draining problem, it may result
in electric shock or fire due to electric
leakage.
Do not insert your hand or a metal object
under the washer.
- This may result in injury.
Insert the laundry into the washer
completely so that laundry does not get
caught in the lid.
- If laundry gets caught in the lid, it may
result in damage to the laundry or the
washer, or result in water leakage.
Ensure that the faucet is turned off when
the washer is not being used.
- Ensure that the water supply hose
connectors are properly tightened.
- Failing to do so may result in property
damage or injury.
Open the faucet and check if the water
supply hose connector is firmly tightened
and that there is no water leaking before
using the product.
- If the water supply hose connectors are
loose, it may result in water leakage.
Do not stand on top of the appliance or
place objects (such as laundry, lighted
candles, lighted cigarettes, dishes,
chemicals, metal objects, etc.) on the
appliance.
- This may result in electric shock, fire,
problems with the product, or injury.
Do not operate the appliance with wet
hands.
- This may result in electric shock.
Do not spray volatile material such as
insecticide onto the surface of the
appliance.
- As well as being harmful to humans, it
may also result in electric shock, fire, or
problems with the product.
Do not place an object that generates an
electromagnetic field near the washer.
- This may result in injury due to a
malfunction.
Since the water drained during a high
temperature wash or drying cycle is hot, do
not touch the water.
- This may result in burns or injury.
Do not wash, spin, or dry water-proof seats,
mats, or clothing.
- Do not wash thick, hard mats even if the
washer mark is on the care label.
This may result in injury or damage to the
washer, walls, floor, or clothing due to
abnormal vibrations.
Do not operate the washer when detergent
dispenser is removed.
- This may result in electric shock or injury
due to water leakage.
Do not insert your hand into the detergent
dispenser after opening it.
- This may result in injury as your hand may
be caught.
Do not place any non-laundry objects, such
as shoes, food waste, or animals into the
washer.
- This can cause abnormal vibrations that
can damage the washer, and, in the case of
pets, cause severe injury or death.
Do not press the buttons using sharp
objects such as pins, knifes, fingernails, etc.
- This may result in electric shock or injury.
Do not wash laundry contaminated by oils,
creams, or lotions usually found in skincare
shops or massage clinics.
- This may result in the rubber seal
becoming deformed and water leakage.
Service manual for Washing Machine
-------------------------------------------------------------------------------------------------------------------------------------------------------
- 8 -
Ensure that the water inlet pipe is
connected and the tap is opened before
washing clothes.
Do not leave metal objects (safety pins, hair
pins, etc.) or bleach in the tub for long
periods of time.
- This may cause the tub to rust.
- If rust appears on the surface of the tub,
apply a neutral cleansing agent to the
surface and use a sponge to clean it. Never
use a metal brush.
Do not use hot water from water
cooling/heating devices.
- This may result in problems with the
washer.
Do not use natural hand-washing soap in
the washer.
- If it hardens and accumulates inside the
washer, it may cause problems with the
product, discoloration, rust, or bad odors.
Do not wash large laundry items such as
bedding in the washing net.
- Failing to do so may result in injury due to
abnormal vibrations.
- Place smaller items, such as lace socks
and lingerie in the washing net.
Do not use hardened detergent.
- If it accumulates inside the washer, it may
result in water leakage.
Do not wash throw rugs or doormats.
- If you wash throw rugs or doormats, the
sand will accumulate inside the washer. It
may result in error such as no draining.
2. How to use
2.1 Controls and function
1. Power button
Press to turn on your washer. Press again to turn off your washer. If you leave your washer on and
do not press POWER button within 10 minutes, your washer automatically turns off.
2. Start/pause button
Press once to start the program. Press again to pause the program. You can add a garment. And
only Cycles and Water Level could be changed. One again to restart the program.
3. Program Selector
Turn to select a wash cycle. The cycle you select determines the wash pattern for the cycle.

Service manual for Washing Machine
-------------------------------------------------------------------------------------------------------------------------------------------------------
- 9 -
4. Water Level
Press to select the water level. Different water levels result in different washing times and wash cycle
setting.
5.Temp
Press to select the washing water temperature. The rinse water temperature is always cold.
6. Soil Level button
Press to select the soil level. Different soil levels result in different washing times and wash cycle
setting.
7.Fabric Softener button
Add liquid fabric softener to the fabric softener compartment, then press this button. The fabric softer
is added to the cycle at the correct time.
8.Delay button
Press to select a time when you want the cycle to begin.
9. Extra Rinse button
Press to add an extra rinse to the wash cycle. Press again to cancel.
10. Digital display
The initial display is the total time for the cycle you select. While your washer is running, the display
shows the cycle process and time remaining in the cycle.
2.2 Cycle guide with option settings

Service manual for Washing Machine
-------------------------------------------------------------------------------------------------------------------------------------------------------
- 10 -
* Table in grey is an initial setting. Dots are all optional functions you can select.

Service manual for Washing Machine
-------------------------------------------------------------------------------------------------------------------------------------------------------
- 11 -
2.3 Detergent

Service manual for Washing Machine
-------------------------------------------------------------------------------------------------------------------------------------------------------
- 12 -
3. DIMENSION and INSTALLATION
3.1 Unit dimension
3.2 Installation
Installation Steps
These instructions should be retained for future reference.

Service manual for Washing Machine
-------------------------------------------------------------------------------------------------------------------------------------------------------
- 13 -
Follow the followings STEP by STEP to ensure a successful installation.
STEP 1: Select a location
Before you install the washer, make sure the location:
- Has a hard, level surface without carpeting or flooring that may obstruct ventilation.
- Is away from direct sunlight.
- Has adequate ventilation.
- Is not exposed to freezing temperatures (temperature under 32°F or 0 °C.
- Is away from heat sources such as oil or gas.
- Has enough space so that the washer doesn’t rest on its power cord.
STEP 2: Connect the water hose
The water supply hoses are not supplied with your washer and must be purchased separately. Before installing
the water supply hoses, make sure there are rubber gaskets inside the fittings at both ends of each new water
hose. Installing the water supply hoses without rubber gaskets can cause water leakage. When you initially install
the washer, be sure to use new hoses. Failing to do so may result in a water leakage or overflow and may damage
your property. Do not connect multiple water supply hoses together to increase the length of the supply hose.
Hoses connected this way can leak and the leakage can cause electrical shock. If a hose is too short, replace the
hose with a longer, high pressure hose.
1. Connect the ends of the water supply hoses to the HOT and COLD faucets.
2. Tighten the fittings by hand until they are snug, and then tighten them an additional two-thirds of a turn with
a wrench.
When you fasten the fittings, do not fasten them too tightly or apply tape or sealant to the faucets or water supply
intakes. This can damage the fittings. After you have connected the water supply hoses to the faucets, ensure
that they are connected correctly by pulling the water supply hoses downwards.
3. Place the unconnected ends of the hoses into a bucket and open the faucets connected to the two water supply
hoses for 10 or 15 seconds to remove any foreign substances from the hoses. Close the faucets before continuing.
4. Connect the ends of the water supply hoses to the water supply intake connections at the back of the washer.
The water supply hose connected to the HOT faucet must be connected to the hot water supply intake and the

Service manual for Washing Machine
-------------------------------------------------------------------------------------------------------------------------------------------------------
- 14 -
water hose connected to the COLD faucet must be connected to the cold water supply intake.
5. Tighten the fittings by hand until they are snug, and then tighten them an additional two-thirds of a turn with
a wrench. Confirm that the water supply hoses are not twisted or bent. If the hoses are twisted or bent, the hoses
can leak and cause electric shock due to the water leakage.
To ensure the correct water usage, connect both the HOT and COLD water faucets. If either or both are not
connected, an error code can occur. If you do not want to use the HOT water supply hose, insert the water intake
cap into the HOT water supply intake hole. In this case, you must select the Tap Cold option for the water
temperature.
6. Turn on the HOT and COLD water supplies and check all the water supply intake connections and the faucets
for water leaks.
STEP 3: Connect the drain hose
1. Put the Drain Hose out of the Clamp.
2. Position the other end of the drain hose.
It can be positioned in three ways.
A. Over the edge of wash basin
Secure the guide to the side of the basin wall with a hook or to the tap with a piece of string to prevent the
drain hose from moving.

Service manual for Washing Machine
-------------------------------------------------------------------------------------------------------------------------------------------------------
- 15 -
B. In a standpipe
The standpipe must be no shorter than 39 in.(99cm) and no longer than 96 in. (245cm).
C. In a laundry tub
The laundry tub must be no shorter than 39 in. (99cm) and no higher than 96 in. (245cm).
Make sure that the connection between the drain hose and the wash basin, or standpipe, or laundry tub is not
airtight.
STEP 4: Leveling your washer
Determine if the washer is level by checking the position of the tub or using a level.
1. Slide the washer into position.
2. Open the lid of the washer, and pour the water into the tub to the leveling circle. If the washer is level ,the
water will touch the leveling circle all the way around. If the washer is not level, the water will only touch part
of the leveling circle.
2. If the washer is not level, carefully tilt your washer just enough to adjust the leveling one the bottom front
of your washer. Extend the feet only as much as is necessary. If the feet are extended too much, your washer
may vibrate.
DO NOT use your washing machine without leveling. It may result in malfunction caused by the production
of excess vibration and noise. Use the leveling feet only when you level the washing machine. If you raise the

Service manual for Washing Machine
-------------------------------------------------------------------------------------------------------------------------------------------------------
- 16 -
leveling feet unnecessarily, it may cause abnormal vibration of the washing machine.
STEP 5: Powering your washer
Plug the power cord into a 3-prong, well grounded 120Volt 60Hz approved electrical outlet protected by a 15-
amp fuse or comparable circuit breaker.
Your washer is grounded through the third prong of the power cord when plugged into a 3-prong grounded
electrical outlet.
STEP 6: Running a test cycle
Run a test cycle as following to check if your washer is properly installed.
1. Load about 6 pounds of laundry into the tub.
2. Select the Cycles to turn on your washer.
3. Select the cycle by turning the.
4. Press the button to start the test cycle.
5. The washer should not rock or vibrate excessively when water is supplied or when washing or spinning, and
should drain well during the spin cycle.
If water leaks while water is being supplied or drained, check the water connections. Refer to the “Connect
the water hose”and “Connect the drain hose”section for instructions.
If the washer rocks and vibrates excessively, level your washer again. Refer to the“Leveling your washer”
section for instructions.

Service manual for Washing Machine
-------------------------------------------------------------------------------------------------------------------------------------------------------
- 17 -
4. TROUBLE SHOOTING
4.1 Test mode by Control
Note: Before entering the test mode, you should empty the machine so that there is no water
left in the drum. You can run a spin cycle or open the service panel from the front of the unit
to get all water out. Then make sure all parts are in their original position for check running.
To enter the test mode, press button Soak, button Extra Rinse button and button Power together at
the same time.
When unit is powered ON, you can turn it OFF by pressing the button Power anytime.
4.2 Test modes
Before starting test mode, the water level sensor should be installed. Otherwise, the unit will alarm
and stop running test mode.
Test 1:Anytime you enter the test mode, all lights and digital will be ON and then flash with 6 beeps.
If any light is not ON, replace the PCB. If the digital in not 88 displayed, replace the PCB. If you can’t
hear the beep, replace the PCB.
Test 2:Washing test, to check the motor and rotate directions.
In 9 seconds after entered test mode, press button Soil Level to enter Washing test.
The Normal cycle light, Wash procedure light will be ON in Washing test.
The digital time will display 3 indicating that the remaining time is 3 minutes.
The motor and impeller will rotate in two-directions in turn.
The test mode will end with 6 beeps and Done light flashing after 3 minutes’operation. All lights will
be OFF when the lid is opened.
Test 3:Spinning test, to check clutch and pump.
In 9 seconds after entered test mode, press button Temp to enter Spinning test.
The Normal cycle light, Spin procedure light will be ON in Spinning test.
The digital time will display 3 indicating that the remaining time is 3 minutes.
The pump will start in 8 seconds. Another 2 seconds later, the unit will start Spinning test.
The test mode will end with 6 beeps and Done light flashing after 3 minutes’operation. All lights will
be OFF when the lid is opened.
Test 4:Inlet valve test, Software version check
In 9 seconds after entered test mode, press button Fabric Softener to enter Inlet valve test.
The inlet valve test will start. The valves will be ON and water can enter the unit. Check the detergent
compartment, softener compartment and the basket water filling to check every valve.
Close the cold water faucet to see if the hot water valve is working or not.

Service manual for Washing Machine
-------------------------------------------------------------------------------------------------------------------------------------------------------
- 18 -
At the same time, the digital display will show the software version. There are two software versions:
one is for display PCB displayed with “U-“and two digital followed; the other one is for power PCB
displayed with “B-“and two digital followed.
The test mode will end with 6 beeps and Done light flashing after 1 minute’s operation. All lights will
be OFF when the lid is opened.
Test 5:Auto-sensing check
In 9 seconds after entered test mode, press button Delay to enter auto-sensing test.
The unit will check the auto-sensing function in this test mode.
The digital will display test result if this function is right.
Replace the Power PCB if there isn’t any display on the digital after the test in 3 seconds.
The test mode will end with 6 beeps and Done light flashing. All lights will be OFF when the lid is
opened.
4.3 Error codes
Error Code
Possible Cause
Solution
E1
Alarm for abnormal water
intaking.
Check if the lid is open.
Turn both faucets on fully.
Check if the water pressure is in the range.
Straighten the water inlet hoses.
Disconnect hoses and clean the screens.
Hose filter screens may be clogged.
E2
Alarm for water drain has not
Finished.
Check the fuse or reset the circuit breaker.
Straighten the drain hoses. Eliminate kinked
hoses. If there is a drain restriction, call for
service.
Close the lid and press the Start/Pause
button. For your safety, your washer will not
spin unless the lid is closed.
Check the height of drain hose end.
E3
The lid is open.
Close the lid.
The door lock or PCB is failed.
Refer to 4.5 troubleshooting.
E4
The unit is out of balance in
spin operation.
Make sure your washer is set on a level
surface. If the surface is not level, adjust
your washer’s feet to level the appliance.
Make sure your washer is not touching any
other object.
Make sure the laundry load is balanced.
During the spin process, if clothes are piled
at one side of basket, it will stop due to

Service manual for Washing Machine
-------------------------------------------------------------------------------------------------------------------------------------------------------
- 19 -
imbalance. The unit will try to solve the
problem automatically. If the washer can’t
solve the problem in three trials, you should
replace the clothes and make it as even as
possible manually.
E5
The unit is out of balance in
spin operation.
Adjust the water level refer to Installation
instructions. If situation continues, call
service center.
F5
Load sensing failed
Call service center.
F8
Water leveling sensor failed
Refer to 4.5 Trouble shooting.
Fd
The door opened over 20
seconds with Child Lock
function activated.
Power off the unit.
Deactivate the Child Lock function.
Call service center.

Service manual for Washing Machine
-------------------------------------------------------------------------------------------------------------------------------------------------------
- 20 -
4.4 Wiring diagram and terminals
Wiring diagram Picture 1
Wiring diagram Picture 2
CN7
CN3
CN14
CN15
5
CN5
CN8
CN1
CN12
Table of contents
Other Midea Washer manuals

Midea
Midea MSW-1508P User manual

Midea
Midea G06 User manual

Midea
Midea MA500W210 Series User manual

Midea
Midea MA200W75 User manual

Midea
Midea MTW55 User manual

Midea
Midea KL13TLE4M User manual

Midea
Midea MG-52-10508 User manual

Midea
Midea MF200W85B Series User manual

Midea
Midea DMWM55 User manual

Midea
Midea MLV41N1AWW User manual

Midea
Midea MLH52S7AGS Manual

Midea
Midea MWD-40P User manual

Midea
Midea MFH180-G1302DS F01E-US How to use

Midea
Midea MLV45N1BWWC Manual

Midea
Midea MFW-752S User manual

Midea
Midea MF200W90WB Series User manual

Midea
Midea MAV10-A2804PS/01FM-US User manual

Midea
Midea MTWM60 User manual

Midea
Midea DMWM80 User manual

Midea
Midea MLV47C4AWW Manual