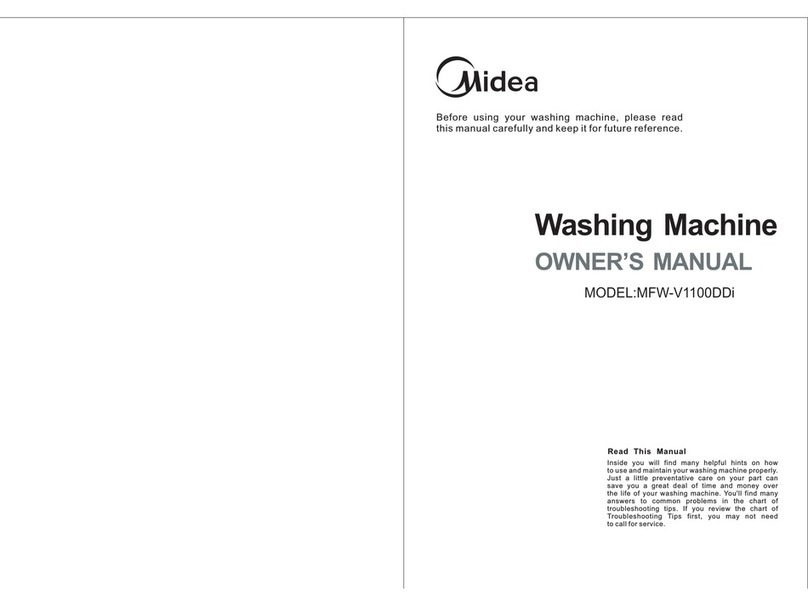
Midea MLH27N5AWWC Manual

Washer
version A
USER MANUAL &
INSTALLATION
INSTRUCTIONS
Warning:
Before using this product,
please read this manual carefully
and keep it for future reference.
The design and specifications
are subject to change without
prior notice for product
improvement. Consult with your
dealer or manufacturer for
details.
Power supply: 120V
Frequency: 60 Hz
MODEL NUMBER
MLH27N5AWWC
www.midea.com/ca
en

Dear user
THANK YOU and CONGRATULATIONS on your purchase of
this high-quality Midea product. Your Midea washer is designed
for reliable, trouble-free performance. Please take a moment to
register your new washer.
Register your new washer at
www.midea.com/ca/support/Product-registration
For future reference, record your product model and serial
numbers located on the inside frame of the washer.
Model Number________________________________________
Serial Number_________________________________________
SAFETY INSTRUCTIONS.................................................................. 4
FEATURES
INSTALLATION INSTRUCTIONS
......................................................................................... 9
........................................................13
OPERATION REQUIREMENTS..........................................................11
Package contents ................................................................................... 9
Main components ...................................................................................10
Control panel ...........................................................................................25
Unpacking your washer........................................................................13
Choosing a location................................................................................14
Electrical requirements
Water requirements
Drainage requirements
Tools you will need................................................................................18
Connect the water hoses ....................................................................
Connect the drain hose ......................................................................20
Level your washer ................................................................................22
Power on ..................................................................................................23
Run a test cycle .....................................................................................24
Setting the child lock ........................................................................... 31
18
WASHER USE ..................................................................................25
Washing a load of laundry..................................................................27
Washer options and settings ............................................................32
..........................................................................11
................................................................................12
.........................................................................12

WASHER CARE ............................................................................... 33
Cleaning and maintenance
................................................................. 33
3
Safety
Instructions Features Operation
Requirements
Installation
Instructions Washer Use Washer Care
Troubleshooting

BEFORE YOU CALL FOR SERVICE ..............................................39
Error codes ..............................................................................................41
WARRANTY.....................................................................................42
PRODUCT REGISTRATION............................................................44
READ AND KEEP THESE INSTRUCTIONS FOR FUTURE
REFERENCE
This manual c
ontains important information on the installation, use,
and care of your appliance. Please read this manual carefully before
installation and operation of this machine to prevent injury and property
damage.
Warnings and Important Safety Instructions in this manual DO NOT
cover all possible conditions and situations that may occur. It is your
responsibility to use common sense, caution and care when installing,
maintaining and operating your washer.
CAUTION
RISK OF ELECTRIC SHOCK
DO NOT OPEN

Safety
Instructions Features Operation
Requirements
Installation
Instructions Washer Use Washer Care
4
SAFETY INSTRUCTIONS
YOUR SAFETY AND THE SAFETY OF OTHERS ARE VERY
IMPORTANT
To prevent injury to the user or other people and property damage, the
instructions shown here must be followed. Incorrect operation due to
ignoring of instructions may cause harm or damage, including death.
The level of risk is shown by the following indications.
CAUTION
WARNING
WARNING
This symbol indicates that there are important operating
and maintenance instructions in the literature accompanying
your washing machine
This indicates that hazards or unsafe practices may cause
minor personal injury or property damage.
This indicates that hazards or unsafe practices may cause
serious personal injury or death.
To reduce the risk of fire, explosion, electric shock or
personal injury when using your washing machine, you
SHOULD follow these basic safety precautions.
WARNING
Do not store or use gasoline or other f1ammable vapors and liquids in the
vicinity of this or any other appliance.
Basic precautions
To reduce the risk of fire, electric shock, or injury to persons when
using your appliance, follow basic precautions:
WARNING
•
•
•
Read all instructions before using the appliance.
Do not wash articles that have been previously cleaned in, washed in,
soaked in, or spotted with gasoline, dry-cleaning solvents, or other
flammable or explosive substances, as they give off vapors that could
ignite or explode.
Do not add gasoline, dry-cleaning solvents, or other flammable or
explosive substances to the wash water. These substances give off
vapors that could ignite or explode.
Troubleshooting

5
•
•
•
•
•
•
Always unplug the washing machine from the power supply before
attempting any service. Disconnect the power cord by grasping the
plug, not the cord.
To reduce the risk of fire, clothes, cleaning rags, mop heads and the
like which have traces of any flammable substance, such as vegetable
oil, cooking oil, petroleum based oils or distillates, waxes, fats, etc.
must not be placed in the washing machine.These items may contain
flammable substances which, even after washing, may smoke or catch
fire.
Never place items in the washer that have been dampened with
gasoline or any combustible or explosive substance. Do not wash or
dry anything that has been soaked in or spotted with any type of oil
(including cooking oils). Doing so can result in fire, explosion, or death.
Do not allow children to play on or in the appliance. Close supervision
of children is necessary when the appliance is used near children.
Glass door or protector may be very hot during the operation. Keep
kids and pets far away from the machine during the operation.
This machine is not intended for use by persons (including kids) with
reduced physical, sensory or mental capabilities, or lack of experience
and knowledge, unless they have been given supervision or instruction
concerning use of the machine by a person responsible for their safety.
Do not machine wash fiberglass materials (such as curtains and
window coverings that use fiberglass materials.) Small particles may
remain in the washing machine and stick to fabrics in subsequent wash
loads causing skin irritation.
Before the appliance is removed from service or discarded, remove
the door and cut off the power cord.
Do not reach into the appliance if the tub or agitator is moving.
Do not install or store this appliance where it will be exposed to the
weather.
Do not tamper with controls.
Do not repair or replace any part of the appliance or attempt any
servicing unless specifically recommended in the user-maintenance
instructions or in published user-repair instructions that you
understand and have the skills to carry out.
Make sure that all pockets are emptied. Sharp and rigid items such
as coin, brooch, nail, screw or stone etc. may cause serious damages
to this machine.
Pull out its plug and cut off the water supply after the operation.
Make sure that the water inside the drum has been drained before
opening its door. Please do not open the door if there is any water
visible.
Do not try to repair the machine by yourself. The machine may be
damaged or more troublesome repair work may be needed and even
dangerous operation may take place if it is repaired by any
inexperienced or unqualified staff.
If the plug (power cord) is damaged, it shall be replaced by the
manufacturer or a service agent to avoid any danger.
Take care that power voltage and frequency shall be identical to
those of washing machine.
•
•
•
•
•
•
•
•
•
•
•
•
Safety
Instructions Features Operation
Requirements
Installation
Instructions Washer Use Washer Care
Troubleshooting

Grounding
Before operating this machine
WARNING
WARNING
6
•
•
•
This appliance must be grounded. In the event of a malfunction or
breakdown, grounding will reduce the risk of electric shock by
providing a path of least resistance for the electric current. This
appliance is equipped with a cord that has an equipment grounding
conductor and a grounding plug. The plug must be plugged into an
appropriate outlet that is properly installed and grounded in
accordance with all local codes and ordinances.
Improper connection of the equipment grounding conductor can
result in electric shock. Connect to an individual branch circuit. Check
with a qualified electrician or serviceman if you are in doubt as to
whether the washer is properly grounded.
DO NOT modify the plug provided with the appliance if it will not fit
the outlet. Please have a proper outlet installed by a qualified
electrician.
Do not use any socket with rated current less than that of the
washing machine. Never pull out a power plug with a wet hand.
To ensure your safety, the power cord plug must be inserted into an
grounded three-pole socket. Check carefully and make sure that your
socket is properly and reliably grounded.
This washing machine should only be repaired and serviced by
qualified technicians.
If connected to a circuit protected by fuses, use time-delay fuses
with this appliance.
Packing materials may be dangerous to the kids. Please keep all packing
materials (plastic bags, foams, etc.) far away from kids.
Washing machine shall not be installed in a bath room or very wet
rooms as well as in rooms with explosive or caustic gases.
Make sure that the water and electrical devices must be connected by
a qualified technician in accordance with the manufacturer's instructions
and local safety regulations.
Before operating this machine, all packages and transport bolts must
be removed. Otherwise, the washing machine may be seriously
damaged while washing the clothes.
Before washing the clothes the first time, the washing machine shall be
operated in Cotton and hot water procedures without the clothes inside.
This washing machine is for indoor use only.
•
•
•
•
•
•
•
•
•
•
Safety
Instructions Features Operation
Requirements
Installation
Instructions Washer Use Washer Care
Troubleshooting
WARNING
WARNING
WARNING
7
Attention shall be paid to protecting the machine
• Do not climb up and sit on the top cover of the machine.
Do not lean against the machine door.
Please do not close the door with excessive forces. If it is found
difficult to close the door, please check if the excessive clothes are
put in or distributed well.
•
•
Cautions during handling machine
• Transport bolts shall be reinstalled to the machine by a specialized
person.
The accumulated water shall be drained out of the machine.
Handle the machine carefully. Never hold each protruded part on
the machine while lifting.
Machine door can not be used as the handle during the conveyance.
•
•
•
Cautions when washing clothes
• Cold city water shall be used and hot water may also be connected
according to the local situations.
Your washing machine is only for home use and is only designed for
the textiles suitable for machine washing.
Flammable and explosive or toxic solvents are forbidden. Gasoline
and alcohol etc. shall not be used as detergents. Please only select the
detergents suitable for machine washing, especially for front loading.
Do not wash carpet in this machine.
Never refill the water by hand during washing.
Always follow the fabric care instructions recommended by the
clothing manufacturer.
Do not use the washing machine if it has a worn power cord or loose
plug. Contact an authorized service agent.
Do not operate the washing machine if any guards, panels and/or
fasteners, except transport fixing bolts, have been removed. Check
the fill hose connections on a regular basis to ensure that they are
tight and not leaking.
Do not operate the washing machine if parts are missing or broken.
Do not touch the door if washing at high temperatures.
•
•
•
•
•
•
•
•
•
•
Safety
Instructions Features Operation
Requirements
Installation
Instructions Washer Use Washer Care
Troubleshooting

8
•
This machine must be grounded properly. If there is any short circuit,
grounding can reduce the danger of electrical shock. This machine is
equipped with power cord, which includes plug, grounding wire at
grounding terminal.
Washing machine shall be operated in a circuit separate from other
electrical appliances. Otherwise, the power protector may be tripped
or the fuse may be burned out.
•
•
•
•
•
•
NOTE:
Installation requirements
WARNING
The IMPORTANT SAFETY INSTRUCTIONS indicated in this manual do
not cover all possible conditions which may occur. Common sense,
caution, and care must be exercised when installing, maintaining, or
operating the washing machine.
Always contact your dealer, distributor, service agent, or the
manufacturer about any problems or conditions that you do not
understand.
NOTE: Environmental Protection
If you plan to dispose of this machine, please comply with the local
waste disposal regulations. Cut off the power cord so that it will not be
put into reuse.
Remove the door so that kids and animals will not be trapped in the
machine.
Do not use excessive detergents.
Safety
Instructions Features Operation
Requirements
Installation
Instructions Washer Use Washer Care
Troubleshooting
9
Make sure that the following items came with your washer
FEATURES
Package Contents
Safety
Instructions Features Operation
Requirements
Installation
Instructions Washer Use Washer Care
Troubleshooting
User GuideHose Holder
Transport hole plugs (x4)Water hoses (x2)

10
Main components
Safety
Instructions Features Operation
Requirements
Installation
Instructions Washer Use Washer Care
Troubleshooting
Front
Back
Detergent
compartment
Door
Filter door
Water supply
inlets
Drain hose
Power plug
Control panel

11
WARNING
To reduce the risk of fire, electric shock, or injury to persons, read the
SAFETY INSTRUCTIONS before operating this appliance.
WARNING
Connect to grounded 3-prong outlet with an individual 12 amp branch
circuit protected by a 12 amp circuit breaker.
Connect to individual branch circuit.
Do not remove the ground prong.
Do not use an adapter.
You must ground your washer. In the event of a malfunction or
breakdown, grounding reduces the risk of electric shock by providing
a path of least resistance for the electric current.
A 120 v, 60 Hz, AC-only,15 or 20 amp, fused electrical supply is
required. We recommend that you use a time-delay fuse or provide a
circuit serving only your washer.
Your washer is equipped with a power cord that has a 3-prong
grounding plug. To minimize possible shock hazard, the cord must be
plugged into a matched 3-prong, grounding type outlet, grounded in
accordance with local codes and ordinances. If a 3-prong outlet is not
available, contact a qualified electrician to install one. Do not use an
adapter.
If codes permit and you use a separate ground wire, we recommend
that a qualified electrician determine that the ground path is adequate.
Check with a qualified electrician if you are not sure your washer is
correctly grounded.
Do not have a fuse in the neutral or ground circuit.
Certain internal parts are intentionally not grounded and may present
a risk of electric shock only during servicing. When servicing, do not
contact the following parts while the appliance is energized: electrical
valve, drain pump and door lock.
INSTALLATION REQUIREMENTS
Electrical requirements
Electrical grounding is required for your washer.
Safety
Instructions Features Operation
Requirements
Installation
Instructions Washer Use Washer Care
Troubleshooting
•
•
•
•
•
•
•
•
•
•
•
Failure to follow these instructions can result in electrical shock, fire, or
death.

•
•
•
•
•
•
12
To fill your washer in the correct amount of time, the water pressure needs
to be between 0.05 MPa~1 MPa.
The recommended height for the drain standpipe is 48 in. (122 cm).
The drain hose must be routed through the drain hose clip to the standpipe.
The standpipe must be large enough to accept the outside diameter of
the drain hose.
The water valve may fail or may not shut off completely.
The time it takes to fill your washer may be longer than the time your
washer controls allow. Your washer will turn off and report an error. A
time-limit is built into the controls to prevent flooding in your home if
a hose becomes loose.
Water inlet hoses must be purchased separately. You can buy inlet
hoses in various lengths up to 8 ft. (240 cm).
Make sure that the water faucets are easily accessible.
Turn off the faucets when you are not using your washer.
Periodically check to make sure that water is not leaking from the
water hose fittings.
Water requirements
Drainage requirements
WARNING
You’re responsible for providing adequate electrical services for your
washer.
Never connect the ground wire to plastic plumbing lines, gas lines,
or hot water pipes.
To avoid the possibility of water damage:
If the water pressure is lower than 0.05 MPa:
Safety
Instructions Features Operation
Requirements
Installation
Instructions Washer Use Washer Care
Troubleshooting
•
•

13
WARNING
CAUTION
Packing materials can be dangerous to children. Keep all packing
materials (plastic bags, polystyrene, and so on) well out of the reach
of children.
Do not operate your washer on the foam base cushion. Doing so will
result in serious vibration, which could cause equipment damage or
physical injury.
INSTALLATION INSTRUCTIONS
Unpacking your washer
•
•
Your washer is heavy. You may need help to unpack and move it.
•
CAUTION
If you do not remove the four bolts, your washer will make loud noise
and vibrate excessively or move. This can damage your washer.
Remove your washer from the packaging.
Make sure that the small, triangular piece of foam comes off with the
packaging base. If it doesn’t, lay your washer on its side, remove the
foam, then set your washer upright.
1
2
Remove the four transport bolts on the back of your washer.
3
Safety
Instructions Features Operation
Requirements
Installation
Instructions Washer Use Washer Care
Troubleshooting
Triangular foam

14
Choosing a location
Cover the holes with the transport hole plugs. Keep the four bolts for
future use. You need them if you want to transport your washer to
another location.
A water heater set to deliver 120° F (49° C) water to the washer.
Selecting a correct location for your washer improves performance and
minimizes noise and possible washer “walk.” Your washer can be installed
under a custom counter or in a basement, laundry room, closet, or recessed
area. See Drainage requirements on page 12. You should also consider a
companion appliance (dryer) location requirements.
For best performance, you need:
4
W
ARNING
Do not install your washer in areas where water may freeze, because
your washer always retains some water in its water valve, pump and
hose areas. Frozen water can damage the valve, pump, hoses and
other components.
Never install on a platform or weakly supported structure.
•
•
•
Safety
Instructions Features Operation
Requirements
Installation
Instructions Washer Use Washer Care
Troubleshooting
Troubleshooting
Transport bolt
Transport
hole plug

15
Washer dimensions and installation measurements
Make sure that the location is:
A grounded electrical outlet located within 6 ft. (1.8 m) of where the
power cord is attached to the back of the washer. See Electrical
requirements on page 11.
Hot and cold water faucets located within 4 ft. (1.2 m) of the hot and
cold water fill valves, and water pressure of between 0.05MPa~1MPa.
A level floor with a maximum slope of 1 in. (25 mm) under entire
washer. Don’t install your washer on soft floor surfaces, such as
carpets or surfaces with foam backing.
A sturdy and solid floor to support the washer with a total weight
(water and load) of 200 lbs. (90 kg)
•
•
•
•
Away from direct sunlight. Direct sunlight can raise the water
temperature, which may cause safety risks.
An area where the temperature is above 32° F (0° C).
Away from the heat resources such as coal or gas. Heat sources can
raise the water temperature, which may cause safety risks.
•
•
•
Safety
Instructions Features Operation
Requirements
Installation
Instructions Washer Use Washer Care
Troubleshooting
42.5 in. (108 cm)
33.5 in. (85 cm)
25.6 in. (65 cm)
23.5 in. (59.5 cm)

16
Installing under a counter
Installing in an alcove or closet
If you install your washer in an alcove or closet, the front of the closet must
have two unobstructed air openings for a combined minimum total area of
72 sq. in. (465 square cm) with a minimum clearance of 3 in. (7.6 mm) at the
top and bottom. A slatted door with equivalent space clearance is
acceptable.
48 square inches
(310 cm )
3 in.
(7.6 cm )
3 in.
(7.6 cm )
2
24 square inches
(155 cm )
2
Safety
Instructions Features Operation
Requirements
Installation
Instructions Washer Use Washer Care
Troubleshooting
1 in. (2.5 cm) 1 in. (2.5 cm)
23.5 in. (59.5 cm)
33.5 in. (85 cm)
2 in. (5 cm)

Before you install your washer, make sure that the location:
WARNING
•
•
Is a hard, level surface without carpeting or soft flooring that can
obstruct ventilation.
Is away from direct sunlight.
Has adequate ventilation.
Is not exposed to freezing temperatures (32 F or 0 C).
Is away from heat sources such as oil or gas.
Has enough space so that the washer does not rest on its power cord.
•
•
•
•
•
•
•
•
Either side: 1 in. (2.5 cm)
Rear: 6 in. (15.2 cm)
Closet Front: 2 in. (5.1 cm)
Top: 2 in. (5.1 cm)
°°
Minimum clearances between your washer and adjacent walls or other
surfaces are:
If you install your washer and dryer side-by-side in a closet, the closet front
must have an unobstructed air opening of at least 72 square inches
(465 square cm).
17
Safety
Instructions Features Operation
Requirements
Installation
Instructions Washer Use Washer Care
Troubleshooting
2 in. (5 cm )
23.5 in.
(59.5 cm )
1 in.
(2.5 cm ) 1 in.
(2.5 cm )
2 in.
(5.1 cm ) 6 in.
(15.2 cm )
25.6 in.
(65 cm )

Caution
1.
•
•
Use new water supply hoses. Using old hoses can result in leakage or
overflow that can damage your property.
Do not connect multiple water supply hoses together to increase the
length of the hose. Hoses connected this way can leak and cause
electrical shock. If a hose is too short, replace the hose with a longer,
high-pressure hose.
Connect the water hoses to the hot and cold water faucets.
2. Tighten the hose and faucet fittings by hand until they are snug. Tighten
them an additional two-thirds of a turn with pliers or a wrench. Pull the
water supply hoses downwards to make sure that they are connected
securely.
3/8” open-end wrench Adjustable wrench or 7/16”
socket with ratchet
Adjustable wrench or 9/16”
open-end wrench
Level
Pliers Nut driver with ratchet
Water supply hose
Tools you will need
Connect the water hoses
18
Safety
Instructions Features Operation
Requirements
Installation
Instructions Washer Use Washer Care
Troubleshooting
Caution
Don’t overtighten the fittings or apply tape or sealant to the faucets or
water supply intakes. This can damage the fittings.
3. Place the unconnected ends of the hoses into a bucket and turn on the
faucets connected to the water supply hoses for 10 or 15 seconds to
remove any foreign substances. Turn off the faucets.
4. Connect the ends of the water supply hoses to the water supply intake
connections at the top of the washer. The water supply hose connected
to the hot faucet must be connected to the hot water supply intake
and the water hose connected to the cold faucet must be connected
to the cold water supply intake.
•
•
NOTE:
If you don't want to use the hot water faucet or you don't have a hot
water faucet, you have to adjust the Temp. setting to cold, or your
washer will have an Error code E10.
If you only have cold water faucet, we recommend that you buy and
install a T-branch pipe.
Back of washer Hot water supply
Cold water supply
Water supply hoses
19
Safety
Instructions Features Operation
Requirements
Installation
Instructions Washer Use Washer Care
Troubleshooting
Caution
•
•
Don’t overtighten the fittings or apply tape or sealant to the faucets
or water supply intakes. This can damage the fittings.
Make sure that the water supply hoses aren’t twisted or bent. A bent
or twisted hose can leak and cause an electric shock because of water
leakage.
Caution
•Make sure that the connection between the drain hose and the wash
basin, standpipe, or laundry tub is not airtight.
Connect the drain hose in one of the following ways.
In a wall standpipe
5. Tighten the fittings by hand until they are snug, then tighten them an
additional two-thirds of a turn with pliers or a wrench.
6. Turn on the hot and cold water supplies, then check all the water supply
intake connections and the faucets for water leaks.
NOTE: The wall standpipe drain requires a minimum diameter standpipe
of 2" (5 cm).
Place the drain hose into the wall standpipe. You can use a nylon ties (not
included) to bundle the hoses and the drain pipe together.
Wall standpipe
Drain hose
Nylon tie
20
Connect the drain hose
Safety
Instructions Features Operation
Requirements
Installation
Instructions Washer Use Washer Care
Troubleshooting
Table of contents
Languages:
Other Midea Washer manuals

Midea
Midea MJ70N68P User manual

Midea
Midea FP-90LTT060GMTM-B User manual

Midea
Midea Sicily Glory G01 User manual

Midea
Midea 360111 User manual

Midea
Midea MWMTL075ZOF User manual

Midea
Midea MFW-EC950 User manual

Midea
Midea MFW-801S User manual

Midea
Midea MT725B User manual

Midea
Midea MFWS512 User manual

Midea
Midea X8 User manual

Midea
Midea KL13TLE4M User manual

Midea
Midea G06 User manual

Midea
Midea MFW-850M2 User manual

Midea
Midea MF200W80B/E User manual

Midea
Midea MLH52N5AWW Manual

Midea
Midea MTE150-P2004S User manual

Midea
Midea MG-52-10508 User manual

Midea
Midea MLTW44A4BWW Manual

Midea
Midea MF200W80B/W-MV User manual

Midea
Midea 360471 User manual