Midland BT City User manual

UK
1
INDEX
Midland BTCity ....................................................................................................................................................................2
Charging batteries...............................................................................................................................................................3
Description of the unit and installation brackets....................................................................................................................3
Switching your Midland BTCity on and o..............................................................................................................................5
Adjusting the volume...........................................................................................................................................................5
Operative Mode...................................................................................................................................................................5
Priority ...............................................................................................................................................................................5
Pairing to other Bluetooth devices........................................................................................................................................6
Resetting all paired devices..................................................................................................................................................9
Special congurations........................................................................................................................................................10
Pairing to a BT Remote.......................................................................................................................................................10
Recommendations for specic uses.....................................................................................................................................11
Use at your own risk...........................................................................................................................................................13
Warranty...........................................................................................................................................................................13

2
Midland BTCity (from vers. rmware 14.03.13)
Thank you for purchasing the Midland BTCity, the wireless intercom
multimedia system for bikers. The Midland BTCity is designed to be t-
ted directly on to your helmet and to be used for communications with
Bluetooth devices like mobile phones, GPS Sat-Navs and MP3 players. If
desired, it can also be paired with another Midland BTCity unit and used
as wireless Rider/Pillion Intercom system or Rider to Rider in bike-to-
bike mode, within a maximum range of 200 meters. The Midland BTCity
is also supplied with a wired connection that can be used to connect an
iPod/MP3 player or PMR446 transceiver,which will then enable bike-to-
bike communications up to a maximum range of 5 km.
Midland BTCity is available in two versions:
›Single BTCity Intercom kit with one unit only
›BTCity IntercomTWIN with two units
Depending on the model purchased, the package contains the fol-
lowing parts:
BTCity
›1 BTCity communication unit
›1 audio kit with two stereo speakers, microphone with boom and
wire microphone
›1 plate with bi-adhesive strip to fix the unit onto the helmet
›1 clamp to fix the unit onto the helmet
›1 stereo audio cable to connect an iPod/ or other models of MP3
players
›1 miniUSB wall-mounting power supply
›Wind Suppressing Foam Microphone Cover, Allen key and Velcro
strip for assembly
BTCity TWIN
›2 BTCity communication units
›2 audio kits with two stereo speakers, microphone with boom and
wire microphone
› 2 plates with bi-adhesive strip to fix the unit onto the helmet
› 2 clamps to fix the unit onto the helmet
› 2 stereo audio cables to connect an iPod/ or other models of MP3
players
› 1 miniUSB wall-mounting power supply with double plug
› Wind Suppressing Foam Microphone Cover, Allen key and Velcro
strip for assembly
The units included in theTWIN kit are already paired and can therefo-
re be immediately used in the Intercom mode.
Technical specications of Midland BTCity
General:
›Bluetooth ver. 2.1 stereo (Headset/Handsfree/A2DP protocol)
›AGC system automatically controls the volume in relation to
background noise
›Voice (VOX) or manual communications option
›Manual controls to enable: telephone, intercom and wire con-
nection
›Fully waterproof
›Lithium battery with 8 hours talk time
›Recharge time: app. 4 hours
Bluetooth connections:
›Identical device for Rider to Pillion or Bike-to-Bike Intercom mode,
up to a maximum range of 200 meters
›With BT Remote for easy to use handlebar commands
›Bluetooth devices
- Mobile phone with MP3 player Stereo (A2DP protocol), GPS (spe-
cific for motorbike)
- PMR446 transceivers (with built-in or external Bluetooth con-
nection) for group bike-to-bike communications
Wire connections:
›For stereo audio input (iPod/MP3 player)
›For PMR446 transceivers (with optional cable)
Attention: before using BTCity for the rst time, remember to
recharge it for at least 5/6 hours.
Attention: Midland BTCity is designed to withstand rain and wa-
ter. However, if it is raining, always verify that the rubber caps
protecting the sockets are fully tted.

UK
3
Charging batteries
Make sure that the unit is fully charged before use. Allow at least 5/6
hours for a full charge before using the unit for the first time. Normal-
ly, after the first time, it takes 4 hours for a full charge.
Charge the unit by inserting the wall-charger into the charging socket
(lift the rubber cover to insert the plug).
›The red LED on the unit will start flashing when charging begins.
›Allow the headset to charge until the blu LED turns on.
›When the charge is complete (blu LED on), release the headset
from the charger.
Attention: everytime the mini USB recharging plug is inserted,
the device is automatically turned o. To use it while it is in
charge, you should turn the device on with the plug already
inserted.
Description of the unit and installation
brackets
The BTCity has 3 multifunction buttons and 3 wired connections in
the lower section.
Description of the button features:
›Control: can be used to enable/disable the intercom and manage
mobile phone features
›Volume+: enables you to increase the volume
›Volume -: enables you to decrease the volume
Description of the wired connections
›Charger jack: enables to recharge the unit using a standard mini
USB power supply and firmware upgrade via PC connection
›Audio kit jack: enable to connect an audio kit (stereo headset and
microphone)
›Auxiliary audio jack (AUX): can be used to connect an audio source,
like a stereo iPod/MP3 player or PMR446 transceiver
Description of the audio kit
The audio system includes two ultra-flat stereo speakers and two in-
terchangeable microphones, which are both supplied with a bracket
and wire connection.
Fixing the stereo speakers
The two stereo speakers have a Velcro/adhesive strip that aids their
fixing to your helmet.
The microphone can be fixed onto the helmet in two ways:
Boom Microphone
Place the section with the Velcro/adhesive strip between the padding
and the rigid cover of the helmet, so that the microphone is correctly
positioned in front of your mouth and that the white symbol is facing
your mouth.This type of microphone is suited for Open Faced and Flip
Front helmets.
Volume+Volume -
Control
Charger jack
Auxiliary audio jack
(AUX)
Audio kit jack

A
4
Wire microphone
Using the Velcro/adhesive strip, place the microphone inside the hel-
met in front of your mouth. This type of microphone is more suited
for Full Faced helmets. The mini connector on the microphone allows
you choose the microphone that best suits the helmet you are using.
Audio kit jack
The audio kit must then be connected to the central jack of the
Midland BTCity unit using the“L”shaped connector.
Description of the installation brackets
The Midland BTCity can be fixed onto the helmet in two different
ways: By either using the plate with bi-adhesive strip, or the clamp.
These methods allow you to safely “fix” the BTCity unit onto your
helmet and to remove it at any time in order to recharge or store it.
Plate with bi-adhesive strip
The fixing plate has a bi-adhesive strip on
one of its sides. To fix the plate in place,
clean the application area on the helmet
surface, remove the bi-adhesive film and
place the fixing plate on the helmet by
keeping it contact with the surface for a
few seconds.
Clamp
Using the Allen Key, loosen the two screws on the clamp and place the
rear plate between the helmet padding and the external rigid protec-
tion. Then, tighten the two screws in order to firmly fix the clamp in
place. Inside the clamp is included a small plastic spacer, that can be
removed to close tigher the clamp.
Fitting and removing your Midland BTCity
The BTCity can be easily fitted onto the helmet by sliding it
downwards so that it fits into the slot of the selected fixing device
(plate with bi-adhesive strip or clamp). BTCity is maintained in posi-
tion thanks to the fixing clip located on the upper section (A).
To detach the BTCity, simply press the fixing clip and push the unit
upwards.
Spacer

UK
5
Switching your Midland BTCity
on and o
Switching the unit on:
›Press and hold“Control”button down for approximately 3 seconds
until the BLUE indicator lights.
Switching the unit o:
›Press and hold both“Control”and “VOL-” buttons together for ap-
proximately 3 seconds until the RED indicator flashes 3 times, thus
lessening the chances that you might turn offthe unit accidentally
(especially whilst wearing heavy gloves).
Adjusting the volume
Your Midland BTCity uses AGC technology, which automatically
adjusts the listening volume in relation to background noises.
However, it is also possible to manually adjust the volume by means
of the“Volume+”and“Volume -“buttons.
Attention: volume can be adjust only when an audio connection
is active.
Operative “mode”
The BTCity can operate in two main“mode”: Intercom and Phone
The function button on the unit can have different functionality de-
pending on which mode the unit is at that moment.
›In “Intercom mode” the “Control” button lets you manage the
communication.
›In “Phone mode” you can manage your Bluetooth cellular phone
to place/answer a phone call or to listen to the music (in stereo
mode). Please use your phone responsibly and safely.
You can switch (toggle) from one mode to the other simply pressing
the Middle button for 3 seconds. A voice announcement will tell in
which mode you are on.
The toggle sequence is the following:
›Intercom mode (if another unit has been paired)
›Phone mode (if a phone has been paired)
Every time you turn on the unit, the default mode is Intercom (if it
was previously paired to another unit), otherwise it will be Phone (If
was paired to a phone).If no pairing was made – the only possible
mode is FM.
If you need to know in which mode the unit currently is, just press the
“Volume + “ and “Volume –“ button together for 3 second. A voice
announcement will tell you the current mode.
Priority
The BTCity manage the different connection/audio sources based on
the following priority rules.
Changing of the operative mode
Every time you change mode (long press of the middle button to tog-
gle between Intercom/ Phone), the previous audio is closed and the
control goes to the new mode.
Intercom
The Intercom has always a higher priority against the music (inclu-
ding Phone/GPS in music play mode). Every time you open the inter-
com the music from a Bluetooth source is stopped. Only the audio/
Music from the “AUX wired connection” is always in background by
default.
Phone calls
The phone call has always the higher priority and will interrupt every
connection, like music, intercom. Only the AUX wired connection can
be still on if the setting“Wired connection always in background”was
enabled.

6
GPS voice announcement
When the GPS is paired to the“Volume +” button,(high priority) the
street voice announcement will always interrupt the intercom.
When paired using the “Volume -” button, (lower priority) the voice
announcement are always in background also if the intercom is active.
AUX wired connection
Music or audio from the AUX wired connection, by default it is always
in the background also when the intercom is open or during a phone
call. It is possible to change this beaver following the procedure de-
scribed in the“Setup and Special configuration”chapter.
Pairing to other Bluetooth devices
The BTCity unit can be paired to other Bluetooth devices, like Phone,
GPS Navigator or PMR446 Radio with built-in or external Bluetooth.
The pairing procedure must be done using the “Volume +” or the
“Volume -“ buttons.
›Pairing to the “Volume +” button: for Phone with music
(A2DP stereo).
›Pairing to the“Volume -”button: for GPS navigators and other
devices which the audio must be always in background.
Attention: The “Volume -” button does not support the pairing with a
phone and do not support A2DP Stereo Music.
Using the telephone features
The cellular phone can be paired only to the“Volume +”, in this way
it is possible to manage all the phone functionalities and listen to the
stereo music. An incoming call has the higher priority, that means all
other communications will be closed (Intercom, Music).
Pairing the unit with a mobile phone
1. Enable the Bluetooth device search feature on your mobile phone.
As this procedure varies according to the brand and model of the
mobile phone, refer to the manual supplied to your particular pho-
ne for further information.
2. Press and hold down the middle button about 7 sec., until the Red
light is on permanently (setup mode). Now press for3 seconds the
“Volume +”button, the Blue and Red light will flash.
3. After a few seconds the mobile phone will display “Midland BTCi-
ty”. Select it and follow the instructions provided in your mobile
phone manual to accept the pairing. When prompted, enter the
pairing code, which is 0000 (four zeroes). Your mobile phone
should then display a confirmation message if the pairing opera-
tion has been successfully completed
4. The BTCity will automatically exit the set up mode (red indicator
on) and go to the working mode (blue light flashing).
Answering a call
When you hear the phone ring, you can answer in two different ways:
Vocally:
Simply say one word to answer the call and start talking.
Manually:
Tap the “Control”button and start speaking.
Rejecting a call
If you don’t wish to answer, you can let the mobile phone ring or press
the“Control”button for 3 seconds (you will hear one audio confirma-
tion tone).
› GPS
› PMR446 Radio › Phone (GPS)

UK
7
Making a call
There are several ways to make a call.
From the mobile keypad:
›Dial the number on the mobile keypad:
›Press“Send” on the mobile phone.
To redial the last number:
›Press and hold “Volume+” button for 3 seconds in order to redial
the last number (you will hear one audio confirmation tone).
To make a voice call:
›Press “Volume-” button for 3 Seconds. If your mobile phone
supports voice calls, you will be asked to speak the name of the
contact you wish to call.
Priority: Calls have a high priority, which means that all other commu-
nications are temporarily disabled when a call arrives and automatically
re-enabled once the call ends.
Ending a call
There are several ways to end a call:
›Wait for the called person to end the call.
›Press the “Control” button for 3 seconds (you will hear an audio
confirmation tone).
›Press“End”button on the mobile phone.
Using the MP3 player feature of the mobile phone
Many mobile phones are now designed to be used as stereo MP3
players. The BTCity device fully supports the A2DP and AVRCP proto-
cols that enable you to listen to stereo music and remotely control
your mobile phone’s MP3 player.You can even use the buttons on the
BTCity unit to control the following play options: Play, Pause, Forward
and Backward.
Available controls:
›To play/pause music: click the“Control”button.
›To skip forward to the next song: keep pressed the“Volume+”
button.
›To skip backwards to the previous song: keep pressed the
“volume-“ button.
Priority: the music listening mode has the lowest priority. Therefore, it
will always be disabled when another type of communication is ena-
bled.
Pairing to a GPS navigator
The GPS can be paired to the “Volume + “ or ”Volume -” button. If
the GPS is paired on“Volume +”, the street voice announcement will
interrupted all the other communications (Intercom, Music). If the
GPS is paired on “Volume -“ all the street announcement will be in
background (and will not interrupted the Intercom communications).
Attention: If you need to connect both Phone and GPS, you must pair
the GPS to the “Volume +“ button and the Phone to the GPS it self (not
anymore to the “Volume -” button). In this case the GPS street voice an-
nouncement and the phone calls are always in background and will not
interrupt the Intercom conversation.
Attention: remember to switch oall the other Bluetooth device, only
the two devices involved in the pairing must be turned on.
Volume+
forward
Volume -
backward
Control
Pause/Play

8
GPS Navigator with stereo music player
If the GPS is also a stereo MP3 player and you want to listen to stereo
music, you must pair the GPS to the“Volume +”button. In this confi-
guration the GPS street voice announcements will interrupt all other
communication (Intercom, Music).
When the GPS is paired to the“Volume +”button the “Phone” mode
is activated.
Attention: It is possible to listen A2DP Stereo music from the
GPS only in “Phone Mode”.
How to pair the BTCity to a GPS
In general is possible to pair the BTCity to all the GPS for motorbike that
support Bluetooth headset connection.
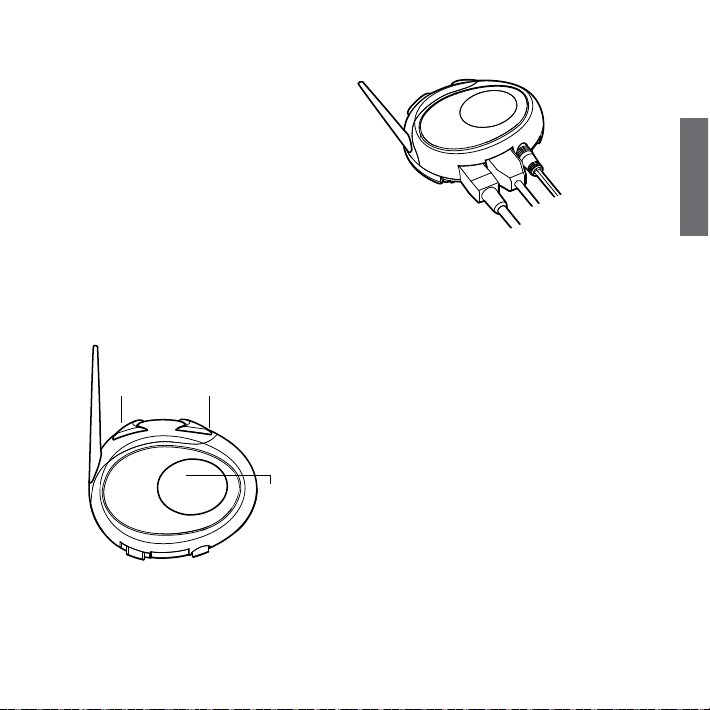
To pair the BTCity to a GPS, you must first enter the setup mode:
1. Turn offthe unit
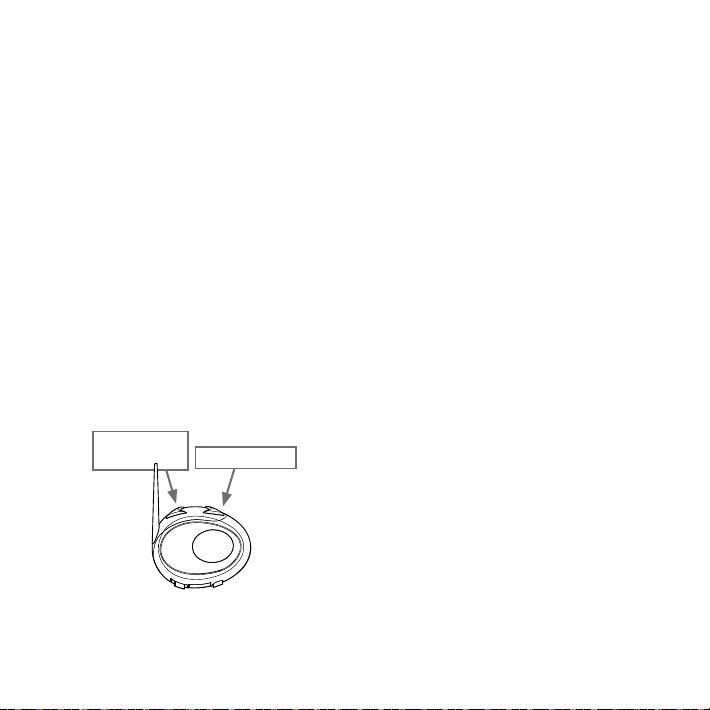
2. Press and hold down the“Control”button about 7 sec., until the Red
light is on permanently.
3. Now press firmly (3 sec) the“Volume +”or “Volume -”button, the
Blue and Red light will flash.
4. Enable the Bluetooth device search feature on your GPS
5. After some seconds, “Midland BTCity”will be displayed on your GPS.
6. Follow the pairing procedure of your GPS. If a pin code is requested
you must enter“0000”(four times zero).
7. When successfully paired, the Blue light of the unit will be on for one
second and then the unit will exit the setup mode and switch to the
working mode (the Blue light will start flashing).
You can now use your BTCity and the GPS street voice announcement
are always in background.
If you pair the GPS to the Volume + button (because for example the
“Volume –“ button was already used), you loose the possibility to pair
the phone to the BTCity unit.You can overcome this limit by pairing the
phone directly to the GPS and then the GPS to the BTCity unit. All the
phone features are therefore managed by the GPS itself.
How to use a GPS
When paired using the“Volume -”button the GPS will be automatically
connected and the voice announcement are always in background also
if the intercom is active.
When the GPS is paired to the “Volume +” button, the street voice an-
nouncement will always interrupt the intercom. In addition, remember
to switch to “Phone”mode in order to listen and control the music (play/
pause - backward and forward).
If the phone is connected through the GPS you must use the control
buttons on the GPS screen in order to control the phone functionality.
Using the intercom feature
To use the Intercom feature, be sure both BTCity units are turned on
and previously paired together.
The two units supplied in the Midland BTCity TWIN Pack, are already
paired and ready for use, which means that it is not necessary to per-
form this procedure.
If the devices are not part of the same pack, or one of the BTCity units
has been purchased separately, you need to pair them in order to be
able to use the Intercom function.
Pairing with another BTCity device
1. Turn offthe unit. Press and hold down the middle button about 7
sec., until the Red light is on permanently.
2. Press the “Control”button on the first unit until the RED and BLUE
lights begin to flash rapidly and alternately.
3. Then press the “Control“button on the second unit until the RED
and BLUE lights begin to flash rapidly and alternately.
4. Now both BTCity units are trying to pair to each other.
When successfully paired, the blue led of each device will light for
1 sec and go back to setting mode (red light always on) waiting for
additional pairing or setting procedures.
5. To use the two devices, exit the setting mode: Double click on the
“Control”button. The red light will quit and the blue light will be-
gin to flash. Now you can use your BTCity.

UK
9
Intercom
The Intercom feature can be enabled in two ways:
Manual activation:
›Press“Control” button, on one of the two units. Communication is
enabled and remains active until you press the “Control” button
again. You will hear 1 audio tone when the Intercom feature is
enabled and 2 audio tones when it is disabled.
Voice activation (VOX):
›This is enabled by default. To start an Intercom communication,
simply start talking. The communication will remain active for all
the time you are talking.
›If there is no conversation, the Intercom is automatically closed
after 40 seconds.
Attention: If needed, you can disable the VOX feature simply by pressing
the Backward button for 7 sec. A voice announcement will advise you
when the VOX is disabled. To turn the VOX on again, just press the same
button and a voice announcement will advise you that the VOX is now
active. This setting is remembered also in you turn othe unit.
How to pair the BT City to previous BT line unit
The BTCity is compatible with all the BT line unit from Midland. You
can pair the BTCity to a BT2, BT1, BTX1, BTX2 or BTNext unit and the
max distance of the intercom is defined from the lower possible.
To pair the BTCity to another BT line unit, you must first enter the
setup mode:
1. Turn offthe unit
2. Press and hold down the Middle button about 7 sec., until the Red
light is on permanently.
3. Now press long (3 sec) the“Control”button, the Blue and Red light
will flash.
4. Follow the procedure on the other unit’s instruction manual (nor-
mally you can use the “Volume +” button on all the previous BT
line units like BT1-BT2).
5. When successfully paired, each unit will have the Blue light on
for one second and than go back to the setup mode (Red light
always on).
If you don’t have more devices to pair, you must exit the setup mode
from both units before you can use them: for BTCity double click on
the“Control”button, the Red light will turn offand the Blue light will
start flashing. For the other devices of BT line, please refer to their
own user manual.
Resetting all paired devices
Sometimes you may find it necessary to delete all the pairing referen-
ces stored in the BTCity unit (reset operation).
›To perform this operation, switch offthe BTCity and keep pressed
the“Control”. The red led turns on.
›Simultaneously press and hold down the“Volume +”and “Volume
–“ buttons for 3 seconds.The Blue Light will be lit on for 1 sec.
This procedure deletes all the paired Bluetooth devices stored in the
memory and it is therefore possible to start a new “clean” pairing
session.
Using the wired audio input
Your Midland BTCity is also supplied with a wired audio input (labeled
AUX), that can be used to connect an audio source, like an iPod (or
any other MP3 Player) or a PMR446 transceiver for communications
in group or for a coverage increase.
Priority: the wired audio input has the lowest priority when compared
to the other Bluetooth connections (including the Intercom) and will
therefore always be disabled when another Bluetooth communication
is opened.
Using a i-Pod/MP3 Player
Listening to music
To listen to music from the wired input, connect the audio source
using the cable supplied with the BTCity unit. The volume level is au-
tomatically adjusted by the AGC system, which means that you only
need to adjust the volume of your iPod/ MP3 player to a level that will
allow you to listen to music in normal speed.

10
Attention: never set the volume of the MP3 Player to the maxi-
mum possible.
Hint: We recommend that you perform a few tests adjusting the volume of
your iPod/MP3 player so at the normal speed the Headset volume is suited
to your needs. The AGC system will automatically increase the volume on
higher speed. Make a note to remember this setting for future trips.
Attention: the volume adjustment, (“Volume+” and “Volume –“)
buttons, cannot be used to adjust the volume of the wired audio
source(eg MP3 player).
Enabling/disabling the wire input
The wire input can be enabled and disabled
›Enabling: double click the“Control”button (you will hear one audio
confirmation tone).
›Disabling: double click the“Control”button(you will hear two audio
confirmation tones).
Using a Two Way Radio transceiver
To be able to use the transceiver, it is necessary to purchase a specific
cable (sold separately) in order to connect the radio to your Midland
BTCity:
Some manufacturers radios use a different pin configuration, so we
recommend that you ask your dealer as to which cable is best suited
to your needs.
To communicate via the attached radio, press the transmission Press To
Talk (PTT) button to speak and release it to listen. It is not possible to
talk and listen simultaneously. Communications can be activated also
without pushing the PTT button, by enabling theVOX function.
Special congurations
Some Midland BTCity features can be configured to suit specific needs:
›Pairing to BT Remote
›Adjusting/ Disabling the VOX feature (Intercom and telephone)
›Wired connection always on
›Intercom and GPS
Pairing to a BT Remote Unit
When paired to a BTRemote unit, you will have available all the 5
buttons of the remote unit:
When you are in“Intercom” mode
›Press short the“Control”button to open /close the intercom
When you are in“Phone” mode
›Press short“Forward”button: voice dial/answer incoming call
›Press long “Forward”button: dial last number/reject incoming call
›Press short“Control”button: Play/Pause music
When the music is playing:
›Press short“Forward”button: forward a song
›Press short“Backward”button: backward a song
›Press short“Control”button: Play/Pause music
In all mode (Intercom or Phone)
›Press long“Backward”button: enable/disable wired AUX input
›Press very long“Backward”button (7 sec.): enable/disable Vox
Adjusting/ Disabling the VOX feature
(Intercom and telephone)
The Intercom feature can be enabled both manually and vocally
(VOX). The VOX activation is influenced by the background noise and
therefore by the speed.
For optimum results, it is possible to choose one of the following four
microphone sensitivity levels: high, medium, low and very low. The
default setting of BTCity is“high”. It is also possible to disable the VOX
feature in order to activate the Intercom and phone call answering
features in manual mode only.
Adjusting the sensitivity of the microphone (VOX)
1. Enter the Setup mode: Switch your BTCity off.
Press and hold down the central button (Control) until the red
indicator switches on permanently. Your BTCity is now in “Set up
mode”.
2. Press the “Volume+” and “Control” buttons till the red indicator

UK
11
will turn to steady blue.
3. Now, press “Volume +”or “Volume -“to increase or reduce sensi-
tivity. Every time you press the Volume buttons the RED light will
flash for confirmation. When you reach the end of the upper and
lower limit, the RED light will not flash.
4. Double press the “Control”button; the Blue light will flash several
times, in order to let you know the selected sensitivity:
once = VOX disabled
Twice = very low sensitivity
3 times= low sensitivity
4 times= medium sensitivity
5 times = high sensitivity
Default = high sensitivity
5. The light indicator is now back to steady RED (“Set up mode”) and
the changes are confirmed
6. If needed, you can adjust again the sensitivity repeating the steps
from point 2, otherwise exit the Setting mode by double clicking
the “Control” button. Once the red light turns off, the blue led
starts blinking. Now you can use your BTCity.
Disabling the VOX feature (Intercom and telephone)
Follow all the procedure described in the previous steps and choose
the option 1 (VOX disabled). You will see the blue led blinks once.
Wired connection always on
This feature let you keep the wired connection always on, even when
the phone or the intercom is open. This feature can be useful when
you connect a PMR446 transceiver.
Enabling:
›Enter the“Setup”mode.
›Press the“Volume+”and “Volume -” buttons for one second. The
blue LED will flash once.
›To exit the“Setup”mode double press the“Control”button.
Disabling:
›Follow the same procedure up described; now the blue LED will
flash three times
›To exit the“Setup”mode double press the“Control”button.
Recommendations for specic uses
The section that follows, provides a few useful suggestions on how to
achieve maximum performance from your BTCity unit.
Using a PMR446 transceiver
To be able to use the transceiver, it is necessary to purchase a specific
cable (sold separately) in order to connect the radio to your Midland
BTCity:
›Some manufacturers radios use a different pin configuration, so
we recommend that you ask your dealer as to which cable is best
suited to your needs
To communicate via the attached radio, press the transmission Press
Top Talk (PTT) button to speak and release it to listen. It is not possible
to talk and listen simultaneously. The cable connected to the transcei-
ver has a PTT button that can be placed on the handlebar of your bike
or held in your hand (If you are the pillion rider).
Adjust the volume of the transceiver to your needs, remembering that
the volume adjustment is controlled by the automatic AGC system
and that it will therefore be automatically increased in relation to
background noise.
If you wish to use a PMR446 transceiver for group communications
and simultaneously maintain the Intercom feature enabled between
two BTCity devices, you must remember that the Intercom feature is
enabled every time you speak by means of the BTCity’s VOX feature.
Consequently, radio communications will be disabled whilst you are
talking with somebody, because they have a lower priority compared
to Intercom communications.
This can be prevented by enabling the “Wired connection always
on” or “Disabling the VOX feature” (both explained in the previous
section).
Disable the VOX feature, as explained in the previous section, to make
sure that the intercom will not automatically be activated when you
speak on the PMR446. To enable the Intercom feature when using this
configuration, you will have to press“Control”button manually.

12
Using the BTSki Audio Kit accessory (optional)
This optional kit is the Bluetooth solution designed for winter sports
(use without helmets or with semi rigid type ski helmets). The audio
system is made up of two ultra thin stereo speakers and a boom mike,
all contained in a soft material lining
The audio system includes two ultra-flat stereo speakers and one mi-
crophone with boom, all assembled into a earwarmer headset.
Fitting and removing your Midland BTCity
The BTCity can be easily fitted by sliding it downwards so that it fits
into the slot of the fixing device.
BTCity is maintained in position thanks to the fixing clip located on
the upper section (A).
To detach the BTCity, simply press the fixing clip and push the unit
upwards.
Using the BTCity without helmet
After have fixed your BTCity on its suitable tool and have inserted the
audio kit plug into the central socket, wear your earwarmer headset
as shown in the figure. Please, be sure to have placed the microphone
in the right way, with the white sign oriented towards your mouth.
Using the BTCity with a semi-rigid helmet
To place the BTCity into a semi-rigid helmet you should first of all
remove the little triangular pads, used to cover the ears in most of
helmets on sale, and then put your helmet directly on the earwarmer
headset audio system.
Be sure the BTCity unit is placed between the two“V”shapes strap.
If your helmet is not equipped with the two removable pads, you
could anyway mount your BTCity system by using the supplied Velcro-
band. Be sure to fix theVelcro-band as shown in the figure.
A

UK
13
Now, fix the BTCity on the Velcro-band. Wear your headset, insert the
connection cable of the headset into the BTCity device and wear the
helmet.
Use at your own risk
The use of the headphone-headset will impair your ability to hear
other sounds and others around you.
Listening to music or speaking on a telephone may prevent you from
hearing others around you and distract you from riding safely. The use
of such headphone-headset while riding or skiing may endanger you
and others, and its use, in some areas, could not be allowed.
Using this headset at a high volume may result in permanent hearing
loss.
If you experience ringing in your ear or any other hearing related pain,
reduce the volume or discontinue using this device. With continued
use at high volume, your ears may become accustomed to the sound
level, which may result in permanent damage to your hearing.
Please use this device at a safe volume level.
Warranty
Midland will repair or replace, at its option without charge, any
BT CITY/EVA device which fails due to a defect in material or wor-
kmanship within TWOYears following the initial consumer purchase.
In the event of a product defect, please return it to the authorized
customer service or to the Manufacturer himself.
To make use of this warranty, it is necessary to return to the authorized
service
centre:
›The affected product (or accessory)
›The original proof of purchase, which clearly indicates the name
and address of the seller and the date and place of purchase.
This warranty does not apply to accidents of any kind, exposure to
pressure, extreme temperatures (outside of -10°C to 55°C), submer-
sion water damage, battery leak or abuse.
This warranty does not include the cost of labor for removal or re-
installation of the product.
European CE Notice Certication and Safety Appro-
vals Information
This product is CE marked according to the RTTE Directive (99/5/EC)
and is free use in all the EU countries.
Users are not permitted to make any changes or modifications to the
device.
Modifications which are not expressly approved by the producer inva-
lidate the warranty card.
For further information, please go to our website
www.cte.it
Other manuals for BT City
4
Table of contents