Midong E&T URIVE i-Shotgun User manual

URIVE i-Shotgun
User Manual

1. Product Information
2. Precautions before using the product
3. Precautions when using the product
4. Features
5. Names of individual components and their functions
6. Functions and buttons
7. Updating
8. Components
9. Socket pin arrangement
10. Precautions for installation
11. Installation of the main body
12. Installation of the external camera
13. Installation of the viewer
14. Execution and deletion of the viewer
15. Main screen of the viewer
16. Buttons of the viewer
17. Full screen view
18. Digital zooming
19. Playback of the recorded data
20. Driving record tracking
21. Viewing of the information of the recorded file
22. Black box environment settin7g
23. SD card formatting
24. Checking and recovery of the SD card
25. Preparations for using the i-Shotgun Wi-Fi function
26. i-Shotgun app downloading and installation
27. Stored data
28. Storage ratio of the memory card based on space
29. Product standards
30. Warranty
31. Consumer compensation regulations
32. Before requesting A/S services
33. Problem analysis before A/S services
Contents
2

0. Before using Urive i-Shotgun
Urive i-Shotgun is a trademark of Midong E&T.
▶All the manual’s contents are protected according to copyright law.
▶The products and services described in this manual are the trademarks of the relevant right holder.
▶All the program rights used in the product belong to Midong E&T and are protected according to copyright law. Any
act of illegal copying, modification, production, and distribution of the product without a prior written consent from
the company will be subjected to criminal punishment, such as up to five-year imprisonment or KRW 50 million-
penalty according to the software protection law.
▶The manual is based on current conditions and may have technical or editorial errors and omissions.
▶Some changes can be made in the product to improve the URIVE i-Shotgun’s performance even without notifying
the customers in advance.
▶The images used in the manual may look different from the actual screens depending on the printing conditions.
▶It is recommended that users should read the manual carefully before using the product to apply it properly and
safely.
3
The user manual can be changed without a prior notice to users for the purpose of improving the
performance of the functions of the product.

1. Product Information
The product is designed to store video and audio information coming from the front and rear cameras. It is a product
made to assist people in driving safely by recording the front and rear videos as well as by recording the audio, when
an accident or a shock occurs. This will provide relevant circumstantial reference data.
▶Install and use the product properly according to the user manual.
▶The company will not be held responsible for failures or accidents that might occur because of the improper use,
installation, or modification of the product.
▶Users need to understand that the product’s specific PC viewer program can run on a PC in which Window
XP/Vista/Windows 7 is installed. For the program to operate smoothly, it is recommended to use a PC with at
least CPU-Intel Core2 Quad Q6600 @ 2.40GHz, RAM –2GB.
▶The product and the user manual can be changed without prior notification for the purpose of improving them.
▶The company holds the rights to all of the product’s software and hardware. Any act of illegal copying, processing, or
distribution of these products will be subjected to pay compensation for loss in civil procedure and may be subjected
to criminal punishment according to the intellectual property protection law.
▶For safety reasons, avoid manipulating the black box while driving.
This product is designed to assist people in driving safely.
Users are required to use the product properly because they will be responsible for all the accidents that may occur.
This product is for assisting people in driving safely.
Users are required to use the product properly considering that they will be responsible for al the accidents if they should
occur.
4

2. Precautions before using the product
Scope of warranty and responsibilities
-This product is for assisting people in driving safely.The company will not be responsible for the loss that could occur due to
failures, data loss, or while using the product itself.
-This product is an ancillary device designed for recording and storing external videos.Some functions may not be supported
depending on the driving conditions and the conditions of avehicle itself.When it comes to the level of support for performance that
is to be provided through the updating of firmware for improving quality and securing stability, it may vary depending on types of
products.Depending on situations, recording may not take place.Considering that, users need to use the product only for getting
information for checking driving-related videos.Recording may not take place also depending on the conditions of the SD card.
-This product is designed for recording the video related to an accident involving auser’s vehicle.However, it is not guaranteed that
awhole length of avideo related to an accident is to be recorded.In case of an accident in which aminor shock occurs, the
detection sensor will not be activated, and, consequently, the video related to the event may not be recorded.
Precautions for using the memory card
-Check the data once aweek at least for confirming that the product works normally.
-Format the micro SD memory card twice amonth at least for using the product stably.
-Recommended to use amicro SD card that is exclusively designed for the product.
Generally, the memory card has a lifetime during which it can be used (6 months are guaranteed). If it has been used for a long period of
time, it would be impossible to store new data. In that case, users need to buy a new memory card for using the product. It should be
understood in advance that the company will not be held responsible, at all, for data loss due to long-time use.
Removing the memory card or turning its power off while the recording is in progress may cause stored data at the last stage to be deleted.
The company will not be held responsible for it at all. It is recommended to copy and store important data into other recording units. 5

Safety precautions must be followed to prevent possible accidents and risks by using the product in a safe and proper manner. The company will not take any
responsibilities for the problems that could occur when instructions in using the product is violated.
3. Precautions when using the product
Warning: Serious injuries or death could be caused if violating the instructions.
Do not place the product in heating equipment (such as
heaters and microwave ovens) for heating it up when it
gets wet.
Otherwise, explosion, transformation, or failure could be caused.
In that case, the warranty service will not be provided .
Do not disassemble or apply shock on it arbitrarily.
The warranty service will not be provided if the user has caused the product
to be damaged by disassembling it or applying shock onto it.
Do not use chemical detergents (such as benzene, thinner,
or alcohol) for cleaning the product.
Otherwise, fires could be caused.
Precaution. Minor injuries or insignificant damage to the product could be caused if violating the instructions
Do not use the product for a long period of time while connected to the
electrical power of the vehicle directly.
Otherwise, the battery could be discharged.
Keep the windshield clean in front of the front camera lens always.
If the video that is improperly recorded due to impurities is fed, the
recording of the video while driving will not take place normally.
Users should pay attention to it.
Apply the dual-side tape firmly when installing the product.
Its position can be changed when used for a long period of time or
due to the vibration from the vehicle, possibly causing the
performance to be degraded.
Be careful about a reflective device, such as a navigation device or a
hi-pass terminal.
The screen will be reflected on the windshield, causing the input of
video to be interfered with. In that case, the quality of video may be
degraded..
Back up the stored file periodically.
When the memory usage exceeds a certain level, files will be deleted
starting with the oldest ones while new ones are saved. Considering that, it
is required to back up the stored files periodically to prevent necessary
ones from being removed.
Refrain from installing or manipulating the product while driving.
Operating the system while driving could cause accidents. When needed to
operate, it is required to park the vehicle at a safe place first before
manipulating it.
Recording may not take place normally when using a non-certified micro
SD card.
The memory card must be inserted or removed while the power cable is
disconnected.
Take precautions when installing the external camera.
When installing it on the rear window, the quality of video will vary
depending on the density of the tinted film.
Keep the memory card separately when a car accident occurs or when the
card is checked for any damage .
When the black box is used continuously and the memory usage level
exceeds a certain level, files will be deleted starting with the oldest ones in
individual folders while new ones are stored, which could cause necessary
files to be deleted.
6

7
4. Features
High-quality video recording with clear images and an optimal viewing angle
In order to clearly record the videos including those taken from the accident site or taken while the vehicle is parked,
the product provides not only clear resolution (Front: 1920x1080 / Rear: 1280x720) both for day and night but also an
optimal viewing angle (Front: 120 degrees / Rear: 110 degrees).
▶Wi-Fi
Through a specific app installed on a smartphone, it is possible to check real-time and recorded videos and to remotely
set functions and an emergency alarm. It is also possible to set a function that will send text messages and audio
information when an emergency situation occurs, such as the turning over of a vehicle.
(however, the distance for sending and receiving signals may vary depending on the state of the environment and
communication)
▶Continuous recording
The product supports a continuous recording function that will record videos taken continuously while driving.
▶Event (shock) recording
When an external shock occurs in the continuous recording mode, it will be detected by a three-axis acceleration
sensor, allowing the video that runs 1–2 minutes, including the part taken for 30 seconds starting from 10 seconds
before the incident to the 20 seconds after it, to be stored
▶Manual (forced) recording
When the “R” (REC) button is pushed in the continuous mode, it will be recognized to be the same as the case of an
event (a shock), allowing the video that runs 1–2 minutes, including the part taken for 30 seconds starting from the 10
seconds before the incident to the 20 seconds after it, to be stored.
▶Recording while parked, which is like the function of a CCTV to protect a user’s car
The product supports a recording function while parked, making it possible to record the motion videos detected or the
damage done to a car that may often take place because of a shock

8
4. Features
▶Memory auto management
The product supports a memory auto management, which will delete files starting from the oldest ones stored in individual
folders in order to keep recording the recent driving videos even when the memory card is out of storage space.
▶Backup recording: even when the power is cut off, the last file will be stored because of the internal backup function.
▶Formatting
The product supports a direct formatting function, which will allow users to format the memory card directly from the product
without connecting it to a PC.
▶Digital zooming
While full HD and HD videos are played back through the specific PC viewer, they can be enlarged using the digital zooming
function to look at the situation closer.
▶Checking the recorded data through the specific PC viewer
The videos, stored by the black box after taken through two channels, the front and the rear ones, can be checked and used
to analyze, for example, the level of shock and the location at the time when an accident occurs. When it comes to the
location analysis function, it can be supported only when the GPS module, an optional item, is installed.
▶Checking the front and rear videos in real time
When the system is installed and operated, the navigation screen will help to check the front and the rear videos in real time
using the video out function (however, the pin arrangement between the AV-IN or CAM socket of the navigation unit and the
video cable should be matched).
▶A two-channel black box that can monitor the front and the rear sides simultaneously
The product is a two-channel black box that records the videos from the front camera through the product’s main body while
recording the videos from the rear side through the external camera installed inside.

5. Names of individual components and their functions
10
external camera
socket
video output
socket
GPS socket
Power cable
socket
LED for the mode of monitoring
while parked (Blue) )
SD card
insertion part
Manual-recording
button
Power, storage state, mute,
and GPS LED (red/green)
Full HD camera
Audio recording on/off
front/rear camera, Wi-Fi
on/off, and formatting
button
Stand
Embedded
microphone
Power on/off

6. Functions and buttons (1)
Buttons Operation State LED Indication Buzzer
-Turning it on System preparation
The blue and red LEDs are turned on after w
aiting for about 20 seconds during the bootin
g process. They will be turned off when the b
ooting process ends.
Long beep–
-Turning it off The file that is being recorded ends safely afte
r the power is turned off.
The blue and red LEDs will stay turned on u
ntil they are turned off at the time of ending. -
-Entering the GPS data GPS operation The green LED will blink. -
REC button
(“R” button) Pushing it once shortly
An event will be generated manually and the r
elevant video, taken from 10 seconds before t
he incident to 20 seconds after it, will be store
d in the event folder.
The red LED will blink fast during the saving
process (the green LED will blink when the G
PS module is connected).
Short beep, beep when the
saving process starts. Short
beep (once) after the saving
process ends
MODE button
(“M“ button)
Pushing it long (longer than 10 se
conds)
Formatting the micro SD card (only possible in
the continuous mode).
The green and blue LEDs will blink.After the
formatting process ends, the system will rest
art.
Formatting starts: long beep
thrice
Formatting ends: long beep
thrice
Pushing it long (longer than 5 sec
onds) in the parking mode and rel
easing it
Turning on Wi-Fi
The green LED for the mini USB Wi-Fi dongl
e will blink.
Short beep, beep
Turning off Wi-Fi
The green LED for the mini USB Wi-Fi dongl
e will be turned off.
Short beep, beep
Pushing it for 3–5 seconds and re
leasing it.
Turning on the audio recording
The red LED will blink slowly (every second).
Short beep, beep when shift
ing
Turning off the audio recording The red LED will blink normally (every 3 seco
nds).
Pushing it thrice consecutively Shifting the front and rear cameras to the vide
o-out mode
No change in the state.Short beep, beep when shift
ing.
Updating
When successfully updating through the micro
SD card
The blue and red LEDs will blink alternately.
When the updating process ends, the syste
m will be rebooted for operation.
Short beep, beep when star
ting
Short beep, beep when end
ing
When failing to update through the micro SD c
ard
The blue and red LEDs will be turned off afte
r waiting while staying turned on. The system
will be rebooted for operation.
Short beep, beep, beep, be
ep when failing, which will b
e repeated thrice every two
seconds
11

6. Functions and buttons (2)
Buttons Operation State LED Indication Buzzer
Continuous recordi
ng The ACC power is turned on whil
e the battery power is on.
1-minute video files will be stored as MDxx in t
he * folder
The red LED will blink every second (the blu
e LED is turned off).
Long beep–when the savin
g process starts
Manual and event r
ecordings Pushing the REC button or when
shock is applied.
A video, taken from 10 seconds before the inc
ident to 20 seconds after it, will be stored as E
Dxx_ in the * folder.
The red LED will blink fast (the blue LED is t
urned off).
Short beep, beep when the
saving process starts. Short
beep (one) only when the p
rocess ends for the manual
recording operation
Recording of the m
otions monitored w
hile parked The ACC power is turned off whil
e the battery power is on.
A file, with the length of up to 30 seconds, will
be stored in the * folder. Motion while parked
PDxx_, Shock while parked. (impossible to ap
ply when using the cigar cable)
Monitoring: the blue LED will blink every sec
ond
Recording: the blue LED will blink fast
(the red LED is turned off)
Enters the parking mode: L
ong beep–
* folder –Blackbox/year/month/date/time
Precaution:
When GPS connection (reception) occurs, the green LED will blink during the operation instead of the red LED.
When the GPS disconnection occurs, the red LED will blink during the operation instead of the green LED.
11
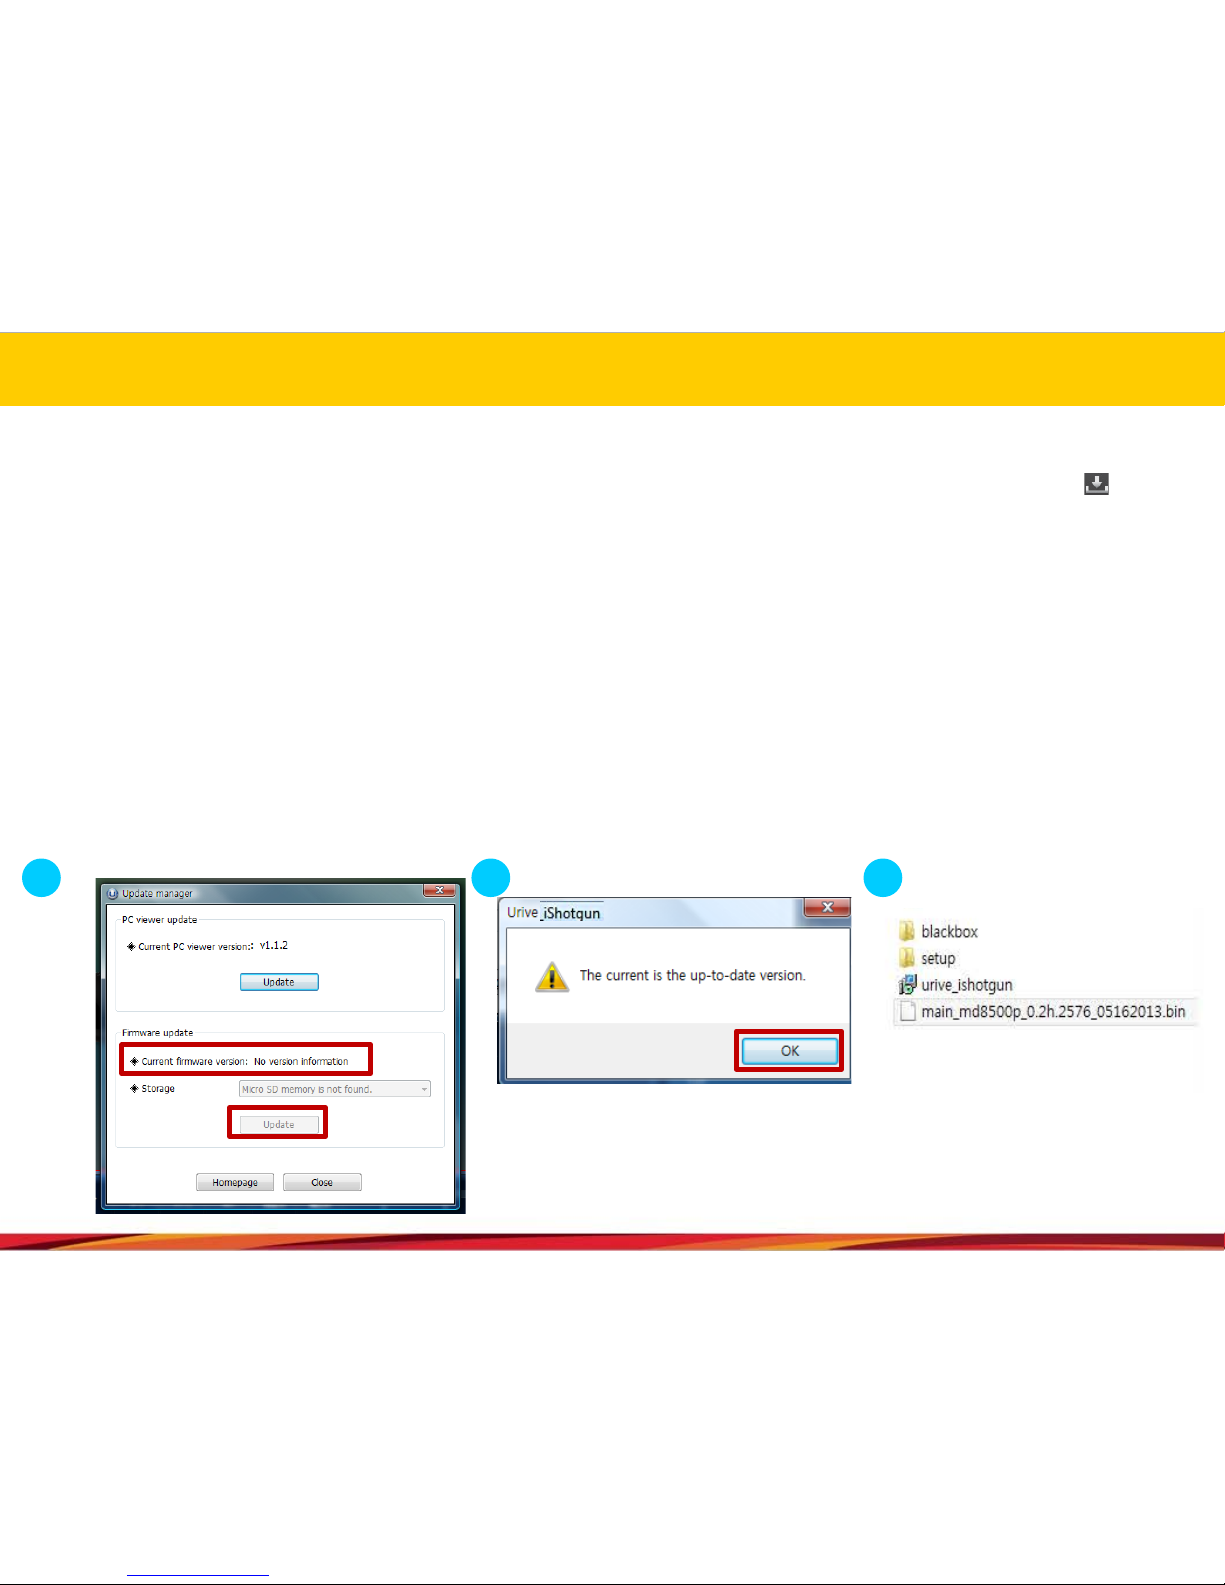
7. Updating (1)
[Automatic updating]
1. Through the specific viewer installed in a PC, the update file can be installed automatically in the memory card. After connecting
the micro SD card to the PC, it is required to push the button on the upper left side of the viewer’s main screen.
2. The current firmware version for the firmware updating can be checked through the Urive i-Shotgun update manager window.
3. It is required to check whether the firmware update file location is the drive to which the memory card is connected.
4. Pushing the “Update” button will allow the upgrade file (main_md8500p_x.xx.xxxx_xxxxxx.bin) to be copied automatically to the
memory card.
[Precaution] If the Windows security warning message is displayed after the update button is pushed, the “Unblock” button must be
pushed. If the “Continuous Block” is pushed, it will be impossible to perform updating afterward because of security issues
related to Windows. Users need to pay attention to this.
1 2 3
12

8. Updating (2)
[Automatic updating]
5. After the power for the black box is turned off, the micro SD card needs to be inserted into the main body of the black box.
6. Supply power to the black box.
7. Wait for about 10–20 seconds.
8. As the updating starts, the red and blue LEDs will blink and a short beeping sound will be generated.
9. When the updating process ends, the red and blue LEDs will be turned off and at the same time, a short beep buzzer sound will
be generated. After a short while, the black box will restart.
[Method for remote updating through Wi-Fi]
1. Launch the Urive app from the smartphone.
2. Touch the remote search menu on the home menu.
3. Touch the remote firmware update menu after adding and check the terminal.
4. Check whether it is possible to carry out updating after checking the current firmware version and the newest firmware version.
5. Then, touch the firmware update button when the result says that it is possible to carry out updating.
6. As the updating starts, the red and blue LEDs will blink and a short beeping sound will be generated.
7. When the updating process ends, the red and blue LEDs will be turned off and at the same time, a short beep buzzer sound will
be generated. After a short while, the black box will restart.
Precaution: take precautions to make sure that the power is not turned off while firmware updating is progressed. After the
firmware updating, the environment setting values previously set will be maintained. When it comes to the remote firmware
updating, it can take place only when the mini USB Wi-Fi dongle is turned on. 13
7. Updating (3)
[Manual updating]
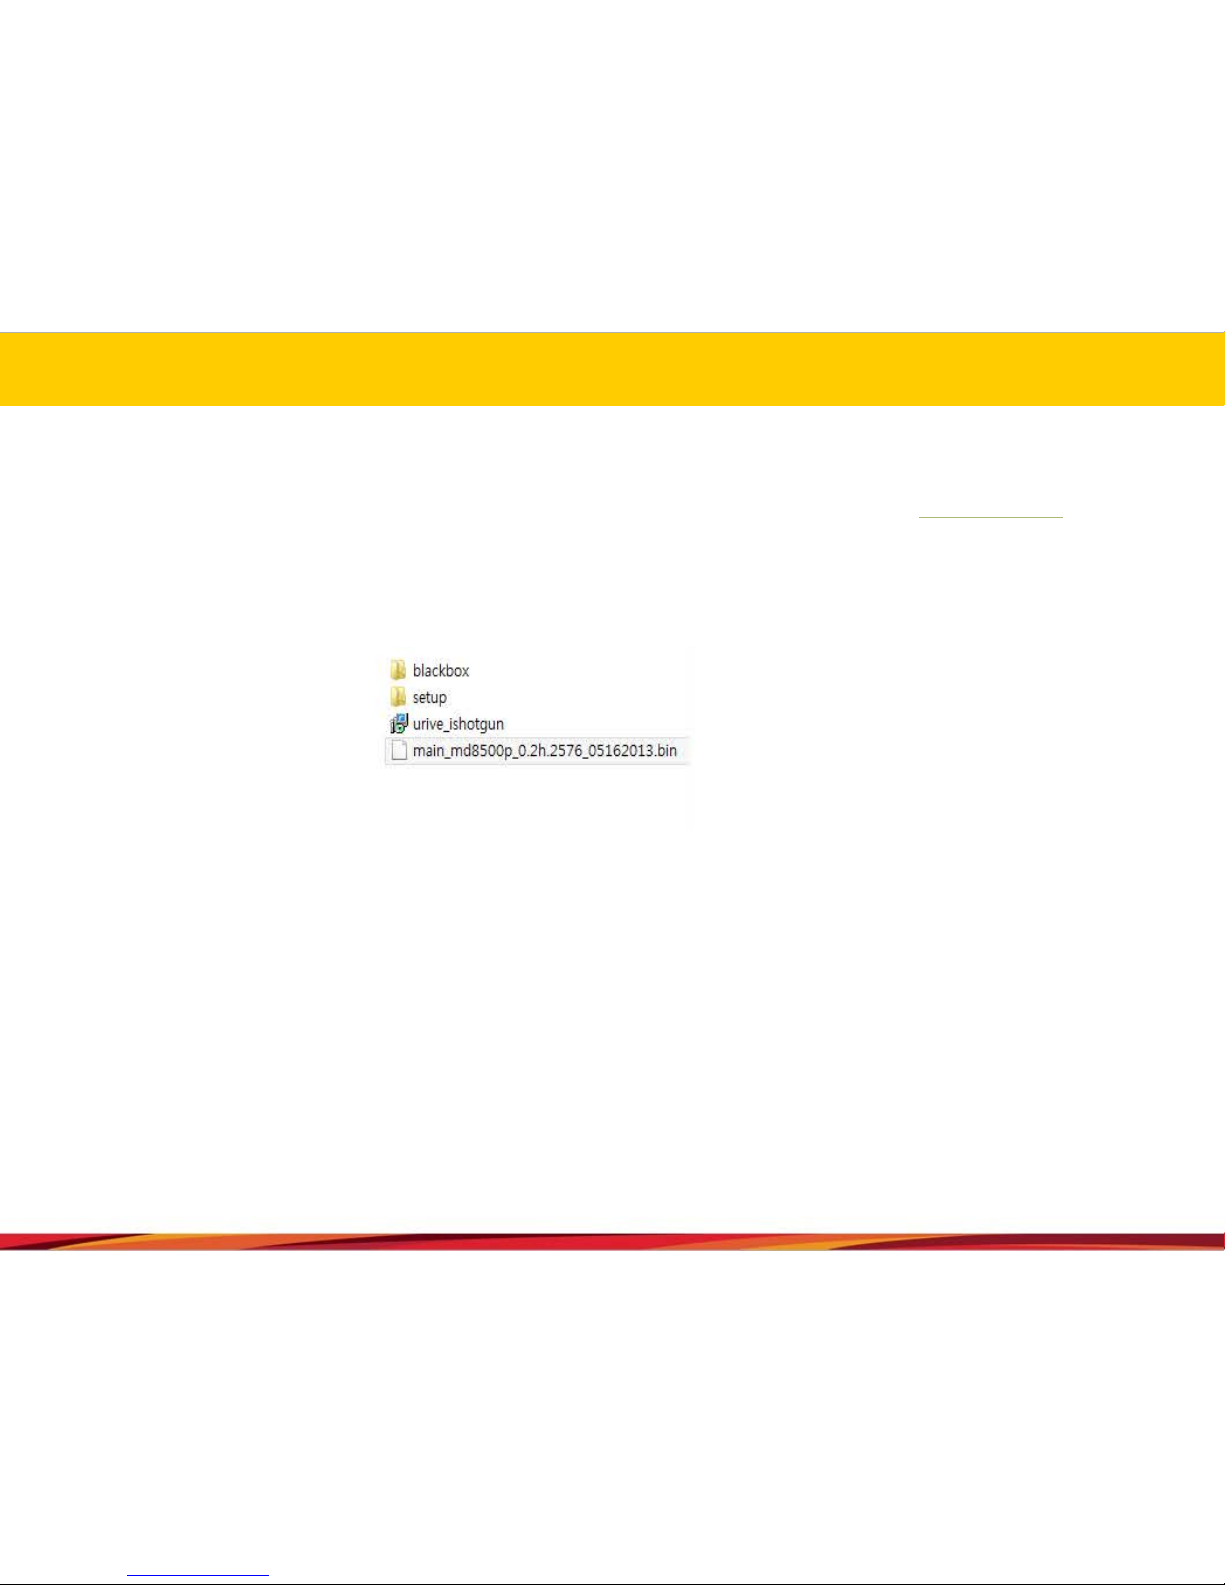
1. The firmware update file needs to be copied into the micro SD card (URIVE download center at www.urive.co.kr).
The micro SD card must be formatted first through the specific PC viewer or through the main body of the black box,
before copying the update file (main_md8500p_x.xx.xxxx_xxxxxx.bin) into the formatted memory card.
2. It is required to insert the micro SD card into the main body of the black box after powering off the black box.
3. Supply power to the black box.
4. Wait for about 10–20 seconds.
5. As the updating starts, the red and blue LEDs will blink and a short beeping sound will be generated.
6. When the updating process ends, the red and blue LEDs will be turned off and at the same time, a short beep buzzer
sound will be generated. After a short while, the black box will restart.
Precaution: take precautions to make sure that the power is not turned off while the firmware updating is in progress.
After the firmware updating, the values of the environment setting previously set will be maintained. 14

After purchasing the product, it is required to check whether all the components are included in the package. If a
component is damaged or has a problem, it is required to contact the selling shop immediately for queries.
.
8. Components
The components may change in their specifications arbitrarily depending on the situation on the supply of parts
(the images shown above are for the users’ information so they may look different from actual components).
Mini USB
Wi-Fi
dongle
Main body
stand Continuous
power cable Dual side tape Hexagon
wrench
Micro SD card for
URIVE (16 GB) SD card
reader
External
camera Manual
Video cable
(Standard 3-pole
cable)
Basic
Specification
Option
(To be sold separately)
GPS module Cigar power cable 3-pole-4-pole
gender
conversion
adapter
Basic
Specification
15

10. Socket pin arrangement
Sockets Images of sockets Pin arrangement
Power socket
(DC socket)
①GND ②ACC ③BAT(B+)
GPS socket
(2.5 pie) ①VCC(3.6~6V DC) ②Rx
③GND ④Tx(GPS Signal Output)
Video socket (3.5 pie)
①Video Out ②No use
③GND
CAM socket (Micro USB 5P)
①VCC(5.0V DC) ②Video signal –
③Video Signal + ④No use ⑤GND
1
2
3
12
34
12
3
1
5
.
.
.
16

11. Precautions for installation
▶It is recommended to install the device in an area with a flat surface.The ignition must be turned off while installing.
▶As the product needs to be built inside a car, it is required to supply the power and check first whether the front and rear
videos are stored normally before completing the process of building and installing it.
▶When it is required to install the external camera, the camera must be connected while the power cable is not
connected to the black box.
▶All the components necessary for the installation are packaged inside the product box. It is required to know the
installation method well and follow the procedures set while installing the system.
▶Check first whether the micro SD card is inserted correctly before supplying the power.
▶Take precautions not to install the product on a location that will disturb the user’s view.
▶It will look cleaner and it will also its enhance safety features if the cables are hidden as much as possible.
▶The windshield on which the product is installed needs to be kept clean.
▶Installation should be performed in a safe and bright place.
▶When a rear camera is attached onto the rear window, it would be impossible to record videos with the desired quality
because the window is tinted or lined with heat wires. Users need to pay attention to this when installing the black box.
▶Once the system is installed, users need to remove the protective vinyl covers on the front and rear camera lens before
using the system.
17

11. Installation (main body)
※It will take about 1minute to 1minute and 20 seconds for the
system to be booted up after the SD card is inserted and the
power is turned on.
Caution:It is recommended that the installation of the black box and the
wiring of the continuous power cable should be carried out at ashop that
specializes in installing black boxes.
1
2
Select the installation location and
clean the windshield as much as
possible.
3
Remove the outer layer of the
dual-side tape of the stand.
Attach it on adesired location.
4Connect the external camera,
the external GPS module
(optional) and the video cable
when necessary.
5
6Connect the power cable socket to
the DC port and turn on the power
switch.(Remove the lens protective
film.)
7Check whether the system works
normally by checking the LEDs and
the buzzer sound.It would be more
convenient to install the product
while looking at the screen of the
navigation device.
The cables for the continuous power
are shown below.
-Black wire:GND (Ground), (ex.) Car
body –Yellow wire:ACC, (ex.) Cigar
jack fuse
-Red wire: BAT (B+), (ex.) Emergency
light
18

11. Installation (external camera)
1
2
Select the installation location and
clean the rear window as much as
possible.
3
Remove the outer layer of the
dual-side tape of the stand.
Attach it on adesired location.
4
5
6
Connect the socket of the
external camera at the port of
the black box.
※Before building in the system completely, users must check whether
the front and rear videos are stored normally.
Caution:After the rear camera is installed, the video from it must be
checked before building it completely
Check whether the system works
normally by checking the LEDs and
the buzzer sound.It would be more
convenient to install the product
while looking at the screen of the
navigation device.
Connect the power cable socket to
the DC port, and turn on the power
switch.(Remove the lens protective
film.)
19

14. Installation of the viewer
1. Execute the setup file for the specific viewer (Urive i-Shotgun.msi) for the black box, which is stored in the micro SD card
(or the one that is downloaded from the URIVE home page) and then follow the procedures as shown below on installing
the viewer.
1
2
3
4
20
Table of contents


