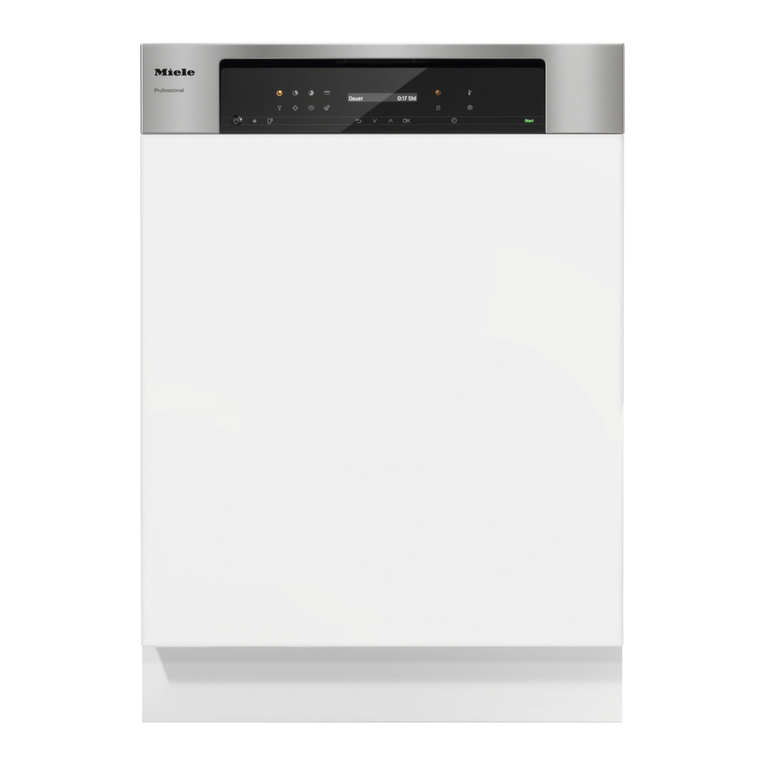
Miele PFD 401 User manual

Operating instructions
Commercial dishwasher
PFD401Marine
To avoid the risk of accidents or damage
to the appliance, it is essential to read
these instructions before it is installed
and used for the first time.
en-GB
M.-Nr. 12 265 340

Contents
2
Notes about these instructions...................................................................................... 6
Symbols used on the commercial dishwasher.................................................................. 7
Definition of terms ............................................................................................................. 7
Correct use ...................................................................................................................... 8
Guide to the appliance.................................................................................................... 9
Machine overview.............................................................................................................. 9
Control panel..................................................................................................................... 10
LEDs in buttons................................................................................................................. 11
Warning and Safety instructions.................................................................................... 12
Warning signs and symbols attached to the dishwasher.................................................. 15
Disposal of your dishwasher ............................................................................................ 15
Caring for the environment ............................................................................................ 16
User profiles..................................................................................................................... 17
User groups....................................................................................................................... 17
User tips ........................................................................................................................... 18
Switching on...................................................................................................................... 18
Switching off...................................................................................................................... 19
Standby/Off ....................................................................................................................... 19
Display screens ................................................................................................................. 19
Touch display .................................................................................................................... 19
Status window................................................................................................................... 20
Fault messages............................................................................................................ 20
Commissioning................................................................................................................ 21
Installation and connection ............................................................................................... 21
Procedure .......................................................................................................................... 21
Switching on.................................................................................................................. 21
Selecting a language ..................................................................................................... 21
WiFi setup...................................................................................................................... 21
Setting the temperature units ........................................................................................ 21
Setting the date............................................................................................................. 22
Setting the time of day .................................................................................................. 22
Setting the water hardness ........................................................................................... 22
Selecting water connections ......................................................................................... 23
Commissioning completed ........................................................................................... 23
Opening and closing the door........................................................................................ 24
Comfort door lock ............................................................................................................. 24
Open the door ............................................................................................................... 24
Closing the door............................................................................................................ 24
Opening the door using the emergency release ........................................................... 25
Filling the container for dishwasher salt....................................................................... 26
Water hardness ................................................................................................................. 26
Setting the water hardness ............................................................................................... 26
Salt refill indicator.............................................................................................................. 28
Reactivation notification................................................................................................ 28
Machine blocked if salt is not available............................................................................. 28

Contents
3
Loading the dishwasher.................................................................................................. 30
Loading the dishwasher .................................................................................................... 30
We recommend ................................................................................................................. 31
Upper basket..................................................................................................................... 32
Adjusting the upper basket ............................................................................................... 33
Lower basket..................................................................................................................... 34
Loading plastic trays ......................................................................................................... 35
Cleaning agent and rinsing agent.................................................................................. 36
Dispensing systems .......................................................................................................... 36
Dispensing module........................................................................................................ 36
Cleaning agent .................................................................................................................. 37
Replacing the canister................................................................................................... 37
Refill indicator................................................................................................................ 38
Dispensing liquid cleaning agent .................................................................................. 38
Filling the door dispenser .............................................................................................. 38
Tips for the Super Shortprogramme (depending on the model) .................................. 39
Rinsing agent..................................................................................................................... 40
Replacing the canister................................................................................................... 40
Refill indicator................................................................................................................ 41
Filling the door dispenser .............................................................................................. 41
Refill indicator................................................................................................................ 42
Dispensing rinsing agent ............................................................................................... 42
Operation.......................................................................................................................... 43
Switching on...................................................................................................................... 43
Selecting a programme ..................................................................................................... 43
Starting a programme ....................................................................................................... 44
Starting the programme using a timer........................................................................... 44
Programme sequence display........................................................................................... 45
End of a programme.......................................................................................................... 46
Switching off...................................................................................................................... 46
Unloading the crockery ..................................................................................................... 46
Interrupting a programme.................................................................................................. 46
Cancelling a programme ................................................................................................... 47
Machine functions ..................................................................................................... 48
Menu structure .................................................................................................................. 48
Dispensing paths............................................................................................................... 48
Filling dispensing paths................................................................................................. 48
Rinsing dispensing paths .............................................................................................. 49
Settings ....................................................................................................................... 51
Menu structure .................................................................................................................. 51
Time of day........................................................................................................................ 52
Date ................................................................................................................................... 53
Display brightness............................................................................................................. 54
Volume............................................................................................................................... 54
Button reaction.................................................................................................................. 55
Welcome tone ................................................................................................................... 55
Temperature unit................................................................................................................ 56

Contents
4
Further settings ......................................................................................................... 57
Menu structure .................................................................................................................. 57
Filter programme lock ....................................................................................................... 59
Standby/Off ....................................................................................................................... 59
Log book ........................................................................................................................... 60
Release programme .......................................................................................................... 61
Set favourites .................................................................................................................... 61
Start screen layout ........................................................................................................ 61
Setting favourites .......................................................................................................... 62
Programme parameters..................................................................................................... 62
Selecting a programme ................................................................................................. 62
Main wash temperature................................................................................................. 63
Main wash holding time ................................................................................................ 63
Final rinse temperature.................................................................................................. 63
Final rinse holding time ................................................................................................. 63
Increased water level..................................................................................................... 64
Interim rinse................................................................................................................... 64
Resetting parameters .................................................................................................... 64
Dispensing systems .......................................................................................................... 65
Selecting a dispensing system...................................................................................... 65
Door dispenser.............................................................................................................. 65
Activating dispensing from the canister ........................................................................ 66
Deactivating dispensing from the canister .................................................................... 67
Dispensing concentration.............................................................................................. 67
Filling dispensing paths................................................................................................. 67
Rinsing dispensing paths .............................................................................................. 67
Cycles until empty......................................................................................................... 68
Water hardness ................................................................................................................. 68
Reactivation notification.................................................................................................... 68
Memory ............................................................................................................................. 69
PIN code............................................................................................................................ 69
Entering the PIN code ................................................................................................... 69
Blocking further settings or making them available ...................................................... 70
Changing a PIN code .................................................................................................... 70
Networking/WiFi ................................................................................................................ 71
WiFi setup...................................................................................................................... 71
Connection via WPS ..................................................................................................... 71
Soft AP .......................................................................................................................... 72
Connecting via Soft-AP................................................................................................. 72
RemoteUpdate .................................................................................................................. 73
Showroom programme...................................................................................................... 73
Software version................................................................................................................ 73
Factory defaults................................................................................................................. 74
Legal information............................................................................................................... 74
Cleaning and care ........................................................................................................... 75
Periodic checks ................................................................................................................. 75
Cleaning the control panel ................................................................................................ 75
Cleaning the machine front ............................................................................................... 76
Cleaning the wash cabinet ................................................................................................ 76
Cleaning the door and the door seal................................................................................. 76
Cleaning filters in the wash cabinet................................................................................... 77

Contents
5
Problem solving guide .................................................................................................... 79
Technical problems ........................................................................................................... 79
Faults with water inlet or drainage..................................................................................... 80
Cancel with fault number .................................................................................................. 81
Door................................................................................................................................... 83
General problems with the dishwasher............................................................................. 84
Noises................................................................................................................................ 86
Unsatisfactory washing result ........................................................................................... 87
Maintenance .................................................................................................................... 89
Cleaning the water inlet filter............................................................................................. 89
Cleaning the drain pump and non-return valve................................................................. 90
Customer service ............................................................................................................ 91
Programme chart ............................................................................................................ 92
Installation........................................................................................................................ 94
Installation ......................................................................................................................... 94
Built-under installation ...................................................................................................... 94
Hose holder ....................................................................................................................... 94
Adjustable plinth panel (depending on the model)........................................................... 95
Levelling and securing the dishwasher ............................................................................. 96
Floor anchoring ................................................................................................................. 96
Moving the dishwasher ..................................................................................................... 97
Electrical connection ...................................................................................................... 98
Peak-load negotiation ....................................................................................................... 98
Plumbing .......................................................................................................................... 99
Connecting the water inlet ................................................................................................ 99
Connecting the drain hose ................................................................................................ 100
Technical data.................................................................................................................. 101

Notes about these instructions
6
Warnings
Warnings contain information which is important for safety.
They alert you to the potential danger of injury to people or damage
to property.
Read these warning notes carefully and observe the procedural
instructions and codes of practice they describe.
Notes
Notes provide information of particular importance that must be
observed.
Additional information and comments
Additional information and comments are contained in a box with a
simple frame.
Operating steps
Instructions on operation are identified by specially marked
procedural instructions. They explain the procedure step by step.
Operating steps are indicated by a black square bullet point.
Example:
Open the door.
Display
Information that is shown on the commercial dishwasher display
appears in a special font similar to the display text.
Example:
Select Settings and confirm your choice with the OKbutton.

Notes about these instructions
7
Symbols used on the commercial dishwasher
Symbol Key
For warnings, see
“Warnings and safety notes”
VDE symbol
EMC symbol of the VDE
Do not dispose of electrical machines in
household waste; they need to be disposed
of separately,
see “Disposal of your old machine”
CE marking of the EU
The corresponding declaration of
conformity is enclosed with the machine
and can be obtained from the
manufacturer.
Manufacturer
Definition of terms
Dishwashers The commercial dishwasher is referred to as a dishwasher in these
operating instructions.
Load items The term “load items” is used wherever the items to be processed are
not defined in any further detail.
Wash water The term “wash water” is used for the mixture of water and process
chemicals.
Process
chemicals
All media dispensed during a programme sequence are generally
referred to as process chemicals, e.g. cleaning agents.
Cycle Machine-based cleaning and reprocessing procedures are generally
referred to as cycles.

Correct use
8
This Miele commercial dishwasher with its short programme running times and powerful
cleaning performance is intended for commercial use. The commercial dishwasher can
also be used on ships with a hull of longer than 24metres, as well as on oil rigs.
The commercial dishwasher is subsequently referred to as a dishwasher in these
operating instructions. The washable items in commercial dishwashers, such as plates,
cups, glasses and cutlery, are generally referred to in these operating instructions as load
items when they are not defined in more detail.
This appliance is designed exclusively for use as a “dishwasher” for cleaning loads as
described in these instructions. Conversions, modifications and any other use are not
permitted.
This dishwasher is intended for stationary, indoor use only.
The special inserts in the baskets should only be used for their specific application.
This dishwasher may not be used to clean medical products or devices.
This dishwasher can only be used by people with reduced physical, sensory or mental
capabilities, or lack of experience or knowledge, if they are supervised whilst using it or
have been shown how to use it in a safe way and understand and recognise the
consequences of incorrect operation.
The commercial dishwasher should only be used in calmer waters (ports and harbours).
This commercial dishwasher can only be used on a ship if:
- The ship’s hull is longer than 24metres.
- The list of the vessel is not more than 2°.
- Any external vibration is no more than 150Hz at an amplitude of 0.35mm.
The safe operation and correct functioning of the commercial dishwasher can only be
guaranteed if the above conditions are met.
The door of the commercial dishwasher must not be opened during operation.
Inappropriate use can lead to water leakage.
This dishwasher must only be operated by appropriately trained personnel. They must
be instructed and trained regularly.
The commercial dishwasher may not be operated on an open deck.
Children should be supervised in the vicinity of the dishwasher. Never allow children to
play with the appliance. There is a danger that children might shut themselves in the
dishwasher.
Children must not use the dishwasher.

Guide to the appliance
9
Machine overview
aDoor lock
bUpper basket runners
cTop machine spray arm
dUpper basket water connection
eLower machine spray arm
fLower basket runners
gData plate
hRinsing agent container
iDoor lock latch
jSalt container
kContainer for powder cleaning agents
lFilter combination
mRear:
– Electrical and water connections
– Suction lance(s) for external containers
(depending on the model)
– Connections for external dispensing
modules (DOS modules)

Guide to the appliance
10
Control panel
abutton (On/Off)
For switching the dishwasher on and off
bService interface
Testing and transmission point for the
Miele Customer Service Department
cbutton (language selection)
For selecting the display language
dTouch display
For displaying and selecting control
elements
eStart/Stopbutton
For starting or cancelling a programme
fbutton (door release)
Open the door
gbutton (cancel or back)
For cancelling a process in the user
interface (not for cancelling programmes)

Guide to the appliance
11
LEDs in buttons
Light-emitting diodes are incorporated in the buttons. They indicate the status of the
dishwasher.
Button LED Display Status
Display
(Reaction to
On/
Offbutton)
ON The dishwasher is switched on.
OFF The dishwasher is switched off.
Start/Stop
button
Pulsing OFF The dishwasher is in standby mode.
ON A programme has been selected but not
yet started.
ON A message has appeared on the display.
Flashes red A fault has occurred (see the fault
message on the display and the “Problem
solving guide”).
ON A programme is running.
OFF A programme has finished.
button
(door button)
ON A programme has been selected but not
yet started.
A programme is running.
A programme is finished and the door is
closed.

Warning and Safety instructions
12
Correct installation
This dishwasher may only be installed and assembled on ships with a hull longer than
24metres by qualified persons who will ensure that the requirements for the safe
installation of this dishwasher are met.
When installing the dishwasher, it must be securely fixed to the floor.
Failure to do this could result in personal injury, damage to the dishwasher and damage to
other objects and installations.
This dishwasher must be securely bolted to the floor using the floor anchoring kit
included.
Do not install this dishwasher in an area where there is a risk of explosion or freezing
conditions.
To ensure stability a built-under dishwasher must only be installed beneath a continuous
worktop that is bolted to the adjacent cabinetry.
In order to reduce the risk of damage from condensation, the furniture in the area
around the dishwasher should ideally be designed for commercial use.
Furniture can be protected using the vapour protection set, which is available as an
optional accessory.
The vapour barrier film should be stuck under the worktop in the area around the
dishwasher door.
Technical safety
This dishwasher must only be commissioned, repaired and maintained by the Miele
Customer Service Department, a dealer or a suitably qualified service technician.
Unauthorised installation, maintenance and repairs can cause considerable danger for the
user.
Before using the dishwasher, check it for any externally visible damage. Do not use a
damaged dishwasher. This could be dangerous.
In the event of a damaged or leaking dishwasher, switch off at the power supply
immediately and call the Miele Customer Service Department, a Miele dealer or a suitably
qualified service technician.
Faulty components must only be replaced by genuine Miele original spare parts. Only
when these parts are fitted can Miele guarantee the correct functioning and safety of the
appliance.
The electrical safety of this dishwasher can only be guaranteed when correctly earthed.
If in any doubt, please have the electrical installation tested by a qualified electrician.
Please follow the advice on installation in these operating instructions and the
installation plan.
Before connecting the appliance, ensure that the connection data on the data plate
(voltage, frequency and fuse rating) match the mains electrical supply.
There must be no electrical sockets behind the dishwasher. Danger of overheating and
fire risk if the dishwasher were to be pushed up against a plug. See “Electrical connection”.

Warning and Safety instructions
13
Do not connect the dishwasher to the mains electricity supply via a multi-socket unit or
an extension lead. These do not guarantee the required safety of the appliance (e.g.
danger of overheating).
Never open the casing of the dishwasher. Any contact with live connections or
tampering with the electrical or mechanical components of the dishwasher will endanger
your safety and may lead to appliance malfunctions.
The dishwasher must not be used if the electrical connection cable is damaged. A
damaged connection cable may only be replaced by a suitable connection cable of the
same type. For safety reasons, such replacement may only be carried out by the Miele
Customer Service Department or a qualified service technician.
The dishwasher must be disconnected from the mains electricity supply before any
maintenance or repair work is carried out.
The plastic housing of the water connection contains electrical components. It must not
be dipped in water.
There are electrical wires in the water inlet hose. Do not shorten the water inlet hose,
even if it is too long.
Correct use
This dishwasher is designed for operation with water and detergents suitable for use in
commercial dishwashers only. Organic solvents and flammable liquid agents must not be
used in it.
This could cause an explosion, damage rubber or plastic components in the dishwasher
and cause liquids to leak out of it.
Only use detergents formulated for use in commercial dishwashers. Unsuitable
detergents could adversely affect components of the dishwasher or the load items.
Do not sit, stand or lean on the opened door. This would tip or damage the dishwasher.
After any plumbing work the water pipework to the dishwasher will need to be vented. If
this is not done, components can be damaged.
Please be aware that the dishwasher may be operating at high temperatures. When the
door is opened there is a danger of burning or scalding. Items, baskets and inserts must
be allowed to cool down before they are unloaded. Any water remaining in containers
could still be very hot. Empty them into the wash chamber before taking them out.
The water in the cabinet must not be used as drinking water.
Pre-treating items (for example with washing-up liquid and other cleaning agents) as
well as some types of soiling and some cleaning agents can cause a build-up of foam in
the wash cabinet. Foam can have an adverse effect on the cleaning result.
Foam escaping from the wash cabinet can cause damage to the dishwasher. If foam
escapes the programme must be cancelled immediately and the appliance must be
disconnected from the mains electrical supply.
There may be a risk of slipping if liquid is spilt on the floor depending on the type of
flooring and footwear being worn. Keep the floor dry where possible and take care to clean
up any liquid spills straight away. Take the necessary precautions when cleaning up
hazardous substances and hot liquids.

Warning and Safety instructions
14
When using cleaning agents and specialised products, it is essential that the
manufacturer’s instructions are followed. Cleaning agents must only be used for the
purpose they are designed for by the manufacturer to avoid any material damage or the
occurrence of strong chemical reactions (e.g. oxyhydrogen explosion).
To avoid material damage and corrosion, do not allow any acids or solutions containing
chloride to get into the wash cabinet or onto the casing. Similarly avoid any ferrous
materials with a corrosive effect.
Do not wash items soiled with ash, sand, wax, lubricating grease or paint in the
dishwasher. These materials will cause damage to the dishwasher.
Do not clean the dishwasher or near vicinity with a hose or a pressure washer.
Ensure that the outer casing of the machine does not come into contact with solutions
or steam containing acid to avoid any corrosion damage.
Be careful when sorting items with sharp pointed ends and positioning them in the
dishwasher that you do not hurt yourself or create a danger for others. Sharp knives, forks,
etc. should be placed in baskets with the pointed ends facing downwards.
The grille of dishwashers with active drying must not be blocked or sealed.
Accessories
Only use genuine Miele original spare parts and accessories with this dishwasher. Using
spare parts or accessories from other manufacturers will invalidate the guarantee and
Miele cannot accept liability.
Only use Miele baskets and inserts with this dishwasher. Using baskets and inserts
made by other manufacturers, or making modifications to Miele accessories can cause
unsatisfactory cleaning results, for which Miele cannot be held liable. Any resultant
damage would not be covered by the guarantee.

Warning and Safety instructions
15
Warning signs and symbols attached to the dishwasher
Warning:
Observe the operating instructions!
Warning:
Danger of electric shock!
Warning: Hot surfaces:
It can be very hot inside the wash cabinet when the door
is opened!
Risk of being cut:
Wear cut-resistant protective gloves when transporting
and setting up the machine!
Disposal of your dishwasher
For safety and environmental reasons, dispose of all chemical agents according to the
manufacturer's instructions and to safety regulations. Safety goggles and protective gloves
should be worn.
Render the door lock inoperable to prevent children from accidentally locking
themselves inside the machine. Ensure a safe removal and proper disposal of the
dishwasher (see “Caring for the environment”).

Caring for the environment
16
Disposing of the packaging
material
The packaging material is used for handling
and protects the appliance from transport
damage. The packaging material used is
selected from materials which are
environmentally friendly for disposal and
can generally be recycled.
Recycling the packaging material reduces
the use of raw materials. Use material-
specific collection points for valuable
materials and take advantage of return
options. Your Miele dealer will take the
packaging material away.
Disposing of your old appliance
Electrical and electronic appliances contain
many valuable materials. They also contain
certain materials, compounds and
components which were essential for their
correct functioning and safety. These could
be hazardous to human health and to the
environment if disposed of with household
waste or if handled incorrectly. Please do
not, therefore, dispose of your old appliance
with household waste.
Instead, please make use of officially
designated collection and disposal points to
dispose of and recycle electrical and
electronic appliances in your local
community, with your dealer or with Miele,
free of charge. By law, you are solely
responsible for deleting any personal data
from the old appliance prior to disposal. You
are legally obliged to remove any old
batteries which are not securely enclosed
by the appliance and to remove any lamps
without destroying them, where this is
possible. These must be taken to a suitable
collection point where they can be handed
in free of charge. Please ensure that your
old appliance poses no risk to children while
being stored for disposal.

User profiles
17
User groups
Users can be divided into two groups:
-Daily operators
Daily operators must be instructed on
operating and loading the dishwasher and
trained regularly to guarantee safe daily
use.
-Experienced operators
Experienced operators can additionally
block access to programmes and modify
programme parameters. These functions
are stored in a PIN code-protected area of
the control unit.

User tips
18
Operation
Operation is carried out via the touch
display as well as via the buttons on the
control panel.
The sensor controls on the control panel
and the buttons on the display react to
finger tip contact. Every touch on the sensor
controls is confirmed by a keypad tone. You
can adjust the volume of the keypad tone or
switch it off (see “Settings/Volume”).
The control panel with sensor controls
and the touch display can be scratched
by pointed or sharp objects, e.g. pens.
Only touch the control field with your
fingers.
Switching on
The dishwasher needs to be connected to
the electricity supply.
Press and hold the button until the
following appears on the display:
As soon as the dishwasher is ready for
operation, the display message changes to
show the programme selection screen, e.g.:
Short Intensive
Universal
55 °C
55 °C
65 °C
If the Memory function is activated, the most
recently started programme is displayed,
e.g.:
1:14 h
Universal
Off
55 °C

User tips
19
Switching off
Press the button.
The dishwasher remains in standby mode
for about one minute before it switches off
completely.
Standby/Off
If the dishwasher has not been used for
10minutes, it can be set to standby or
switched off automatically.
In standby mode, the dishwasher remains
switched on and the Start/Stop button
flashes. The dishwasher can be reactivated
by pressing the Start/Stop button, touching
the display or opening the door.
After automatic switch-off, the dishwasher
is switched off and can be switched on
again by pressing the button.
Display screens
Language
deutsch
ﺍﻟﻌﺮﺑﻴﺔ
dansk
čeština
All display screens shown in these operating
instructions are examples, which can be
different from the actual display screens.
Touch display
In operating mode, the display is divided
into 2–4 fields. The fields are buttons that
can be selected by tapping on them.
1
Further choices
1
2
Further choices
2
13
Further choices
Fields 1–3 are assigned pre-selected
programmes ex-works. However, you can
also assign favourite programmes to these
fields. (Further choices) opens the
system settings.

User tips
20
The displays for the system settings and for
system and fault messages are divided into
3columns.
Log book
Water
Liquid
cleaning agent
OK
Information
Approx. wash cycles
left until reactivation.
The left-hand column displays the title of
the currently selected menu with a
pictogram or, in the case of system or fault
messages, the pictograms for information
or faults.
The central column contains the menu
options that can be selected and the system
or fault messages.
If required for the specific context, control
elements are displayed in the right-hand
column, such as the and arrow buttons
or an OKbutton.
Status window
Target temperature:
Universal
Actual temperature:
65°C
57°C
A symbol appears on the display while a
programme is running. If you tap this
symbol, a status window opens for
10seconds, which you can use to display
various parameters and status messages
about the programme in progress.
System messages
Information
OK
Refill salt -appliance will
be disabled shortly.
The symbol denotes system messages.
These give information about current
processes and the status of the machine.
System messages are displayed at the end
of the programme. If there is more than one
system message, they are shown one after
the other and must be acknowledged
individually by pressing OK.
Fault messages
In the event of a fault, a warning symbol
appears on the display and the Start/Stop
button flashes red in rapid succession. If
buzzer tones are activated, a warning tone
will also sound.
Acknowledge the fault by tapping on the
warning symbol. Then follow the
instructions on the display and in the
“Problem solving guide”.
Table of contents
Other Miele Dishwasher manuals

Miele
Miele G 4225 SC User manual

Miele
Miele ADVANTA G 2170 User manual

Miele
Miele G5xx0 Series User manual

Miele
Miele Excella G2732SCi User manual

Miele
Miele G 8066 User manual

Miele
Miele HG06 User manual

Miele
Miele HG02 User manual

Miele
Miele G 6582 User manual

Miele
Miele G 6500 User manual

Miele
Miele G 5260 User manual

Miele
Miele G 2420 G 2430 User manual

Miele
Miele PG 8056 User manual

Miele
Miele G 6980 User manual

Miele
Miele G 2630 SCi User manual

Miele
Miele G 811 User manual

Miele
Miele G 5775 User manual

Miele
Miele PFD 102i User manual

Miele
Miele PG 8172 User manual

Miele
Miele Optima II G1262SCVi User manual

Miele
Miele G 5705 User manual