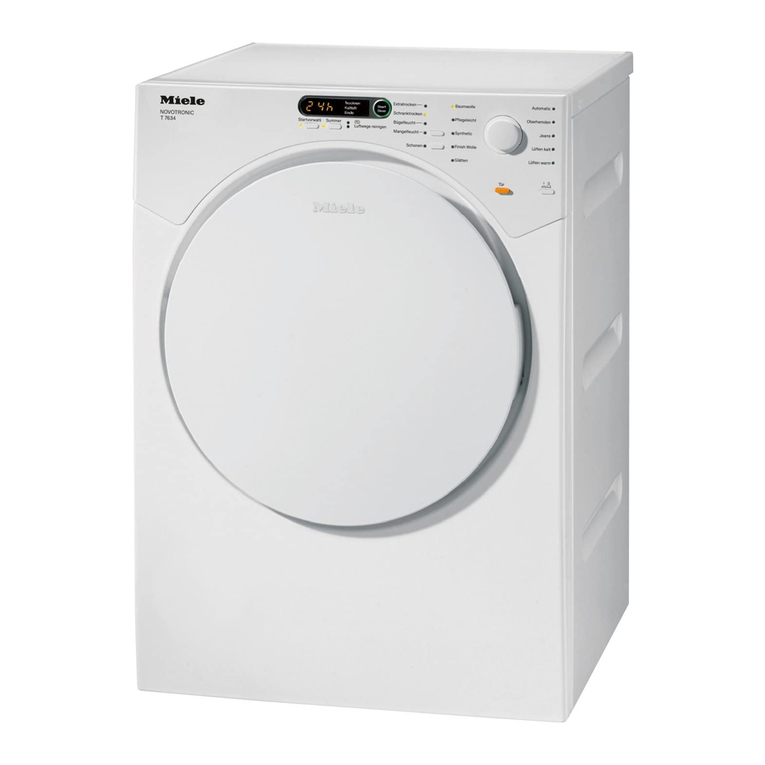
Miele PDR 507 EL User manual

Operating and installation instructions
Vented Dryer
It is essential to read these operating instructions before installing and
using the appliance. This prevents both personal injury and damage to
the appliance.
en-AU, NZ M.-Nr. 11 420 920

Contents
2
Caring for the environment ................................................................................. 6
Warning and Safety instructions ......................................................................... 7
Operating the tumble dryer ................................................................................ 18
Control panel......................................................................................................... 18
Symbols on the control panel ............................................................................... 19
Symbols in the display .......................................................................................... 20
Sensors and touch display with sensor controls .................................................. 21
Main menu............................................................................................................. 21
Examples on how to operate the appliance.......................................................... 22
Selection list ..................................................................................................... 22
Single selection ................................................................................................ 22
Setting numerical values .................................................................................. 22
Exiting a submenu............................................................................................ 22
Using for the first time ........................................................................................ 23
Switching on the tumble dryer .............................................................................. 23
Setting the display language ................................................................................. 23
Reference to external appliances.......................................................................... 24
Setting the display brightness............................................................................... 24
Confirming the time query..................................................................................... 24
Setting the time of day .......................................................................................... 24
Selecting programme packages ........................................................................... 25
Setting up a payment system................................................................................ 25
Completing the commissioning process............................................................... 26
1. Notes on correct laundry care ....................................................................... 27
Washing................................................................................................................. 27
Drying .................................................................................................................... 27
Garment care label symbols.................................................................................. 27
2. Loading the tumble dryer ............................................................................... 28
3. Selecting a programme .................................................................................. 29
Switching on the tumble dryer .............................................................................. 29
Selecting a programme ......................................................................................... 29
Selecting standard programmes with the programme selector ....................... 29
Selecting special programmes via the programme selector position ......... 29
4. Selecting programme settings....................................................................... 30
Main menu for a programme................................................................................. 30
Selecting the drying level ................................................................................. 30
Selecting the duration (timed drying programmes) ......................................... 30

Contents
3
Selecting Extras..................................................................................................... 31
Low temperature .............................................................................................. 31
Anti-crease ....................................................................................................... 31
Selecting Delay start ............................................................................................. 32
5. Starting a programme..................................................................................... 33
Starting a programme ........................................................................................... 33
6. End of programme - unloading the drum...................................................... 34
At the end of the programme ................................................................................ 34
Removing the laundry ........................................................................................... 34
Observing care instructions .................................................................................. 34
Programme chart ................................................................................................ 35
Standard programmes .......................................................................................... 35
Special programmes ........................................................................................ 37
Programme packages ........................................................................................... 40
Changing the programme sequence................................................................. 43
Changing a programme after it has started .......................................................... 43
Cancelling a programme ....................................................................................... 43
Reselecting a cancelled programme................................................................ 43
Adding or removing laundry .................................................................................. 43
Cleaning and care ............................................................................................... 44
Cleaning interval.................................................................................................... 44
Cleaning the filters................................................................................................. 44
Removing the filter in the plinth........................................................................ 44
Dismantling the filter......................................................................................... 45
Cleaning the filter parts dry .............................................................................. 45
Cleaning the filter parts with water................................................................... 45
Cleaning the filter in the drum loading area ..................................................... 46
Assembling and refitting the filters ................................................................... 47
Cleaning the dryer ................................................................................................. 48
Problem solving guide ........................................................................................ 49
The display shows the following messages or faults ............................................ 49
Unsatisfactory drying result................................................................................... 52
The drying process takes a long time. .................................................................. 53
General problems with the tumble dryer ............................................................... 54
Service.................................................................................................................. 55
Contact in case of fault ......................................................................................... 55
Optional accessories............................................................................................. 55

Contents
4
Installation............................................................................................................ 56
Front view .............................................................................................................. 56
Rear view............................................................................................................... 57
Installation locations.............................................................................................. 58
Side view .......................................................................................................... 58
Steel plinth........................................................................................................ 58
View from above............................................................................................... 58
Washer-dryer stack .......................................................................................... 58
Transporting the dryer to its installation site ......................................................... 59
Installation ............................................................................................................. 60
Levelling the dryer ............................................................................................ 60
External control equipment .............................................................................. 60
Electrical connection ............................................................................................. 61
Installation of the ducting................................................................................... 62
General principles of exhaust air management..................................................... 62
General principles of the air supply....................................................................... 62
Calculating the total ducting length ...................................................................... 63
Exhaust air outlets on the back of the tumble dryer ............................................. 64
Sealing the air outlets....................................................................................... 64
Dimensions of the exhaust air outlets .............................................................. 64
Installing plug-in pipes .......................................................................................... 65
Example............................................................................................................ 65
Installing flexible hoses ......................................................................................... 66
Flat ducting....................................................................................................... 66
Examples.......................................................................................................... 67
Shared exhaust air duct ........................................................................................ 68
Technical data...................................................................................................... 70
Supervisor level ................................................................................................... 71
Opening the Supervisor level ................................................................................ 71
Access via code ............................................................................................... 71
Change code.................................................................................................... 71
Opening the Supervisor level ........................................................................... 71
Exiting the Supervisor level ................................................................................... 71
Language............................................................................................................... 72
Brightness ............................................................................................................. 72
Clock display......................................................................................................... 72
Finish tone volume ................................................................................................ 72
Keypad tone .......................................................................................................... 72
Welcome tone volume........................................................................................... 72
Fault alarm............................................................................................................. 73
Memory ................................................................................................................. 73

Contents
5
Anti-crease ............................................................................................................ 73
Further cooling ...................................................................................................... 73
Cooling down temperature.................................................................................... 73
Delay start ............................................................................................................. 74
Programme name.................................................................................................. 74
Drying level Cottons .............................................................................................. 74
Drying level Minimum iron..................................................................................... 74
Drying level Automatic plus................................................................................... 74
Drying level Machine iron ...................................................................................... 74
Clean the airways .................................................................................................. 75
Clean the filters ..................................................................................................... 75
Programme packages ........................................................................................... 75
Peak load signal .................................................................................................... 76
Peak load prevention............................................................................................. 76
External exhaust flap ............................................................................................. 76
Additional fan ........................................................................................................ 77
Pressure sensor..................................................................................................... 77
Payment system .................................................................................................... 77
Settings for the payment system ..................................................................... 77
Time / Impulse.................................................................................................. 78
Feedback signal to pay system........................................................................ 78
Payment system lock ....................................................................................... 78
Clear paid signal............................................................................................... 78
Debounce time ................................................................................................. 79
Payment system overriding time ...................................................................... 79
Duration Cool air .............................................................................................. 79
Duration Warm air............................................................................................. 79
FOC programmes............................................................................................. 79

Caring for the environment
6
Disposal of the packing
material
The transport and protective packaging
has been selected from materials which
are environmentally friendly for
disposal, and can normally be recycled.
Recycling the packaging reduces the
use of raw materials in the
manufacturing process and also
reduces the amount of waste in landfill
sites. Ensure that any plastic
wrappings, bags etc. are disposed of
safely and kept out of the reach of
babies and young children. Danger of
suffocation.
Disposing of your old
appliance
Electrical and electronic appliances
often contain valuable materials. They
also contain specific materials,
compounds and components, which
were essential for their correct function
and safety. These could be hazardous
to human health and to the environment
if disposed of with your domestic waste
or if handled incorrectly. Please do not,
therefore, dispose of your old appliance
with your household waste.
Please dispose of it at your local
community waste collection / recycling
centre for electrical and electronic
appliances. You are also responsible for
deleting any personal data that may be
stored on the appliance prior to
disposal. Please ensure that your old
appliance poses no risk to children
while being stored prior to disposal.

Warning and Safety instructions
7
It is essential to read these instructions.
This tumble dryer complies with all current local and national
safety requirements. However, inappropriate use can lead to
personal injury and damage to property.
Read the operating instructions carefully before using the tumble
dryer. They contain important information on safety, installation,
use and maintenance of the appliance. This prevents both
personal injury and damage to the tumble dryer.
In accordance with standard IEC60335-1, Miele expressly and
strongly advises that you read and follow the instructions in
“Installation”, as well as in the “Warning and Safety instructions”.
Miele cannot be held liable for injury or damage caused by non-
compliance with these instructions.
Keep these operating instructions in a safe place and pass them
on to any future owner.
When instructing other people how to use the tumble dryer, they
must be made aware of these Warning and Safety instructions.
Correct application
The dryer is intended exclusively for drying textiles washed in
water which have been labelled as suitable for tumble drying by the
manufacturer on the care label. Any other applications may be
dangerous. Miele cannot be held liable for damage resulting from
incorrect or improper use or operation.

Warning and Safety instructions
8
This tumble dryer is intended for commercial use in small
businesses, care homes, sports clubs, hospitals and other similar
commercial environments. This machine may also be operated by
lay persons in public areas such as laundrettes, communal laundry
rooms or similar.
This tumble dryer is not suitable for outdoor use.
This appliance is not intended for use by persons (including
children) with reduced physical, sensory or mental capabilities, or
lack of experience or knowledge, unless they are supervised whilst
using it or have been shown how to use it in a safe way and
understand and recognise the consequences of incorrect operation.
Young children must not be allowed to use this appliance.
Older children may only use the dryer if its operation has been
clearly explained to them and they are able to use it safely. They
must be able to understand and recognise the possible dangers
caused by incorrect operation.
Children must not be allowed to clean or maintain the tumble
dryer unsupervised.
Children should be supervised in the vicinity of the tumble dryer.
Do not allow them to play with the appliance.

Warning and Safety instructions
9
Technical safety
Before installing the dryer, check it for visible signs of damage.
Do not install or use a damaged appliance.
Do not make any alterations to the dryer, unless authorised to do
so by Miele.
Do not connect the dryer to the mains electricity supply by an
extension lead. Extension leads do not guarantee the required safety
of the appliance (e.g. danger of overheating).
The electrical safety of this appliance can only be guaranteed
when continuity is complete between it and an effective earthing
system. It is essential that this standard safety requirement is
observed and regularly tested. If in any doubt, have the electrical
installation inspected by a qualified electrician. Miele cannot be held
liable for the consequences of an inadequate earthing system (e.g.
electric shock).
Unauthorised repairs could result in unforeseen dangers for the
user, for which Miele cannot accept liability. Repairs must only be
carried out by a Miele authorised service technician, otherwise any
subsequent damage will not be covered by the warranty.

Warning and Safety instructions
10
If the electrical connection cable is faulty, it must only be replaced
by a Miele authorised service technician to protect the user from
danger.
Faulty components must only be replaced by genuine Miele
original spare parts. Miele can only guarantee the safety standards of
the machine when Miele replacement parts are used.
To ensure the correct performance of the tumble dryer and to
prevent malfunctions and fire hazards, it is important to carry out
maintenance on a regular basis.
In the event of a fault and for cleaning purposes, the tumble dryer
must be disconnected from the electricity supply. It is only
completely disconnected when:
– it is switched off at the wall socket or the plug is withdrawn, or
– the mains fuse is disconnected, or
– it is switched off at the mains circuit breaker.
For further information see “Installation - Electrical connection”.
This tumble dryer must not be installed and operated in mobile
locations (e.g. on a ship).

Warning and Safety instructions
11
Please observe the instructions in “Installation”, “Installation of the
ducting” and “Technical data”.
The electrical socket must be easily accessible so that the tumble
dryer can be disconnected from the electricity supply.
If the appliance is hard wired, adequate provision must be made
on site to switch off all poles to disconnect the tumble dryer from the
electricity supply. The means of disconnection must be incorporated
in the fixed wiring in accordance with the wiring rules.
The gap between the bottom of the tumble dryer and the floor
must not be blocked with plinth facings, deep pile carpet etc., which
would obstruct the openings. This would hinder a sufficient flow of
air to the tumble dryer.
The appliance must not be installed behind a lockable door, a
sliding door or a door with a hinge on the opposite side to that of the
tumble dryer, in such a way that a full opening of the tumble dryer
door is restricted.
This tumble dryer is supplied with a special lamp to cope with
particular conditions (e.g. relating to temperature, moisture, chemical
resistance, abrasion resistance, and vibration). This special lamp
must only be used for the purpose for which it is intended. It is not
suitable for room lighting. Replacement lamps may only be fitted by
a Miele authorised technician or by Miele Professional Service.

Warning and Safety instructions
12
Correct use
Warning: Risk of fire / Flammable materials.
To avoid the possible danger of fire, please read these warnings
carefully.
A clogged filter is a fire hazard!
The fluff filter must be cleaned after every programme.
The maximum load is 7kg (dry laundry). See the “Programme
chart” for the maximum recommended loads for individual
programmes.
Do not lean on the door. Otherwise, the tumble dryer may tip over,
causing injury to yourself or others.
Always close the door after use. This way you will avoid the
danger of
– children climbing into the tumble dryer or hiding things in it.
– pets or other small animals climbing into the tumble dryer.
Do not use a pressure washer or high-pressure hose to clean the
tumble dryer.
Keep the room where the tumble dryer is located free from dust
and fluff. Fluff must not be allowed to accumulate around the dryer.
If the air that is taken into the machine contains dirt particles, they
can cause blockages. This can lead to faults and create a fire
hazard.

Warning and Safety instructions
13
The tumble dryer may only be operated when the ducting has
been installed and the room is sufficiently ventilated.
Adequate ventilation has to be provided to avoid back flow gases
into the room from appliances burning other fuels, including open
fires.
Please observe the instructions in “Installation of the ducting”.
The ducting must never be installed in any of the following flues or
shafts:
– Chimneys or exhaust smokestacks that are in use.
– Shafts that are used to ventilate installation rooms with fireplaces.
– Flues that are used by third parties.
If smoke or exhaust gas is pushed back into the flue or shaft, there is
a risk of poisoning. Exhaust air must not be discharged into a flue
which is used for exhaust fumes from appliances burning gas or
other fuels.
There is a risk of suffocation and poisoning from exhaust gas
recirculation if gas-powered flow heaters, gas-powered room
heaters, coal-burning stoves with a chimney connection, etc., are
installed in the same room or in the apartment or in adjacent rooms
and the negative pressure is 4 Pa or more.
You can prevent negative pressure in the installation room if you
ensure sufficient room ventilation by taking the following measures
(examples):
– Installing vents that cannot be closed in the exterior walls.
– Window switch: The tumble dryer can only be switched on when
a window is open.
In any case, you should seek confirmation from the appropriate
authority (or a gas fitter) that the appliance is operated safely and
that a negative pressure of 4 Pa or more is being prevented.

Warning and Safety instructions
14
Regularly check all components in the ducting (e.g. wall pipe,
external grille, bends, elbows, etc.) to make sure that air can move
through them and to ensure that they are working properly. Clean
components when necessary. Fluff deposits in the ducting system
will prevent the air from being extracted properly and, as a result, will
stop the tumble dryer from working properly.
If existing exhaust ducting is to be used, it must be checked before it
is installed on the tumble dryer.
If several tumble dryers are to be installed on one exhaust air
duct, a non-return flap must be installed directly on the duct for each
tumble dryer.
Failure to do so may damage the dryers and affect their electrical
safety.
The fluff filter must be cleaned on a regular basis.
Never operate the tumble dryer without the fluff filter or with a
damaged fluff filter. This could lead to malfunctions. Fluff can clog
the air passages, heating elements and ducting, which could result
in a fire.
Stop the tumble dryer immediately and replace the damaged fluff
filter.
Do not install the tumble dryer in a room where there is a risk of
frost. At temperatures around freezing point, the tumble dryer may
not be able to operate properly.
The permitted room temperature is between 2°C and 35°C.

Warning and Safety instructions
15
To prevent the risk of fire, the following textiles must not be dried
in the tumble dryer:
– Items which have not been washed.
– Items, such as workwear, which have not been thoroughly
cleaned and are still soiled with grease, oil or other deposits (such
as cooking oils, cosmetics, lotions, etc.). If items have not been
thoroughly cleaned, there is a danger that they might ignite when
heated, even after they have been removed from the tumble dryer
at the end of the programme.
– Items (e.g. mops and floor cloths) that have been treated with
inflammable cleaning agents or which contain residues of
acetone, alcohol, benzene, petrol, kerosene, stain remover,
turpentine, wax and wax remover or other chemicals.
– Items which have been splashed with hair lacquer, hair spray, nail
varnish remover or similar substances.
When washing such heavily soiled items ensure that you use a
larger quantity of detergent and select a high temperature. If in
doubt, wash the items several times.
Oil-affected items can ignite spontaneously, especially when
exposed to heat sources such as in a tumble dryer.
The items become warm, causing an oxidation reaction in the oil.
Oxidation creates heat.
If the heat cannot escape, the items can become hot enough to
catch fire. Piling, stacking or storing oil-affected items can prevent
heat from escaping and so create a fire hazard.
If it is unavoidable that fabrics contaminated with vegetable or
cooking oil, or hair care products, be placed in a tumble dryer, they
should first be washed in hot water with extra detergent - this will
reduce, but not eliminate, the hazard.
Remove all items from pockets (e.g. lighters, matches).

Warning and Safety instructions
16
WARNING: Never switch the tumble dryer off before the end of
the drying programme unless all items are removed immediately and
spread out to cool down.
Fire hazard!
This tumble dryer must not be connected to a controllable socket
(e.g. a timer or a peak-load switch-off device).
The tumble dryer may only be operated with a peak-load device if
this is connected to the tumble dryer via the Miele XCI box and the
relevant settings have been configured on the tumble dryer.
There is a risk of the laundry self-igniting if the drying programme is
cancelled before the cooling phase has finished.
To prevent the risk of fire, the following textiles must never be
dried in the tumble dryer:
– Items which have been cleaned using industrial chemicals (e.g.
professional dry-cleaning agents).
– Fabrics which contain a large proportion of rubber, foam rubber or
rubber-like materials. For example, products made from latex
foam rubber, shower caps, waterproof textiles, rubberised articles
and items of clothing and pillows with foam rubber filling.
– Fabrics which contain padding or fillings which are damaged (e.g.
pillows, jackets). The filling could fall out and cause a fire.
The programme finishes when the cooling phase has been
completed. Many programmes are followed by a cooling phase to
ensure that the items are not too hot to handle when you remove
them (this also reduces the risk of the laundry self-igniting).
Make sure that you do not remove the laundry until the programme
has finished.
Fabric softener and similar products must be used according to
the instructions on the manufacturer's packaging.
Do not store or use petrol, kerosene, paraffin or other flammable
substances near the dryer. Risk of fire and explosion!

Warning and Safety instructions
17
Do not expose the dryer to air which contains chlorine, fluorine or
other solvent vapours. This contaminated air can cause a fire.
For appliance parts made from stainless steel:
Avoid contact between stainless steel surfaces and liquid detergents
or disinfecting agents containing chlorine or sodium hypochlorite.
These agents can cause corrosion on stainless steel.
Aggressive chlorine bleach vapours can also be corrosive.
Do not store open containers of these agents near the appliance.
Accessories
Only use genuine Miele spare parts and accessories with this
machine.
If spare parts or accessories from other manufacturers are used, any
warranty, performance and product liability claims will be invalidated.
Miele tumble dryers and Miele washing machines can be installed
as a washer-dryer stack. This requires a Miele washer-dryer stacking
kit which can be purchased separately. Please ensure that the
washer-dryer stacking kit is suitable for your Miele tumble dryer and
your Miele washing machine.
If you order a plinth for this tumble dryer (available from Miele as
an optional accessory), make sure it is the correct one.
Miele cannot be held liable for damage caused by non-
compliance with these Warning and Safety instructions.

Operating the tumble dryer
18
Control panel
a language sensor
For selecting the current user
language in the display.
After switching the appliance off and
back on, the supervisor language is
displayed again.
bTouch display with sensors
Displays the selected programme.
The programme settings are selected
using the sensors in the touch
display.
c sensor
Takes you back one level in the
menu.
dStart/Stop sensor
For starting the selected programme
and cancelling a programme that has
already started.
eOptical interface
For service technicians.
fProgramme selector
For selecting the drying programmes.
The programme selector can be
turned clockwise or anti-clockwise.
g button
For switching the tumble dryer on
and off.
The tumble dryer switches off
automatically to save energy. This
occurs 15 minutes after the end of
the programme/Anti-crease phase, or
after being switched on if no further
selection is made.

Operating the tumble dryer
19
Symbols on the control panel
Special programmes
Express
Normal
Minimum iron
Normal plus
Normal
Hand iron
Woollens
Timed drying programme
Warm air
Cottons
Normal plus
Normal
Hand iron
Machine iron
PRO
Cottons PRO
Normal
Cottons Eco
Normal

Operating the tumble dryer
20
Symbols in the display
Extras: Use the Extrassensor to add Extras to a drying programme.
Low temperature: The Low temperature sensor allows you to reduce the
mechanical stress placed on the items while drying.
Anti-crease: The Anti-crease sensor allows you to reduce creasing if the
laundry is not removed immediately after the end of a programme.
Delay start: Use the Delay startsensor to set the start time ...
...or the finish time
... or the time until the programme starts.
Timed drying programme: This sensor enables you to select the
duration of a timed drying programme.
Supervisor level: Use the Supervisor levelsensor to alter the tumble
dryer's settings.
Information: This allows you to view the selected options while the
drying programme is running.
Table of contents
Other Miele Dryer manuals

Miele
Miele PDR 510 EL User manual

Miele
Miele T 4839 Ci User manual

Miele
Miele PT 7186 Vario User manual

Miele
Miele T 6185 User manual

Miele
Miele Eco&Steam&9kg TCR 780 WP User manual

Miele
Miele T 4462 C User manual

Miele
Miele TKR850 WP S User manual

Miele
Miele PT 5136 EL User manual

Miele
Miele PDR 908 HP User manual

Miele
Miele VENTED DRYER T 1302 User manual

Miele
Miele PT 7186 Vario User manual

Miele
Miele PT 8507 D User manual

Miele
Miele T369C - User manual

Miele
Miele PT 5135 C EL User manual

Miele
Miele PT 7137 WP User manual

Miele
Miele TOUCHTRONIC T 1312 Parts list manual

Miele
Miele TSF 763 WP User manual

Miele
Miele TDA 150 User manual

Miele
Miele Novotronic T 220 User manual

Miele
Miele TCE 630 WP User manual