manuals.online logo
Brands
  1. Home
  2. •
  3. Brands
  4. •
  5. Miele
  6. •
  7. Laundry Accessories
  8. •
  9. Miele APCL Series User manual

Miele APCL Series User manual

This manual suits for next models

2

Other Miele Laundry Accessories manuals

Miele WTV 511 User manual

Miele

Miele WTV 511 User manual

Miele WTS510/APCL041 User manual

Miele

Miele WTS510/APCL041 User manual

Miele 501 User manual

Miele

Miele 501 User manual

Miele WTV 417 User manual

Miele

Miele WTV 417 User manual

Popular Laundry Accessories manuals by other brands

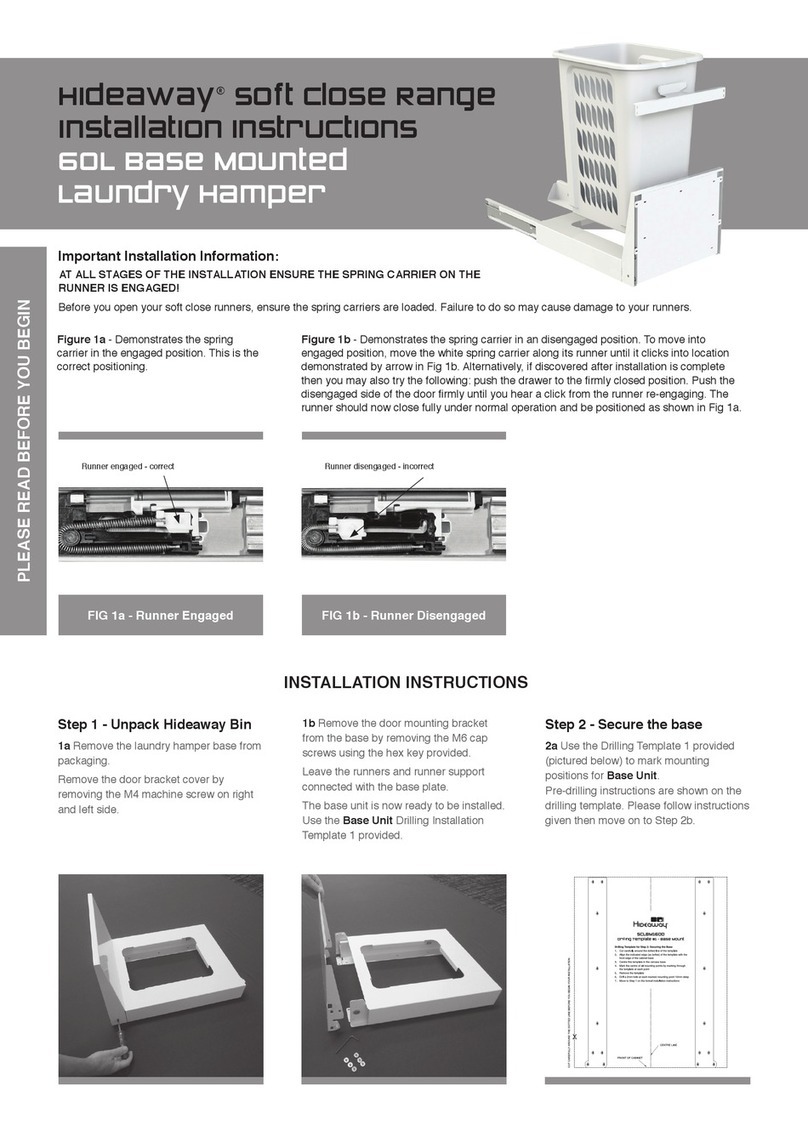
Hideaway Soft Close Series installation instructions

Hideaway

Hideaway Soft Close Series installation instructions

Miele professional XCI-Box-LG Operating and installation instructions

Miele professional

Miele professional XCI-Box-LG Operating and installation instructions

Remington KF40E manual

Remington

Remington KF40E manual

Primus XCONTROL PLUS Original Programming Manual

Primus

Primus XCONTROL PLUS Original Programming Manual

Asko Hidden Helpers Pedestal Drawer operating instructions

Asko

Asko Hidden Helpers Pedestal Drawer operating instructions

IPS WATER-TITE quick start guide

IPS

IPS WATER-TITE quick start guide

American Dryer Corp. AD-170SE Service manual

American Dryer Corp.

American Dryer Corp. AD-170SE Service manual

Amana 495P3 installation instructions

Amana

Amana 495P3 installation instructions

American Dryer Corp. AD-115 Service manual

American Dryer Corp.

American Dryer Corp. AD-115 Service manual

ECOEGG LAUNDRY EGG instructions

ECOEGG

ECOEGG LAUNDRY EGG instructions

American Dryer Corp. ML-145 Service manual

American Dryer Corp.

American Dryer Corp. ML-145 Service manual

Electrolux EPWD15T installation instructions

Electrolux

Electrolux EPWD15T installation instructions

American Dryer Corp. ADG-310 Operator's manual

American Dryer Corp.

American Dryer Corp. ADG-310 Operator's manual

American Dryer Corp. AD-25 installation manual

American Dryer Corp.

American Dryer Corp. AD-25 installation manual

Samsung SKK-8 Series installation instructions

Samsung

Samsung SKK-8 Series installation instructions

LG LWP-250 Series installation instructions

LG

LG LWP-250 Series installation instructions

Simoniz 039-8708-0 Use and care guide

Simoniz

Simoniz 039-8708-0 Use and care guide

Milnor KWACSD001R instructions

Milnor

Milnor KWACSD001R instructions

manuals.online logo
manuals.online logoBrands
  • About & Mission
  • Contact us
  • Privacy Policy
  • Terms and Conditions

Copyright 2025 Manuals.Online. All Rights Reserved.

Umbau- und Montageanweisung
M.-Nr. 11313371 1 von 61
Diese Unterlagen dürfen ohne unsere Genehmigung weder vervielfältigt noch Dritten zugänglich gemacht werden. Eigentumsrechte vorbehalten. 16.07.2020
de Montageanweisung
APCL Sockel 47/75
en Installation instructions for
APCLplinth 47/75
bg Инструкция за монтаж на
цокъла APCL47/75
cs Montážní návod
APCL soklu 47/75
da Monteringsanvisning
APCL sokkel 47/75
el Οδηγίες τοποθέτησης
APCL σε βάση 47/75
en-
US APCL 47/75 stand installation
instructions
es Instrucciones de montaje
APCL zócalo 47/75
fi Asennusohje – Jalusta
APCL47/75
fr Notice de montage socle
APCL 47/75
hr Upute za ugradnju
APLC postolja 47/75
hu Szerelési útmutató
APCL 47/75 lábazathoz
it Istruzioni di montaggio
APCL zoccolo 47/75
nl Montage-instructie
APCL sokkel 47/75
no Monteringveiledning for
sokkel APCL 47/75
pl Instrukcja montażu cokołu
APCL47/75
pt Instruções de montagem da
sapata APCL47/75
ru Инструкция по монтажу
цоколя APCL47/75
sk Návod na montáž podstavca
APCL 47/75
sl Navodila za montažo
podnožja APCL47/75
sr Uputstvo za montažu
APCL postolja 47/75
sv Monteringsanvisning
APCL-sockel 47/75
tr APCLbaza47/75 montaj
talimatı
1
Umbau- und Montageanweisung
2 von 61 M.-Nr. 11313371
16.07.2020 Diese Unterlagen dürfen ohne unsere Genehmigung weder vervielfältigt noch Dritten zugänglich gemacht werden. Eigentumsrechte vorbehalten.
2
3
Umbau- und Montageanweisung
M.-Nr. 11313371 3 von 61
Diese Unterlagen dürfen ohne unsere Genehmigung weder vervielfältigt noch Dritten zugänglich gemacht werden. Eigentumsrechte vorbehalten. 16.07.2020
4
5
Umbau- und Montageanweisung
4 von 61 M.-Nr. 11313371
16.07.2020 Diese Unterlagen dürfen ohne unsere Genehmigung weder vervielfältigt noch Dritten zugänglich gemacht werden. Eigentumsrechte vorbehalten.
de
Montageanweisung APCL Sockel 47/75
Grund: Mit dem Sockel kann eine ergonomische Arbeitshöhe für eine Waschmaschine oder einen Trockner erreicht
werden.
APCL007, APCL011 (Sockel 47cm)
Enthaltene Teile
Anzahl M.-Nr. Benennung
1 Sockel
4 Dübel S12
8 Scheibe B15x44x3
4 Scheibe 8,4
4 Sechskantholzschraube 8x65
4 Gewindestift M10x50
12 Sechskantmutter M10
8 Scheibe B10,5
8 Unterlage
2 Spannplatte
4 Linsenschraube CEM6X12
2 Sechskantschraube M6x20
1 Vorderwand (nur Sockel geschlossen)
2 Seitenwand (nur Sockel geschlossen)
12 Linsenschraube M4x25 (nur Sockel geschlossen)
APCL020 (Sockel 75cm)
Enthaltene Teile
Anzahl M.-Nr. Benennung
1 Sockel
4 Dübel S16
4 Scheibe 15x44x3
4 Sechskantholzschraube 12x90
4 Gewindestift M10x50
12 Sechskantmutter M10
8 Scheibe B10,5
8 Unterlage
2 Spannplatte
4 Linsenschraube CEM6X12
2 Sechskantschraube M6x20
Umbau- und Montageanweisung
M.-Nr. 11313371 5 von 61
Diese Unterlagen dürfen ohne unsere Genehmigung weder vervielfältigt noch Dritten zugänglich gemacht werden. Eigentumsrechte vorbehalten. 16.07.2020
Gefahr durch unsachgemäße Instandhaltungsarbeiten
WARNUNG
Gefahr durch unsachgemäße Instandhaltungsarbeiten.
Unsachgemäße Instandhaltungsarbeiten können hohen Sachschaden und schwere Verletzungen mit Todesfolge
verursachen.
AInstandhaltungsarbeiten dürfen nur von einer Elektrofachkraft mit fachlicher Ausbildung, Fachkenntnissen und
Facherfahrungen durchgeführt werden.
AGültige Sicherheitsbestimmungen müssen berücksichtigt werden.
AErst die Technische Service Dokumentation (TSD) lesen, dann handeln.
Maßnahmen, bevor Instandhaltungsarbeiten am Gerät durchgeführt werden
- Elektrische Sicherheitsprüfung durchführen.
- Sämtliche Geräteanschlüsse entsprechend der Gebrauchsanweisung von der Installation trennen.
Maßnahmen, nachdem Instandhaltungsarbeiten am Gerät durchgeführt wurden
- Elektrische Sicherheitsprüfung durchführen.
- Gerät auf Funktion prüfen.
Schnittverletzungsgefahr bei Instandhaltungsarbeiten
WARNUNG
Bauteile können fertigungsbedingt scharfkantig sein.
Schnittverletzungsgefahr bei Instandhaltungsarbeiten.
AZum Schutz vor Schnittverletzungen Schutzhandschuhe tragen.
Verletzungsgefahr durch übermäßige körperliche Beanspruchung
WARNUNG
Verletzungsgefahr durch übermäßige körperliche Beanspruchung.
Verletzung der Wirbelsäule.
ADas Gewicht der Geräte im Verhältnis zur eigenen körperlichen Kraft beachten. Gewichtsangabe des Gerätes,
siehe Geräte-Gebrauchsanweisung.
Sockel vorbereiten
ASockel auf dem Boden ausrichten.
ABohrlöcher anzeichnen.
AAn den Markierungen folgende Löcher bohren.
- APCL007, APCL011 (Sockel 47cm): Durchmesser 12mm etwa 65mm tief.
- APCL020 (Sockel 75cm): Durchmesser 16mm etwa 120mm tief.
ADübel in die Bohrlöcher stecken.
AWenn ein Trockner auf dem Sockel montiert werden soll, die Spannplatten auf der Rückseite des Sockels mit je 2
Schrauben 6x12 anschrauben, siehe Abb. 1.
ASockel mit den beiliegenden Unterlagen (2) gerade ausrichten, siehe Abb. 2.
ASockel mit den Sechskant-Holzschrauben (3) und den Scheiben B13 (4) auf dem Boden befestigen, siehe Abb. 2.
Umbau- und Montageanweisung
6 von 61 M.-Nr. 11313371
16.07.2020 Diese Unterlagen dürfen ohne unsere Genehmigung weder vervielfältigt noch Dritten zugänglich gemacht werden. Eigentumsrechte vorbehalten.
Waschmaschine auf dem Sockel montieren
AMaschinenfüße abschrauben.
AJe 2 Sechskantmuttern M10 auf die Gewindestifte M10 aufdrehen und kontern, so dass 15mm ± 1mm Gewinde
überstehen, siehe Abb. 3.
AGewindestifte M10 mit der 15mm langen Seite bis zum Anschlag anstelle der Maschinenfüße einschrauben und
festziehen, siehe Abb. 3.
AJe eine Scheibe B10,5 auf die Gewindestifte stecken.
AWaschmaschine auf den Sockel heben und dabei die Gewindestifte in den Sockel stecken.
AVon der Innenseite des Sockels je 1 Scheibe B10,5 und 1 Sechskantmutter M10 auf die Gewindestifte drehen und
festziehen, siehe Abb. 3.
Trockner auf Sockel montieren
AFüße des Trockners mindestens 5mm herausdrehen.
ATrockner auf den Sockel stellen und mit den hinteren Füßen in die Spannplatten schieben.
ATrockner auf dem Sockel endgültig ausrichten.
AJe 1 Schraube (1) M6x20 in die Spannplatten einschrauben und festziehen, siehe Abb. 4.
Sockelwände montieren
ABeide Seitenwände mit jeweils 4 Schrauben M4x25 anschrauben, siehe Abb. 5.
AVorderwand mit 4 Schrauben M4x25 anschrauben, siehe Abb. 5.
de
en
Installation instructions for APCLplinth 47/75
Reason: Fitting a washing machine or tumble dryer on a plinth enables an ergonomic height to be achieved.
APCL007, APCL011 (47cm plinth)
Included parts
No. Mat. no. Designation
1 Plinth
4 Plug S12
8 Washer B15x44x3
4 Washer 8.4
4 Hexagonal-head wood screw 8x65
4 Threaded pin M10x50
12 Nut M10
8 Washer B10.5
8 Underlay
2 Clamping plate
4 Raised-head screw CEM6x12
2 Hexagonal bolt M6x20
1 Front panel (box plinth only)
2 Side panel (box plinth only)
12 Raised-head screw M4x25 (box plinth only)
APCL020 (75cm plinth)
Umbau- und Montageanweisung
M.-Nr. 11313371 7 von 61
Diese Unterlagen dürfen ohne unsere Genehmigung weder vervielfältigt noch Dritten zugänglich gemacht werden. Eigentumsrechte vorbehalten. 16.07.2020
Included parts
No. Mat. no. Designation
1 Plinth
4 Plug S16
4 Washer 15x44x3
4 Hexagonal-head wood screw 12x90
4 Threaded pin M10x50
12 Nut M10
8 Washer B10.5
8 Underlay
2 Clamping plate
4 Raised-head screw CEM6x12
2 Hexagonal bolt M6x20
Danger due to incorrectly carried out service and repair work
WARNING
Danger due to incorrectly carried out service and repair work
There is a risk of serious damage, injury and even death if service and repair work is carried out incorrectly.
AService and repair work should only be carried out by a suitably qualified electrician with specialist training,
knowledge and experience.
AAll appropriate safety regulations must be taken into account.
AFirst read the Technical Service Documentation (TSD), then commence work.
Measures to be carried out before commencing any service work
- Carry out appropriate electrical safety checks.
- Disconnect all machine utility connections in accordance with the operating instructions.
Measures to be carried out after service work has been completed
- Carry out appropriate electrical safety checks.
- Check the appliance for correct operation.
Risk of cuts during service and maintenance work
WARNING
Components may have sharp edges.
There is a risk of cuts during service and maintenance work.
AProtective gloves should be worn.
Danger of injury due to excess physical strain
WARNING
Danger of injury due to excess physical strain.
Spinal injuries.
AThe relation of the weight of the machines to the physical strength of the technician must be taken into account.
For machine weight details, see the operating instructions.
Umbau- und Montageanweisung
8 von 61 M.-Nr. 11313371
16.07.2020 Diese Unterlagen dürfen ohne unsere Genehmigung weder vervielfältigt noch Dritten zugänglich gemacht werden. Eigentumsrechte vorbehalten.
Preparing the plinth
ALevel the plinth on the floor.
AMark the hole positions.
ADrill the following holes in the marked positions.
- APCL007, APCL011 (47cm plinth): 12mm in diameter, depth of approx. 65mm.
- APCL020 (75cm plinth): 16mm in diameter, depth of approx. 120mm.
AInsert the plugs in the holes.
AIf a tumble dryer is to be fitted to the plinth, use 2 6x12 screws to attach each of the clamping plates to the rear of
the plinth, see Fig.1.
ALine the plinth up with the underlay supplied (2), see Fig.2.
AFasten the plinth to the floor with the hexagonal-head wood screws (3) and the B13 washers (4), see Fig.2.
Fitting a washing machine to the plinth
ARemove the machine feet.
AFit two M10 nuts on each M10 threaded pin and counter them such that 15mm±1mm of thread protrudes, see
Fig.3.
AInstead of fitting the machine feet, screw in the M10 threaded pins with the 15mm long side as far as they will go
and tighten, see Fig.3.
AFit a B10.5 washer on each threaded pin.
ALift the washing machine onto the plinth and insert the threaded pins into the plinth.
AFrom the inside of the plinth, fit a B10.5 washer and an M10 nut on each threaded pin and screw tight, see Fig.3.
Fitting a tumble dryer to the plinth
AUnscrew the tumble dryer feet by at least 5mm.
ASet the tumble dryer down on the plinth and slide it into the clamping plates with the rear feet.
ALevel the tumble dryer on the plinth.
AScrew one M6x20 screw (1) into each of the clamping plates and tighten, see Fig.4.
Fitting the plinth panels
AUse 4 M4x25 screws to attach each of the 2 side panels, see Fig.5.
AUse 4 M4x25 screws to attach the front panel, see Fig.5.
en
Umbau- und Montageanweisung
M.-Nr. 11313371 9 von 61
Diese Unterlagen dürfen ohne unsere Genehmigung weder vervielfältigt noch Dritten zugänglich gemacht werden. Eigentumsrechte vorbehalten. 16.07.2020
bg
Инструкция за монтаж на цокъла APCL47/75
Предназначение: С цокъла може да се постигне ергономична работна височина за пералната машина или
сушилнята.
APCL007, APCL011 (цокъл 47cm)
Включени части
брой M.-Nr. Описание
1 Цокъл
4 Дюбел S12
8 Шайба B15x44x3
4 Шайба8,4
4 Винт за дърво с шестоъгълна глава 8x65
4 Щифт с резба M10x50
12 Шестостенна гайка M10
8 Шайба B10,5
8 Подложка
2 Притискаща пластина
4 Винт със сферична глава CEM6x12
2 Винт с шестостенна глава M6x20
1 Предна стена (закрит е само цокълът)
2 Странична стена (закрит е само цокълът)
12 Винт със сферична глава M4x25 (закрит е само цокълът)
APCL020 (цокъл 75cm)
Включени части
брой M.-Nr. Описание
1 Цокъл
4 Дюбел S16
4 Шайба 15x44x3
4 Винт за дърво с шестоъгълна глава 12x90
4 Щифт с резба M10x50
12 Шестостенна гайка M10
8 Шайба B10,5
8 Подложка
2 Притискаща пластина
4 Винт със сферична глава CEM6x12
2 Винт с шестостенна глава M6x20
Umbau- und Montageanweisung
10 von 61 M.-Nr. 11313371
16.07.2020 Diese Unterlagen dürfen ohne unsere Genehmigung weder vervielfältigt noch Dritten zugänglich gemacht werden. Eigentumsrechte vorbehalten.
Опасност вследствие на неправилни работи по поддръжката
ВНИМАНИЕ
Опасност вследствие неправилни работи по поддръжката.
Неправилните работи по поддръжката могат да предизвикат значителни материални щети и тежки
наранявания с фатални последици.
AРаботите по поддръжката трябва да се извършват само от електротехник със специализирано
образование, технически познания и опит.
AТрябва да се спазват действащите наредби за безопасност.
AПреди започване на работа първо прочетете техническата сервизна документация (TSD).
Мерки преди извършване на работи по поддръжката на уреда
- Извършете проверка на електрическата безопасност.
- Разединете уреда от инсталацията в съответствие с ръководството за употреба.
Мерки след извършване на работите по поддръжката на уреда
- Извършете проверка на електрическата безопасност.
- Проверете функционирането на уреда.
Опасност от порезни рани при извършване на работите по поддръжката
ВНИМАНИЕ
В зависимост от начина на изработка детайлите могат да бъдат с остри ръбове.
Опасност от порезни рани при извършване на работите по поддръжката.
AЗа защита от порезни рани носете подходящи предпазни ръкавици.
Опасност от нараняване вследствие на прекомерно физическо натоварване
ВНИМАНИЕ
Опасност от нараняване вследствие на прекомерно физическо натоварване.
Опасност от нараняване на гръбначния стълб.
AПреценете своите физически възможности по отношение на теглото на уредите. Вижте теглото на уреда в
ръководството за употреба на уреда.
Подготовка на цокъла
AНивелирайте цокъла на пода.
AОтбележете отворите за пробиване.
AПробийте на мястото на маркировките следните отвори.
- APCL007, APCL011 (цокъл 47cm): диаметър 12mm с дълбочина около 65mm.
- APCL020 (цокъл 75cm): диаметър 16mm с дълбочина около 120mm.
AПоставете дюбелите в пробитите отвори.
AАко върху цокъла ще бъде монтирана сушилня, завинтете притискащите пластини от обратната страна на
цокъла с по 2 винта 6x12, вижте фиг. 1.
AНивелирайте хоризонтално цокъла с включените в комплекта подложки (2), вижте фиг. 2.
AЗакрепете цокъла към пода с винтовете за дърво с шестоъгълна глава (3) и шайбите B13 (4), вижте фиг. 2.