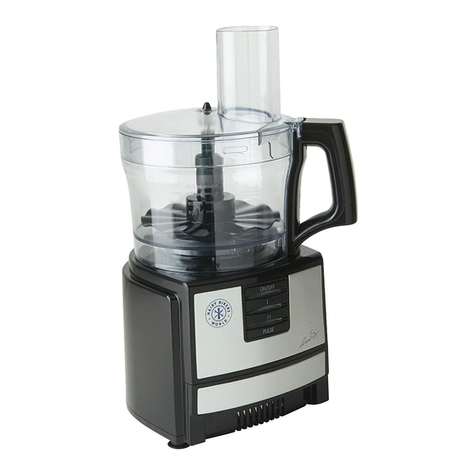
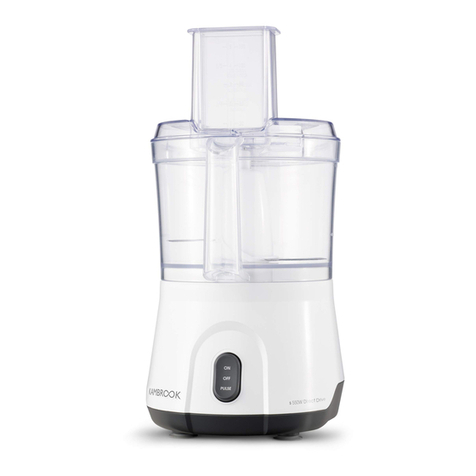
Mienta FUSION User manual

1Instruction Manual
FUSION - Food Processer - FP141128A
Instruction Manual

2Instruction Manual
Instruction Manual
Food Processor - FUSION - FP141128A
Mode D’emploi
Robot Culinaire - FUSION - FP141128A
Manual de instrucțiuni
Robot de bucătărie - FUSION - FP141128A
Εγχειρίδιο Οδηγιών
Μίξερ - FUSION - FP141128A
Руководство по эксплуатации
Капельная кофеварка - FUSION - FP141128A
- FUSION - FP141128A
ماﺪﺨﺘﺳﻻا ﺐﻴﺘﻛ
مﺎﻌﻃ ﺮﻀﺤﻣ - FUSION - FP141128A
FUSION - FP141128A
EN
FR
RO
EL
RU
BN
AR
FA
03
10
17
24
31
38
51
58

3Instruction Manual
Safety Instructions
Please carefully read the instructions before using your appliance for the first
time. Any use that does not conform to the following instructions does not hold
accountable and cancels your product’s warranty.
Keep these instructions, warranty card,
purchase receipt and, if possible, the box,
together with inner packaging.
Make sure that the voltage rating of your
appliance is compatible with that of your
household’s electric supply.
Any connection error cancels the
appliance’s warranty.
Always unplug the appliance from the
source before fitting or removing any
attachments of the motor unit.
Always turn off the appliance before fitting
the jug on the motor unit.
Always turn off the appliance and wait for
the appliance to completely stop before
removing the jug or the accessories.
Never immerse the unit in water or any
other liquids, or come into contact with
them. Do not use it with wet hands.
Do not use outdoors.
Do not operate your appliance without
cover.
Keep the utensils (the spoons, the spatula,
or any other object) away from the
processor bowl and blender jug whilst it’s
connected to the power supply.
Do not leave the appliance unattended
when plugged in.
Use the appliance on flat, stable and heat-
resisting surfaces only.
Never leave the power cord in contact
with the hot parts of your appliance, near a
source of heat or over sharp edges.
Do not overflow the jug because if the liquid
gets under the motor unit, it may be sucked
into the motor and it may damage it.
Do not operate your appliance longer than
2 minutes when chopping or cutting or
grating. Otherwise, do not operate your
appliance longer than 1 minute and let the
motor cool down for 2 minutes.
Never use this appliance to mix or stir
anything other than foods. Use this
appliance only for its intended purpose.
Never use this appliance if it is not working
properly or presents signs of damages. In
such cases, directly contact an approved
service center.
Do not use the appliance if the power
cord or the plug are damaged. To avoid
accidents, they must be replaced at an
approved service center.
This appliance can be used by children
above 8 years and people with reduced
physical, sensory, or mental capabilities, or
lack of experience and knowledge if they
have been given supervision or guidance
regarding the usage of the appliance by
a person responsible for their safety and
understand the involved hazards.
Children should be supervised to ensure
that they do not play with the appliance.
Cleaning and user maintenance shall not be
made by children without supervision.
This appliance has been designed for
domestic use only. Any commercial use,
misuse or failure to conform with the
instructions cancels the warranty and frees
from all responsibilities.
Never put food inside the jug or bowl with
your hands. Always use the pusher.
Never open the bowl while the appliance
is operating. Switch off the appliance and
unplug it from the mains power before
removing food from the sides of the bowl.
THE CUTTING BLADES ARE VERY SHARP!
Be careful when handling the cutting blades,
emptying the bowl and during cleaning the
appliance.
Be careful if hot liquid is poured into the

4Instruction Manual
blender as it can be ejected out of the
appliance due to a sudden steaming.
This product has been designed to
operate only if the lid and the blender jug
have been fitted correctly. If it still does not
operate, take it to the nearest approved
service center.
For your own safety, only use the spare
parts and accessories that are original and
suitable to your appliance.
Never touch any rotating or moving parts,
always wait for them to stop operating.
This appliance can be used in household
and similar applications such as:
- Staff kitchen areas in shops, offices and
other working environments
- Farm houses
- By clients in hotels, motels and other
residential type of environments
- Bed and breakfast type of environments
Do not use the safety lock to operate
the appliance, such as turning off the
appliance by removing the bowl or the
lid. Always use the on/off speed control
knob.
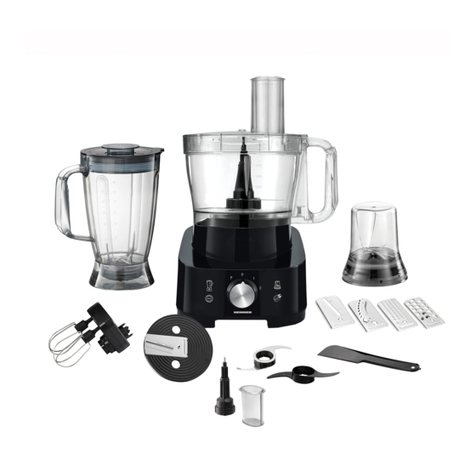
Before using your appliance, you must familiarize yourself with its different components.
Components:
1. Thin slicing blade
2. Coarse slicing blade
3. Medium grater blade
4. Thin grater blade
5. Coarse grater blade
6. Blade support
7. Emulsifying disc
8. Kneading blade
9. Blade cover
10. Stainless steel main
chopping blade
11. Pusher
12. Feeder tube
13. Bowl cover
14. Measuring cup
15. Blender jug cover
16. Blender jug
17. Drive shaft
18. Bowl
19. Speed control knob
20. Grinder
21. Stainless steel upper chopping blade
1
2
3
4
5
6
7
8
9
10
21
11
12
13
19
20
18
17
16
15
14

5Instruction Manual
Before the first use
Remove all packaging material and clean the accessories in warm soapy water.
Before placing the jug or the bowl on the motor unit, make sure that the speed
knob on set on the “OFF” position.
Using your appliance
1. USING THE PROCESSOR BOWL
Helpful Hints:
The maximum capacity of the processor bowl is 1.5 liter.
Do not operate your appliance continuously for more than 2 minutes when
chopping or cutting or grating and let the motor cool down for 2 minutes.
Do not use your appliance with excessive load.
1-1-Chopping:
1. Place the bowl on the motor base and lock it in position by
turning it in the clockwise direction.
2. Insert the drive shaft in the bowl.
3. Then fit the chopping blades onto the drive shaft.
4. Put the ingredients to be processed in the bowl.
5. Place the bowl cover on the bowl and lock it in position by
turning it in the clockwise direction, a “CLICK” sound will be
heard indicating the correct installation.
6. Turn the speed control knob to position “2” to start or for
better chopping, you can use the position “Pulse”.
7. To add ingredients while the appliance is working, lift out
the pusher, add the ingredients via the feed tube then place
the pusher again.
8. After you finish, turn the speed control knob to the “OFF” position, wait until the
blade completely stops then remove the chopping blade before pouring contents
from the bowl.
Ingredients
Meat
Onions
Nuts
Cheese
Bread
Parsley
Chocolate
Max. Quantity
300 grams
700 grams
250 grams
150 grams
100 grams
100 grams
250 grams
Speed
Pulse & 2
Pulse
2
2
1
Pulse
2

6Instruction Manual
Note:
The chopping blades is not suitable for manipulating with very hard objects
such as crushing ice or grinding coffee beans, or converting granulated sugar
to caster sugar.
1-2-Kneading / Mixing:
1. Place the bowl on the motor base and lock it in position
by turning it in the clockwise direction.
2. Insert the drive shaft in the bowl.
3. Then fit the kneading blade onto the drive shaft.
4. Put the ingredients to be processed in the bowl.
5. Place the bowl cover on the bowl and lock it in position by turning it in the
clockwise direction, a “CLICK” sound will be heard indicating correct installation.
6. Turn the speed control knob to position “1” or “2” to start kneading.
7. After you finish, turn the speed control knob to the “OFF” position.
(*) Do not remix the yeast dough or leave its ingredients to stay long in the bowl as it
may overload the processor.
(*) When kneading dough, do not operate the appliance for more than 1 minute. Please
wait at least 2-3 minutes before operating the appliance again.
1-3-Emulsify/Beat/Whip:
1. Place the bowl on the motor base and lock it in position by turning it in the
clockwise direction.
2. Insert the drive shaft in the bowl.
3. Then fit the emulsifying disc onto the drive shaft.
4. Put the ingredients to be processed in the bowl.
5. Place the bowl cover on the bowl and lock it in position
by turning it in the clockwise direction, a “CLICK” sound
will be heard indicating the correct installation.
6. Turn the speed control knob to position “1” or “2” to
start.
7. After you finish, turn the speed control knob to the “OFF” position.
Ingredients
Bread/ Pizza (*)
Cake
Max. Quantity
500 grams
500 grams flour
360 ml water
Speed
1
1 / 2
Ingredients
Mayonnaise/ Cream
Egg
Max. Quantity
125-350 ml
4 pcs
Speed
1
1

7Instruction Manual
Ingredients
Cucumber, Carrots,
Zucchini, Potatoes
Cheese, Vegetables,
Fruit puree
Carrots, Pumpkins, etc
Apple, Cucumber, etc
Max. Quantity
500 grams
200 – 500
grams
500 grams
2 pcs
Speed
1
1
1
1
Ingredients
Thin - Coarse
Slicer
Medium Grater
Thin Grater
Coarse Grater
Notes:
• Do not use the emulsifying disk when preparing cake mix containing
margarine and fat or when kneading dough. Use kneading blade instead.
• Make sure that the bowl and the emulsifying disk are dry and oil-free while
mixing egg whites. Egg whites must be at room temperature.
1-4-Grating / Slicing:
1. Place the bowl on the motor base and lock it in
position by turning it in the clockwise direction.
2. Insert one of the slicing or grating blades into the
blade support.
3. Fit the blade support onto the drive shaft by placing
the hole of the blade support on the shaft spindle and press the blade handle until
it clicks into place.
4. Place the blade support together with the cutting blade in the bowl.
5. Place the bowl cover on the bowl and lock it in position by turning it in the
clockwise direction, a “CLICK” sound will be heard indicating the correct installation
6. Introduce the food through the feeder tube and push them using the pusher.
7. Turn the speed control knob to position “1” to slice or “2” to grate.
8. After you have finished, turn the speed control knob to the “OFF” position, wait until
the blade support with the cutting blade has completely stopped then remove the
blade support with the cutting blade before pouring contents from the bowl.
Notes:
• When cutting or grating soft materials, use a low speed so they do not
become puree.
• When grating hard cheese, do no operate the appliance for a long time,
otherwise the cheese starts to melt and clump up.

8Instruction Manual
2- USING THE BLENDER JUG:
With the blender jug you can mix dairy products, sauces, juices,
soups, beverage mixes and shakes. Also you can mix soft blends
such as crepe dough, mayonnaise, baby food.
1. Put the ingredients in the jug without exceeding the maximum
level of 1 L.
2. Close the cover with the measuring cup and lock by turning it.
3. Place the assembled jug on the motor base, and lock it in
position by turning it in clockwise direction.
4. Turn the speed control knob to position “1”or “2” to start
or for better control of the mixture, you can use the “Pulse”
feature.
5. To add ingredients while the appliance is working, remove the measuring cup from
the cover and add the ingredients through the feeder hole of the cover.
6. After you have finished, turn the speed control knob to the “OFF” position.
Helpful Hints:
• Do not operate the appliance with empty jug.
• Always use the blender with its cover.
• NEVER put hot liquids or food in the blender jug as this could damage the
blender blades.
• Always pour the liquid ingredient into the blender first before adding the
solid ingredients without exceeding the maximum level 1 L.
• Do not use the blender with dry ingredients such as hazelnuts, almonds,
peanuts, etc.
• To crush ice cubes: add 15ml (1tbsp) water to 6 ice cubes then use the
pulse function in the speed control to crush the ice using very short bursts,
until the desired level is reached.
3- USING THE GRINDER
1. Put the ingredients you want to grind into the transparent cover
of the grinder.
2. Place the grinder body on the cover upside down.
3. Place the assembled grinder on the motor base and lock it in
position by turning it in clockwise direction.
4. Turn the speed control knob to position “1” or “2”. You can use
the “Pulse” position for better grinding.
* With the grinder you can grind in just few seconds: coffee
beans, black pepper seeds, dried fruits and all spices.
5. After you have finished, turn the speed control knob to the “OFF” position.

9Instruction Manual
Cleaning and Maintenance
Always clean all removable parts immediately after each use.
1. Disconnect the appliance from the main supply.
2. Disassemble all removable parts before cleaning.
3. To clean the jug, pour warm water with a few drops of cleaning soap into the jug,
close the lid then turn on the appliance for 5 seconds. Then turn off the appliance
and remove the jug and rinse it under running water.
DO NOT WASH THE
BLENDER JUG IN THE DISHWASER.
4. Wash the attachments parts with soapy warm water. Do not use anything that may
damage the attachments such as abrasive detergent, dishwasher and aerosol
cleaners.
5. BE CAREFUL when washing the chopping blades and the slicing / grating blades
because it can cause serious injuries as THEY ARE EXTREMLY SHARP!
6. Use dry cloth to clean the main body and ensure that the interlock area is clear of
food debris.
7. Store excess cord in the storage area at the bottom of the appliance.
Troubleshooting:
If your appliance doesn’t work, check:
The appliance is well connected to the mains outlet.
The used accessory is well locked on the motor base.
The speed knob is set to speed “1” or “2”.
Correct Disposal of this product
This marking indicates that this product should not be disposed with other household
wastes throughout the EU. To prevent possible harm to the environment or human health
from uncontrolled waste disposal, recycle it responsibly to promote the sustainable reuse
of material resources. To return your used device, please use the return and collection
systems or contact the retailer where the product was purchased. They can take this
product for environmental safe recycling.
Disposal of The Appliance and its Packing Materials
The packaging is comprised exclusively of materials that present no danger
for the environment and which may therefore be disposed of in accordance
with the recycling measures in force in your area. For disposal of the
appliance itself, please contact the appropriate service of your local authority.
Technical Specification
Model: FP141128A
Power Supply: 220-240 V~ 50/60 Hz
Output Power: 1000 W 2019

10 Mode D’emploi
Consignes de Sécurité
Vous êtes priés de lire les instructions d’utilisation attentivement avant d’utiliser
votre appareil pour la première fois. Toute utilisation qui n’est pas conforme à
ces instructions dégagerait de toute responsabilité et annule la garantie.
Conservez ces instructions, le certificat de
garantie, le reçu d’achat et, si possible, la
boîte, ainsi que l’emballage intérieur.
Vérifiez que la tension nominale de votre
appareil correspond à celle de votre
alimentation électrique du réseau.
Toute erreur de branchement annule la
garantie.
Débranchez toujours votre appareil du réseau
électrique avant de monter ou retirer les
accessoires du bloc moteur.
Eteignez toujours votre appareil avant
d’installer le bol mixeur sur le bloc moteur.
Eteignez toujours votre appareil et attendez
que l’appareil s’arrête complètement avant
d’enlever le bol-mixeur ou les accessoires.
Ne mettez jamais l’appareil dans l’eau ou tout
autre liquide. N’utilisez jamais l’appareil avec
les mains mouillées.
N’utilisez pas l’appareil en plein air.
Ne faites pas fonctionner votre appareil sans
mettre le couvercle.
Gardez toutes ustensiles (les cuillères,
la spatule ou tout autre objet) loin du bol
hachoir et du bol mixeur quand l’appareil est
connecté à l’alimentation électrique.
Ne laissez pas l’appareil sans surveillance
lorsqu’il est branché.
Utilisez l’appareil uniquement sur une surface
plane, stable et résistante à la chaleur.
Le cordon d’alimentation ne doit jamais être
en étroite proximité ou en contact avec les
parties chaudes de votre appareil, à proximité
d’une source de chaleur ou reposant sur des
bords tranchants.
Ne dépassez pas le niveau maximal du bol
mixeur, car si le liquide se trouve sous le bloc
moteur, il peut être aspiré dans le moteur et il
peut l’endommager.
Ne faites pas fonctionner votre appareil
pendant plus de 2 minutes lors du
découpage ou du hachage ou du râpage.
Autrement, Ne faites pas fonctionner votre
appareil pendant plus de 1 minute et laissez
le moteur refroidir pendant 2 minutes.
N’utilisez pas l’appareil pour mélanger des
éléments autres que les aliments. Utilisez cet
appareil uniquement pour ses fonctions de
base.
N’utilisez jamais l’appareil s’il ne fonctionne
pas correctement, ou s’il est endommagé.
Dans un cas pareil, contactez un centre de
service agréé .
Si le cordon d’alimentation ou la prise sont
endommagés, n’utilisez pas votre appareil.
Pour éviter tout risque, ils doivent être
remplacés par un centre de service agréé
.
Cet appareil peut être utilisé par les enfants
ayant de plus de 8 ans des personnes
ayant les capacités physiques, sensorielles
ou mentales réduites, ou ayant du manque
d’expérience et de connaissances, si elles
ont été supervisées ou elles ont reçu les
instructions concernant l’utilisation de
l’appareil par une personne responsable de
leur sécurité et comprennent les dangers
impliqués.
Les enfants devraient être surveillés pour
s’assurer qu’ils ne jouent pas avec l’appareil.
Le nettoyage et l’entretien ne doivent
pas être effectués par les enfants sans
surveillance.
Ce produit a été conçu pour un usage
domestique. Toute utilisation commerciale,
inappropriée ou non-conforme dégage
de sa responsabilité et annule sa
garantie.
N’introduisez jamais les aliments dans la
cheminée par les mains. Utilisez toujours le

11Mode D’emploi
poussoir fourni.
N’ouvrez jamais le bol lorsque l’appareil est
en marche. Éteignez toujours l’appareil et
débranchez-le du courant électrique avant
retirer les aliments des parois du bol.
LES LAMES SONT TRES TRANCHANTES!
Prenez soin en les manipulant, en vidant le
bol/bol mixeur ou pendant le nettoyage.
Faites attention si vous versez du liquide
chaud dans le bol mixeur car il peut être
éjecté de l’appareil à cause de la vapeur
soudaine.
Ce produit a été conçu pour fonctionner
uniquement si le couvercle et le bol mixeur
ont été installés correctement. Si cela ne
fonctionne toujours pas, prenez-le au plus
proche centre de service agréé .
Pour votre propre sécurité, utilisez
uniquement les pièces détachées et les
accessoires originaux qui sont adaptés à
votre appareil.
Ne touchez jamais les parties en
mouvement de l’appareil, avant qu’elles ne
soient complètement arrêtées.
Cet appareil est destiné à être utilisé dans
des applications domestiques et dans les
applications similaires, telles que :
- Les zones de cuisine de fonctionnaires
dans les magasins, bureaux et autres
environnements de travail
- Les maisons de ferme
- Par les clients dans les hôtels, motels et
autres environnements de type résidentiel
- Les environnements de type « Chambres
d’hôtels ».
N’utilisez pas le verrou de sécurité pour
faire fonctionner l’appareil, par exemple
n’éteignez pas l’appareil en retirant le bol ou
le couvercle. Toujours utilisez le variateur de
vitesse marche / arrêt.
Avant d’utiliser votre appareil, vous devez vous familiariser avec
les différentes parties de votre appareil.
Composants
1. Lame de coupe fine
2. Lame de coupe grosse
3. Lame de râpe moyenne
4. Lame de râpe fine
5. Lame de râpe grosse
6. Support de la lame
7. Disque émulsionneur
8. Couteau de pétrin
9. Couverture de la lame
10. Lame d’hachoir inox
11. Poussoir
12. Tube d’alimentation
13. Couvercle du bol hachoir
14. Bouchon doseur
15. Couvercle du bol-mixeur
16. Bol-mixeur
17. Tige d’entraînement
18. Bol hachoir
19. Variateur de vitesse
20. Moulin
21. Lame d’hachoir supérieure inox
1
2
3
4
5
6
7
8
9
10
21
11
12
13
19
20
18
17
16
15
14

12 Mode D’emploi
Avant la première utilisation
Déballez l’appareil de tous ses emballages, et nettoyez les accessoires avec de l’eau
tiède et du savon.
Avant de placer le bol-mixeur ou le bol hachoir sur le bloc moteur, assurez-vous que
le variateur de vitesse est réglé à la position “OFF”.
Utilisation de votre appareil
1- Utilisation du bol hachoir:
Conseils utiles:
La capacité maximale du bol hachoir est de 1,5 litre.
N’utilisez pas votre appareil en continu pendant plus de 2
minutes lorsque vous hachez, coupez ou râpez et laissez le
moteur refroidir pendant 2 minutes.
N’utilisez pas votre appareil avec une quantité excessive.
1-1-Hacher:
1. Placez le bol hachoir sur le bloc moteur verrouillez-le en le
tournant dans le sens horaire.
2. Placez la tige d’entraînement dans le bol hachoir.
3. Faites glisser la lame d’hachoir sur la tige d’entraînement.
4. Mettez les ingrédients dans le bol hachoir.
5. Placez le couvercle et verrouillez-le en tournant dans le sens horaire, vous entendrez
un «clic» indiquant que l’installation est correcte.
6. Tournez le variateur de vitesse sur la position « 2 » pour la mise en marche, ou pour
avoir un meilleur contrôle du hachage, utilisez la position « Pulse ».
7. Pour ajouter des ingrédients pendant l’utilisation de l’appareil, soulevez le poussoir,
ajoutez les ingrédients par le tube d’alimentation puis remettez le poussoir à nouveau.
8. Une fois que vous avez terminé, tournez le variateur de vitesse à la position «OFF»,
attendez que la lame soit complètement arrêtée, puis retirez la lame de hachage
avant de verser le contenu du bol
Remarque: les lames de hachage ne conviennent pas à manipuler
ingrédients
Viande
Oignons
Noisettes
Fromage
Pain
Persil
Chocolat
Quantité maximale
300 grams
700 grams
250 grams
150 grams
100 grams
100 grams
250 grams
Vitesse
Pulse & 2
Pulse
2
2
1
Pulse
2

13Mode D’emploi
avec des objets très durs tels que le broyage de la glace ou la
mouture de café en grains, ou la conversion du sucre cristallisé en
sucre en poudre.
1-2-Pétrir/Mixer:
1. Placez le bol hachoir sur le bloc moteur verrouillez-le en le
tournant dans le sens horaire.
2. Placez la tige d’entraînement dans le bol hachoir.
3. Faites glisser le couteau de pétrin sur la tige
d’entraînement.
4. Mettez les ingrédients dans le bol.
5. Placez le couvercle et verrouillez-le en tournant dans le sens horaire, vous entendrez
un «clic» indiquant que l’installation est correcte.
6. Tournez le variateur de vitesse sur la position « 1 »ou « 2 » pour commencer à pétrir.
7. Une fois que vous avez terminé, tournez le variateur de vitesse à la position «OFF».
(*) Ne mélangez pas la pate déjà levée ou laissez ses ingrédients longtemps dans le bol,
Ingrédients
Pain / Pizza (*)
Gâteau
Quantité maximale
500 grams
500 grams de farine
360 ml d’eau
Speed
1
1 / 2
ceci peut surcharger l’appareil.
(*)Lorsque vous pétrissez la pâte, ne faites pas fonctionner l’appareil pendant plus d’une
minute. Prière d’attendre au moins 2-3 minutes avant de faire fonctionner l’appareil à
nouveau.
1-3-Emulsionner/Battre/Fouetter :
1. Placez le bol hachoir sur le bloc moteur verrouillez-le en le
tournant dans le sens horaire.
2. Placez la tige d’entraînement dans le bol hachoir.
3. Faites glisser le disque émulsionneur sur la tige
d’entraînement.
4. Mettez les ingrédients dans le bol.
5. Placez le couvercle et verrouillez-le en tournant dans le sens horaire, vous entendrez
un «clic» indiquant que l’installation est correcte.
6. Tournez le variateur de vitesse sur la position « 1 »ou « 2 » pour la mise en marche.
7. Une fois que vous avez terminé, tournez le variateur de vitesse à la position «OFF».
Ingrédients
Mayonnaise / Crème
Œufs
Quantité maximale
125-350 ml
4 pièces
Vitesse
1
1

14 Mode D’emploi
Remarques :
N’utilisez pas le disque émulsionneur lors de la préparation du
mélange à gâteau contenant de la margarine et la graisse ou lors du
pétrissage de la pâte. Utilisez souvent le couteau de pétrin,
Assurez-vous que le bol et le disque émulsionneur sont secs et sans
huile lors du mélange des blancs d’œufs. Les blancs d’œufs doivent
être à la température ambiante.
1-4-Râper/Trancher :
1. Placez le bol hachoir sur le bloc moteur verrouillez-le en
le tournant dans le sens horaire.
2. Insérez l’une des lames de coupe dans le support de
lame.
3. Mettez le support de lame sur la tige d’entraînement en
plaçant le trou du support de lame sur l’axe et appuyez
sur la poignée de la lame jusqu’elle se verrouille en place.
4. Placez l’ensemble du support de lame avec la lame de coupage désirée dans le bol
hachoir.
5. Placez le couvercle et verrouillez-le en tournant dans le sens horaire, vous entendrez un
«clic» indiquant que l’installation est correcte.
6. Faites introduire les aliments dans le tube d’alimentation et poussez-les avec le poussoir.
7. Tournez le variateur de vitesse sur la position « 1 » pour trancher ou la positon « 2 »
pour râper.
8. Une fois que vous avez terminé, tournez le variateur de vitesse à la position «OFF»,
attendez le support de lame avec la lame de coupage soit complètement arrêté, puis
retirez l’ensemble du support de lame avec la lame de coupage avant de verser le
contenu du bol.
Ingrédients
Concombre, carottes,
courgettes, pommes de
terre
Fromage, Légumes,
Purée De Fruits
Carottes, citrouilles, etc.
Pomme, concombre, etc.
Quantité maximale
500 grams
200 – 500
grams
500 grams
2 pièces
Vitesse
1
1
1
1
Lame
Lame de coupe
Fine- Grosse
Lame de râpe
moyenne
Lame de râpe
Fine
Lame de râpe
Grosse
Remarques :
Lorsque vous coupez ou râpez des matériaux mous, utilisez basse
vitesse afin qu’ils ne deviennent pas purée.
Lorsque vous râpez du fromage dur, ne faites pas fonctionner
l’appareil pendant une longue période, sinon le fromage commence à
fondre et à s’agglutiner.

15Mode D’emploi
2-Utilisation du bol mixeur :
Avec le bol mixeur, vous pouvez mélanger des produits laitiers, des sauces, des jus de
fruits, des soupes, boissons et des shakes. Vous pouvez également faire des tels que pâte
à crêpe, mayonnaise est les aliments pour bébés.
1. Mettez les ingrédients dans le bol mixeur sans dépasser le niveau maximum de 1 L.
2. Fermez le couvercle, avec le bouchon doseur, et verrouillez-le en place.
3. Placez le bol mixeur assemblé sur le bloc moteur verrouillez-le en
le tournant dans le sens horaire.
4. Tournez le variateur de vitesse sur la position « 1 » ou « 2 » pour la
mise en marche. Vous pouvez utiliser la position « Pulse » pour un
meilleur contrôle du mélange.
5. Pour ajouter des ingrédients lorsque l’appareil est en marche,
retirez le bouchon doseur du couvercle et ajoutez les ingrédients à
travers le trou d’alimentation du couvercle.
6. Une fois que vous avez terminé, tournez le variateur de vitesse à la
position «OFF».
Conseils utiles :
N’utilisez pas l’appareil avec un bol mixeur vide.
Utilisez toujours le bol mixeur avec son couvercle.
Ne mettez JAMAIS les liquides ou des aliments chauds dans le bol
mixeur car cela pourrait endommager les lames du bol mixeur.
Versez toujours les ingrédients liquides dans le bol mixeur avant
d’ajouter les ingrédients solides sans dépasser le niveau maximal 1
litre.
N’utilisez jamais le bol mixeur pour les ingrédients trop durs comme
les noisettes, les amandes, les arachides, etc.
Lorsque vous pilez la glace : ajoutez 15 ml (1 cuillère à soupe) d’eau
à 6 glaçons, puis utilisez le variateur de vitesse sur la position « Pulse
» en utilisant des rafales très courtes, jusqu’à ce que le niveau désiré
soit atteint.
3- Utilisation du bol mixeur :
1. Placez les ingrédients que vous souhaitez moudre dans le
couvercle transparent du moulin.
2. Placez le corps du moulin sur le couvercle à l’envers.
3. Placez le moulin assemblé sur le bloc moteur et verrouillez-la en
la tournant dans le sens horaire.
4. Tournez le variateur de vitesse sur la position « 1 » ou « 2 » pour
la mise en marche. Vous pouvez utiliser la position « Pulse » pour
un meilleur contrôle de la mouture.
* Avec le moulin, vous pouvez moudre en quelques secondes : les grains du café, les
grains du poivre noir, de fruits secs et d’épices.
5. Une fois que vous avez terminé, tournez le variateur de vitesse à la position «OFF».

16 Mode D’emploi
Nettoyage et entretien
Nettoyez toujours toutes les pièces amovibles immédiatement après chaque utilisation.
1. Débranchez l’appareil du courant électrique.
2. Démontez toutes les pièces amovibles avant le nettoyage.
3. Pour nettoyer le bol mixeur, versez d’eau tiède avec quelques gouttes de savon
liquide dans le bol mixeur, fermez le couvercle, puis faites fonctionner l’appareil
pendant 5 secondes. Ensuite, éteignez l’appareil, retirez le bol mixeur et rincez-le sur
l’eau courante. NE LAVEZ JAMAIS LE BOL MIXEUR DANS LE LAVE-VAISSELLE.
4. Lavez les accessoires avec de l’eau tiède savonneuse. N’utilisez pas des matériaux
peuvent endommager les accessoires comme les détergents abrasives, lave-vaisselle
et nettoyants en aérosol.
5. SOYEZ PRUDENT lorsque vous lavez les lames d’hachoir et les lames du tranchage/
râpage, car elles peuvent causer des blessures graves car elles sont EXTRÊMEMENT
TRANCHANTES !
6. Utilisez un chiffon sec pour nettoyer le bloc moteur et assurez-vous que la zone de
verrouillage dans le bloc moteur ne contient pas de débris d’aliments.
7. Arrangez le cordon dans la zone de stockage au fond de l’appareil.
Dépannage
Si votre appareil ne fonctionne pas, vérifiez que:
Il est bien raccordé à une prise de courant.
L’accessoire utilisé est bien verrouillé sur le bloc moteur.
Le variateur de vitesse est tourné à la vitesse “1” ou “2”.
DISPOSITION DE L’APPAREIL ET DE SES MATERIAUX D’EMBALLAGE
L’emballage se compose exclusivement de matériaux qui ne présentent aucun
danger pour l’environnement et qui peuvent donc être éliminés d’une manière
qui conforme aux mesures de recyclage en vigueur dans votre région. Pour la
disposition de l’appareil lui-même, s’il vous plaît contactez le service approprié de
votre autorité locale.
Ce marquage indique que ce produit ne doit pas être jetté avec les déchets urbains
à travers l’UE. Pour éviter tout dommage possible dû à l’élimination incontrôlée de
déchets, faites recycler de façon responsable pour encourager la réutilisation des
ressources matérielles. Pour se débarrasser de votre appareil utilisé, s’il vous plaît
utilisez les systèmes de renvoi et de ramassage ou contactez le commerçant où
l’appareil a été acheté. Ils peuvent prendre ce produit pour le recycler sans danger
pour l’environnement.
AVERTISSEMENTS POUR L’ÉLIMINATION CORRECTE DU PRODUIT
Spécifications Techniques:
Modèle: FP141128A
Alimentation électrique: 220-240 V~ 50/60 Hz
Puissance électrique: 1000 Watt

17Manual
Instrucțiuni privind siguranța
Vă rugăm să citiţi cu atenţie instrucţiunile înainte de a folosi aparatul pentru prima dată.
Utilizarea neconformă cu următoarele instrucţiuni nu implică responsabilitatea companiei
şi anulează garanţia produsului.
Păstrați instrucțiunile, cartea de garanție,
chitanța de achiziție și, dacă este posibil,
cutia împreună cu ambalajul interior
Asigurați-vă că tensiunea nominală a
aparatului este compatibilă cu cea a sursei
de alimentare a locuinței.
Orice eroare de conexiune anulează
garanția aparatului.
Deconectați aparatul de la priză înainte
de a monta sau îndepărta accesorii de pe
unitatea motorului.
Opriți întotdeauna aparatul înainte de a
monta cana pe unitatea motorului.
Opriți întotdeauna aparatul și așteptați
oprirea completă a acestuia înainte de a
îndepărta cana sau accesoriile.
Nu introduceți niciodată unitatea în apă
sau alte lichide și nu lăsați aparatul să
intre în contact cu acestea. Nu manevrați
aparatul cu mâinile umede.
Nu folosiţi aparatul în aer liber.
Nu utilizați aparatul fără capac.
Nu introduceți ustensilele (linguri, spatula
sau alt obiect) în bolul robotului și cana
blenderului când acestea sunt conectate la
sursa de alimentare.
Nu lăsați aparatul nesupravegheat când
este în priză.
Utilizați aparatul pe o suprafață plană,
stabilă și rezistentă la căldură.
Nu lăsați cablul de alimentare în contact
cu piesele erbinți ale aparatului, lângă
o sursă de căldură sau suspendat peste
margini ascuțite.
Nu umpleți în exces cana deoarece dacă
lichidul ajunge sub unitatea motorului,
acesta poate absorbit de motor și îl
poate deteriora.
Nu folosiți aparatul mai mult de 2 minute
când tocați, tăiați sau radeți. În caz contrar,
nu utilizați aparatul mai mult de 1 minut și
lăsați motorul să se răcească 2 minute.
Nu folosiți aparatul pentru a amesteca
sau agita altceva decât alimente. Folosiți
aparatul doar pentru scopul pentru care a
fost conceput.
Nu utilizați niciodată aparatul dacă nu
funcționează adecvat sau prezintă semne
de deteriorare. În aceste situații, contactați
direct un centru de service autorizat
.
Nu folosiți aparatul dacă ștecherul sau
cablul de alimentare sunt deteriorate.
Pentru a evita accidentele, acestea trebuie
înlocuite la un centru de service autorizat
.
Aparatul poate folosit de copiii cu vârsta
de peste 8 ani și persoanele cu capacități
zice, senzoriale sau mentale reduse,
sau lipsite de experiență și cunoștințe, cu
condiția să e supervizate sau instruite cu
privire la utilizarea aparatului de către o
persoană responsabilă pentru siguranța
acestora și să înțeleagă pericolele
asociate.
Copiii trebuie supravegheați pentru a
vă asigura că nu se joacă cu aparatul.
Curățarea și întreținerea aparatului nu vor
realizate de copiii nesupravegheați.
Aparatul a fost proiectat exclusiv
pentru utilizare casnică. Orice utilizare
comercială, folosire necorespunzătoare
sau nerespectare a instrucțiunilor anulează
garanția și exonerează
de orice
răspundere.
Nu introduceți niciodată alimentele
manual. Folosiți împingătorul furnizat
Nu deschideți bolul dacă aparatul este în
funcțiune. Opriți aparatul și scoateți-l din
priză înainte de a îndepărta alimentele de
pe marginile bolului.
LAMELE SUNT FOARTE ASCUȚITE
Atenție la manevrarea lamelor, la golirea
bolului și în timpul curățării aparatului.

18 Manual
Fii atenți dacă în blender este turnat
lichid erbinte deoarece poate vărsat
din aparat din cauza presurizării bruște.
Produsul a fost conceput să funcționeze
doar dacă capacul și cana blenderului au
fost montate corect.
Dacă tot nu funcționează, adresați-vă
celui mai apropiat centru de service
.
Pentru siguranța dvs., folosiți doar piesele
de schimb și accesoriile originale și
adecvate pentru aparat.
Nu atingeți niciodată piesele rotative
sau mobile când se aă încă în mișcare;
așteptați întotdeauna să se oprească.
Aparatul este destinat utilizării casnice și
altor întrebuințări similare precum:
- Bucătării destinate personalului din
magazine, birouri și alte spatii de lucru
- Ferme
- Hoteluri, moteluri și alte medii de tip
rezidențial.
- Unități de tip „bed and breakfast”.
Nu folosiți încuietoarea de siguranță
pentru a utiliza aparatul, cum ar oprirea
aparatului prin îndepărtarea bolului sau a
capacului. Folosiți întotdeauna butonul de
control al vitezei.
Înainte de a folosi aparatul, trebuie să vă familiarizați cu diferitele componente ale
acestuia.
Componente:
1. Lamă pentru tăiere nă
2. Lamă pentru tăiere grosieră
3. Lamă răzătoare medie
4. Lamă răzătoare nă
5. Lamă răzătoare grosieră
6. Suport lamă
7. Disc de emulsionare
8. Lamă de frământat
9. Capac lamă
10. Lamă de tocat principală din inox
11. Împingător
12. Tub de alimentare
13. Capac bol
14. Cupă dozatoare
15. Capac cană blender
16. Cană blender
17. Arbore de acționare
18. Bol
19. Buton de control al vitezei
20. Râșniță
21. Lamă de tocat superioară din inox
Înainte de prima utilizare
Îndepărtați materialul de ambalare și curățați accesoriile în apă caldă cu
detergent.
Înainte de a așeza cana sau bolul pe unitatea motorului, asigurați-vă că butonul
pentru viteză este în poziția OFF.
1
2
3
4
5
6
7
8
9
10
21
11
12
13
19
20
18
17
16
15
14

19Manual
Utilizarea aparatului
FOLOSIREA BOLULUI PENTRU AMESTECAT
Recomandări utile:
Capacitatea maximă a bolului pentru amestecat este de 1,5 litri.
Nu folosiți aparatul mai mult de 2 minute când tocați, tăiați sau radeți și lăsați
motorul să se răcească timp de 2 minute.
Nu încărcați aparatul în exces.
Tocare:
1. Așezați bolul pe baza motorului și xați-l în poziție prin
rotirea în sens orar.
2. Introduceți arborele de acționare în bol.
3. Apoi montați lamele de tocare pe arborele de acționare.
4. Introduceți ingredientele de procesat în bol.
5. Așezați capacul bolului pe bol și xați- pe poziție rotindu-l
în sens orar, se va auzi un sunt de xare indicând
instalarea corectă.
6. Rotiți butonul de control al vitezei în poziția 2 pentru
pornire sau pentru un mai bun control al tocării, puteți
folosi poziția Impuls.
7. Pentru a adăuga ingrediente când aparatul funcționează,
îndepărtați împingătorul, adăugați ingredientele prin tubul de alimentare și apoi
introduceți împingătorul din nou.
8. Când ați terminat, rotiți butonul de control al vitezei în poziția OFF, așteptați până
la lama oprit complet, apoi îndepărtați lama de tocare înainte de a turna conținutul
din bol.
Ingrediente
Carne
Ceapă
Nuci
Brânză
Pâine
Pătrunjel
Ciocolată
Cantitate max.
300 grame
700 grame
250 grame
150 grame
100 grame
100 grame
250 grame
Viteză
Pulse/ 2
Pulse
2
2
1
Pulse
2
Notă: Lama de tocare nu este adecvată pentru folosirea împreună cu obiecte
foarte dure precum gheața sau boabele de cafea ori transformarea zahărului
granulat în zahăr pudră.

20 Manual
Frământarea/mixarea:
1. Așezați bolul pe baza motorului și xați-l în poziție prin
rotirea în sens orar.
2. Introduceți arborele de acționare în bol.
3. Apoi montați lama de frământat pe arborele de
acționare.
4. Introduceți ingredientele de procesat în bol.
5. Așezați capacul bolului pe bol și xați- pe poziție rotindu-l în sens orar, se va auzi
un sunt de xare indicând instalarea corectă.
6. Rotiți butonul de control al vitezei în poziția 1 sau 2 pentru a începe frământatul.
7. La nal, rotiți butonul de control al vitezei în poziția OFF.
Ingrediente
Pâine/pizza (*)
Prăjitură
Cantitate max.
500 grame
500 grame de făină
360 ml de apă
Viteză
1
1 / 2
(*) Nu frământați din nou aluatul dospit și nu lăsați ingredientele mai mult timp în bol
deoarece pot supraîncărca robotul.
(*) Când frământați aluat, nu folosiți aparatul mai mult de 1 minut. Așteptați cel puțin
2-3 minute înainte de a reutiliza robotul.
Emulsionare/frecat/bătut:
1. Așezați bolul pe baza motorului și xați-l în poziție prin
rotirea în sens orar.
2. Introduceți arborele de acționare în bol.
3. Apoi montați discul disc de emulsionare pe arborele de
acționare.
4. Introduceți ingredientele de procesat în bol.
5. Așezați capacul bolului pe bol și xați- pe poziție rotindu-l
în sens orar, se va auzi un sunt de xare indicând instalarea corectă.
6. Rotiți butonul de control al vitezei în poziția 1 sau 2 pentru a porni.
7. La nal, rotiți butonul de control al vitezei în poziția OFF.
Ingrediente
Maioneză/frișcă
Ou
Cantitate max.
125-350 ml
4 buc
Viteză
1
1
Note:
Nu folosiți discul de emulsionare când pregătiți amestec pentru prăjituri
care conține margarină și untură sau când frământați aluatul. Folosiți lama
de frământat în schimb.
Asigurați-vă că bolul și discul de emulsionare sunt uscate și fără ulei când
amestecați albușuri. Albușurile trebuie să e la temperatura camerei.
Other manuals for FUSION
1
This manual suits for next models
1
Table of contents
Languages:
Other Mienta Food Processor manuals
