Miglia TVMini Plus Installation instructions

Revision 1.0
(c) 2007, Miglia
TVMini+
Hardware Guide

Table of contents
Introduction and Overview of TVMini+ . . . . . . . . . . . . . . . . . . . . . . . . . . . . . . . . . . . . . . . . . . . . . . . . . . . . . .1
Introduction and System requirements . . . . . . . . . . . . . . . . . . . . . . . . . . . . . . . . . . . . . . . . . . . . . . . . . . . . . . . .2
Overview of TVMini+ . . . . . . . . . . . . . . . . . . . . . . . . . . . . . . . . . . . . . . . . . . . . . . . . . . . . . . . . . . . . . . . . . . . . . .3
Hardware and Software installation . . . . . . . . . . . . . . . . . . . . . . . . . . . . . . . . . . . . . . . . . . . . . . . . . . . . . . . . .4
Hardware installation . . . . . . . . . . . . . . . . . . . . . . . . . . . . . . . . . . . . . . . . . . . . . . . . . . . . . . . . . . . . . . . . . . . . . . .5
Connecting your video source . . . . . . . . . . . . . . . . . . . . . . . . . . . . . . . . . . . . . . . . . . . . . . . . . . . . . . . . . . . . . . . .5
Software installation . . . . . . . . . . . . . . . . . . . . . . . . . . . . . . . . . . . . . . . . . . . . . . . . . . . . . . . . . . . . . . . . . . . . . . .7
Compression settings for TVMini+ . . . . . . . . . . . . . . . . . . . . . . . . . . . . . . . . . . . . . . . . . . . . . . . . . . . . . . . . . .8
Video Compression Settings . . . . . . . . . . . . . . . . . . . . . . . . . . . . . . . . . . . . . . . . . . . . . . . . . . . . . . . . . . . . . . . . .9
Remote Control . . . . . . . . . . . . . . . . . . . . . . . . . . . . . . . . . . . . . . . . . . . . . . . . . . . . . . . . . . . . . . . . . . . . . . . . . . . .10
Warranty agreement . . . . . . . . . . . . . . . . . . . . . . . . . . . . . . . . . . . . . . . . . . . . . . . . . . . . . . . . . . . . . . . . . . . . . .11

Introduction and Overview
of TVMini+
TVMini+™ User Guide
Page 1

Introduction
Thank you for choosing TVMini+ from Miglia. TVMini+ allows you to watch and record digital (DVB-T, Freeview)
and analogue TV and as well as capture video on your Mac. TVMini+ has been designed from the ground up for
your Mac.
System requirements:
• Mac with built-in USB 2.0 connectivity
• G5 or Intel processor
• 512 MB of RAM
• Mac OS X 10.4.x or 10.5.x
• QuickTime 7
Package contents
• TVMini+
• Infrared Remote Control
• CD-ROM with MigliaTV software and installation guide
• Portable digital antenna
• Video capture cable
• USB 2.0 extension cable
• Warranty card
• QuickStart Guide
User Guide Overview
This User Guide will guide you through the TVMini+ installation as well as explain as certain hardware specific
functions. The full MigliaTV user guide for the software functions is available on the CD-ROM that ships with
TVMini+ or via download from the Miglia website.
Technical Support
Should you ever have any questions regarding your product, please do not hesitate to contact Miglia.
The best way to contact technical support, is to fill out a ‘Technical Support Case Form’. Please go to
http://www.miglia.com/Support and click on the TVMini+ link.
TVMini+™ User Guide
Page 2

Overview of TVMini+™
Video inputs
TVMini+™ features several video inputs:
• Coaxial TV input
• Composite input (via Breakout cable)
• S-Video input (via Breakout cable)
• RCA Stereo audio input (via Breakout cable)
•Coaxial connection: This is the TV Tuner connection, which can receive digital and analogue TV.
Connect the portable antenna, a cable from a roof-top antenna or a cable from a
CableTV outlet (the latter only works for analogue)
•Composite input: Composite is a widely used standard for connecting video
equipment. This type of connector is often found on camcorders and
VCRs.
•S-Video input: This connection gives a better image quality than composite and is
generally found on mid-range camcorders, VCRs and DVD players. If
you intend to capture video from an analogue source, use this
connection whenever you can.
• Stereo audio IN: TVMini+ card uses conventional RCA plugs
• USB 2.0: For the connection to your Mac
TVMini+™ User Guide
Page 3
Composite
S-Video
Audio
TV
USB 2.0

Hardware and Software
Installation
TVMini+™ User Guide
Page 4

I. Hardware Installation
Connect TVMini+ to a USB 2.0 port of your computer. The stick is thin enough to be used on the left USB 2.0 port
of a MacBook Pro, without covering the Magsafe port.
II. Connecting your video source
1. Coaxial connection
If you receive TV channels via a roof-mounted antenna, an analogue cable service or a portableantenna, you
will most likely want to use the TV input on TVMini+.
Connect your coaxial cable as shown on the illustration below
TVMini+™ User Guide
Page 5

2. Composite Connection
Digital TV subscribers (Cable, Satellite) can use their digital receiver set top box with TVMini+. You can either
make a connection via S-Video or Composite.
If you wish to capture video footage from a Camcorder, VCR or DVD-Player, a connection with Composite or S-
Video is recommended over the coaxial input tuned to a certain channel.
The diagram below shows a connection via Composite.
3. S-Video Connection
For digital TV subscribers and users wishing to capture video from an analogue source, an S-Video connection is
strongly recommended as it will usually give you a higher picture quality compared to Composite.
Note that S-Video do not carry audio signals, but only video signals. Using the left/right audio connectors and
cables is necessary.
The diagram below shows a connection via S-Video
TVMini+™ User Guide
Page 6
Audio
Composite
Audio
S-Video
TVMini+ Hardware Guide
Page 7
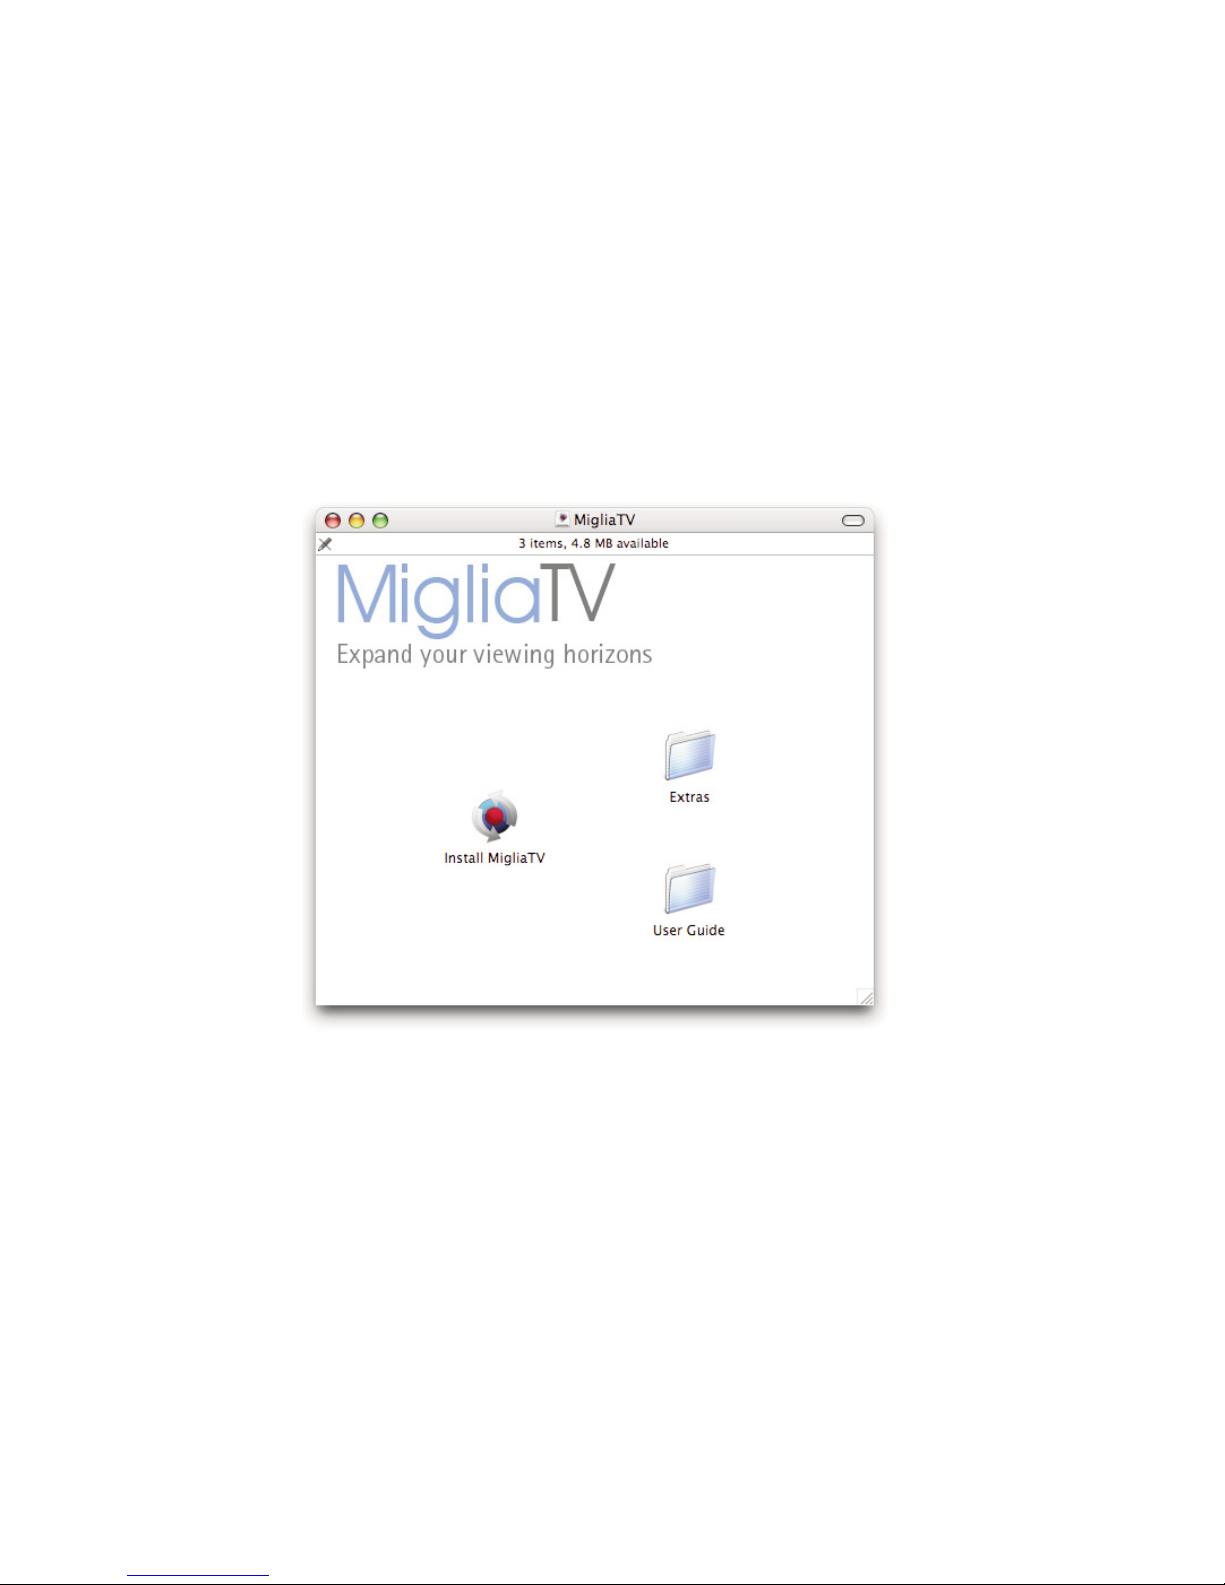
I. Installing MigliaTV
1. Insert the CD-ROM that ships with your product into the CD/DVD drive of your Mac
2. Double-click on the ‘’Install MigliaTV” icon to launch the installer. Select the startup drive of your choice and
click on ‘Install’. Note that you will be asked for your administrator password when performing the
installation.
Note: The administrator password is your Mac OS X password that you selected when you first ran Mac OS X.
It is not the software activation key.
4. Once the installation process is finished, quit the installer
5. The MigliaTV folder will be located in the ‘Applications’ folder of the volume containing
your system software.

Compression Settings
for TVMini+
TVMini+™ User Guide
Page 8

Compression Settings
TVMini+ saves digital TV straight to your hard drive, without changing the quality in any way. What is broadcast
is what you get on your hard drive. For analogue TV, TVMini+ uses a high quality MPEG-2 software compressor to
deliver files that can be easily burnt to DVD (without conversion) or exported to an iPod, iPhone, AppleTV (with
conversion)
The Quality slider lets you adjust the bitrate of the MPEG-2 file you are going to record to your hard drive. The
higher the bitrate, the better the picture quality and the larger the file size. If hard drive space is not an issue for
you, move the slider to 100%.
The Quality slider does not affect digital recordings.
TVMini+™ User Guide
Page 9

TVMini+ Hardware Guide
Page 10
TVMini+
Remote Control
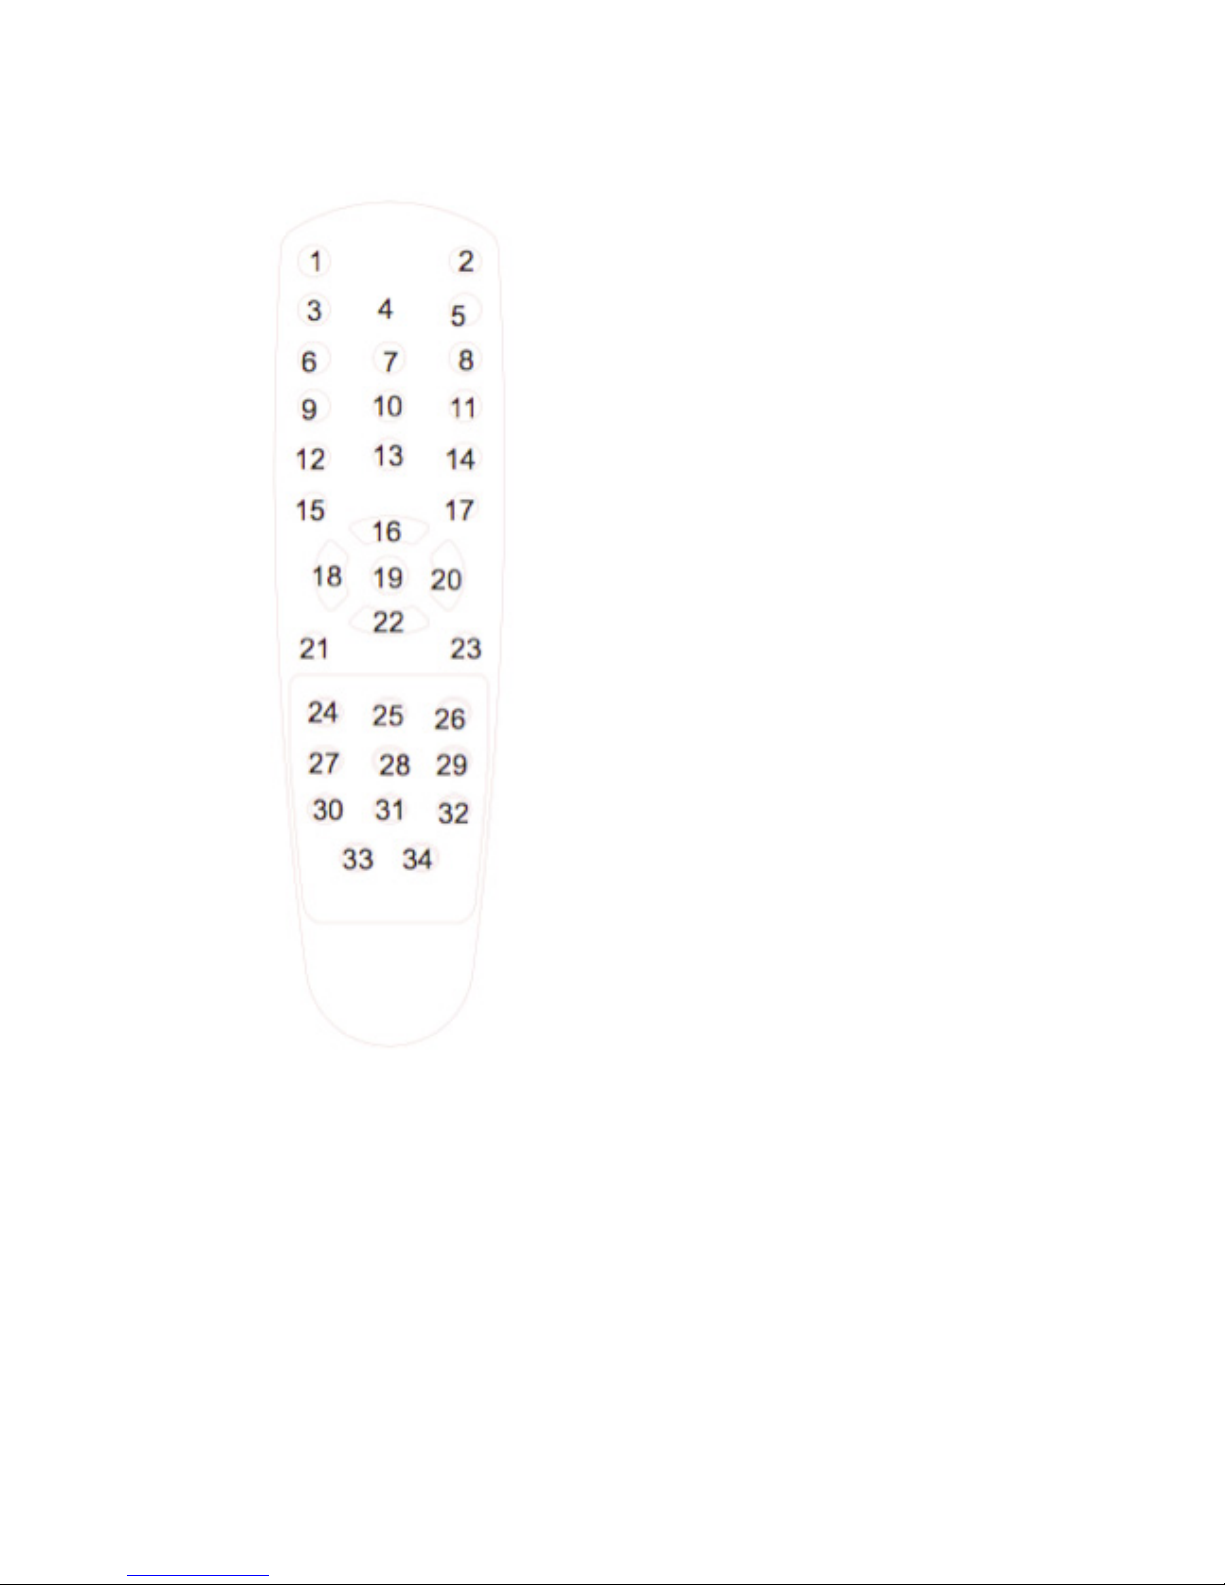
Remote Control Key assignation
1: Open/Close TV window
2: Record
3 - 11, 13: Numeral keys. Enters a channel number directly
12: Switch to last channel watched
14: Reserved
15: Reserved
16: Channel UP
17: Toggles the video input (Tuner, Composite, S-Video)
18: Volume down
19: Reserved
20: Volume UP
21: Reserved
22: Channel down
23: Reserved
24: Rewind live TV
25: Pause/Resume live TV
26: Skip forward live TV
27: Go back to beginning of TV buffer
28: Go to live feed
29: Toggles audio channel (if program is bilingual)
30: Reserved
31: Reserved
32: Reserved
33: Toggle full screen/window mode
34: Mute
A reserved key will not have any effect when pressed. This
type of key will be enabled in future releases of the
software as the featureset grows.
TVMini+ Hardware Guide
Page 11

TVMini+™ User Guide
Page 12
Warranty Agreement
Hardware Products:
HDMI Ltd warrants your hardware product against any defect in material and workmanship, under normal use, for
the designated warranty period. The warranty becomes effective from the date of purchase by the end user.
If the product is found to be defective within the warranty period, HDMI Ltd will, at its sole option, repair or
replace the defective product.
HDMI Ltd will not, under any circumstances, be liable for direct, special or consequential damages such as, but
not limited to, damage or loss of property or equipment, loss of profits or revenues, cost of replacement goods, or
expense or inconvenience caused by service interruptions.
This warranty is void if:
• The product was operated or stored in abnormal use or maintenance conditions.
• The product was repaired, modified or altered or undergone attempted repair by non-authorised personel,
unless HDMI Ltd has authorised such repair, modification or alteration.
• The product was damaged, abused or misused
• The product was installed without following the supplied installation instructions.
• The serial number of the product is defaced, modified or missing.
• The “Warranty Void” seal on the casing has been modified, removed or broken.
The decision of HDMI Ltd shall be final and binding with regards to the condition of product return and eligibility
of repair or replacement.
Software Products:
Software Products are covered specifically for defective media or manuals only, for a 14 day period. The software
license you acquired cannot under any circumstance by transferred back to HDMI Ltd. HDMI Ltd does not
warrant or represent that all third-party software or hardware will function error-free when used in conjunction
with its products.
How to obtain warranty service:
To obtain warranty service, within 30 days of the date of purchase, please contact the retailer from whom you
made your purchase. To obtain warranty service, after 30 days of the date of purchase contact Miglia’s Technical
Support Service. A proof of purchase will be required to confirm that the product is still under warranty. Should
Miglia’s Technical Support diagnose a fault on your product, a Return to Manufacturer Authorisation (RMA)
number will be issued to you.
All products returned to HDMI Ltd must be securely packaged in their original box and shipped at the customer’s
cost inclusive of any requested documentation. Return shipment of repaired or replaced product will be covered
by HDMI Ltd.
Any product returned without an RMA number issued by Miglia's Technical Support Service will be refused.
This manual suits for next models
1
Table of contents
Other Miglia TV Tuner manuals


 quick start guide")


