Milagrow HumanTech
4.2 Start Up Procedure
(1) When placing the RoboPhelps
15/20/25/30 in the pool: you must wobble
the RoboPhelps 15/20/25/30 according
Pic.4.2.1 to make sure the air inside
is released when you put the RoboPhelps
15/20/25/30 in the water, So it will
automatically sink to the bottom of pool.
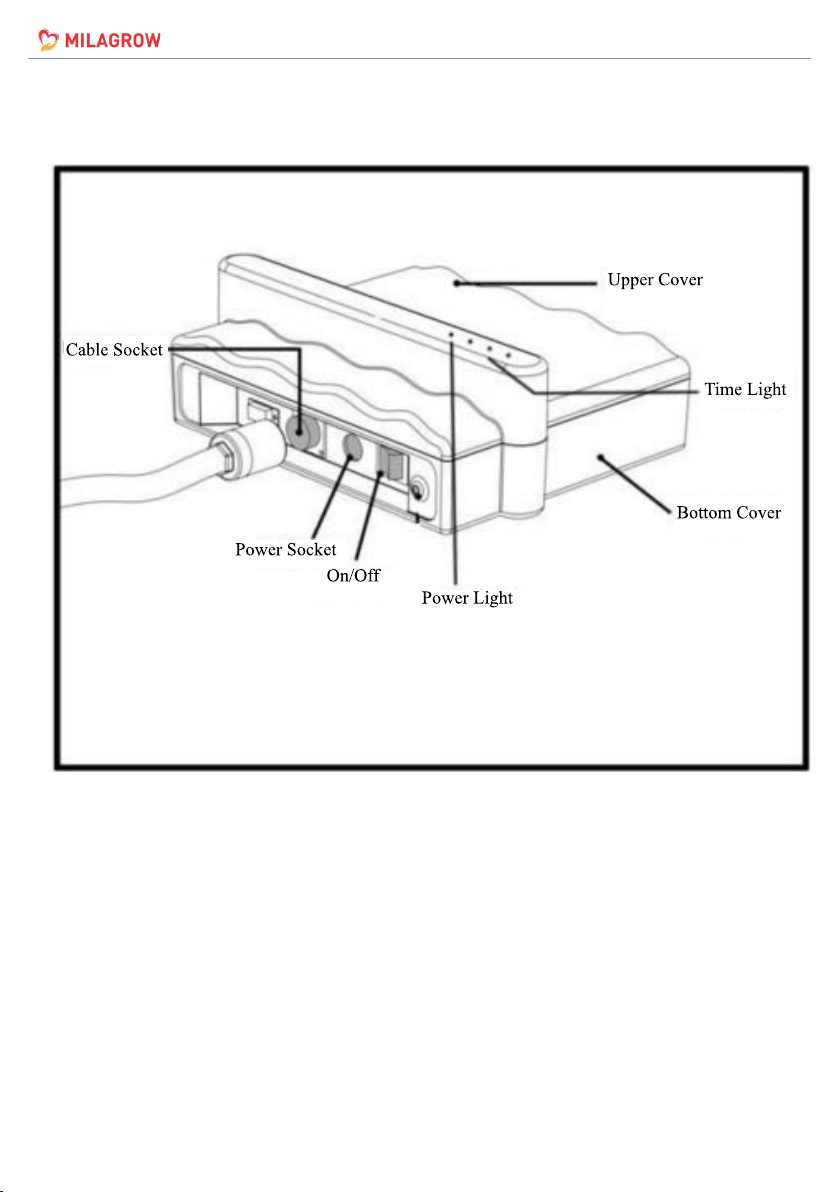
(2) Start: Press the “ON” button, LED
“POWER” indicator.
And “0.5H” cycle time LED will illuminate
(see pic.4.2.2) You may select 0.5Hr,
1Hr or 2Hrs cleaning time using the
“ON” button on the Remote Control and
relative L E D i n d i c a t o r s w i l l
illuminate on the Power Box when
selected.
(Pic.4.2.1)
(Pic.4.2.2)
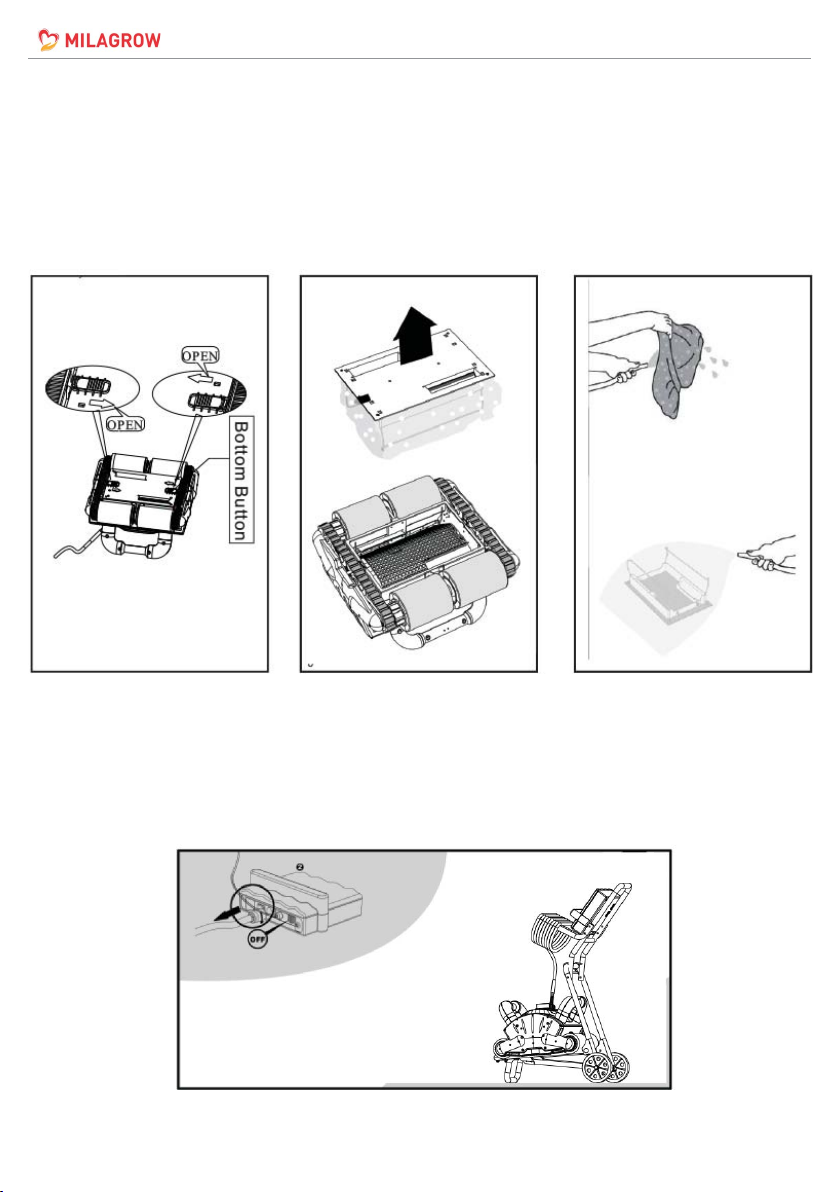
4.3 Proper Shut Down and Care
(1) To Shut Down The RoboPhelps
15/20/25/30: Turn the power switch on
the power Box to the off position, once the
RoboPhelps15/20/25/30nishesworking,
pull the Floating Cable slowly until the
Handle emerges from the water (Pic.4.3.1),
and then pull the RoboPhelps 15/20/25/30
out of the pool by its Handle.
HANGZHOU GAOYUE TECHNOLOGY CO., LTD.
4.3 Proper Shut Down and Care
(1) To Shut Down The iCleaner-120:
Turn the power switch on the power
Box to the off position, once the
iCleaner-120 finishes working, pull the
Floating Cable slowly until the Handle
emerges from the water (Pic.4.3.1), and
then pull the iCleaner-120 out of the
pool by its Handle.
(2) Clean iCleaner-120: Invert the iCleaner-120 gently onto the floor, unlock the
Latch on the Base Plate (Pic4.3.2) and remove the Filter Bag from Base Plate,
clean the Filter Bag (Pic.4.3.3), once clean place the Filter Bag on its frame,
reassemble the Base Plate and put it back into the iCleaner-120 once the Filter
Bag is dry.
(Note: When re-fitting the Filter Bag to the Base Plate, please ensure the long
sides of the Filter Bag are smooth to ensure an easy fit into the base of the
iCleaner-120.)
6
4
7