OM-237 679 Page 2
3. Operation
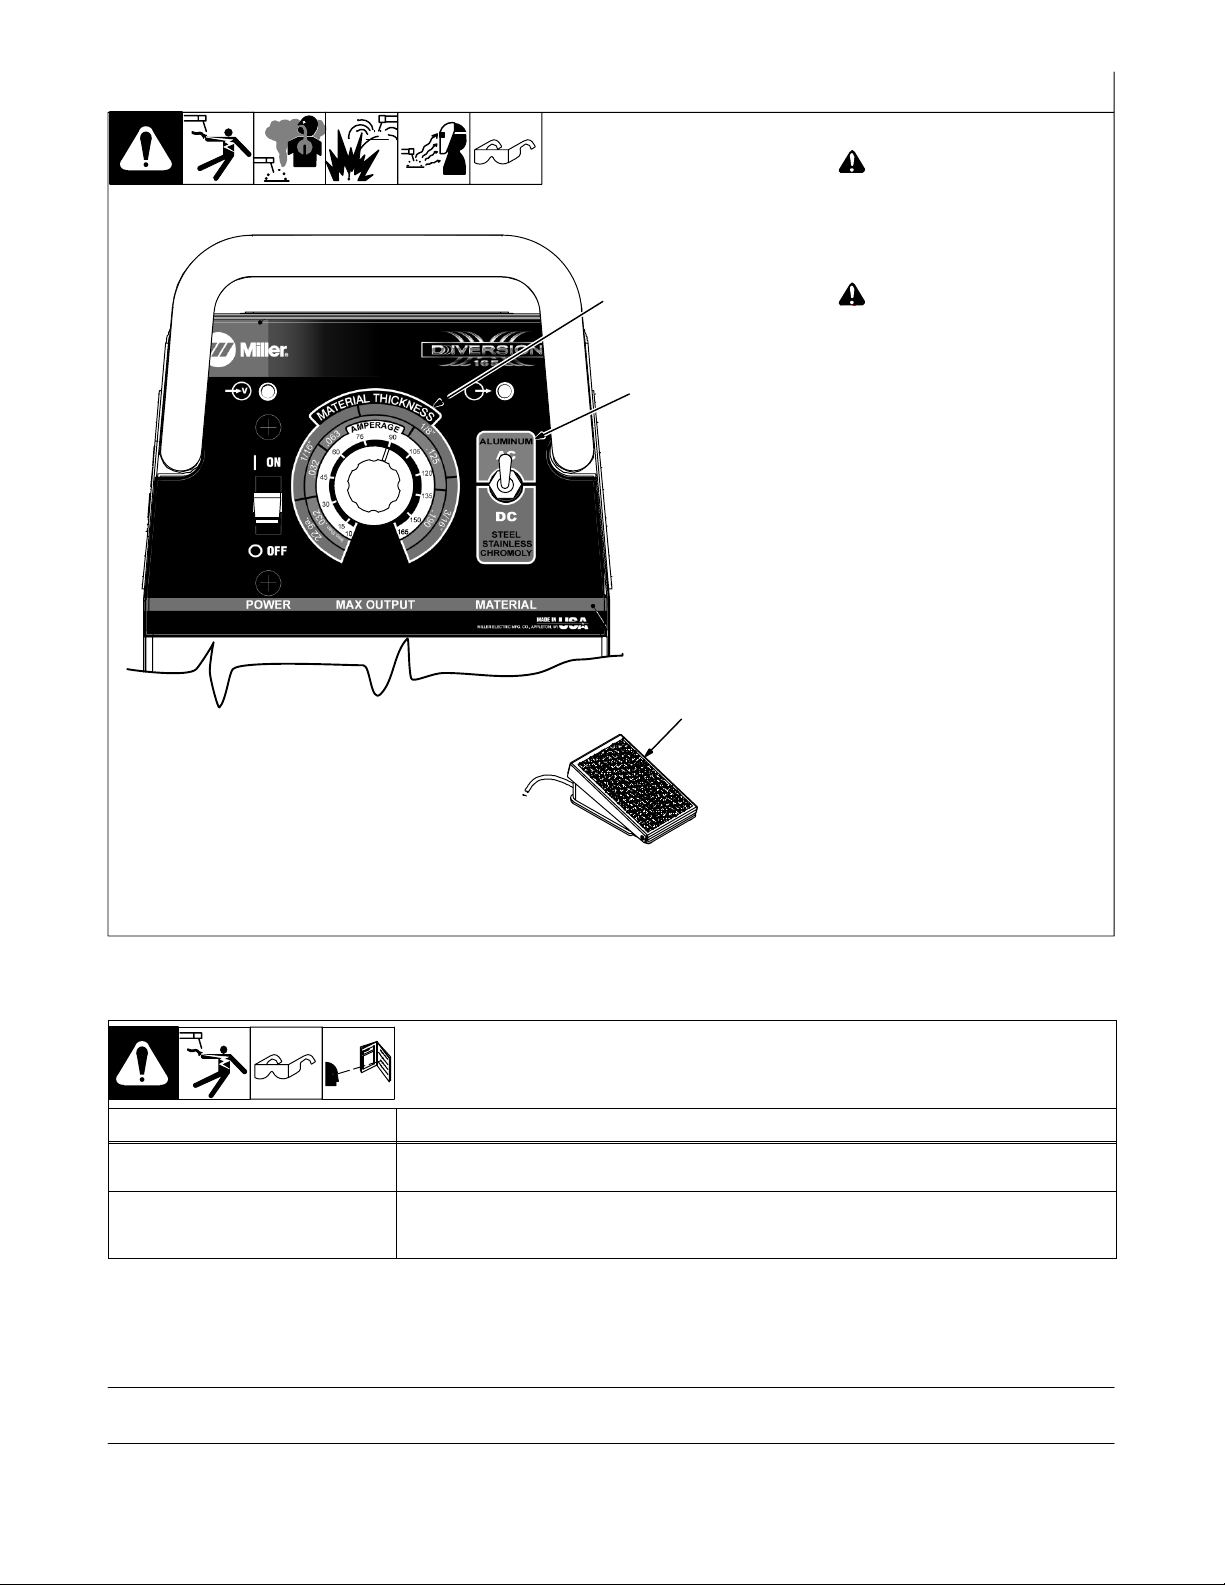
232 896
1 Material Switch
!Do not use AC output in
damp areas, if movement is
confined, or if there is dan-
ger of falling. Use AC output
ONLY if required for the
welding process, and then
use a remote control.
!Do not change position of
switch while welding or
while under load.
Use switch to select DC for steel,
stainless steel, and chrome-moly,
or AC for aluminum applications.
2 Material Thickness/Amperage
Control
Use control to select material thick-
ness and corresponding amper-
age.
When Material switch is in the DC
position, use the blue scale to se-
lect the appropriate material thick-
ness and corresponding amperage
from the white scale. When Material
switch is in the AC position, use the
gray scale to select the appropriate
material thickness and correspond-
ing amperage from the white scale.
Set maximum desired amperage.
The maximum amperage available
when using the foot control will be
the value the Amperage control dial
is set at.
3 Foot Control
Press pedal lightly to turn weld
output and gas flow on. Press pedal
further to increase weld output.
Raise pedal to reduce amperage,
crater-out, and turn off weld output
and gas flow.
3
2
1
4. Troubleshooting
Trouble Remedy
No weld output Be sure foot control cord is plugged into matching receptacles on welding power source and back of
foot control.
Not enough weld amperage Set weld amperage to highest desired value on welding power source Material Thickness/Amperage
control. Amperage available with foot control is 10 amps to max value set on Thickness/Amperage
control.
5. Parts
Description
Part
No. Quantity
300 432 RFCS−RJ45 (FOOT CONTROL) 1. . . . . . . . . . . . . . . . . . . . . . . . . . . . . . . . . . . . . . . . . . . . . . . . . . . . . . .
237 678 FOOT CONTROL, RFCS−RJ45 1. . . . . . . . . . . . . . . . . . . . . . . . . . . . . . . . . . . . . . . . . . . . . . . . . . . . . . .
237 676 CABLE CONNECTING, W/CONNECTORS 14−1/2 FT 1. . . . . . . . . . . . . . . . . . . . . . . . . . . . . . . . . . . .


