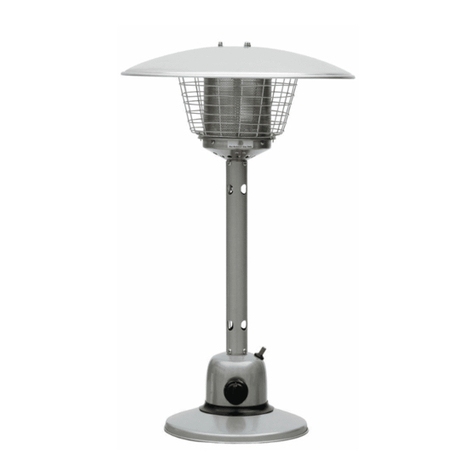
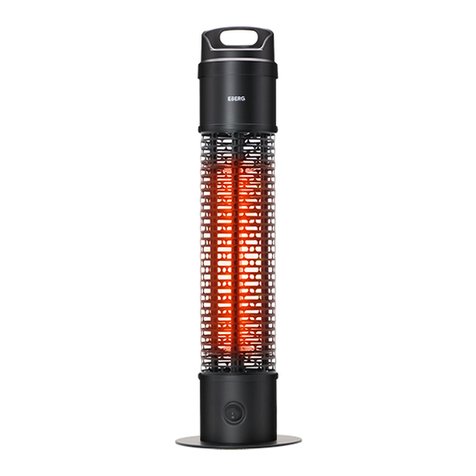
Mimosa 0082326 User manual

OUTDOOR GAS AREA HEATER
-CHARCOAL
Provides warmth and ambiance for outdoor settings
infrared patio heaters
Important: Please retain these instructions for future use
0082326
0082326

1
DANGER
If you smell gas:
1. Shut off gas to the appliance.
2. Extinguish any open flame.
3. If odor continues, keep away from the appliance
and immediately call your gas supplier or fire department.
DANGER CARBON MONOXIDE HAZARD
This appliance can produce carbon
monoxide which has no odor. Using it
in an enclosed space can kill you.
Never use this appliance in an
enclosed space such as a camper,
tent, car or home.
WARNING
Do not store or use gasoline or other flammable vapors and
liquids in the vicinity of this or any other appliance. An
LP-cylinder not connected for use shall not be stored in the
vicinity of this or any other appliance.
WARNING
Improper installation, adjustment, alteration, service or
maintenance can cause property damage, injury or death.
Read the installation, operation and maintenance instructions
thoroughly before installing or servicing this equipment.
WARNING: ForOutdoor Use Only

GAS LEAK TEST
Gas connections on the heater are leak tested at the factory prior to shipment. A complete gas
tightness check must be performed due to possible mishandling in shipment or excessive pressure
being applied to the heater gas connections.
1.Make a soap solution of one part liquid detergent and one part water.
Make sure the control knob on the heater is off and the gas valve on the cylinder is off before
mixing the soapy solution.
2.Turn on the gas bottle.
3. Apply the soap solution to the gas connections using a soft bristle brush.
Soap bubbles will appear
if there is a gas leak.
In case of a leak, turn off
the gas supply. Tighen any
leaking fittings, then turn the
gas supply on and re-check.
If there is a leak anywhere
on the gas cylinder, do not
use the cylinder. Locate the
leaking cylinder outdoors
away from sources of
ignition, then contact your
local gas authority or
cylinder exchange provider
to arrange disposal.
Warning:
Do not operate the appliance until all gas leaks have been rectified.
Never leak test while smoking.
+++
+
+
+
Regulator / Cylinder
Hose / Regulator
Detergent
2

PACKAGE CONTENTS
3
NOITPIRCSEDTRAP QUANTITY
A
Female Safety Guard
1
B
Male Safety Guard
1
C
Burner Head Assembly
1
D1
E
Tank Housing Body
FBase
1
1
Regulator and hose assembly
B
C
E
F
D
A

HARDWARE CONTENTS (shown actual size)
4
SAFETY INFORMATION
Please read and understand this entire manual before attempting to assemble, operate or install
the product. This manual contains important information about the assembly, operation and
maintenance of this patio heater. General safety information is presented in these first few pages
and is also located throughout the manual. Keep this manual for future reference and to educate
new users of this product. This manual should be read in conjunction with the labeling on the product.
Safety precautions are essential when any mechanical or LPG fueled equipment is involved.
These precautions are necessary when using, storing, and servicing. Using this equipment with the
respect and caution demanded will reduce the possibilities of personal injury or property damage.
The following symbols shown below are used extensively throughout this manual. Always heed
these precautions, as they are essential when using any mechanical or fueled equipment.
DANGER DANGER
DANGER indicates an imminently hazardous situation
which, if not avoided, will result in death or serious injury. FOR YOUR SAFETY
If you smell gas:
1. Shut off gas to the appliance.
2. Extinguish any open flame.
3. If odor continues, keep away from the appliance and
immediately call you gas supplier or fire department.
DANGER
Failure to comply with the precautions and instructions
provided with this heater can result in death, serious
bodily injury and property loss or damage from
hazards of fire, explosion, burn, asphyxiation, and/or
carbon monoxide poisoning. Only persons who can
understand and follow the instructions should use or
service this heater.
Stand connectors
Qty. 6
DD
Screw
M5 x 12
Qty. 10
Qty. 1
M6
Dome
Nut
BB
Self Taping
Screws
Qty. 4
CC
AA

5
SAFETY INFORMATION
DANGER
&$5%210212;,'(+$=$5'
7KLVKHDWHULVDFRPEXVWLRQDSSOLDQFH$OO
FRPEXVWLRQDSSOLDQFHVSURGXFHFDUERQPRQR[LGH
&2GXULQJWKHFRPEXVWLRQSURFHVV7KLVSURGXFWLV
GHVLJQHGWRSURGXFHH[WUHPHO\PLQXWHQRQKD]DUGRXV
DPRXQWVRI&2LIXVHGDQGPDLQWDLQHGLQDFFRUGDQFH
ZLWKDOOZDUQLQJVDQGLQVWUXFWLRQV'RQRWEORFNDLU
IORZLQWRRURXWRIWKHKHDWHU
&DUERQ0RQR[LGH&2SRLVRQLQJSURGXFHVIOXOLNH
V\PSWRPVZDWHU\H\HVKHDGDFKHVGL]]LQHVVIDWLJXH
DQGSRVVLEO\GHDWK<RXFDQWVHHLWDQG\RXFDQW
VPHOOLW,WVDQLQYLVLEOHNLOOHU,IWKHVHV\PSWRPVDUH
SUHVHQWGXULQJRSHUDWLRQRIWKLVSURGXFWJHWIUHVKDLU
LPPHGLDWHO\
)RURXWGRRUXVHRQO\
1HYHUXVHLQVLGHKRXVHRURWKHUXQYHQWLODWHGRU
HQFORVHGDUHDV
7KLVKHDWHUFRQVXPHVDLUR[\JHQ'RQRWXVHLQ
XQYHQWLODWHGRUHQFORVHGDUHDVWRDYRLGHQGDQJHULQJ
\RXUOLIH
DANGER
(;3/26,21),5(+$=$5'
.HHSVROLGFRPEXVWLEOHVVXFKDVEXLOGLQJPDWHULDOV
SDSHURUFDUGERDUGDVDIHGLVWDQFHDZD\IURPWKH
KHDWHUDVUHFRPPHQGHGE\WKHLQVWUXFWLRQV
3URYLGHDGHTXDWHFOHDUDQFHVDURXQGDLURSHQLQJV
LQWRWKHFRPEXVWLRQFKDPEHU
1HYHUXVHWKHKHDWHULQVSDFHVZKLFKGRRUPD\
FRQWDLQYRODWLOHRUDLUERUQHFRPEXVWLEOHVRUSURGXFWV
VXFKDVJDVROLQHVROYHQWVSDLQWWKLQQHUGXVWSDUWLFOHV
RUXQNQRZQFKHPLFDOV
'XULQJRSHUDWLRQWKLVSURGXFWFDQEHDVRXUFHRI
LJQLWLRQ.HHSKHDWHUDUHDFOHDUDQGIUHHIURP
FRPEXVWLEOHPDWHULDOVJDVROLQHSDLQWWKLQQHUFOHDQLQJ
VROYHQWVDQGRWKHUIODPPDEOHYDSRUVDQGOLTXLGV'R
QRWXVHKHDWHULQDUHDVZLWKKLJKGXVWFRQWHQW
0LQLPXPKHDWHUFOHDUDQFHVIURPFRPEXVWLEOH
PDWHULDOVWZRIHHWIURPWKHVLGHVIRXUIHHW
IURPWKHWRS
DANGER
WARN,1*
'RQRWVWRUHRUXVHJDVROLQHRURWKHUIODPPDEOHYDSRUV
DQGOLTXLGVLQWKHYLFLQLW\RIWKLVRUDQ\RWKHUDSSOLDQFH
$Q/3F\OLQGHUQRWFRQQHFWHGIRUXVHVKDOOQRWEH
VWRUHGLQWKHYLFLQLW\RIWKLVRUDQ\RWKHUDSSOLDQFH
WARN,1*
,PSURSHULQVWDOODWLRQDGMXVWPHQWDOWHUDWLRQVHUYLFHRU
PDLQWHQDQFHFDQFDXVHSURSHUW\GDPDJHLQMXU\RU
GHDWK5HDGWKHLQVWDOODWLRQRSHUDWLRQDQG
PDLQWHQDQFHLQVWUXFWLRQVWKRURXJKO\EHIRUHLQVWDOOLQJ
RUVHUYLFLQJWKLVHTXLSPHQW
&$5%210212;,'(+$=$5'
7KLVDSSOLDQFHFDQSURGXFH
FDUERQPRQR[LGHZKLFKKDV
QRRGRU8VLQJLWLQDQHQFORVHG
VSDFHFDQNLOO\RX1HYHUXVHWKLV
DSSOLDQFHLQDQHQFORVHGVSDFH
VXFKDVDFDPSHUWHQWRUKRPH
WARN,1*)RU2XWGRRU8VH2QO\
DANGER
(;3/26,21),5(+$=$5'
1HYHUVWRUH/3*QHDUKLJKKHDWRSHQIODPHV
SLORWOLJKWVGLUHFWVXQOLJKWRWKHULJQLWLRQVRXUFHVRU
ZKHUHWHPSHUDWXUHVH[FHHGGHJUHHV)&
/3*YDSRUVDUHKHDYLHUWKDQDLUDQGFDQ
DFFXPXODWHLQORZSODFHV,I\RXVPHOOJDVOHDYHWKH
DUHDLPPHGLDWHO\
1HYHULQVWDOORUUHPRYH/3*F\OLQGHUZKLOHKHDWHU
LVOLJKWHGQHDUIODPHSLORWOLJKWVRWKHULJQLWLRQVRXUFHV
RUZKLOHKHDWHULVKRWWRWRXFK
7KLVKHDWHULVUHGKRWGXULQJXVHDQGFDQLJQLWH
IODPPDEOHVWRRFORVHWRWKHEXUQHU.HHSIODPPDEOHV
DWOHDVWIHHWIURPVLGHVIHHWIURPWRS.HHS
JDVROLQHDQGRWKHUIODPPDEOHOLTXLGVDQGYDSRUVZHOO
DZD\IURPKHDWHU
6WRUHWKH/3*F\OLQGHURXWGRRUVLQDZHOOYHQWLODWHG
VSDFHRXWRIUHDFKRIFKLOGUHQ1HYHUVWRUHWKH/3*
F\OLQGHULQDQHQFORVHGDUHDKRXVHJDUDJHHWF,I
KHDWHULVWREHVWRUHGLQGRRUVGLVFRQQHFWWKH/3*
F\OLQGHUIRURXWGRRUVWRUDJH
WARN,1*
:$51,1*LQGLFDWHVDQLPPLQHQWO\KD]DUGRXVVLWXDWLRQ
ZKLFKLIQRWDYRLGHGZLOOUHVXOWLQGHDWKRUVHULRXVLQMXU\

6
PREPARATION
Before beginning assembly of product, make sure all parts are present. Compare parts with
package contents list and hardware contents above. If any part is missing or damaged, do not
attempt to assemble the product.Contact customer service for replacement parts.
Estimated AssemblyTime: 20 minutes
Tools Required for Assembly (not included):
Phillips screwdriver. Leak Detection Solution.
WARNING
BURN HAZARD
1HYHUOHDYHKHDWHUXQDWWHQGHGZKHQKRWRULQXVH
.HHSRXWRIUHDFKRIFKLOGUHQ
WARNING
7KLVSURGXFWLVIXHOHGE\/3*/3*LVLQYLVLEOHRGRUOHVV
and flammable. An odorant is normally added to help
detect leaks and can be described as a “rotten egg” smell.
The odorant can fade over time so leaking gas is not
always detectable by smell alone.
/3*LVKHDYLHUWKDQDLUDQGOHDNLQJ/3*ZLOOVLQNWRWKH
lowest level possible. It can ignite by ignition sources
including matches, lighters, sparks or open flames of any
kind many feet away from the original leak. Use only LPG
set up for vapor withdrawal.
6WRUHRUXVH/3*LQFRPSOLDQFHZLWKORFDO
ordinances and codes or with ANS/NFPA 58. Turn off
LPG when not in use.
WARNING
$OHUWFKLOGUHQDQGDGXOWVWRWKHKD]DUGVRIKLJKVXUIDFH
temperatures. Stay away from these surfaces to avoid
burning skin or igniting clothing.
&DUHIXOO\VXSHUYLVH\RXQJFKLOGUHQZKHQLQWKHYLFLQLW\
of the heater.
'RQRWKDQJFORWKLQJRUDQ\RWKHUIODPPDEOHPDWHULDOV
from the heater, or place on or near the heater.
5HSODFHDQ\JXDUGRUSURWHFWLYHGHYLFHUHPRYHGIRU
servicing the appliance prior to placing back in service.
,QVWDOODWLRQDQGUHSDLUVKRXOGEHGRQHE\DTXDOLILHG
service person. The heater should be inspected
before use and annually by a qualified service person.
More frequent cleaning may be required as necessary.
It is imperative that the control compartment, burners,
and circulating air passageway of the appliance be
kept clean.
SAFETY INFORMATION
CAUTION
&$87,21LQGLFDWHVDQLPPLQHQWO\KD]DUGRXVVLWXDWLRQ
which, if not avoided, may result in minor or moderate
personal injury, or property damage.
CAUTION
SERVICE SAFETY
.HHSDOOFRQQHFWLRQVDQGILWWLQJVFOHDQ0DNHVXUH
LPG cylinder valve outlet is clean.
'XULQJVHWXSFKHFNDOOFRQQHFWLRQVDQGILWWLQJVIRU
leaks using soapy water. Never use a flame.
8VHDVDKHDWLQJDSSOLDQFHRQO\1HYHUDOWHULQDQ\
way or use with any device.
WARNING
Certain materials or items, when stored under the
heater, will be subjected to radiant heat and could be
seriously damaged.

7
ASSEMBLY INSTRUCTIONS
Hardware Used
1
2
1. Use 6pcs M5X12 screw to join the stand and stand
connectors.
2.Use 4pcs M5X12 screw(BB) to join the tank housing
body ( E ) and base ( F ).
BB Screw M5 x 12 x 4
BB
E
F
Hardware Used
BB Screw M5 x 12 x 6
DD Stand connectors x 6
3
3-1. Hasp the second door locker and open the first one
as shown in photos.
3-2. Use 4pcs Self Taping Screws join the burner head
and tank housing body.
Hardware Used
CC Self Taping Screws x 4
C
CC

8
ASSEMBLY INSTRUCTIONS
4
4. Use the M6 Dome Nut ( AA ) connect the female safety
guards ( A ) and male safety guard ( B ) to burner head
assembly ( C ).
5
A
B
AA
C
AA x 1
M6 Dome Nut
Hardware Used
5-1. Open the door of tank housing body.
5-2. Attach the regulator (D) to the gas cylinder and
tighten with wrench if fitted with a nut, or tighten by
hand if fitted with a hand wheel.
5-3. Then leak test the gas inlet and gas cylinder
connections as explained on page 11.
5-4. Put the gas cylinder into the tank housing, then close
the door.
D

9
ASSEMBLY INSTRUCTIONS
6
6. Connect hose and regulator to cylinder.
The LPG gas and cylinder are sold separately.
Use a standard 20 lb. LPG cylinder only
(approximately 12.2 in. / 31cm. in diameter and 17.9 in.
/ 45.5cm high).
Use this heater only with a LPG vapor withdrawal
supply system. See chapter 5 of the standard for
storage and handling of liquefied petroleum gas,
ANS/NFPA 58. Your local library or fire department
should have this book.
Storage of an appliance indoors is permissible only if
the cylinder is disconnected and removed from the
appliance. A cylinder must be stored outdoors in a
well-ventilated area out of the reach of children.
A disconnected cylinder must have dust caps tightly
installed and must not be stored in a building, garage or
any other enclosed area. The maximum inlet gas supply
pressure: 250 psi /1750 kPa. The minimum inlet gas
supply pressure: 5 psi /35kPa. Manifold pressure with
regulator provided: 11 inch W.C/ 2.74 kPa.
The pressure regulator and hose assembly supplied with
the appliance must be used. The installation must conform
with local codes, or in the absence of local codes, with
national fuel gas code, ANS Z223.1/NFPA54, natural gas
and propane Installation Code, CSA B149.1, or propane
storage and handling code, B149.2.
Standard 20 lb. tank
12.2 in. / 31cm
17.9 in. / 45.5cm

10
ASSEMBLY INSTRUCTIONS
A dented, rusted or damaged LPG cylinder may be
hazardous and should be checked by your cylinder
supplier. Never use a LPG cylinder with a damaged
valve connection.
The LPG cylinder must be constructed and marked
in accordance with the specifications for LP gas
cylinders of the U.S. Department of Transportation
(DOT) or the standard for cylinders, spheres and
tubes for transportation of dangerous goods and
commission, CAN/CSA-B339.
The cylinder must have a listed overfilling prevention
device.
The cylinder must have a connection device compatible
with the connection for the appliance.
The cylinder used must include a collar to protect the
cylinder valve.
Never connect an unregulated LPG cylinder to the
heater.
Attach regulator to cylinder. Complete attachment.
Install cylinder.
Do not store a spare LP-gas cylinder under or near this appliance;
Never fill the cylinder beyond 80 percent full;
“Place the dust cap on the cylinder valve outlet whenever the cylinder is not
in use. Only install the type of dust cap on the cylinder valve that is provided with
the cylinder valve. Other type of caps or plugs may result in leakage of propane.”
The knob on the LP tank must be closed. Make sure that
the knob is turned clockwise to a full stop. The
cylinder supply system must be arranged for vapor
withdrawal. Check that the control knob on the control
unit is turned off. Hold the regulator in one hand and
insert the nipple into the valve outlet. Be sure the nipple
is centered in the valve outlet. The coupling nut connects
to the large outside threads on the valve outlet.
Hand-tighten the coupling nut clockwise until it comes
to a full stop. Firmly tighten by hand only.
To Disconnect: Fully close the tank valve by turning
clockwise. Turn the coupling nut counterclockwise
until the regulator assembly detaches.

11
OPERATION INSTRUCTIONS
Leak Check
1. Make 2-3 oz. of leak check solution (one part liquid detergent and one part water).
2. Apply solution thoroughly where hose attaches to regulator and heater.
3. Apply solution thoroughly where regulator connects to cylinder.
4. Make sure all patio heater and light valves are OFF.
5. Turn cylinder valve ON.
If bubbles appear at any connection, there is a leak.
1. Turn cylinder valve OFF.
2. If leak is at hose/regulator connection: tighten connection and perform another leak test. If bubbles
continue appearing, the hose should be returned to the place of purchase.
3. If leak is at regulator/cylinder valve connection: disconnect, reconnect, and perform another leak
check. If you continue to see bubbles after several attempts, cylinder valve is defective and should be
returned to cylinder’s place of purchase.
If NO bubbles appear at any connection, the connections are secure.
NOTE: Whenever gas connections are loosened or removed, you must perform a complete leak test.
4. Complete installation.
WARNING
3HUIRUPDOOOHDNWHVWVRXWGRRUV
([WLQJXLVKDOORSHQIODPHV
1(9(5OHDNWHVWZKHQVPRNLQJ
'RQRWXVHWKHKHDWHUXQWLODOOFRQQHFWLRQVKDYHEHHQ
leak tested and do not leak.
Regulator / Cylinder
Hose / Regulator

12
OPERATION INSTRUCTIONS
DANGER
• CARBON MONOXIDE HAZARD
• For outdoor use only. Never use inside house, or other
unventilated or enclosed areas. This heater consumes air
(oxygen). Do not use in unventilated or enclosed areas to
avoid endangering your life.
Before Turning Gas Supply ON:
1. Your heater was designed and approved for outdoor use only. Do NOT use it inside a building,
garage, or any other enclosed area.
2. Make sure surrounding areas are free of combustible materials, gasoline, and other flammable
vapors or liquids.
3. Ensure that there is no obstruction to air ventilation. Be sure all gas connections are tight and
there are no leaks.
4. Be sure the cylinder cover is clear of debris. Be sure any component removed during assembly or
servicing is replaced and fastened prior to starting.
Lighting:
Note: For initial start or after any cylinder change, hold control knob in for 2 minutes to purge air from
gas lines before proceeding.
Caution: Do not attempt to operate until you have read and understand all General Safety Information
in this manual and all assembly is complete and leak checks have been performed.
TO TURN ON THE HEATER
1. Turn on the valve on the gas cylinder.
2. Press and turn the control knob to HI position (anti-clockwise 90°).
3. Press and hold down the control knob, at the same time repeatedly pressing the igniter button until
the burner is ignited. Release the control knob 10 seconds after the ignition, at which time the
burner should remain alight.
4. Turn the control knob to LO and leave it there for 5 minutes or more before turning the knob to the
desired temperature setting.
5. If the burner fails to light or goes out turn the control knob to the "OFF" position. Wait at least 5
minutes to allow any gas to dissipate, and repeat steps 2 - 4.
6. If still unable to light the burner turn the control knob to the "OFF" position, turn off the valve on the
gas cylinder, disconnect and remove the gas cylinder and return the heater to the place of purchase
for a replacement.
Before Lighting:
1. Heater should be thoroughly inspected before each use, and by a qualified service person at least
annually. If relighting a hot heater, always wait at least 5 minutes.
2. Inspect the hose assembly for evidence of excessive abrasion, cuts, or wear. Suspected areas
should be leak tested. If the hose leaks, it must be replaced prior to operation. Only use the
replacement hose assembly specified by manufacturer.
3. The pressure regulator and hose assembly supplied with the appliance must be used. Replacement
pressure regulators and hose assemblies must be those specified by the appliance manufacturer.

13
OPERATION INSTRUCTIONS
If you experience any ignition problem please consult “Troubleshooting” on page 16.
Caution: Avoid inhaling fumes emitted from the heater’s first use. Smoke and odor from the burning
of oils used in manufacturing will appear. Both smoke and odor will dissipate after approximately 30
minutes. The heater should NOT produce thick black smoke.
TO TURN OFF THE HEATER
1. Turn the control knob to HI position.
2. Press and turn the control knob to OFF position.
3. Turn off the valve on the gas cylinder.
When heater is ON:
Emitter screen will become bright red due to intense heat. The color is more visible at night. Burner
will display tongues of blue and yellow flame. These flames should not be yellow or produce thick
black smoke, indicating an obstruction of airflow through the burners. The flame should be blue with
straight yellow tops. If excessive yellow flame is detected, turn off heater and consult “Troubleshooting”
on page 16.
WARNING
FOR YOUR SAFETY
Heater will be hot after use. Handle with extreme care.
Operation Checklist
For a safe and pleasurable heating experience, perform this check before each use.
Before Operating:
1. I am familiar with entire owner’s manual and understand all precautions noted.
2. All components are properly assembled, intact and operable.
3. No alterations have been made.
4. All gas connections are secure and do not leak.
5. Wind velocity is below 10 mph.
6. Unit will operate at reduced efficiency below 40°F.
7. Heater is outdoors (outside any enclosure).
8. There is adequate fresh air ventilation.
Variable Control knob

14
OPERATION INSTRUCTIONS
CARE AND MAINTENANCE
9. Heater is away from gasoline or other flammable liquids or vapors.
10. Heater is away from windows, air intake openings, sprinklers and other water sources.
11. Heater is at least 48 in. on top and at least 24 in. on sides from combustible materials.
12. Heater is on a hard and level surface.
13. There are no signs of spider or insect nests.
14. All burner passages are clear.
15. All air circulation passages are clear.
16. Children and adults should be alerted to the hazards of high surface temperatures and
should stay away to avoid burns or clothing ignition.
17. Young children should be carefully supervised when they are in the area of the heater.
18. Clothing or other protective material should not be hung from the heater, or placed on
or near the heater.
19. Any guard or other protective device removed for servicing the heater must be replaced
prior to operating the heater.
20. Installation and repair should be done by a qualified service person. The heater should be
inspected before use and at least annually by a qualified service person.
21. More frequent cleaning may be required as necessary. It is imperative that control
compartment, burner and circulating air passageways of the heater be kept clean.
After Operation
1. Gas control is in OFF position.
2. Gas Tank valve is OFF.
WARNING
FOR YOUR SAFETY:
'R127WRXFKRUPRYHKHDWHUIRUDWOHDVWPLQXWHV
after use.
To enjoy years of outstanding performance from your heater, make sure you perform the following
maintenance activities on a regular basis:
Keep exterior surfaces clean.
1. Use warm soapy water for cleaning. Never use flammable or corrosive cleaning agents.
2. While cleaning your unit, be sure to keep the area around the burner and pilot assembly dry at all
WLPHV'RQRWVXEPHUJHWKHFRQWUROYDOYHDVVHPEOy. If the gas control is submerged in water, do
NOT use it. It must be replaced.
a. Keep the appliance area clear and free from combustible materials, gasoline and other
flammable vapors and liquids.
E'RQRWREVWUXFWWKHIORZRIFRPEXVWLRQDQGYHQtilation air.
c. Keep the ventilation opening(s) of the cylinder enclosure free and clear from debris.
3. Air flow must be unobstructed. Keep controls, burner, and circulating air passageways clean.
Signs of possible blockage include:

15
CARE AND MAINTENANCE
Gas odor with extreme yellow tipping of flame.
Heater does NOT reach the desired temperature.
Heater glow is excessively uneven.
Heater makes popping noises.
Spiders and insects can nest in burner or orifices. This dangerous condition can damage heater and
render it unsafe for use. Clean burner holes by using a heavy-duty pipe cleaner. Compressed air may
help clear away smaller particles.
Carbon deposits may create a fire hazard. Clean dome and burner screen with warm soapy water if
any carbon deposits develop.
Note: In a salt-air environment (such as near an ocean), corrosion occurs more quickly than normal.
Frequently check for corroded areas and repair them promptly.
TIP:
Use high-quality automobile wax to help maintain the appearance of
your heater. Apply to exterior surfaces from the pole down. Do not
apply to emitter screen or domes.
Storage
Between uses:
Turn Control Knob OFF.
Disconnect LP source.
Store heater upright in an area sheltered from direct contact with inclement weather (such as rain,
sleet, hail, snow, dust and debris).
If desired, cover heater to protect exterior surfaces and to help prevent build-up in air passages.
Note: Wait until heater is cool before covering.
During periods of extended inactivity or when transporting:
Turn Control Knob OFF.
Disconnect LP source and move to a secure, well-ventilated location outdoors.
Store heater upright in an area sheltered from direct contact with inclement weather (such as rain,
sleet, hail, snow, dust and debris).
If desired, cover heater to protect exterior surfaces and to help prevent build-up in air passages.
Never leave LP cylinder exposed to direct sunlight or excessive heat.
Note: Wait until heater is cool before covering.
Service
Only a qualified service person should repair gas passages and associated components.
Caution: Always allow heater to cool before attempting service.
Abnormal Operation

16
Problem Possible cause
What you can do
(if these do not work,
contact an authorised
technician)
What ONLY an
authorised
service
technician can
do
Burner will not light
Gas valve may be OFF
Tank fuel empty
Opening blocked
Loose connections
Low gas pressure
Thermocouple bad
Not in correct location
Turn the gas valve ON
Check all fittings
Replace cylinder with a new
cylinder
Refill gas cylinder
Remove and clean
Replace thermocouple
Burner will not stay
on
Loose connections
Thermocouple bad
Gas leak in line
Lack of fuel pressure
Tank near empty
Tighten connections
Check connections
Refill gas cylinder
Clean dirty area
Replace
thermocouple
Burner flame is low Supply hose is bent or
twisted
Straighten hose and perform leak
test on hose
Emitter glows
uneven
Low gas pressure
Base is not on a level
surface
Replace cylinder with a new
cylinder
Place heater on a level surface
Thick black smoke Blockage in burner Turnoff the heater and let it cool.
Remove blockage and
clear burner inside
and outside
Gas leak at inlet
connection
Damaged or deteriorated
O-ring seal Fit a new O-ring
Carbon build-up Dirt or film on r eflector
and flame screen Clean reflector and flame screen
Trouble Shooting

PRODUCT WARRANTY
Any claim under this warranty must be made within 12 Months of the date of
purchase of the product. To make a claim under the warranty, take the
product (with proof of purchase) to any Bunnings store (see
www.bunnings.com.au or bunnings.co.nz for store locations)
Bunnings Group Ltd bears reasonable, direct, expenses of claiming under the
warranty. You may submit details and proof to our store for consideration.
The warranty covers manufacturer defecWVLQPDWHULDOVZRUNPDQVKLSDQGÀQLVK
under normal use.
This warranty is provided in addition to other rights and remedies you may have
under law: our goods come with guarantees which cannot be excluded under
the Australian Consumer Law or Consumer Guarantees Act 1993 (NZ). You are
entitled to replacement or refund for a major failure and to compensation for
other reasonably foreseeable loss or damage. You are also entitled to have
the goods repaired or replaced if the goods fail to be of acceptable quality
and the failure does not amount to a major failure.
The warranty excludes damage resulting from product misuse or product
neglect. The warranty covers domestic use only and does not apply to
commercial applications.
This warranty is given by Bunnings Group Limited ABN 26 008 672 179, Botanicca
3 Level 2 East Tower 570 Swan Street, Burnley, VIC 312, e-mail:
Or call our Customer Support Team – Ph.1800 797 586
This warranty is given by Bunnings NZ Limited: Postal address: PO Box 14436,
Panmure, Auckland 1741,
e-mail: [email protected] Or call our Customer Support Team –
Ph.1800 797 586
17
Table of contents
Other Mimosa Heater manuals
Popular Heater manuals by other brands
Ambient Air
Ambient Air NDK15-12K instructions
Clarke
Clarke CONTRACTOR GSH15 Operation & maintenance instructions
Caframo
Caframo Low Profile Space Heater 9206CA-BBX Features
Honeywell
Honeywell HZ-850 Series instructions
Harvia
Harvia FU60 Instructions for installation and use
Mellerware
Mellerware Cozy! manual
