8
Product features
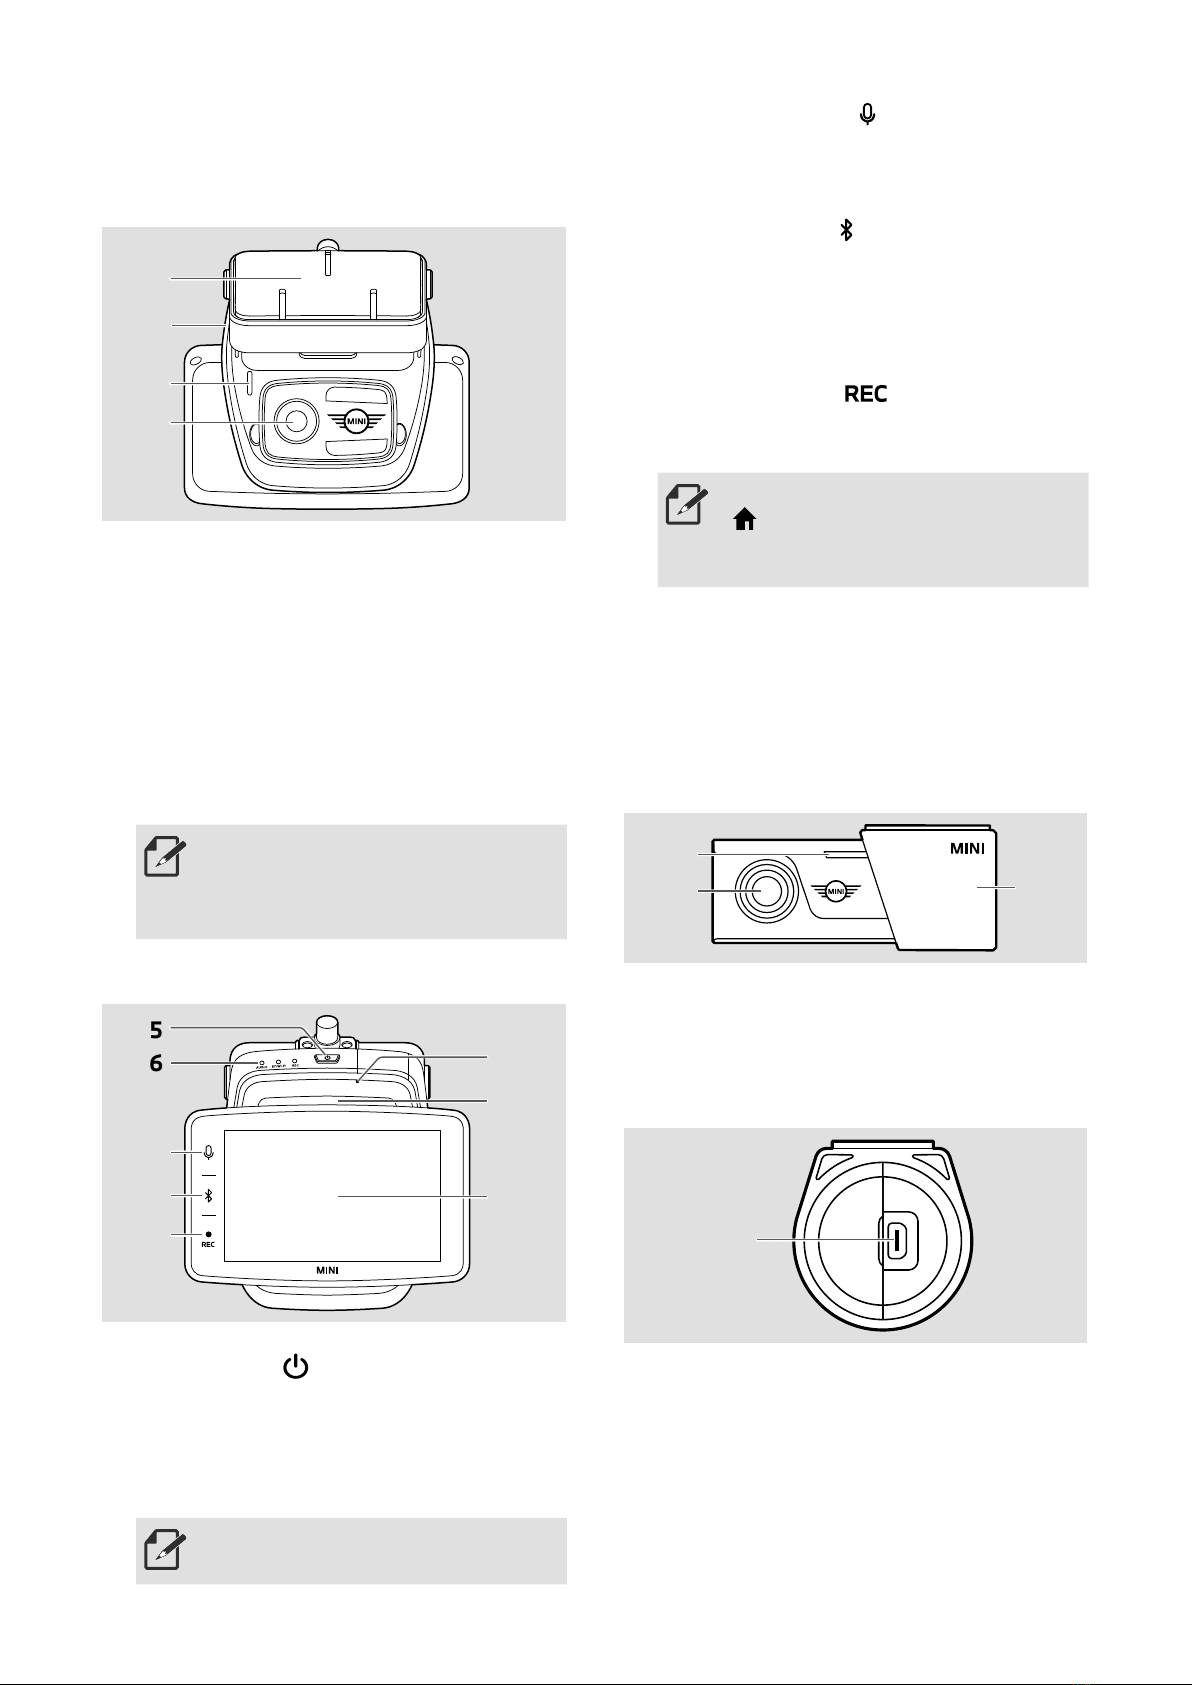
The MINI Advanced Car Eye 3.0 PRO
monitors the vehicle both as you drive and
when it is parked. Intelligent sensors enable
the camera to record risky trafc situations,
(attempted) break-ins and accidents.
Driving mode
When the vehicle is started, the status
LED will turn on in combination with a
voice announcement. Driving mode will be
activated.
■Continuous recording: While driving, videos
are recorded in 1-minute segments and
stored in the "DRIVING" folder. You can
also check the recordings on the Live view
screen. Touch ()
>
Recordings
>
Driving.
■Incident recording: When an impact to the
vehicle is detected, the video recording
will be started from 10 seconds before
to 50 seconds after the incident and is
stored in the "INCIDENT" folder. You can
also check the recordings on the Live view
screen. Touch ()
>
Recordings
>
Driving
Events.
• You can choose between
continuously recording and incident
recording.
• Please check the current laws in the
country in which the ACE 3.0 PRO
and app is intended to be used.
Check out whether and how its use
is legal or not and comply with the
legal regulations. ◀
Parking mode
When the engine is turned off, the product
automatically switches to Parking mode after
the Exit phase time has elapsed.
When motion or an impact is detected in
Parking mode, a video is recorded for the
10 seconds before and after the impact and is
saved in the "PARKING" folder. You can also
check the recordings on the Live view screen.
Touch ( )
>
Recordings
>
Parking Events.
■Exit phase: This refers to the adjustable
assumed amount of time for the driver to
leave the vehicle after the engine is turned
off.
■Entry phase: This refers to the adjustable
assumed amount of time for the driver
to enter the vehicle before the engine is
turned on.
Videos of impacts recorded within the Exit
or Entry phase do not add up to the number
of incidents announced by the camera or the
ACE 3.0 app. The recordings will be stored
in the "DRIVING" folder. During this phase
it is still possible to establish a connection
between the camera and smartphone.
• Be sure to regularly check if the
laws and regulations of the country
allow the use of the Parking mode.
• If the ACE 3.0 app and the product
are connected during the Exit
phase, the Parking mode will not be
initiated as the driver is considered
to be staying inside the vehicle.
• Depending on the tinting lm, the
detectable distance may be reduced
if there is radar interference.
• When sitting in the vehicle while
parking, radar may be detected due
to radar wave reections, but it is
not a malfunction. ◀
Manual recording (REC)
Videos can be recorded and pictures can be
taken manually.
Press the record button ( ) on the front
camera to start recording. Recordings will be
saved in the "SNAPSHOT" folder. You can
also check the recordings on the Live view
screen. Touch ()
>
Recordings
>
Manual.
The video contains 10 seconds before to
50 seconds after pressing the button.
Change between video or picture: ( )
>
Settings
>
Camera settings
>
Rec
Button Action on the Live view. ◀