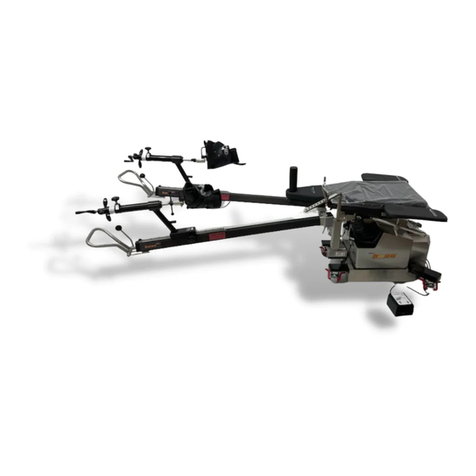
Mizuhosi 5943 User manual

MIZUHOSI 2009 NW0504 Rev. D1
JACKSON SPINAL SURGERY TOPS
AND 5927 RADIOLUCENT IMAGING TOP
OWNER’S MANUAL
Models 5943 & 5943AP
This manual is written in five
languages in the following order:
(en) English
(es) Spanish
(fr) French
(de) German
(it) Italian
MIZUHO OSI
30031 AHERN AVENUE UNION CITY, CA 94587
Bus: 510-429-1500 Toll Free: 800-777-4674 Fax: 510-429-8500
WWW.MIZUHOSI.COM ·NEWHIPNEWS.COM · NEWSPINENEWS.COM

MIZUHOSI 2009 NW0504 Rev. D
2
IMPORTANT NOTICES
CAUTION: To ensure safe operation of the equipment, please READ THESE
INSTRUCTIONS COMPLETELY and keep this manual readily available to operating
room personnel for future reference.
Carefully observe and comply with all warnings, cautions and instructions which are
printed on the equipment or described in this manual.
The WARNING symbol in this manual is intended to alert the user to the presence
of important operation, maintenance, or safety instructions.
Warning:
Proper pre-operative and intra-operative procedures must be followed to prevent
venous stasis and pooling, pressure sore development, neuropathy, improper
electrosurgical tissue grounding, hypotension and hypothermia.
NOTE: The application techniques outlined in these instructions are the manufacturer’s
suggested techniques. The final disposition of each patient’s care as related to the use
of this equipment rests with the attending physician.
This device is to be used by trained personnel only.
PROTECTION AGAINST ELECTRICAL SHOCK HAZARD:
This symbol indicates this equipment is an applied part, TYPE B in
accordance with IEC 60601-1 and is generally suitable for applications involving
external or internal contact with the patient, excluding the heart. The patient
circuit is connected to a protective earth ground, and this equipment should be
connected only to outlets with a protective earth ground.
This symbol indicates an external ground stud that is required for use
when the AC power cable is not connected to a protective earth ground outlet in
your operating room or facility.
To protect the patient and hospital staff from any possible hazards, an external
ground wire connection is required between the external ground stud and
protective earth ground.
Warning:
Medical electrical equipment needs special precautions regarding EMC and
needs to be installed and put into service according to the EMC information
provided in this manual.

MIZUHOSI 2009 NW0504 Rev. D
3
Warning:
Portable and mobile RF communications equipment can affect medical electrical
equipment.
Warning:
This equipment should not be used adjacent to or stacked with other equipment
and that if adjacent or stacked use is necessary, the equipment should be
observed to verify normal operation in the configuration in which it will be used.
Warning:
The use of accessories, transducers and cables other than those specified by
MIZUHO OSI may result in increased emissions or decreased immunity of the
equipment.
Disposal of Electrical Components
In accordance with the WEEE directive, all electrical components, batteries and
carbon composite components must be returned to Mizuho OSI for proper
disposal. Please contact Mizuho OSI Technical Service Department at 1-800-777-
4674 for further information regarding this requirement.

MIZUHOSI 2009 NW0504 Rev. D
4
TABLE OF CONTENTS
1.0 OVERVIEW.........................................................................................................................................6
1.1 General Description ......................................................................................................................6
1.2 Storage..........................................................................................................................................6
1.3 Acceptance & Transfer..................................................................................................................6
1.4 Inspection and Transfer ................................................................................................................6
2.0 COMPONENT IDENTIFICATION.......................................................................................................7
2.1 Jackson Spinal Surgery Top.........................................................................................................7
2.2 Radiolucent Imaging Top..............................................................................................................8
2.3 H-Frame........................................................................................................................................8
2.4 T-Pin..............................................................................................................................................9
2.5 Patient Safety Straps ....................................................................................................................9
2.6 Articulating Arm Board Assembly..................................................................................................9
2.7 Cervical Traction Vector..............................................................................................................10
2.8 Pulley Assembly..........................................................................................................................10
2.9 Coupling Device Identification.....................................................................................................11
3.0 TABLE TOP COUPLING PROCEDURES .......................................................................................12
3.1 5890/5891 Modular Table Bases................................................................................................12
3.2 5890/5891 Patient Transfer Safety Lock.....................................................................................12
3.3 5890/5891 Rotational Friction Control ........................................................................................13
3.4 Twenty-Five Degree Rotation Stop.............................................................................................13
3.5 Installing The H- Frames............................................................................................................14
3.6 Selecting The Mounting Holes For The Table Top.....................................................................15
3.7 5892/5803 Advanced Control Base............................................................................................17
3.8 5892/5803 Table Control Identification.......................................................................................17
3.9 Rotation Safety Lock Switch .......................................................................................................18
3.10 180° Rotation Lock Indicator.....................................................................................................18
3.11 Tilt Drive Status Indicator..........................................................................................................19
3.12 Installing The H-Frames............................................................................................................19
3.13 Selecting The Mounting Holes For The Table Top...................................................................20
4.0 IMAGING PROCEDURES................................................................................................................21
4.1 5890/5891 Modular Table Bases ............................................................................................21
4.2 5892/5803 Advanced Control Bases.......................................................................................21
5.0 SUPINE POSITIONING FOR ANTERIOR SPINE SURGERY AND PROCEDURES .....................23
5.1 5890/5891 Modular Table Bases ............................................................................................23
5.2 5892/5803 Advanced Control Bases.......................................................................................23
6.0 LATERAL POSITIONING FOR LUMBAR & THORACIC SPINE SURGERY AND PROCEDURES..
...........................................................................................................................................................25
6.1 5890/5891 Modular Table Bases ............................................................................................25
6.2 5892/5803 Advanced Control Bases.......................................................................................25
7.0 PRONE POSITIONING FOR POSTERIOR SPINE SURGERY AND PROCEDURES....................27
7.1 5890/5891 Modular Table Bases ............................................................................................27
7.2 5892/5803 Advanced Control Bases.......................................................................................27
7.3 5943AP Jackson Spinal Surgery Top with Advanced Control Pad System............................28
7.4 Patient Support Pad Operation................................................................................................28
7.5 Selection Of Hip Pads .............................................................................................................29
7.6 Use Of The Leg Sling..............................................................................................................30
7.7 Selection Of Head Support Method.........................................................................................31
7.8 Transferring The Patient..........................................................................................................33
7.9 Positioning Of The Head .........................................................................................................33
7.10 Positioning Of The Arms..........................................................................................................33
7.11 Positioning Of The Chest.........................................................................................................33
7.12 Positioning Of The Hips And Thighs .......................................................................................34
7.13 Positioning Of The Legs..........................................................................................................35

MIZUHOSI 2009 NW0504 Rev. D
5
8.0 ROTATION PROCEDURES.............................................................................................................36
8.1 Intra-Operative Lateral Rotation or Lateral Tilt........................................................................36
8.2 5890/5891 Modular Table Bases ............................................................................................36
8.3 5892/5803 Advanced Control Bases.......................................................................................37
8.4 180-Degree Patient Rotation...................................................................................................37
8.5 Preparation For Rotation.........................................................................................................38
8.6 Compression Sequence..........................................................................................................39
8.7 Rotation Procedure For The 5890/5891 Modular Table Bases...............................................41
8.8 Rotation Procedure For The 5892/5803 Advanced Control Base...........................................42
8.9 Removing The Radiolucent Imaging Top After Rotation.........................................................42
8.10 Rotating The Patient From Prone To Supine..........................................................................45
9.0 CART AND STORAGE IDENTIFICATION.......................................................................................46
10.0 USE OF OPTIONAL ACCESSORIES..............................................................................................47
10.1 Dual Chest Pads......................................................................................................................47
10.2 Wilson Plus™ Radiolucent Wilson Frame...............................................................................48
11.0 5943 JACKSON SPINAL SURGERY TOP STANDARD COMPONENTS......................................49
12.0 5943APJACKSON SPINAL SURGERY TOP WITH ADVANCED CONTROL PAD SYSTEM.......52
13.0 OPTIONAL ACCESSORIES ............................................................................................................53
14.0 CLEANING........................................................................................................................................56
14.1 Maintenance............................................................................................................................56
14.2 Cleaning and Disinfecting........................................................................................................56
14.3 Table Top.................................................................................................................................56
14.4 Casters ....................................................................................................................................56
14.5 Table Pads...............................................................................................................................56
15.0 REPAIR AND TECHNICAL SERVICE.............................................................................................57
15.1 Contact for Parts and Service..................................................................................................57
15.2 Instant Support Value Package...............................................................................................57
15.3 To order Replacement Parts (RP)...........................................................................................57
15.4 To return damaged parts (RGA)..............................................................................................57
15.5 To send a part for repair (RA)..................................................................................................58
15.6 EC Authorized Representative................................................................................................58

MIZUHOSI 2009 NW0504 Rev. D
6
1.0 OVERVIEW
1.1 General Description
The Mizuho OSI Jackson Spinal Table System is comprised of a Modular Table Base
with two interchangeable procedure-specific table tops and a variety of table
accessories. The two tops are the Jackson Spinal Surgery Top and the Radiolucent
Imaging Top.
For detailed information on the operation and components of the Modular Table Bases,
Cervical Management Systems and Wilson PlusRadiolucent Frame, refer to the
owner’s manual for each of those specific products. A thorough understanding of the
use of each of these products is required in order to perform certain procedures using
the Jackson Spinal Table System.
This manual requires the reader to be thoroughly familiar with the operation of the
appropriate Mizuho OSI Modular Table Base owner’s manual (NW0498).
1.2 Storage
When not in use, store table top in a clean, dry environment with temperature between
32°F and 120°F (0° C to 49°C).
It is recommended that the 5803 Base be stowed with the power cord plugged into a
proper AC receptacle with the on/off power-switch “on” to assure batteries are fully
charged and ready for service.
If recharge is required, charge a minimum of 3 hours. A full charge should be
available after 18 hours.
1.3 Acceptance & Transfer
Upon receipt of your table top, remove the table top from the shipping crate according to
the unpacking instructions. Visually inspect all surfaces for freight damage.
NOTE: Any freight damage must be reported to the freight carrier immediately upon
delivery. It is the responsibility of the recipient to make freight damage claims.
1.4 Inspection and Transfer
Before use, inspect the device for possible damage, excessive wear or non-functioning
parts. Carefully inspect all critical, inaccessible areas, joints, electrical cords and all
movable parts for possible damage.
Damaged or defective products should not be used or processed. Contact your local
Mizuho OSI sales representative for repair or replacement.

MIZUHOSI 2009 NW0504 Rev. D
7
Articulating arm boards (2) H-frame
FOOT END
Spinal surgery
top
Support sections (leg boards)
Thigh pads (2)
Hip pads (2)
Chest pad
Head support (face plate)
HEAD END
H-frame
2.0COMPONENT IDENTIFICATION
2.1 Jackson Spinal Surgery Top
The Jackson Spinal Surgery Top is 17” (43 cm) wide, 84” (213 cm) long, made from a
carbon composite material and has a patient weight limit of 500 pounds (226 kg). The
table top is labeled to indicate its patient weight limit. The Jackson Spinal Surgery Top
includes the following items as standard components (see Figure 1):
Figure 1: 5943/5943AP Jackson spinal surgery tops (standard components)
Figure 2: 5943 Jackson spinal surgery top with components
(The table top is shown coupled to the 5803 Advanced Control Modular Table System Base.)
5943 and 5943AP JACKSON SPINAL SURGERY TOPS
(Standard Components)
Components 5943 5943AP
Small Hip Pad 2 2
Regular (Medium) Hip Pad 2 2
Large Hip Pad 4 2
Thigh Pad (Right/Left) 2 2
Chest Pad Assembly 1 1
Head Support Section (Face Plate) 1 1
Leg Support Section (Leg Boards) 2 2
Leg Sling 1 1
Buttock Strap 1 1
Safety Strap 60” 1 1
Safety Strap 90” 4 4
Articulatiing Arm Board 2 2

MIZUHOSI 2009 NW0504 Rev. D
8
2.2 Radiolucent Imaging Top
The Radiolucent Imaging Top is 21.5” (54.6 cm) wide, 84” (213 cm) long, made from a
carbon composite material and has a patient weight limit of 500 pounds (226 kg). Each
Radiolucent Imaging Top is labeled to indicate its patient weight limit. The imaging top
is radiolucent including views through the radiolucent side rails. It includes a 2” thick
Mizuho OSI Tempur-Med® table pad and two (2) side rail mounted safety straps.
Figure 3: Radiolucent Imaging Top component identification
(The table top is shown coupled to the 5803 Advanced Control Modular Table System Base)
NOTE: Mizuho OSI P/N 5855-830 side rail adapters must always be used to attach
these types of devices to the table to prevent damage. If retractors, clark sockets, arm
boards or other accessories are attached directly to the side rail of the radiolucent
imaging top, they may cause damage in the form of cracking or splintering of the carbon
fiber table top. Please see section 3.0 in this owner’s manual for more information
related to the use of the Radiolucent Imaging Top.
2.3 H-Frame
Each Jackson Spinal Surgery Top and Radiolucent Imaging Top is supplied with two (2)
H-frames (see Figure 4). The H-frames are used to connect the table tops to the base
with T-pins. Four (4) H-frames are required to attach both table tops for a 180 degree
patient rotation (see section 8.0: Rotation Procedures).
Figure 4: H-Frame
Safety strap (2) Radiolucent
imaging top
FOOT END
H-frameTable padH-frame
HEAD END

MIZUHOSI 2009 NW0504 Rev. D
9
90"
60"
Buttock strap
2.4 T-Pin
Each Jackson Spinal Surgery Top and Radiolucent Imaging Top is supplied with four (4)
T-pins (see Figure 5). The T-pins are used to connect the H-frames to the crossbars on
the table base and to connect the table tops to the H-frames. Eight (8) T-pins are
required to attach both table tops for a 180 degree patient rotation (see section 8.0:
Rotation Procedures).
Figure 5: T-pin
2.5 Patient Safety Straps
The Jackson Spinal Surgery Top is supplied with six (6) patient safety straps; four (4)
90” straps, one (1) 60” strap, and one (1) buttock strap (see Figure 6). When a patient
is positioned on the Jackson Spinal Surgery Top or Radiolucent Imaging Top, verify that
the appropriate patient safety straps are applied and secured as described in section
7.0 of this owner’s manual.
Figure 6: Jackson Spinal Surgery Top patient safety straps
2.6 Articulating Arm Board Assembly
The Jackson Spinal Surgery Top is supplied with two (2) articulating arm boards and
mounting brackets (see Figure 7). These arm boards may be attached directly to the
spinal top at any location along the length of the frame. The articulating arm board is
adjustable in six directions as shown by the arrows in Figure 7.
Figure 7: Articulating arm board for the Jackson Spinal Surgery Top
Drop lock
Mounting
bracket
Armboard
assembly

MIZUHOSI 2009 NW0504 Rev. D
10
2.7 Cervical Traction Vector
The modular table base is equipped with a cervical traction vector (see Figure 8). The
cervical traction vector provides the adjustability of the angle of pull for cervical traction
as shown in Figure 9.
Figure 8: Cervical traction vector
2.8 Pulley Assembly
The pulley assembly is permanently attached to the head end column to guide a traction
rope. The cervical traction vector attaches to the medial side of the head end H-frame
in the mounting holes to achieve the desired angle of traction (see Figure 9). Sandbag
weights may be added to provide the appropriate traction load during anterior or
posterior cervical surgery or any other time cervical traction is desired. The traction
weight is connected to a rope, which passes over the pulley assembly, threads through
the pivot shaft of the head end crossbar and connects to the patient traction apparatus
(see Figure 10).
NOTE: The amount of traction load applied to the patient is completely at the discretion
of the attending physician.
Figure 9: Cervical traction vector installed in
H-frame.
Traction rope
connecting to patient
traction apparatus
Cervical
traction
vector
Figure 10: Traction pulley assembly
Pulley
Weight
Pivot
shaft

MIZUHOSI 2009 NW0504 Rev. D
11
2.9 Coupling Device Identification
Identify the coupling device on the end of the table top (see Figures 11 and 12). Early
versions of the Jackson Spinal Surgery Top and Imaging Tops have fixed mounting
tubes. Jackson Spinal Surgery Tops built after October 1999 and Radiolucent Imaging
Table Tops built after January 1997 will have gimbal mounting assemblies (Figure 12).
Gimbals allow for rotation of the table top when positioned in extreme lateral tilt and
trendelenburg or reverse trendelenburg. Both designs couple to the H-frame in the
same fashion. The 5890/5891 Modular Table Bases can utilize either version of the
coupling devices but the 5892/5803 Advanced Control Bases must use only gimbal
mounting assemblies (Figure 12).
WARNING:
Use of table tops on the 5892/5803 Advanced Control Bases without gimbal
mounting assemblies (Figure 12) can result in damage to the table top.
Fixed mounting tube
Gimbal mounting tube
Figure 11: Fixed mounting
tube on Jackson S
p
inal Sur
g
er
y
To
p
Figure 12: Gimbal mounting
assembly on Radiolucent Imaging Top

MIZUHOSI 2009 NW0504 Rev. D
12
3.0TABLE TOP COUPLING PROCEDURES
The Jackson Spinal Surgery Top and Radiolucent Imaging Top may be coupled and
interchanged to any modular table base, as needed, to provide flexibility and procedural
capability.
NOTE: For complete instructions on the modular table base operation and functions,
please refer to the appropriate owner’s manual supplied with the Modular Table Base.
A thorough understanding of the operation of the 5890 and 5891 Modular Table Base is
required before continuing.
3.1 5890/5891 Modular Table Bases
The following instructions are directed toward the use of a table top on the 5890 or 5891
Modular Table Base. These bases do not have the powered lateral tilt function.
3.2 5890/5891 Patient Transfer Safety Lock
Each 5890/5891 Modular Base is equipped with a patient transfer safety lock at both the
head and foot end columns. The patient transfer safety lock is actuated by positioning
the lever protruding out of the right side of the control box at the head end column (see
Figure 13). A second patient transfer safety lock is located on the side of the foot end
control box (see Figure 14). When engaged, the patient transfer safety lock prevents
rotation of the crossbar by locking the crossbar in the horizontal position.
Rotational friction
control
Patient transfer
safety lock
Figure 13: Head end column (5890/5891 bases
shown
)
Figure 14: Foot end column (5890/5891 bases
shown)
Disengage
motion
Crossbar
Crossbar
Patient transfer
safety lock
Disengage
motion

MIZUHOSI 2009 NW0504 Rev. D
13
3.3 5890/5891 Rotational Friction Control
The rotational friction control is located at both the head and foot end columns. At the
head end, the rotation friction control is the large right-angled lever on top of the head
end control box (see Figure 13). At the foot end, the rotation friction control is the black
lever that is located on the lower side of the control box (see Figure 15). The rotation
friction control may be tightened to act as a friction brake or it can be adjusted to hold
the table top at any degree of lateral tilt. As a friction brake, it can be loosened to
maintain the desired amount of resistance while still allowing the table top to be
adjusted to a different degree of tilt. When completely loose, the rotation friction control
will facilitate 180 degree rotations. Rotate the rotation friction control clockwise to
increase friction and counterclockwise to reduce friction. It is recommended that the
rotation friction control be left in the maximum friction position (fully clockwise)
whenever table top movement is not intended.
Figure 15: Foot end column (5890/5891 base shown)
NOTE: Because the foot end rotation friction control lever has limited range of
movement, occasionally it may not be possible to fully loosen or tighten the brake with
one turn of the handle. In that case, once the end of the movement range has been
reached, pull the handle down. This will disengage the mechanism and allow the
handle to be returned to its starting position without affecting the amount of friction.
Repeat the process until the desired amount of friction is achieved.
3.4 Twenty-Five Degree Rotation Stop
Each modular base is equipped with a 25-degree rotation stop. The rotation stop
is actuated by the lever located on the left side of the control box near the top of
the head end column. It can be easily activated with the left hand when standing
at the head end of the table (see Figure 16). When engaged, the rotation stop
prevents lateral rotation greater than 25 degrees from the horizontal position.
The rotation stop should be left in the engaged position and disengaged only
during a 180-degree rotation.
Figure 16: Head end column 25 degree rotation stop (5890/5891 base shown)
Rotation
friction
control
Crossbar
25 Degree rotation stop
Disengage motion
Crossba
r

MIZUHOSI 2009 NW0504 Rev. D
14
SLIDE
T-
p
in
Crossbar
H-frame
Rotation friction control
ON
T-
p
in
Drop lock
3.5 Installing The H- Frames
The following coupling procedure assumes the head end and foot end columns do not
have either the Jackson Spinal Surgery Top or the Radiolucent Imaging Top in place.
1. Lock the table base in position by engaging the (4) caster locks.
2. Install an H-frame to head end crossbar and secure with a T-pin (see Figures 17 and 18).
WARNING:
Failure to install the T-pin will result in the patient and table assembly being dropped.
3. Install an H-frame to foot end crossbar and secure with a T-pin. Fully retract the foot
end crossbar by sliding it toward the foot end column (see Figure 19).
Figure 19: H-frame installed – foot end column (5890/5891 base shown)
Crossbar
H-frameT-pin
Drop lock
Mounting stud
Figure 17: H-frame aligned with mounting stud
and T-pin prepared for insertion Figure 18: T-pin insertion into H-frame and
crossbar head end column
(5890/5891 base shown)
Crossbar
H-frame
T-pin
HEAD END

MIZUHOSI 2009 NW0504 Rev. D
15
4. Engage the patient transfer safety lock on the head end and foot end columns (see
Figures 13 and 14)
Warning:
For safe patient transfer, the patient transfer safety lock must be engaged prior to
transfer in order to prevent the possibility of the table top rotating while the
transfer occurs. Failure to do so may result in the patient being dropped.
5. Set the rotational friction control on the head and foot end columns to maximum
friction by fully rotating clockwise (see Figures 13 and 15).
6. Set the 25 degree rotation stop on the head end column (see Figure 16).
Warning:
Prior to coupling the table tops, verify that the two (2) H-frames are properly
installed to the crossbar. Confirm the T-pins passes completely through the H-
frames and the crossbars and that the T-pin drop locks are in sight and pivot
freely. Failure to do so may result in the patient being dropped.
3.6 Selecting The Mounting Holes For The Table Top
When selecting the H-frame mounting hole, it is intended that the center of gravity of the
patient be at or below the centerline of the crossbars. For most patients, the fourth
open mounting hole below the crossbar is the appropriate position (see Figure 20).
Figure 20: Center of gravity axis of patient below the centerline of crossbars
NOTE: Two people are required to complete the following sequence of actions.
7. Select the appropriate mounting holes on the H-frame to support the table top.
Insert the T-pin into the H-frame on the head end column first. Align the mounting
tube on the table top to the selected mounting hole on the H-frame. Push the T-pin
through the H-frame, completely through the mounting tube and through the
opposite side of the H-frame. The T-pin drop lock should be in sight and pivot freely
(see Figure 21).
Center of gravity of patient
Centerline of crossbars

MIZUHOSI 2009 NW0504 Rev. D
16
Warning:
Verify that the T-pin is inserted through the H-frame, passes completely through
the table mounting tube and through the opposite side of the H-frame and that the
T-pin drop lock is in sight and pivots freely.
8. To couple the foot end of the table top, slide the H-frame and crossbar as necessary
to accommodate the length of the table top (see Figure 22). Align the mounting tube
on the table top to the selected hole on the foot end H-frame. Push the T-pin
through the H-frame, completely through the mounting tube on the table top and
through the opposite side of the H-frame. This should be done at the same level as
the mounting hole where the head end was coupled. The T-pin drop lock should be
visible and pivot freely.
Figure 22: Foot end column with coupled Jackson Spinal Top
H-frame
FOOT END
T-pin
Drop lock
Jackson Spinal
Surgery Top
Figure 21: Head end column with coupled Jackson Spinal Surgery Top
H-frame
Drop lock
T-pin
Jackson Spinal
Surgery Top
HEAD END

MIZUHOSI 2009 NW0504 Rev. D
17
Warning:
Failure to follow the above prescribed procedures regarding securing the H-frame
to the crossbars and the table top to the H-frames may result in the patient being
dropped.
Figure 23: Jackson Spinal Surgery Top coupled to 5890/5891 Modular Table Base
(shown without patient support pads)
3.7 5892/5803 Advanced Control Base
The Jackson Spinal Surgery Top and Radiolucent Imaging Top may be coupled and
interchanged to the 5892/5803 Advanced Control Base as needed to provide flexibility
and procedural capability. Identify the coupling device on the end of the table top as
described in section 2.9, Figures 11 and 12 of this manual.
Warning:
The Jackson Spinal Surgery or Radiolucent Imaging Tops used on the 5892/5803
Advanced Control Base must have gimbals (Figure 12). Earlier versions of these
table tops do not have gimbals. Use of table tops without gimbals can result in
damage to the table top.
NOTE: For complete instructions on the 5892/5803 Advanced Control Base operation
and functions, please refer to the appropriate owner’s manual supplied with the
advanced control base. A thorough understanding of the operation of the 5892/5803
advanced control base is required before continuing.
3.8 5892/5803 Table Control Identification
The head end of the 5892/5803 Advanced Control Base is equipped with three indicator
lights. These lights are: 1) 180° rotation lock indicator light, 2) tilt drive status light and 3)
rotation safety indicator light. Verify that the rotational safety lock switch is in the ON
position, and the 180 degree rotation lock lever is in the locked position. All three lights
must be illuminated before a patient is transferred to the table.

MIZUHOSI 2009 NW0504 Rev. D
18
Figure 24: Indicator lights, head end column 5892/5803 Advanced Control Base
3.9 Rotation Safety Lock Switch
The rotation safety lock switch (with the lighted indicator) locks out the lateral tilt
function. This feature is designed to prevent unintended lateral tilt of the table top. The
rotation safety lock switch should be turned off only when a 180-degree patient rotation
is to be performed. If the rotation safety lock switch is not illuminated, press the rocker
switch to the ON position.
3.10 180° Rotation Lock Indicator
The 180° rotation lock indicator light, when lit, indicates the 180-degree rotation lock is
engaged and the table cannot be rotated 180 degrees. If the 180-degree rotation lock
indicator is not on, rotate the rotation lock lever clockwise until the light is illuminated.
NOTE: If a 180 degree patient rotation is to be performed, the rotation lock lever should
be rotated counterclockwise approximately one half rotation past the point that the
rotation lock indicator light goes out. Rotating the lock lever to this point lessens the
drag of the friction control, thereby allowing the table tops to rotate more freely during
the patient rotation. If even less friction is desired, the lock lever may be rotated further,
counterclockwise, as necessary.
After the patient rotation is complete, rotate the rotation lock lever clockwise until the
rotation lock indicator light is illuminated.
Warning:
When the rotation lock indicator light is not illuminated, the table top is
UNLOCKED regardless of how much the lock lever has been rotated clockwise or
counterclockwise. Always rotate the lock lever until the rotation lock Indicator
light is illuminated after a 180° rotation. If increased friction lock on the rotation
is required, rotate handle in a clockwise direction until desired friction is met.
Warning:
All three lights must be illuminated before a patient is transferred to the table. If
all three lights are not illuminated, do not transfer the patient until they are
illuminated.
Rotation safety
lock switch / indicator
light
180° rotation lock
indicator light
Traction pulley 180° rotation
lock lever
Crossbar
Tilt drive status
indicator light

MIZUHOSI 2009 NW0504 Rev. D
19
3.11 Tilt Drive Status Indicator
The tilt drive status indicator light is lit when the power lateral tilt mechanism is in the
center position of the +/- 25 degree powered lateral tilt range. If the tilt drive indicator is
not illuminated, operate the lateral tilt function using the hand pendant in the appropriate
direction until the indicator is lit. The head end crossbar should be horizontal when the
tilt drive status indicator is lit. If the head end crossbar is not horizontal, the internal
power tilt mechanism is out of synchronization with the crossbar. Refer to the section
on synchronizing the lateral tilt function in the 5892 advanced control base user guide or
the 5803 owner’s manual, to reset this function.
3.12 Installing The H-Frames
The following coupling procedure assumes the head end and foot end columns do not
yet have either the Jackson Spinal Surgery Top or the Radiolucent Imaging Top in
place. The coupling procedure for the Jackson Spinal Surgery Top or the Radiolucent
Imaging Top is as follows:
1. Lock table base in position by engaging the (4) caster locks.
2. Install an H-frame to head end crossbar and secure with a T-pin (see Figure 25).
Fully retract the head end crossbar against the head end column.
3. Install an H-frame to foot end crossbar and secure with a T-pin (see Figure 26).
Sliding assembly
H-frame
ON
T-pin
HEAD END
Figure 25: H-frame installed - head end column
5892/5803 Advanced Control Base Figure 26: H-frame installed – foot end column
5892/5803 Advanced Control Base
FOOT END
T-pin
H-frame
Drop lock
Crossbar
ON

MIZUHOSI 2009 NW0504 Rev. D
20
3.13 Selecting The Mounting Holes For The Table Top
When selecting the H-frame mounting hole, it is intended that the center of gravity of the
patient be at or below the centerline of the crossbars. For most patients, the fourth
mounting hole below the crossbar is the appropriate position (see Figure 20).
NOTE: Two people are required to complete the following sequence.
4. Select the appropriate mounting holes on the H-frame to support the table top.
Insert the T-pin into the H-frame on the foot end column first. Align the mounting
tube on the table top to the selected mounting hole on the H-frame. Push the T-pin
through the H-frame, completely through the mounting tube and through the
opposite side of the H-frame. The T-pin drop lock should be visible and pivot freely
(see Figure 22).
Warning:
Verify that the T-pin is inserted through the H-frame, passes completely through
the table mounting tube, and through the opposite side of the H-frame and the T-
pin drop lock is in sight and pivots freely. Failure to do so will result in the
patient and table assembly being dropped.
5. To couple the head end of the table top; slide the H-frame and crossbar away from
the foot end (shown in Figure 25) as necessary to accommodate the length of the
table top. Select the appropriate mounting holes on the H-frame to support the table
top. Align the mounting tube on the table top to the selected mounting hole on the
H-frame. Push the T-pin through the H-frame, completely through the mounting tube
and through the opposite side of the H-frame. This should be done at the same
level as the mounting hole where the head end was coupled. The T-pin drop lock
should be in sight and pivot freely (see Figure 21).
A table top completely coupled to a table base is shown in Figure 23.
Warning:
Failure to follow the above prescribed procedures regarding securing the H-frame
to the crossbars and the table top to the H-frames may result in the patient being
dropped.
This manual suits for next models
2
Table of contents
Languages:
Other Mizuhosi Medical Equipment manuals